

Ages 14+
ITEM NO.T53/T653
T-SERIES
3-CHANNEL DIGITAL PROPORTIONAL R/C COAXIAL HELICOPTER MODEL
Introduction
Thank you for purchasing this product, please read this maunal carefully before use and
retain it for future reference.
1.Coaxical-rolor design,built-in gyro and unique function of digital speed setting and
operation of the helicopter.It is the best choice for beginner.
2.By using of latest infrared auto connection technology, up to two helicopters can be
operated simultaneously with high stability.
3.Full charged battery can support the helicopter flys about 9 mins.
4.Tripple circuit protections make the flight more safer and improve the service life of the
helicopter.
5.The helicopter has Videography and Photography function.
Safety Guidelines
1. Please read this instruction manual carefully before playing and operate the product
according to the manual.
2. Keep the small accessories away from the kids to avoid accident.
3. Keep batteries away from fire or high temperature environment.
4. When flying the helicopter, keep it 1 ~ 2 meters away from user or others to avoid
injury due to collision.
5. Not to decompose or modify the product which may cause malfunction or accident.
6. Fly the helicopter within your eye vision for easy and safety control.
7. Need adult supervision when this helicopter is being played by children.
8. Only batteries of the same or equivalent type as recommended are to be used.
9. Insert batteries with correct polarity.
10. Non rechargeable batteries are not to be charged.
11. Do not mix old and new batteries.
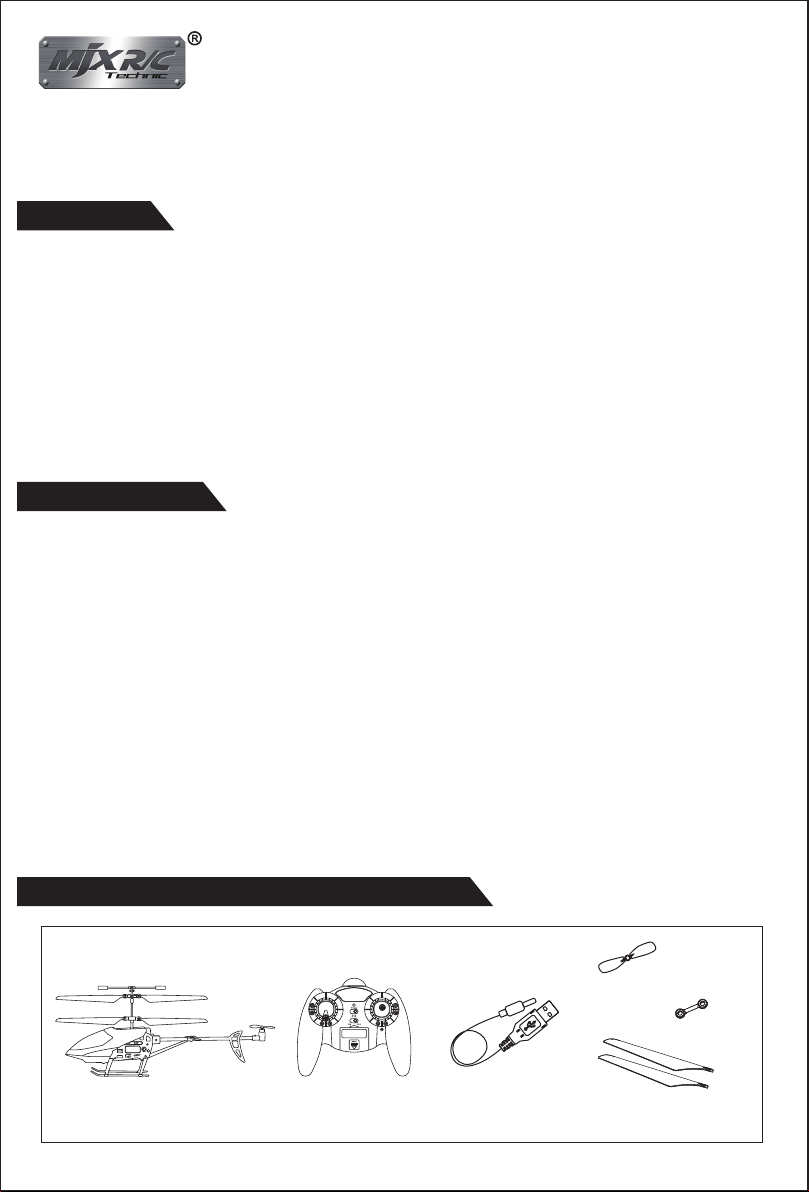
Product / Spare Parts Included in This Packaging
Helicopter
Remote Control
USB Charger
Tail rotor
connect buckle
rotor blade
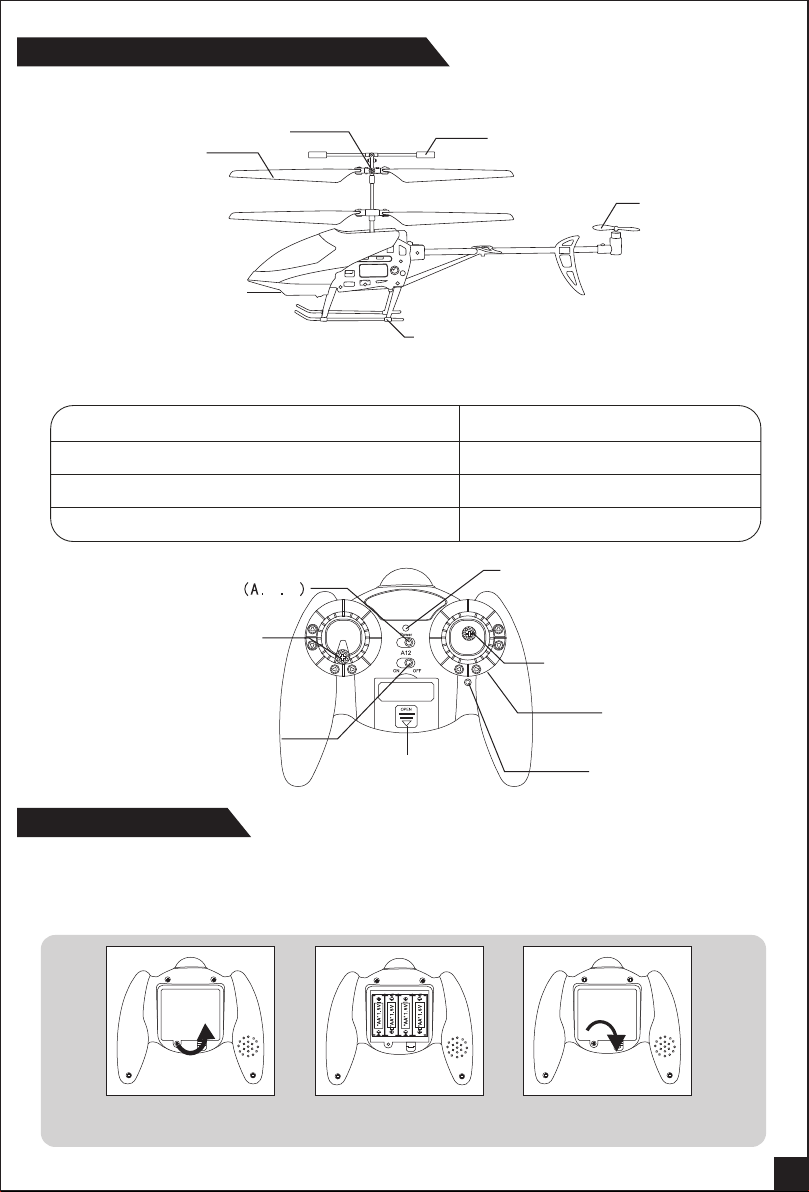
Sketch - major Parts and Function Switches
Connect buckle
Main Rotor
Searchlight
Fuselage Length: 250mm
Overall height: 115mm
Main Rotor Diameter: 200mm
Gross Weight: about 48g
Channel selector
Throttle control stick
1
2
Stabilizer bar
Tail Rotor
Landing gear
Motor: Coreless Motor
Gear Ratio: 1:11
Battery: 3.7V 300mAh
Charging Time: about 60mins
Light indicator
right control stick
Gyro trim
Power switch
Charging
compartment
camera button
Battery Installation
1. Unscrew counter clockwise to open the battery compartment cover.( Pic. 1 )
2. Install 4 X AA batteries into the battery compartment according to the given polarity. ( Pic. 2 )
3. Screw clockwise to close the battery compartment. (Pic. 3 )
Pic. 1 Pic. 2
How to remove and insert batteries.
Pic. 3
1
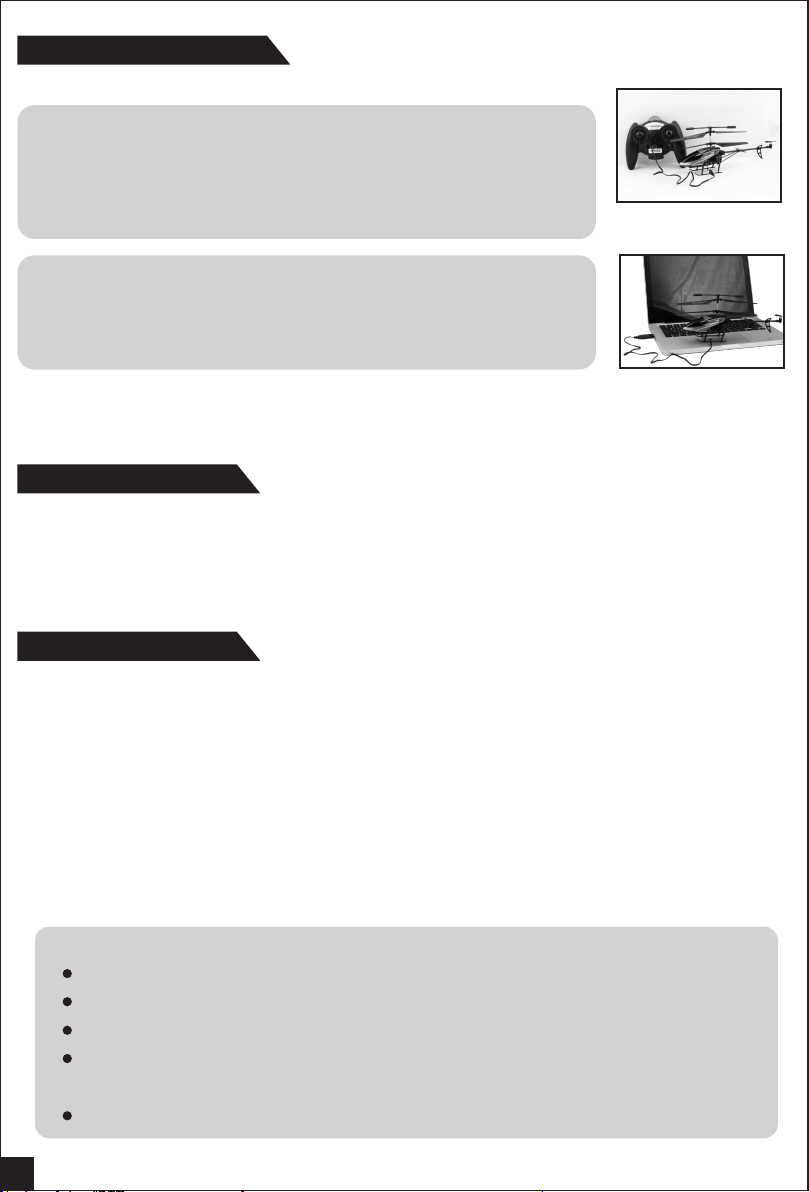
Charge the helicopter
1.There are two ways available to charge the helicopter.
A. Use the remote control to charge to helicopter
● Open the cover of the charging compartment on the remote control
and take out the charging cable.
● Ensure the helicopter is in a “OFF” power status.
Plug the output jack of the charging cable into the charging socket
of the helicopter. Then, charging is beginning. (pic 4)
B. Use the USB charger to charge the helicopter
Connect the USB charger to the USB interface of the computer,
ensure that the helicopter is in a “OFF” power status, then, plug the
output jack of the USB cable into the charging socket of the
helicopter.(pic 5)
Pic. 4
2. The light of the remote control/USB charger is off when charging
is proceeding and will turn on automatically when charging is
done. Fully charge takes approximately 60 minutes.
Pic. 5
Flight Environment
1. Indoor , stay away from unstable airflow generated by air conditioners or fans and without
table lamps or other dangerous objects.
2. Wide open space : Recommended minimum 3M ( wide ) x 5M ( length ) x 2.5M ( height )
3. Since this product is using of the infrared remote control technology, operating under
strong sun light or other any other light may cause lost of control.
Preparation for Flight
Must set the remote control at the “OFF” position before operating.
1. Turn on the helicopter by push the power switch and the searchlight will keep flashing
rapidly.After a few seconds, the searchlight will turn to slowly blinking,indicating that the
helicopter is ready to connect with the remote control.
2. Firstly, select the "A","1" or "2" channel;turn on the remote control and the power light of the
remote control will blink slowly; push the throttle control stick up to the top, then push it to the
bottom, the power light of the remote control will keep rapidly blinking, meaning that the
remote control is sending out connectional signal.Once signal connection is done, the power
light of the remote control will turn to constant "ON" without blinking.
3. Slowly push up the throttle stick and the helicopter takes off.
Hints
Select channel 1 and channel 2 and operate maximum 2 helicopters simultaneously.
Not to use the same channel by 2 helicopters at the same time.
Set the connection one by one. Otherwise, it may not be connected.
Once turn off the power. The connection procedure must be repeated to operate the
helicopter.
It is advised to select channel A if there's only 1 helicopter is playing.
2

Operating
Upward
Push up the left control
stick, the rotation speed
of the main rotor is
increasing and the
helicopter ascends
accordingly.
Power
A12
ON OFF
OPEN
Downward
Turn left
Turn right
Forward
Backward
Push down the left
control stick, the
rotation speed of the
main rotor is decreasing
and the helicopter
descends accordingly.
Push the direction lever
to the left and the nose
of the helicopter will be
turning left.
Push the direction lever
to the right and the nose
of the helicopter will be
turning right.
When the helicopter is
flying,push up the right
control stick, the
helicopter nose will
incline down and then
moves ahead.
When the helicopter is
flying,push down the
right control stick, the
helicopter nose will
incline upward and flies
reversely.
Power
A12
ON OFF
OPEN
Power
A12
ON OFF
OPEN
Power
A12
ON OFF
OPEN
Power
A12
ON OFF
OPEN
Power
A12
ON OFF
OPEN
Trimmer Functions
If the helicopter keeps spinning even there is no control signal given,users may adjust the Gyro
trim to keep the helicopter balanced.
Power
A12
ON OFF
OPEN
Press the right gyro trim
When flying the helicopter, if it keeps
spinning counterclockwise, press the
right gyro trim until it stops spinning.
3

Power
A12
ON OFF
OPEN
Press the left gyro trim
When flying the helicopter, if it keeps
spinning clockwise, press the left
gyro trim until it stops spinning.
Circuit Protection Devices
1. The power light indicator of the helicopter will start to blink fast when the battery voltage of
the helicopter drops to certain level. The helicopter will be out of control. Recharge is
necessary to resume the function.
2. To protect the helicopter and prevent any risks caused by the stuck of the main rotor. The
main rotor will stop rotating and the power indicator light of the helicopter will keep blinking
fast when the main rotor is stuck or being blocked for 3 seconds. Pull the throttle joystick to
the lowest position to re-launch the helicopter.
Videography and Photography Function
If installed the C4003 videography device(should be ordered separately from MJX), the
helicopter has the videography function.
How to install the videography device
1.Install the videograhpy module to the button of the helicopter and fix it by screw.(Pic.6 Pic.7)
2.Insert the videograhpy module plug to the video socket which is located on the PCB of the
helicopter. (Pic.8)
Pic.6 Pic.7 Pic.8
Video control
1. Insert the TF memory card into the videography module of the helicopter and turn on the
helicopter by push the power switch. Atthis time, the red light and the green light keep flashing
in turn. Two seconds later, the green light keeps “ON” means it is ready.
2. When the helicopter is finished signal connection and is not under shooting condition,
the indicator light of the videography module keeps constant “ON”. At this time,
Turn the switch button on videography module to the direction of the videography icon
(Pic.9), and then turn on the camera switch of the remote control, it will start taking
videography and the red light of module keeps flashing. Press the camera button again,
videography taking will be stopped.
Turn the switch button on videography module to the direction of the photography icon
(Pic.10), and then press the camera button on the remote control to take photos.
4

Pic.9 Pic.10
To stop shooting, please press the shooting switch on the remote controller. Directly
unplug the battery cable or take out the TF memory card from the videography module
will result in loss of the video data.
To avoid
videography module,when the circuit is on. TF memory card should be installed before
circuit is on and take out after shooting switch is turned off.
When crash occurs,turn off the helicopter and then turn on the power to recover normal
working.
When the red light and the green light of the vediographic device keep flashing
alternately, it means that the TF memory card is not inserted or the TF memory card is
damaged. It is possible to restore the memory card by reformatting(Take out the TF
memory card, then, insert it into the car reader, then, connect it to the computer and
format the memory card)
The red light will keep constant "ON" to indicate insufficient memory.
helicopter
crash,please do not insert or take out the TF memory card from the
TIPS
Repair and Maintainance
1. Use wet cloth to clean this product.
2. Avoid this product to be exposed in the sunlight or the heated place.
3. Do not soak this toy in the water, otherwise the electronic part will be damaged.
4. Switch off the transmitter and power of the helicopter when it is not used.
5. Batteries should be taken out of the transmitter when it is not used for a long time.
6. You are highly suggested to use all-new alkaline battery to make sure the helicopter can
develop its best flying performance.
7. Periodically check the plug and other parts, If any damage is discovered, please do not use
it until it is completely repaired.
Trouble Shooting
Problem Reason Solution
No reaction from
the helicopter
Reaction from the
helicopter is not
sensitive
1. The helicopter is underpowered.
2. The transmitter is underpowered.
3. The channel of the RC does not
comply with the channel of the
helicopter.
1. Influenced by the sunlight or
strong light.
2. Another RC nearby is sending
out infrared signal of the same
frequency.
3. Another helicopter with the same
channel is being played nearby.
1. Get the battery of the helicopter
charged.
2. Replace with new batteries in the
RC.
3. Turn the channel switch to get the
correct channel.
1. Choose a better place to avoid
the helicopter exposure to strong
sunlight or other strong light.
2. Change another place where there
is no infrared.
3. Slide the channel switch of the RC
to another channel.
5

1
When the controller/helicopter is underpowered, the control distance would be shortened due to this effect.
2
If the helicopter is underpowered, it would result in difficulty of taking off or lower flight altitude.
3
If the helicopter is damaged or become deformed, please repair it in time. If it is seriously damaged
(e.g. the rotor of the helicopter is ruptured), user should stop playing; otherwise, it may get the user injured.
4
If you do not play the helicopter for a long time, please take out the batteries inside the controller to avoid
battery leakage which would damage the product.
5
Please do not have the helicopter fell from high altitude or crashed. It would make the helicopter broken or
greatly reduce the service life of the helicopter.
The wire that fixed on the landing gear is the
receiver of the helicopter, disassembling this wire
may be dangerous or causes accident.
6
 Loading...