

Page 1
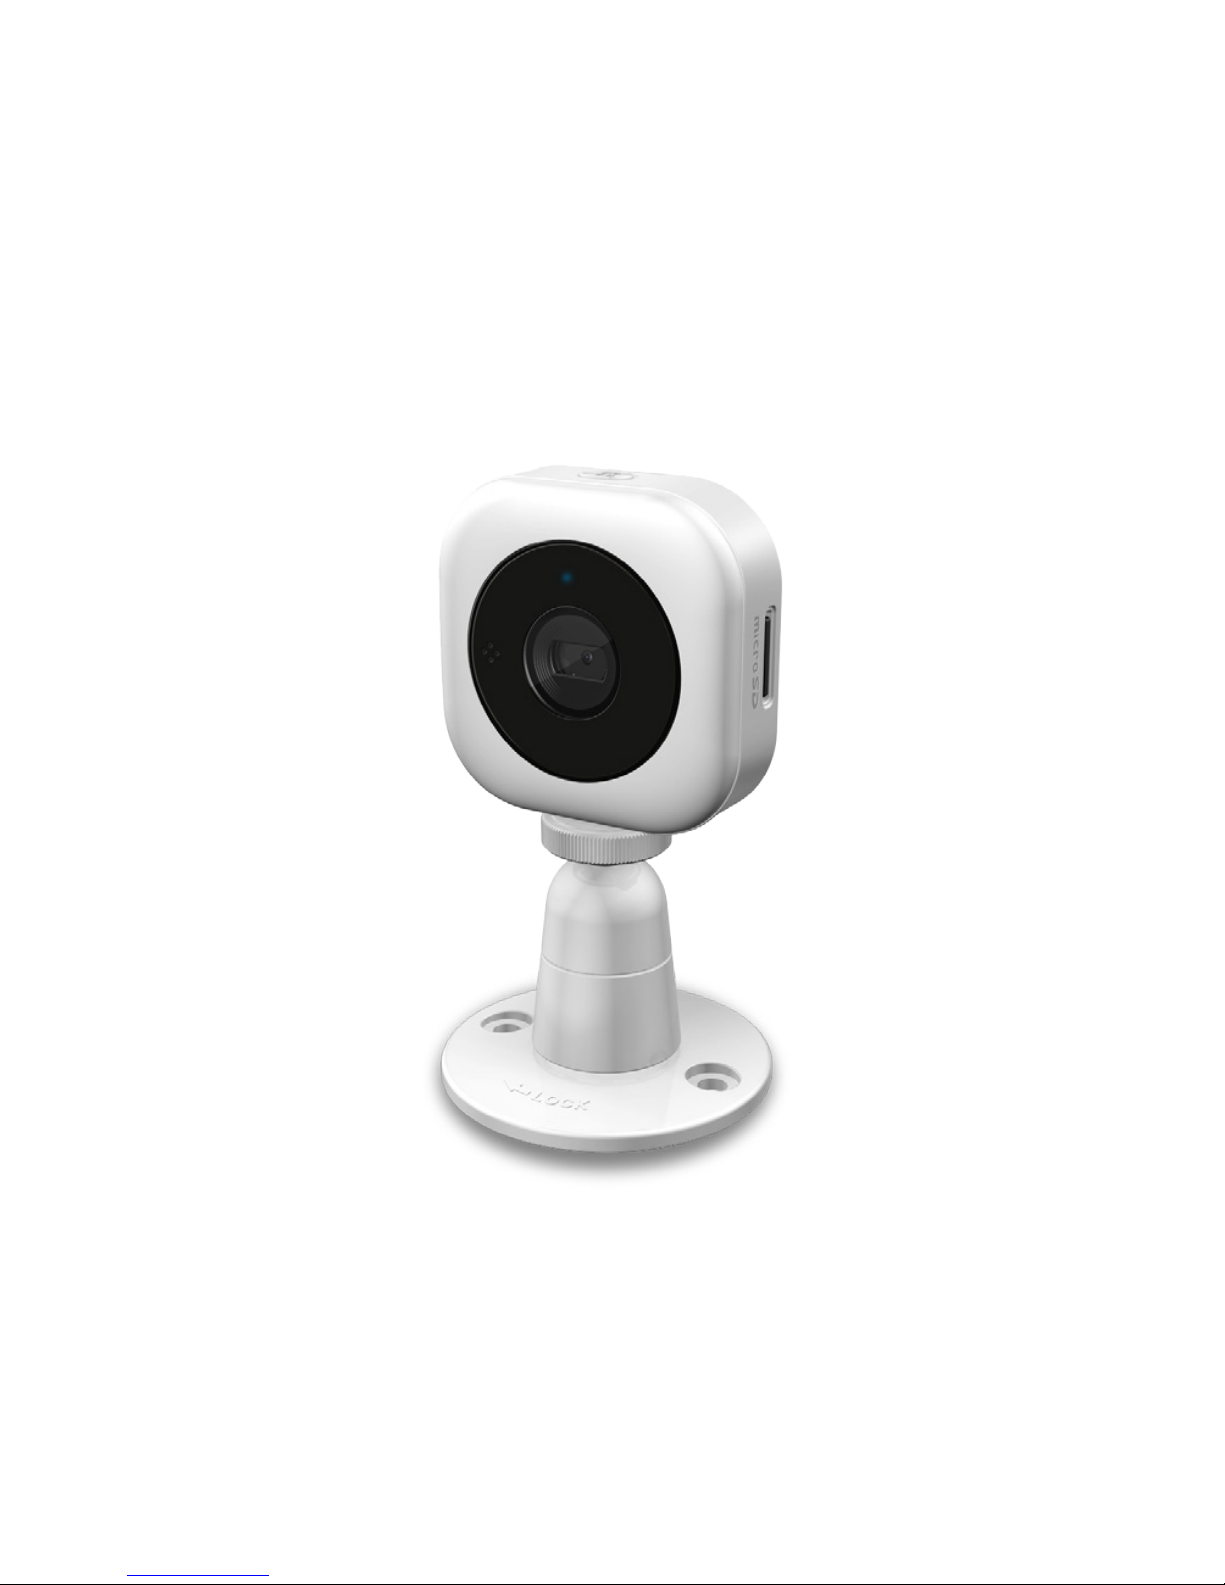
WiFi Home Camera
User Manual
IPC2202
MivaTek
Page 2
| 1
English
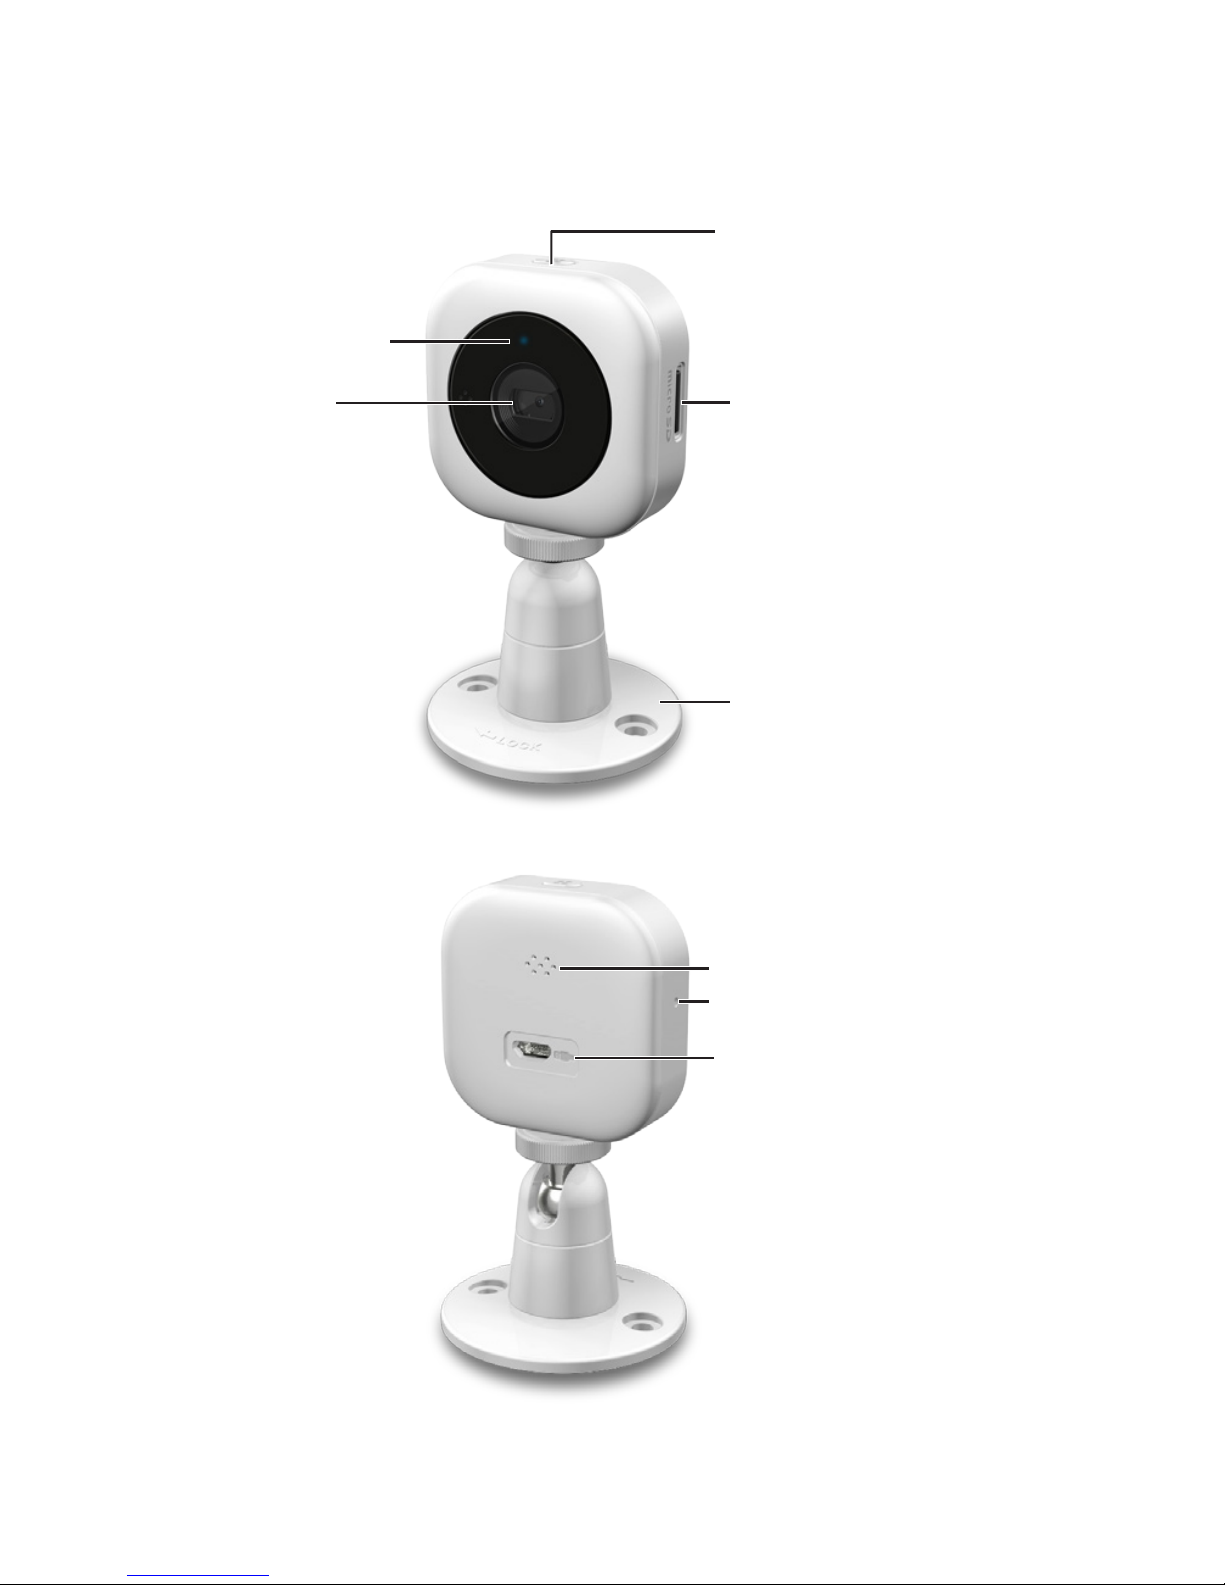
Names of Parts
Lens
LED
Indicator
Micro USB Port
Mode Button
Speaker
Reset Button
microSD
Card Slot
Stand
Page 3
2 |
English
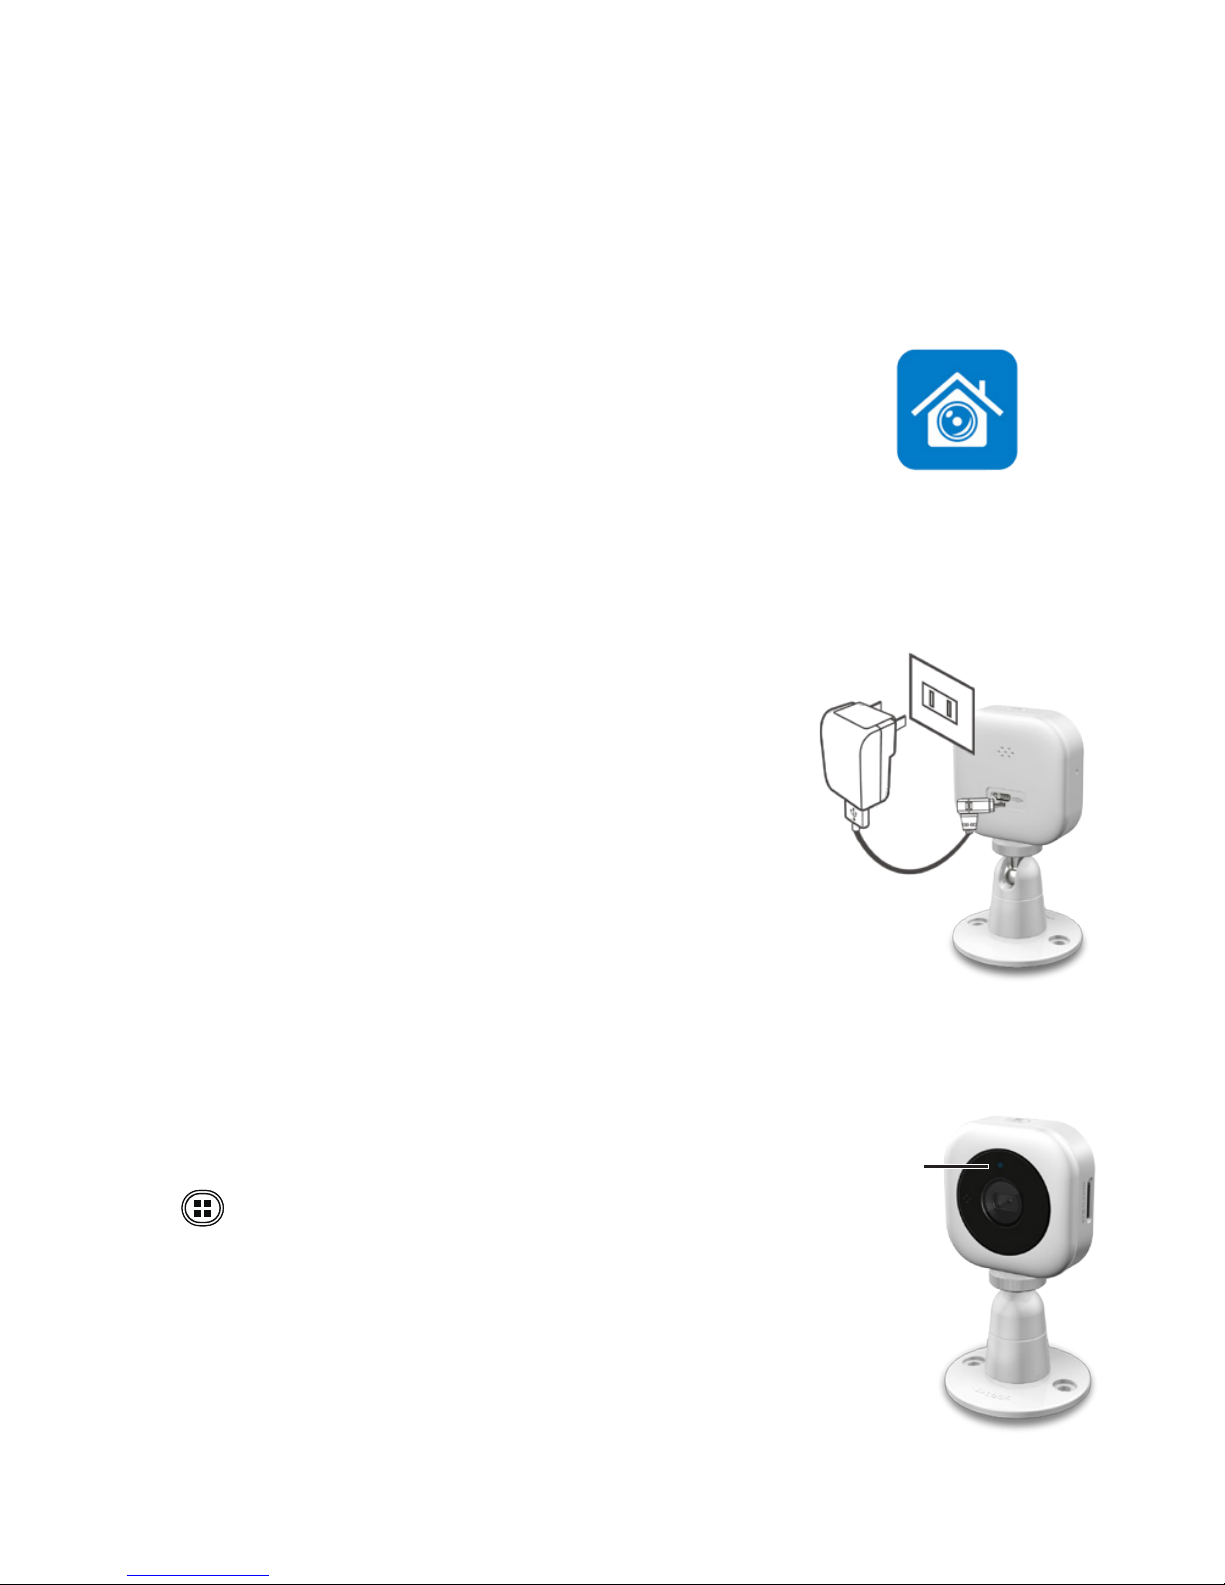
1. Insert a microSD Card (suggested
class 10, up to 64GB).
For initial use, mobile device needs to:
1. Connects to internet (via WiFi, 3G/4G).
2. Download and install App [Unieye Home] from
Google Play Store or Apple App Store.
Getting Started
2.
Power on: Plug a USB power cable into one of
• PC USB port
• USB output adapter
Unieye Home
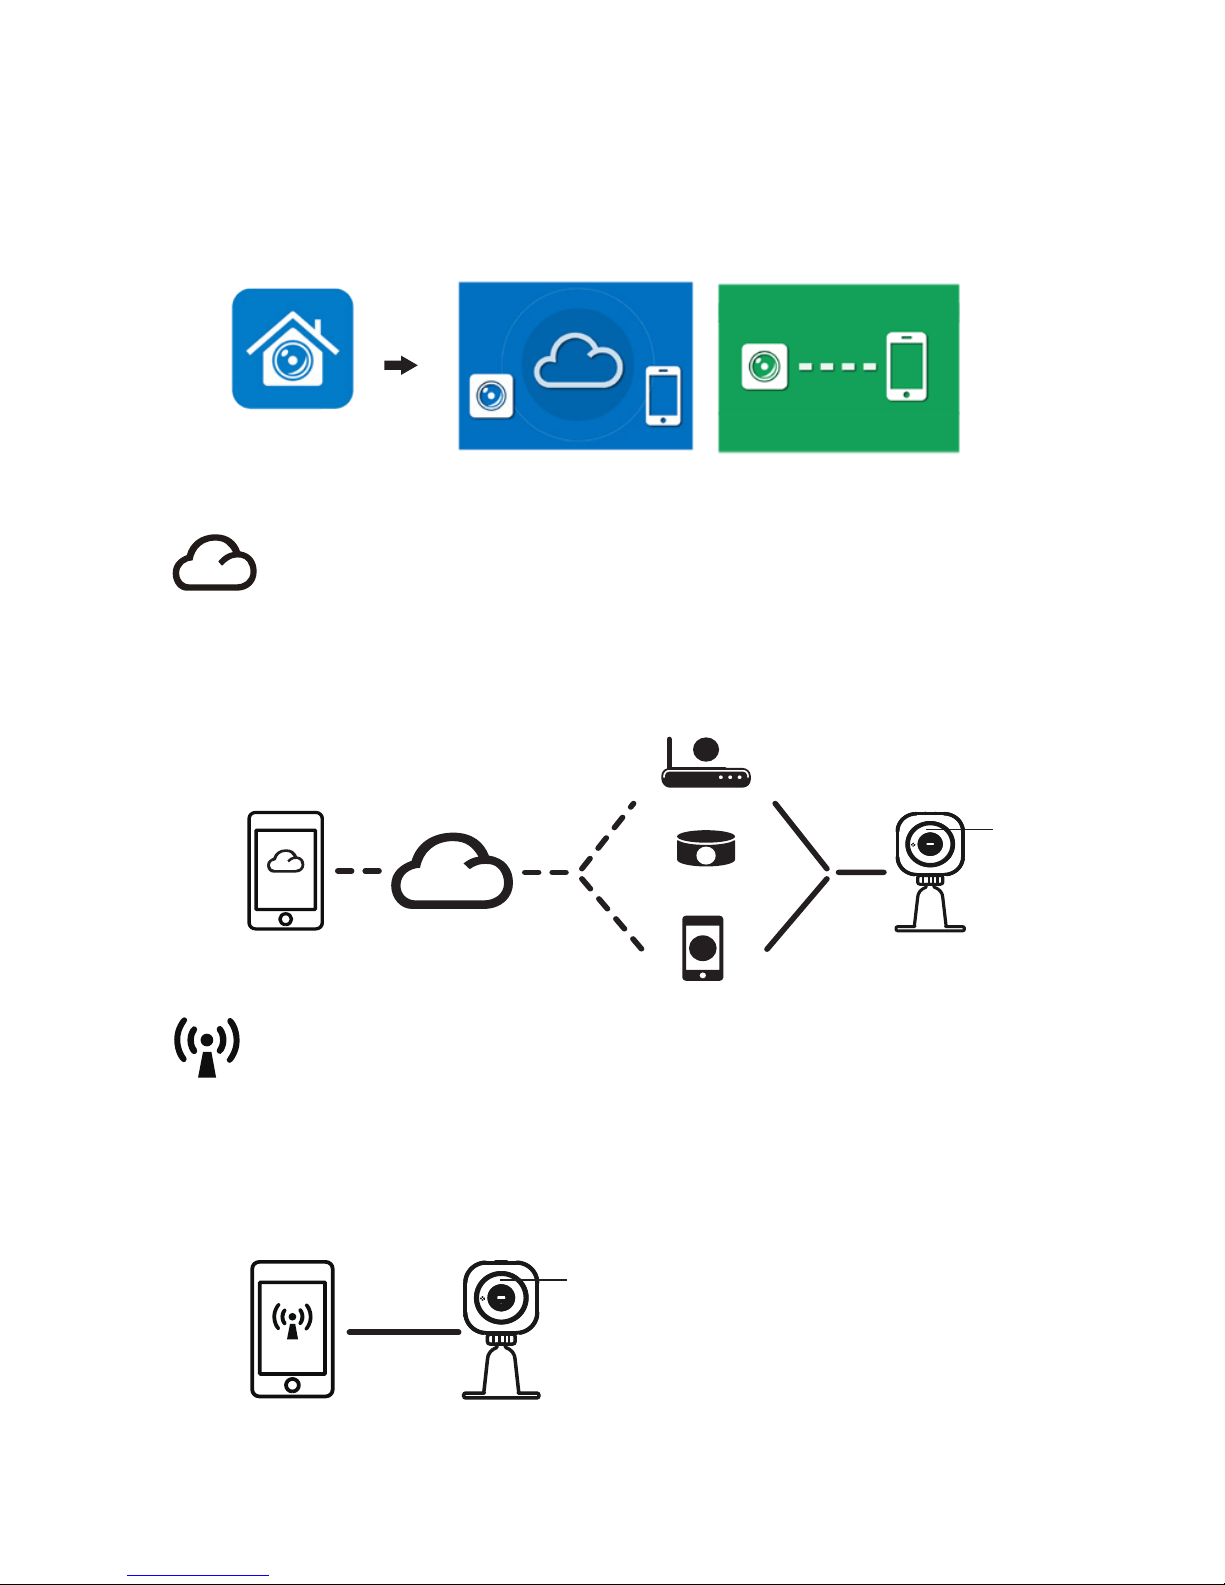
Mobile device connects to smart WiFi Home Camera directly via App
[Unieye Home] for remote control, live view, Widget display and
receives push alerts when events are detected.
Modes Switch in Camera
Led indicator shows network connection status.
Press
to switch.
•
Steady purple for direct control
• Steady blue for Internet control
Camera needs to:
Led
Indicator
Page 4
| 3
English
Wireless & App Operation
Run App [Unieye Home] on mobile device and navigate either one of
modes:
(I) Internet Mode - Internet (II) Local Mode - Direct control
Unieye Home
Internet Mode
Local Mode
【
Local Mode
】
(I)
【
Internet Mode
】
(II)
Mobile
Local
Camera
Status: Purple
Status:
Blue
Unieye
Server
AP
3G/4G Mobile Hotspot
Wireless Router
AP
Camera
3G/4G Mobile
Wireless Router
AP
Mobile
Internet
Mobile device directly connects to camera via WiFi for remote
control, live view, pan angel change, camera setup and receives
push alerts when noise and motion events are detected.
Mobile device connects to camera via internet for remote control,
live view, pan angel change, camera setup, push notication,
Widget display and the instant live view from partner's camera.
Page 5
4 |
English
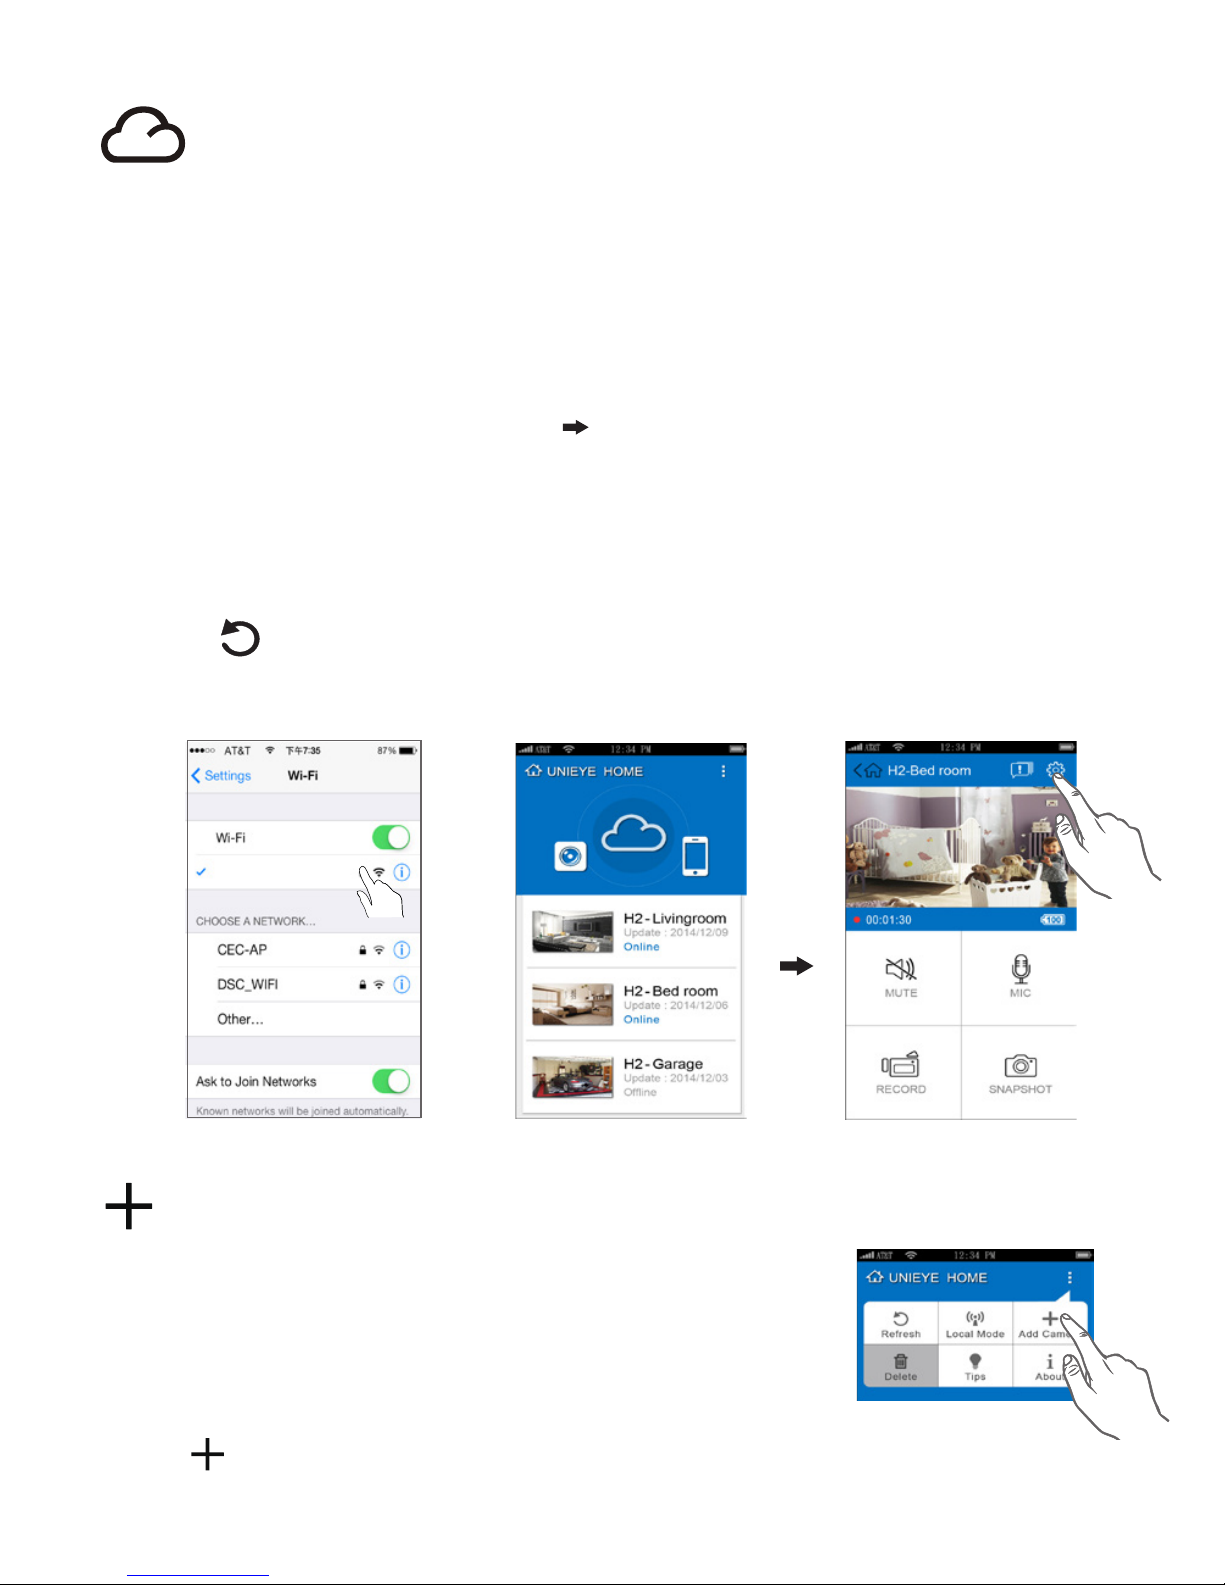
Mobile Device Connects to Camera
1. F
or Android: Turn on [Wi-Fi].
For iOS:
Go to [Settings] [Wi-Fi].
Turn on [Wi-Fi] and select the camera name.
2. Run [Unieye Home].
3. Tap【Local】and select the camera to enter View Page.
Tap [
] to scan again if camera is not found.
Note:
For rst use, password setting is required.
iOS Settings
H3-00000001
Before using
【
Internet Mode】 on mobile App, ensure WiFi on mobile
device is on and network indicator on camera shows steady purple.
Remote Control Page
Internet Mode Main Page
【
Internet Mode
】
1. Run [Unieye Home] and tap
.
2. Tap
Add Camera in list. Enter camera ID and password.
Add Camera
Before adding a congured camera or using another
mobile, ensure the
camera is in 【Internet Mode】
and status indicator shows steady green.
Page 6
| 5
English
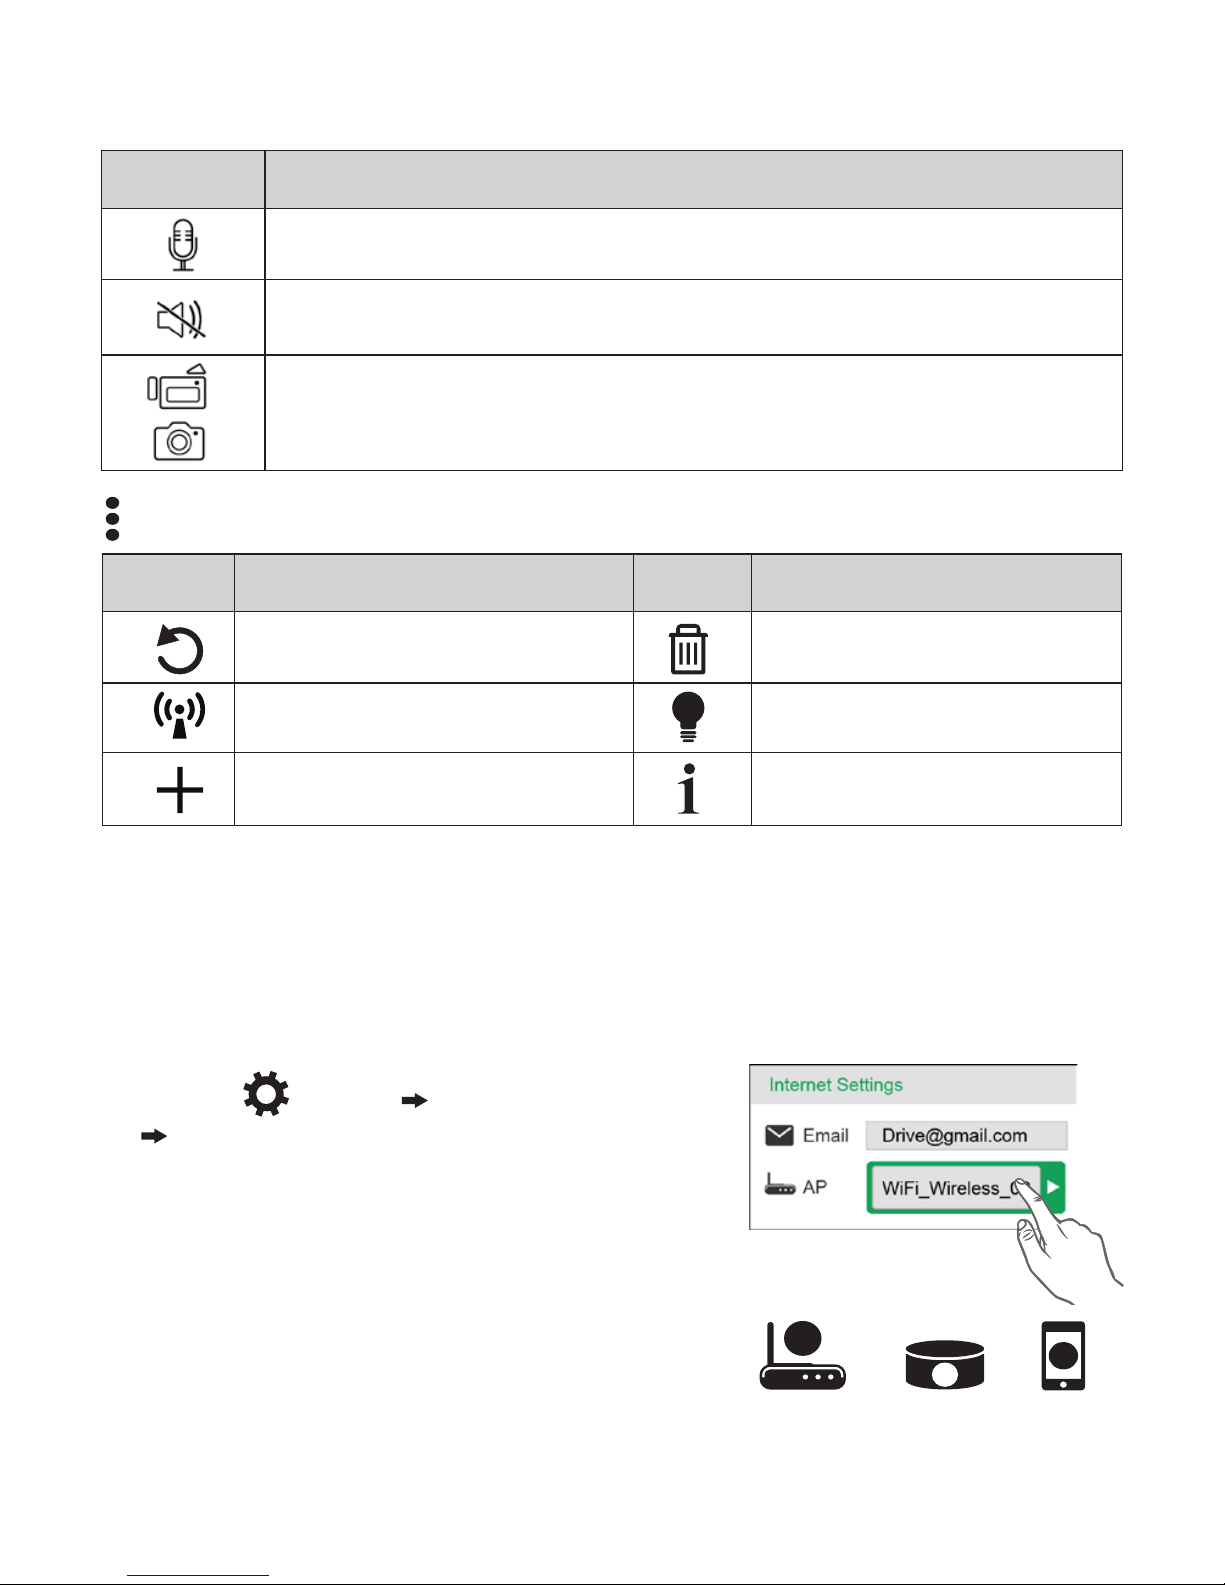
Remote Control:
Advance Setup:
Items Descriptions
Talk to camera from mobile.
Mute the sound from camera.
Shoot videos or take photos and save to storage on mobile
"Album\Unieye Home\“
Items Descriptions Items Descriptions
Rescan for cameras Delete camera
Switch to local mode Tip for help
Add camera About
1. Go to [ Setup] [ Internet Settings
]
Edit Email and AP
2. Tap [Save] to complete Email & AP
settings.
Camera Internet Setup
Before using internet cloud service, Email and AP must be properly
set up.
Note: AP(Access Point) can be
• Wireless Router or
• 3G/4G Mobile Wireless Router or
• 3G/4G Mobile Hotspot
AP
AP
AP
AP
AP
AP
Wireless Router
3G/4G Mobile
Wireless Router
3G/4G
Mobile Hotspot
Page 7
6 |
English
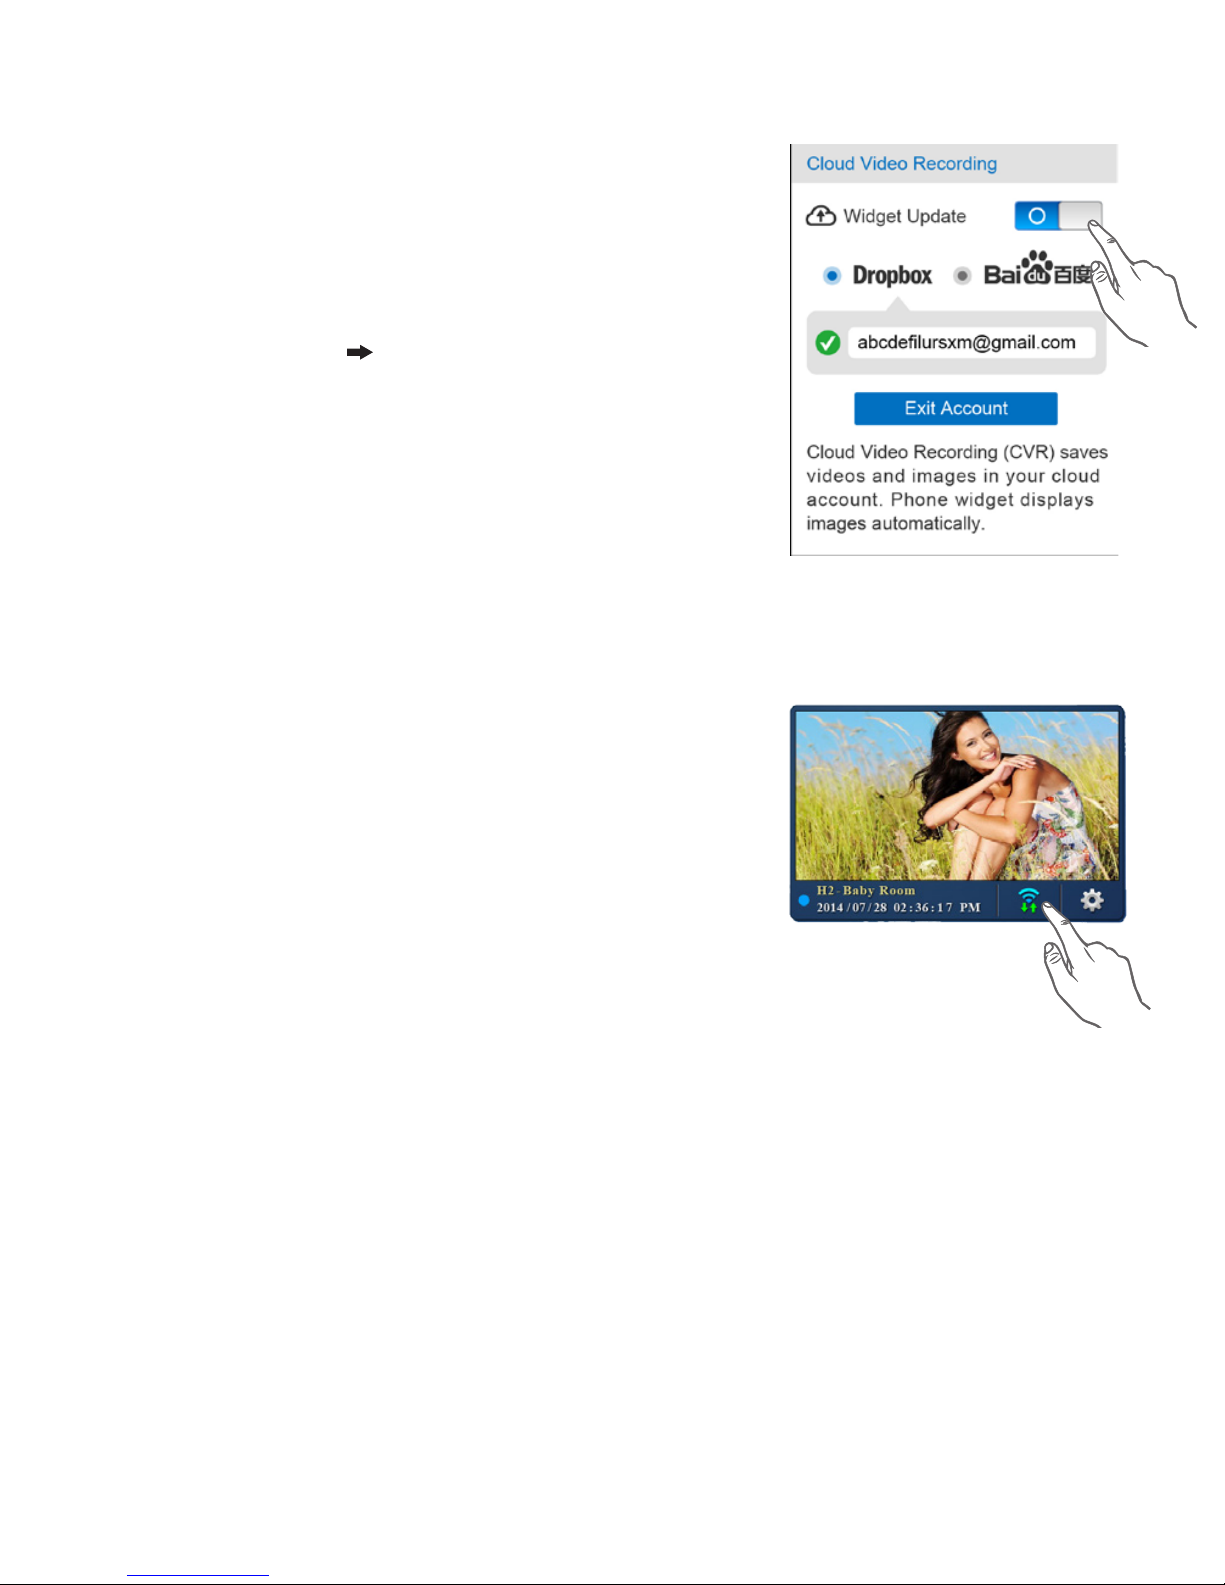
Cloud Video Recording
Widget displays on mobile desktop
Cloud Video Recording (CVR) saves videos
and images in your cloud account. For initial
use, cloud account should be authenticated.
Widget is a small tool for Android devices that real
tim
shows alert inforamtion on Mobile desktop.
1. Go to [Setup] Turn on [Save to CVR]
2. Select a cloud account and enter account
information.
3. Tap Save on [Setup] page to activate CVR
function.
1. Add an Unieye Home Widget.
2. On widget setting page, select a camera and
adjust photo fetch interval.
3. Tap [Conrm] to create the Widget on mobile
desktop.
Photos on widget update regularly or when events
detected.
Push Alert
When camera is in【Internet Mode】and events are detected,
Push alerts and Email will be sent to mobile device.
Page 8
| 7
English
Note: Record event clips only when mobile device did not connect
to camera.
Groups Descriptions
Camera Settings
Edit name, password. Format SD card. Adjust
night vision, noise detection, motion detection,
image rotation, etc.
Internet Settings Edit Email and AP for【Internet Mode】.
Events (for camera)
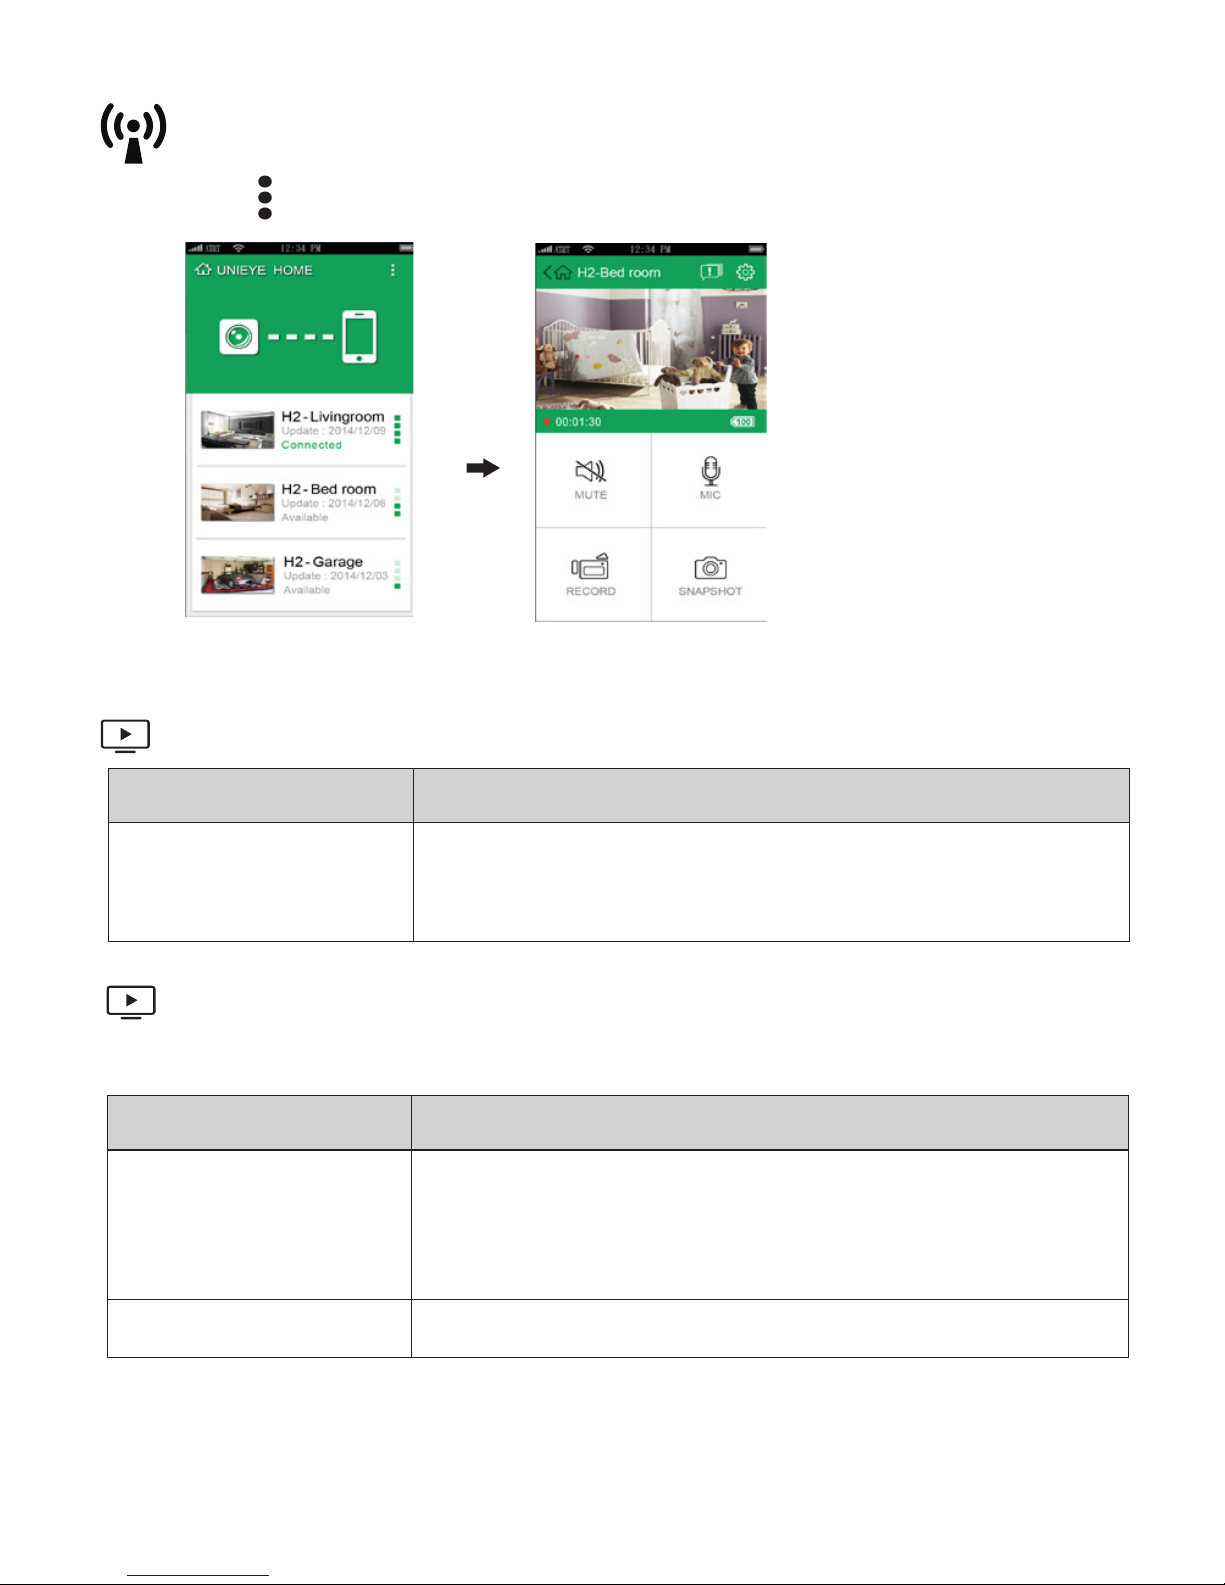
In [Setup] Page, tap [Save] to complete settings to camera.
Tap [
] and select [Local Mode] to switch to Local Mode .
Items Descriptions
Camera Videos
View or delete recorded video les saved in camera
SD card during motion and noise detection.
Setup (for camera)
【
Local Mode
】
Local Mode Main Page
Remote Control Page
Page 9
8 |
English
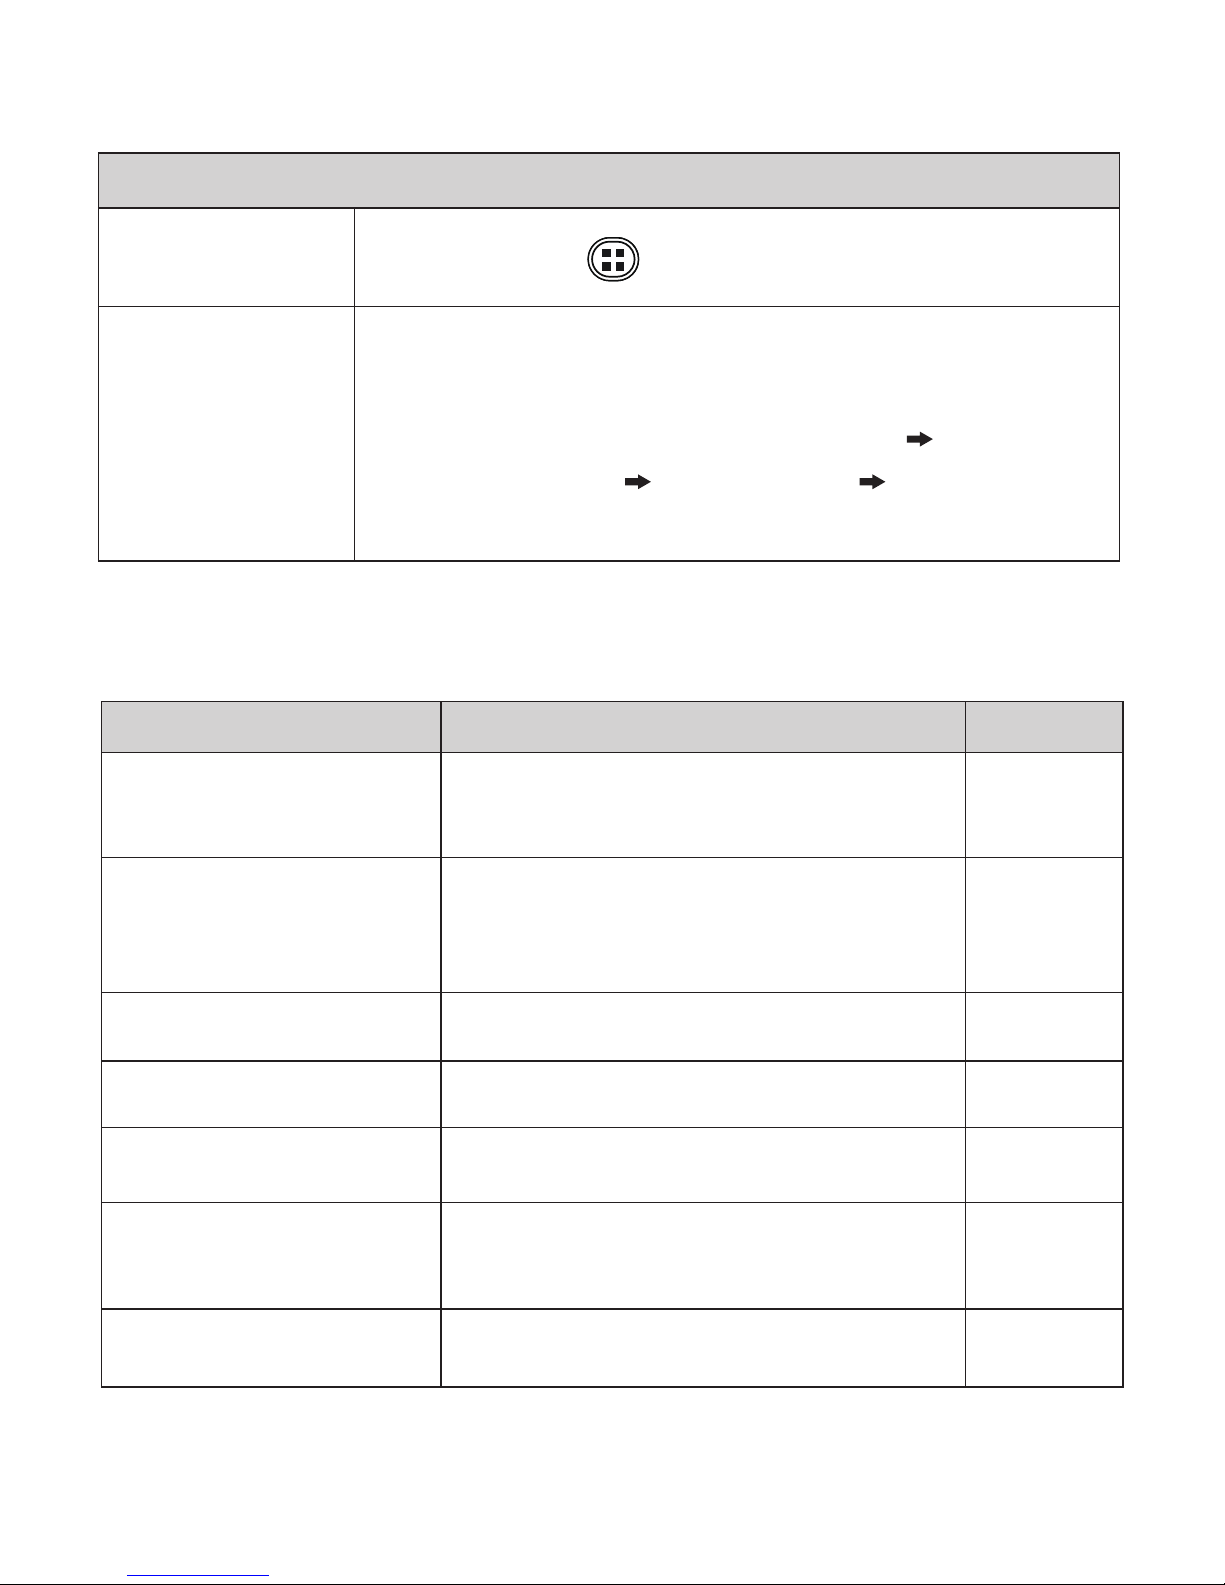
Condition Status Indicator Beep
Power On
Flash for few seconds, then turn to
steady purple.
1 time
【
Local Mode
】
Steady purple
(For 1st use, Indicator ashs for few
seconds, then turn to steady purple)
N/A
【
Internet Mode
】
Steady blue N/A
Power Off No indication 1 time
Low Battery Flash in red 2 times
Fail connect to
【
Internet Mode
】
Flash in blue for few seconds, then
turn to purple
N/A
Factory Reset No change 3 times
Camera Hotkey
Forced Shutdown
Press and hold for 5 seconds to turn off camera.
Forced
Factory
Settings
• Camera: Open the top cover. Insert a small thin
paper clip into the hole and press lightly to reset.
• Mobile:
Go to App [Unieye Home]
Connect
【
Local Mode】
[Setup] page Reset
factory settings.
Camera Indication
Camera Hotkey
Page 10
| 9
English
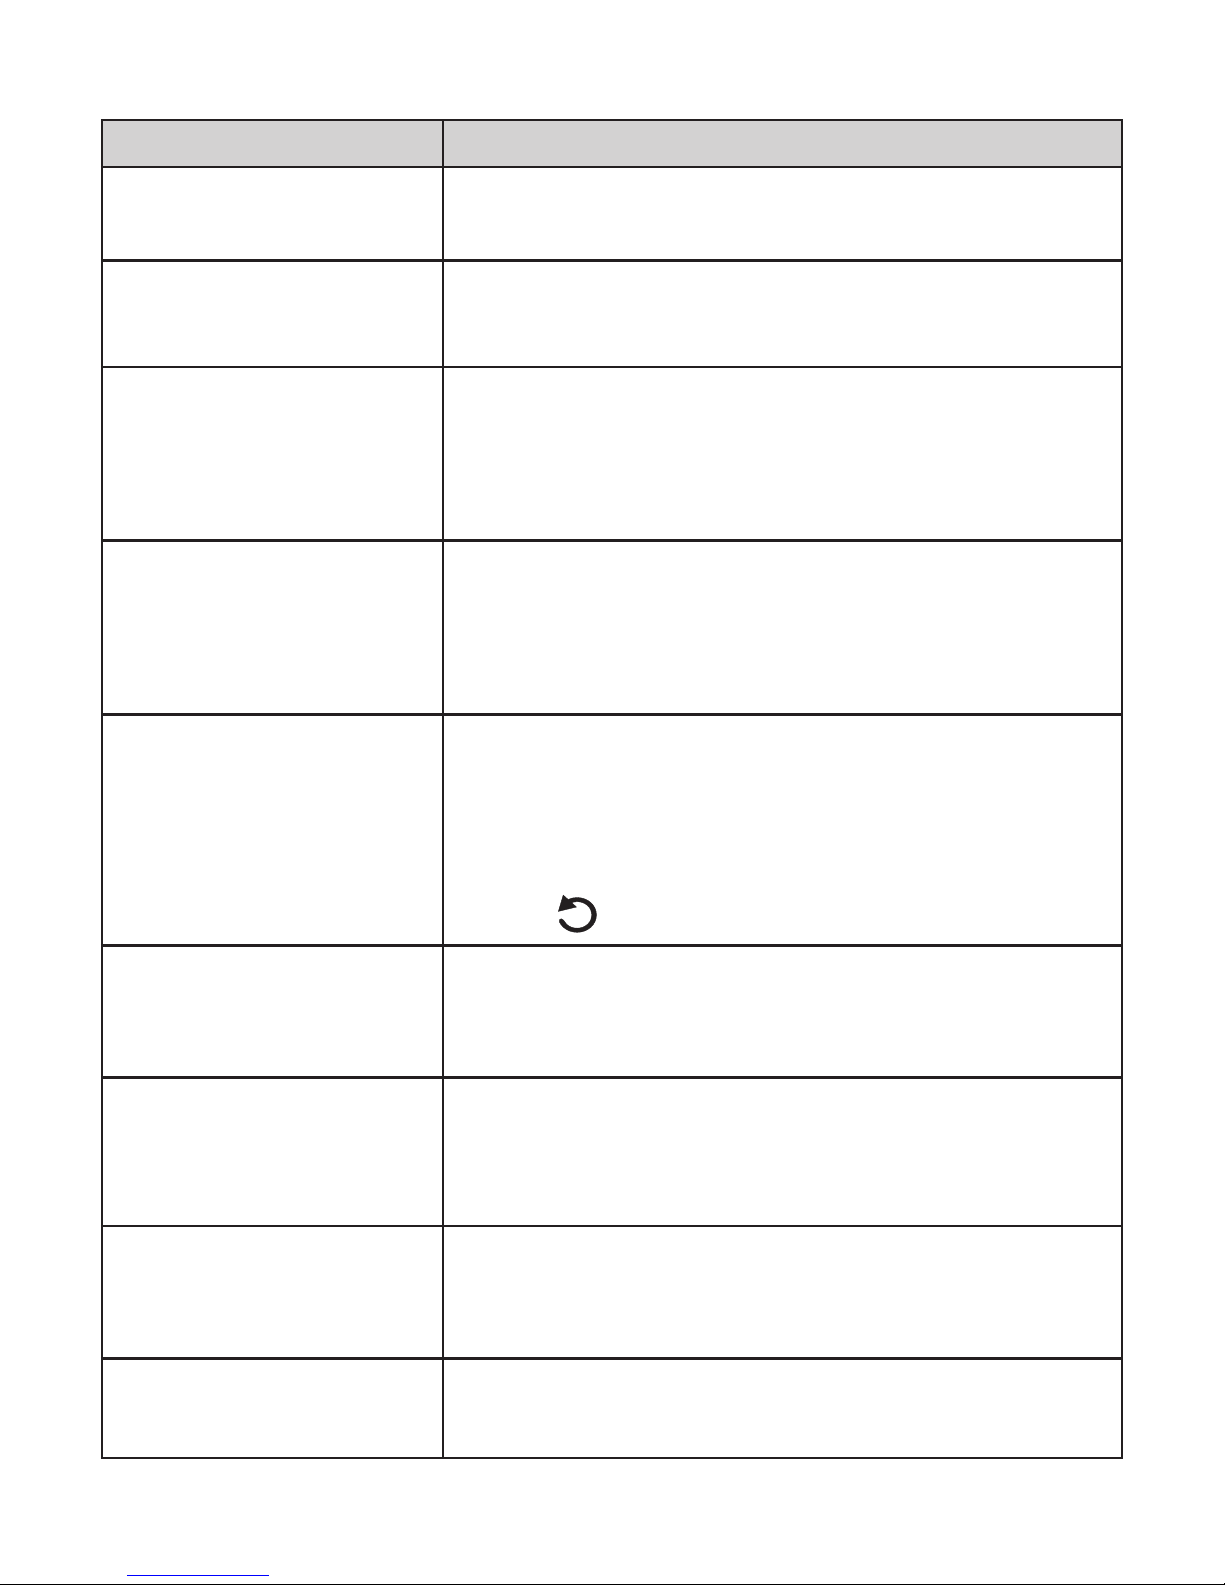
Situation Cause/Solution
Camera cannot turn on
Unplug power adapter, then plug again to
power on.
Camera is frozen
Unplug power adapter, then plug again to
power on.
Camera cannot record
•
No microSD card or microSD card is full
•
microSD card cannot be recognized
•
Format microSD card in [Unieye Home] or
replace microSD card
Camera cannot
connect to AP or could
server
• Invalid AP name or password
• Weak WiFi signal or not in WiFi coverage
• No internet or cloud server is not accessible
• Blocked by rewall
Mobile cannot nd
Camera
• Camera not in WiFi coverage
• Mobile WiFi is disabled
• iOS user does not choose camera name in
Wi-Fi Settings
• Tap [
] on [Unieye Home]
Mobile cannot watch
live view
• Weak WiFi signal
• Camera is occupied by other mobile
Mobile cannot connect
to cloud server
•
Check mobile 3G/4G or WiFi internet connection
• Blocked by rewall
Mobile cannot watch
live view
The internet bandwidth is insufcient for
camera upload or mobile download
Factory Reset
Insert a small thin paper clip to press reset
button lightly.
Troubleshooting
【
Internet Mode
】
【
Internet Mode
】
【
Local Mode
】
【
Local Mode
】
Page 11

Federal Communication Commission Interference Statement
This equipment has been tested and found to comply with the limits for a Class B digital device, pursuant
to Part 15 of the FCC Rules. These limits are designed to provide reasonable protection against harmful
interference in a residential installation. This equipment generates, uses and can radiate radio
frequency energy and, if not installed and used in accordance with the instructions, may cause harmful
interference to radio communications. However, there is no guarantee that interference will not occur in
a particular installation. If this equipment does cause harmful interference to radio or television reception,
which can be determined by turning the equipment off and on, the user is encouraged to try to correct the
interference by one or more of the following measures:
Reorient or relocate the receiving antenna.
Increase the separation between the equipment and receiver.
Connect the equipment into an outlet on a circuit different from that to which the receiver is
connected.
Consult the dealer or an experienced radio/TV technician for help.
FCC Caution: Any changes or modifications not expressly approved by the party responsible for
compliance could void the user's authority to operate this equipment.
This device complies with Part 15 of the FCC Rules. Operation is subject to the following two conditions:
(1) This device may not cause harmful interference, and (2) this device must accept any interference
received, including interference that may cause undesired operation.
This device and its antenna(s) must not be co-located or operating in conjunction with any other antenna
or transmitter.
For product available in the USA/Canada market, only channel 1~11 can be operated. Selection of other
channels is not possible.
IMPORTANT NOTE:
FCC Radiation Exposure Statement:
This equipment complies with FCC radiation exposure limits set forth for an uncontrolled environment.
This equipment should be installed and operated with minimum distance 20cm between the radiator &
your body.
 Loading...