

Page 1
Racing Pr
Frequency Change Instructions
If there is interference with the operation of the scales (ex. much slower operation
than normal or no operation at all) it may be necessarry to change the frequency.
This can be done by following these steps.
1. Set all scale pads out individually (at least 12” apart).
2. Pivot the hand held antenna until the antenna is perpindicular to the oor (this
is essential for communication between the pads and hand held) and turn the
hand held on by pushing the “ON/OFF” button. DO NOT turn the scale pads
on at this time.
3. When the menu appears, select “RF Frequency” by pressing the “OK” button.
Give the unit a few seconds to scan the channels and you will see numbers
appear under “ACTIVITY”. Scroll the arrow down and select the frequency
with the lowest number (least amount of interference) by pressing “OK”.
(Typically 903-915 commumicate the fastest.)
4. Turn the hand held off by pushing the “ON/OFF” button for 2 seconds.
5. Turn the scale pads on by switching the battery switch on each scale pad to
“ON” and press the reset button on the front of the black box.(Green light will
start blinking indicating power is on.)
6. Turn the hand held back on by pushing the “ON/OFF” button.
7. When the menu appears, select “Weigh Vehicle” by pressing the “OK” button.
Give the hand held 2 minutes to start communication with the scale pads.
When the red lights on ALL scale pads are blinking and numbers appear on
the scaling screen the frequency has been changed and the scales are ready
to use. If you nd that one scale does not blink red after 2 minutes, simply
turn that scale off and back on and press the reset button.
10” Pads
oducts
By
For Further Technical Assistance Please Contact
Tanner Racing Products by MB
10 Cooperative Way Wright City, MO 63390
P.O. Box 110 Foristell, MO 63348
1-800-467-2464 Fax 1-636-745-2874
www.tannerracing.com
www.mittlerbros.com
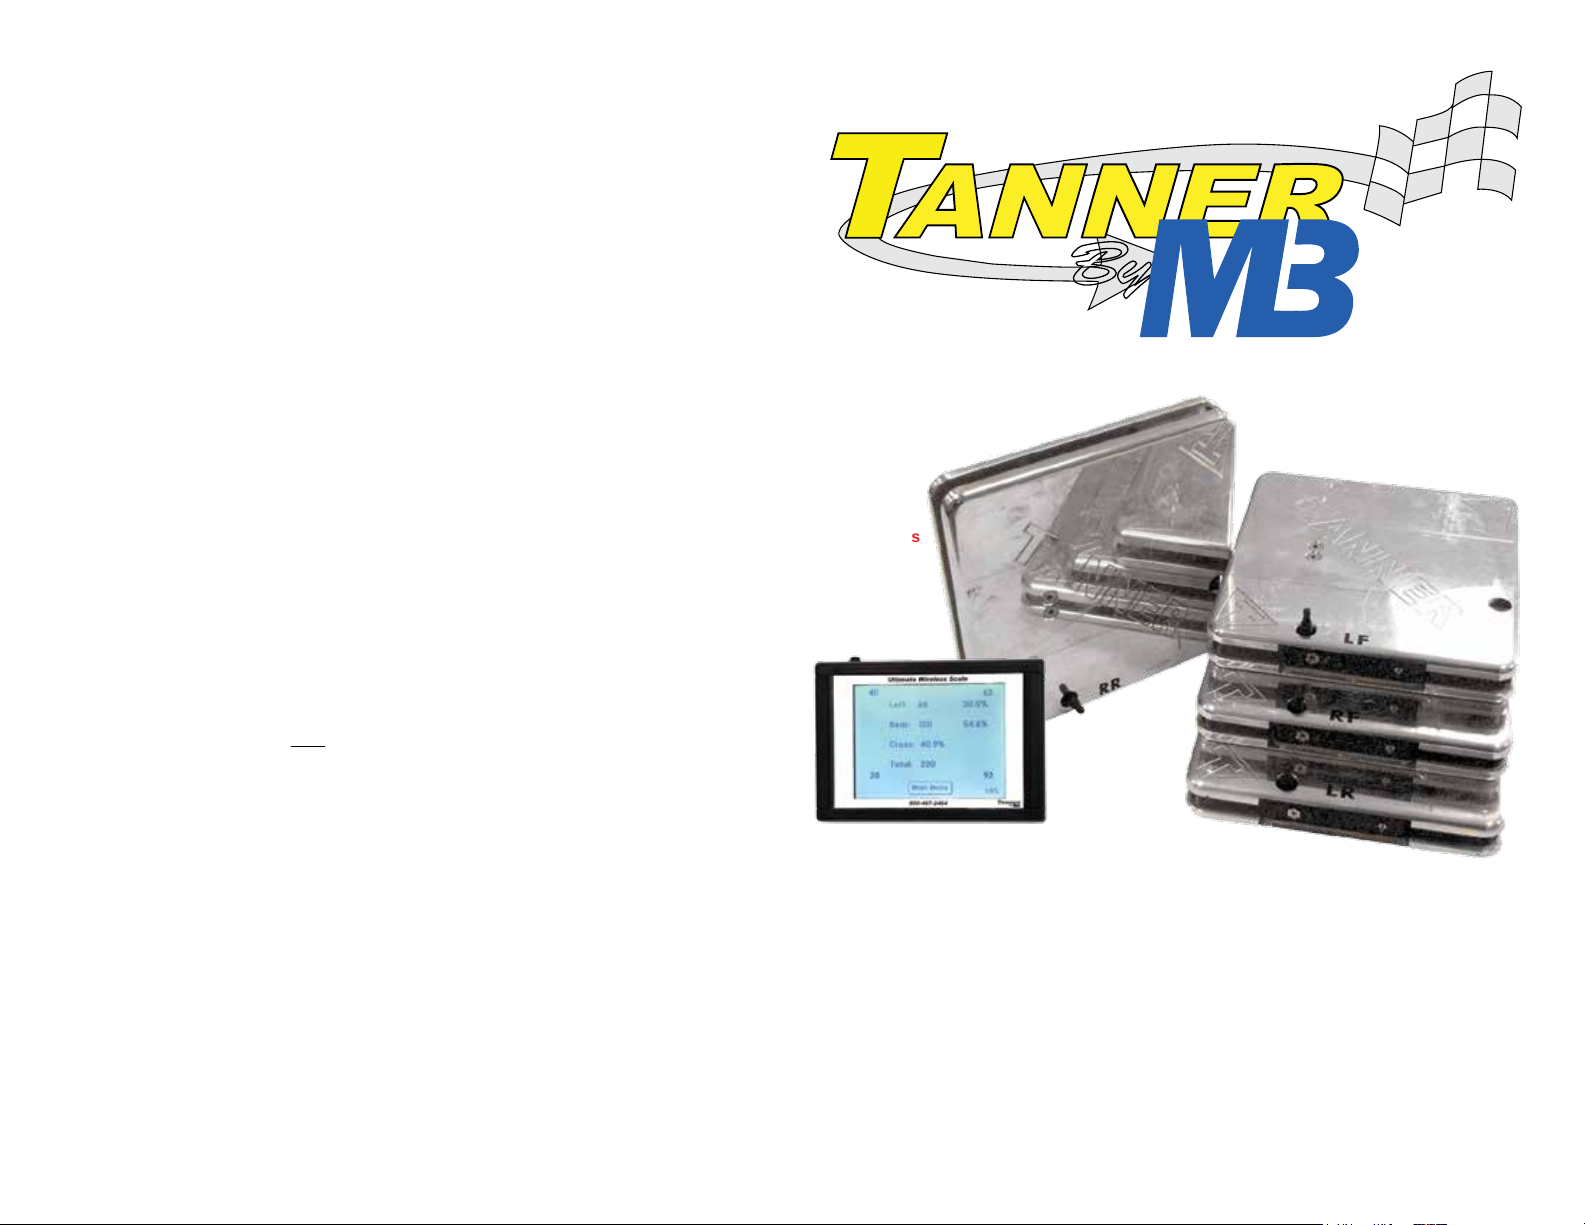
10” Wireless
RaceScale
Instructions
Page 2

Scaling Instructions System ID / Pad Location Change
Please read all instructions prior to operating scales.
1. Set all scale pads out individually (at least 12” apart).
2. Turn on the scale pads by switching the power switch on each scale pad to
“ON” and press the reset button on the front of the black box.(Green light will
start blinking indicating power is on.)
3. Pivot the hand held antenna until the antenna is perpindicular to the oor (this
is essential for communication between the pads and hand held) and turn the
hand held on by pushing the “ON/OFF” button.
4. When the menu appears, select “Weigh Vehicle” by pressing the “OK”
button. Give the hand held a few seconds to start communication with the
scale pads. When the red lights on ALL scale pads are blinking and numbers
appear on the scaling screen the scales are ready to use. If you nd that one
scale does not blink red after 1 minute, simply turn that scale off and back on
and press the reset button.
5. Zero the system (if necessary) by pushing the “MENU” button and selecting
zero all pads. This will then display zero’s in the locations selected. (this may
take a few seconds)
6. Put your racecar on the scales and the weights will register, the %’s and
totals will show on the display.
7. Turn the hand held off by pushing the “ON/OFF” button for 2 seconds.
8. Turn the scale pads off to conserve battery life.
9. The hand held unit contains rechargeable batterys, simply recharge by
plugging the power adapter into the unit. For best performance, charge
battery for 12 hours. Each scale pad contains (4) AA batteries.
If you wish to change a pad location (ex. change the RF to the LR etc.) or change
the system ID, this can be done by following these steps.
1. Set all scale pads out individually (at least 12” apart).
2. Turn on the scale pads by switching the power switch on each scale pad to
“ON” and press the reset button on the front of the black box.(Green light will
start blinking indicating power is on.)
3. Pivot the hand held antenna until the antenna is perpindicular to the oor (this
is essential for communication between the pads and hand held) and turn the
hand held on by pushing the “ON/OFF” button.
4. When the menu is displayed on the hand held, select “SYSTEM ID”. Scroll
the arrow down to the word ID and press the right arrow over to where the
name is. When a character is underlined, you can change it to whatever you
wish using the up and down arrows, this will make your system unique so no
one else with a wireless scale system can pick up on your “channel” and see
your information. Once you are nished scroll back completely to the left and
back up until the arrow is pointiong to “Save and Exit” then press “OK”.
5. Plug the communications cable into the hand held and into one scale pad.
6. Press “MENU” and scroll down past “UNITS” & “PAD SETUP” will appear.
This will allow you to change pad location and/or download a new system
ID. Scroll the arrow down until it is pointed at the pad you are plugged into
(RF,LF,RR or LR) and press “OK”. You will see a message scroll across
the bottom of the screen and the message “Pad set OK” will ash. Plug the
cable into every scale pad to complete this step, each time selecting the pad
you are plugged into. Once you have completed all 4 scale pads, you must
turn the pads off by ipping the switch to “OFF”and turn the hand held off by
pressing the “ON/OFF” button for 2 seconds.
7. Complete steps 1-5 of the scaling instructions and your scales are now ready
to be used.
8. Turn the scale pads and hand held off to conserve battery life.
CAUTION: Changes or modications not expressly approved by the
party responsible for compliance could void the user’s authority to
operate the equipment.
 Loading...