

Page 1

WiFi-Doc Client for iOS
User’s Manual
Version: 2.2
Date: Oct. 7 , 2012
Page 2
1 WiFi-Doc Utility for iOS
1.1 Download from App Store
A. Connect your iOS device to Internet network.
B. Launch the App Store
C. Download the WiFi-Doc application.(Figure.1)
D. Follow the instructions to finish the installation.
1.2 Transfer Office file to your iPhone or iPad
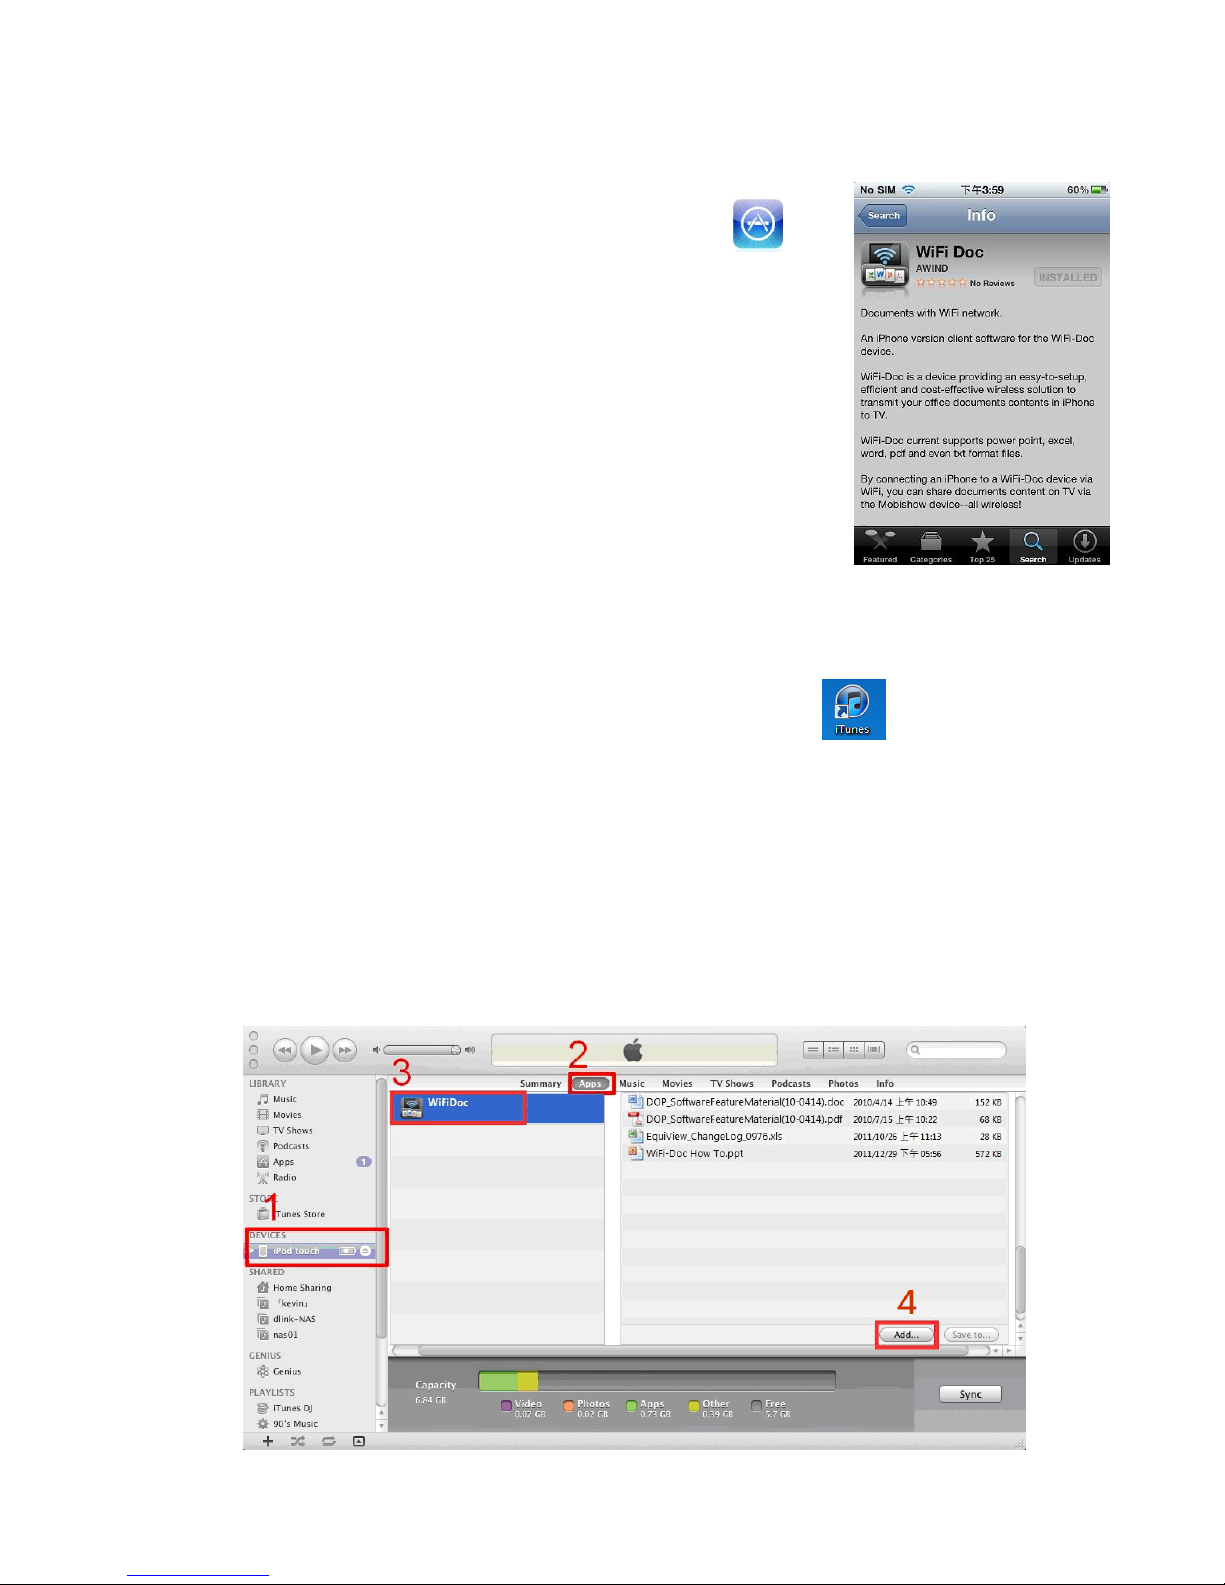
1.2.1 upload document files with iTunes
1. Click iTunes to launch application (Figure.1)
2 Connect your iOS device to PC/Laptop.
3 Click the iOS device.(step.1)
4 Click the Apps list.(step.2).
5 Click WiFi-Doc and you can see everything you uploaded
associated with WiFi-Doc.(step.3)
6 Click add button, and choose file to upload to your iOS
device.(step.4)
Figure.1
Page 3
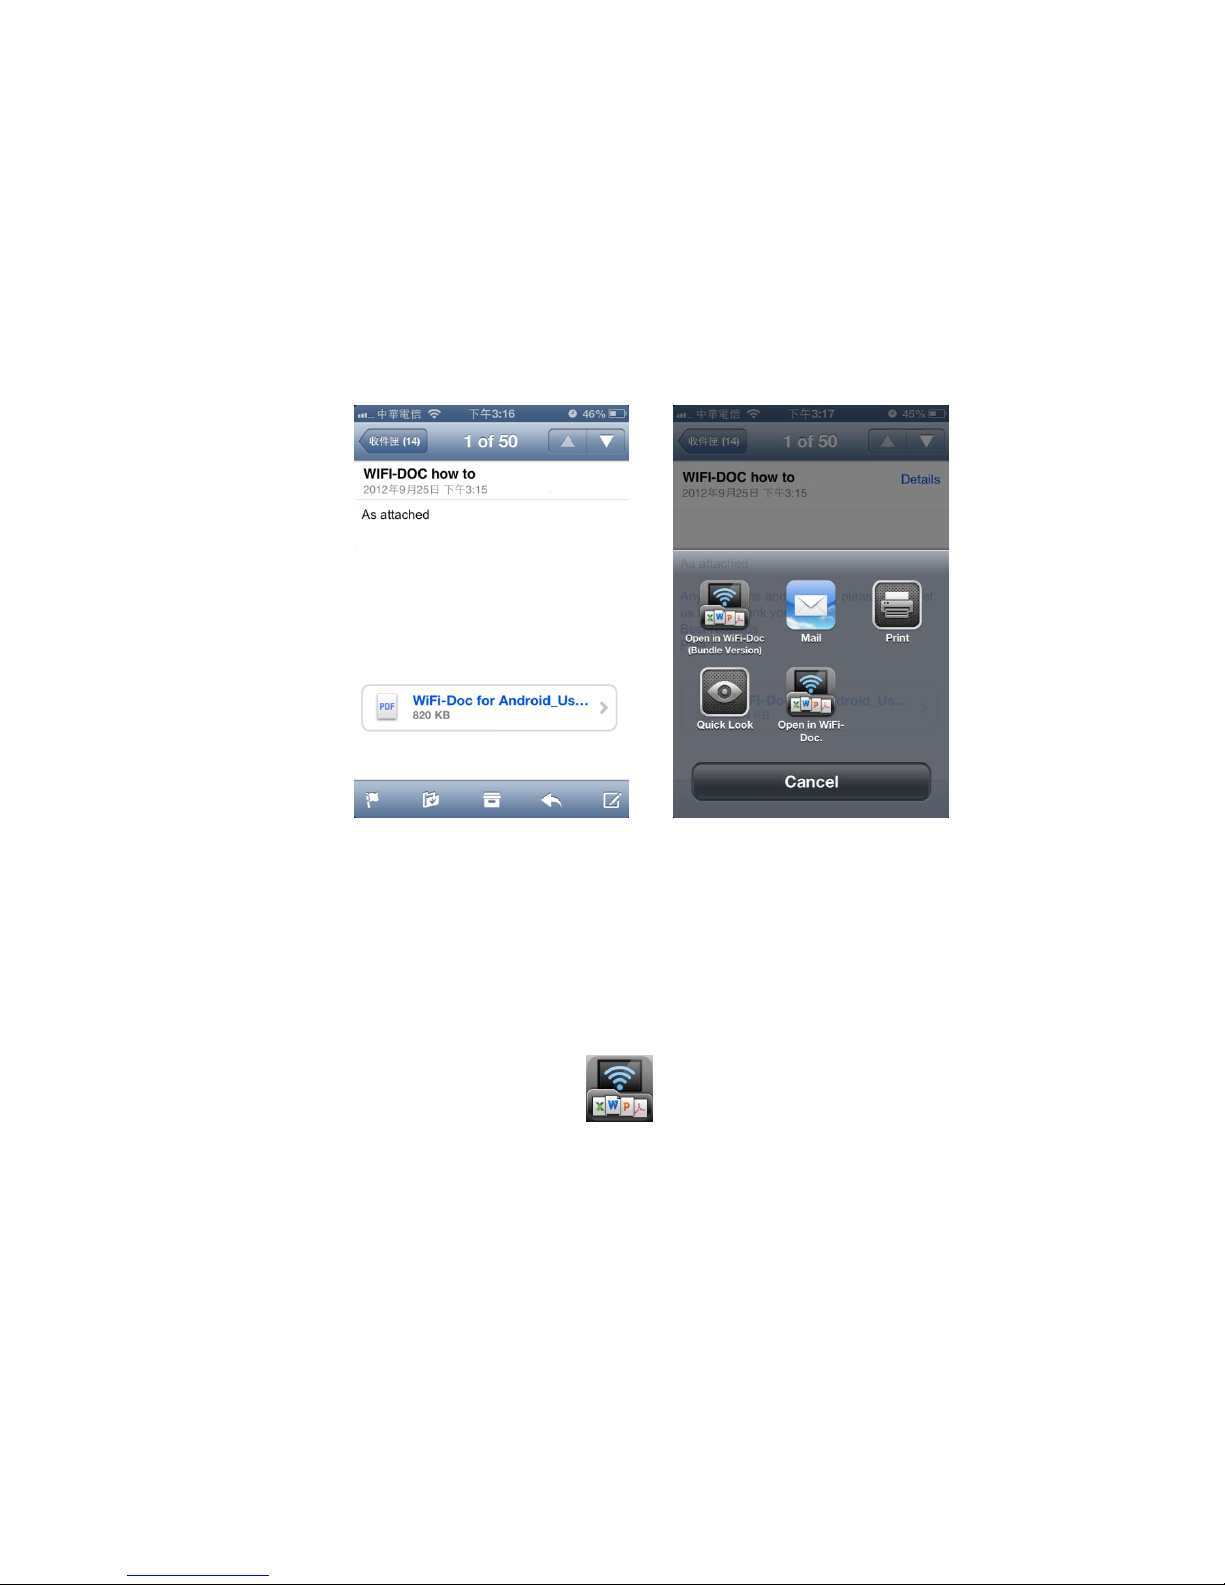
1.2.2 Use E-mail
1. Email office file to yourself, and receive email by your iPhone and
iPad
2. Click on the email attachment (Figure.2)
3. Click on the “Open in…” button, and select WiFi-Doc (Figure.3)
4. Select a MirrorOp or WPS compatible receive devices, and start
the show
2.1 Using WiFi-Doc with iOS
A. Enable the WiFi and connect to the Access Point where the
WiFi-Doc compatible device connected.
B. Select “WiFi-Doc” icon to launch the client software.
C. WiFi-Doc client will start to search for WiFi-Doc compatible
devices automatically.(Figure.4)
D. Choose a WiFi-Doc device, if login code is enabled, it will popup
the login page. Enter the login code and press login. If there is no
login code, it will login device directly (Figure.5)
E. If “No receiver found”, please check if your Wireless has
connected to Projector correctly, or you can choose “Manual Input
IP” to enter IP address manually.
Figure.2
Figure.3
Page 4

Figure.4
Figure.5
View Locally
You can also choose “View Locally” to view local document/photo files
on your iOS device. (Figure.6)
Figure.6
Page 5

2.1.1 Documents
You can use WiFi-Doc to project Documents (word,pdf,excel, text and
powerpoint files ) stored on your phone/tablet to big screen. The
document will be prepared for playback on big screens rather than for
the tiny screens of your phone/tablet.
Open and select the document file,
Figure.7
Figure.8
Page 6

Next/Previous page
As below photo shown (Figure.9), for Next/Previous page, you can use
your finger to slide the screen to go to the previous/next page directly.
Go to page function
As below photo shown (Figure.10), you can also use the go to page
function to jump to the page which you want directly.
Figure.10
Figure.9
Page 7

Zoom in/out function
As below photo (Figure.11), zoom in/out function is available; you can
use your finger on your phone to zoom in/out the projection screen
during document playback.
Figure.11
Button
Description
Press Stop to stop the projection.
Press Play to play the projection screen
Back to documents select screen
Page 8

2.1.2 Photos
You can use WiFi-Doc to project Photo stored on your phone/tablet
Camera Roll to big screen. (Support both vertical and horizontal
operation) The photo will be prepared for playback on big screens
rather than for the tiny screens of your phone/tablet.
Open and select the photo file, then project it through WiFi-Doc to
MirrorOp compatible device.
Note. Photo function supported in iOS 4.2 and above only.
For photo function, enable iOS location service is required.
Please allow WIFI-DOC to use iPhone Location Service to let it can
access iOS Camera Roll.
Figure.11
Figure.12
Page 9

Next/Previous photo file
As below photo shown (Figure.13), for Next/Previous file, you can use
your finger to slide the screen to go to the previous/next file directly.
Go to function
As below photo shown (Figure.14), you can also use the go to page
function to jump to the photo file which you want directly.
Figure.14
Figure.13
Page 10

Zoom in/out function
As below photo (Figure.15), zoom in/out function is available; you can
use your finger on your phone to zoom in/out the projection screen
during photo playback.
Figure.15
Button
Description
Press Pause to freeze the projection screen.
Press Play to play the projection screen
Go to documents select screen
Press it to start/stop SildeShow
Note.SlideShow supported in iOS5 and
above only
Rotate photo 90 degrees
 Loading...