

Mitsubishi VS50VA2, VS50VA1, VS45VA1 Owner’s Manual
,,,_,_MITSUBISHI
Proj e,ctlon
TV
Owner's
Guide
-3
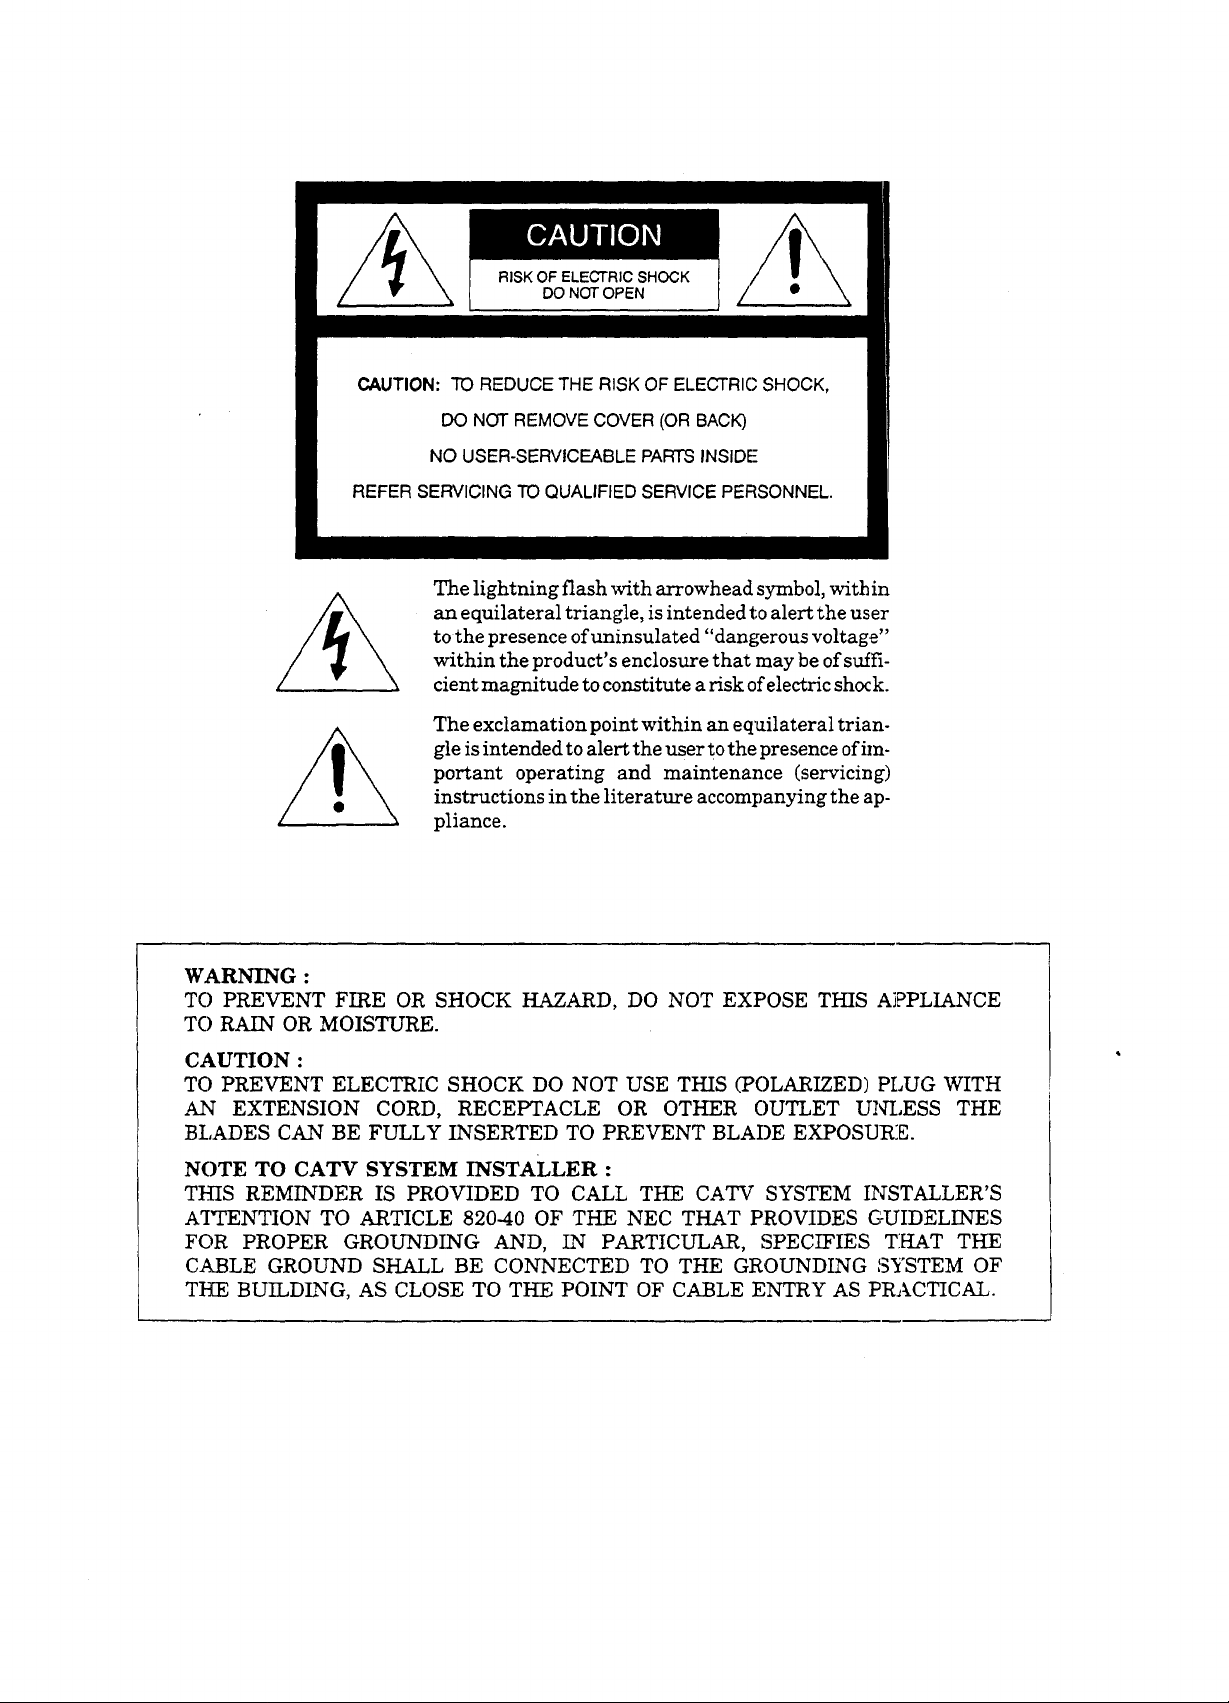
RISK OF ELECTRIC SHOCK
DO NOT OPEN
CAUTION: TO REDUCE THE RISK OF ELECTRIC SHOCK,
DO NOT REMOVE COVER (OR BACK)
NO USER-SERVICEABLE PARTS INSIDE
REFER SERVICING TO QUALIFIED SERVICE PERSONNEL.
The lightning flash with arrowhead symbol, within
an equilateral triangle, is intended to alert the user
to the presence ofuninsulated "dangerous voltage"
within the product's enclosure that may be of suffi-
cient magnitude to constitute a risk of electric shock.
The exclamation point within an equilateral trian-
gle is intended to alert the user to the presence of im-
portant operating and maintenance (servicing)
instructions in the literature accompanying the ap-
pliance.
WARNING :
TO PREVENT FIRE OR SHOCK HAZARD, DO NOT EXPOSE THIS AiPPLIANCE
TO RAIN OR MOISTURE.
CAUTION :
TO PREVENT ELECTRIC SHOCK DO NOT USE THIS (POLARIZED) PLUG WITH
AN EXTENSION CORD, RECEPTACLE OR OTHER OUTLET UNLESS THE
BLADES CAN BE FULLY INSERTED TO PREVENT BLADE EXPOSUR:E.
NOTE TO CATV SYSTEM INSTALLER :
THIS REMINDER IS PROVIDED TO CALL THE CATV SYSTEM INSTALLER'S
A'ITENTION TO ARTICLE 820-40 OF THE NEC THAT PROVIDES GUIDELINES
FOR PROPER GROUNDING AND, IN PARTICULAR, SPECIFIES THAT THE
CABLE GROUND SHALL BE CONNECTED TO THE GROUNDING SYSTEM OF
THE BUILDING, AS CLOSE TO THE POINT OF CABLE ENTRY AS PRACTICAL.
MITSUBISHI OWNER'S GUIDE
of onte-- s
Important Safeguards .......................................................... 4
Preface: Welcome to Mitsubishi ................................................. 9
Summary of Special Features ............................................... 10
Unpacking Your Projection TV ............................................. 11
What you'll fred ....................................................... 11
A few suggestions ...................................................... 11
What's in Each Chapter .................................................... 12
Some Conventions Used in This Guide ....................................... 13
Chapter 1: Getting to Know Your Projection TV ................................ 15
Overview of the Front Panel ............................................... 16
Overview of the Remote Control ............................................. 18
Getting ready to use the remote control .................................... 18
Remote control buttons and functions ...................................... 20
Chapter 2: Connecting Your Projection TV ..................................... 25
Overview of the Back Panel ................................................ 26
Basic Connections ........................................................ 28
Projection TV + external speakers ........... ............................. 29
Projectaon TV + antenna or cable without a decoder box ..................... 30
Projection TV + antenna or cable with a decoder box ........................ 31
Projectaon TV + separate UHF and VHF antennas .......................... 33
Projection TV + VCR + antenna or cable without a decoder box .............. 34
Projecuon TV + VCR + antenna or cable with a decoder box ................ 37
Projectxon TV + home theater receiver (A/V receiver) ....................... 40
Projecuon TV + audio system ............................................ 42
Projecuon TV + external speaker with subwoofer out termfiaal ................ 43
Projecuon TV + an amplifier that has a center channel O[.EC terminal
(VS-50VA1, VS-50VA2, and VS-60VA2 only.) ............................. 44
Chapter3: Operating Your Projection TV ........................... 47
Getting Started ................................................ 48
Programming the remote control ................................ 49
Turning the Projection TV on/off .............................. 52
Selecting the input source ..................................... 53
Changing channels ........................................... 54
Setting the clock ............................................. 57
Memorizing channels ......................................... 58
Adding and deleting channels ................................. ,59
Using home theater ........................................... 60
Renaming the inputs ........................................... 61
Adjusting the color alignment .................................. 62
Adjusting the sound .......................................... 63
Adjusting the picture .......................................... 65
Using the Advanced Features ..................................... 67
Setting the timer ............................................. 68
Using the parental lock ........................................ 69
Using the super quick view tuning .............................. 70
Using Video Mute ............................................ 72
Using the power restore feature ................................. 73
Chapter 4: Using the Special Features ................................ 75
Understanding the On-Screen Displays ............................. 76
Using the Off-Timer ........................................... 78
Setting the off-timer .......................................... 79
Changing or canceling the off-timer ............................. 80
Using the Picture-in-Picture (PIP) Mode ............................ 81
Selecting the PIP image ....................................... 82
Selecting the source ......................................... 83
Exchanging the PIP image ..................................... 84
Freezing the PIP image ....................................... 85
Moving the PIP image ........................................ 86
Chapter 5: Troubleshooting ...................................... 87
Using the VCR Tray ......................................... 90
Caution and Care ........................................... 92
Calling for Service .......................................... 93
Appendix: Automatic Procedure for the Parental Lock .............. 95
Index .......................................................... 97
3 Table of Contents

IMPORTANT SAFEGUARDS
PLEASE READ ALL THESE INSTRUCTIONS REGARDING
YOUR TELEVISION SET AND RETAIN FOR FUTURE
REFERENCES. FOLLOW ALL WARNINGS AND INSTRUC-
TIONS MARKED ON THE TV RECE]VER.
I.Read Instructions
Allthesafetyandoperatinginstructionsshouldbereadbeforethe
applianceisoperated.
2. Retain Instructions °
The safety and operating instructions ._hould be retained for fu-
ture reference.
3. Heed Warnings
All warnings on the appliance and in the operating instructions
should be adhered to.
4. Follow Instructions
All operating and use instructions should be followed.
°
Cleaning
Unplug this Projection TV from the wall outlet before cleaning.
Do not use liquid or aerosol cleaners. Use a damp cloth for
cleaning.
.
Attachment and Equipment
Never add any attachments and/or equipment without approval
of the manufacturer as such additions may result in the risk of
fire, electric shock or other personal injury.
.
Water and Moisture
Do not use this Projection TV where contact with or immersion in
water is a possibility. Do not use near: bath tubs, mash bowls,
kitchen sinks, laundry tubs, or swimming pools, etc.
4
. Accessories
Do not place this Projection TV on an unstable cart, stand, tripod,
bracket, or table. The Projection TV may fall, causing serious inju-
ry to a child or adult, and serious damage to the applia:ace. Use
only with a cart, stand, tripod bracket, or table recommended by
the manufacturer, or sold with the Projection TV. Any mounting
of the appliance should follow the manufacturer's ia_l_ctions,
and should use a mounting accessory recommended by the
manufacturer.
An appliance and cart combination should be moved w:ith care.
Quick stops, excessive force, and uneven surfaces may cause the
appliance and cart combination to overturn.
. Ventilation
S3126A
Slots and openings in the cabinet are provided for ventilation and
to ensure reliable operation of the Projection TV and to protect it
from overheating. Do not block these openings or allow them to be
blocked by placing the Projection TV on a bed, sofa, rug, or other
similar surface. Nor should it be placed over a radiator or heat
register. If the Projection TV is to be placed in a rack or bookcase,
insure that there is adequate ventilation and that the manufac-
turer's instructions have been adhered to.
10.PowerSources
ThisProjectionTVshouldbeoperatedo:aly from the type of power
source indicated on the marking label. If you are not sure of the
type of power supply to your home, consult your appliance dealer
or local power company.
11. Grounding or Polarization
For your safety, this Projection TV is equipped with a polarized al-
ternating current line plug having one blade wider th an the other.
This plug will fit into the power outlet; o:aly one way. ]£you are un-
able to insert the plug fully into the outlet, try reversing the plug.
If the plug should still fail to fit, contact :your electrician to replace
your obsolete outlet. Do :not defeat the _'_ety purpose of the pola-
rized plug.
12. Power-Cord Protection
Power-supply cords should be routed :30that they are not likely to
be walked on or pinched by items placed upon or against them,
paying particular attention to cords at plugs, convenience recep-
tacles, and the point where they exit from the appliance.
13. Lightning
For added protection for this Projection TV during; a lightning
storm, or when it is left unattended and unused for long periods of
time, unplug it from the wall outlet and disconnect the antenna or
cable system. This will prevent damage to the video product due to
lightning and power-line surges.
14. Power Lines
An outside antenna system should not t>elocated in the vicinity of
overhead power lines or other electric light or power circuits, or
where it can fall into such power line,_ o r circuits. When installing
an outside antenna system, extreme care should be taken to keep
from touching such power lines or c:Lrcuits as contact with them
might be fatal.
6
15.Overloading
Donotoverloadwall outletandextensioncordsasthiscanresult
in a risk offire orelectricshock.
16.
Object and Liquid Entry
Never push objects of any kind into this Prqje(,_ion TV through
openings as they may touch dangerous voltage points or short-out
parts that could result in a fire or electric shock. :Never spill liquid
of any kind on the Projection TV.
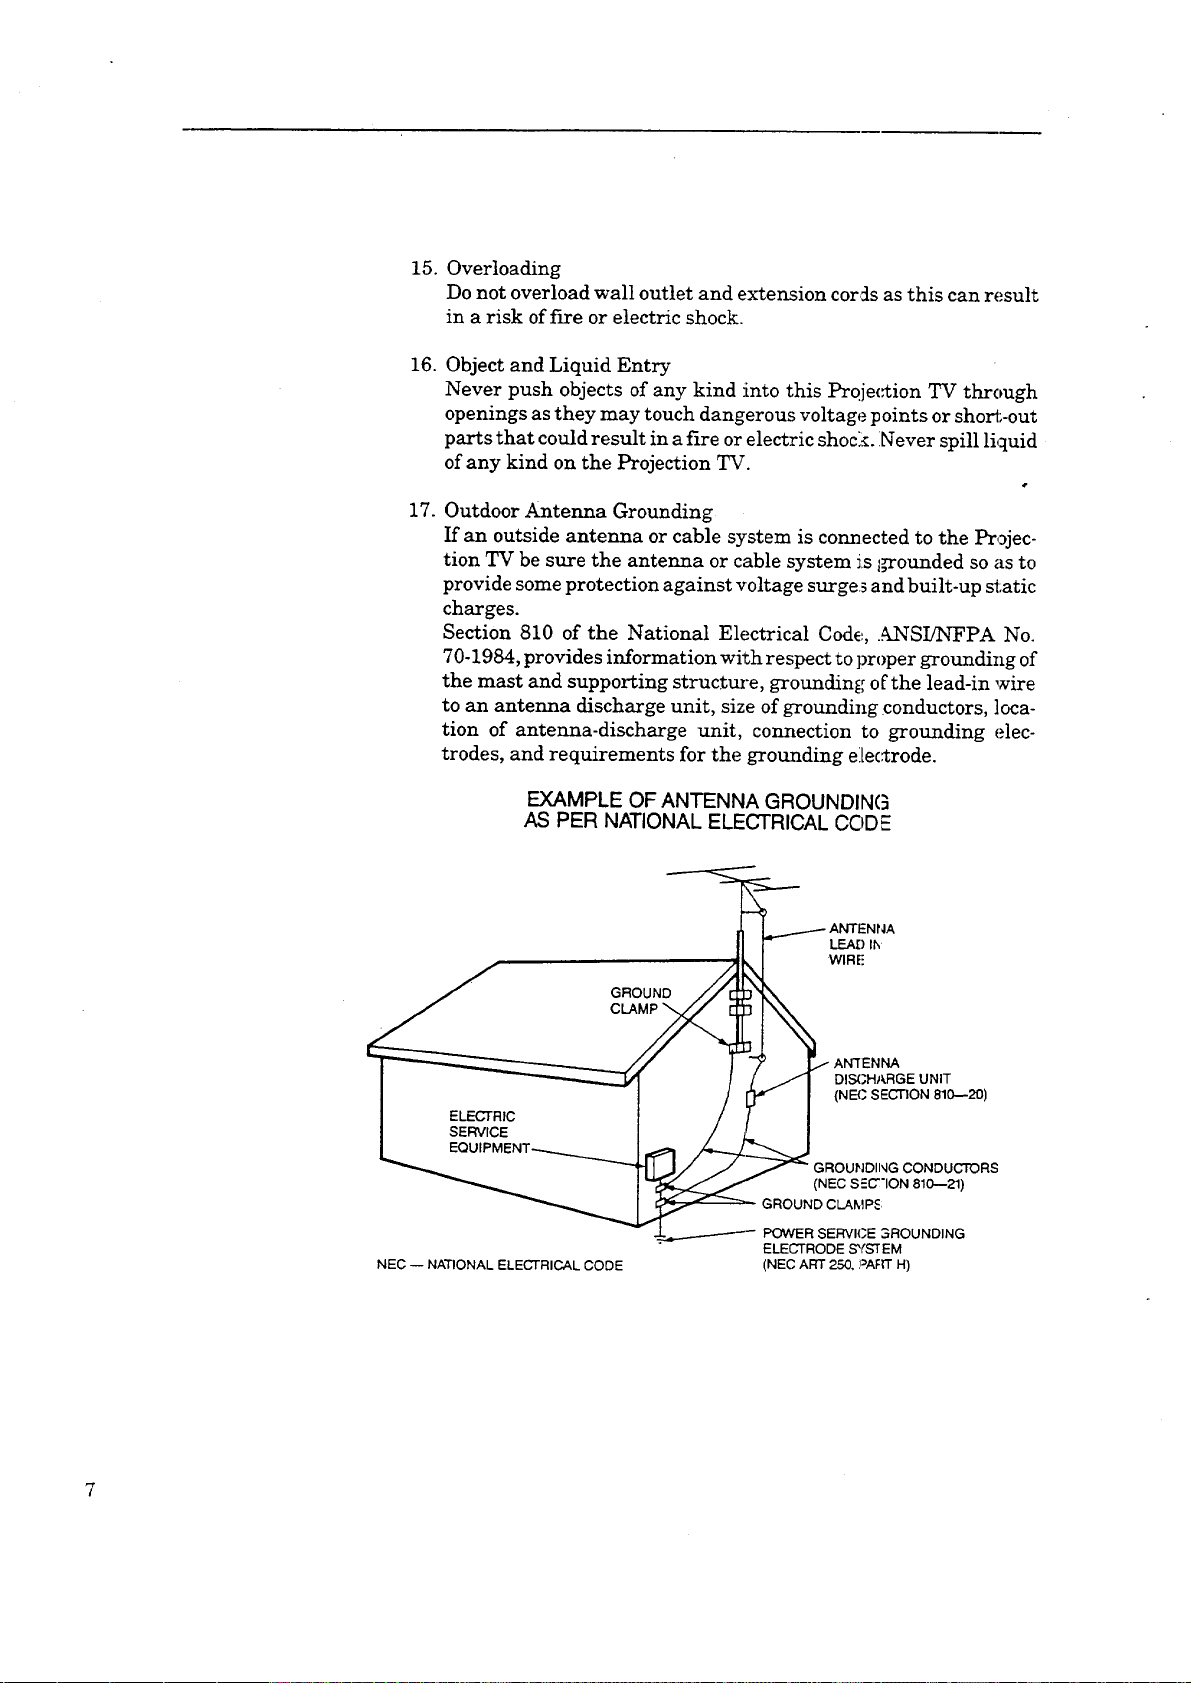
17.
Outdoor Antenna Grounding
If an outside antenna or cable system is connected to the Projec-
tion TV be sure the antenna or cable system is I,rrounded so as to
provide some protection against voltage surges and built-up static
charges.
Section 810 of the National Electrical Code,., ANSIiNFPA No.
70-1984, provides information with respect to proper grotmding of
the mast and supporting structure, grounding of the lead-in wire
to an antenna discharge unit, size of grounding conductors, ]oca-
tion of antenna-discharge unit, connection to grounding elec-
trodes, and requirements for the grounding electrode.
EXAMPLE OF ANTENNA GROUNDING
AS PER NATIONAL ELECTRICAL CODE
_ ANTENNA
II F LEAOI_
II. I WIRE
I_ . " J _" _ AN'I'ENNA
I _ I / /I DISCHARGEUNIT
I - / [7" I
I ELECtRiC / / I
] SERVICE / L I
L EQUIPMENT_ _ //_..._
NEC -- NATIONAL ELECTRICAL CODE (NEC ART 250, ?AFrr H)
_ ]_J/ / /_ GROUNDIIqG CONDUCTORS
_ (NEC S;C"ION 810--21)
_--4--"------------------POWER SERVICE 3ROUNDING
GROUND CLAMP_:
ELECTRODE SYSTEM
18. Servicing
Do not attempt to service this Projection TV yourself as opening or
removing covers may expose you to dangerous voltage or other
hazards. Refer all servicing to qualified service personnel.
19. Damage Requiring Service
Unplug this Projection TV from the wall outlet and refer servicing
to qualified service personnel under th_ following conditions:
(a) When the power-supply cord or plug is damaged..
(b) If liquid has been spilled, or objects have fallen into the Projec-
tion TV.
(c) If the Projection TV has been expo,;ed to rain or water.
(d) If the Projection TV does not operate normally by following
the operating instructions. Adjust only those controls that are
covered by the operating instruc_icns as an improper adjust-
ment of other controls may result in damage and will often
require extensive work by a qualifie d technician _orestore the
Projection TV to its normal operation.
(e) If the Projection TV ihas been dropped or the cabinet has been
damaged.
(f) When the Projection TV exhibits a distinct change in perfor-
mance -- this indicates a need for _ervice.
20. Replacement Parts
When replacement parts are required, be sure the service techni-
cian has used replacement parts specified by the manufacturer or
have the same characteristics as the original part. Unauthorized
substitutions may result in fLre, electri.c shock or ot:her hazards.
21. Safety Check
Upon completion of any service or repairs to this l:_ojection TV
ask the service technician to perform safety checks to determine
that the Projection TV is in a safe o_erating conditions.
8


PREFACE
Telcome to Mitsubishi
Congratulations on your purchase of the Mitsubishi Projection TV. Your
Projection TV is designed for superb viewing pleasure as well as con-
tinued reliability.
To familiarize you with your new Projection TV and owner's guide,
we suggest that you read through the preface, which provides the follow-
ing important information.
• Summary of Special Features
• Unpacking Your Projection TV
• What's in Each Chapter
• Some Conventions Used in This Guide
Mitsubishi has strived to create your Project2.on TV so that it will bring
you years of viewing enjoyment. Similarly, your owner's guide is
designed with a "user friendly" philosophy that will help you take
advantage of all of your equipment's feam:;es.
Once again, thank you for selecting our product and welcome to Mitsubishi!
Summary of Special Features
Your top rated Mitsubishi Projection TV delivers:
• 181-Channel Capacitymprograms up to 181 channels, ensuring
your continued viewing pleasure as cable services continue to expand.
• Two-Speaker Sound System--a special speaker system produces
clear, stereo sound.
• Expanded Sound Capabilitymallows you to connect the Projec-
tion TV to an external audio system for enhanc_ listening pleasur[.
In addition to the standard features found on most advanced Projection
TVs, Mitsubishi is proud to offer the following distinctive features:
• Remote Control with VCR/TV Ftmction--us_s a single re:mote
control transmitter for the television and select Mitsubishi VCRs.
• Learning Remote Control Unit---can learn the functions of other
remote control unit.
• On-Screen Displays--indicates the status of various functions and
appears whenever a function is adjusted.
• Picture-in-Picture Mode--allows you to view _o different sources
at the same time.
Each of these features will be explained in more detail in Chapter 3,
"Operating Your Projection TV."
10 Preface
Unpacking Your Projection TV
What you will find
As you unpack your new Mitsubishi Projection TV, please check to
be sure that the following items are included:
• an owner's guide,
• a remote control transmitter,
• a set of two size AAA batteries for the remote control and,
• a belt for VCR (VS-45VA 1, VS-45VA2, VS-50VA1 and VS-50VA2
only). "
A few suggestions
Before you hook up your new Projection TV p:.ease take a few minutes to:
0 Complete the registration card. The registration card asks for the
Projection TV's serial number, which you'll find on the back of
the unit.
0 Keep the box and packing materials fo:: furore use.
0 File your sales receipt and warranty card.
0 Place the Projection TV on a stable surface with sufficient fighting
to do the hook-up.
Unpacking Your ProjectionTV II
What's in Each Chapter
Here's what you will find in this owner's guide::
Chapter 1, "Getting to Know Your Projection TV", introduces you
to the location and functions of the buttons, conuols and terminals of
your Projection TV.
Chapter 2, "Connecting Your Projection TV", explains how to connect
a VCR, antenna, decoder and other equipment to yeur Projection TV.
Chapter 3,"Operating Your Projection TV", provides the step-by-step
instructions you need in order to use your Projection TV.
Chapter 4, "Using the Special Features", explains how to use some
of your Projection TV's special features.
Chapter 5, "Troubleshooting", summarizes the problLems you may have
along with the suggestions for remedying these problems.
The appendix explains an automatic procedure for the channel lock.
You'll also find a detailed index at the back of r.he book.
12 Preface
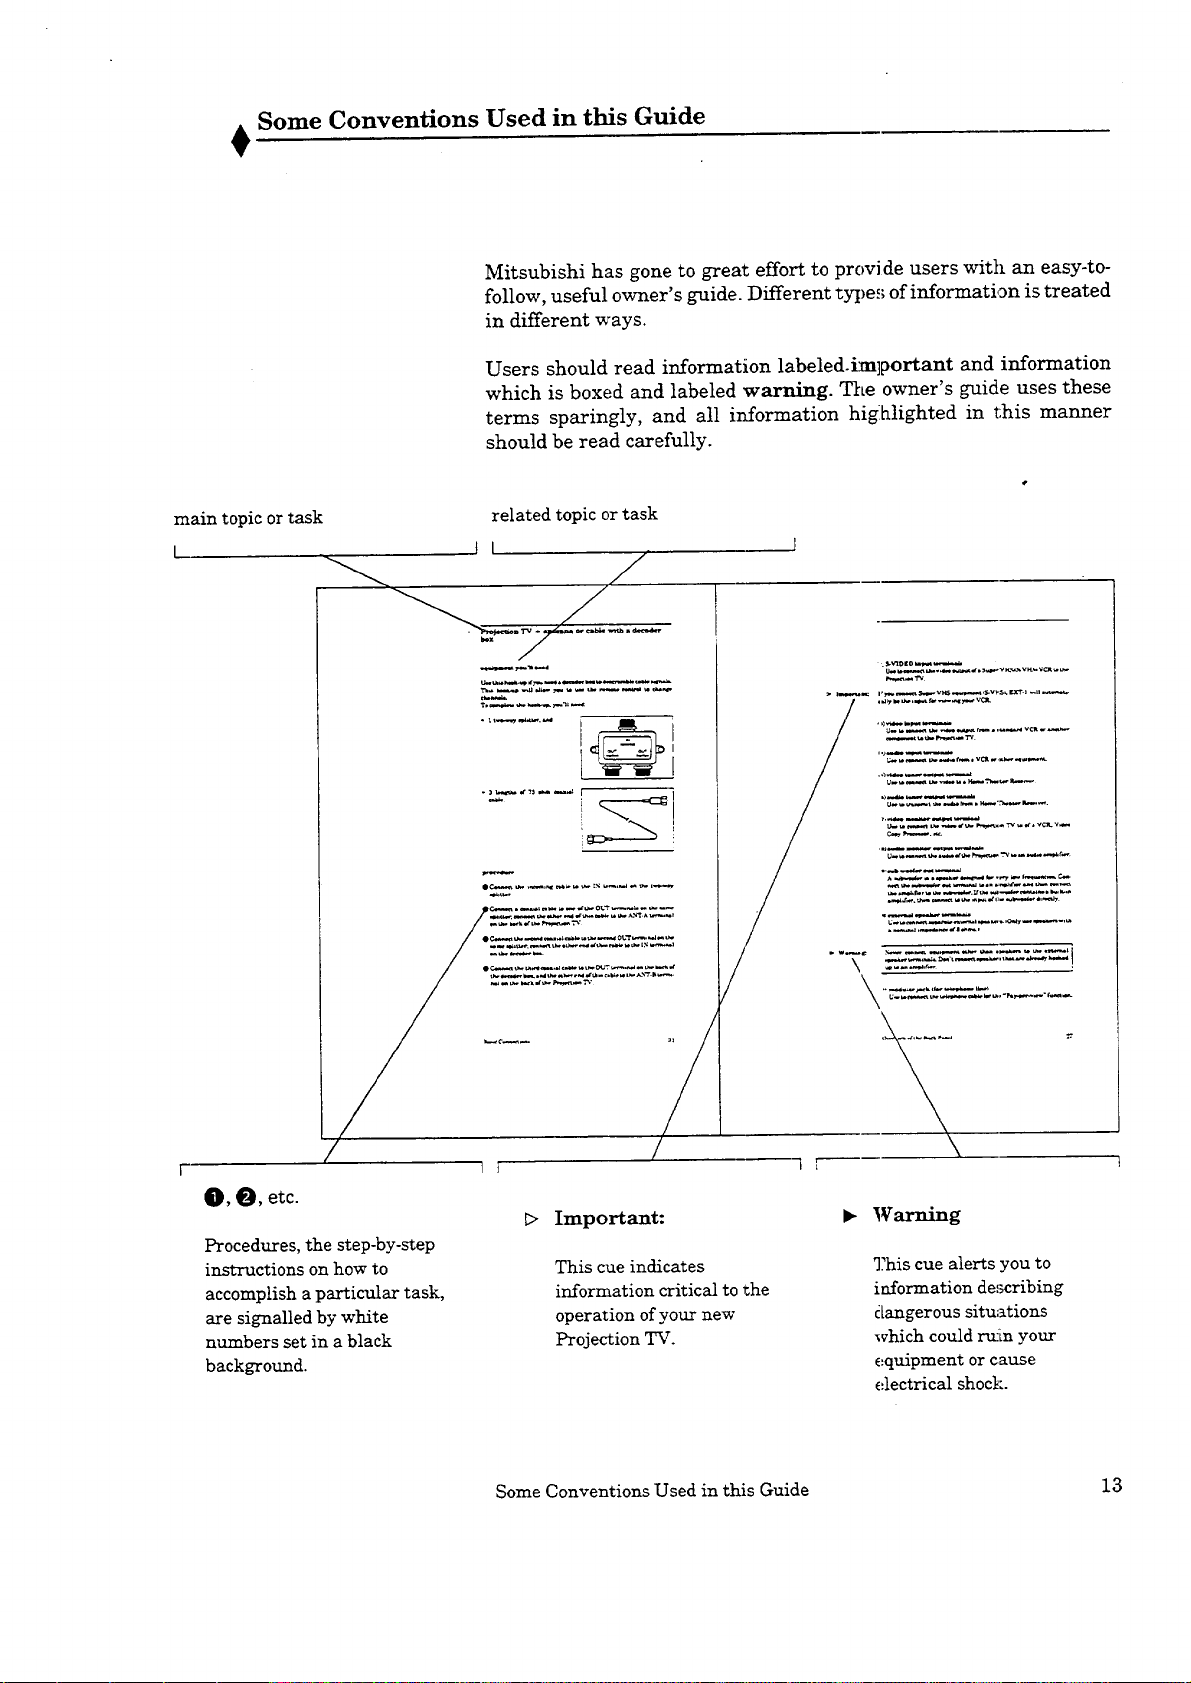
Some Conventions Used in this Guide
Mitsubishi has gone to great effort to provide users with an easy-to-
follow, useful owner's guide. Different _ype_; of information is treated
in different ways.
Users should read information labeled.im]portant and information
which is boxed and labeled warning. The owner's guide uses these
terms sparingly, and all information hig:hlighted in this manner
should be read carefully.
main topic or task related topic or task
,i-wDto w._
F._,,.-,_-rv
_, _, etc.
Procedures, the step-by-step
instructions on how to
accomplish a particular task,
are signalled by white
numbers set in a black
background.
I
D Important:
This cue indicates
information critical to the
operation of your new
Projection TV.
>,,,,_ lw• w
Warning
This cue alerts you to
information describing
dangerous situations
which could ruAnyour
equipment or cause
electrical shock.
Some Conventions Used in this Guide 13

CHAPTER 1
Getting to Know Your Projection TV
Now that you've unpacked your Projection TV, read through the safety
information, and glanced at the overview explaining how this owner's guide
is organized, it's time to become familiar with the buttons and controls you'll
be using when you operate the TV. This chapter will introduce the range of
options available by using the buttons on the front panel of the TV or the remote
control. It also offers some general guideline., for using the remote control.
Most functions can be controlled by using either the front panel or the
remote control, but certain specialized functions require the use of one
or the other. This chapter, which will familiarize you with the full
range of button functions, contains the following sections:
• Overview of the Front Panel
• Overview of the Remote Control

Overview of the Front Panel
.S-_O _,IDEO L-AUI_O.-R
L._ F'I:_:_Fr IN (EX'F-'T)------------;
PROGRAM
TIMER
(MONO)
E> Important:
0 0 0
(_)S-VIDEO input terminal
Use to connect the video output of a Super VHS (S-VHS) VCR to the
Projection TV.
If you connect Super VHS equipment (S-VHS), EXT-1 will automati-
cally be the input for viewing S-VHS VCR.
video input terminals
Use to connect the video output from a VCR or aJ_other video com-
ponent.
audio input terminals
Use to connect the audio output from a VCR o:: other equipment
AV reset button
Press to reset all audio and video functions except volume, recep-
tion mode (Stereo/SAP/Mono) and Projection TV Speaker (Intelmali
External) to their normal level or setting.
(_)test button (TEST)
This button is used to adjust optimum convergence.
audio and video controls
These buttons are used in pairs to adjust rear,ares of the image or
sound (other than volume) with a two-step process: using one of the
audio or video buttons to select a function, an5 then using the ad-
just buttons.
16 Chapter 1: Getting to Know Your Projection TV
audio function buttons (AUDIO) -- Use either the • buuon or
the • button to select one of the following audio functions:
-- listen to stereo/sap/mono,
-- monitor out variable/fixed,
-- extra bass,
-- speaker internal/external,
-- audio expansion on/off,
-- balance,
-- treble, or
bass. .
video function buttons (VIDEO) -- Use either button to select one
of the following video functions:
-- tint,
-- color,
-- contrast,
-- brighmess,
-- sharpness,
-- video noise reduction on/off,
-- notch filter,
-- color temperature, or
-- color bias.
adjust buttons (ADJUST) -- After selecting the audio or video func-
tion, use either the • button or the • button to adjust the function
you've selected. The adjust buttons ca_ be used to:
-- turn the function on or off (e.g., expansion),
-- increase or decrease the function (e.g., color),
-- shift from one end of a scale to the other (e.g., balance), or
-- select a position (e.g., stereo).
@ input buttons (INPUT)
Use either button to select the input so'arce to view:
• Antenna A,
• Antenna B, or
• External 1 or 2.
@ channel controls (SCAN)
Use the • button to switch to a channel with a higher number and
the T button to switch to a channel with a lower mtmber.
@ volume controls (VOL)
Press the • button to turn up the volume and the • button to turn
down the volume.
(D timer reset button
Use to change all the settings to the imti,'d factory set-up. Any pro-
grams in memory and the clock-time a:re erased.
@ power button (POWER)
Use to mrn the Projection TV on or off.
@ program timer indicator (PROGRAM-TIIVIER)
Lights up when the Projection TV is programmed to turn on at a
particular time.
Overview of the Front Panel 17
Overview of the Remote Control
Getting ready to use the remote control
This section explains general information about using tae remote control.
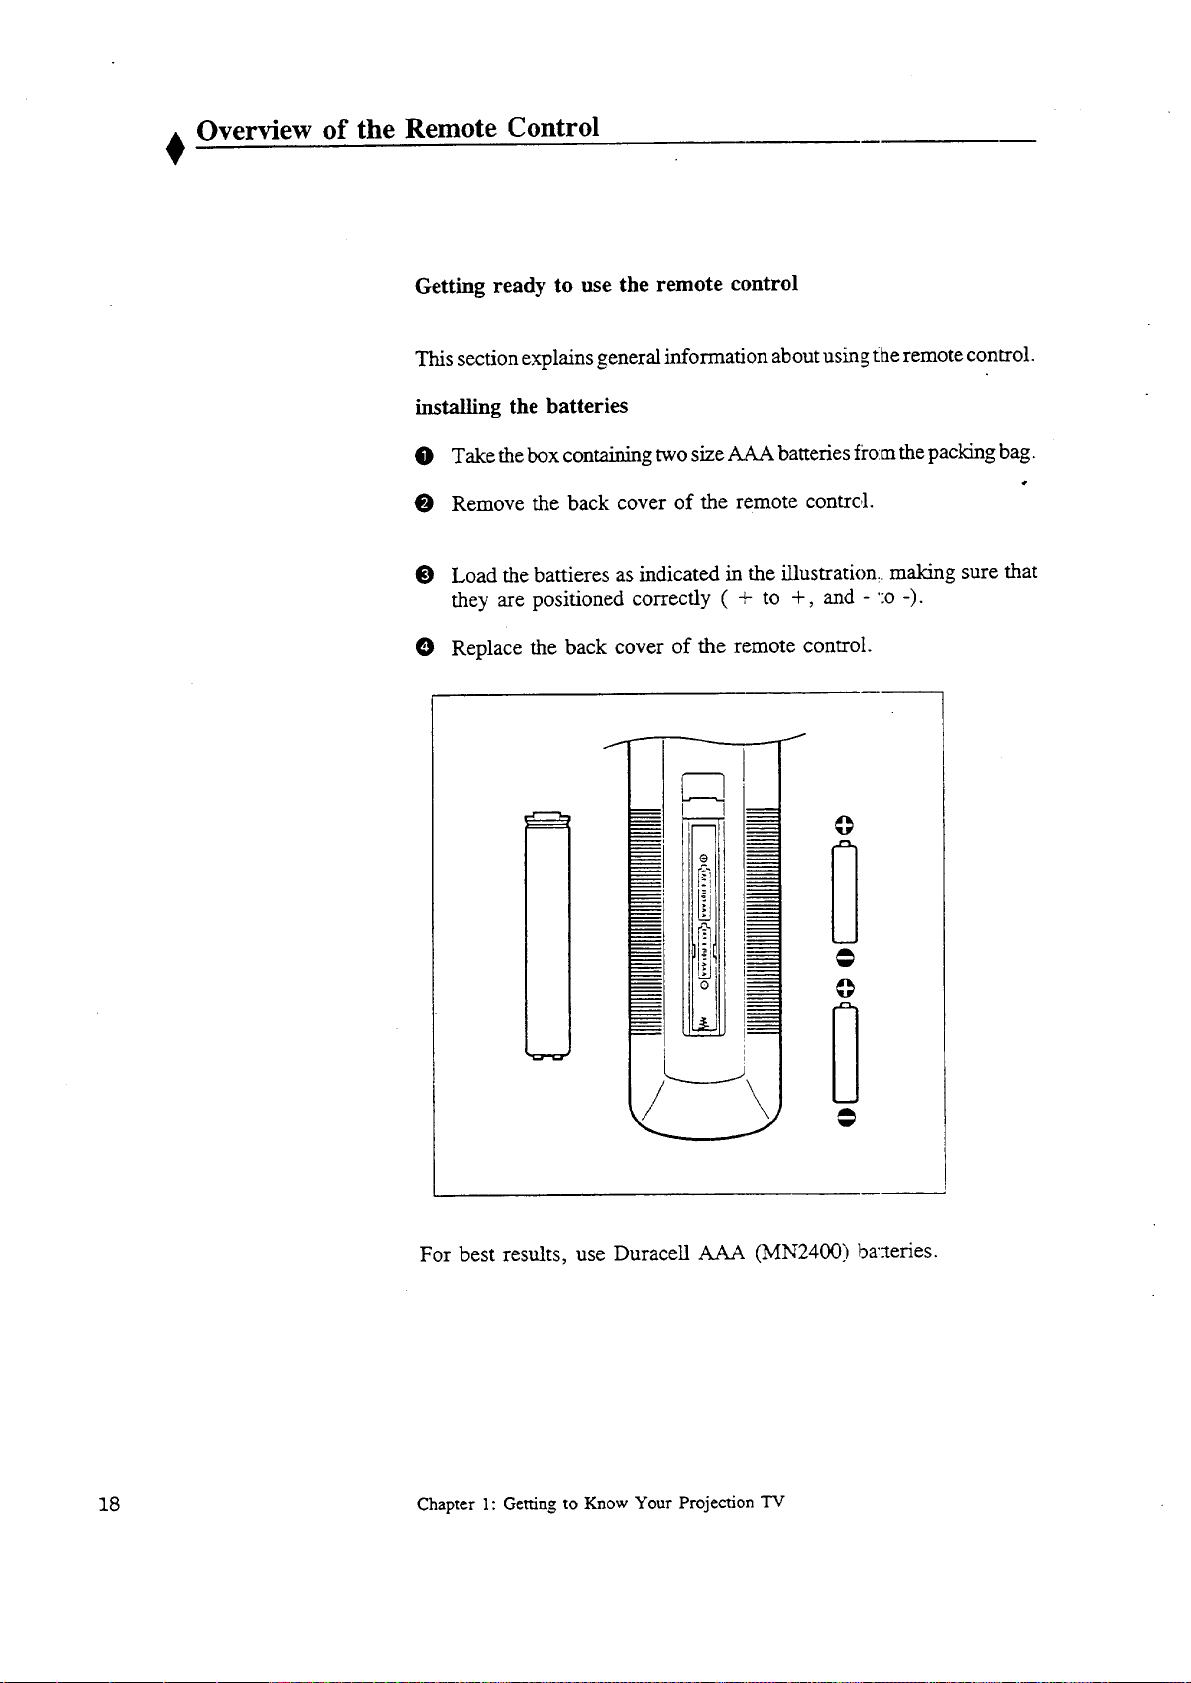
installing the batteries
O Take the box containing two size AAA batteries from the packing bag.
O Remove the back cover of the remote contrc,1.
O Load the battieres as indicated in the illustration: making sure that
they are positioned correctly ( + to +, and - ':o -).
O Replace the back cover of the remote control.
For best results, use Duracell AAA (MN2400) bazteries.
18 Chapter 1: Getting to Know Your Projection TV
some dos and don'ts
To ensure that your remote control will continue working properly,
follow these guidelines:
• Don't press two or more buttons at the same time.
• Don't allow the remote control to get we_ or become heated.
• Avoid dropping the remote control on a hard surface.
• When cleaning the remote control, don't use any harsh chemicals.
Use only a soft, slightly moistened cloth.
general instructions
When using the remote control to operate the Projection TV or VCR,
follow these procedures:
O Be within 20 feet of the Projection TV.
Point the top of the remote control towa::d the Projection TV.
O Press the appropriate button or group 3 c,fbuttons.
The following section explains more about t he range of options availa-
ble by using the remote control.
Overview of the Remote Control 19
@
©
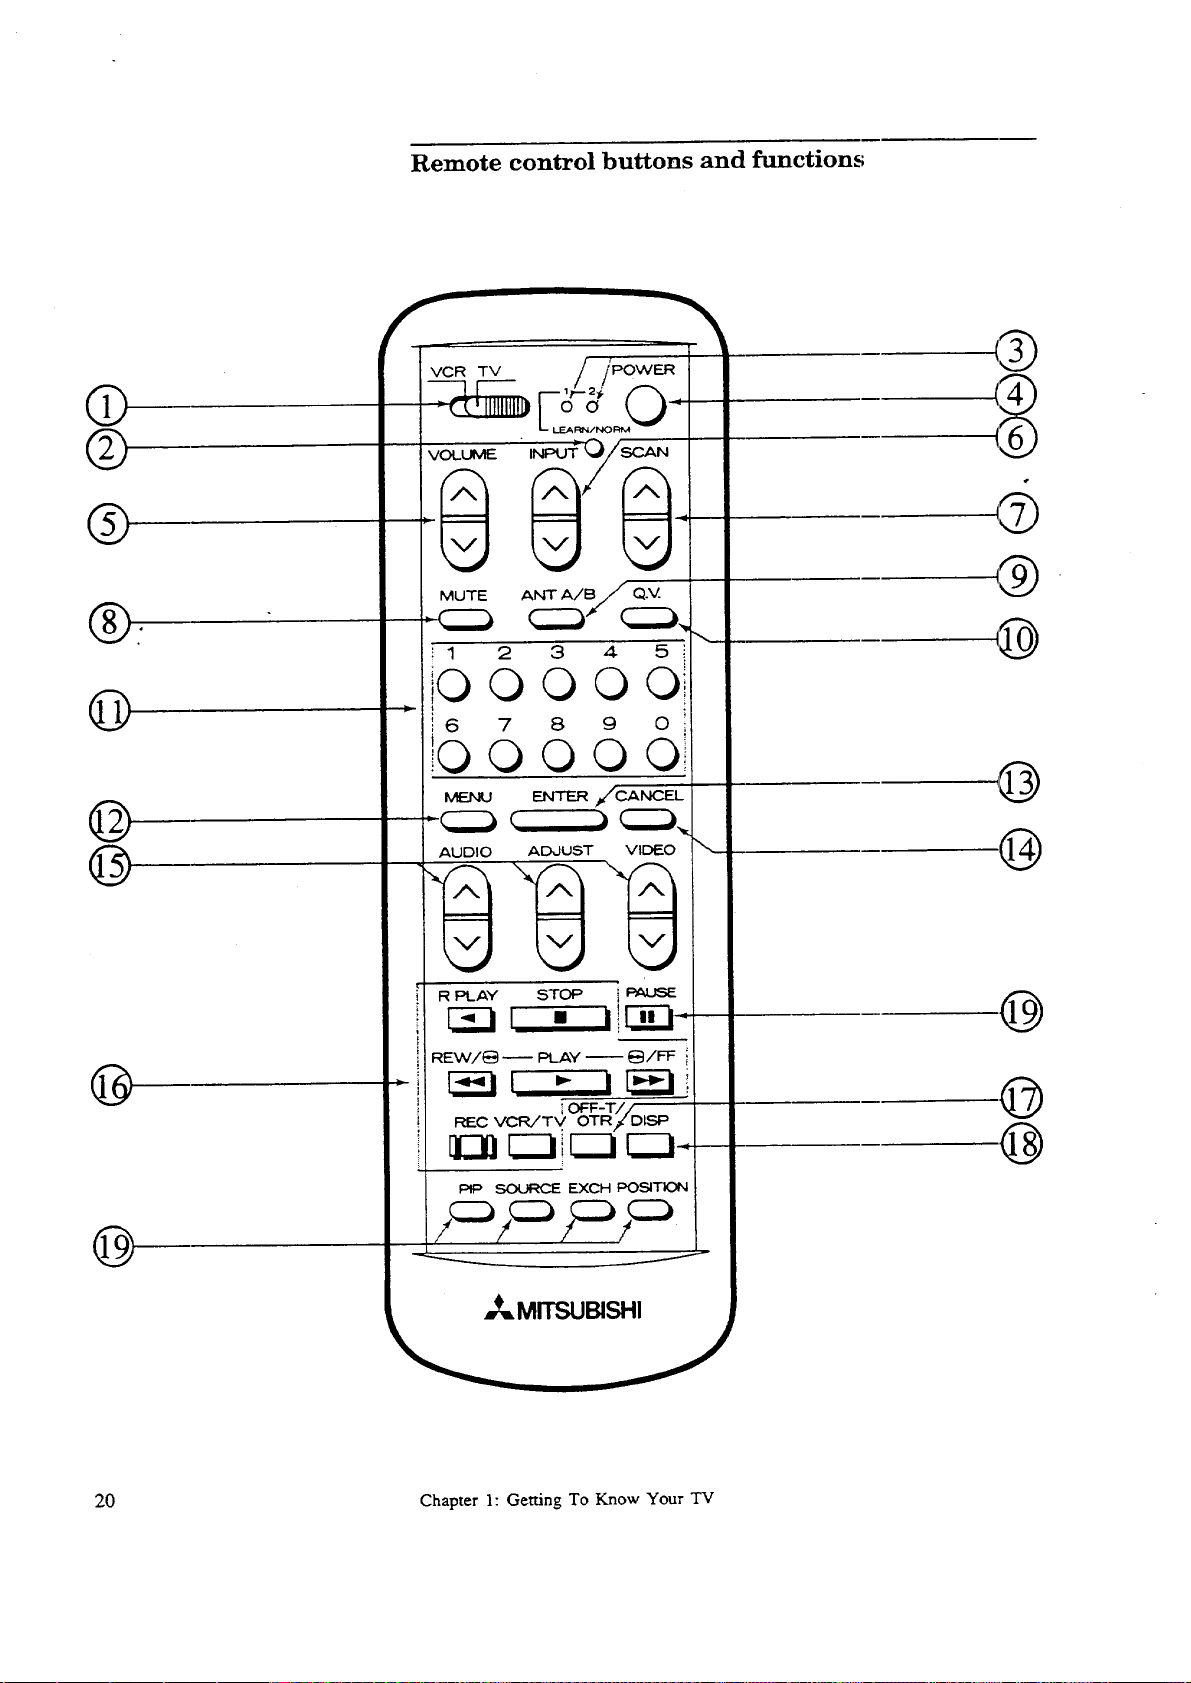
Remote control buttons and functions
VCR TV
®
@
@
@
@
MUTE
2
I
0
0
6
©
AUDIO ADJUST VIDE.O
R F_I-AY STOP j PAUSE
REVV/_ -- PLAY -- _/FF
REC VCR/TV, OTR/DISP
OFF-T//
@
,9
@
©
@
PiP SOURCE EXCH POSITION
@
_.MITSUBISHI
20 Chapter 1: Getting To Know Your TV
Q
VCR/TV control (VCR/TV)
Setto "VCR" to operate the VCR and "TV" to opera.te the Projec-
tion 'IV.
learn button (LEARN/NORM)
©
Use toprogram the remote control, See "Programming the remote
control," page 49.
®
learning indicators
See "Programming the remote contcoY' page 49.
power button (POWER)
®
Use to turn the Projection TV on or off.
volume control (VOL)
®
Press the top part of the button to turn up the volume; press the
lower part of the button to reduce the volume. This button works
for the Projection TV even if the VCR/'IV control is set to "VCR".
input button (INPUT)
®
Use to select the input source to be monitored:
TV, or
External 1 or 2.
®
channel control (SCAN)
Press the top part of the button to change to a channel with a higher
number; press the bottom part to change to a channe]l with a lower
number.
mute control (MUTE)
®
Use to turn the sound off completely or restore it _:oits original
volume. This button works for the Projection TV even if the VCRiTV
control is set to "VCR".
antenna button (ANT A/B)
®
Press to switch antenna between A ard B.
@
quick view (Q.V.)
Press to switch between the current &Larmel and the last one viewed.
When the super-quick-view tuning is set, it is used to view selected
channels programmed into super quick view memory.
@
number buttons (0-9)
Use to select a channel number, and to enter the parental lock code.
@
menu button (MENU)
Projects an on-screen menu with additional instructions for special
functions.
enter button (ENTER)
®
May be used after selecting a channel number, an item from the
on-screen menu, parenta2t lock code, or for entering the desired channel
number into super quick view memory.
Overview of the Remote Control 21
Remote control buttons and functions (cont.)
cancel button (CANCEL)
®
This button is used to cancel the entered channel n_mber within ldaree
seconds, to erase the parental lock code during the parental lock se-
quence, and to clear the channel programmed into super quick view
memory.
audio and video controls
®
These buttons are used in pairs to adjust features of the image or sc,und
(other than volume) with a two-step process: using one of the audio
or video buttons to select a function, and then ushag the adjust buttons.
audio function buttons (AUDIO)--Use either the top or the boa-
torn part of the button to select one of the following audio functions:
-listen to stereo/SAP/mono,
-monitor out variable/fixed,
-extra bass,
-speaker internal/external,
-audio expansion on/off,
-balance,
-treble, or
-bass.
video function buttons (VIDEO)--Use to select one of the foE.ow-
ing video functions:
-tint,
-color,
-contrast,
-brightness
-sharpness,
-video noise reduction on/off,
-notch filter on/off,
-color temperature high/mid/low, or
-color bias.
adjust buttons (ADJUST)--After selecting an audio or video fimc-
tion, use either the A button or the ¥ button to adjust the function
you've selected. The adjust button can be used to:
-turn the function on or off (e.g. :.expansion),
-increase or decrease the function (e.g., color),
-shift from one end of a scale to the other (e.g., balance), or
-select a position (e.g., stereo).
These are also used to select an item from the on-screen menu.
VCR buttons
®
Can be used to control most Mitsubishi VCRs (See your VCR's
owner's guide for additional information). These buttons work with
the VCR even if the VCPUTV control is set to "TV".
®
off-timer button (OFF-T/OTR)
Use to program the TV to turn off automatically at a later tJ.me.
®
display button (DISP)
Use to view an on-screen summary of the current settings for Projec-
tion TV or cable functions.
22 Chapter 1: Getting to Know Your Projection TV
picture-in-picture controls
®
Use to control the special picture-in--picture (PIP) fumction.
PIP button (PIP)-Press to see the reduced PIP image or cancel it.
pause button 0PAUSE)-Press to freeze the reduced PIP image or
cancel the image freezing.
source button (SOURCE)-Press reI_ttedly to switch the source of
the reduced PIP image between the TV and the external inputs.
exchange button (EXCH)-Press to :,'witch back and forth between
the reduced PIP image and the main image.
position button (POSITION)-Press to move the position of the
reduced PIP image.
Overview of the Remote Control 23

A CHAPTER 2
Connecting Your Projection TV
This chapter offers step-by-step instructions for completimg the most
common hook-ups. It contains the following sections: ,
• Overview of the Back Panel
• Basic Connections
Overview of the Back Panel
ANT
(VHF/UHF)
A
-0
@
°t
INPUT OUTPUT .
EXT-1 EXT-2 TUNER MONITOR
I I I
®
Important:
CAUTION: CONNECT TO
EXTERNAL SPEAKERS ONLY.
DO NOT MAKE ANY OTHER
CONNECTIONS INCLUDING
EXTERNAL AMPLIFIER.
NOTE:
TURN OFF THE SETBEFORE
SWITCHING SPEAKERS.
LJ
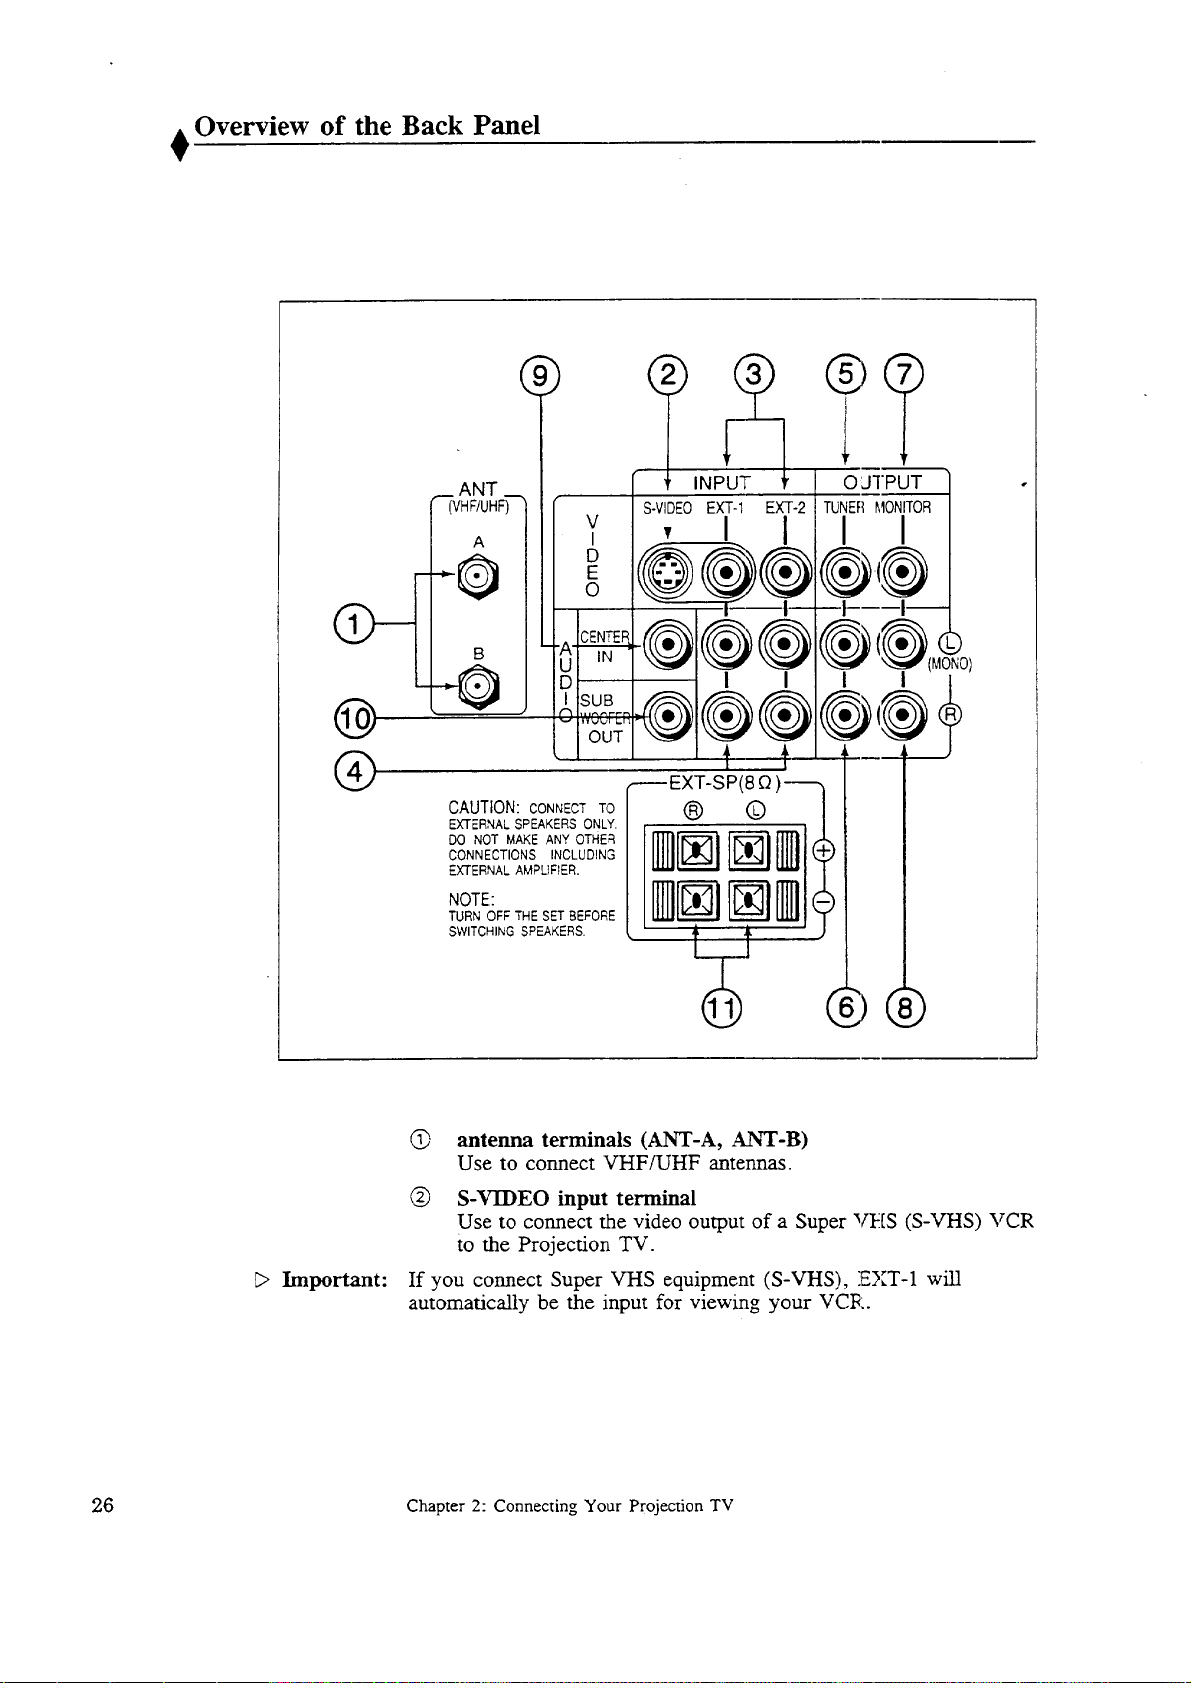
@ antenna terminals (ANT-A, ANT-B)
Use to connect VHF/UHF antennas.
(_) S-VIDEO input terminal
Use to connect the video output of a Super _[S (S-VHS) VCR
to the Projection TV.
If you connect Super VHS equipment (S-VHS), EXT-1 will
automatically be the input for viewing your VCR.
9.6 Chapter 2: Connecting Your Projection TV
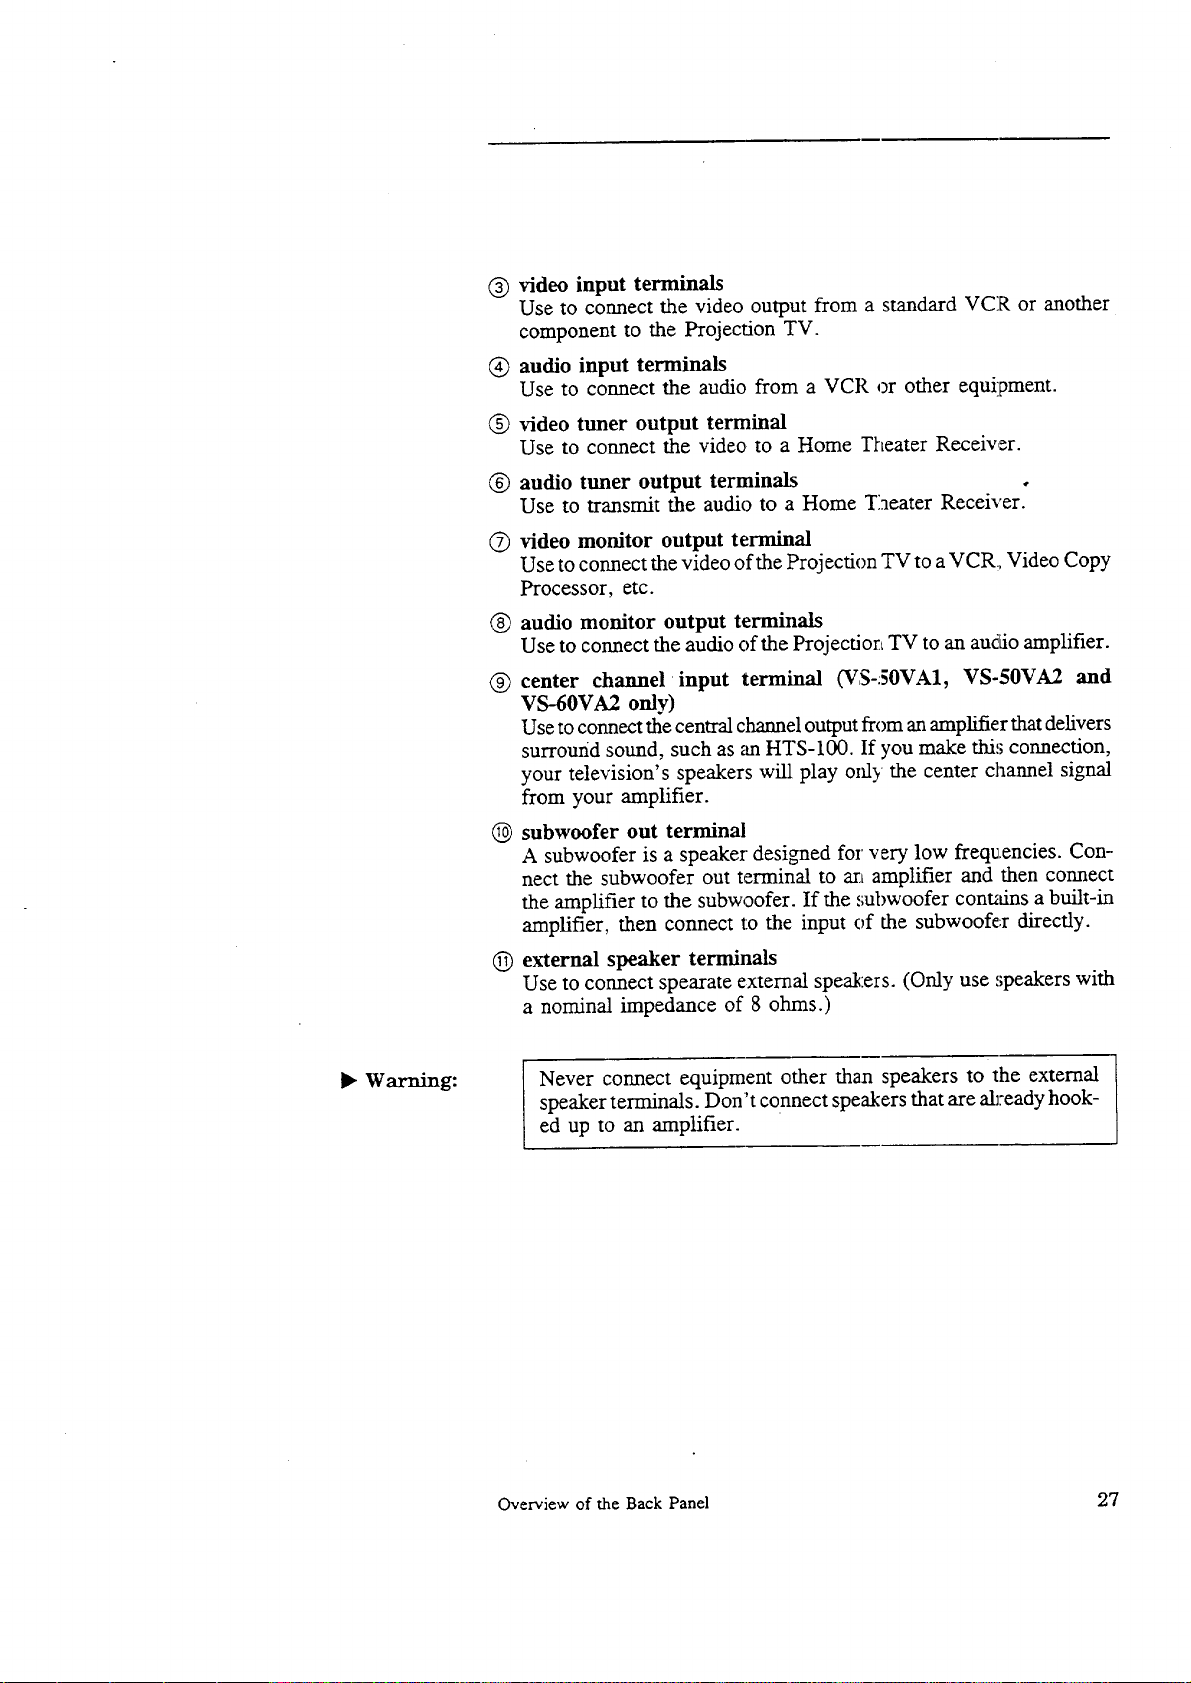
®
video input terminals
Use to connect the video output from a standard VCR or another
component to the Projection TV.
®
audio input terminals
Use to connect the audio from a VCR or other equipment.
®
video tuner output terminal
Use to connect the video to a Home Theater Receiver.
®
audio tuner output terminals
Use to transmit the audio to a Home Theater Receiver.
®
video monitor output terminal
Use to connect the video of the Projection TV to a VCR, Video Copy
Processor, etc.
®
audio monitor output terminals
Use to connect the audio of the Projectior_ TV to an audio amplifier.
®
center channel •input terminal (VS-50VA1, VS-50VA2 and
VS-60VA2 only)
Use to connect the central channel output from an amplifier that delivers
surround sound, such as an HTS-100. If you make this connection,
your television's speakers will play only the center channel signal
from your amplifier.
subwoofer out terminal
®
A subwoofer is a speaker designed for very low frequencies. Con-
nect the subwoofer out terminal to an amplifier and then connect
the amplifier to the subwoofer. If the subwoofer cont_fins a built-in
amplifier, then connect to the input of the subwoofer directly.
®
external speaker terminals
Use to connect spearate external speakers. (Only use ,;peakers with
a nominal impedance of 8 ohms.)
• Warning: Never connect equipment other than speakers to the external
speaker terminals. Don't connect speakers that are ab:eady hook-
ed up to an amplifier.
Overview of the Back Panel 27
Basic Connections
This section explains the basic connections you will need to make be-
tween your Projection TV, antennas, and VCR. You will see there are
different connections shown depending upon whether you have adecoder
box and the type of antenna you are using. Choose the type of cormection
for the type of equipment you have.
• Projection TV + external speakers,
• Projection TV + antenna or cable without a decoder box,
• Projection TV + antenna or cable with a decoder box,
• Projection TV + separate UIIF and VHF antennas,
• Projection TV + VCR + antenna or cable without a decoder box,
• Projection TV + VCR + antenna or cable with a decoder box,
• Projection TV + home theater receiver (A/V receiver),
• Projection TV + audio system,
• Projection TV + external speaker with subwoofer out terminal,
and
• Projection TV + an amplifier that has a cente:v channel olYr
terminal (VS-50VA1, VS-50VA2, and VS-60VA2 only).
28 Chapter 2: Connecting Your Projection TV
 Loading...