

Page 1

PCS 1900 MOBILE STATION
HANDHELD PORTABLE TELEPHONE
M4 Social
(MT-239)
User Operations Manual
Part 1
Version 1.0
14 July, 1999
Page 2

CONFIDENTIAL Mitsubishi Electric
Table of Contents
1. INTRODUCTION.........................................................................................................................................5
1.1 S
ERVICES & FEATURES......................................................................................................................... 5
1.1.1 Services............................................................................................................................................ 5
1.1.2 Services: SMS and broadcast..........................................................................................................6
1.1.3 Services: supplementary services.................................................................................................... 7
1.1.4 Services: Memory related functions ................................................................................................ 8
1.1.5 Advanced features............................................................................................................................9
1.1.6 Other features................................................................................................................................10
1.2 P
1.3 K
RODUCT KEYPAD..................................................................................................................................11
EYPAD USAGE ...................................................................................................................................... 12
1.3.1 Idle states....................................................................................................................................... 12
1.3.2 Menus, lists and editors.................................................................................................................13
1.3.3 Editors functions............................................................................................................................ 13
1.4 A
1.5 T
1.6 B
CTIONS MENUS CONTENTS....................................................................................................................14
ONES .................................................................................................................................................... 14
ACKLIGHT MANAGEMENT .................................................................................................................... 15
1.6.1 Back lighting Behaviour with electrical connections.................................................................... 15
1.7 B
ATTERY CHARGING AND DISPLAY......................................................................................................... 16
1.7.1 Charging and mobile on................................................................................................................16
1.7.2 Charging and mobile off................................................................................................................ 16
1.8 L
1.9 R
ED BEHAVIOUR AND CONNECTIONS...................................................................................................... 17
EADING THE IMEI.................................................................................................................................. 17
2. MOBILE SWITCHING ON AND OFF.................................................................................................... 18
2.1 M
2.2 M
OBILE SWITCH-ON BY THE USER ......................................................................................................... 18
OBILE SWITCHING OFF BY THE USER....................................................................................................20
3. STAND-BY STATE DESCRIPTION........................................................................................................21
3.1 P
3.2 I
RESENTATION....................................................................................................................................... 21
NFORMATION DISPLAY IN IDLE STATE.................................................................................................... 21
3.2.1 Permanent display......................................................................................................... ................ 21
3.2.2 Additional display.......................................................................................................................... 21
3.2.3 Information management in Idle screen........................................................................................ 22
3.3 S
HORT-CUTS FROM IDLE WINDOW...........................................................................................................26
3.3.1 Quick ADN direct access............................................................................................................... 26
3.3.2 General menu access..................................................................................................................... 26
3.3.3 Direct Alert tones access............................................................................................................... 26
3.3.4 Keypad lock................................................................................................................................... 26
3.3.5 Speed dialling................................................................................................................................26
3.3.6 Last numbers dialled list................................................................................................................ 26
3.3.7 Volumes control............................................................................................................................. 26
3.3.8 Programming the hotkey ...............................................................................................................27
4. MMI POLICY .............................................................................................................................................28
4.1 D
4.2 U
IRECTION ARROWS MANAGEMENT........................................................................................................28
SE OF FUNCTION KEYS IN MENUS.......................................................................................................... 29
4.2.1 Line mode menus........................................................................................................................... 29
4.2.2 Page mode menus.......................................................................................................................... 30
4.3 A
4.4 I
4.5 R
4.6 E
4.7 T
4.8
4.9 G
UTOMATIC SCROLL...............................................................................................................................30
NFORMATION MESSAGE DISPLAY PROCEDURE....................................................................................... 31
ECAPITULATION DISPLAY PROCEDURE.................................................................................................. 31
RROR DISPLAY PROCEDURE..................................................................................................................31
RANSITION DISPLAY PROCEDURE.......................................................................................................... 32
BINARY CHOICE PROCEDURE...................................................................................................................33
ENERAL USER ENTRY POLICY............................................................................................................... 34
Page 2/102
.
Page 3

CONFIDENTIAL Mitsubishi Electric
4.9.1 Display........................................................................................................................................... 34
4.9.2 Function keys usage.......................................................................................................................34
4.9.3 Use of End key............................................................................................................................... 34
4.10 N
4.10.1 Screen examples ........................................................................................................................34
4.10.2 Key usage...................................................................................................................................34
4.10.3 Description................................................................................................................................ 34
4.11
4.11.1 Screens examples........................................................................................................................... 36
4.11.2 Key usage.......................................................................................................................................36
4.11.3 Description.................................................................................................................................... 36
4.11.4 Characters sets..............................................................................................................................37
4.11.5 Special characters pages............................................................................................................... 37
4.12 D
4.13 "N
4.14 P
4.15 P
4.15.1 Screen example.......................................................................................................................... 41
4.15.2 Key usage...................................................................................................................................41
4.15.3 Description................................................................................................................................ 41
4.16 D
UMERIC AND FLOAT EDITOR............................................................................................................. 34
ALPHANUMERIC EDITOR ..................................................................................................................... 36
IALLING ENTRY ................................................................................................................................39
UMBER CORRECTION BEFORE DIALLING" ENTRY............................................................................ 40
HONE NUMBER ENTRY ...................................................................................................................... 40
ASSWORD ENTRY.............................................................................................................................. 41
IALLING IN ME NUS............................................................................................................................ 41
5. MAKING AND RECEIVING CALLS...................................................................................................... 42
5.1 M
AKING A SINGLE CALL..........................................................................................................................42
5.1.1 Making a call from the idle screen................................................................................................ 43
5.2 Sending dtmf tones during outgoing call.................................................................................................. 45
5.1.2 Error cases .................................................................................................................................... 45
5.1.3 The autoretry feature..................................................................................................................... 46
5.2 R
ECEIVING A CALL..................................................................................................................................47
5.2.1 Receiving a call: Display............................................................................................................... 47
5.2.2 Receiving a call: Accept................................................................................................................ 47
5.2.3 Receiving a call: Reject (Busy)...................................................................................................... 48
5.2.4 Sending dtmf tones on call reception............................................................................................. 48
5.2.5 Additional messages received during incoming call state............................................................. 49
5.3 D
URING THE S INGLE CALL...................................................................................................................... 50
5.3.1 One Call: Display.......................................................................................................................... 50
5.3.2 One Call: Direct actions................................................................................................................ 51
5.3.3 One Call: "Options" menu............................................................................................................ 54
5.3.4 The auto-dtmf feature .................................................................................................................... 54
5.3.5 One Call: Receiving Notifications Messages.................................................................................56
5.3.6 One call: Cost control operations ................................................................................................. 57
5.3.7 One call: Receiving a new call...................................................................................................... 57
5.3.8 One call: Making a transfer when making a new call................................................................... 59
5.4 C
ALL TERMINATION................................................................................................................................60
5.4.1 Ending a single call....................................................................................................................... 60
5.4.2 End of the call by the remote party................................................................................................ 61
5.5 T
WO CALLS MANAGEMENT..................................................................................................................... 62
5.5.1 Two calls: display.......................................................................................................................... 62
5.5.2 Two calls: Direct operations......................................................................................................... 62
5.5.3 Two calls: "Options" menu........................................................................................................... 65
5.5.4 Two calls: Receiving a new call .................................................................................................... 66
5.5.5 Two calls: Making a transfer......................................................................................................... 66
5.6 C
ONFERENCE CALLS MANAGEMENT ....................................................................................................... 68
5.6.1 Conference call: display................................................................................................................ 68
5.6.2 Conference call: "Options" Menu ................................................................................................68
6. MANAGING CALLS AND COSTS.......................................................................................................... 71
6.1 P
6.2 U
RESENTATION....................................................................................................................................... 71
SING THE CALL REGISTER..................................................................................................................... 71
Page 3/102
.
Page 4

CONFIDENTIAL Mitsubishi Electric
6.2.1 Last numbers dialled list (lnd)........................................................................................... ............ 71
6.2.2 Unanswered calls list (ucl)............................................................................................................ 76
6.2.3 Received calls list (rcl) .................................................................................................................. 77
6.3 C
6.3.2 Using the balance information service.......................................................................................... 82
6.3.3 Resetting the call timers.................................................................................................................84
6.4 C
6.4.1 Showing the call costs....................................................................................................................85
6.4.2 Managing the credit limit value.....................................................................................................87
6.4.3 Resetting all call costs...................................................................................................................91
6.4.4 Choosing the costs display mode................................................................................................... 92
6.5 S
6.5.1 Presentation................................................................................................................................... 96
6.5.2 Examples........................................................................................................................................ 96
7. USING THE VOICE MAIL.......................................................................................................................99
ALL TIMERS MANAGEMENT .................................................................................................................. 78
ALL COSTS MANAGEMENT .................................................................................................................... 85
ELECTING A LINE (DCS FEATURE) ........................................................................................................ 96
7.1 V
OICE MAIL CONFIGURATION..................................................................................................................99
7.1.1 Presentation................................................................................................................................... 99
7.1.2 Voice mail menu access................................................................................................................. 99
7.1.3 Setting the voice mail phone number........................................................................................... 100
7.1.4 Setting the voice mail alert mode................................................................................................. 100
7.2 C
ALLING THE VOICE MAIL..................................................................................................................... 101
7.2.1 Presentation................................................................................................................................. 101
7.2.2 Calling the voice mail A number is defined ............................................................................ 101
7.2.3 Calling the voice mail No number is defined.......................................................................... 102
Page 4/102
.
Page 5
CONFIDENTIAL Mitsubishi Electric
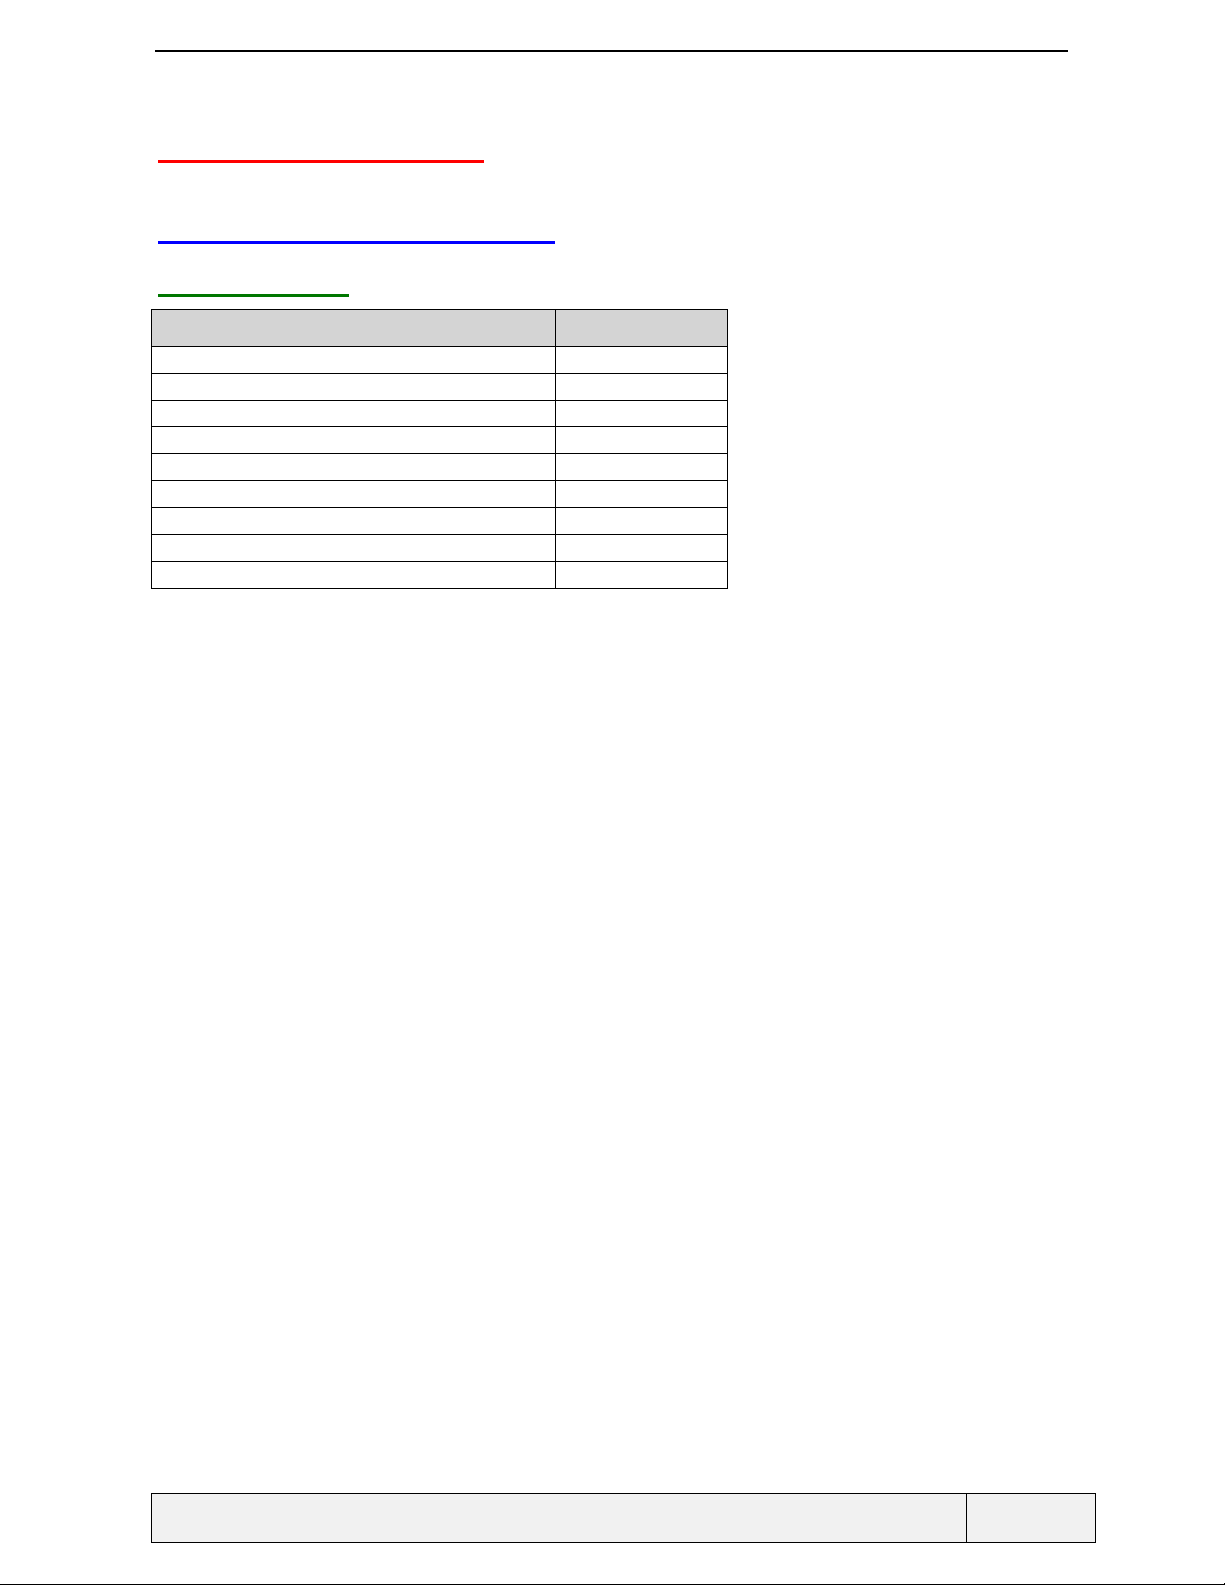
1. INTRODUCTION
1.1 SERVICES & FEATURES
1.1.1 SERVICES
M4 Social
Tri-codec (FR+HR+EFR) Yes
Emergency Call and ECC management Yes
SDN names presentation line by line Yes
Service Operator Direct access Yes
Voice Mail indication Icon/Alert Yes
Voice Mail indication with line/Nb msg Yes
One(Dedicated) Key for Voice Mail Listening Yes
Page 5/102
.
Page 6
CONFIDENTIAL Mitsubishi Electric
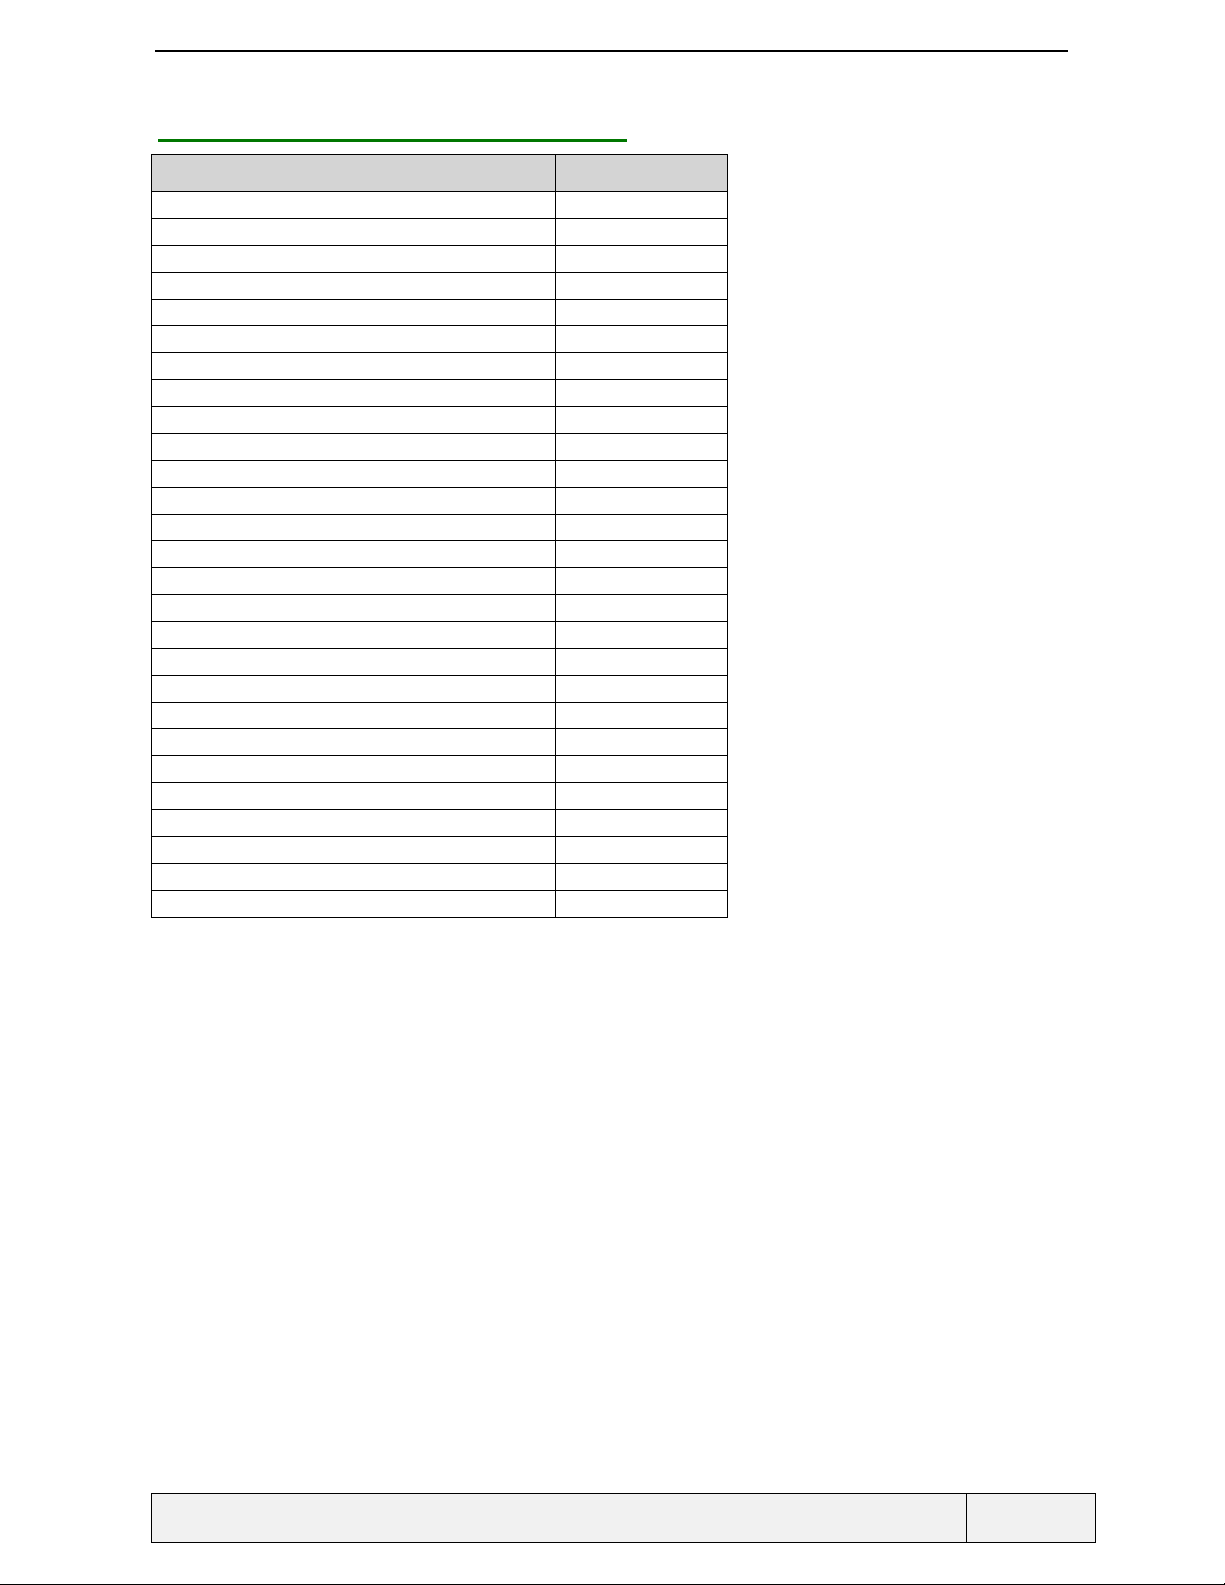
1.1.2 SERVICES: SMS AND BROADCAST
M4 Social
Support of concatenated SMS MT Yes
Writing of concatenated SMS on Contact Yes
Compression of User Data 03.42 New SMS indication Icon/Alert Yes
Specific SMS Alert Yes
One (Dedicated) Key SMS Reading Yes
Storage of SMS in EEPROM Yes (10)
Storage of SMS class3 on DTE Yes
Separated Presentation of SMS MT/MO Yes
Presentation in chronological order Yes
Status of used/free Yes
Forward function Yes
SMS Call-back function Yes
Status Report Storage in eeprom Yes (10)
Status Report Storage in SMSR Yes
Time Display in Status Report Yes
SMS Parameters Yes
SMS-CB Yes
CB Message Type Selection Yes
SMSCB and Data Transfer 07.05 Yes
Page 6/102
.
Page 7
CONFIDENTIAL Mitsubishi Electric
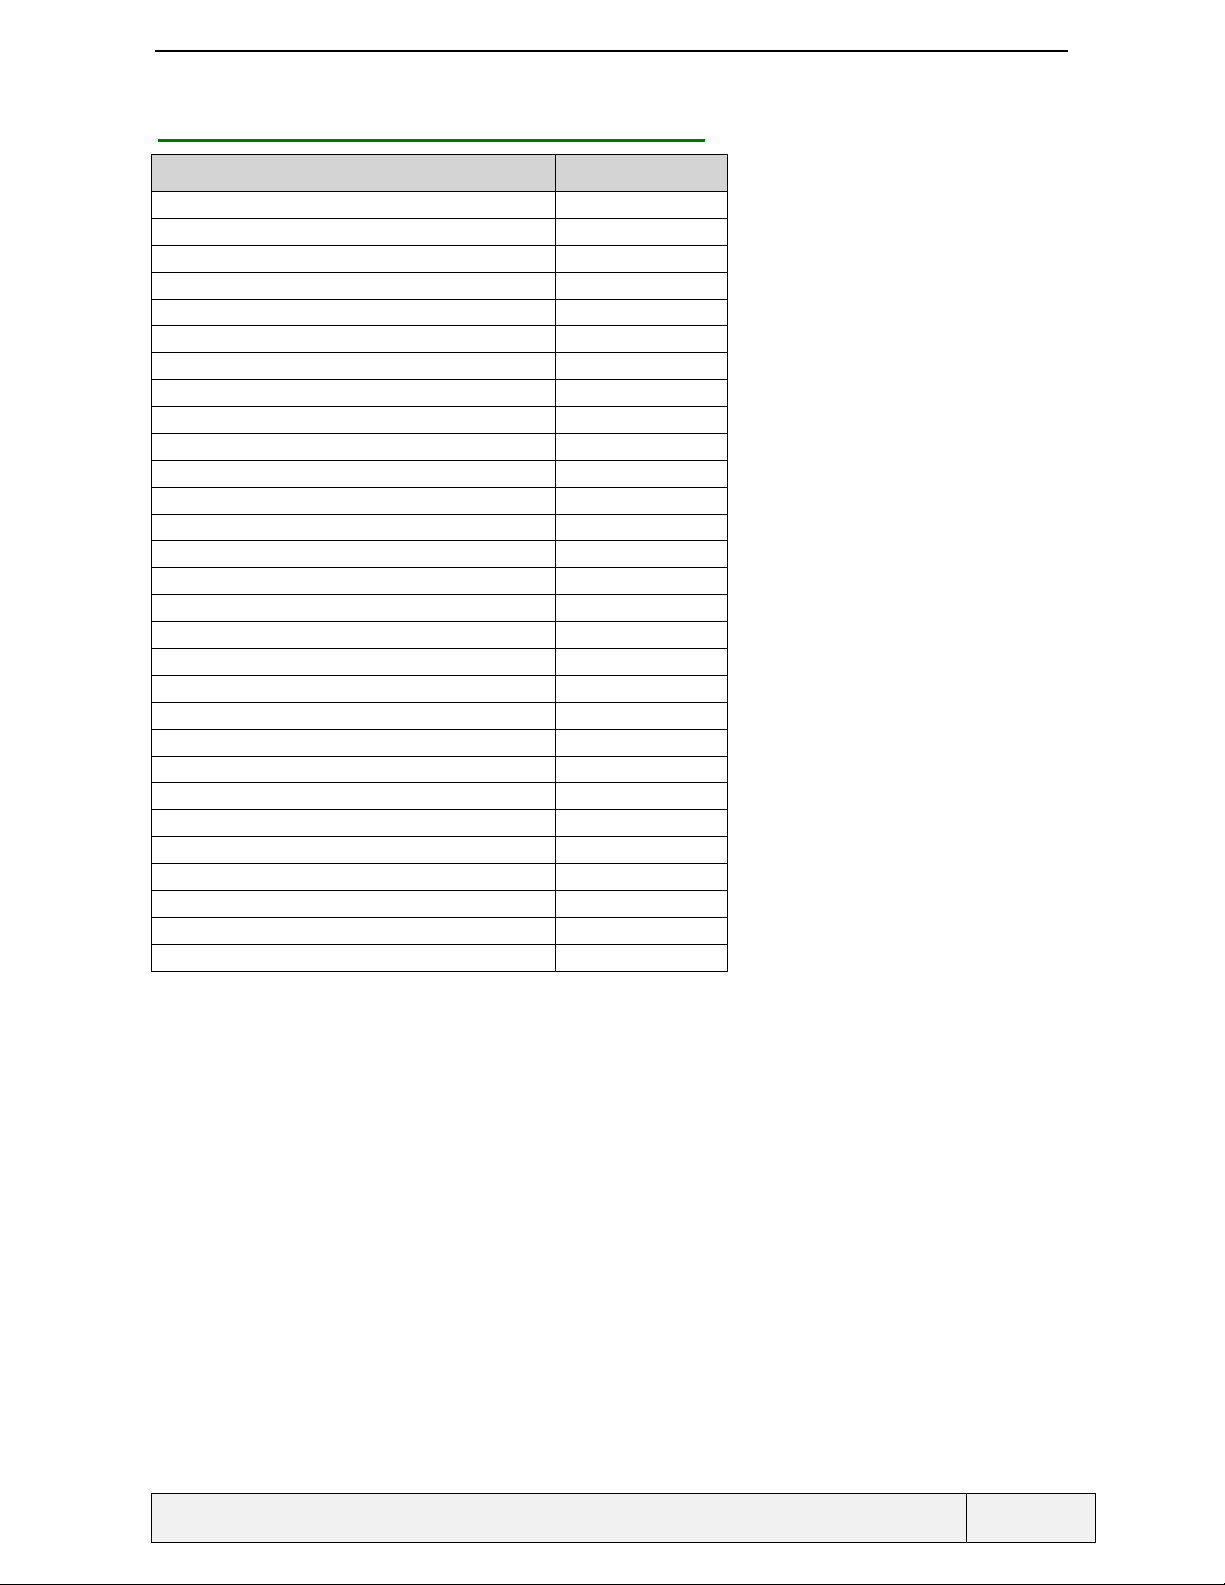
1.1.3 SERVICES: SUPPLEMENTARY SERVICES
M4 Social
Call Forwarding Yes
CFU Icon management Yes
Forwarded -To- Number storage Yes
Voice Mail choice for FTN Yes
Time entry when CFNRy (5s-30s) Yes
CF adaptive menu in function of CSP Yes
All CF options for all basic services Yes
FTN controlled when FDN active Yes
Display of details for conditions Yes
Call Barring Yes
Call Holding Yes
Call Waiting Yes
CLIP status (MMI sequence + menu) Yes
display withheld numbers Yes
CLIR status (MMI sequence + menu) Yes
CLIR per call basis (MMI sequence + menu) Yes
Settings for all calls Yes
CLIR and "Bis" function Yes
COLP (MMI sequence + menu) MMI sequence only
COLR (MMI sequence + menu) MMI sequence only
Network Selection (Manual/Automatic) Yes
CNAP (US only) Yes
AoC Yes
14,4 kbits/s (US only) Yes
Page 7/102
.
Page 8
CONFIDENTIAL Mitsubishi Electric
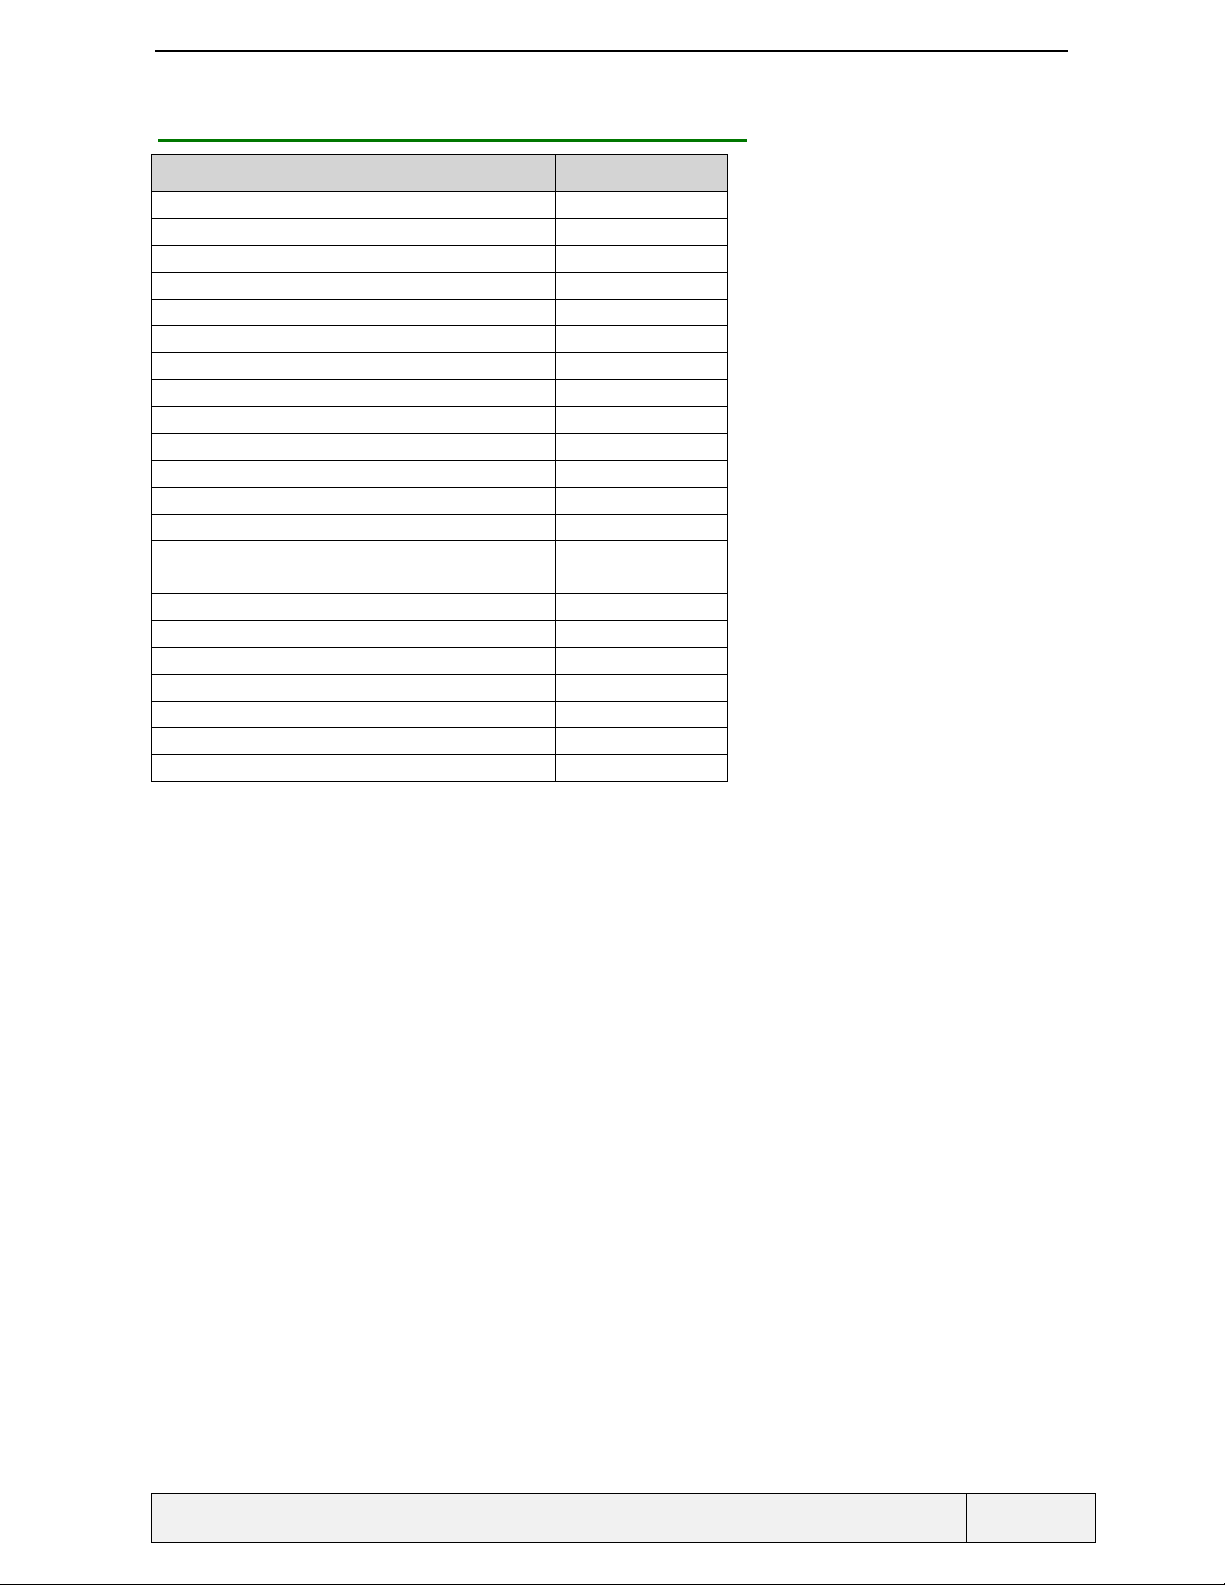
1.1.4 SERVICES: MEMORY RELATED FUNCTIONS
M4 Social
Management of SIM Memories Yes
Management of Phone Memories Yes (1*200)
Speed Dialling 9
Numeric Recall SIM/EEPROM
Last Dialled Number EEPROM
Deletion of LND one by one Yes
SS per call basis in LND Yes
Direct access to phonebook names Yes
Alphabetical Recall (ADN) SIM and Phone
Presentation of Directory Numbers mix option Yes
Wild character entry Yes
FDN Yes
Phonebook access always available in FDN
mode
Copy between SIM and Tel Phonebook Yes
Yes
MSISDN reading/writing Yes
Unanswered Call in EEPROM 10
Received Call in EEPROM 10
Page 8/102
.
Page 9
CONFIDENTIAL Mitsubishi Electric
1.1.5 ADVANCED FEATURES
M4 Social
Scratchpad in EEPROM 20 entries
Agenda with call-back Yes (20 entries)
Currency Converter Yes
Talk Time Management Yes
Talk Time for outgoing/incoming calls Yes
"InfoConso" feature Yes
Call timer reminder Yes
Language Selection(Manual) Yes
Language Selection, Automatic by SIM Yes
Language Reset by MMI sequence Yes
Hidden Menu Yes
Customer Service Profile Yes
Adaptive menu generalisation Yes
Dialling in menu instead go to idle Yes (gen. menus)
Two Line Service (ALS) Yes
Line Names Yes
Auto Answer Yes
Automatic Retry Yes
Any Key answer Option Yes
Programmable Key Hotkey
Page 9/102
.
Page 10
CONFIDENTIAL Mitsubishi Electric
1.1.6 OTHER FEATURES
M4 Social
Ciphering Indicator Yes
Keypad lock Yes
Keypad lock dedicated key Yes
Keypad lock restored after a call Yes
Volume Control Yes
Master Volume Control Yes
Ring Tones (r ) and melody (m) Selection Yes(4r + 16m)
Ramping Ring Tone Yes
Melody/Ring tone distinction by Phone directory Yes
Display View Angle Control Yes
Animated Welcome Message Yes
Reset Phone to Factory Default settings Yes
SIM PIN Control Yes
Unlock Code Control Yes
DTMF Transmission Yes
SIM Locking Yes
Auto SIM Locking Yes
International Country codes table Yes
Page 10/102
.
Page 11
CONFIDENTIAL Mitsubishi Electric
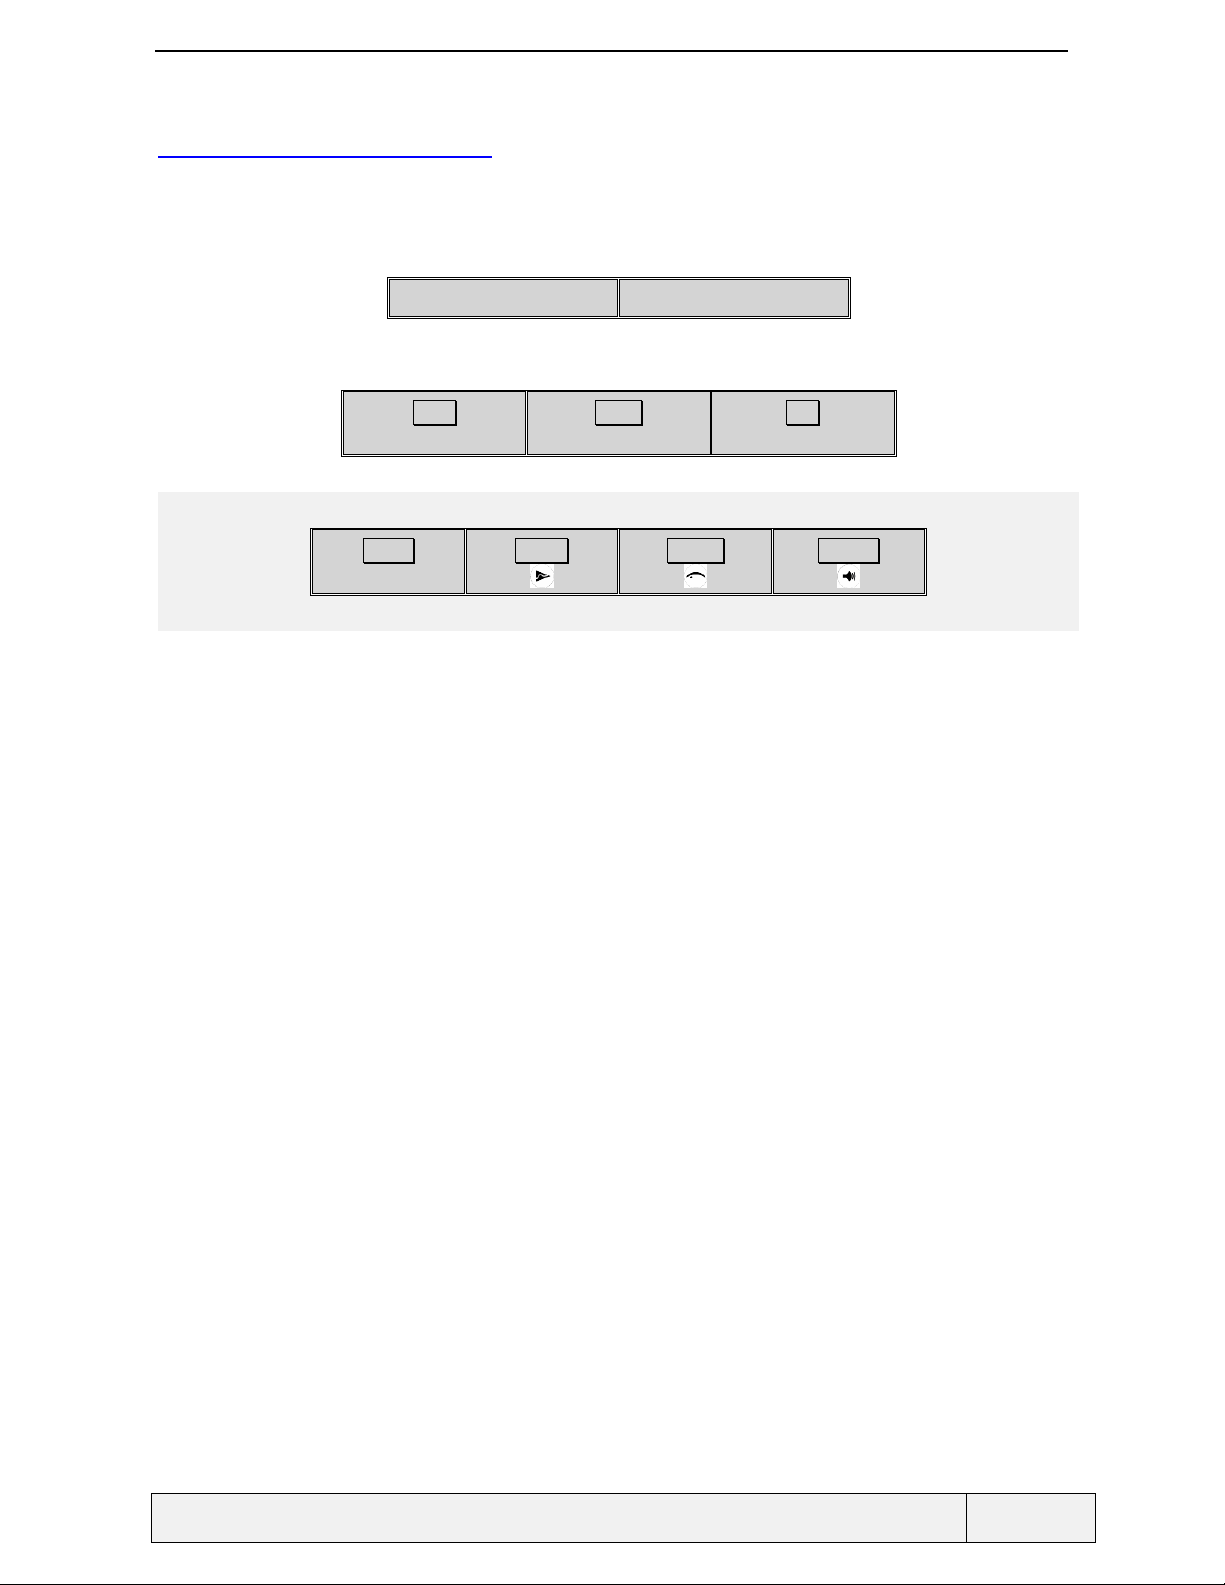
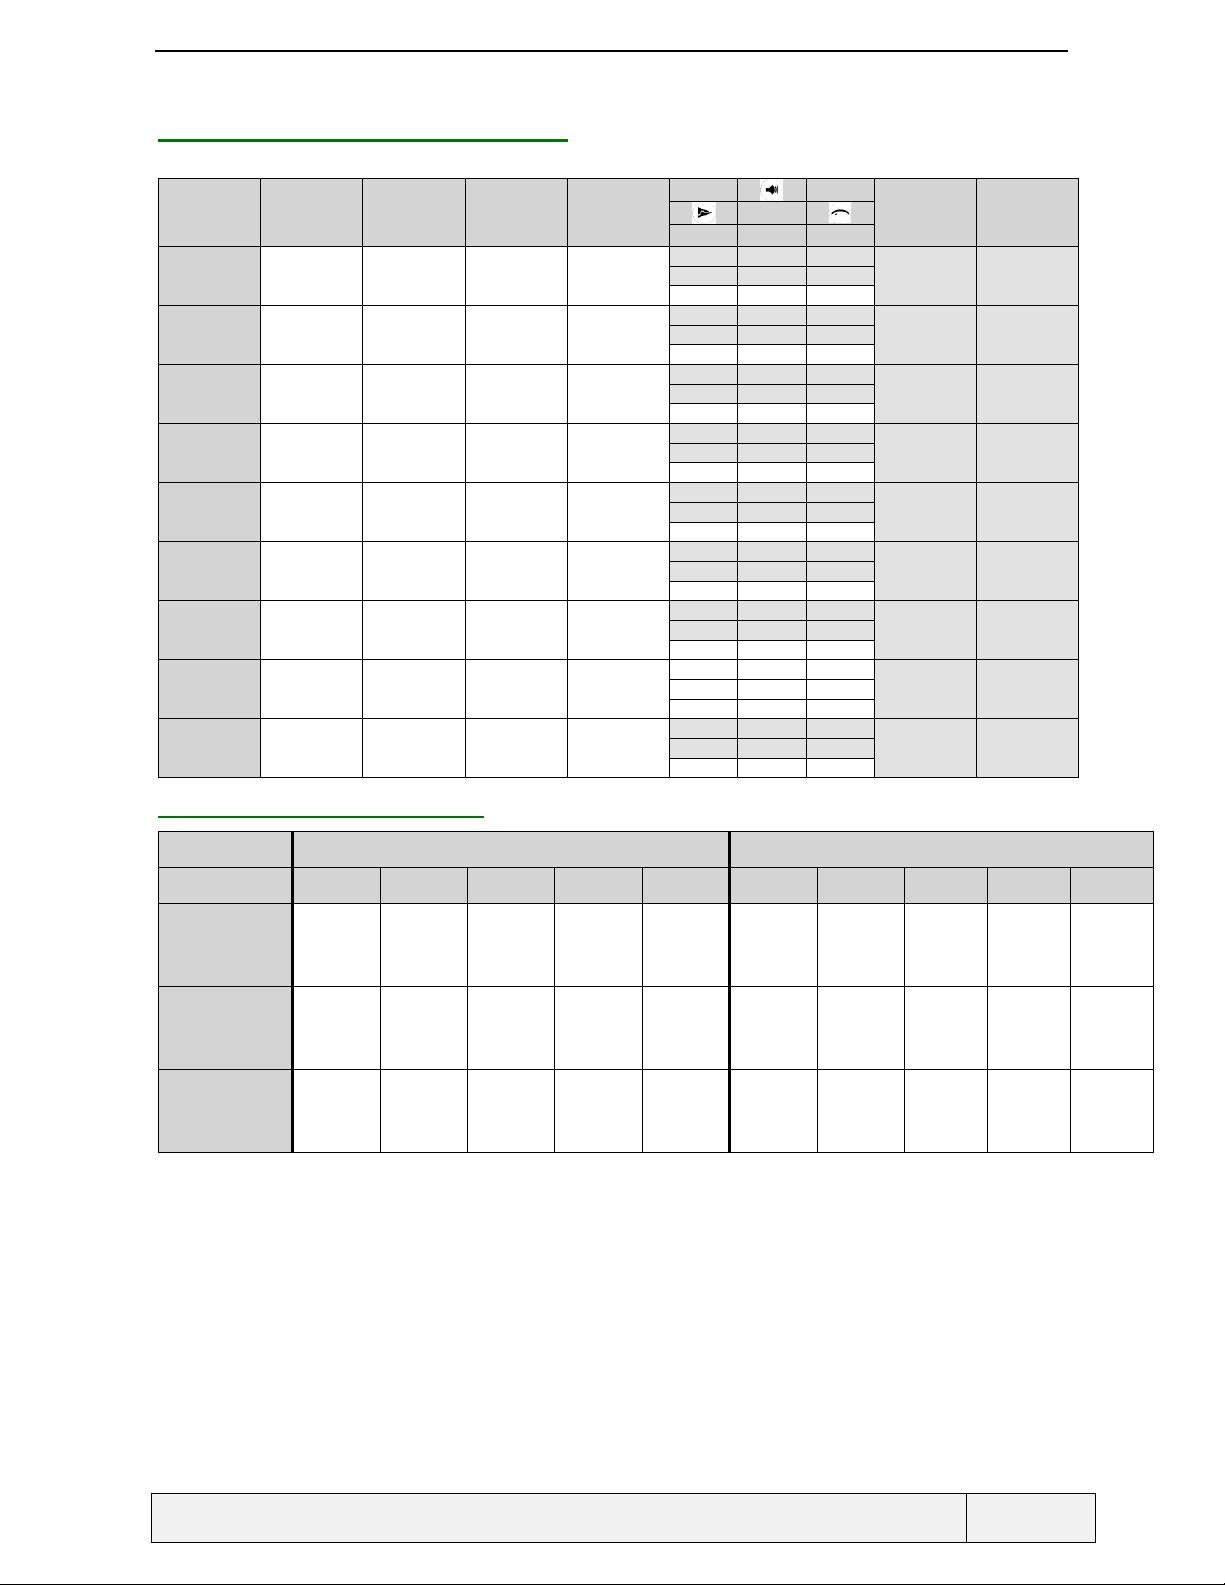
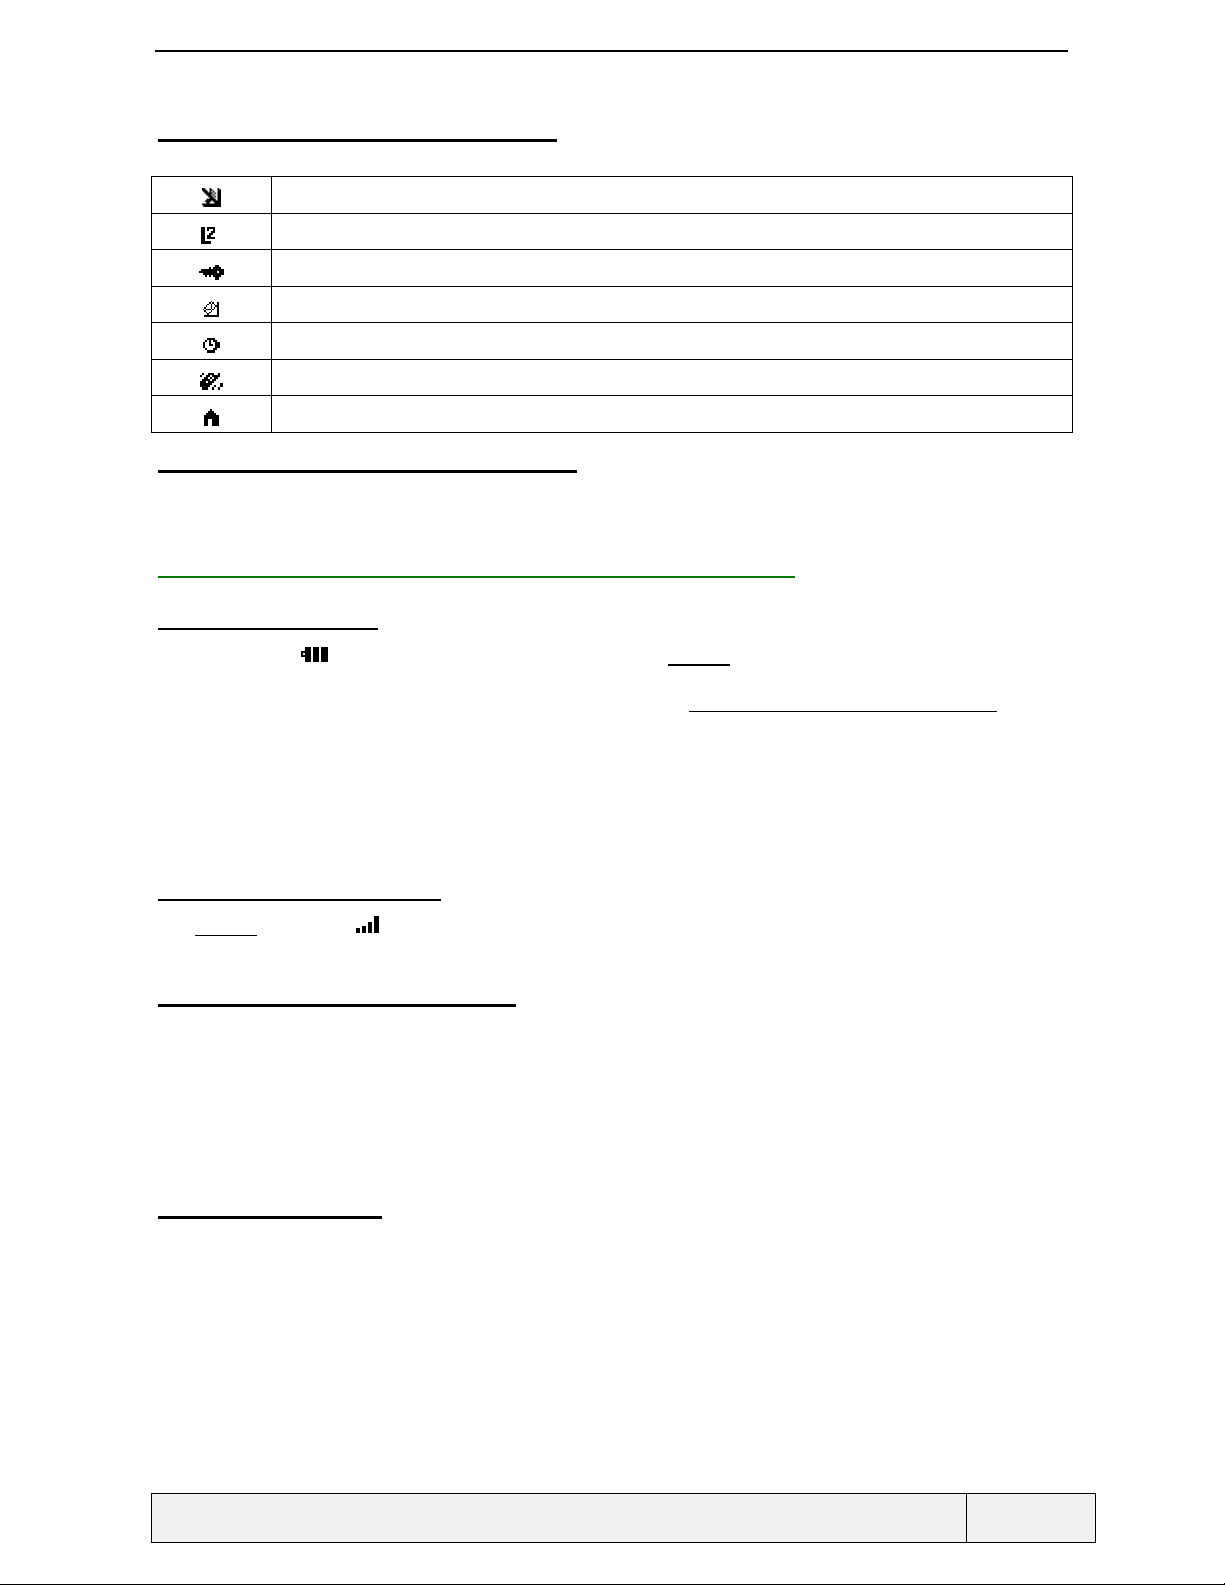
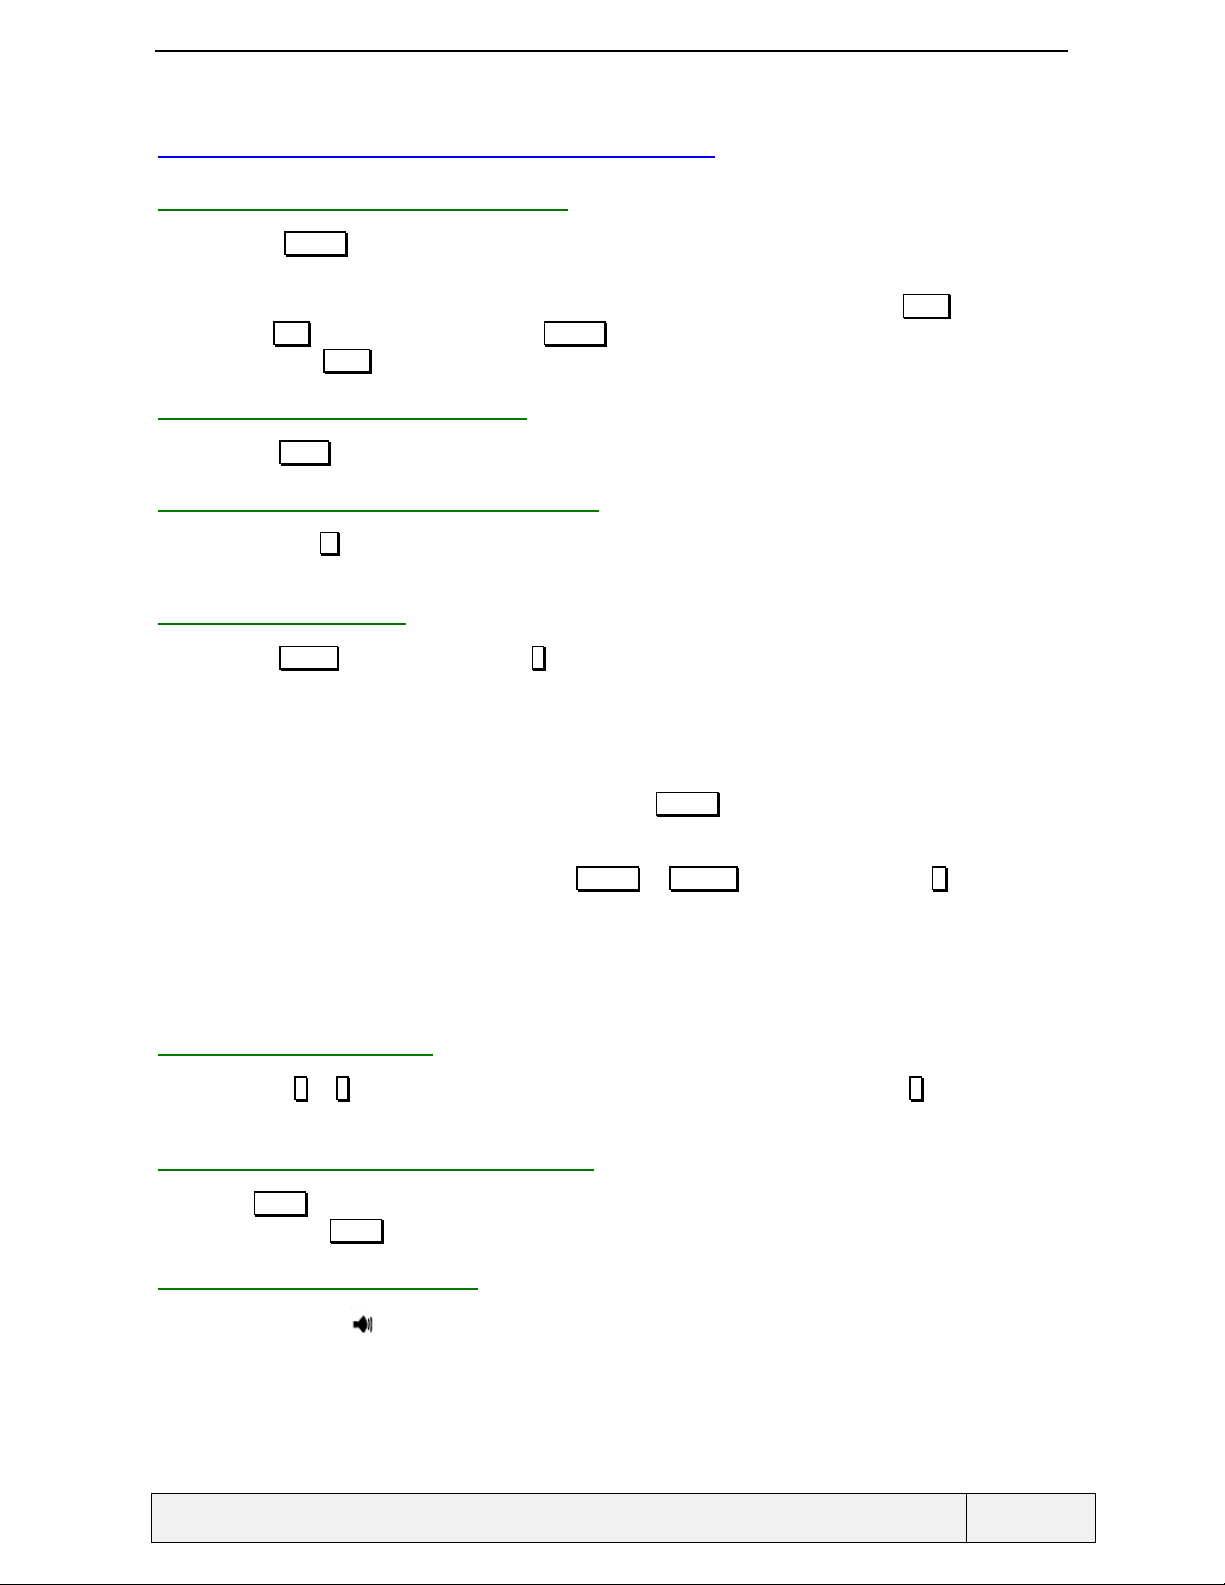
1.2 PRODUCT KEYPAD
The product has a keypad composed of the following keys:
The semantics are as follows:
Left softkey Right softkey
Send Down End
Power
mmmm
Action Hotkey Volume
Page 11/102
.
Page 12
CONFIDENTIAL Mitsubishi Electric
1.3 KEYPAD USAGE
1.3.1 IDLE STATES
State Left softkey Right softkey Send End */# [0..9]
0
Idle no com
no icon
1
Idle no com
1 icon
2
Idle no com
> 1 icon
3
Idle no com
Digits
4
Idle menu
5
Incoming Call
6
Outgoing Call
7
Idle 1 com
No digits
8
Idle 1 com
digits
9
Call waiting
10
Idle 2 com
no digits
11
Idle 2 com
digits
12
1 active + 1
held + 1 waiting
13
Idle + Network
event
Names Menu Last dial -
Read
(Direct access
to event)
Read
(Idle Menu
access)
Store Clear
Select Exit
(Deflect) Stop ring Accept call Reject call
(Transfer) - End Outgoing
Names Menu Hold
Store Clear
Replace Reject (UDUB) Accept call End the
Names Menu Call swap End all calls
Store Clear
Replace Reject (UDUB) Call swap End the
Names Menu Ack event or
Menu Last dial Change left
Menu Last dial Change left
// Clear All
// Back Idle
// Clear All
// Clear All
Send Back Idle
Selected item
related function
/ Retrieve
Hold + Send End all calls
- End all calls
event specific
action
softkey to
Names
softkey to
Names
Back Idle
(UDUB)
End all calls
established call
established calls
Clear event
(with confirm.)
Keylock Shortcut
Volumes
AlertMode
Volumes.
Keylock Shortcut
AlertMode
Volumes
Keylock Shortcut
AlertMode
Volumes
- Shortcut
AlertMode
Volumes
- Shortcut
Next Item
-
- -
-
Vol. acc.
- -
-
Vol. acc.
Call opts Shortcut
// Mute
Vol. acc.
Call opts Shortcut
// Mute
Vol. acc.
- Shortcut
// Mute
Vol. acc.
Call opts Shortcut
// Mute
Vol. acc.
Call opts Shortcut
// Mute
Vol. acc.
- Shortcut
// Mute
Volumes
Event opts Shortcut
Next page
*/# Digits
*/# Digits
*/# Digits
*/# Digits
Next / Prev.
item
DTMF tones DTMF tones
- -
DTMF tones DTMF tones
DTMF tones DTMF tones
DTMF tones DTMF tones
DTMF tones DTMF tones
DTMF tones DTMF tones
DTMF tones DTMF tones
Next / Prev.
page
// Speed dial
// Speed dial
// Speed dial
-
-
Page 12/102
.
Page 13
CONFIDENTIAL Mitsubishi Electric
1.3.2 MENUS, LISTS AND EDITORS
State Left softkey Right softkey Send End */# [0..9]
14
Menu / Setting
list / Question
15a
Header
(SMS MT)
15b
Header
(SMS MO)
16a
Message
zoom (MT)
16b
Message
zoom (MO)
17
Quick ADN
18
Last dial, Rec.
Unanswered
19a
XY Editor
21
1-2 coms
Volume mode
Select Exit
// Back Idle
Read Exit
// Back Idle
Read Exit
// Back Idle
Delete Exit
// Back Idle
Delete Exit
// Back Idle
Edit Exit
// Back Idle
Details Exit
// Back Idle
Vol- Vol+ - 1) end t he
1.3.3 EDITORS FUNCTIONS
- 1) end the
Call Nb
(Sender, Nb in
SMS)
Send the
message
Call Nb
(Sender, Nb in
SMS)
Send the
message
Call selected
item
Call selected
item
established calls
2) Back idle
1) end the
established calls
2) Back idle
1) end the
established calls
2) Back idle
1) end the
established calls
2) Back idle
1) end the
established calls
2) Back idle
1) end the
established calls
2) Back idle
1) end the
established calls
2) Back idle
established calls
2) Back idle
-
Next Item
Actions_1
Next Msg
Actions_2
Next Msg
Actions_3
Next Msg
Actions_4
Next Msg
Actions_5
Next Card
Actions_6
Next entry
Vol+ (circ.)
- Shortcut
// Mute
Next / Prev
item
Next / Prev
msg
Next / Prev
msg
Next / Prev
msg
Next / Prev
msg
Next / Prev
card
Next / Prev
entry
DTMF DTMF
Quick access to
-
-
-
-
-
names
-
Editor
19b
X
Phone number
19b
X
Numeric
19b
X
alpha-numeric
Normal press Long press
0 1 2..9 * # 0 1 2..9 * #
0 1 2..9 * # 0 1 2..9 *, , +,p #
0 1 2..9 No action No action or
decimal
point
0 1.,-'@:? Chars
and2..9
shift next
char
space 0 1 2..9 Toggle caps
0 1 2..9 No action No action or
decimal
point
special
lock
chars
access
Page 13/102
.
Page 14
CONFIDENTIAL Mitsubishi Electric
1.4 ACTIONS MENUS CONTENTS
Corresponding to each state above, when relevant, an actions menu is defined with the following items. In each
actions menu, the first items are those that have no direct access.
Action menus
7
Idle 1 com No digits
AutoDtmf
Hold | Retrieve
Mute |Unmute
End call
13
Idle + Network event
Network event dependent Read text
AutoDtmf
[Private With (if conference)]
Hold | Retrieve
Mute |Unmute
[End X (if conference)]
End Call
Delete
Reply
Forward
Numbers
8
Idle 1 com digits
15a
SMS MT header
Actions_1
10
Idle 2 coms no digits
AutoDtmf
Swap
Join
Transfer
Mute |Unmute
End Held
End Active
End All
15b
SMS MO header
Actions_2
Read text
Delete
Status
Send
11
Idle 2 coms digits
Swap
Join
Transfer
Mute | Unmute
End Held
End Active
End All
16a
Message zoom (MT)
Actions_3
Delete
Reply
Forward
Numbers
16b
Message zoom (MO)
Actions_4
Delete
Edit
Status
Send
Edit
Delete
Copy
Move
Call
17
Quick DN
Actions_5
18
LND, Received,
unanswered
Actions_6
Store
Delete
Delete All
Edit
Details
Call
1.5 TONES
The tones defined by the GSM recommendations can all be generated as often as required.
Tones may be turned ON or OFF, according to user preference, using the silent alert mode.
Dual Tone Multi Frequency (DTMF) tones are used as Numeric key feedback tones except when entering a
secret code. When dialling SDN and information numbers, DTMF tones feedback may be suppressed as an
operator option.
All tone volumes can be set in the "Settings/Volumes" menu.
Page 14/102
.
Page 15

CONFIDENTIAL Mitsubishi Electric
1.6 BACKLIGHT MANAGEMENT
The management of the backlight includes the LCD and the KEYBOARD.
If the mobile is charging, the backlight is Off, except during connection and disconnection phases where a 10-
second backlight switch on is made. This applies for all power sources except Full H/F.
In the case of a full F/H kit (H/F kit with power source), the backlight is switched on in a permanent mode,
whatever is the backlight setting status.
The backlight operates according to its Setting in the "Settings" Menu when the phone is used as a handheld, with
no power connection.
1.6.1 BACK LIGHTING BEHAVIOUR WITH ELECTRICAL CONNECTIONS
This paragraph describes the behavioural specification of the back lighting. The LCD and the keypad are
backlighted together in all situations. The back lighting management cases are:
Connection of the mobile to a Cigarette Light Adapter or AC/DC,
Connection of the mobile to a Hands Free (H/F) car-kit,
Connection to a Desk Top Charger (DTC),
Key press or network event with display and mobile connected to a H/F kit, CLA, AC/DC or DTC,
Key press or network event with display or , connected to a power source and mobile charging is
terminated,
Incoming Call.
The back lighting is managed via a phone Setting. Some connections enforce temporarily this Setting (connection
to a H/F kit enforces the Setting to "On"). The mobile can be charged in either "Switch Off" or " Switch On"
state.
Page 15/102
.
Page 16
CONFIDENTIAL Mitsubishi Electric
1.7 BATTERY CHARGING AND DISPLAY
If the mobile is being charged:
• If the mobile is On, the battery charge process is confirmed by a round robin display in the battery icon
of the Idle screen. The LED is not affected by the charging process.
• If the mobile is Off, the charging process is confirmed by a large animation on the screen. At end of
charging, the screen displays the information charge ended with a full battery icon and a relevant text such
as "Battery Full". During the charge process, the LED is switched on RED, at end of charge, the LED is
switched on GREEN.
1.7.1 CHARGING AND MOBILE ON
Idle screen and charging process:
The battery icon is switched in a round robin manner. At end of charge,
"Idle screen"
the icon remains steady with all bars full.
1.7.2 CHARGING AND MOBILE OFF
Charging process and mobile off:
The display indicates that the charge process is in progress
Charging…
Battery full
The LED is switched on RED
Charging process and mobile off:
End of charging display
The LED is switched on GREEN.
Page 16/102
.
Page 17
CONFIDENTIAL Mitsubishi Electric
1.8 LED BEHAVIOUR AND CONNECTIONS
A bicolour LED is present on the mobile front. In a hardware point of view, it can be viewed as
two red and green LED’s that are never switched "ON" at the same time. The LED appearance
gives information about the mobile status and events, as indicated below. Priorities between events
are given. The mobile keeps track of all Led related events and manages the Led behaviour
accordingly to the priorities indicated.
Mobile state Event LED
Status priority
colour/behaviour
Off Charge completed Green Steady 1 (Most important)
Charging Red Steady 2
On Incoming call ringing Green/ Flashes quickly 1 (Most important)
Alarm clock, diary event Red/ Flashes quickly 2
Mobile registered to a
network
Charge completed Off 4
Charging Off 5
Off 3
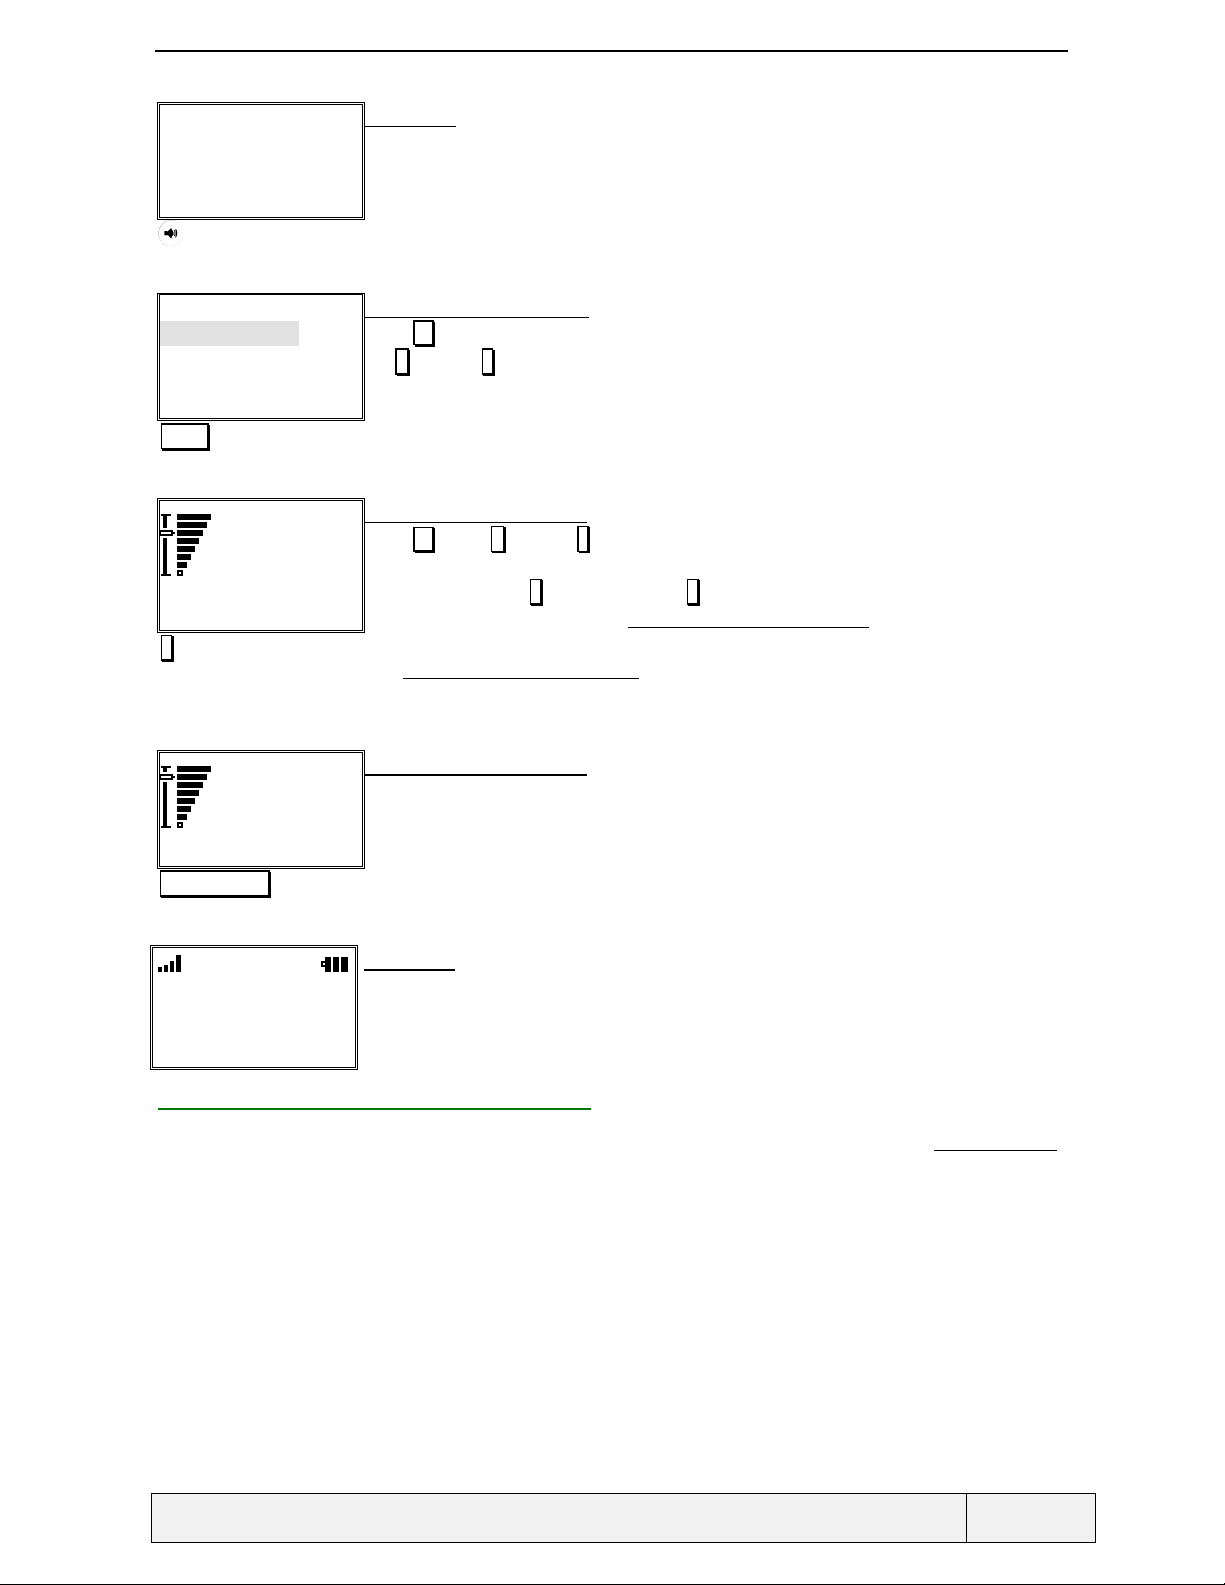
1.9 READING THE IMEI
Every GSM telephone has a unique identity that is given by its IMEI (International Mobile Equipment Identity)
which is a 14-digit number. The IMEI of a phone is followed by the check digit and the Software Version (16
digits in fact) can be seen in the display as follows :
Press : ∗∗∗∗
IMEI:
1233345678910112
1
# 0 6 #
IMEI display:
A press on softkeys clears the display.
A 3 seconds timer clears also the display automatically.
Page 17/102
.
Page 18
CONFIDENTIAL Mitsubishi Electric
2. MOBILE SWITCHING ON AND OFF
2.1 MOBILE SWITCH-ON BY THE USER
To switch the phone on, press and hold the Power key. T he "AUDIO_POWER_ON_TONE" tone is played if the alert
mode is not "Vibrate only", otherwise a short vibrator activation is performed.. Before the mobile becomes ready
for use, the following operations sequence takes place. It is called the "Power On" sequence.
Self check screen:
The whole screen is blacked. The mobile performs various controls on internal components.
"End of tests"
Enter phone lock:
|
"1234"
Enter phone lock:
****|
Ok Clear
Ok
Enter PIN:
|
"0000"
Phone lock entry screen:
A password editor is entered
If the phone lock code is set, it is requested at this stage.
The phone lock code is a 4-digit numeric code.
In case of error, you have an infinite number or trials.
Phone lock code entry
You can also enter the international emergency number 112 that will be called in this case
During the call, no other phone feature is available. After the end of the call, the phone returns to
the lock code sequence request with an empty entry.
Phone lock entry screen:
Press Ok. softkey to validate the lock code
Clear softkey to erase the last character. Long Press Clear softkey to erase whole
Press
entry
Phone lock code validation
PIN entry screen:
A password editor is entered.
If the PIN control is active on SIM, it is requested at this stage.
The PIN code is a 4-digit to 8-digit number.
The behaviour when entering a PIN is described in Annex B.
PIN entry
You can also enter the international emergency number 112 that will be called in this case
During the call, no other phone feature is available. After the end of the call, the phone returns to
the PIN sequence request with an empty entry.
Page 18/102
.
Page 19
CONFIDENTIAL Mitsubishi Electric
Enter PIN:
****|
Ok Clear
Ok
"Welcome animation"
"End of searching"
"Idle screen"
Names Menu
PIN entry screen:
Press # or Ok softkey to validate the PIN.
Clear softkey to erase the last character. Long Press Clear softkey to erase whole
Press
entry
PIN validation
Welcome animation screen:
During the display, the mobile determines the language to be used. A network search is also
performed during this animation.
All keys, while in this state, have the same functions as in Idle screen.
Access to all mobile functions is allowed during the animation display.
Idle screen:
When the mobile is registered, a " AUDIO_SVC_TONE " tone is played (according to the current
alert mode Setting) and the idle screen is displayed. The phone is now ready for use.
If the ring volume is Off, the ring-off icon is displayed in Idle screen.
Page 19/102
.
Page 20
CONFIDENTIAL Mitsubishi Electric
2.2 MOBILE SWITCHING OFF BY THE USER
To switch the phone Off, press and hold the Power key, at any moment, except when the keypad is locked and
when a call is engaged.
Idle screen:
"Idle screen"
Names Menu
Power long press
"Switch Off animation"
To switch off the mobile
A "
AUDIO_POWER_OFF_TONE" tone is played at the same time if the key tone is not silent.
If the mobile switching off is due to a lack of battery power, the switching off sequence is not
displayed.
Switch Off animation screen:
A single message can also be displayed.
During the display, the mobile is disconnected from the network.
End of sequence
The mobile disconnects from the network.
Mobile switched off screen:
Page 20/102
.
Page 21
CONFIDENTIAL Mitsubishi Electric
3. STAND-BY STATE DESCRIPTION
3.1 PRESENTATION
The idle state with no established call is the Stand-by State.
This state allows reaching the main menu, the quick ADN list consultation for calling, the direct number dialling,
and the last numbers dialled list direct access.
3.2 INFORMATION DISPLAY IN IDLE STATE
3.2.1 PERMANENT DISPLAY
Permanent display means a display that is always present in normal Idle State. Some other information may
overlap these ones, but the cases are always transitory.
When no phone number is entered, the idle screen information are, when available:
• The RSSI level, if a network is available,
• The battery level,
• The network operator name. If the mobile cannot register on one of the available networks, A blank area
is displayed. If the mobile cannot find a network, the label "No Network" is displayed.
• The time (hour: minute) and date (day/month),
The Service provider name, if the SIM card has the EF
• Two softkeys, labelled Names (left) and Menu (Right).
SPN
file,
3.2.2 ADDITIONAL DISPLAY
Some graphic icons provide additional information, when relevant. These pieces of information may be missing
depending on current mobile situation. All icons (except the alarm icon, displayed near the time information) are
displayed in the Idle screen icon bar, on top of the screen.
3.2.2.1 NETWORK RELATED INFORMATION
▲
Roaming icon, displayed only if the mobile is camped on a network which is not the user "Home
network"
New received SMS icon
New received Voice mail icon (distinctive icons for all lines, line 1 and line 2)
Unanswered calls icon
Call diverting icon (divert unconditionally): displayed if this function has been set by the user with
the corresponding service menu item,
Page 21/102
.
Page 22
CONFIDENTIAL Mitsubishi Electric
3.2.2.2 MOBILE SETTINGS INFORMATION
Ring off icon
Line 2 in use (for DCS only). When using line 1, no indication is displayed,
Keypad is locked,
SMS full icon (same icon as new SMS, but blinking),
The clock alarm icon, when a clock alarm is set,
The vibrator alert mode, displayed when activated,
Home zone indicator
3.2.2.3 VOLATILE DYNAMIC INFORMATION
• CB idle: CB Idle messages are directly displayed on the idle screen and overlap other information
(Service provider name for instance). The information is updated as soon as necessary.
3.2.3 INFORMATION MANAGEMENT IN IDLE SCREEN
3.2.3.1 BATTERY ICON
The battery icon ( ) indicates the battery charge level, with a 3 levels bar graph icon. The icon blinks when the
battery becomes too low for normal operation. For the first time the battery becomes low, a "pop-up" warning
screen is displayed and has to be acknowledged by the user. An "AUDIO_LOW_BATTERY_ALARM_TONE" tone is
played at the same time. If the batter y charger is plugge d during the pop-up screen display, this one is removed
from the screen.
During battery charging, the battery icon displays a cyclic animation indicating the charging process. When the
battery is full, the cyclic display is stopped and the icon remains static with full Power State.
See preceding section, on connected parts, for the display during charging process.
3.2.3.2 RSSI LEVEL DISPLAY
The 4 levels RSSI icon ( ) indicates the radio signal quality as perceived by the mobile when it is camped on a
network. If the mobile cannot register on a network, no icon is displayed.
3.2.3.3 NETWORK OPERATOR NAME
This information is managed as follows:
• If the mobile can register on a known network, the corresponding name (without country code) is
displayed. If t he network is unknown, the countr y abbreviation a nd network number are d isplayed instead,
• If the mobile is unable to register on one of the available networks, the area is blank,
• If the mobile founds no network, the text "No Network" replaces the network operator name.
3.2.3.4 ROAMING ICON
The roaming icon (▲) is shown if the mobile is camped on a network that is different from the HPLMN. When
roaming in the home country, the network operator name remains the one of the home network, otherwise the
name of the visited net work is shown.
Page 22/102
.
Page 23
CONFIDENTIAL Mitsubishi Electric
3.2.3.5 SMS ICON
This icon ( ) is switched on in the following conditions:
• No SMS icon and The left softkey is labelled Names : no new SMS received and SMS storage is Ok,
• SMS icon blinks and the left softkey is labelled Names : The SMS storage is full,
• SMS icon (non blinking) and the left softkey is labelled Read: New SMS have been received,
• SMS icon blinks and the left softkey is labelled Read: New SMS have been received and the SMS
storage is full.
Depending on t he number of networks eve nts pending (SM S, Voice M ail, unanswered c alls), the
gives access to the event related function directly or to the Idle menu.
Read so ftkey
3.2.3.6 NEW RECEIVED VOICE MAIL ICON MANAGEMENT
This icon ( ) is switched on when a SMS indicating a voice mail message has been received and not yet listened
to. The left softkey behaviour and label is the same as for a new SMS event. A message in Idle screen indicates
also the fact that new voice mail are waiting (x voice mails). When the mobile is not engaged in a call, a
"AUDIO_SMS_TONE" tone is played each time such an indication is received. The icon and information are
removed when the user calls the related voice mail boxes.
3.2.3.7 NEW UNANSWERED CALLS ICON MANAGEMENT
The "New Unanswered Calls" icon ( ) is switched on when calls have been received, but not answered and
when the user has not yet accessed the unanswered calls list from the Idle screen or from the menus. The left
softkey behaviour is t he same as for new SMS management.
In complement to the icon, a message in Idle screen indicates also that unanswered calls have been received (x
unanswered), but not yet checked.
3.2.3.8 CALL DIVERTING ICON
If the call diverting status "Always" is active and known (for the current line in use), the corresponding icon " :"
is displayed on the idle screen. No icon is displayed when the calls are not diverted or when the call diverting
status is unknown. The icon status is stored in mobile non-volatile memory.
At mobile power on:
If the SIM card contains the EF/CFU file, the icon is displayed according to the state indicated in the file
and also to the current line in use,
Otherwise the icon is displayed according to the state indicated in non-volatile memory and according to
the SIM card associated id.
3.2.3.9 RING OFF ICON
This icon ( ) is shown if the ring volume is set to Off and the alert tones is "Ring only", "Vibrate then ring",
"Vibrate and ring".
3.2.3.10 VIBRATOR ALERT TONES
This icon ( ) is displayed in the icon bar when the Alert mode is set to "Vibrate only" or " Vibrate then ring".
This icon is displayed at the same place as the Ring off icon, and has priority on display. When setting the Alert
tones to "Ring" or "Vibrate and Ring" and if the ring volume is Off, the Ring off icon then replaces the vibrator
mode icon..
3.2.3.11 DCS LINE 2 ICON
This icon ( ) is shown if the mobile currently uses the DCS line 2. No icon is shown in case of DCS line 1
usage.
Page 23/102
.
Page 24
CONFIDENTIAL Mitsubishi Electric
3.2.3.12 CB IDLE MESSAGES DISPLAY
CB messages are directly displayed on the Idle screen. The display principles make use of the largest possible
area, but the Network operator name is preserved in any case. So, these messages are displayed on the bottom
part of the screen. Two lines of the Idle screen is used for CB Idle display. This information may be hidden in
some case, when more important information has to be displayed (Such as network events notifications).
3.2.3.13 OTHER CB MESSAGES DISPLAY
CB messages are displayed on the Idle screen. If required, the whole screen is used for such a display. If the
message is too long to be entirely displayed, a scrolling is provided using the
acknowledged by the user to be removed from the screen. After display, the screen content becomes the one
before the CB display.
key. A CB message must be
3.2.3.14 DATE AND TIME DISPLAY
The Date and Time are displayed permanently in Idle screen. The time is displayed on a 24-hour display
basis(Hour, Minute), the date is displayed according to the date format chosen when entering the date value. The
year is not displayed. In case of a numerous of network events, the information is temporarily hidden.
3.2.3.15 HOME ZONE INDICATOR
This icon ( ) is displayed in the icon bar when the mobile is in the user home zone, if this information is
available from the network. Generally, the user home zone allows to have preferential charge when calling.
3.2.3.16 CLOCK ALARM INDICATOR
This icon ( )is displayed near the current time information, when the clock alarm is active.
3.2.3.17 GENERAL INFORMATION DISPLAY FOR NETWORKS EVENTS
When several network events are received, the following information are displayed in the Idle screen:
• The relevant icons are displayed on top of the screen,
• For each network information, a complementary text is displayed, with the following policy:
For the first event, the area used to display CB Idle message is used (for instance : 3 messages)
For the second event type, the area used to display the time and date is used (for instance, 2 voice
mail),
For the third one, the area used to display the network operator name is used (for instance (2
unanswered).
• The left softkey is renamed Read in this context.
3.2.3.18 ACCESS TO NETWORK EVENTS
The left softkey is context sensitive:
• If no network event has to be managed, the softkey label is labelled Names,
• If only one network event has to be managed, the softkey label is changed to Read and gives a direct
access to the network event related function,
• If several network events are to be managed, the softkey label is changed to Read. In this case, the
softkey gives access to an "Idle menu" that gives access to the related functions,
• In case of Read softkey, the left softkey can be changed to Names again by a press on the End ke y.
Returning from the phonebooks or the menu in this condition will restore the
again to the pending network events.
.
Read softkey and access
Page 24/102
Page 25
CONFIDENTIAL Mitsubishi Electric
Example:
Itineris
3 Voice Mail
3 messages
Read Menu
Read
Idle screen:
2 network events icons are displayed in the status bar.
The left softkey label is changed to Read
.
The display indicates the pending events: Voice mail, SMS
Access to the Idle menu
Messages: 3 new
Voice mail: L1 2 new
Line Menu screen:
The number of events is given for each event type, when available.
Voice mail: L2 1 new
Select Exit
Select
Access to new received SMS process
New SMS read process:
"New SMS read process"
The process is similar as an inbox consultation, except that old SMS are not shown.
"End of SMS consultation" A return to Idle is realised
Itineris
3 Voice Mail
Idle screen:
The voice mail icon is now alone in the icon bat
The left softkey label remains Read
A text on the screen indicates the pending network events, here 3 new voice mail messages
Read Menu
Read
Direct access to the voice mail calling process.
.
"Calling Voice mail
process"
"End of Voice mail
consultation
Itineris
Names Menu
Calling Voice mail process:
The voice mail is called directly
A return to Idle is realised
Idle screen:
No more network event icon
The left softkey has now its normal usage.
Page 25/102
.
Page 26
CONFIDENTIAL Mitsubishi Electric
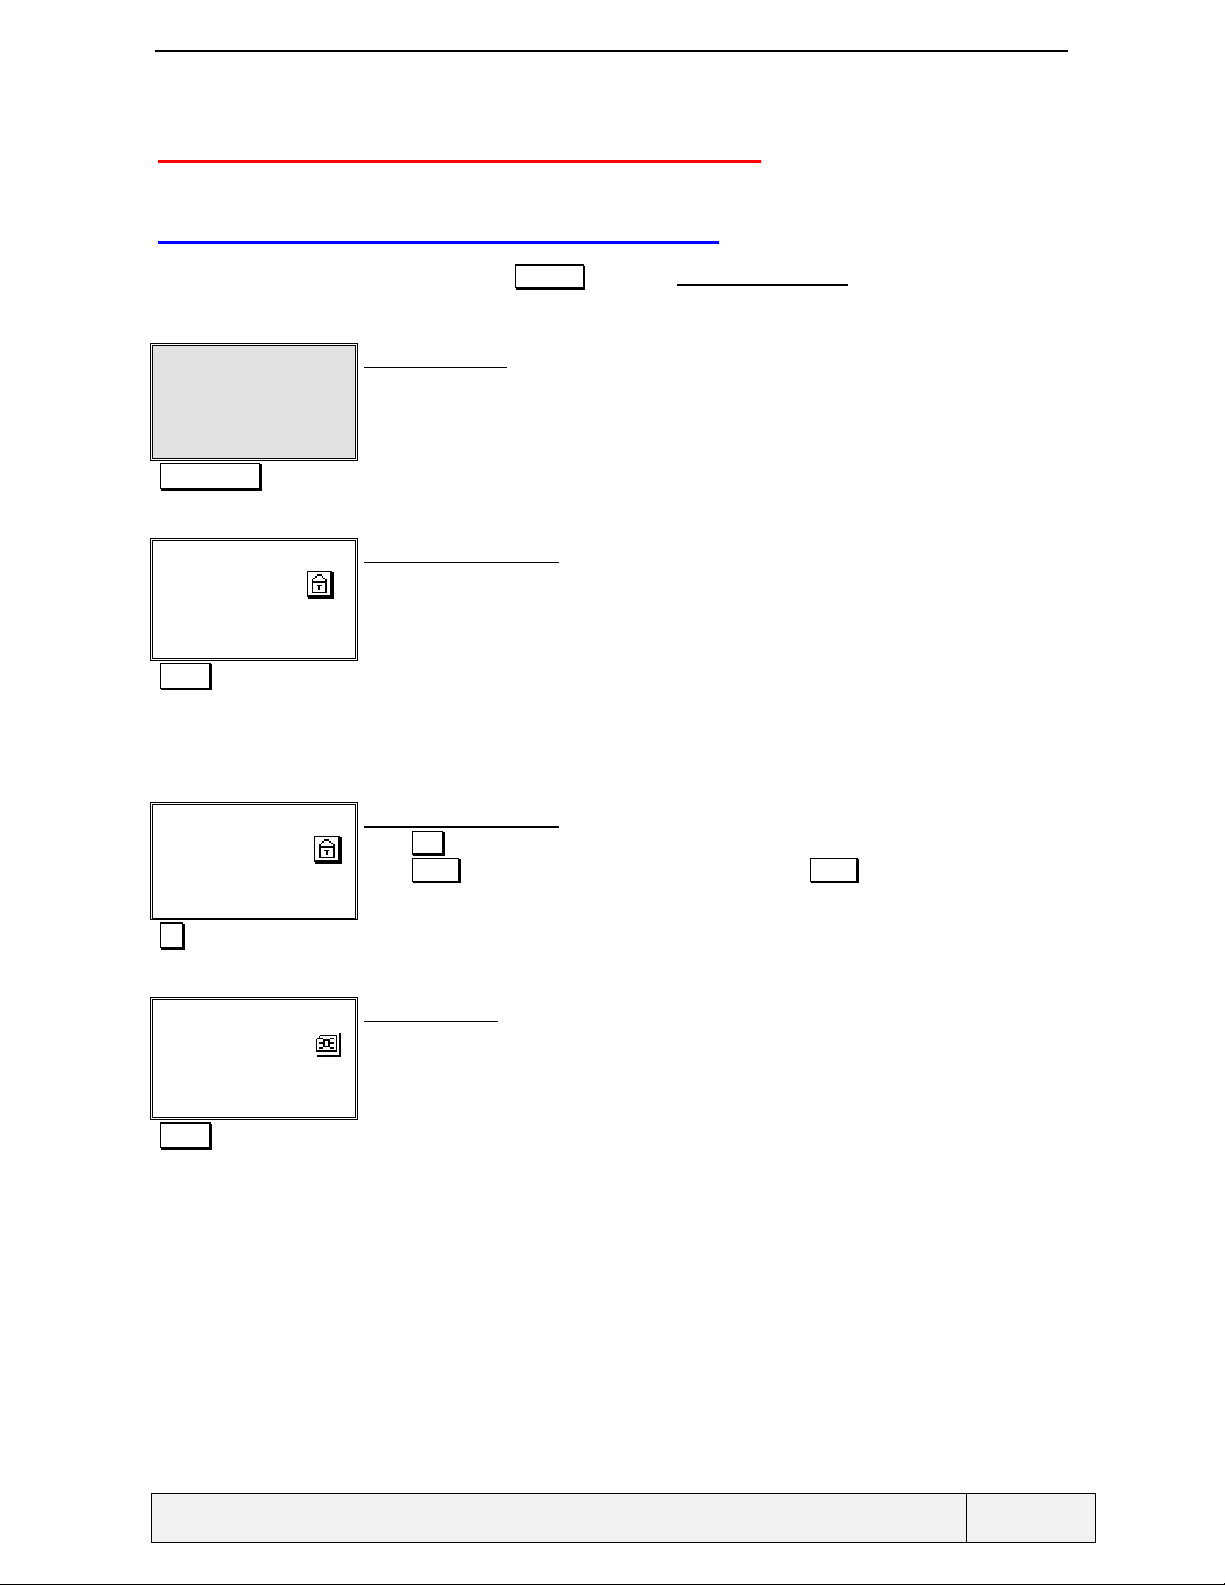
3.3 SHORT-CUTS FROM IDLE WINDOW
3.3.1 QUICK ADN DIRECT ACCESS
A press on the Names softkey gives access to the quick ADN, allowing a quick way for dialling. See memory
section for details.
When the left softkey is reserved to access the pending network events menu and is labelled
press on the
previously removed
End key allows to restore the Names label for the softkey. On return from the menus, the
Read softkey is restored automatically.
Read in this case, a
3.3.2 GENERAL MENU ACCESS
A press on the Menu softkey gives access to the general menu, allowing managing all phone functions.
3.3.3 DIRECT ALERT TONES ACCESS
A long press on the key gives access to the alert mode menu, with a direct choice between (Vibrate and Ring).
See the setting section for details
3.3.4 KEYPAD LOCK
A press on the Action followed by a press on # key locks/unlocks the keypad. In the locked state:
• The way for unlocking the keypad is indicated to the user on each key press, via an information screen,
• No sounds are generated on key presses,
• The backlight is "switched on" on key presses,
• The left softkey is hidden and the right softkey label is Unlock .
• The keypad locked icon is displayed between the softkeys.
• The keypad unlock is obtained by a press on Unlock or Actions followed by a press on #.
While in locked state:
• Dialling emergency numbers is possible: international number 112, and all emergency numbers stored on
SIM. Receiving a new call unlocks the keypad automatically, allowing answering to the call. After call
termination, the locked state is retrieved automatically.
3.3.5 SPEED DIALLING
Long presses on 1 to 9 keys allow dialling the corresponding associated phone number. The 1 key is devoted to
voice mail.
3.3.6 LAST NUMBERS DIALLED LIST
A press on SEND while in Idle state displays the Last Numbers Dialled list with the most recent call displayed
first. A new press on
SEND calls this number. See LND list management for details.
3.3.7 VOLUMES CONTROL
A press on the volume ( ) key gives access to the volumes control menu. When entering the function, a volume
menu is displayed allowing to choose which volume to operate on, with the ring volume at first position.
The behaviour is the same as the access to the volume control via the menus. After tuning of one of the volumes,
the process returns directly to the volume menu.
Page 26/102
.
Page 27
CONFIDENTIAL Mitsubishi Electric
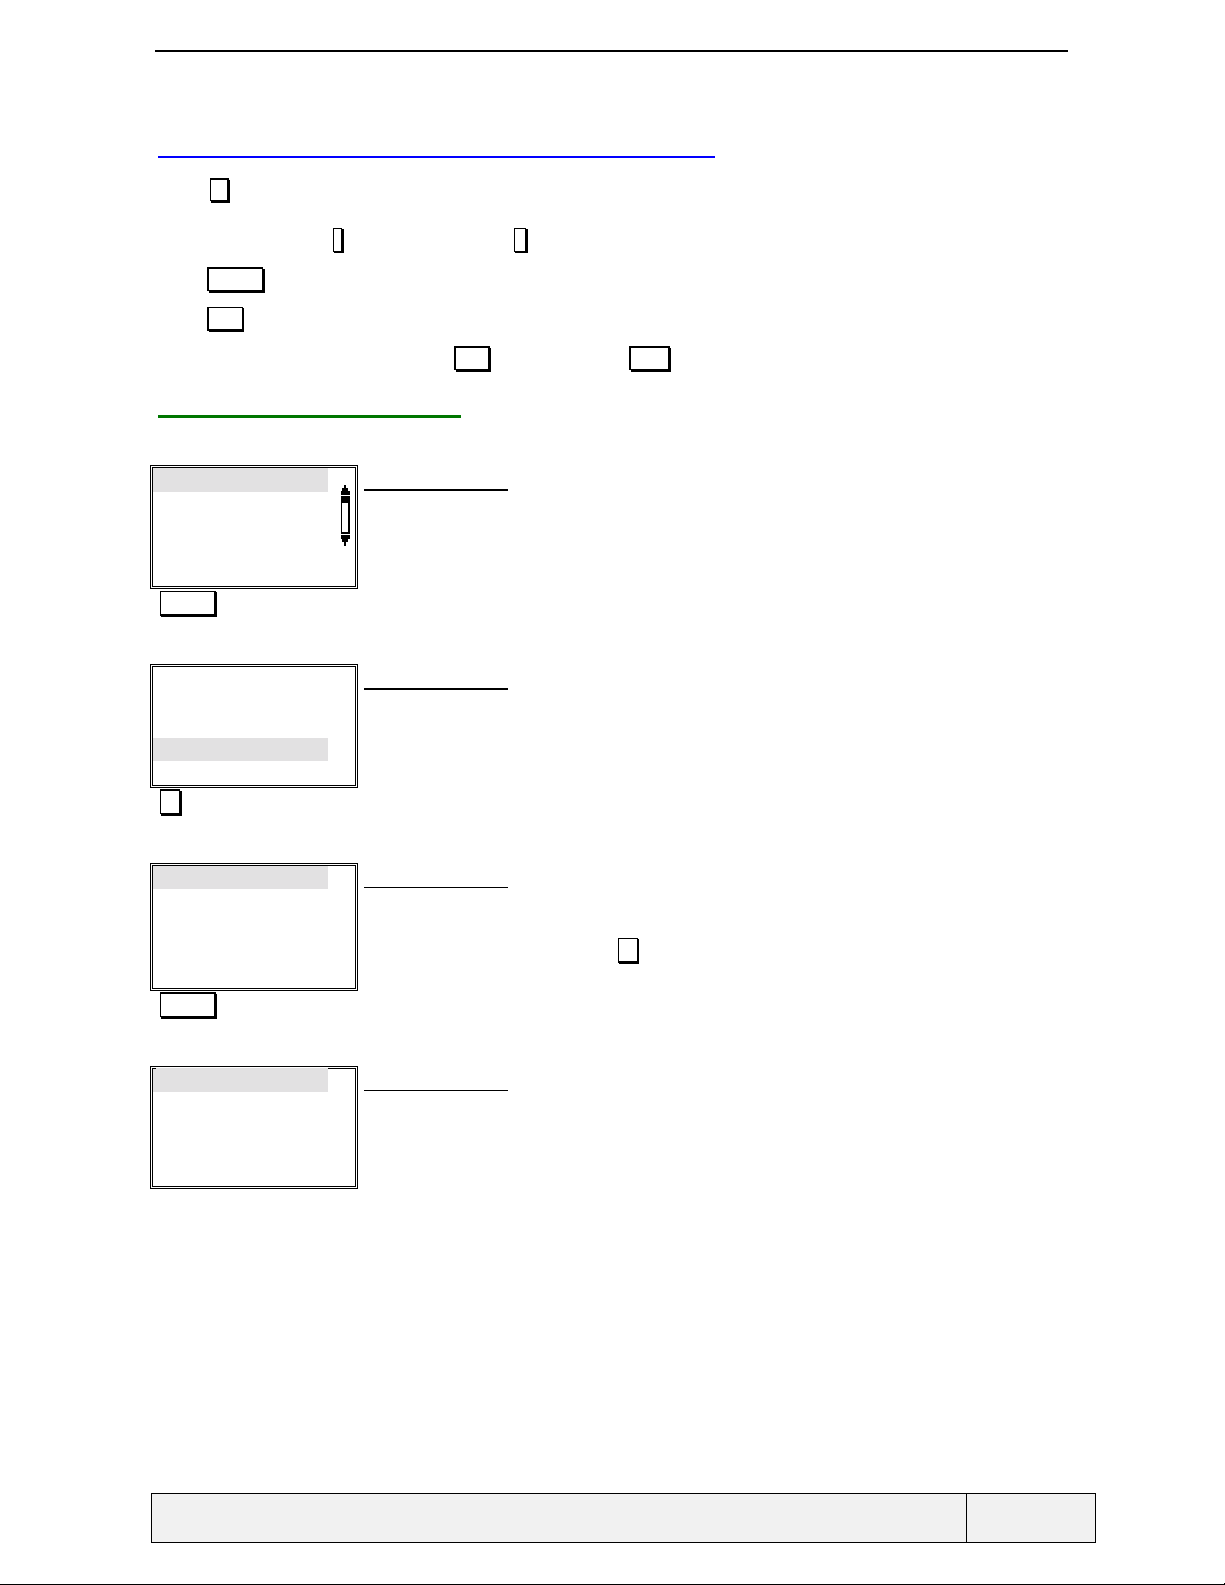
Idle screen:
"Idle screen"
Names Menu
Access to volumes control
Volumes Control:
Ring
Ramping
Keys
Select Exit
Select
Ring
volume
Ok Exit
#
Ring
volume
Ok Exit
Exit long press
Master volume control menu
Press key to choose the volume to tune, in a circular way.
The *
( ) and # () keys allow also a menu navigation.
Master volume tuning selection
Ring volume control screen:
Press key or * ( ) and # () keys to adjust the control
8 steps are offered for volume tuning. Press on the corresponding key adjust the volume to the
same value (Press on 7
When going outside the bounds, a " AUDIO_VOLUME_KEY_ERROR_TONE " tone is played
Increase the ring volume control value
The "AUDIO_VOLUME_RING_TONE" is played according to the value and the master volume
current value.
Ring volume control screen:
Return to Idle screen
sets the volume to 7
"Idle screen"
Names Menu
Idle screen:
3.3.8 PROGRAMMING THE HOTKEY
On the Social mobile phone, the hotkey is user programmable. This can be realised using the "Settings/hotkey"
menu item or by a long press on the hotkey. See the Setting chapter for details.
Page 27/102
.
Page 28
CONFIDENTIAL Mitsubishi Electric
4. MMI POLICY
This section presents the different principles used in MMI policy.
4.1 DIRECTION ARROWS MANAGEMENT
In order to indicate that several screens are available for the current display, two arrows are displayed between
the softkeys. The two arrows have the following meaning:
Drawing Meaning
First page of display
Page in the middle of pages list
Last page of display
Only one page of display.
Page 28/102
.
Page 29
CONFIDENTIAL Mitsubishi Electric
4.2 USE OF FUNCTION KEYS IN MENUS
Press key to navigate in the menu. Continuous presses allow fast navigation. The navigation is done in a
circular way. After the end of the menu, an automatic return to the beginning is performed. Another way to
navigate is the use of
Select softkey to select the current item.
Press
Press
Exit softkey to exit to the parent menu.
* (to navigate ) and # keys (to navigate), but this requires opening the flip.
To directly return to Idle, long press
4.2.1 LINE MODE MENUS
Example: the menu has 7 items.
Item 1
Item 2
Item 3
Item 4
Select Exit
Item 1
Item 2
Item 3
Item 4
Select Exit
Item 5
Item 6
Item 7
Select Exit
Line Menu screen:
the current highlighted item is Item 1
Press 3 times
Line Menu screen:
The current highlighted item is Item 4
Line Menu screen:
We change of group of menu items: this allows a faster view of the next items.
the current highlighted item is now Item 5.
This page has 3 items. A press on
Press 3 times
Exit softke y or press END if no call is connected .
while on item 7 will go to the first screen above.
Item 1
Item 2
Item 3
Item 4
Select Exit
.
Line Menu screen:
Return to the first group of items.
Page 29/102
Page 30
CONFIDENTIAL Mitsubishi Electric
4.2.2 PAGE MODE MENUS
Same navigation pri nciples as for line mode menus.
Page Menu screen:
"Menu page 1
Item 1"
Select Exit
Page Menu screen:
"Menu page 2
Item 2"
Select Exit
When on the last page, Press to go to the first page
4.3 AUTOMATIC SCROLL
Automatic scroll is used to display some large text information, such as SMS text, CB text, etc. The automatic
scroll is entered after a 5 seconds duration with no user action. Once started, each page is displayed during 5
seconds. If the user makes an action (such a manual scroll), the automatic scroll procedure is restarted after this
delay.
The information is scrolled in pages units.
An example is given below.
Text display:
Text page 1
"5 sec timer"
Text page 2
Text page 3
Page 1 of text
Exit
Goes to the next page
Text display:
Page 2 of text
Exit
Goes manually to the next page
Text display:
Page 3 of text
Exit
Page 30/102
.
Page 31

CONFIDENTIAL Mitsubishi Electric
4.4 INFORMATION MESSAGE DISPLAY PROCEDURE
This window is composed of a text area and an icon area. An example is shown below.
Information display:
Call is on hold
This information is displayed during 3 seconds and can be exited by a press on any softkey.
The way to exit is to press the softkeys only.
END keys have a function related to the current call situation.
Presses on numeric keys have no actions.
Exit
4.5 RECAPITULATION DISPLAY PROCEDURE
This window is composed of a text area and an icon area.
✆ // ✆
Albert
00:03:12
Recapitulation display:
The way to exit is to press the softkeys only.
END keys have a function related to the current call situation.
Presses on numeric keys have no actions.
Exit
This information is displayed during 3 seconds and can be exited by a press on any softkey.
For the settings modifications, a recapitulation display is made in any case when a setting is changed. This relates
to all phone settings and also for supplementary services settings and all alert tones settings. No such screen when
the settings are not changed. The standard recapitulation screen in these case is as follows:
Recapitulation display:
Stored
For setting modification
Duration 1 second. Exit possible by
Exit
Exit .
4.6 ERROR DISPLAY PROCEDURE
This display procedure allows the display of a recapitulation screen. This window is composed of a text area and
an icon area. The icon is an error typical one. Example:
Error display:
User Busy
The way to exit is to press the softkeys only.
END keys have a function related to the current call situation.
Presses on numeric keys have no actions.
Exit
The screen is automatically removed after 3 seconds of display.
An error beep signals the problem at the time of display.
This information is displayed during 3 seconds and can be exited by a press on any softkey.
.
Page 31/102
Page 32

CONFIDENTIAL Mitsubishi Electric
4.7 TRANSITION DISPLAY PROCEDURE
The transition procedure is used when a requested user action cannot be performed immediately (for instance,
setting a network service, which calls the network to realise the action). The behaviour is as follows:
• If the action cannot be realised within a one-second delay, a waiting screen is displayed during the action.
This display is composed of a text area and an icon area. The icon is a wait typical one and may be an
animated one. In this case, the sequence is displayed as often as necessary until action completion.
Example:
Transition display:
Requesting…
Abort
• When the action has been completed or not, a result screen is displayed, which explains the new situation,
in relation to the user requested action. Example:
Depending on the context, an Abort softkey may be displayed.
Outgoing calls
barred
Recapitulation display:
The way to exit is to press the softkeys only.
END keys have a function related to the current call situation.
Presses on numeric keys have no actions.
Exit
Page 32/102
.
Page 33

CONFIDENTIAL Mitsubishi Electric
4.8 BINARY CHOICE PROCEDURE
This procedure is used to select a value between two ones: Yes or No, On or Off or any other labels, but with
only 2 possible and exclusives options. A question procedure is a particular case of a binary choice procedure.
The window is composed of a title area, a text for option 1, a text for op tion 2, an icon area indicating a choice
between two answers.
If no setting is attached to the choice, the user is proposed to validate the positive answer, performing the action
associated to the question.
Example:
Delete entry?
Yes
No
Select Exit
If a phone setting is attached to the choice, the screen is entered with the current setting of the related function. In
this case, the user has to choose the other item if he wants to change the setting value.
Binary choice display (no setting):
Same navigation principles as in menus
Press Select
Press Exit
Press END key (if no call) to directly exit to the idle screen.
softkey to select the current item.
softkey to exit to the parent menu, Long press on Exit goes directly to Idle screen
Example:
Voice mail alert:
On
Off
Select Exit
Binary choice display:
When entering the question, the current voice mail alert setting value is "On"
Page 33/102
.
Page 34

CONFIDENTIAL Mitsubishi Electric
4.9 GENERAL USER ENTRY POLICY
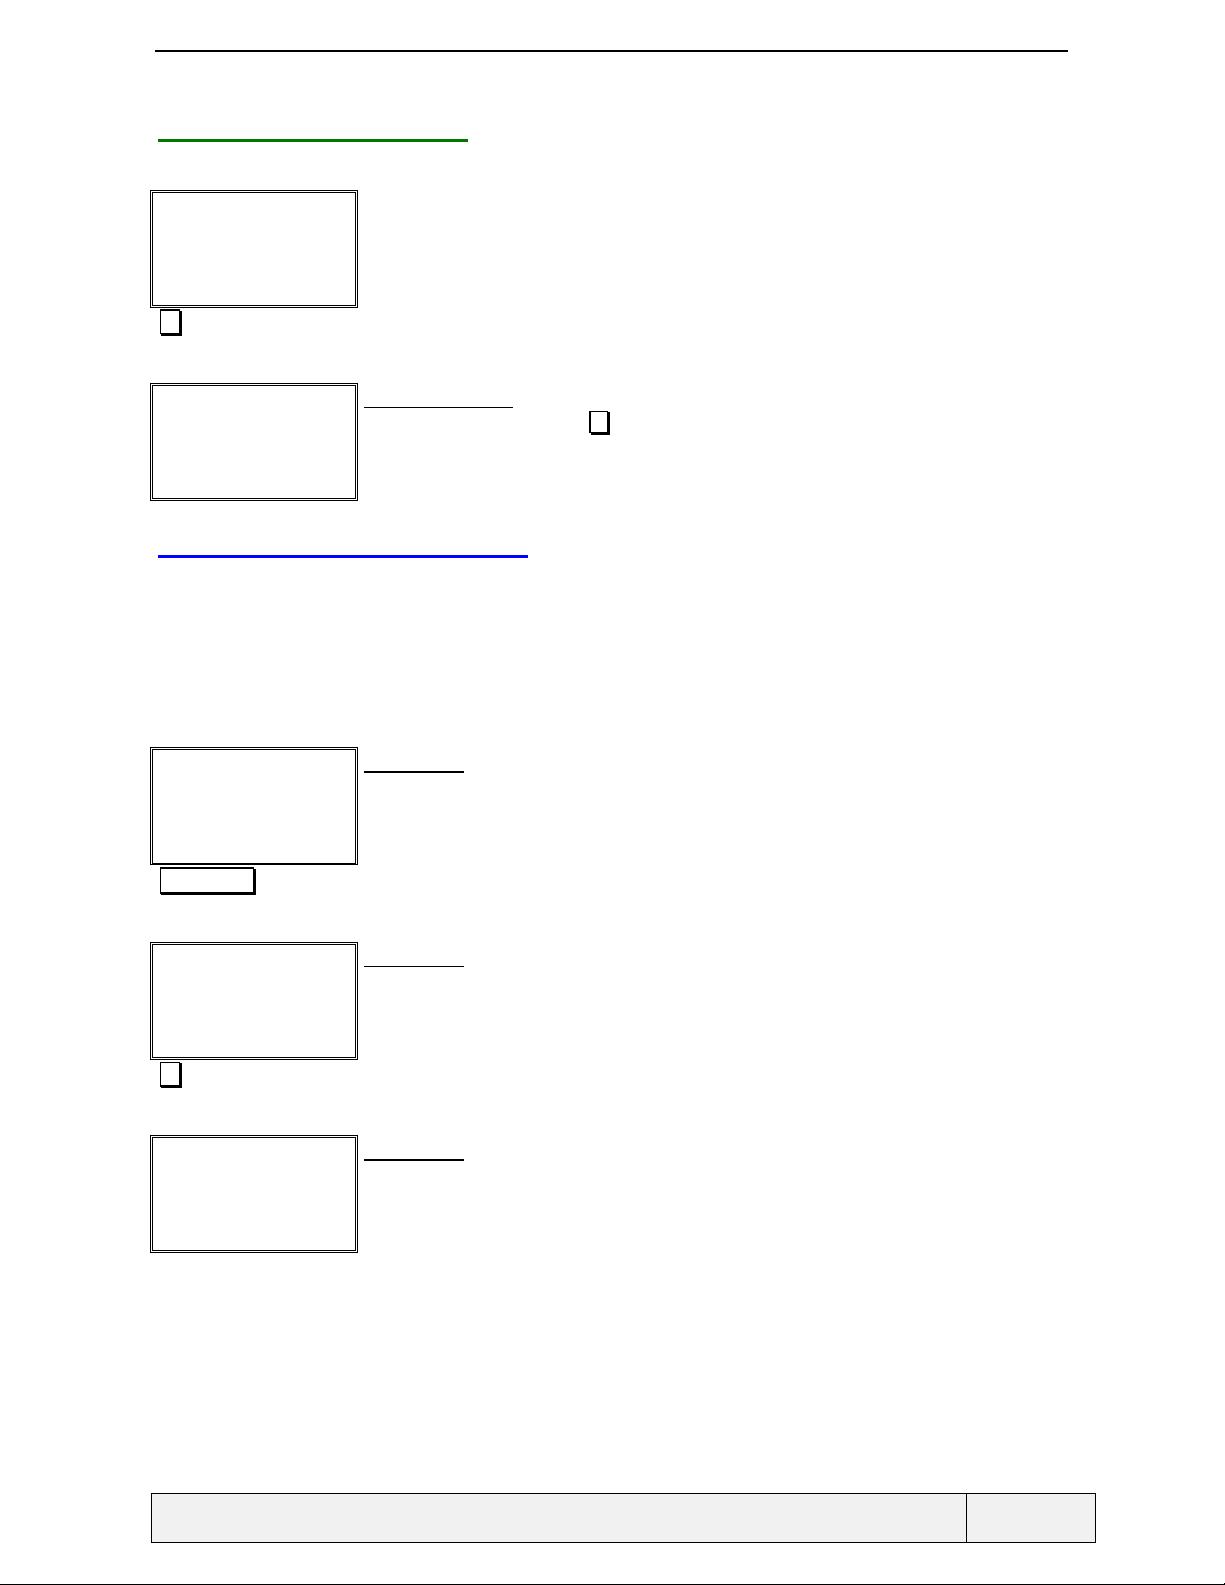
4.9.1 DISPLAY
The display contains:
• An optional header,
• An entry.
The punctuation symbol at the end of the text header is part of the header. It can be ":" or "?" or even left away if
required to solve a translation problem.
4.9.2 FUNCTION KEYS USAGE
The function keys usage depends on the context. The principal types of entries are studied below.
4.9.3 USE OF END KEY
A press on END during menu or entry operations will terminate all (active or held) connected calls ( END is a
mean to exit the menus when no call is connected). So, in this situation, use the
or memories). A normal press on
Exit exits to the parent process, a long press on Exit directly exits to the Idle
screen.
Exit softkey to exit the menus
4.10 NUMERIC AND FLOAT EDITOR
4.10.1 SCREEN EXAMPLES
Enter unit:
|
Ok Exit
PPU
0.2345|
Ok Clear
4.10.2 KEY USAGE
0 1 2..9 * # 0 1 2..9 * #
0 1 2..9 No action No action or
Numeric entry without initial entry:
Numeric entry with initial entry:
Normal press Long press
0 1 2..9 No action No action or
decimal
point
decimal
point
Ok
softkey
Entry
validation
Exit
softkey
Exit to
parent menu
/ process
Clear
softkey
Clear last
digit
Goes one
char right
(circular)
Ok
softkey
- Exit to Idle Erases
Exit
softkey
Clear
softkey
whole entry
Goes to end
of entry
4.10.3 DESCRIPTION
A vertical line cursor is used ( | ) with the convention: (Digit before cursor)|(Digit at cursor).
.
Page 34/102
Page 35

CONFIDENTIAL Mitsubishi Electric
When entering d igits, the ri ght softke y is changed to Clear, the left softkey appears if the minimum entry size is
reached and is labelled
The entry mode is only replace (the entered digit replaces the digit before cursor position, if any).The number is
displayed left justified.
An "
AUDIO_DIGIT_KEY_TONE" is played for each key press. When the maximum entry size is reached, an
"AUDIO_KEY_ERROR_TONE" tone is played and the entry remains unchanged.
Ok in this case.
Page 35/102
.
Page 36

CONFIDENTIAL Mitsubishi Electric
4.11 ALPHANUMERIC EDITOR
4.11.1 SCREENS EXAMPLES
Name:
Alphanumeric entry without initial entry:
|
Ok Exit
Name:
Alphanumeric entry with initial entry:
Albert |
Ok Clear
For SMS and scratchpad editors, the default letter case is lower case. For other editors, the default letter case is
uppercase.
4.11.2 KEY USAGE
Normal press Long press
0 1 2..9 * # 0 1 2..9 * #
0 1.,-'@:? Chars
Ok
softkey
Exit
softkey
and2..9
Clear
softkey
shift next
char
space 0 1 2..9 Toggle caps
lock
Ok
softkey
Exit
softkey
Clear
softkey
special
chars
access
Entry
validation
Exit to
parent menu
/ process
Clear last
digit
Goes one
char right
(circular)
- Exit to Idle Erases
whole entry
Goes to end
of entry
4.11.3 DESCRIPTION
A vertical line cursor is used ( | ) with the convention: (Character before cursor)|(Character at cursor).
If empty entry, the left softkey is labelled
softkey is labelled
Exit .
Characters are inserted using the keypad, before the character at cursor position. The right softkey is changed to
Clear, the left softkey appears if the minimum entry size is reached and is labelled Ok in this case.
The entry mode is only insertion (the entered characters are inserted after the character before cursor).
Presses on keys display the corresponding character set available on the key. Successive key presses allow to
choose the desired character from the list displayed on the top of the screen.
The text is displayed left justified and starts from the left upper corner of the screen.
An "
AUDIO_DIGIT_KEY_TONE" is played for each key press. When the maximum entry size is reached, an
"AUDIO_KEY_ERROR_TONE" tone is played and the entry remains unchanged.
Ok or is missing (i f a minimum entry length is required). The right
Page 36/102
.
Page 37

CONFIDENTIAL Mitsubishi Electric
4.11.4 CHARACTERS SETS
A set of characters is associated to each numeric key except 0. These characters are accessed by successive short
presses on the key, in a round robin manner. The associated set of chara cters is language dependent . For instance ,
here are the lists for English and French.
See in Annex A the complete sequences of char acter sets for 3 Eur opean languages. A extrac t of this annex is
given below.
French English
Key Lower Upper Lower Upper
0
1
2
3
4
5
6
7
8
9
abc2àç ABC2 abc2 ABC2
def3éè DEF3É def3 DEF3
ghi4 GHI4 ghi4 GHI4
jkl5 JKL5 jkl5 JKL5
mno6 MNO6 mno6 MNO6
pqrs7 PQRS7 pqrs7 PQRS7
tuv8ùü TUV8 tuv8 TUV8
wxyz9 WXYZ9 wxyz9 WXYZ9
00
1.,-'@:? 1.,-'@:?
4.11.5 SPECIAL CHARACTERS PAGES
The special characters are set in 3 pages that are accessed by a long press on "#". A page scroll is then possible
using the direction keys. A direct symbol selection is made using the [1..9] keys. After that, the display returns to
the alphanumeric entry.
The special characters pages contents are as follows:
()% +#* ¥$£
!;" /&=
_¡¿ <>§
Example:
Chicken stock has been
unblocked. Note that if A
Ok Clear
# long press
1:( 2:) 3:%
4:! 5:; 6:¥
7:£ 8:$ 9: ¿
6
.
Alphanumeric entry screen:
To access the special characters pages
Special characters screen:
Select directly the right character by a press on the corresponding position key on the keypad
1 to select "(", 2 to select ")", Press 9 to select " ", etc.)
(Press
Press
Exit
To select the ":¥" character
(circular) or Press * and # to view other pages..
Page 37/102
Page 38

CONFIDENTIAL Mitsubishi Electric
Chicken stock has been
unblocked. Note that if A
Alphanumeric entry screen:
the = symbol has been added to the text at cursor position
:¥|
Ok Clear
F
F Note: The order of characters displayed here in the special characters pages is only an example and
FF
may be different in the final product.
Page 38/102
.
Page 39

CONFIDENTIAL Mitsubishi Electric
4.12 DIALLING ENTRY
This entry mode is entered when dialling a phone number from the Idle screen. The number is displayed rightjustified. The number is displayed in double-height digits if it can fit on one LCD line, otherwise normal height
characters are used.
Dialling screen:
Use 0 to 9 , * and # for entry
Clear softkey to erase last char.
+44712251637|
Store Clear
Press
Long press
Store allows to store the number in memories
The entry is displayed in double height characters if the number can fit on a line, otherwise
normal size characters are used.
Press
A press on
Direction keys have no usage related to the entry.
A telephone number (including « P » symbols) can be up to 46 digits in length and one "+" for
international Dialling. Digits after the maximum number of digits will not be accepted
Long press on
An "
reached, an " AUDIO_KEY_ERROR_TONE" toneis played and the entry remains unchanged.
Clear softkey to return to Idle.
SEND key to send the call.
END terminates previously connected calls if any or returns directly to Idle
* gives access to *, +, P (pause).
AUDIO_DIGIT_KEY_TONE" is played for each key press. When the maximum entry size is
Page 39/102
.
Page 40

CONFIDENTIAL Mitsubishi Electric
4.13 "NUMBER CORRECTION BEFORE DIALLING" ENTRY
This kind of editor is entered when a number containing wild characters is called from the memories. Before
calling, the number has to be completed by the user at calling time.
Number correction screen:
Press Clear softkey to erase the last entered character.
+447|_2251__
Ok Clear
Long press Clear softkey to erase all entered characters
Ok validates the entry and sends the number.
Wild characters are indicated by _.
The entry is displayed in double height characters if the number can fit on one line; otherwise
normal size characters are used.
Press
SEND key to send the call (This is allowed only if no wild characters remain).
A press on
key allows navigating through the wild characters, in a circular way.
New characters can be added after the rightmost one (Use
END terminates previously connected calls if any or returns directly to Idle.
0 to 9, * and # are allowed).
4.14 PHONE NUMBER ENTRY
This mode is entered when a phone number is required to continue the current process.
Phone number:
+44712251637|
Ok Clear
Phone number entry screen:
Press Clear softkey to erase last char.
Long press
When allowed, press
Press Ok to validate the entry and return to the parent process.
A press on
Press on
presses allow a circular navigation in the number.
A telephone number (including « P » symbols) can be up to 46 digits in length and one "+" for
international Dialling. Digits after the maximum number of digits will not be accepted
Long press on
The initial entry can be empty or a previously entered or selected number.
On empty entry,
Clear softkey to clear the whole entry.
SEND to call the number. In some circumstances, SEND has no effect
END terminates previously connected calls if any or returns to Idle
to navigate in the number. A long press goes to the end of the number, short
* gives access to *, +, P (pause), _(wild character) characters.
Clear softkey is renamed Exit and allows to leave the current process
- the
Ok softkey is replaced by a Names softkey (depending on the context),
- the
allowing an access to phone books
Page 40/102
.
Page 41

CONFIDENTIAL Mitsubishi Electric
4.15 PASSWORD ENTRY
4.15.1 SCREEN EXAMPLE
Enter PIN:
Password entry screen:
****|
Ok Clear
4.15.2 KEY USAGE
Normal press Long press
0 1 2..9 # 0 1 2..9 #
0 1 2..9 Entry
Ok
softkey
Entry
validation
Exit
softkey
Exit to
parent menu
/ process
Clear
softkey
Clear last
digit
SEND key
Emergency
call / Error
validation
0 1 2..9 Entry
Ok
softkey
- Exit to Idle Erases
Exit
softkey
Clear
softkey
whole entry
validation
4.15.3 DESCRIPTION
The password entry mode is activated when entering passwords: Phone lock, PIN, PIN2, PUK; PUK2, Call
barring password.
The entry is displayed left justified. A vertical line cursor indicates the entry point. No initial entry is possible.
"*" are echoed when entering digits.
Depending on the circumstance s, the right so ftkey may have an
Exit label on empty entry, allowing leaving the
process, otherwise the softkey has no label associated with.
The left softkey becomes
As the
# key has to be allowed for the PIN validation, it is also allo wed for all passwords validatio n in addition
Ok softkey.
to the
Ok only when the minimum password length has been reached.
During the mobile initialisation phase, the user must be able to start an emergency call set-up even at password
entry. As a consequence if the user validates a SOS phone number followed by
SEND , a SOS call is initiated.
When the call is ended, the password editor will be reached back with an empty entry.
4.16 DIALLING IN MENUS
Dialling in the main menu structure is possible at any moment except:
• In terminal operations menus, that require an answer for a precise operation,
• In the options menus.
Due to
When dialling in menus is performed, the current menu position is lost and dialling is made as for a normal
dialling from the Idle screen.
* and # keys usage for menu scrolling, the dialled number cannot starts with one of these two characters.
Page 41/102
.
Page 42

CONFIDENTIAL Mitsubishi Electric
5. MAKING AND RECEIVING CALLS
5.1 MAKING A SINGLE CALL
Sending a call is one of the most important functions of a phone. Sending a call can be realised using the
fol lowing ways:
• Once in Idle display, enter a phone number followed by a press on the SEND key,
• Scan through the phonebook., accessed via the Names softkey, scrolling in the list using the or * , #
keys and pressing SEND to call the current card number,
• Scan through memories, accessed by the Menu softkey, "Memory/Recall" item and doing the same
actions as above,
• Calling a number from the last numbers dialled list, accessed by a press on the SEND key while no call,
scrolling thro ugh the list using the
• Calling a number from the "Received" and "Unanswered" calls list, via the Menu softkey, fol lowed by "
Memory/Call Register" item selection and selecting the corresponding list. Once on the list, doing the
same actions as for the "Last dialled numbers" list,
or *, # keys and pressing SEND to recall the current card number,
• Calling a number included in a received SMS during SMS inbox consultation (see this section for details),
• Calling a number included in a CB message,
• Calling a number stored in the memo, by an access to the Scratchpad (see corresponding section),
• Calling a number from the network operator SDN or Information numbers lists,
• Calling the voicemail, the "InfoConso" service, etc.
The following paragraphs describe only the first case.
Page 42/102
.
Page 43

CONFIDENTIAL Mitsubishi Electric
5.1.1 MAKING A CALL FROM THE IDLE SCREEN
5.1.1.1 DIALLING A NUMBER
"Idle screen"
Names Menu
"+44712251637"
+44712251637
Store Clear
SEND
Idle screen:
Use the numeric keys 0 to 9, * and # to enter the desired telephone number.
International calls can be made using the local international access code or by using the
By a long press on the key, the "+" symbol will be displayed; this shall be followed by the country
code and the subscriber number
During a telephone number input the
the telephone number sequence. When the
inserted.
Dialling screen:
Clear allows to erase the last character
Store allows to store the number in memories
The entry is displayed in double height characters if the number can hold on a line.
Sends the call
A telephone number (including « P » symbols) can be up to 46 digits in length and one "+" for
international Dialling. Digits after the maximum number of digits will not be accepted
* key also can be used to enter « Pause » characters in
* key is held down, the « P » symbol will be
* key.
John
✆ →
✆✆✆✆
L2
John
✆ →
✆✆✆✆
L2
"John answers"
L2
✆✆✆✆
Names Menu
John
00:00:10
Calling screen:
An animation shows the progress of the call
The "Off-hookl." icon is switched on
END to terminate the call
Press
The dialled number is compared with the numbers stored in all memories. If a match is found,
the corresponding name is displayed instead of the phone number.
No line is indicated, so the call is set-up from the line 1, otherwise the line 2 is indicated
Calling screen:
John is alerted
The ringing tone is heard in the ear-piece. When the call is connected, the connected call screen
(with the call timer) is displayed.
Connected call screen:
John is connected
The micro is switched on automatically.
5.1.1.2 LIST OF INTERNATIONAL COUNTRY CODES FOR DIALLING
If the international prefix "+" is dialled as first character, the user is proposed an access to a list of international
country codes, allowing a more reliable entry mode. Example:
L2
.
Idle screen:
Page 43/102
Page 44

CONFIDENTIAL Mitsubishi Electric
"Idle screen"
Names Menu
"*"long press
Codes Clear
Codes
Starting composing a new phone number with a "+" as first digit
Dialling screen:
Clear allows to erase the last character
Codes allows to consult a list of international country codes
+
The entry is displayed in double height characters if the number can hold on a line.
Consult the list of codes
England
France
Germany
Italy
Select Exit
***Select
List of country codes:
Fast access is allowed using the keypad: 2 starts in the countries from A, or B (after two
presses) or C after 3 presses, 3 starts with country with a D, etc..
A subset of 32 countries is proposed.
Selects Italy
Dialling screen:
The code for Italy has been appended to the entry.
+39
Store Clear
The list of countries includes the following countries:
Algeria Germany Argentina Australia Austria
Belgium Brazil Canada Denmark Spain
United States Finland Greece Hong-Kong Iran
Ireland Israel Italy Japan Lebanon
Luxembourg Morocco Mexico Norway New Zealand
Netherlands Portugal United Kingdom Singapore Sweden
Switzerland Tunisia France Russia Estonia
Latvia Lithuania China
.
Page 44/102
Page 45

CONFIDENTIAL Mitsubishi Electric
5.2 SENDING DTMF TONES DURING OUTGOING CALL
Sending DTMF tones is possible during the outgoing call state. In this case, presses on 0 to 9, * and # keys
results in sending DTMF tones to the remote user. No display is done for such entries. The DTMF tone
corresponding to the key pressed is played in the ear-piece as feedback.
5.1.2 ERROR CASES
In each case of error, a warning tone signals the problem and at the same time, an information screen is displayed
during 3 seconds. A press on any softkey allows exiting the screen.
5.1.2.1 ERRORS DUE TO LOCAL PROBLEMS
The phone may reject the call in the following cases:
♦ When the call is refused due to fixed dialling mode (Error message "Fixed Dialling only"),
♦ Two calls are already connected: a third one cannot be set-up (Error message "Not allowed"),
♦ T he SIM has a limited amount of charge and the limit is already reached, so the new call cannot be
set-up (Error message "Max cost reached"),
♦ The phone number structure is unrecognised or is incorrect (Error message "Entry Error"),
In these cases, an information screen is displayed immediately, indicating the reason of the problem and the
display returns to Idle screen or Call connected screen, as appropriate. An example of such a screen is displayed
below.
Error screen:
Fixed dialling only
Exit
Page 45/102
.
Page 46

CONFIDENTIAL Mitsubishi Electric
5.1.2.2 ERRORS DUE TO REMOTE PARTY PROBLEMS
♦ User busy (Error message "User busy"),
♦ No response ("No response"),
♦ Incoming calls barred (Error message "Call barred"),
♦ User unreachable (Error message "Call failed"),
♦ The remote party has changed of number (Error message " Number changed "),
♦ Other cases (Error message "Call failed").
Depending on the reason, the auto-retry is activated or not and if the Setting is on. In these cases of errors,
supervisory tones are played to signal the problem to the user.
Example:
Error screen:
User busy
Exit
5.1.3 THE AUTORETRY FEATURE
If the auto-retry is activated, the following screen is displayed after the error message display.
Retrying
Calling
John
Names Menu
The auto-retry is possible only in no calls situations.
A press on any key clears the auto-retry screen. In this case, the recall number is definitively stopped. The display
goes to the relevant state that caused the auto-retry stop. If the auto-retry is not stopped, the call is tried again
using the same parameters as for the first time.
Each time a call is tried, a warning tone indicates the calling process activation. The calling process is executed
as for a normal call. If the call fails, the return to auto-retry is automatic and a new attempt will be tried after a
defined duration.
The number of attempts depends on the cause of the failure. For example, if the called party was busy, 10
attempts will be made. If the call set-up fails after the allowed number of attempts is reached, the auto-retry
screen is erased and the display returns to the Idle screen content.
If the retry attempt succeeds, it will proceed like a normal call and the auto-retry feature is deactivated.
Auto-retry screen:
The auto-retry name blinks when in this state
The process is cancelled by a press on any key.
Page 46/102
.
Page 47

CONFIDENTIAL Mitsubishi Electric
5.2 RECEIVING A CALL
This paragraph relates the display and actions when receiving a call in Idle state only.
5.2.1 RECEIVING A CALL: DISPLAY
Incoming call screen:
John
L2 No ring
-A phone ringing animation is displayed
-The ringing tone is played according to the phone Setting (ring tone or Names, ring volume,
ramping option)
The line used for the call is given in the screen.
The right softkey allows to stop the ring. Once stopped, the sk label is suppressed
The line which has been call, in case of such a feature (ALS)
The backlight is switch on in a steady mode (if ring is active) or flashes (if no ring),
The LED flashes green.
Depending on information availability, the calling user identity can be displayed in the following
forms:
- "Call", if the calling party number is not available,
- "Withheld", if the number has been hidden by the calling user, via the CLIR service,
- "Number", if the number is provided and not found in memories,
- "Name", if the number can be matched with one of the memories cards.
5.2.2 RECEIVING A CALL: ACCEPT
In the case of an incoming call, the different possible actions are as follows.
5.2.2.1 ACCEPT THE CALL
Incoming call screen:
John
L2 No Ring
SEND
L2
✆✆✆✆
Names Menu
John
00:00:10
Accepts the call
The incoming call identification is added to the "Received calls list " automatically, with the
following information, when available: caller phone number or name (if found in Phonebooks).
Connected call screen:
See description in next section
Page 47/102
.
Page 48

CONFIDENTIAL Mitsubishi Electric
5.2.3 RECEIVING A CALL: REJECT (BUSY)
Incoming call screen:
John
L2 No Ring
END
"Mobile state before call"
Rejects the call
The call is then rejected with a busy cause, sent to the calling user.
The call identification information are added to the " Received calls list " with the calling party
phone number (if available) or name (if the phone number has been found in memories).
Idle screen:
5.2.4 SENDING DTMF TONES ON CALL RECEPTION
Sending DTMF tones is possible during the incoming call state. In this case, presses on 0 to 9, * and # ke ys
results in sending DTMF tones to the calling user. the corresponding digits are echoed on the screen at the same
time. As feedback, for each key, the corresponding DTMF tone is played when pressing on the key.
Page 48/102
.
Page 49

CONFIDENTIAL Mitsubishi Electric
5.2.5 ADDITIONAL MESSAGES RECEIVED DURING INCOMING CALL STATE
During these states, additional messages can be received, depending on network capacities and depending on
network services activation. Such messages include:
• Call is a diverted one (the call was for another user and is diverted to you),
• Call divert is active (the network informs you the call diverting service is active),
• Call is transferred (the call is a call that the calling user transfers to you).
These information are displayed in an information screen displayed briefly while the call is waiting/ringing. Such
a screen is given here:
Incoming call screen:
The line used for the call is given in the screen.
The right softkey allows to stop the ring.
Incoming call screen:
If the call is a diverted one or r is a transfered one, the incoming call screen displays also
information about this.
The display switches between all these information with the same global screen structure
Press on SEND or END to manage the call as normal
Accepts the call
The incoming call identification is added to the "Received calls list " automatically, with the
following information, when available: caller phone number or name (if found in Phonebooks).
In the case of a waiting call, softkeys are used as normal instead of
SEND and END keys for
call management.
In case of several information displayed in the incoming call screen, the switch timing is 2
seconds.
SEND
John
No Ring
L2
Diverted call
No Ring
L2
L2
✆✆✆✆
John
00:00:10
Names Menu
Connected call screen:
See description in next section
Page 49/102
.
Page 50

CONFIDENTIAL Mitsubishi Electric
5.3 DURING THE SINGLE CALL
5.3.1 ONE CALL: DISPLAY
L2
✆✆✆✆
Names Menu
John
00:00:10
Connected call screen:
The call duration indicates the hours, minutes and seconds and is updated in real time. If the
costs are computed and the Credit limit value is not 0 on the SIM card, the remaining cost is
displayed instead of the call duration.
the remote user phone number or corresponding name (if found in memories) is displayed,
A graphic drawing shows the current status of the call (active or held)
The Off-hook icon is displayed steady
Names to access to the quick ADN,
Press
Menu softkey to access the general menu
Press
SEND to hold/retrieve the call,
Press
Long press
Press
Press
The status bar gives all information related to the call : line in use, EFR, micro muted, RSSI and
battery level.
down to mute/unmute the micro
Actions to access the options menu (call contextual menu)
to adjust the audio volume.
5.3.1.1 ICONS IN SUCH STATE
While in a call, the icon bar can display any of the following icons:
L2 Line 2 in use (for DCS only). When using line 1, no indication is displayed
Home zone indicator
Micro is muted
<TBD> High Quality Sound
<TBD> Call is not enciphered (This icon is managed on operator request only)
Page 50/102
.
Page 51

CONFIDENTIAL Mitsubishi Electric
5.3.2 ONE CALL: DIRECT ACTIONS
5.3.2.1 SPEECH VOLUME ADJUSTMENT
L2
✆✆✆✆
Names Menu
Vol- Vol+
An other way to tune the volume is to use the left softkey (volume decrease) or right softkey (volume increase). An
"AUDIO_VOLUME_KEY_ERROR_TONE is played when overstepping the bounds).
John
00:00:10
Speech Volume
Connected call screen:
Press adjust the audio volume.
A bar graph is displayed during tuning and the audio level is modified accordingly.
Special tones indicate that the minimum or maximum level has been reached.
8 levels are foreseen for audio adjustment.
Access to speech volume control
Ring volume control screen:
Continuous presses on key allow an continuous audio level increase or decrease operation
(In a circular way). The conversation volume is played as tuning feedback
The function is exited when no actions on keys after 2 seconds or by a press on any key.
Increase the volume control value.
The volume is immediately modified and no validation is needed to confirm the modification.
Ring volume control screen:
Speech Volume
Vol- Vol+
"Timer" Leave the process
L2
✆✆✆✆
Names Menu
John
00:00:10
Connected call screen:
5.3.2.2 SENDING DTMF TONES
If the connected call is active, entering 0 .. 9 , * , # sends DTMF tones to the remote party. At the same time,
digits are displayed on the screen as for a dialling screen. The DTMF tone feedback corresponding to the key
pressed is played at the same time, as long as the key is pressed.
5.3.2.3 MAKING A NEW CALL
The same means used to make a new call from the idle screen can be used to make a new call while in a
conversation. The current connected call is put on hold automatically and the new call becomes active when
connected. After the new call connection, the display is a "two connected calls" one. See details below for this
display. The feature with the international country codes access is also available.
5.3.2.4 END THE CALL
See next section
.
Page 51/102
Page 52

CONFIDENTIAL Mitsubishi Electric
5.3.2.5 HOLD AND RETRIEVE OPERATIONS
L2
✆✆✆✆
Names Menu
SEND
Requesting..
Call on hold
John
00:00:10
Connected call screen:
The micro is muted.
SEND to hold the active call.
Press
Holds the call
Transition screen:
the screen is displayed only if the operation duration exceeds 1 second.
Information screen:
Display during 2 seconds
Exit
L2
[
✆✆✆✆
]
[
✆✆✆✆
]
[
✆✆✆✆
]
Names Menu
SEND
Requesting..
Call active
John
00:00:12
Exit
Connected call screen:
Press SEND to retrieve the held call
Retrieves the call
Transition screen:
the screen is displayed only if the operation duration exceeds 1 second.
Information screen:
Display during 2 seconds
L2
✆✆✆✆
Names Menu
.
John
00:00:23
Connected call screen:
Retrieving a call unmutes the micro automatically
Page 52/102
Page 53

CONFIDENTIAL Mitsubishi Electric
5.3.2.6 MUTING AND UNMUTING THE MICROPHONE
L2
✆✆✆✆
Names Menu
Mute
John
00:00:10
Connected call screen:
Long Press key to directly unmute the microphone.
Mute the micro
L2
✆✆✆✆
Names Menu
Long press
L2
✆✆✆✆
Names Menu
John
00:00:10
John
00:00:10
Connected call screen:
The micro is muted.
Long Press
Unmutes the micro
F
F Note: the micro is automatically unmuted when the call is retrieved (i.e. during swap
FF
operations). This allows to talk with no additional action as soon as the retrieve operation is
terminated.
Connected call screen:
The micro is active again.
key to directly unmute the microphone.
5.3.2.7 MENU AND NAMES ACCESS
Press Names to access to the quick ADN, press on Menu to access to the Main Menu. The same operations as
normal accesses to these services are allowed. The connected call remains connected during menu and names
operations.
If you were in the menus or editing a SMS at the time of incoming call connection, the menu context is preserved
as long as no menu access is made during the call. In this situation, during the call, a press on
to the menu root and the current operation context is lost. Nevertheless, if a SMS was being written at the time of
call, the SMS text is saved (in RAM memory only) and a new SMS composition access will display the saved
text as initial entry.
Menu gives access
Note: A press on END during these operations will terminate all (active or held) connected call ( END can
be used to exit the menus when no call is connected only). So, in this situation, use the Exit softkey to exit the
menus or memories).
Page 53/102
.
Page 54

CONFIDENTIAL Mitsubishi Electric
5.3.3 ONE CALL: "OPTIONS" MENU
Press Actions key to access to call related operations menu:
Item Function
AutoDTMF To enter a DTMF string and send it, available only if the call is active:
- This item allows you to enter a DTMF string and send it to the remote party,
- The string can be entered directly or can be selected from the memories,
- A waiting screen is displayed during the DTMF transmission.
Hold | Retrieve
Mute | Unmute To Mute or unmute the micro (same actions as a press on the key)
End call
To hold the active call or retrieve the held call (Same actions as a press on
The item is Hold is the connected call is active, Retrieve otherwise.
The item is Mute if the micro is active, Unmute otherwise.
An icon in the icon bar indicates the
Allows to end the call (Same actions as a press on the
END key, see next section).
SEND key)
5.3.4 THE AUTO-DTMF FEATURE
Another way to send DTMF tones is via the options menu, using the Auto-dtmf item. This item opens a p hone
number editor where the user can enter a GSM string. Pressing SEND sends the DTMF string, as described
below.
The user can get a DTMF string from the memories ( Names
softkey).
(Store
L2
✆✆✆✆
Names Menu
Actions
John
00:00:10
Connected call screen:
Options menu access
softkey) or can store a new one before sending it
Auto DTMF
Hold
Mute
End call
Select Exit
Select
DTMF codes:
Names Exit
12345678901234456*56
#
DTMF codes:
.
Options menu:
Selects Auto-dtmf item
DTMF string entry:
Names = access to phone book in order to select a dtmf string
|
DTMF string entry
DTMF string entry:
Store = the string can be stored in phone books as a normal phone number
Page 54/102
Page 55

CONFIDENTIAL Mitsubishi Electric
1
2345678901234456*56#|
Store Clear
Send
Sends the DTMF string
Page 55/102
.
Page 56

CONFIDENTIAL Mitsubishi Electric
Transition screen:
Sending DTMF...
The string is being transmitted
L2
✆✆✆✆
Names Menu
John
00:00:34
Connected call screen:
5.3.5 ONE CALL: RECEIVING NOTIFICATIONS MESSAGES
Notification messages can be received while connected. For example:
• You are joined to a conference call,
• You are split from a conference call,
• The other party has put you on hold,
• The other party has retrieved the conversation,
• The call has been transferred to another party,
• Etc.
Example::
L2
✆✆✆✆
Names Menu
John
00:00:10
Connected call screen:
Call joined
to a
conference
"Right softkey" Exits the screen
L2
✆✆✆✆
Names Menu
.
John
00:00:10
Information screen:
A warning beep is played at the same time.
Exit by any softkey
Exit
Connected call screen:
Page 56/102
Page 57

CONFIDENTIAL Mitsubishi Electric
5.3.6 ONE CALL: COST CONTROL OPERATIONS
During the call, and if the network provides the service, the call cost is calculated in real time, based on network
information. Files on the SIM stores also values related to the cost management (ACMMax file, ACM file). If the
ACMMax value is set to a non-zero value, the call is terminated when the ACM reaches the ACMMax value. In
this situation, when the ACM reaches the ACMMax, an "
order to inform the user.
AUDIO_AOC_TONE" tone is played in the ear-piece in
5.3.7 ONE CALL: RECEIVING A NEW CALL
Such a situation is called "Call waiting" and is submitted to your network subscription.
If you have not subscribed to the service, this situation cannot occur and the network rejects new incoming calls
directly with a "busy" cause.
5.3.7.1 ONE CALL + WAITING: DISPLAY
Waiting call screen:
-An animation with a phone ringing is displayed (waiting call animation)
The "
AUDIO_CALL_WAITING_TONE" is played
–The caller identity is managed as for an incoming call
-The line which has been call, in case of such a feature (ALS), if line 2, is indicated
-The backlight is switch on in a steady mode (if ring is active) or flashes (if no ring),
-The LED flashes green.
-The "Off-hook" icon is displayed indicating a call already established
Press
Repl. to replace the current call
Rej . to reject the waiting call.
Press
SEND to accept the waiting call (the current one is automatically put on hold if
Press
necessary)
Repl.
✆
L2 Reject
John
Waiting call screen:
As for an incoming call, information about the waiting call can be displayed during the incoming
call state.
The keypad keys and softkeys roles remain the same as for a waiting call.
Repl.
Diverted call
✆
L2 Rej.
5.3.7.2 ONE CALL + WAITING: ACCEPT THE WAITING CALL
Waiting call screen:
John
Repl.
SEND
Names Menu
✆
L2 Rej.
L2
✆✆✆✆
John
Albert
Accepts the waiting call
If active, the connected call is put on hold automatically.
Two calls screen:
Albert has been put on hold.
Page 57/102
.
Page 58

CONFIDENTIAL Mitsubishi Electric
5.3.7.3 ONE CALL + WAITING: END THE CONNECTED CALL
Waiting call screen:
John
Repl.
END
"Right softkey"
✆
L2 Rej.
✆ ⁄⁄ ✆
Albert
00:03:12
John
✆
L2 No Ring
Ends the connected call
Call Ended screen:
3 seconds display
Press any softkey to clear the screen
Exit
The clear the screen
Incoming call screen:
the display, the ring tone and backlight are changed accordingly.
5.3.7.4 ONE CALL + WAITING: REPLACE THE CONNECTED CALL BY THE WAITING ONE
Waiting call screen:
John
Repl.
Repl.
"Right softkey"
Names Menu
✆
L2 Reject
✆ ⁄⁄ ✆
Albert
00:03:12
L2
✆✆✆✆
John
00:00:10
Exit
To replace the call. The sequence 1 SEND has the same effect
Call Ended screen:
3 seconds display
Press any softkey to clear the screen
To erase the screen
Connected active call screen:
Conversation with John
Page 58/102
.
Page 59

CONFIDENTIAL Mitsubishi Electric
5.3.7.5 ONE CALL + WAITING: REJECT THE WAITING CALL
Waiting call screen:
John
Repl.
Rej
Names Menu
✆
L2 Rej.
L2
✆✆✆✆
Albert
00:03:12
To reject the call
The call identification information is added to the "Received calls" list.
The calling party will receive a "busy" cause to his call and may make new call attempts.
Connected active call screen:
Conversation with Albert continues
5.3.8 ONE CALL: MAKING A TRANSFER WHEN MAKING A NEW CALL
While making a new call, you can make a transfer between the call already connected and the new one being
called. The transfer operation is made using the Transfer softkey when displayed (The transfer is only possible
when the new called user is being alerted.
5.3.8.1 TRANSFER (NORMAL CASE)
The operations are as follows:
L2
✆✆✆✆
René
12:00:45
Connected call screen:
Names Menu
"+44712251637"
+44712251637
Store Clear
SEND
✆ → ☎
John
L2 End
✆ → ((☎ ))
John
Transfer L2 End
Transfer
Making a new call
Dialling screen:
Clear allows to erase the last character
Store allows to store the number in memories
The entry is displayed in double height characters if the number can hold on a line.
Sends the call
Calling screen:
An animation shows the progress of the call
END key or softkey to cancel the new call..
Press
Calling screen:
John is alerted.
Transfer softkey is displayed allowing a transfer between the two calls.
The
The ringing tone is heard in the ear-piece. When the call is connected, the connected call screen
(with the call timer) is displayed.
Page 59/102
.
Page 60

CONFIDENTIAL Mitsubishi Electric
Transition screen
Please wait…
Cancel
"Transfer completed"
Transfer complete
Exit
The transfer is being completed between René and John.
Information screen
The transfer is complete between René and John.
Exit
✆ // ✆
René
12:30:33
"Right softkey"
L2
"Idle screen"
Names Menu
Call Ended screen:
Call with René is ended
Exit
To exit the display
Idle screen:
5.3.8.2 TRANSFER (FAILED)
In case of unsuccessful outcome, an information message is displayed with the error message "Failed" and we
return to the state before the transfer (the outgoing call remaining alerted) or connected (if the new called user
has answered to the call). Depending on the network load of traffic, the calls being transferred may be kept or
lost.
5.4 CALL TERMINATION
5.4.1 ENDING A SINGLE CALL
L2
✆✆✆✆
Names Menu
END
"Right softkey"
.
Albert
00:03:12
✆ // ✆
Albert
00:03:14
Exit
Connected active call screen:
To terminate all calls
Call Ended screen:
If the call cost has been computed and a cost limit is defined, the call cost is displayed instead of
the call duration, otherwise the call duration is displayed only.
To exit the display
Page 60/102
Page 61

CONFIDENTIAL Mitsubishi Electric
"Idle screen" or
"Mobile state before call"
Idle screen or other state:
See paragraph on context management for precise behaviour.
5.4.2 END OF THE CALL BY THE REMOTE PARTY
The same behaviour as above applies.
Page 61/102
.
Page 62

CONFIDENTIAL Mitsubishi Electric
5.5 TWO CALLS MANAGEMENT
This situation occurs when :
• You make a new call while already engaged in a conversation,
• You answer to a waiting call.
5.5.1 TWO CALLS: DISPLAY
L2
✆✆✆✆
✆
✆
✆
Names Menu
Albert
John
Two calls screen:
On top, A status bar indicates the RSSI and battery level, the use of line 2, EFR, etc.
- The names/Number or labels Call 1/Call 2 of the two remote parties are displayed,
- Drawing/Icons indicate the current call state for each call
Press
SEND to swap between the two calls
Press Names to access the quick ADN
Menu softkey to access the general menu
Press
Long press
Press
If a name is known, it is displayed to identify the call or the label Call i is displayed according to
the call numbering order (starting from 1).
The status bar gives all information related to the call : line in use, EFR, micro muted, RSSI and
battery level, not enciphered call (operator specific), etc..
down to mute/unmute the micro
Volume to adjust the audio volume.
5.5.2 TWO CALLS: DIRECT OPERATIONS
5.5.2.1 LIMITATIONS
F
FNote: You cannot make new calls in this situation.
FF
Page 62/102
.
Page 63

CONFIDENTIAL Mitsubishi Electric
5.5.2.2 SWAP OPERATIONS
✆✆✆✆
✆
✆
✆
Albert
John
Names Menu
SEND
Requesting…
"Network answer"
Swapped
Exit
"Timer"
L2
✆✆✆✆
✆
✆
✆
John
Albert
Names Menu
Two calls screen:
The call with Albert is connected, the call with John is on hold
SEND to swap the two calls.
Press
Transition screen:
Displayed only if the operation duration exceeds 1 second.
Confirmation screen:
The operation result is given
One second display, exit by any softkey.
Two calls screen:
Now the call with John is connected, the call with Albert is on hold
The line may change, according to the line used by the call with Albert.
If the micro was muted, it is automatically unmuted.
Page 63/102
.
Page 64

CONFIDENTIAL Mitsubishi Electric
5.5.2.3 MAKING A CONFERENCE CALL
Press 3 SEND to make a conference call. The two remote parties and you can hear each other. The
conference call is active automatically and the microphone automatically unmuted. A conference call can also be
realised by the options menu Join item.
The display is changed to the one of a conference call. See conference calls management for details.
F
FNote: a conference call cannot be created from calls connected to different DCS lines. The network will reject
FF
a "Join" request in this situation.
L2
✆✆✆✆
✆
✆
✆
John
Albert
Names Menu
3 SEND
Requesting…
"Network answer"
Joined
Exit
"Timer"
L2
✆..✆
Conference
2 users
Two calls screen:
Now the call with John is connected, the call with Albert is on hold
The line may change, according to the line used by the call with Albert.
If the micro was muted, it is automatically unmuted.
Transition screen:
Displayed only if the operation duration exceeds 1 second.
Confirmation screen:
The operation result is given
One second display, exit by any softkey.
Conference call screen:
The two calls are joined now.
Names Menu
.
Page 64/102
Page 65

CONFIDENTIAL Mitsubishi Electric
5.5.3 TWO CALLS: "OPTIONS" MENU
Press Actions to access to call related operations menu:
Item Function
AutoDtmf
Swap
Join
Transfer
Mute |Unmute
End held
End active
To enter a DTMF string and send it, available only if the call is active:
- This item allows you to enter a DTMF string and send it to the remote party,
- The string can be entered directly or can be selected from the memories,
- A waiting screen is displayed during the DTMF transmission,
- The DTMF string is sent to the current active call remote party
To swap the calls (Same action as a press on the
SEND key
To make a conference call. The active and held calls are joined together. Each party can then hear
all other parties. See conference calls management for details.
See below for a screens sequence example.
Same actions as a press on
3 SEND
To make a transfer between the two connected calls. See description below.
Same actions as a press on
To Mute or unmute the micro (same actions as a long press on the
4 SEND
key)
To end the held connected call. A "Call Ended " screen is displayed during 3 seconds and can be
erased by a press on any softkey. After that, the display returns to the call connected state, related
to the call being active.
Same actions as a press on
0 SEND
To end the active connected call. A "Call Ended " screen is displayed during 3 seconds and can be
erased by a press on any softkey. After that, the display returns to the call connected state, related
to the call being held. The remaining call stays in held state.
Same actions as a press on
1 1 SEND or 1 2 SEND
When ending the active call, the held call is automatically retrieved (no need to make a manual
retrieve operation)
End all
Allows to end the connected call (Same actions as a press on the
END key).
Page 65/102
.
Page 66

CONFIDENTIAL Mitsubishi Electric
5.5.4 TWO CALLS: RECEIVING A NEW CALL
This situation is submitted to network capacities and subscription options.
Two Calls + Waiting: display
The display is the same as for a waiting call described above.
5.5.4.1 TWO CALLS + WAITING: DIRECT ACTIONS
You have the choice between:
• Either reject the waiting call (Press on Rej. softkey),
• Replace the current active call by the new one (Press on Repl . Softkey),
• Swap the two connected calls (Press on SEND key),
• End connected calls (Press on END key).
5.5.5 TWO CALLS: MAKING A TRANSFER
A transfer can be performed only between single connected calls. The transfer is initiated by the following
means:
Either by the SS string
Or by the actions menu Transfer item.
While making a new call, you can make a transfer between the call already connected and the new one being
called. The transfer operation is made using the Transfer softkey when displayed (The transfer is only possible
when the new called user is being alerted.
4 SEND,
5.5.5.1 TRANSFER (NORMAL CASE)
The operations are as follows:
L2
✆✆✆✆
✆
Names Menu
4 SEND
Please wait…
"Transfer completed"
René
John
Cancel
Two calls screen:
Calls with René and John.
Making a transfer between the two calls
Transition screen
The transfer is being completed between René and John.
Transfer complete
Exit
.
Information screen
The transfer is complete between René and John.
Exit
Page 66/102
Page 67

CONFIDENTIAL Mitsubishi Electric
✆ // ✆
René
12:30:33
"Right softkey"
✆ // ✆
John
05:45:10
"Right softkey"
L2
"Idle screen"
Names Menu
Call Ended screen:
Call with René is ended
Exit
To exit the display
Call Ended screen:
Call with John is ended
Exit
To exit the display
Idle screen:
5.5.5.2 TRANSFER (FAILED)
In case of unsuccessful outcome, an information message is displayed with the error message "Failed".
Depending on the network, load of traffic we return to the two connected calls screen with no change or we loose
the two already connected calls.
Page 67/102
.
Page 68

CONFIDENTIAL Mitsubishi Electric
5.6 CONFERENCE CALLS MANAGEMENT
A conference call is initiated by a first Join operation between an active and a held call. The result is a conference
call with two remote participants.
F
FNote: the number of remote parties in a conference is limited to 5. Making a conference call is submitted to
FF
your subscription options and depends on network services capabilities.
5.6.1 CONFERENCE CALL: DISPLAY
L2
✆..✆
Names Menu
Conference
2 users
Conference call screen:
- A graphic drawing indicates the call situation
– The label Conference with the number of participants
– The "Off-hook" icon indicates that calls are connected
–Two softkeys (
- The icon status bar gives all information related to the call state (Line 2, EFR, call not
enciphered (operator specific), etc..)
Names and Menu) allow access to the quick ADN and main menu
5.6.2 CONFERENCE CALL: "OPTIONS" MENU
5.6.2.1 "OPTIONS" MENU CONTENT
Press Actions key to access to conference call related operations menu:
Item Function
AutoDtmf
Private with
To enter a DTMF string and send it, available only if the call is active:
- This item allows you to enter a DTMF string and send it to the remote party,
- The string can be entered directly or can be selected from the memories,
- A waiting screen is displayed during the DTMF transmission,
- The DTMF string is sent to all the remote parties
This item allows making a private conversation with one of the conference participants, putting all
other participants on hold. See description below.
The item is hidden if the conference is in held state.
Same actions as the sequence
2 x SEND
Hold | Retrieve
Mute | Unmute
End_X
End All
.
To put the conference call on hold or retrieve it.
The same behaviour as for a single call is applied to the conference call
Another way is to press
To Mute or unmute the micro (same actions as a long press on the
Allows ending a call with one of the participants. See description below.
Allows ending the conference call (Same actions as a press on the
SEND to hold or retrieve the conference.
key)
END key).
Page 68/102
Page 69

CONFIDENTIAL Mitsubishi Electric
5.6.2.2 MAKE A PRIVATE CONVERSATION
To make a private conversation with one of the participants, when the conference call is active, press 2 x
SEND to put all calls on hold except the call "x" which remains active. (x is in 1 .. 5 is the rank of the call to
be split from the conference). This can be also realised using the options menu as shown below:
L2
Conference call screen:
✆..✆
Conference
3 users
Names Menu
Opts
…..
Private with
…..
Select
✆
Exit
…Select
John
0299831111
Call 3
Select
✆
Exit
Select
Requesting..
Access to the options menu
Options menu:
Scroll down using or * key, up using # key.
Scroll in menu and Press
Select to select item
To select Private with item
List of participants screen:
Scroll down using or * key, up using # key.
Scroll in menu and Press
Select to select item
To select 0299831111 user
Transition screen:
The split operation is in progress
Split
✆
"Timer"
L2
✆✆✆✆
✆
✆
✆
.
.
✆
.
.
✆
.
.
✆
0299831111
Conference
Opts Mute
.
Confirmation screen:
The operation result is given
One second display, exit by any softkey.
Exit
Call + Conference screen:
The private conversation is now with 0299831234
The micro is automatically unmuted
The line is indicated, if line 2 and ALS service
Page 69/102
Page 70

CONFIDENTIAL Mitsubishi Electric
5.6.2.3 END A PARTICULAR CALL OF THE CONFERENCE
To end a particular conversation with one of the participants, when the conference call is active, press 1 x
SEND (x is in 1 .. 5 is the rank of the call to be ended).
This can be also realised using the options menu as shown below:
L2
Conference call screen:
✆..✆
Conference
3 users
Names Menu
Opts
…..
End_X
…..
Select
✆
Exit
…Select
John
0299831111
Bill
Select
✆
Exit
Select
✆ // ✆
John
00:03:12
L2 Exit
END
Options menu:
Scroll down using or * key, up using # key.
Scroll in menu and Press
Select to select item
List of participants screen:
Scroll down using or * key, up using # key.
Scroll in menu and Press
Select to select item
To terminate with John
Call Ended screen:
The call with John is ended
3 seconds display
To exit the display
L2
✆..✆
Conference
2 users
Names Menu
.
Conference call screen:
Two calls remain in conference
Page 70/102
Page 71

CONFIDENTIAL Mitsubishi Electric
6. MANAGING CALLS AND COSTS
6.1 PRESENTATION
This section describes all call-related facilities allowing a better control of the phone regarding calls:
• The Call Register allows to manage lists of numbers saved by the phone on particular events: Last
numbers dialled, Received calls and Unanswered calls lists,
• The call timers management allows to see the duration of calls and to reset the counters,
• The call costs management allows to see the costs of calls, reset the values and adjust the costs
parameters: ACM, ACMMax, PPU and currency name,
• The line selection allows selecting a line for next calls. This feature is shown only if the ALS service is
present on the SIM.
F
FInformation: See Annex A for the Call supervision menu structure.
FF
6.2 USING THE CALL REGISTER
6.2.1 LAST NUMBERS DIALLED LIST (LND)
6.2.1.1 LND LIST CONTENT
The list contains the 10 last numbers dialled. Particular options that have been used at call time (additional
strings, such as a CLIR option Setting by a GSM sequence, or the use of pause character and DTMF strings
joined to the number) are also stored in the list.
The last number dialled is displayed first. An identical number appears only one time in the list. This list is
common to all DCS lines and is saved in phone non-volatile memory only.
Each entry contains the following information:
• The dialled string,
• The date and time of the call,
• The call duration (if call was connected).
When displaying the list in a global view, each entry is displayed on one line with the following content:
• Either the called party phone number, if no match is found in phone books, or the called party name if a
match is found in phone books,
A list entry is displayed on one page with the following content:
• Either the called party phone number, if no match is found in phone books, or the called party name if a
match is found in phone books,
• The date and time of the call,
• The call duration (in case of connected call)
6.2.1.2 LND ACCESS
To access the list directly, press SEND while in Idle State. The other access is by the menu (Press Menu
softkey ), via the "Calls & Times/CallRegister/LastDial" folder.
Page 71/102
.
Page 72

CONFIDENTIAL Mitsubishi Electric
6.2.1.3 LND DISPLAY
The list is displayed in a line mode list, the most recent card being displayed first. While in the list:
• Press or * key to scroll down in the list (circular navigation),
• Press # key to scroll up in the list,
• The list is scrolled in a circular mode,
• Press SEND to call the current highlighted item.
• Press Exit softkey to exit from the list.
• Press Details softkey to view the card details,
• Press Actions key to access the options menu with the following items:
Item Function
Store To store the current entry phone number in memories
Delete To delete the current entry.
Delete All To delete all items
Call To call the current entry phone number
Details To view the details on the current highlighted item.
Page 72/102
.
Page 73

CONFIDENTIAL Mitsubishi Electric
6.2.1.4 LND EXAMPLES
6.2.1.4.1 Calling an entry
Calls log
Call timers
Call costs
Line
Select
Select
✆
Call supervision menu:
Exit
Validates the Calls log entry
Last Dial
Unanswered
Received
Select Exit
Select
Alfred
Thierry
0299831111
0299111111
Exit
Details
SEND
"Calling process
for Alfred"
Call Regsiters menu:
Validates the Last Dial entry
Last dial list:
Alfred has been the last number dialled
Calls Alfred
Calling screen:
Page 73/102
.
Page 74

CONFIDENTIAL Mitsubishi Electric
6.2.1.4.2 Deleting an entry from the list
Last Dial
Unanswered
Received
Select Exit
Select
Call Registers menu:
Validates the Last Dial entry
Alfred
Thierry
0299831111
0299111111
Details
Actions
Store
Delete
Delete All
Edit
Select Exit
Select
Deleted
"Timer" exits the information screen.
Last dial list:
Alfred has been the last number dialled
Exit
Call options menu
Options menu:
Scroll down using or * key, up using # key.
Scroll in menu and Press
Selects Delete item
information screen:
The entry has been deleted.
3 seconds display
Exit by any softkey
Exit
Select to select item
Thierry
0299831111
0299111111
René
Details
.
Last dial list:
Thierry is now the current item of the list
Exit
Page 74/102
Page 75

CONFIDENTIAL Mitsubishi Electric
6.2.1.4.3 Deleting all entries
♦ In this case, a binary choice procedure (Yes/No) is called before deleting all entries. A result screen
all entries deleted is displayed when the operation is completed.
6.2.1.4.4 Viewing entry details
Alfred
Thierry
0299831111
0299111111
Details
View
Last dial list:
Alfred has been the last number dialled
Exit
To view entry details
Alfred
0299831111
12/08 -13:45
00:30:23
Edit Exit
Details on last call to Alfred:
The name and phone number, the date and time are displayed.
Last
Dial
Exit
allows exiting the detailed view and returning to the global view on the same entry.
allows number modification before calling.
Edit
The screen displays the date, time end duration of the call if available.
Page 75/102
.
Page 76

CONFIDENTIAL Mitsubishi Electric
6.2.2 UNANSWERED CALLS LIST (UCL)
6.2.2.1 LIST CONTENT
This list contains the last 10 received, but unanswered, calls information.
An incoming call is considered as Unanswered if no action has been made on call arrival and the call has been
either terminated by the network or diverted to another number via the call diverting service.
This list is common to all DCS lines and is saved in phone non-volatile memory.
The most recent unanswered call is displayed first.
If unanswered calls are stored and the list has not been accessed, the "Unanswered calls" icon is displayed in the
Idle screen, on the left softkey. See Idle screen description for details.
The UCL list is stored in phone non-volatile memory only.
Each entry contains the following information:
• The calling party phone number, if available,
• An indication if the calling party number was withheld,
• The date and time of the call.
When displaying the list in a global view, each entry is displayed on one line with the following content:
• Either the calling party phone number, if no match is found in phone books, or the calling party name if a
match is found in phone books, or "Unknown", if the number is unavailab le, or "W ithhe ld" , if t he number
was withheld by the calling party.
A list entry is displayed on one page with the following content:
• Either the calling party phone number, if no match is found in phone books, or the calling party name if a
match is found in phone books, or "Unknown", if the number is unavailab le, or "W ithhe ld" , if t he number
was withheld by the calling party.
• The date and time of the call.
6.2.2.2 LIST ACCESS
6.2.2.2.1 Access via the menus
The normal way is by the menu via the Calls & Times / Call Register / Unanswered" folder.
When accessing the list from the menu, all the unanswered calls are listed.
6.2.2.2.2 Access to the new unanswered calls
When new unanswered calls are received, they are indicated by an icon in Idle screen, a textual information and
the left softkey is labelled Read in this case. In these conditions, the "Read" softkey gives only access to the new
unanswered calls. The icon and Idle related information are removed when accessing the list via the softkey or
via the menu.List usage
The same functions as the those used for the LND list management are available. For examples, see also LND list
examples.
Page 76/102
.
Page 77

CONFIDENTIAL Mitsubishi Electric
6.2.3 RECEIVED CALLS LIST (RCL)
6.2.3.1 LIST CONTENT
This list contains the last 10 received (answered or rejected), calls information.
An incoming/waiting call is a received one if it has been answered to or if it has been rejected.
This list is common to all DCS lines and is saved in phone non-volatile memory. The most recent received call is
displayed first. The same phone number appears only one time in the list. The RCL list is stored in phone nonvolatile memory only.
Each entry contains the following information:
• The calling party phone number, if available,
• An indication if the calling party number was withheld,
• The date and time of the call.
When displaying the list in a global view, each entry is displayed on one line with the following content:
• Either the calling party phone number, if no match is found in phone books, or the calling party name if a
match is found in phone books, or "Unknown", if the number is unavailab le, or "W ithhe ld" , if t he number
was withheld by the calling party.
A list entry is displayed on one page with the following content:
• Either the calling party phone number, if no match is found in phone books, or the calling party name if a
match is found in phone books, or "Unknown", if the number is unavailab le, or "W ithhe ld" , if t he number
was withheld by the calling party.
• The date and time of the call,
• The call duration, if connected.
6.2.3.2 LIST ACCESS
From the Idle screen, press on the Menu softkey to access the general menu. Then, using the navigation, select
the "Calls & Times/CallRegister/Received" folder.
6.2.3.3 LIST USAGE
The same functions as the LND list are available. See also LND list for examples.
Page 77/102
.
Page 78

CONFIDENTIAL Mitsubishi Electric
6.3 CALL TIMERS MANAGEMENT
Showing the call timers
6.3.1.1 PRESENTATION
Two views of presentation are provided: a global view and a detailed view. The global view is directly displayed
when entering the folder. The detailed view is entered during global view display, via the
For calls, connected or not, refer to Annex H table for call timers management.
6.3.1.2 ACCESS
Via the general menu in the " Calls & Times/Call Timers/Show" folder.
6.3.1.3 CALL TIMERS: GLOBAL VIEW
The "Calls & Times/Call Timers/Show" folder allows to display all call times information: Last call time, all call
times, and, if ALS service is active, all call times with line 1, all call times with line 2. For each display, the times
for incoming and outgoing calls are given.
Example:
Calls log
Call timers
Call costs
Line
Select
Select
✆
Call supervision menu:
Exit
Validates the Timers entry
Details softkey.
Show
Balance information
Reset
Select
Select
✆
Last Call
00:10:34
00:05:45
Call Timers menu:
Exit
Validates the Show entry
Show Timers:
Scroll down using or * key, up using # key.
☎
☎
Exit
Go to next screen
Page 78/102
.
Page 79

CONFIDENTIAL Mitsubishi Electric
Global:
All Calls
00:45:30
00:23:00
☎
☎
Details Exit
Global:
All Calls L1
00:30:30
00:10:00
☎
☎
Details Exit
Global:
All Calls L2
00:15:00
00:13:00
☎
☎
Details Exit
Show Timers:
Details allows to view all calls details
Go to next screen
Show Timers:
Details allows to view all calls details
(This screen is displayed only if two lines are managed (ALS))
Go to next screen
Show Timers:
Details allows to view all calls details
(This screen is displayed only if two lines are managed (ALS))
Go to next screen
Last Call
00:10:34
00:05:45
Exit
Show
Balance information
Reset
Select
✆
Show Timers:
No details for the last call
☎
☎
Exit
Exits
Call Timers menu:
Exit
Page 79/102
.
Page 80

CONFIDENTIAL Mitsubishi Electric
6.3.1.4 CALL TIMERS: DETAILED VIEW
This view is accessed via the left softkey (labelled Details) while in global view, when relevant. It gives access
to a global table which details all call information by category: Voice calls (Home, national roaming,
international roaming), If fax and/or data calls have been made, the same details are displayed).
Example:
Show
Balance information
Reset
Call Timers menu:
Select
Select
Last Call
All Calls
Details Exit
Details
My network
✆
00:10:34
00:05:45
00:45:30
00:23:00
00:30:00
00:10:00
Exit
☎
☎
Exit
☎
☎
☎
☎
Exit
Validates the Show entry
Show Timers:
Scroll down using or * key, up using # key.
Go to next screen
Show Timers:
Details allows to view all calls details
View details
Show Timers details:
Scroll down using or * key, up using # key.
Exit
exits to global view
View next screen
Nat Roam
00:30:00
00:10:00
.
Show Timers details:
☎
☎
Exit
View next screen
Page 80/102
Page 81

CONFIDENTIAL Mitsubishi Electric
Intl roam
00:05:30
00:03:00
☎
☎
Exit
My network
00:30:00
00:10:00
☎
☎
Exit
Exit
All Calls
00:45:30
00:23:00
☎
☎
Details Exit
Show Timers details:
View next screen
Show Timers details:
Exits to global view
Show Timers:
Go to next screen
All Calls L1
00:30:30
00:10:00
☎
☎
Details Exit
Etc.
Show Timers:
Displayed if (ALS) only.
Go to next screen
Page 81/102
.
Page 82

CONFIDENTIAL Mitsubishi Electric
6.3.2 USING THE BALANCE INFORMATION SERVICE
6.3.2.1 PRESENTATION
The "InfoConso" allows setting and calling the number provided by the network operator (To consult information
about charging). This information is saved in phone non-volatile memory.
6.3.2.2 ACCESS
The access is by the menu in the "Calls & Times/Call timers/Balance information." folder.
6.3.2.3 EXAMPLE: SETTING AND CALLING THE COST INFORMATION NUMBER
Show
Balance information
Reset
Call Timers menu:
Select
Select
Call
Set Number
Select Exit
Select
Right softkey
Number:
|
Names Exit
123456
✆
No Number
Exit
Exit
Validates the Balance Information entry
InfoConso menu:
Validates the Call entry
information:
Go to next screen
Number entry:
Phone number editor.
An access to the memories is possible using the
Number entry
Names softkey.
Page 82/102
.
Page 83

CONFIDENTIAL Mitsubishi Electric
Number:
123456|
Ok Clear
Ok
Stored
Right softkey
"Calling process"
Number entry:
Entry validation
Information screen:
Exit
Go to next screen
Calling process:
The calling process is started after storage because the menu option is entered to call the
service.
Page 83/102
.
Page 84

CONFIDENTIAL Mitsubishi Electric
6.3.3 RESETTING THE CALL TIMERS
6.3.3.1 PRESENTATION AND ACCESS
This allows to set all call timers to 0. The phone lock code entry is requested for this operation.
Access by the menu in the "Calls & Times/Timers/Reset" folder.
6.3.3.2 EXAMPLE
Show
Balance information
Reset
Call Timers menu:
Select
Select
Reset timers:
Yes
No
Select Exit
Select
Enter phone lock:
|
"1234"
Enter phone lock:
****|
Ok
✆
Ok Clear
Exit
Exit
Validates the Reset entry
Binary choice screen:
The positive answer is selected as initial answer.
Validates the Yes choice
Lock code entry:
Password editor.
The lock code is requested for resetting all timers
Lock code entry
Lock code entry:
Lock code validation
Timers
reset
Right softkey
Show
Balance information
Reset
Select
.
✆
information screen:
3 seconds display or exit by any softkey.
Exit
Go to next screen
Call Timers menu:
Exit
Page 84/102
Page 85

CONFIDENTIAL Mitsubishi Electric
6.4 CALL COSTS MANAGEMENT
6.4.1 SHOWING THE CALL COSTS
6.4.1.1 PRESENTATION AND ACCESS
This allows showing the call costs: last call cost, all call costs since last reset, remaining cost. The displayed
values are those stored on the SIM (for all calls cost) or temporarily in the mobile (for the last call cost if the
mobile has not been switched off since the last call). The costs are displayed in unit or currency, depending on
the cost display Setting.
Access by the menu in the "Calls & Times/Costs/Show" folder.
6.4.1.2 EXAMPLE
Calls log
Call timers
Call costs
Line
Select Exit
Select
Call supervision menu:
Selects the Costs entry
Show
Credit Limit
Reset
Display cost type
Select Exit
Select
Last Call cost
12,00 FFR
Exit
Call costs menu:
Selects the Show entry
Call costs sequence:
Scroll down using
Go to next screen
or * key, up using # key.
Page 85/102
.
Page 86

CONFIDENTIAL Mitsubishi Electric
All Calls costs
since last reset
120,35 FFR
Exit
Remaining credit
No limit
Exit
Last Call cost
12,00 FFR
Exit
Exit
Show
Credit Limit
Reset
Display cost type
Select Exit
Call costs sequence:
Go to next screen
Call costs sequence:
Go to next screen
Call costs sequence:
Exits
Call costs menu:
Page 86/102
.
Page 87

CONFIDENTIAL Mitsubishi Electric
6.4.2 MANAGING THE CREDIT LIMIT VALUE
6.4.2.1 PRESENTATION AND ACCESS
The user can set a cost limit value for his calls or set a no limit value. When the limit is reached, all connected
calls are terminated automatically and you cannot make any more calls. The credit limit change operation needs
to enter the PIN2 code.
Acess via the menu in the Calls & Times/Costs/Credit Limit.
6.4.2.2 CREDIT LIMITS AND CALLS
If the accumulated credit reaches the credit limit value, all chargeable calls are barred: this includes all outgoing
calls (except calls to emergency services) and all incoming calls, when charge is applied to such calls (this is
possible in international roaming). In this case, an error message is given for outgoing calls.
During a call, the phone advises the user when the accumulated charge becomes too near to the credit limit value
by an information screen coupled to an "
value or to inhibit any limit. Note that this requires the PIN2 code knowledge.
AUDIO_AOC_TONE" tone. This allows you to recharge the credit limit
Page 87/102
.
Page 88

CONFIDENTIAL Mitsubishi Electric
6.4.2.3 EXAMPLES
Credit limit: no limit defined
Show
Credit Limit
Reset
Display cost type
Select Exit
Select
Call costs menu:
Validates the Credit Limit entry
Credit Limit
No Limit
Edit Exit
Edit
Enter PIN2:
|
1234
Enter PIN2:
****|
Ok Clear
Ok
Set limit
In $:
|
123#45
Credit Limit screen:
Credit information modification
PIN2 entry screen:
Password editor
Exit
PIN2 entry
PIN2 entry screen:
PIN2 entry validation
Credit Limit entry screen:
A float editor is entered for this entry
long press "#" inserts a decimal point
he current currency is $
Exit
Credit limit entry
Set limit
In $:
123.45|
Ok Clear
Ok
.
Credit Limit entry screen:
Entry validation
Page 88/102
Page 89

CONFIDENTIAL Mitsubishi Electric
Credit Limit
123.00 $
The value is rounded due to storage constraints
Exit after 3 seconds or by a press on Exit
Exit
Information screen:
Exit
Show
Exits
Call costs menu:
Credit Limit
Reset
Display cost type
Select Exit
Credit limit: a limit is defined: Setting no limit
Show
Call costs menu:
Credit Limit
Reset
Display cost type
Select Exit
Select
Selects the Credit Limit entry
Credit Limit screen:
Credit Limit
Options menu allows to set another limit or to set a no limit value
123.00 $
Edit Exit
Actions
Edit
Set no limit
Select Exit
Select
Enter PIN2:
|
Exit
1234
Access to the options menu
Call costs action menu:
Selects the Set no Limit entry
PIN2 entry screen:
PIN2 entry
Page 89/102
.
Page 90

CONFIDENTIAL Mitsubishi Electric
Enter PIN2:
****|
Ok Clear
Ok
Credit Limit
No Limit
Exit
Exit
Show
Credit Limit
Reset
Display cost type
Select Exit
PIN2 entry screen:
PIN2 entry validation
information screen:
Exit after 3 seconds or by a press on Exit
Exits
Call costs menu:
Page 90/102
.
Page 91

CONFIDENTIAL Mitsubishi Electric
6.4.3 RESETTING ALL CALL COSTS
6.4.3.1 PRESENTATION
This item allows setting all call costs to 0.
6.4.3.2 EXAMPLE
Show
Credit Limit
Reset
Display cost type
Select Exit
Call costs menu:
Validates the Reset entry
Reset costs:
Yes
No
Select Exit
Select
Enter PIN2:
|
Exit
1234
Enter PIN2:
****|
Ok Clear
Ok
All costs reset
Exit
Right softkey
Binary choice screen:
The positive answer is selected as initial answer.
Selects the Yes choice
PIN2 entry screen:
PIN2 entry
PIN2 entry screen:
PIN2 entry validation
Information screen:
Exits
Show
Credit Limit
Reset
Display cost type
Select Exit
.
Call costs menu:
Page 91/102
Page 92

CONFIDENTIAL Mitsubishi Electric
6.4.4 CHOOSING THE COSTS DISPLAY MODE
6.4.4.1 PRESENTATION
This item allows the user to choose the display mode of the costs: either in units or in currency. If currency is
chosen, the user has to enter the currency name and the unit value in this currency.
Example
6.4.4.2 DISPLAY MODE: CURRENCY, CHANGE TO UNITS
Show
Credit Limit
Reset
Display cost type
Select Exit
Select
Call costs menu:
Selects the Display cost type item
Units
Currency
Select Exit
Units
Currency
Select Exit
Select
Show
Credit Limit
Reset
Display cost type
Select Exit
Display cost type Menu:
The current display mode is highlighted when entering the item.
Validates the Units item
Display cost type Menu:
Selects the Units item
Call costs menu:
Page 92/102
.
Page 93

CONFIDENTIAL Mitsubishi Electric
6.4.4.3 DISPLAY MODE: UNITS, CHANGE TO CURRENCY
Show
Credit Limit
Reset
Display cost type
Select Exit
Select
Call costs menu:
Selects the Display cost type item
Units
Currency
Select Exit
Select
Display: FFR
Unit = 0,70 FFR
Edit Exit
Exit
Show
Credit Limit
Reset
Display cost type
Select Exit
Display cost type menu:
Selects the Currency item
Display cost type screen:
You can change the parameters by a press on Edit
Exits
Call costs menu:
6.4.4.4 DISPLAY MODE: CURRENCY, MODIFY THE CURRENCY PARAMETERS
Show
Credit Limit
Reset
Display cost type
Select Exit
Select
Call costs menu:
Selects the Display cost type item
Units
Currency
Select Exit
Select
.
Display mode menu:
Selects the Currency item
Page 93/102
Page 94

CONFIDENTIAL Mitsubishi Electric
Display: FFR
Unit = 0,70 FFR
Edit Exit
Edit
Enter PIN2:
|
1234
Enter PIN2:
****|
Ok Clear
Ok
Currency:
FFR|
Ok
Clear long press $
Display mode screen:
Edit the currency parameters
PIN2 entry screen:
Exit
PIN2 entry
PIN2 entry screen:
PIN2 entry validation
Currency entry screen:
Alphanumeric editor
If the user clears the whole entry, he is proposed to access a list of currencies where he can
choose the currency name.
Clear
$ is selected as currency
Currency:
$|
Ok Clear
Ok
Unit in $:
|
Ok Clear
0#0045
Currency name entry screen:
Entry validation
Unit in currency entry screen:
Float editor
The currency name is taken into account immediately.
Float editor. #
long press is for decimal point entry.
Unit entry
Page 94/102
.
Page 95

CONFIDENTIAL Mitsubishi Electric
Unit in $:
0.0045|
Ok Clear
Ok
Display: $
Unit = 0,0045 $
Exit
Show
Credit Limit
Reset
Display cost type
Select Exit
Unit in currency entry screen:
Entry validation
information screen:
Exit after 3 seconds or after a press on Exit
Exits
Call costs menu:
Page 95/102
.
Page 96

CONFIDENTIAL Mitsubishi Electric
6.5 SELECTING A LINE (DCS FEATURE)
6.5.1 PRESENTATION
This menu allows to select a DCS line for outgoing calls and to lock or not on this line. The menu content is
adaptive de p end ing o n the cur r ent Se tt ing and o n the cur r ent ne twork ( int er nat io nal ro a ming). The line names are
those stored in the SIM EF
This menu is hidden if the ALS service is not activated on the SIM.
6.5.2 EXAMPLES
6.5.2.1 ACCESS TO LINE STATUS
Calls log
Call timers
Call costs
Line selection
Select Exit
Select
file.
MSISDN
Calls & Times Menu:
Selects Line entry
Office
Personal
Select Exit
Line status display
The current line is Office
Page 96/102
.
Page 97

CONFIDENTIAL Mitsubishi Electric
6.5.2.2 CHANGING OF LINE
Calls log
Call timers
Call costs
Line selection
Select Exit
Select
Office
Personal
Select Exit
Office
Personal
Select Exit
Select
Calls & Times Menu:
Selects Line entry
Line status display
The current line is Office
Change of line
Line status display
The current line is now Personal
Choice confirmation
Calls log
Call timers
Call costs
Line selection
Select Exit
Note: The line name can be cha nged via the "Phone Book/Own numbers" menu.
Calls & Times Menu:
Page 97/102
.
Page 98

CONFIDENTIAL Mitsubishi Electric
Page 98/102
.
Page 99

CONFIDENTIAL Mitsubishi Electric
7. USING THE V O ICE MAIL
7.1 VOICE MAIL CONFIGURATION
7.1.1 PRESENTATION
The Services/Voicemail/Number and Services/Voicemail/Alert menu items allow to configure the voice mail phone
number and the voice mail alert mode. These settings relate to the current DCS line in use.
The voice mail phone number is defined as follows:
• If the SIM card includes a file for voice mail numbers storage, this file content is used as voice mail phone
numbers,
• Otherwise, the voice mail phone number is stored in the phone non-volatile memory. This field remains
unchanged even if the SIM has a voic e mail p hone number de fined. T his field has to be e dit ed b efor e usage . T he
SIM can contain a voice mail phone number for each line.
The voicemail alert mode allows setting on or off an audio signal on each voicemail indication arrival. The alert will be
played immediately if no call is connected, otherwise after the end of the call.
F
FBy default the voice mail number is empty and the voice mail alert is set.
FF
7.1.2 VOICE MAIL MENU ACCESS
From the menu, Press Select softkey when on the voice mail item. The voice mail menu is displayed.
Voice Mail
Phone Book
Messages
Call & Timers
Select Exit
Select
Call
Number
Alert
Select Exit
Main Menu:
Selects Voicemail item
Voice mail menu:
Scroll down using or * key, up using # key.
Select softkey to enter the selected item,
Press
Exit softkey to exit to main menu, Long press Exit to go directly to Idle
Press
Page 99/102
.
Page 100

CONFIDENTIAL Mitsubishi Electric
7.1.3 SETTING THE VOICE MAIL PHONE NUMBER
Voice Mail:
0299111111|
Ok Clear
Ok
Call
Number
Alert
Select Exit
Voice mail number entry: phone number editor
If a number is already stored in the voice mail number storage, this number is displayed. If no
number is stored, the display indicates no number
In case of empty entry, an access to the memories is offered via a Names
Return to the voicemail menu after completion or validation
If the number is not user editable on SIM, only an information screen is displayed and the user is
only allowed to exit the display.
Voice mail menu:
7.1.4 SETTING THE VOICE MAIL ALERT MODE
Call
Number
Alert
Select Exit
Select
Voice mail alert:
On
Off
Select Exit
Voice mail menu:
Selects the voice mail alert mode
Voice mail alert choice procedure:
The current Setting is highlighted as initial entry.
Scroll down using
Change to On
or * key, up using # key.
softkey.
Voice mail alert:
On
Off
Select Exit
Select
Call
Number
Alert
Select Exit
Voice mail alert choice procedure:
Validation
Voice mail menu:
Page 100/102
.
 Loading...