

Page 1

ENGINE
LUBRICATION
CONTENTS
12-1
GENERAL INFORMATION 2..................
SERVICE SPECIFICATIONS 3.................
SEALANT 3..................................
LUBRICANTS 3..............................
SPECIAL TOOLS 3..........................
ON-VEHICLE SERVICE 4.....................
Engine Oil Check 4............................
Engine Oil Replacement 4.......................
Oil Filter Replacement 5........................
Oil Level Warning System Check 6..............
Oil Pressure Check 7..........................
Page 2

12-2
ENGINE LUBRICATION -
GENERAL INFORMATION
General Information
The lubrication method is a fully force-fed, full-flow
filtration type. The oil pump for 4G9 engines is
a trochoid type which is directly mounted to the
crankshaft, and the one for 4G6 engines is a gear
type which is driven by the crankshaft via the timing
ENGINE OILS
Health Warning
Prolonged and repeated contact with mineral oil
will result in the removal of natural fats from the
skin, leading to dryness, irritation and dermatitis.
In addition, used engine oil contains potentially
Recommended Precautions
The most effective precaution is to adapt working
practices which prevent, as far as practicable, the
risk of skin contact with mineral oils, for example
by using enclosed systems for handling used engine
oil and by decreasing components, where
practicable, before handling them.
Other precautions:
D Avoid prolonged and repeated contact with oils,
particularly used engine oils.
D Wear protective clothing, including impervious
gloves where practicable.
D Avoid contaminating clothes, particularly
underpants, with oil.
D Do not put oily rags in pockets, the use of
overalls without pockets will avoid this.
D Do not wear heavily soiled clothing and
oil-impregnated foot-wear. Overalls must be
cleaned regularly and kept separate from
personal clothing.
belt.
Furthermore, the oil level sensor is located in the
oil pan, and a system is equipped whereby an
indicator gives a warning when the oil level drops.
harmful contaminants which may cause skin cancer.
Adequate means of skin protection and washing
facilities must be provided.
D Where there is a risk of eye contact, eye
protection should be worn, for example,
chemical goggles or face shields; in addition
an eye wash facility should be provided.
D Obtain First Aid treatment immediately for open
cuts and wounds.
D Wash regularly with soap and water to ensure
all oil is removed, especially before meals (skin
cleansers and nail brushes will help). After
cleaning, the application of preparations
containing lanolin to replace the natural skin
oils is advised.
D Do not use petrol, kerosine, diesel fuel, gas
oil, thinners or solvents for cleaning skin.
D Use barrier creams, applying them before each
work period, to help the removal of oil from
the skin after work.
D If skin disorders develop, obtain medical advice
without delay.
Page 3
ENGINE LUBRICATION -
Service Specifications/Sealant/Lubricants/Special Tools
SERVICE SPECIFICATIONS
Item Standard value Limit
Oil pressure kPa at idle 29 or more -
at 3,500 r/min 294 - 686 -
SEALANT
Item Specified sealant Remark
Oil pressure switch 3M ATD Part No. 8660 or equivalent -
LUBRICANTS
Items Specifications
Engine oil (API classification) SG or higher
Engine oil quantity L Oil filter 0.3
12-3
Total 3.8
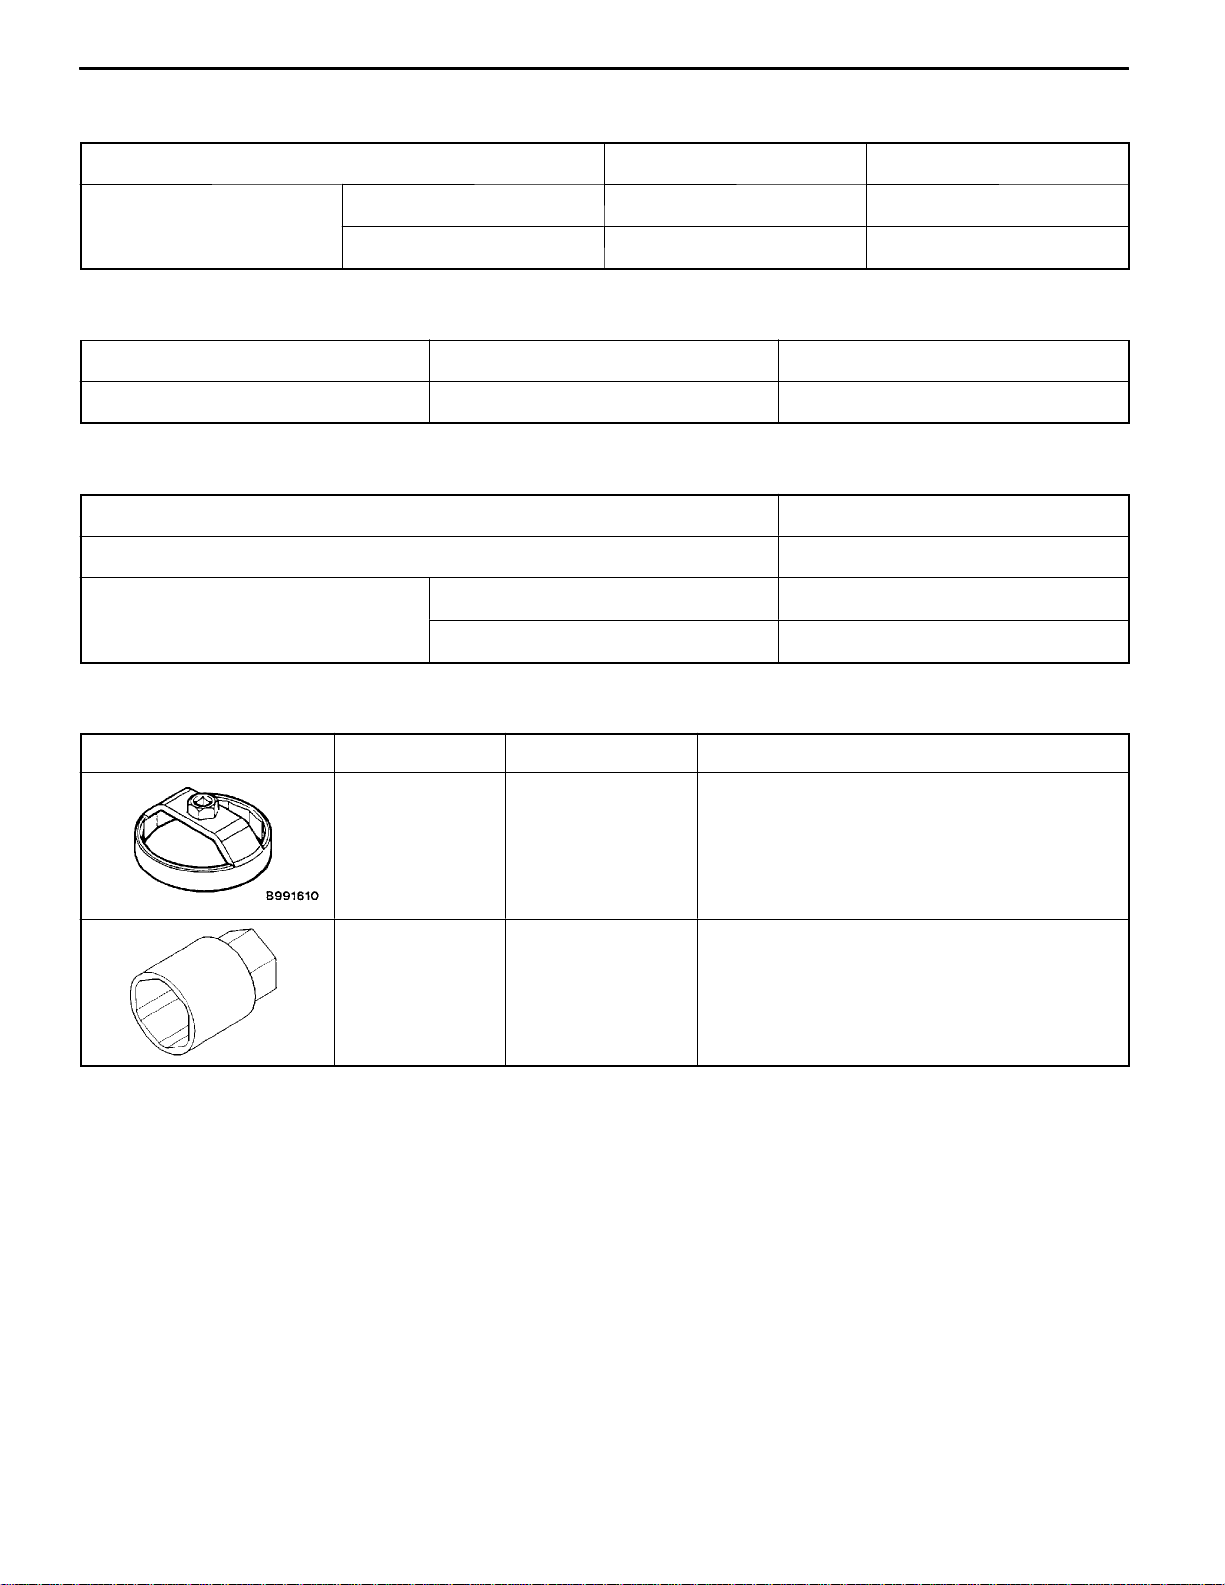
SPECIAL TOOLS
Tool Number Name Use
MB991610 Oil filter wrench Removal and installation of engine oil filter
MD998054 Oil pressure switch
wrench
(When using the oil filter of MD136466 and
MD356000)
Removal and installation of oil pressure switch
Page 4

12-4
ENGINE LUBRICATION -
ON-VEHICLE SERVICE
ENGINE OIL CHECK
1. Pull out the level gauge slowly and check that the oil
level is in the illustrated range.
2. Check that the oil is not excessively dirty, that there is
no coolant or gasoline mixed in, and that it has sufficient
viscosity.
ENGINE OIL REPLACEMENT
1. Start the engine and allow it to warm up until the
temperature of the coolant reaches 80_Cto90_C.
2. Remove the engine oil filler cap.
3. Remove the drain plug to drain oil.
Caution
Use care as oil could be hot.
On-vehicle Service
Drain plug gasket
39 Nm
Barometric temperature
Oil
pan
side
4. Install a new drain plug gasket so that it faces in the
direction shown in the illustration, and then tighten the
drain plug to the specified torque.
NOTE
Install the drain plug gasket so it faces in the direction
shown in the illustration.
5. Refill with specified quantity of oil.
Specified Engine Oil (API classification):
SG or higher
Total quantity (Includes volume inside oil filter and
oil cooler): 3.8 L
6. Install the engine oil filler cap.
7. Check oil level.
Page 5

ENGINE LUBRICATION -
OIL FILTER REPLACEMENT
MB991610 or
commerciallyavailable tool
1. Start the engine and allow it to warm up until the
temperature of the coolant reaches 80_Cto90_C.
2. Remove the engine oil filler cap.
3. Remove the drain plug to drain oil.
Caution
Use care as oil could be hot.
4. Remove the under cover.
5. Use the respective tool in the following table to remove
the engine oil filter.
6. Clean the filter bracket side mounting surface.
On-vehicle Service
12-5
7. Apply a small amount of engine oil to the O-ring of the
new oil filter.
8. Once the O-ring of the oil filter is touching the flange,
use the respective tool in the following table to tighten
to the specified torque.
9. Install the drain plug and refill engine oil. (Refer to Engine
Oil Replacement on P.12-3.)
10. Race the engine 2 - 3 times, and check to be sure that
O-ring
Number Tool Tightening torque
MD136466 MB991610 or equivalent tool Approx. 3/4 turn (17 Nm)
MD322508 Commercially-available tool Approx. 3/4 turns (17 Nm)
MD356000 MB991610 or equivalent tool Approx. 3/4 turn (14 Nm)
no engine oil leaks from installation section of the oil
filter.
Page 6

12-6
ENGINE LUBRICATION -
Engine oil level relay
On-vehicle Service
OIL LEVEL WARNING SYSTEM
CHECK <4G6>
1. Check that the proper amount of oil has been filled.
2. When the ignition switch is turned to ON (do not start
the engine), check that the oil level warning lamp
illuminates.
NOTE
If the oil level warning lamp does not illuminate, the cause
is probably a blown lamp, or a malfunction in the relay.
Engine oil level sensor
connector (Harness side)
Engine oil level sensor
connector (Equipment side)
3. When the engine is started, check that the oil level warning
lamp turns off.
If the oil level warning lamp will not go out, disconnect
the connector of the oil level relay and measure the voltage
of the No.1 terminal on the harness side of the connector
while idling the engine in order to confirm that it is the
same as the battery voltage.
NOTE
(1) If the voltage at the connector is the same as t he
battery voltage, the problem is probably a malfunction
of either the oil level relay or the oil level sensor.
(2) If the voltage at the connector is lower than the battery
voltage, t he problem is probably a malfunction of either
the alternator or the wiring harness.
4. Disconnect the oil level sensor connector. Check that
the oil level warning lamp illuminates after approximately
40 seconds.
If the oil level warning lamp does not illuminate, replace
the oil level relay.
5. Check the continuity between the oil level sensor
terminals.
Engine oil temperature
Oil level Continuity
Engine oil level sensor
9Nm
At 50_C or lower Normal
(proper volume)
Low (drained) Continuity
At 60_C or higher Normal
(proper volume)
Low (drained) No continuity
Continuity
Continuity
6. If there is a defect, replace the oil level sensor.
Page 7

ENGINE LUBRICATION -
On-vehicle Service
12-7
<4G6>
<4G9>
Oil pressure switch
Oil pressure
switch
MD998054
OIL PRESSURE CHECK
1. Check engine oil quantity.
2. Remove the oil pressure switch terminal.
3. Use the special tool (oil pressure switch wrench) to remove
the oil pressure switch.
Caution
Since sealant is applied to the thread of oil pressure
switch,take care nottodamage theoil pressureswitch
when removing it.
4. Install the oil pressure gauge.
NOTE
Use a adapter of PT 1/8 thread.
5. Run the engine to warm it.
6. After the engine has been warmed up, check that oil
pressure is within the standard value.
Standard value:
At idle: 29 kPa or more
At 3,500 r/min: 294 - 686 kPa
7. Remove the oil pressure gauge.
8. Apply the specified sealant to the thread of oil pressure
switch.
Specified sealant: 3M ATD Part No. 8660 or equivalent
Page 8

12-8
ENGINE LUBRICATION -
On-vehicle Service
MD998054
9. Use the special tool to tighten the oil pressure switch
to the specified torque.
Tightening torque: 19 Nm
Caution
Do not start the engine within one hour after the oil
pressure switch has been installed.
10. Install the oil pressure switch terminal.
 Loading...