

Mitsubishi 290p106010 Operating Manual
290P106010
Remote Control
Operating
Manual
Part IV: Operation
1
2
3
32
Remote Control Functions: Overview
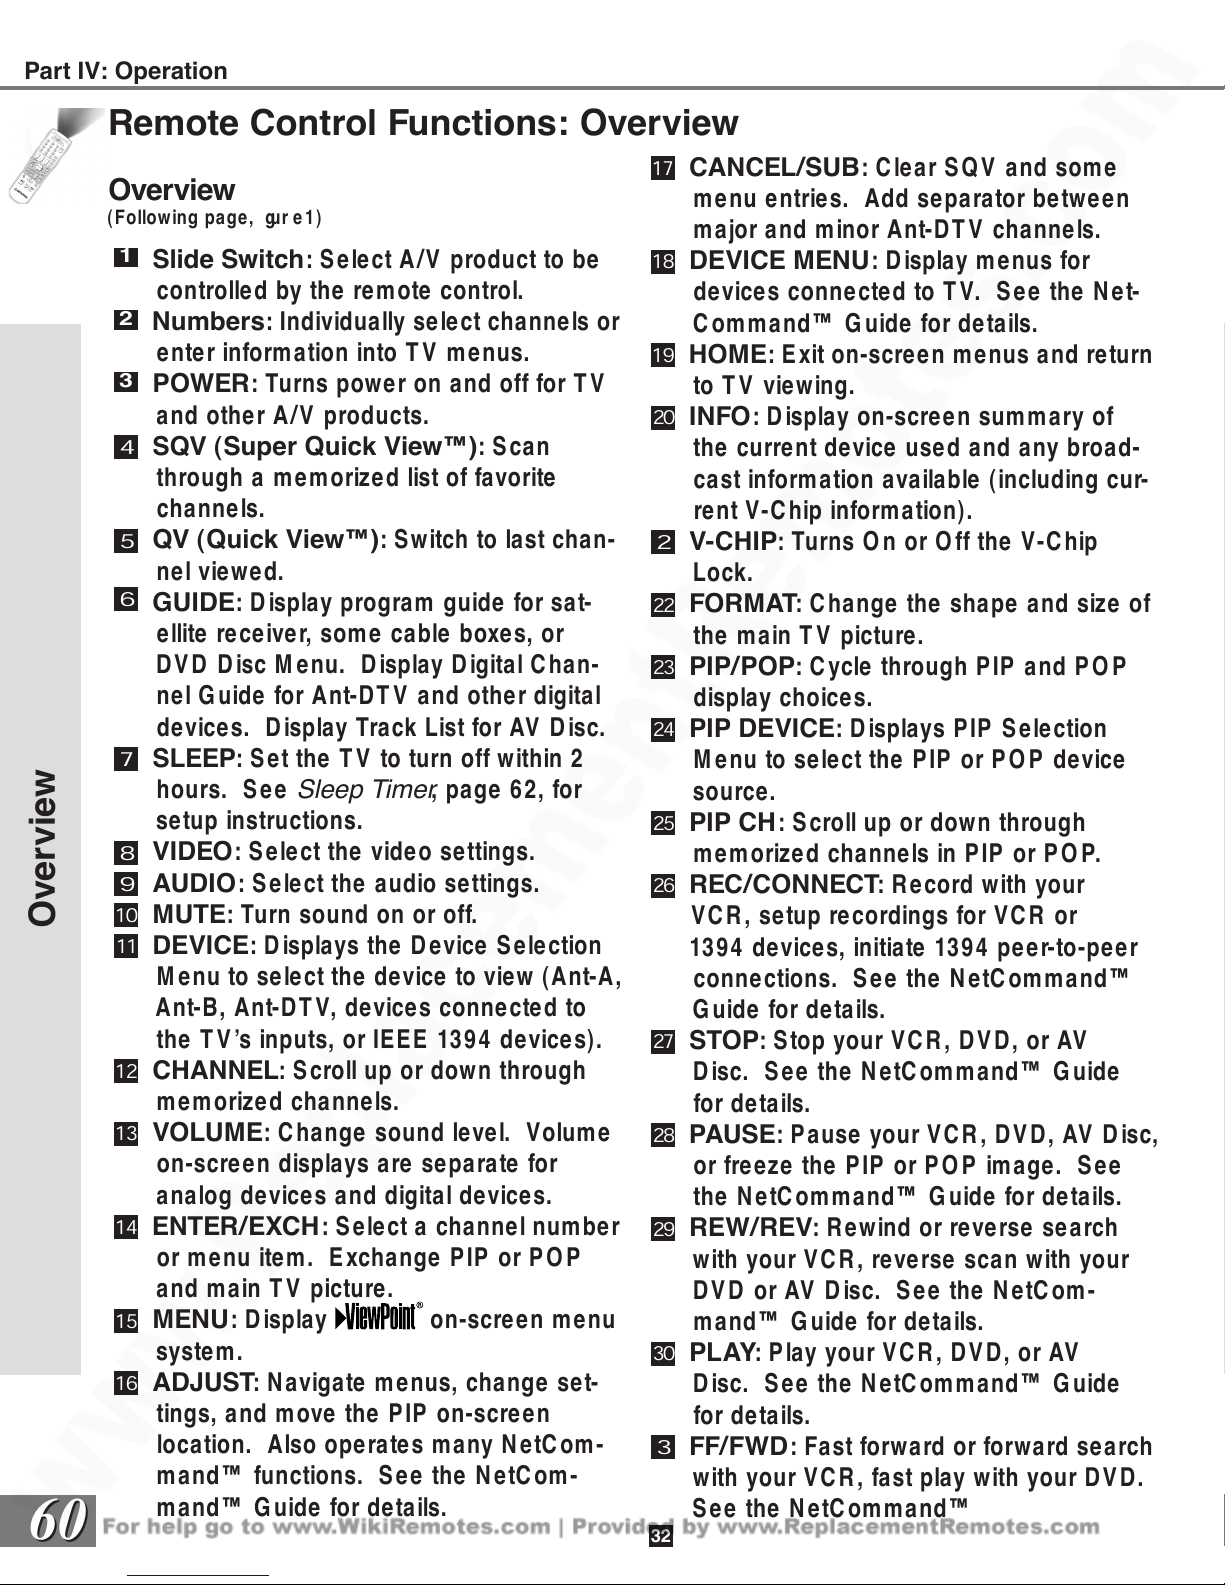
Overview
(Following pa ge, gur e 1 )
Slide Switch: S elect A /V product to be
controlled by the rem ote control.
Numbers: Individually select channe ls or
enter inform ation into T V menus.
POWER: Turns power on and off for T V
and other A /V products.
SQV (Super Quick View™): Scan
through a m em orize d list of favorite
channe ls.
QV (Quick View™): Switch to last chan-
ne l viewed.
GUIDE: D isplay program guide for sat-
ellite receive r, som e cable boxe s, or
DV D D isc M enu. D isplay D igita l C han-
ne l G uide for Ant-DT V and other digita l
de vice s. D isplay Track List for AV D isc.
SLEEP: S et the T V to turn off within 2
hours. S e e Sleep Timer, pa ge 62, for
se tup instructions.
VIDEO: S elect the vide o se ttings.
AUDIO: S elect the audio settings.
Overview
MUTE: Turn sound on or off.
DEVICE: D isplays the D evice S election
M enu to select the device to view (Ant-A,
Ant-B, Ant-DT V, devices conne cted to
the T V’s inputs, or IE EE 1394 devices).
CHANNEL: S croll up or dow n through
me morize d channe ls.
VOLUME: C hange sound level. Volume
on-scre en displays are separate for
analog devices and digital devices.
ENTER/EXCH: S elect a channel number
or menu ite m. Exchange P IP or P OP
and m ain T V picture.
MENU: D isplay
syste m.
ADJUST: N avigate me nus, change set-
tings, and m ove the P IP on-scre en
location. Also ope rate s many N etC om-
mand™ functions. S e e the N etC om -
mand™ G uide for deta ils.
on-scree n menu
CANCEL/SUB: C lear S QV and some
me nu e ntrie s. Add se para tor betwe en
major and m inor Ant-DT V channe ls.
DEVICE MENU: D isplay me nus for
de vice s conne cted to T V. S ee the N et-
C omm and™ G uide for de tails.
HOME: E xit on-screen menus and return
to T V viewing.
INFO: D isplay on-scree n summ ary of
the curre nt de vice use d and any broad-
ca st information available (including cur-
rent V-C hip information).
V-CHIP: Turns O n or O ff the V-C hip
Lock.
FORMAT: C ha nge the shape and size of
the main T V picture.
PIP/POP: Cycle through PIP and PO P
display choices.
PIP DEVICE: D isplays PIP S election
M enu to se le ct the PIP or PO P device
source .
PIP CH: S croll up or down through
me morize d channe ls in PIP or PO P.
REC/CONNECT: R ecord with your
VC R, setup recordings for V CR or
139 4 device s, initiate 139 4 pe er-to-pee r
conne ctions. S ee the N etC omm and™
G uide for deta ils.
STOP: Stop your V CR , DV D, or AV
D isc. S ee the N etC omm and™ G uide
for details.
PAUSE: P ause your V CR , DV D, AV D isc,
or freeze the PIP or PO P im age. S ee
the N etCom m and™ G uide for de tails.
REW/REV: R ewind or reve rse search
with your V CR , reve rse sca n with your
DV D or AV D isc. S ee the N etC om -
mand™ G uide for deta ils.
PLAY: Play your VC R, DV D, or AV
D isc. S ee the N etC omm and™ G uide
for details.
FF/FWD: Fa st forward or forwa rd se arch
with your V CR , fast play with your D VD .
Se e the N etC om ma nd™
Part IV: Operation
1
2
3
Remote Control Functions: Channel Selection and Sleep Timer
Channel Selection
For Ant-A or Ant-B Channels:
E nter thre e numbers (for channe l 2,
press 0 02).
or
P ress the channel number a nd E NTE R
(for channe l 2, press 2, the n EN TER ).
or
E nter the channel num ber a nd wa it four
se conds. The T V will cha nge automati-
ca lly.
For Ant-DTV Channels
(When Ant-DTV is the current device):
E nter tw o or three numbers for the
major channel numbe r. If three num bers a re pre ssed, the se para tor is
autom atically a dded a nd you m ay proce ed to ste p 2. If two num be rs are
presse d, you must add the separator
by pre ssing the SU B button on the
rem ote control.
E nter a 1-digit sub-channe l num be r
and wait four seconds. Enter a
1-digit sub-channe l num ber a nd pre ss
EN TER . O r e nter 2 digits and the T V
will automatically switch channe ls.
Sleep Timer
Setting the Sleep Timer:
P ress SLEEP on the remote control.
A me ssage indica ting the length of time
the slee p time r is to be set for is displayed on the T V scree n.
E ach pre ss of SLEEP w ill increase
the time displayed by 30 m inutes, until
the maximum va lue of 120 m inutes is
reached.
After 5 seconds of inactivity, the me s-
sa ge will disa ppear.
P ress SLEEP to view the rem aining time
before the tim er turns the T V off.
Canceling the Sleep Timer:
P ress SLEEP to display the on-scre en
me ssa ge.
P ress SLEEP re pe ate dly until O FF is
displaye d.
After 5 seconds of inactivity, the me s-
sa ge box will disappear.
Remote Control Functions: Operation of PIP and POP
Picture-In-P icture (P IP ) and Picture-O utside Picture (P OP ) feature s a llow you to view
Program ming in differe nt ways. W hile watching the ma in scree n, you can display programs from other channels a nd other inputs.
You ca n display a single P IP, side -by-side
pictures, three P OP s, or nine PO Ps.
Channel Selection, Sleep Timer, Operation of PIP and POP
Activating the PIP and POP
Figure s 1-5 on following pa ge
Pre ss P IP /P OP to activate the P IP /P OP
option. W ith e ach pre ss of the P IP /PO P
button on the T V rem ote control (within 3
se conds of each other), the P IP /PO P w ill
cycle through the following display options.
POP: side-by-side picture s
POP: thre e PO P s
POP: nine P OP s
PIP: P IP
PIP/POP: off
To turn PIP /P O P off, wait at least 10 se c-
onds, and press P IP /PO P. The next tim e
you a ctiva te P IP /PO P, the last use d P IP /
P O P option w ill be displaye d rst .
Part IV: Operation
1
2
3
Programming the Remote Control to Control NetCommand™ A/V
Products
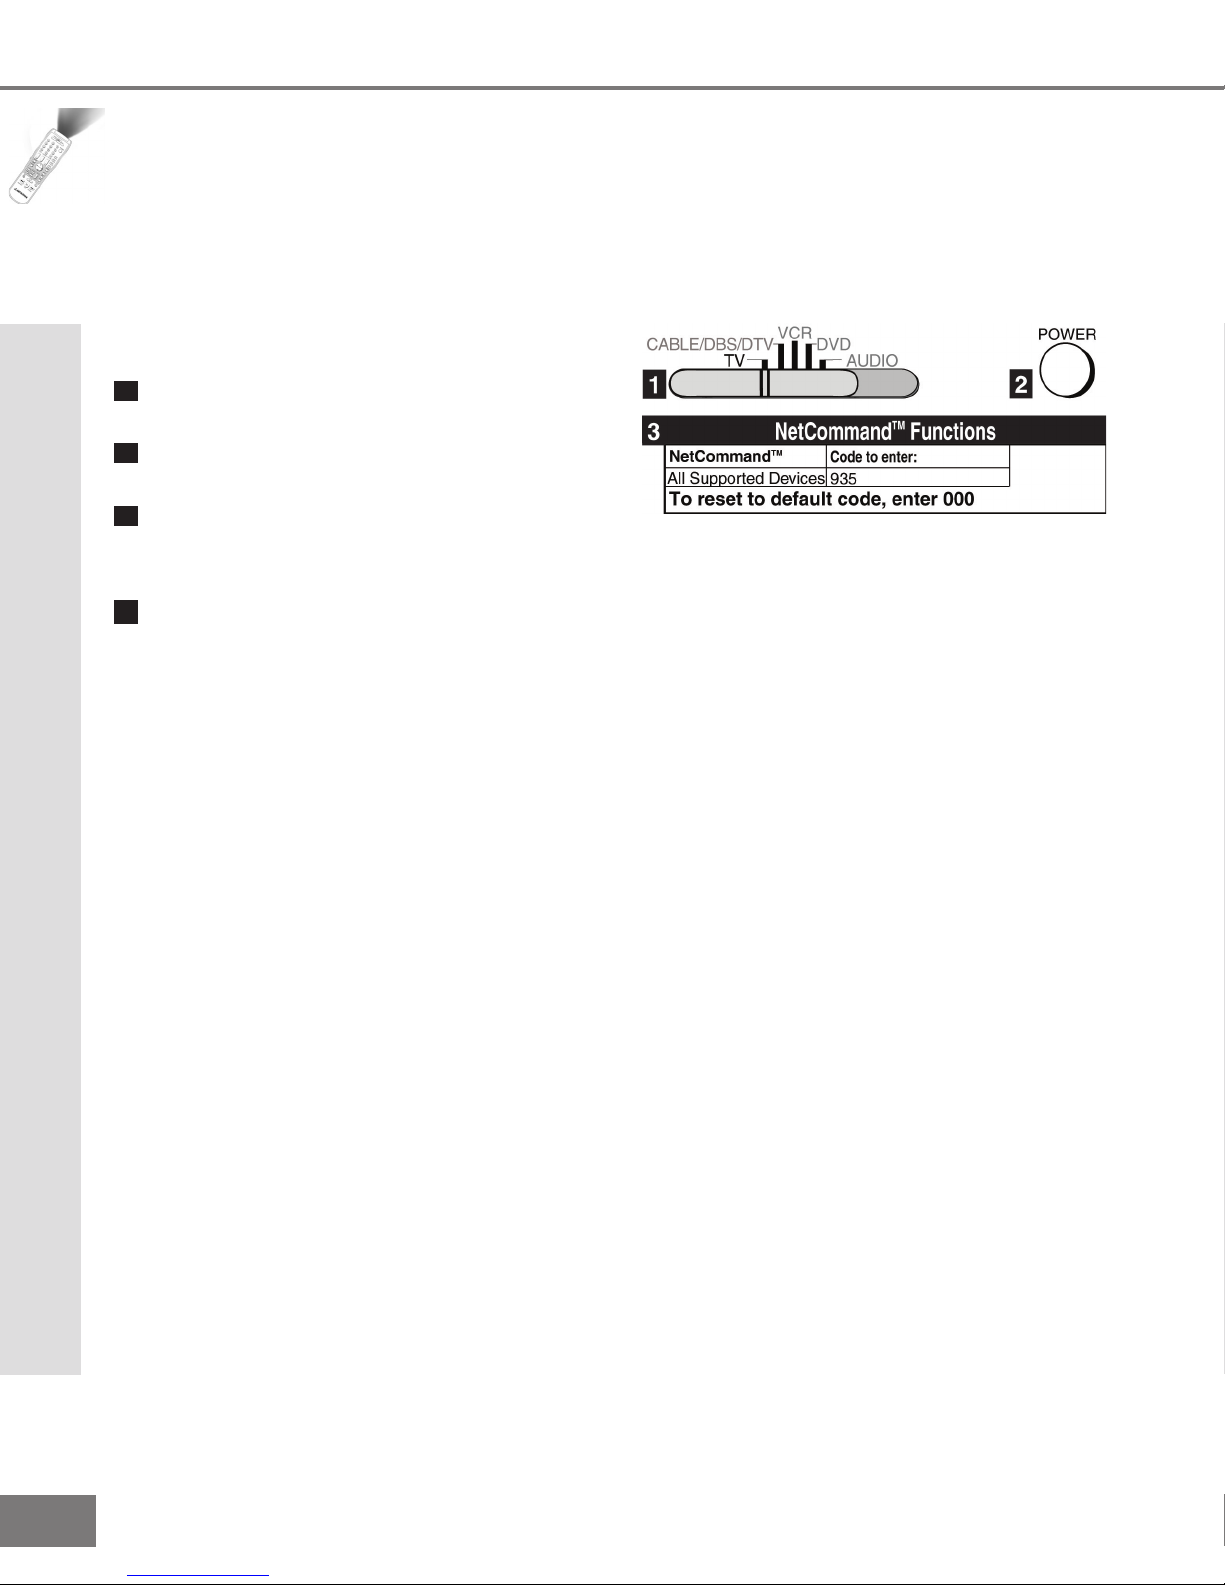
To Program the Remote to Control
NetCommand A/V Products:
(See NetCommand Supported Devices, page 16, for
the list of A/V products supported by the NetCommand System.)
M ove the slide switch a t the top of the
rem ote to the T V layer.
P ress and hold the P OW ER button on
the rem ote control.
E nter the three digit code of 9 35 , and
then re lease the P OW ER button on the
rem ote control.
The re mote control is now progra mm ed
to send N etC om mand™ signals to the
T V so the T V ca n control the IE EE
139 4 device s and selected olde r N et-
C omm and™ supported IR devices. Se e
the N etCom m and™ guide for details.
Figure 1. Programming the remote to control your NetCommand™ A/V devices.
Programming Remote Control
 Loading...