

Page 1

JP-SERIES
OPERATION MANUAL
COLD WATER ELECTRIC
PRESSURE WASHER
READ MANUAL BEFORE OPERATING!
This manual is an important part of the pressure washer
©Copyright 2005, Mi-T-M Corporation Form #37-0595-E/S-101909
Mi-T-M JP-Electric Operator's Manual 1
CAUTION
RISK OF INJURY!
and must remain with this unit!
Page 2

TAbLE OF CONTENTS
INTRODUCTION ................................................................................................................................... 3
IMPORTANT SAFETY wARNINGS...................................................................................................4-7
ELECTRICAL PRECAUTIONS ....................................................................................................... 4
SPRAY PRECAUTIONS .................................................................................................................5
MISCELLANEOUS SAFETY PRECAUTIONS ................................................................................ 6
DETERGENT CLEANING PRECAUTIONS .................................................................................... 7
FEATURES
SAFETY DECALS ............................................................................................................................9, 11
INSTALLATION & PREPARATION
OPERATING INSTRUCTIONS ...................................................................................................... 16-17
STORAGE & MAINTENANCE ....................................................................................................... 18-19
TROUbLESHOOTING ................................................................................................................... 20-21
..................................................................................................................................... 8, 10
...............................................................................................12-15
ATTIRE .......................................................................................................................................... 12
SETUP .......................................................................................................................................... 12
POWER CORD CONNECTION ............................................................................................... 12-13
NOZZLE REVIEW ......................................................................................................................... 13
NOZZLE CONNECTION ............................................................................................................... 14
WATER SUPPLY ........................................................................................................................... 14
UNLOADER .................................................................................................................................. 14
THERMAL RELIEF VALVE ........................................................................................................... 15
PRE-START INSPECTION PROCEDURES ................................................................................. 15
PRIMING THE PUMP ................................................................................................................... 16
START-UP ..................................................................................................................................... 16
CLEANING WITH DETERGENTS ................................................................................................ 17
SHUTDOWN ................................................................................................................................. 17
SPECIFIC MAINTENANCE ..........................................................................................................18
WINTERIZING .........................................................................................................................18-19
START UP AFTER EXTENDED STORAGE ................................................................................. 19
ACCESSORIES ..................................................................................................................................22
STATEMENT OF wARRANTY ........................................................................................................... 23
2 Mi-T-M JP-Electric Operator's Manual
Page 3
INTRODUCTION
Congratulations on the purchase of your Job Pro® pressure washer! You can be assured your Job Pro® pressure washer
was constructed and designed with quality and performance in mind. Each component has been rigorously tested to
ensure the highest level of acceptance.
This operator's manual was compiled for your benet. By reading and following the simple safety, installation, operation,
maintenance and troubleshooting steps described in this manual, you will receive years of trouble free operation from
your Job Pro® pressure washer. The contents of this manual are based on the latest product information available at
the time of publication. Mi-T-M
®
reserves the right to make changes in price, color, materials, equipment, specications
or models at any time without notice.
! IMPORTANT !
These paragraphs are surrounded by a "SAFETY ALERT bOX". This box is used to designate and
emphasize Safety warnings that must be followed when operating this pressure washer.
Accompanying the Safety warnings are "signal words" which designate the degree or level
of hazard seriousness. The "signal words" used in this manual are as follows:
DANGER: Indicates an imminently hazardous situation which, if not avoided, wILL
result in death or serious injury.
WARNING: Indicates a potentially hazardous situation which, if not avoided, COULD
result in death or serious injury.
CAUTION: Indicates a potentially hazardous situation which, if not avoided MAY
result in minor or moderate injury.
The symbols set to the left of this paragraph are "Safety Alert Symbols". These symbols
are used to call attention to items or procedures that could be dangerous to you or other
persons using this equipment.
ALwAYS PROVIDE A COPY OF THIS MANUAL TO ANYONE USING THIS EQUIPMENT. READ
ALL INSTRUCTIONS bEFORE OPERATING THIS PRESSURE wASHER AND ESPECIALLY
POINT OUT THE "SAFETY wARNINGS" TO PREVENT THE POSSIbILITY OF PERSONAL
INJURY TO THE OPERATOR.
Once the unit has been removed from the box, immediately write in the serial number of your unit in the space provided
below.
SERIAL NUMbER_________________________________
Inspect for signs of obvious or concealed freight damage. If damage does exist, le a claim with the transportation
company immediately. Be sure that all damaged parts are replaced and that the mechanical problems are corrected
prior to operation of the unit. If you require service, contact Customer Service at 800-553-9053.
Please have the following information available for all service calls:
1. Model Number
2. Serial Number
3. Date and Place of Purchase
Mi-T-M Corporation
8650 Enterprise Drive
Peosta, IA 52068
Mi-T-M JP-Electric Operator's Manual 3
Page 4
IMPORTANT SAFETY wARNINGS
ELECTRICAL PRECAUTIONS:
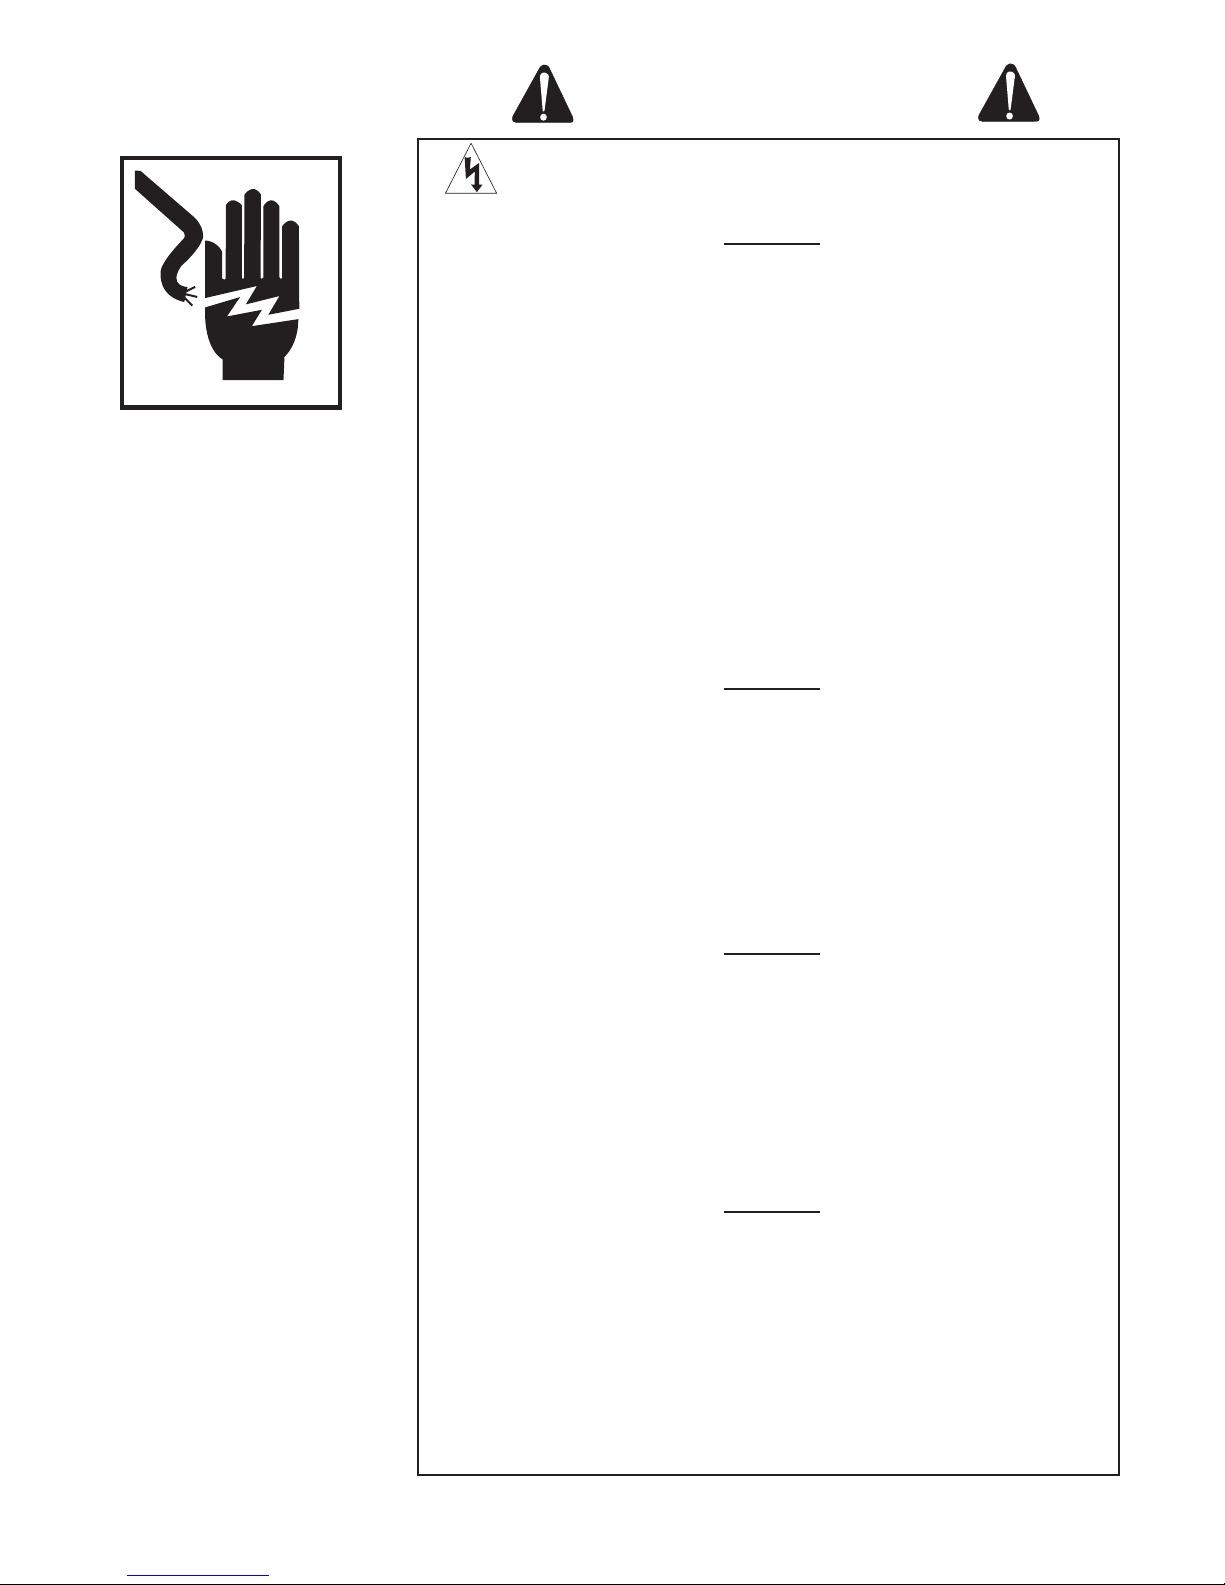
RISK OF ELECTRIC SHOCK OR ELECTROCUTION:
WARNING
Serious injury or death could occur if the pressure washer is
not properly grounded. Your pressure washer is powered by
electricity and may cause electric shock or electrocution if not used
properly.
1. This product must be grounded. Make sure the pressure washer is equipped
with a GFCI built into the power supply cord. If this is not available, the
pressure washer must be plugged into a receptacle that is protected by
a GFCI. Disconnect when not in use.
2. If your unit is equipped with a GFCI, DO NOT drop the GFCI as damage
could result. If the GFCI is accidentally dropped, be certain to test the
GFCI before using to ensure it is working properly. (Follow instructions
on GFCI for test procedures.)
3. Always be certain the unit is receiving proper voltage. Disconnect when
not in use.
4. DO NOT modify the plug provided with the product. If it will not t the
outlet, have a proper outlet installed by a qualied electrician. DO NOT
use any type of adapter.
WARNING
Electrical shock may occur from electrical cord.
5. Check power cord for signs of crushing, cutting or heat damage. If
replacement of plug or cord is needed use only identical replacement
parts
6. DO NOT use extension cords with this pressure washer.
7. Keep all connections dry and off the ground. Do not allow electrical cords
to lay in water or in such a position where water could come in contact
with them. Do not touch plug with wet hands.
8. DO NOT pull on the electrical cord to disconnect from the outlet.
WARNING
Electrical shock may occur if pressure washer is not operated
properly.
9. DO NOT direct spray on or into electrical installations of any kind! This
includes electrical outlets, light bulbs, fuse boxes, transformers, the unit
itself, etc.
10. DO NOT allow metal components of the pressure washer to come in
contact with live electrical components.
11. Never operate the pressure washer with safety guards/covers removed
or damaged.
WARNING
Serious injury or death may occur if unqualied persons attempt
electrical repairs.
12. Any electrical wiring or repairs performed on this pressure washer should
be done by Authorized Service Personnel in accordance with National and
Local electrical codes.
13. Before opening any electrical enclosure, always shut off the pressure
washer, relieve pressure and unplug the pressure washer from the power
source. Allow the pressure washer to cool down. Never assume the
pressure washer is safe to work on just because it is not operating. It
could restart at any time! Service in a clean, dry, at area.
4 Mi-T-M JP-Electric Operator's Manual
Page 5
IMPORTANT SAFETY wARNINGS
SPRAY PRECAUTIONS
DANGER
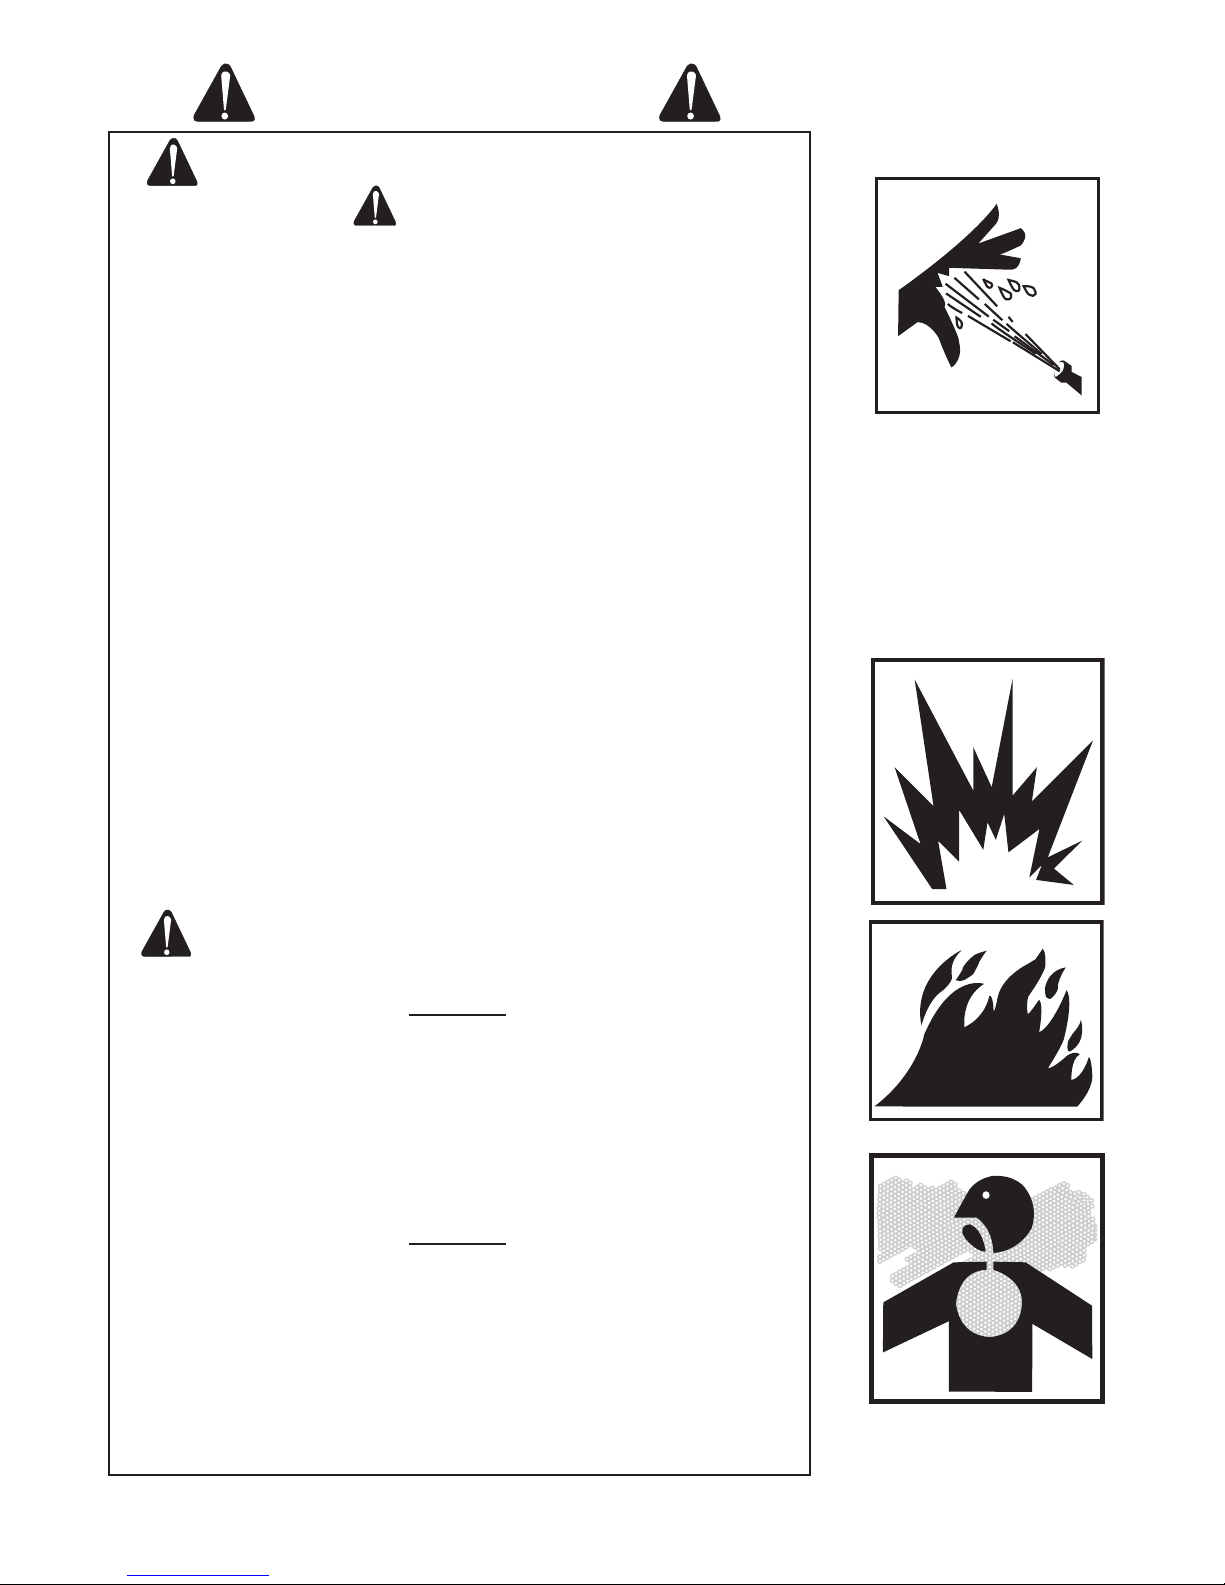
RISK OF INJECTION OR SEVERE CUTTING INJURY:
Keep clear of nozzle. Do not direct discharge stream at persons or
pets. when using this product, basic precautions should always
be observed, including the following:
1. Keep clear of the nozzle and spray! Never put your hand, ngers or
body directly over the spray nozzle.
2. Never point the high pressure spray at yourself or anyone else.
3. This product is to be used only by trained operators.
4. Always keep operating area clear of all persons.
5. Never allow children or adolescents to operate this unit.
6. SEEK EMERGENCY MEDICAL CARE if the spray appears to have
penetrated the skin! DO NOT TREAT AS A SIMPLE CUT!
7. High pressure hoses should be inspected daily for signs of wear. If
evidence of failure exist, promptly replace all suspect hoses to prevent
the possibility of injury from the high pressure spray. If a hose or tting
is leaking, NEVER PLACE YOUR HAND DIRECTLY ON THE LEAK.
8. NEVER operate the gun with the trigger wired in the open position. To
prevent accidental discharge, the trigger gun should be securely locked
when not in use.
9. Do not move the unit by pulling on the hose
10. Before removing the spray nozzle or servicing the unit, ALWAYS shut
off the unit and trigger the gun to release trapped pressure. (Even after
you shut off the unit, there is high pressure water left in the pump, hose
and gun until you release it by triggering the gun.)
11. Do not leave pressurized unit unattended. Shut off the pressure washer
and relieve trapped pressure before leaving.
MISCELLANEOUS SAFETY PRECAUTIONS
RISK OF EXPLOSION OR FIRE:
WARNING
Serious injury or death may occur from normal sparks in the motor
and electrical system.
1. DO NOT operate unit in an area where ammable gas vapors may be
present. An electric spark may cause an explosion or re.
2. DO NOT spray ammable liquids. Do not spray in an area containing
combustible dust, liquids or vapors.
RISK OF ASPHYXIATION:
WARNING
Serious injury or death may occur from inhaling dangerous
vapors.
1. Follow all safety instructions provided with the materials you are spraying.
Use of a respirator may be required when working with some materials.
Do not use this pressure washer to dispense hazardous detergents.
Mi-T-M JP-Electric Operator's Manual 5
Page 6
IMPORTANT SAFETY wARNINGS
MISCELLANEOUS SAFETY PRECAUTIONS, CONT'D.
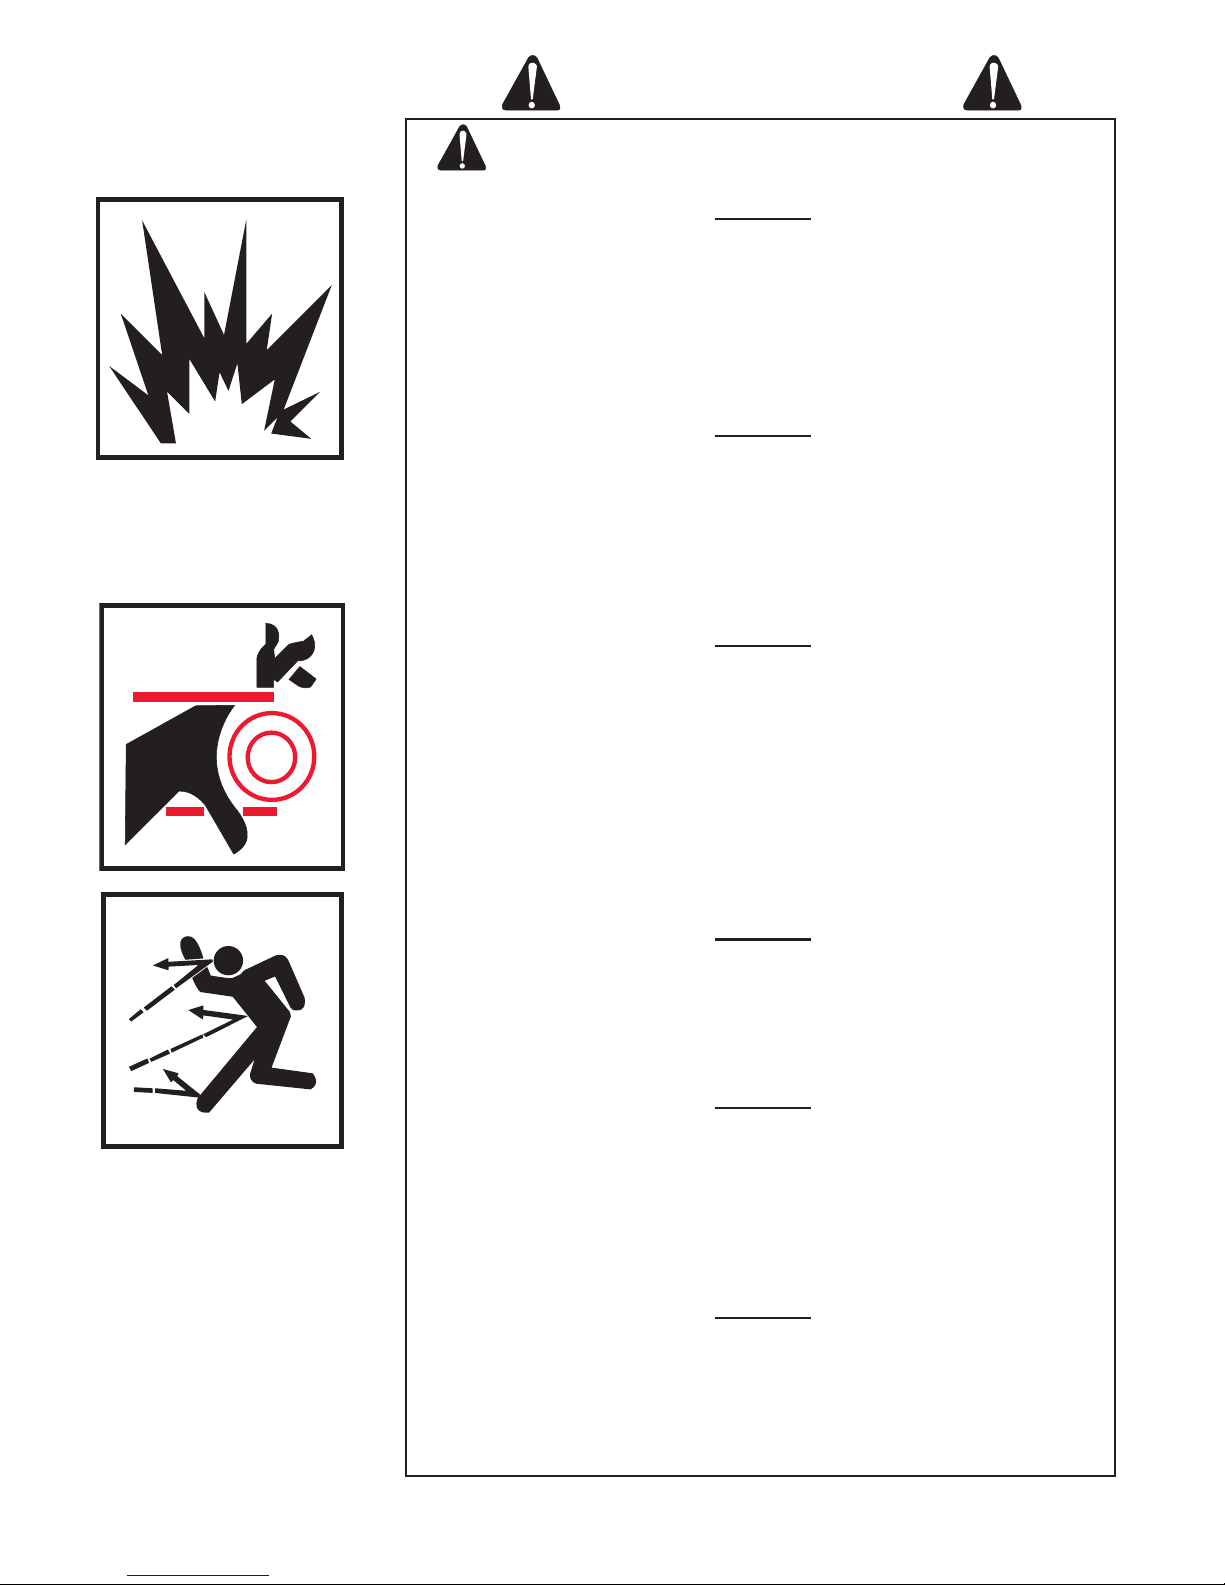
RISK OF bURSTING:
WARNING
Serious injury may occur from a pressure washer malfunction or
exploding accessories if incorrect system components, attachments
or accessories are used.
1. Never make adjustments to the factory set pressures.
2. Never exceed manufacturers maximum allowable pressure rating of
attachments.
3. Use only manufacturer recommended repair parts for your pressure
washer.
WARNING
Serious injury or death may occur if attempting to start the pressure
washer when the pump is frozen.
4. In freezing temperatures, the unit must always be warm enough to ensure
there is no ice formation in the pump. Do not start the pressure washer
if it has been transported in an open or underheated vehicle without rst
allowing the pump to thaw.
RISK FROM MOVING PARTS:
WARNING
Serious injury may occur to the operator from moving parts on the
pressure washer.
1. Never make adjustments to the unit while it is connected to the power
source.
2. Do not operate the unit without all protective covers in place.
3. Before servicing the pressure washer, turn the unit off, disconnect from the
power source, relieve the water pressure and allow the unit to cool down.
Service in a clean, dry, at area.
4. Follow the maintenance instructions specied in the manual.
RISK OF bODILY INJURY:
WARNING
Serious injury can occur from loose debris being propelled at high
speed from the spray gun.
1. Always wear protective goggles when operating the unit to shield the eyes
from ying debris and detergents.
2. Do not direct spray toward fragile materials such as glass. Shattering could
result in serious injury.
WARNING
Injury may occur if the operator loses balance caused by the thrust
of water traveling through the spray nozzle.
1. Stay alert-watch what you are doing. Do not operate the unit when fatigued
or under the inuence of alcohol or drugs.
2. Never squeeze the trigger unless securely braced. DO NOT overreach or
stand on unstable support. Wet surfaces can be slippery, wear protective
foot gear and keep good footing and balance at all times. Never trigger the
gun while on a ladder or roof.
WARNING
Injury may occur from the pressure washer.
1. Always hold on rmly to the gun/lance assembly when starting and
operating the unit. Failure to do so can cause the lance to fall and whip
dangerously.
2. Know how to stop the pressure washer and bleed pressures quickly. Be
thoroughly familiar with controls.
6 Mi-T-M JP-Electric Operator's Manual
Page 7
IMPORTANT SAFETY wARNINGS
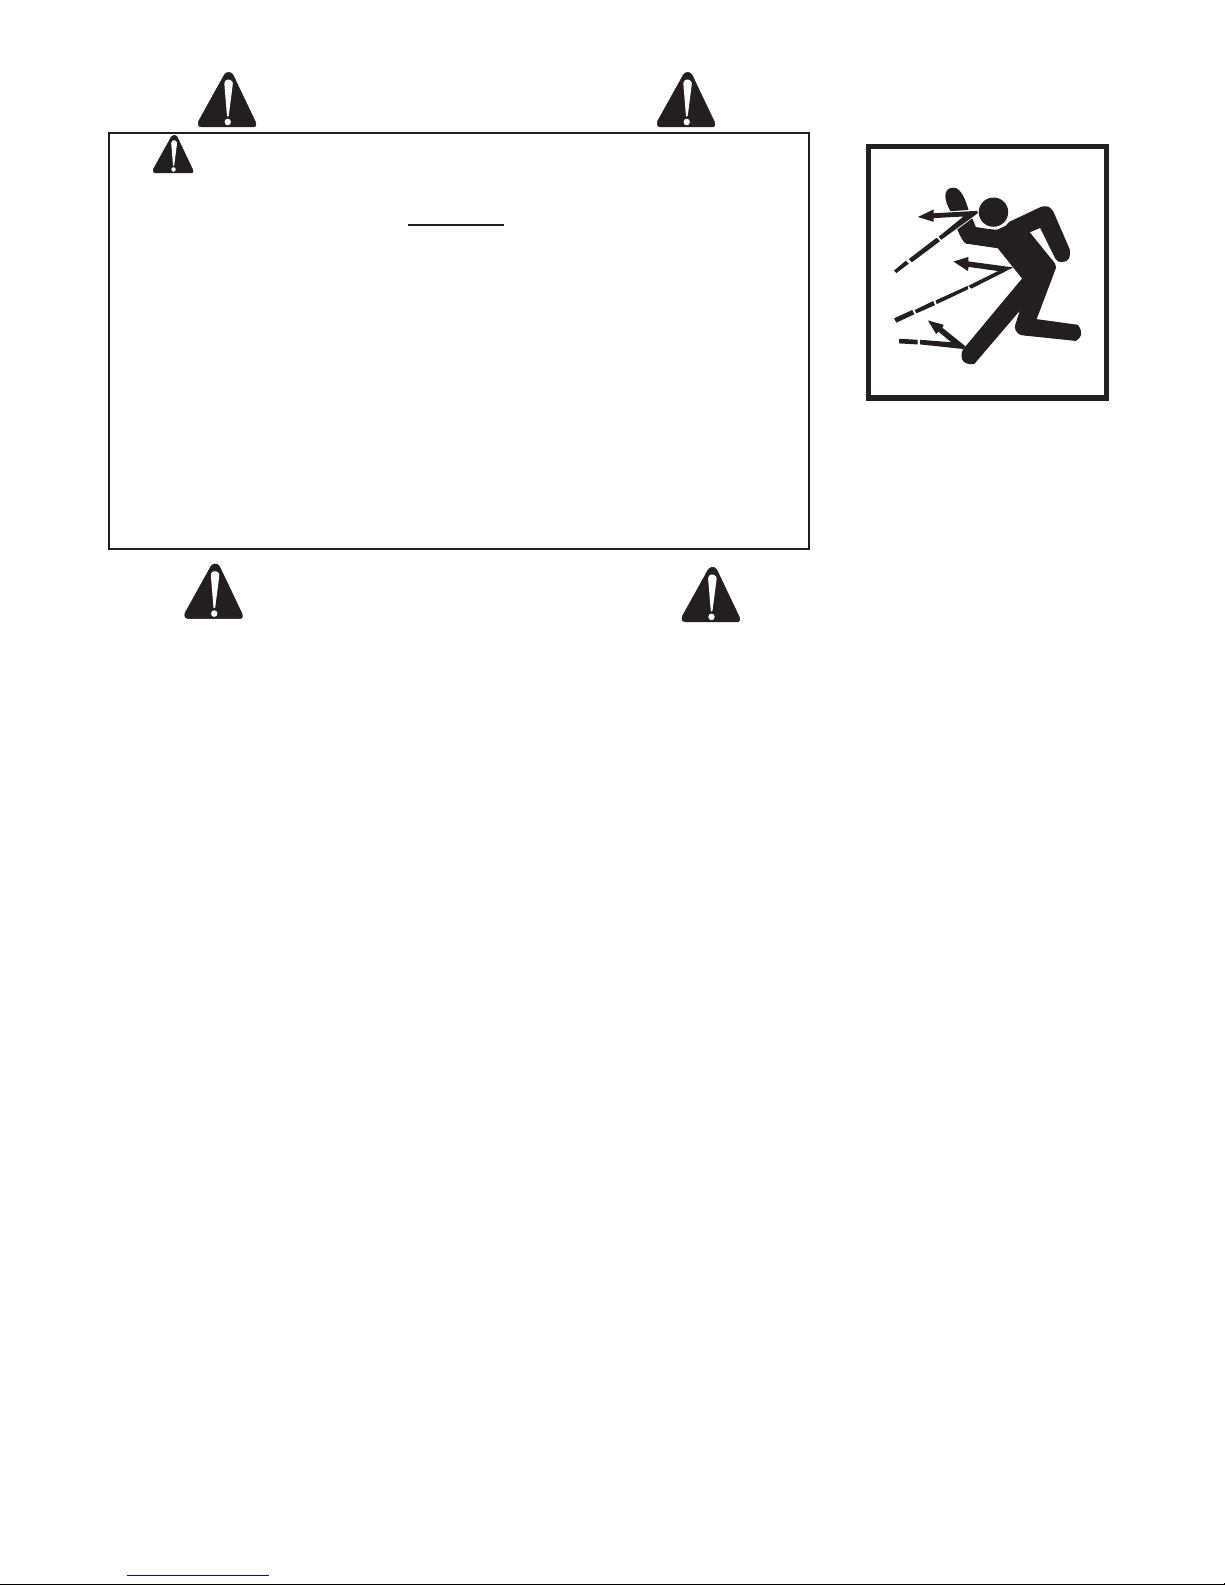
DETERGENT CLEANING PRECAUTIONS
RISK OF bODILY INJURY:
WARNING
Serious injury or death may occur from detergents contacting the
skin.
1. DO NOT use solvents, highly corrosive detergents or acid type cleaners
with this pressure washer. Use only mild detergents.
2. KNOW YOUR DETERGENTS! Be prepared to tell a physician exactly
what you are using in the event of an emergency. Read the Material
Safety Data Sheet (MSDS) provided with your detergent and all detergent
labels. Follow all appropriate instructions regarding preparation, use,
safety and transportation.
3. Protective equipment such as rubber suits, gloves and respirators are
advisable, especially when using cleaning detergents.
4. Keep all detergents out of the reach of children.
! SAVE THESE INSTRUCTIONS !
Mi-T-M JP-Electric Operator's Manual 7
Page 8
FEATURES
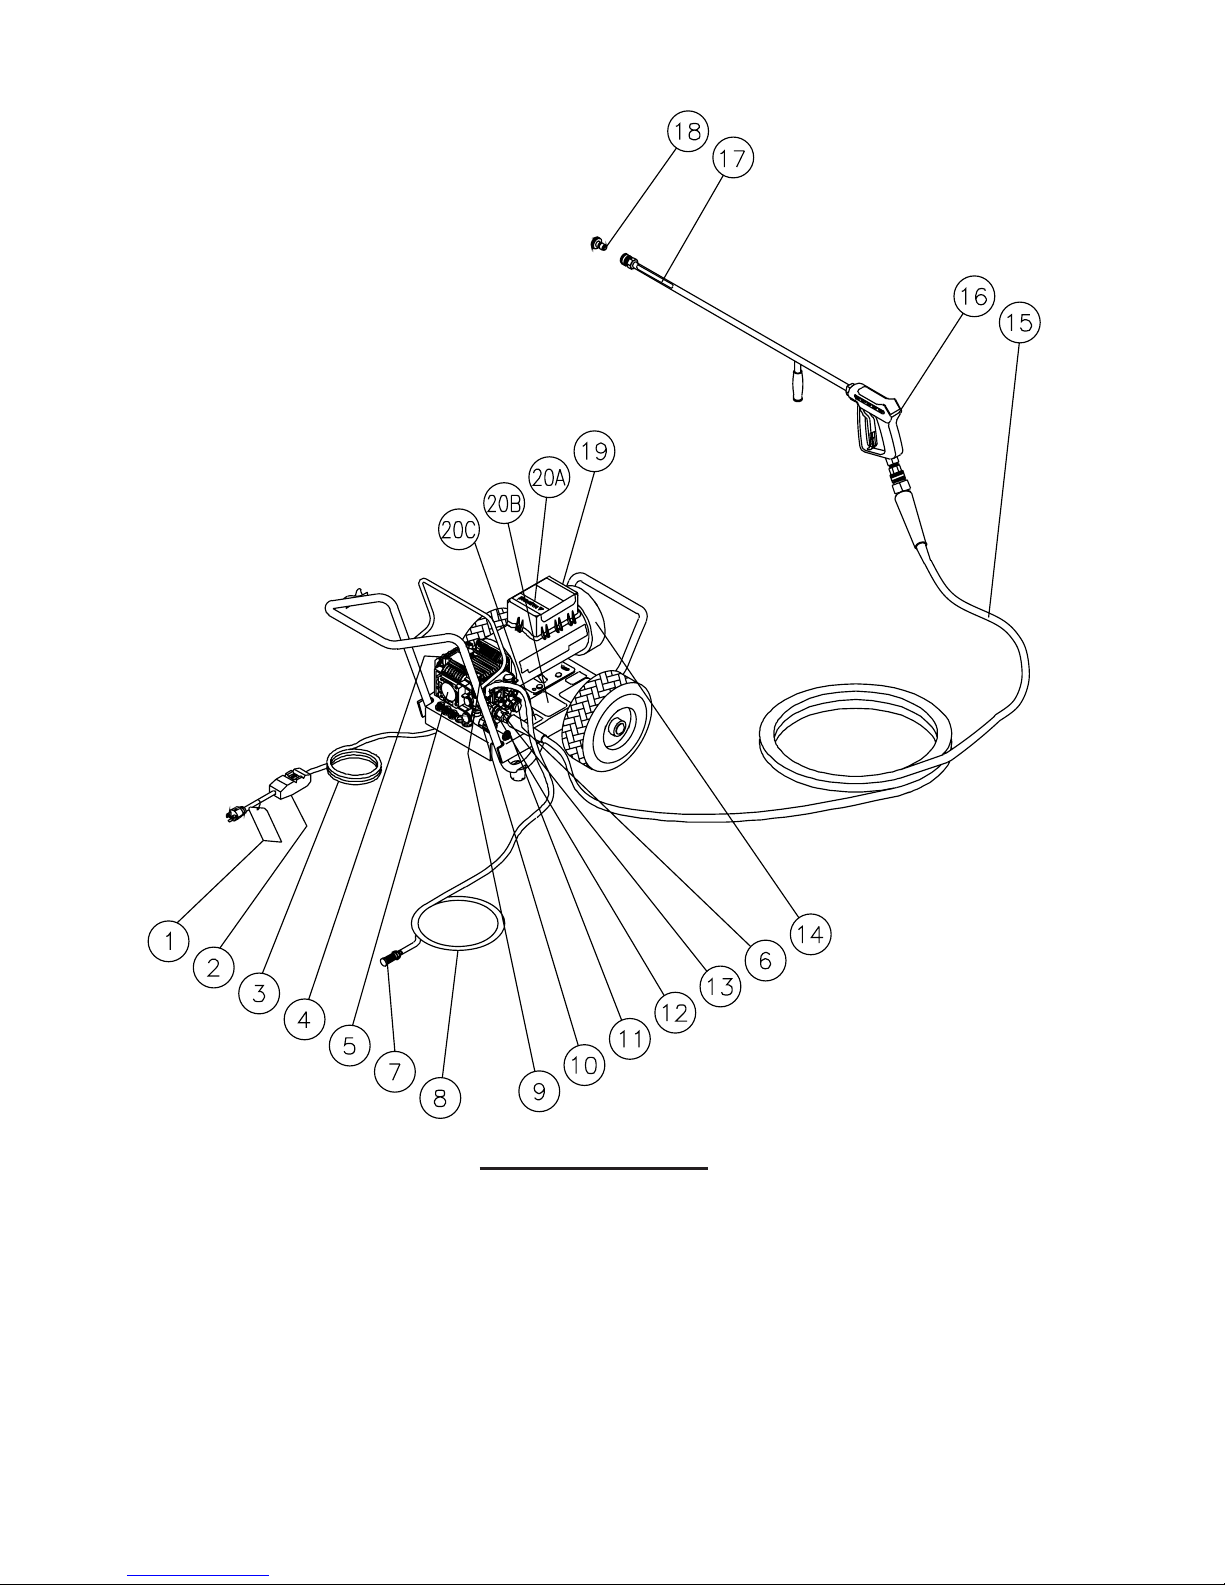
JP SM ELECTRIC FEATURES-042500-EDW
FEATURES LISTING
1. Tag-Warning: Risk of Electrocution
2. GFCI
3. Power Cord
4. Oil Sight Glass
5. Pump
6. Thermal Relief Valve
7. Detergent Strainer
8. Detergent Hose
9. Adjustment Knob
10. Water Inlet
11. Water Inlet Strainer
12. Adjustable Detergent Injector
8 Mi-T-M JP-Electric Operator's Manual
13. Water Outlet
14. Motor
15. High Pressure Discharge Hose
16. Gun Assembly
17. Decal-Warning: Risk of Injection
18. Quick Connect Nozzle
19. On/Off Switch
20A. Decal-Warning: Risk of Electrocution
20B. Decal-Warning: Caution
20C. Decal-Warning: Risk of Injection/Explosion
Page 9
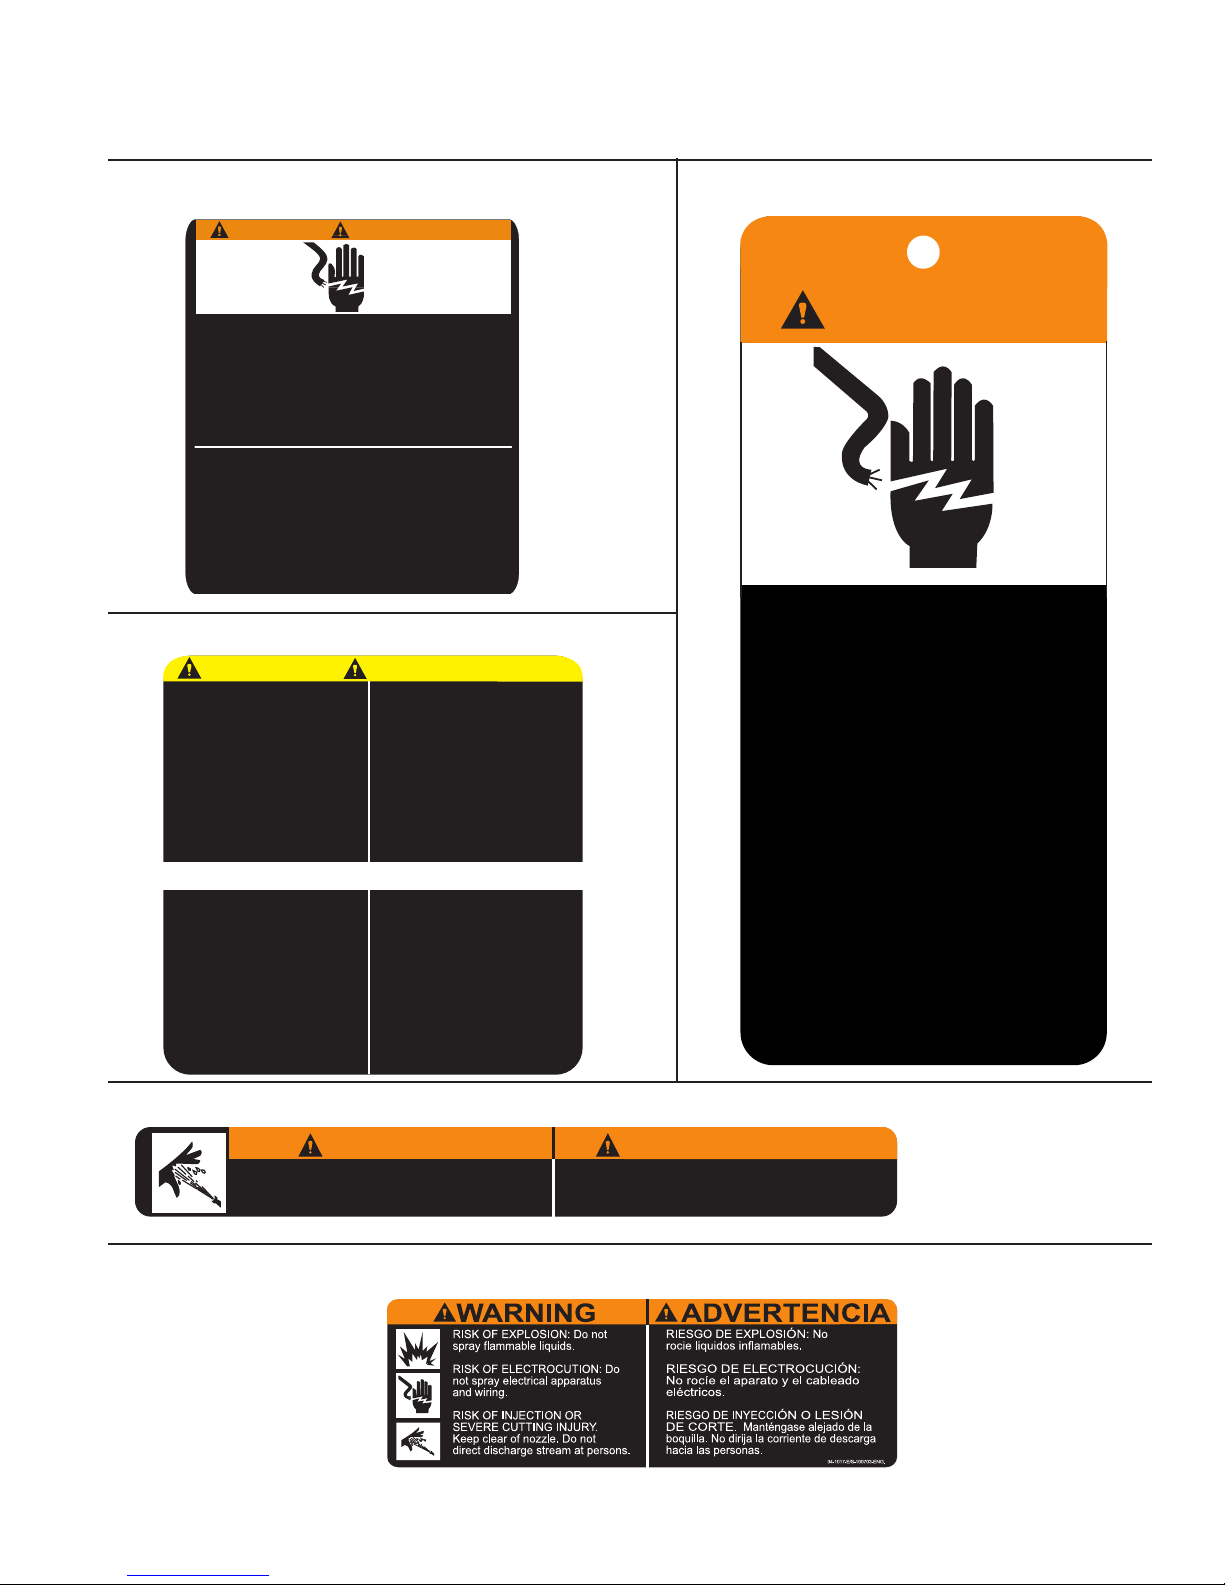
SAFETY DECALS & PLACEMENT
WARNING
RISK OF ELECTROCUTION. DO NOT REMOVE THIS TAG.
FAILURE TO FOLLOW THE ABOVE INSTRUCTIONS
COULD RESULT IN A SEVERE ELECTRICAL SHOCK.
RIESGO DE ELECTROCUCION. NO RETIRE ESTA CALCOMANIA.
ADVERTENCIA
1. Conecte solamente a un tomacorriente apropiadamente
conectado a tierra. No retire la clavija de conexion a tierra.
2. Antes de usar inspeccione el cordon. si el cordon esta dañado
no la use.
3. Mantenga todas las conexiones secas y alejadas del suelo.
4. No toque el enchufe con las manos mojadas.
5. Este producto viene con un interruptor de circuito de falla de
conexion a tierra (GFCI) incorporado al enchufe del cordon
electirco. Use solo piezas identicas de repuesto si se necesita
un reemplazo del enchufe o del cordon.
6. No use un cordon de extension con esta maquina.
7. Antes de usar lea el manual del operador.
1. Connect only to a properly grounded outlet. Do not
remove ground pin.
2. Inspect cord before using. Do not use if cord is damaged.
3. Keep all connections dry and off the ground.
4. Do not touch plug with wet hands.
5. This product is provided with a Ground Fault Circuit
Interrupter (GFCI) built into the power cord plug. If
replacement of plug or cord is needed, use only identical
replacement parts.
6. Do not use an extension cord with this machine.
7. Read the operator's manual before using.
EL NO SEGUIR LAS INSTRUCCIONES DE ARRIBA PUEDE
RESULTAR EN UN CHOQUE ELECTRICO GRAVE.
34-1013-E/S-080699-ENG.
WARNING
RISK OF ELECTROCUTION.
DO NOT REMOVE THIS TAG.
FAILURE TO FOLLOW THE ABOVE
INSTRUCTIONS COULD RESULT
IN A SEVERE ELECTRICAL SHOCK.
1. CONNECT ONLY TO A PROPERLY
GROUNDED OUTLET. DO NOT
REMOVE GROUND PIN.
2. INSPECT CORD BEFORE USING. DO
NOT USE IF CORD IS DAMAGED.
3. KEEP ALL CONNECTIONS DRY AND
OFF THE GROUND.
4. DO NOT TOUCH PLUG WITH WET
HANDS.
5. THIS PRODUCT IS PROVIDED WITH A
GROUND FAULT CIRCUIT
INTERRUPTER (GFCI) BUILT INTO
THE POWER CORD PLUG. IF
REPLACEMENT OF PLUG OR CORD
IS NEEDED, USE ONLY IDENTICAL
REPLACEMENT PARTS.
6. DO NOT USE AN EXTENSION CORD
WITH THIS MACHINE.
7. READ THE OPERATOR'S MANUAL
BEFORE USING.
34-1014-081099-E/S-ENG
RISK OF INJECTION OR SEVERE INJURY.
Never put your hand, fingers or body directly
over the spray nozzle.
34-1253-030801-ENG.
WARNING
ADVERTENCIA
RIESGO DE INYECCION O LISION SEVERA
Nunca coloque la mano, los dedos o el cuerpo
directamente sobre la boquilla de rocío.
CAUTION PRECAUCION
34-1015-081099-E/S-ENG.
1. Read operator's manual
carefully before using.
2. Spray gun can kick back.
Hold with both hands.
3. Risk of eye injury. Always
wear eye protection.
4. See the operator's manual
for proper chemical
usage.
1. Lea cuidadosamente el
manual del operador antes
de usar.
2. El revolver rociadora
puede retroceder
violentemente. Sujétela
con ambas manos.
3. Riesgo de lesiones a los
ojos. Use siempre
protección para los ojos.
4. Para un uso químico
apropiado consulte el
Manual del Operador.
CONNECT TO AN
INDIVIDUAL
BRANCH CIRCUIT ONLY.
CONECTAR SOLAMENTE
A UN CIRCUITO
DERIVADO INDIVIDUAL.
IMPORTANT
IMPORTANTE
• For indoor and outdoor
use.
• Store indoors.
• Avoid pump damage.
Protect from freezing. Do
not run for more than
3 minutes with spray gun
not triggered.
• If connected to a circuit
protected by fuses,
use time-delay fuses only.
• Para uso interior y exterior.
• Almacene bajo techo.
• Evite daños a la bomba.
Protéjala contra la
congelación.
No haga funcionar por más
de 3 minutos sin accionar
el gatillo de la pistola.
• Si se conecta a un circuito
protegido por fusibles, use
fusibles con retardo
solamente.
RIESGO DE LESIONES
RISK OF INJURY
DO NOT REmOvE sAFETy DECAls FROm UNIT UNlEss
REplACING WITh mOsT CURRENT sAFETy DECAl!!
Reference #20A Decal: Warning-Risk of Electrocution Reference #1 Tag: Risk of Electrocution
(Part # 34-1013) (Part # 34-1014)
Reference #20B Decal: Caution Statements (Part # 34-1015)
Reference #17 Decal: Warning-Risk of Injection (Part # 34-1253)
Reference #20C Decal: Warning-Risk of Injection/Explosion (Part # 34-1017)
Mi-T-M JP-Electric Operator's Manual 9
Page 10
FEATURES
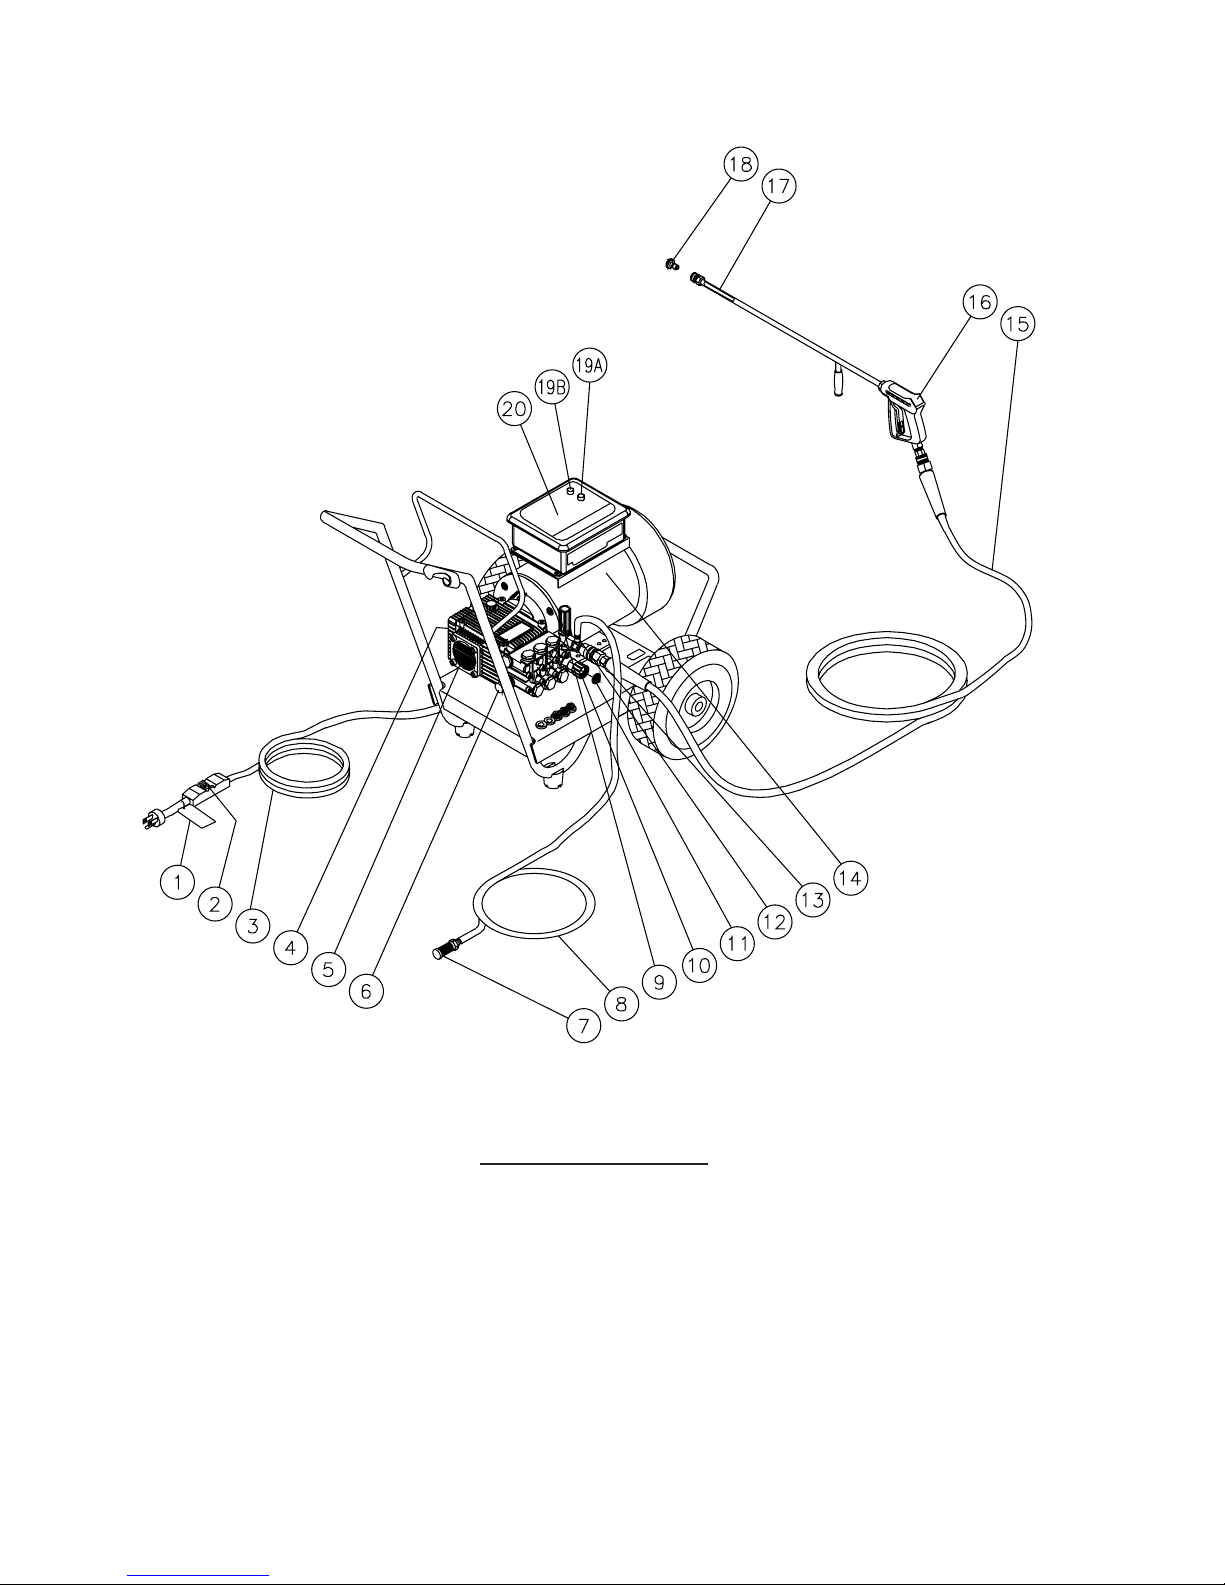
JP LG ELECTRIC FEATURES-060100-EDW
FEATURES LISTING
1. Tag-Warning: Risk of Electrocution
2. GFCI
3. Power Cord
4. Oil Sight Glass
5. Pump
6. Thermal Relief Valve
7. Detergent Strainer
8. Detergent Hose
9. Adjustment Knob
10. Water Inlet
11. Water Inlet Strainer
12. Adjustable Detergent Injector
10 Mi-T-M JP-Electric Operator's Manual
13. Water Outlet
14. Motor
15. High Pressure Discharge Hose
16. Gun Assembly
17. Decal-Warning: Risk of Injection
18. Quick Connect Nozzle
19A. On Switch
19B. Off Switch
20. Decal-Warning/Caution/Operating
Page 11
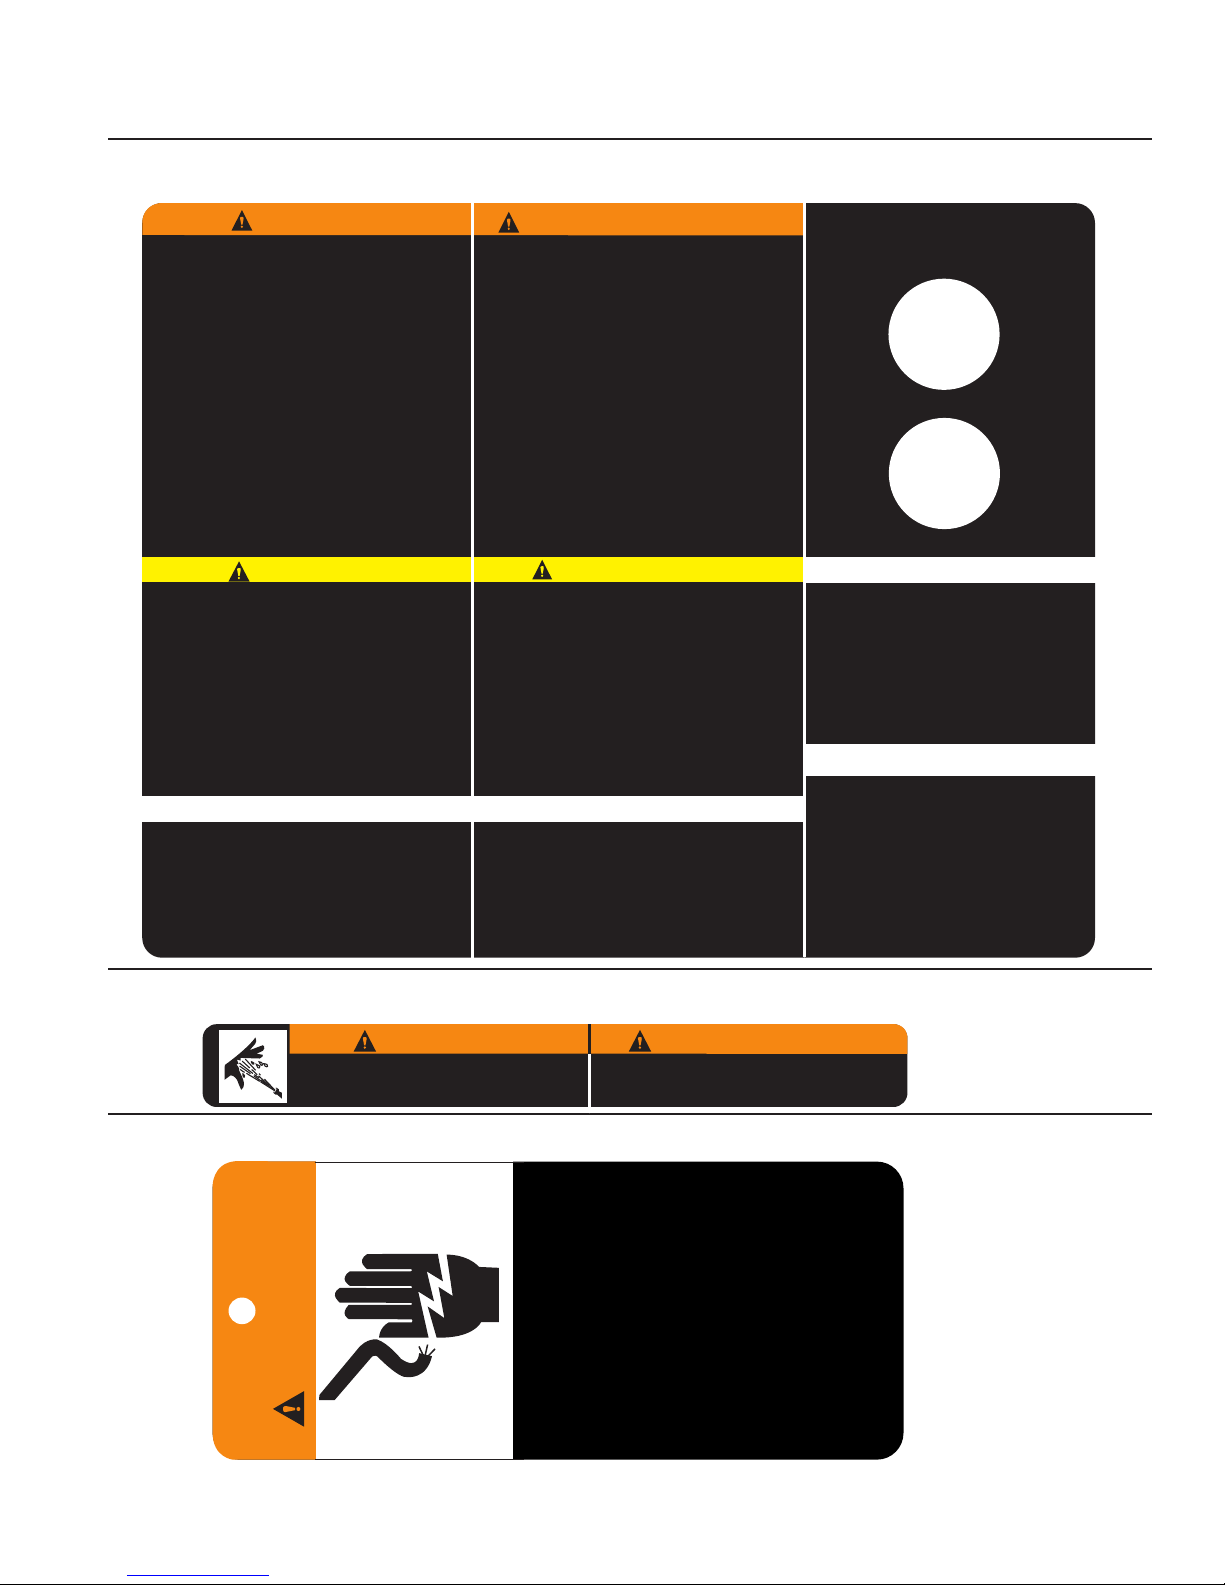
SAFETY DECALS & PLACEMENT
RISK OF ELECTROCUTION. DO NOT REMOVE THIS LABEL.
1. Connect only to a properly grounded outlet. Do not remove
ground pin.
2. Inspect cord before using. Do not use if cord is damaged.
3. Keep all connections dry and off the ground.
4. Do not touch plug with wet hands.
5. This unit may be provided with a Ground Fault Circuit
Interrupter (GFCI) built into the power cord plug. If replacement
of plug or cord is needed, use only identical replacement parts.
If this unit is not provided with a GFCI, this unit should only be
connected to a power supply receptacle protected by a ground
fault circuit interrupter.
6. Do not use an extension cord with this machine.
7. Read the operator's manual carefully before using.
8. Risk of Injection or Severe Injury to persons. Keep clear of
nozzle. Do not touch or direct discharge stream at persons. This
machine is to only be used by qualified operators.
9. Risk of Electrocution: Do not direct spray toward any electrical
connections or outlets.
10. Risk of Explosion: Do not spray flammable liquids. Do not spray
in an area containing combustible dust, liquids or vapors.
11. Risk of Injury: Always wear proper safety attire including eye
protection. Do not use this product when children are present.
12. Risk of Chemical Exposure: Use only water and recommended
detergents with this unit.
FAILURE TO FOLLOW THE ABOVE INSTRUCTIONS COULD
RESULT IN A SEVERE ELECTRICAL SHOCK.
RIESGO DE ELCTROCUCION. NO QUITE ESTA ETIQUETA.
1. Conecte solamente a una toma corriente que está bien fundado. No
quite la pata de conexión de la tierra.
2. Antes de usar inspeccióne la cuerda. No use si la cuerda està
dañando.
3. Mantenga los conexiones secos y apar tados de la tierra.
4. No torque el enchufe con manos mojados.
5. Este producto debe conectarse a tierra. Asegúrese de que la lavadora
a presión esté equipada con un Interruptor de circuito de falla a tierra
(Ground Fault Circuit Interrupter, GCIF) incorporado en el cordón de
alimentación. Si no lo tiene, debe conectarse la lavadora a presión
únicamente en un receptáculo que esté protegido por un Interruptor
de circuito de falla a tierra. Desconéctela cuando no esté en uso.
6. No use una cuerda extensión con la unidad.
7. Antes de usar lea y entienda todas las instrucciónes y el manual de
operación.
8. Riesgo de inyección o lesion severa. Mantenga la boquilla despe jada.
No dirija el chorro hacía alguna persona o hacía usted.
9. Riesgo de electrocución. No dirija el rociado hacía conexiones o toma
corrientes electricos.
10. Riesgo de explosion. No dirija el chorro hacía conexiones electricos.
Tomas de corrientes o lineas de alimentacion de corriente.
11. Riesgo de lesion. Mientras se opera esta unidad se recomiendan
antiparras y protección apropriada. No use esta unidad cerca de
niños.
12.
SI NO SIGA LAS INSTRUCCIÓNES HAY EL RIESGO DE
ELECTROCUCIÓN SEVERA.
CAUTION
WARNING
ADVERTENCIA
PRECAUCION
1. To Reduce Risk of Injury: Read and understand the operation
manual and all instructions before using.
2. Stay Alert: Hold onto gun/wand firmly with both hands to avoid
dangerous kickbacks.
3. Do not overreach or stand on unstable suppor t. Keep good
footing and balance at all times.
4. Inspect all hoses for kinking, cuts and leaks.
5. Risk of Eye Injury: Always wear eye protection.
6. Protect pump from freezing.
7. Always turn on water supply to pump before star ting.
8. Engage trigger safety lock-off when not in use.
1. Para Reducir el Riesgo de que Ocurran Lesions: Lea y
entienda el manual de operacion y todas las instrucciones ante
de usar el producto.
2. Permanizca Alerta: Sostenga la pistola var illa firmenmente con
ambas mano para evitar golpes de retroceso peligrosos.
3. No se extienda demasiado o se pare en un apoyo inestable.
Mantenga una buena posicion y balance todo el tiempo.
4. Inspeccione las mangueras por dobleces, cortes y pérdidas.
5. Riesgo de que Ocular Lesions: Use siempre proteccion ocular.
6. Proteja la bomba de la congelacion.
7. Antes de comenzar. Abra sienpre el suminstro de agua a la
bomba.
8. Coloque el suguro del gatillo en la posicion apagado cuando no
este usando el producto.
CONNECT TO AN INDIVIDUAL BRANCH
CIRCUIT ONLY.
CONECTE A UNA RAMA INTERRUPTOR
INDIVIDUAL SOLAMENTE.
IMPORTANT
IMPORTANTE
1. For indoor and outdoor use.
2. Store indoors.
3. Avoid pump damage. Protect from freezing. Do not run for
more than 3 minutes with spray gun not triggered.
4. If connected to a circuit protected by fuses, use time-delay
fuses only.
5. Servicing is to be done with the unit disconnected from the
supply circuit.
1. Para uso interior y exter ior.
2. Almacene bajo techo.
3. Evite daños a la bomba. Protéjala contra la congelación. No
haga funcionar por más de 3 minutos sin accionar el gatillo de
la pistola.
4. Si se conecta a un circuito protegido por fusibles, use fusibles
con retardo solamente.
5. Para hacer los servicios, necesita desconectar la unidad del
circuito de suministro.
OPERATION
1. Be sure that the correct electrical system (voltage,
amperage) is supplied for this unit.
2. Connect the inlet water supply to the unit. Turn on
the water supply. Trigger gun to prime pump and
release air.
3. Point gun in a safe direction. Brace wand securely to
avoid recoil.
4. To start the unit, press the green "ON" button.
5. To stop the unit, press the red "OFF" button. Always
turn off water supply and trigger spray gun to release
pressure.
6. Observe lubrication and maintenance
recommendations as listed in the operator's manual.
1. Sea usted seguro que la sistema electrica es corecta
(voltaje, amperaje) para esta unidad.
2. Conecte usted el suministro del agua a la unidad.
Encienda el suministro del agua. Haz la pistola para
preparar la bomba y despedir el aire.
3. Haz la pistola en una manera segura. Afirme la
varita seguramente para evitar el retroceso.
4. Para encender la unidad, pon el botón verde de
"encendido".
5. Para apagar la unidad, pon el botón rojo de
"apagado".
6. Lea usted las recomendaciones del lubricacíon y el
mantenimiento como se dice en el manual del
propietario.
OPERACIÓN
34-1137-E/S-041100-ENG.
ON
I
OFF
O
RISK OF INJECTION OR SEVERE INJURY.
Never put your hand, fingers or body directly
over the spray nozzle.
34-1253-030801-ENG.
WARNING
ADVERTENCIA
RIESGO DE INYECCION O LISION SEVERA
Nunca coloque la mano, los dedos o el cuerpo
directamente sobre la boquilla de rocío.
WARNING
RISK OF ELECTROCUTION.
DO NOT REMOVE THIS TAG.
FAILURE TO FOLLOW THE ABOVE
INSTRUCTIONS COULD RESULT
IN A SEVERE ELECTRICAL SHOCK.
1. CONNECT ONLY TO A PROPERLY
GROUNDED OUTLET. DO NOT
REMOVE GROUND PIN.
2. INSPECT CORD BEFORE USING. DO
NOT USE IF CORD IS DAMAGED.
3. KEEP ALL CONNECTIONS DRY AND
OFF THE GROUND.
4. DO NOT TOUCH PLUG WITH WET
HANDS.
5. THIS PRODUCT IS PROVIDED WITH A
GROUND FAULT CIRCUIT
INTERRUPTER (GFCI) BUILT INTO
THE POWER CORD PLUG. IF
REPLACEMENT OF PLUG OR CORD
IS NEEDED, USE ONLY IDENTICAL
REPLACEMENT PARTS.
6. DO NOT USE AN EXTENSION CORD
WITH THIS MACHINE.
7. READ THE OPERATOR'S MANUAL
BEFORE USING.
34-1014-081099-E/S-ENG
DO NOT REmOvE sAFETy DECAls FROm UNIT UNlEss REplACING WITh mOsT CURRENT sAFETy DECAl!!
Reference #20 Decal: Warning-Risk of Electrocution (Part # 34-1137)
Reference #17 Decal: Warning-Risk of Injection (Part # 37-1253)
Reference #1 Tag: Warning: Risk of Electrocution (Part # 34-1014)
Mi-T-M JP-Electric Operator's Manual 11
Page 12
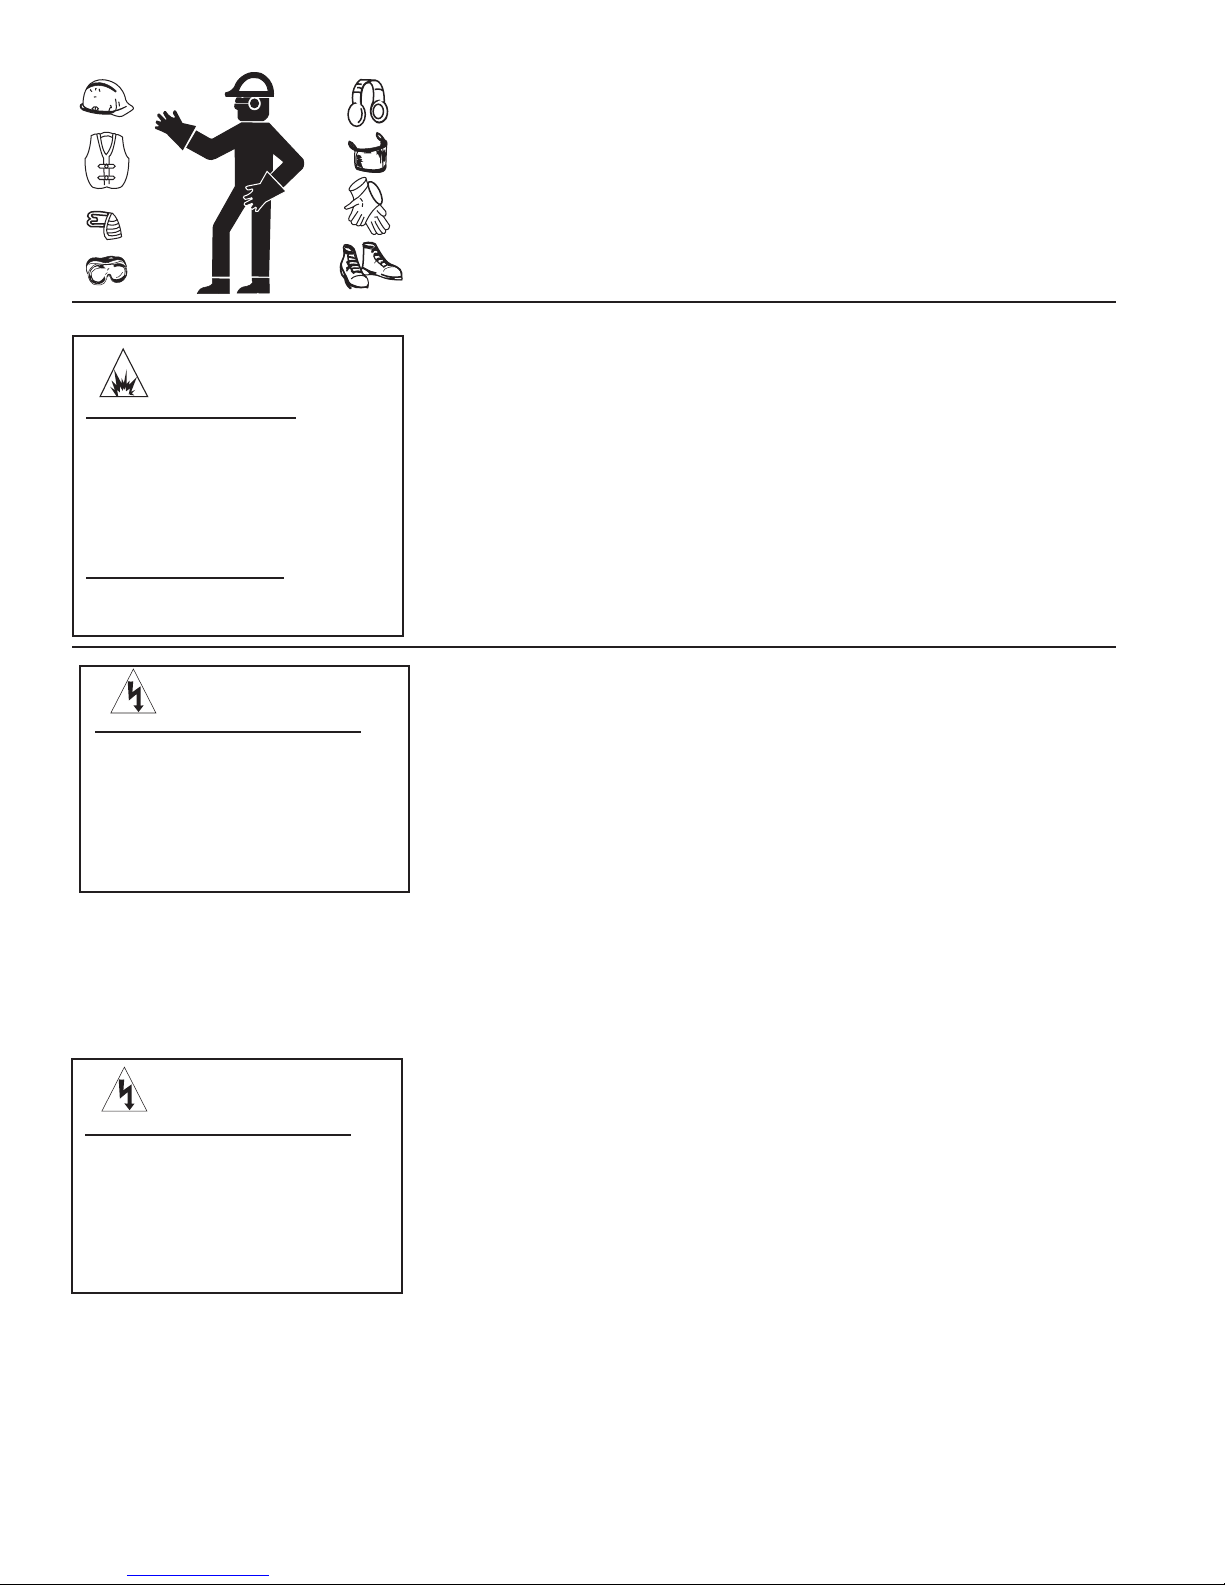
WARNING
RISK OF EXPLOSION!
DO NOT OPERATE UNIT IN AN
AREA wHERE FLAMMAbLE GAS
VAPORS MAY bE PRESENT. AN
ELECTRIC SPARK MAY CAUSE
AN EXPLOSION.
RISK OF bURSTING!
DO NOT STORE / OPERATE UNIT
IN A FREEzING ENVIRONMENT.
INSTALLATION & PREPARATION
ATTIRE:
Proper attire is essential to your safety. It is advised to utilize whatever means
necessary to protect eyes, ears, and skin. Additional safety attire (such as
respiratory mask) may be required when using detergent cleaning agents with
this washer.
SETUP:
1. This unit should only be placed on a level surface to ensure proper lubrication
for the water pump while operating. NEVER spray water directly on the
unit!
2. Do not place unit in an area:
a. where there is evidence of oil or gas leaks.
b. where ammable gas vapors may be present.
3. Do not allow the unit to be exposed to rain, snow or freezing temperatures.
If any part of the unit becomes frozen; excessive pressure may build up in
the unit which could cause it to burst, resulting in possible serious injury to
the operator or bystanders.
4. Before each use, be certain the oil level is in the center of the sight glass.
If low, ll with Mi-T-M pump oil (#AW-4085-0016). DO NOT OVERFILL!
DANGER
RISK OF ELECTROCUTION!
THIS UNIT MUST bE CONNECTED
TO A PROPERLY GROUNDED
OUTLET. DO NOT USE AN
ADAPTER OR REMOVE THE
THIRD GROUNDING PRONG.
WARNING
RISK OF ELECTROCUTION!
TO REDUCE THE RISK OF
ELECTROCUTION, KEEP ALL
CONNECTIONS DRY AND OFF
THE GROUND. DO NOT TOUCH
PLUG wITH wET HANDS.
POwER CORD CONNECTION:
1. Make certain the motor switch is in the "OFF" position.
2. Ensure electrical supply is identical to the specications listed on the pressure
washer data plate.
3. GROUNDING INSTRUCTIONS: This product must be grounded. If it should
malfunction or breakdown, grounding provides a path of least resistance for
electric current to reduce the risk of electric shock. This product is equipped
with a cord having an equipment-grounding conductor. The plug must be
plugged into an appropriate outlet that is properly installed and grounded
in accordance with all local codes and ordinances.
4. DANGER: Improper connection of the equipment-grounding conductor
can result in a risk of electrocution. Check with a qualied electrician or
service personnel if you are in doubt as to whether the outlet is properly
grounded. Do not modify the plug - if it will not t the outlet, have a proper
outlet installed by a qualied electrician. Do not use any type of adaptor
with this product.
5. GROUND FAULT CIRCUIT INTERRUPTER PROTECTION:
a. SINGLE PHASE: If this pressure washer is provided with a Ground
Fault Circuit Interrupter (GFCI) built into the plug or the power supply
cord, test the GFCI each time it is plugged into an outlet according to
instructions on the GFCI. DO NOT use the pressure washer if the test
fails! The GFCI provides additional protection from the risk of electric
shock. Should replacement of the plug or cord become necessary, use
only identical replacement parts that include GFCI protection.
b. SINGLE PHASE: If this pressure washer is not provided with a GFCI,
this pressure washer should only be connected to a receptacle that
is protected by a Ground Fault Circuit Interrupter (GFCI) to comply with
the National Electric Code (NFPA 70) and to provide additional protection
from the risk of electric shock.
c. THREE PHASE: These pressure washers are not provided with GFCI
protection.
12 Mi-T-M JP-Electric Operator's Manual
Page 13
INSTALLATION & PREPARATION
POwER CORD CONNECTION, CONT'D.:
6. EXTENSION CORDS: Mi-T-M DOES NOT RECOMMEND THE USE OF
EXTENSION CORDS! If use of an extension cord is unavoidable, it must
be plugged into a GFCI found in circuit boxes or protected receptacles.
When using an extension cord, consult a qualied electrician to determine
the proper wire gauge needed for the length of the extension cord.
SINGLE PHASE: Use only 3-wire extension cords that have 3-prong grounding-
type plugs and 3-pole cord connectors that accept the plug from the
product.
THREE PHASE: Use only 4 wire extension cords that have 4-prong grounding type
plugs and 4-pole cord connectors that accept the plug from the product.
Use only extension cords that are intended for outdoor use. These extension
cords are identied by a marking "Acceptable for use with outdoor appliances;
store indoors while not in use." Use only extension cords having an electrical
rating not less than the rating of the product. Do not use damaged extension
cords. Examine extension cord before using and replace if damaged. Do
not abuse extension cord and do not pull on any cord to disconnect. Keep
cord away from heat and sharp edges. Always connect or disconnect the
extension cord from the receptacle before connecting or disconnecting the
product from the extension cord.
7. Ensure the area between the pressure washer cord and outlet is kept dry.
8. Insert the male plug into a grounded AC outlet. DO NOT use an adapter
OR remove the grounding plug!!
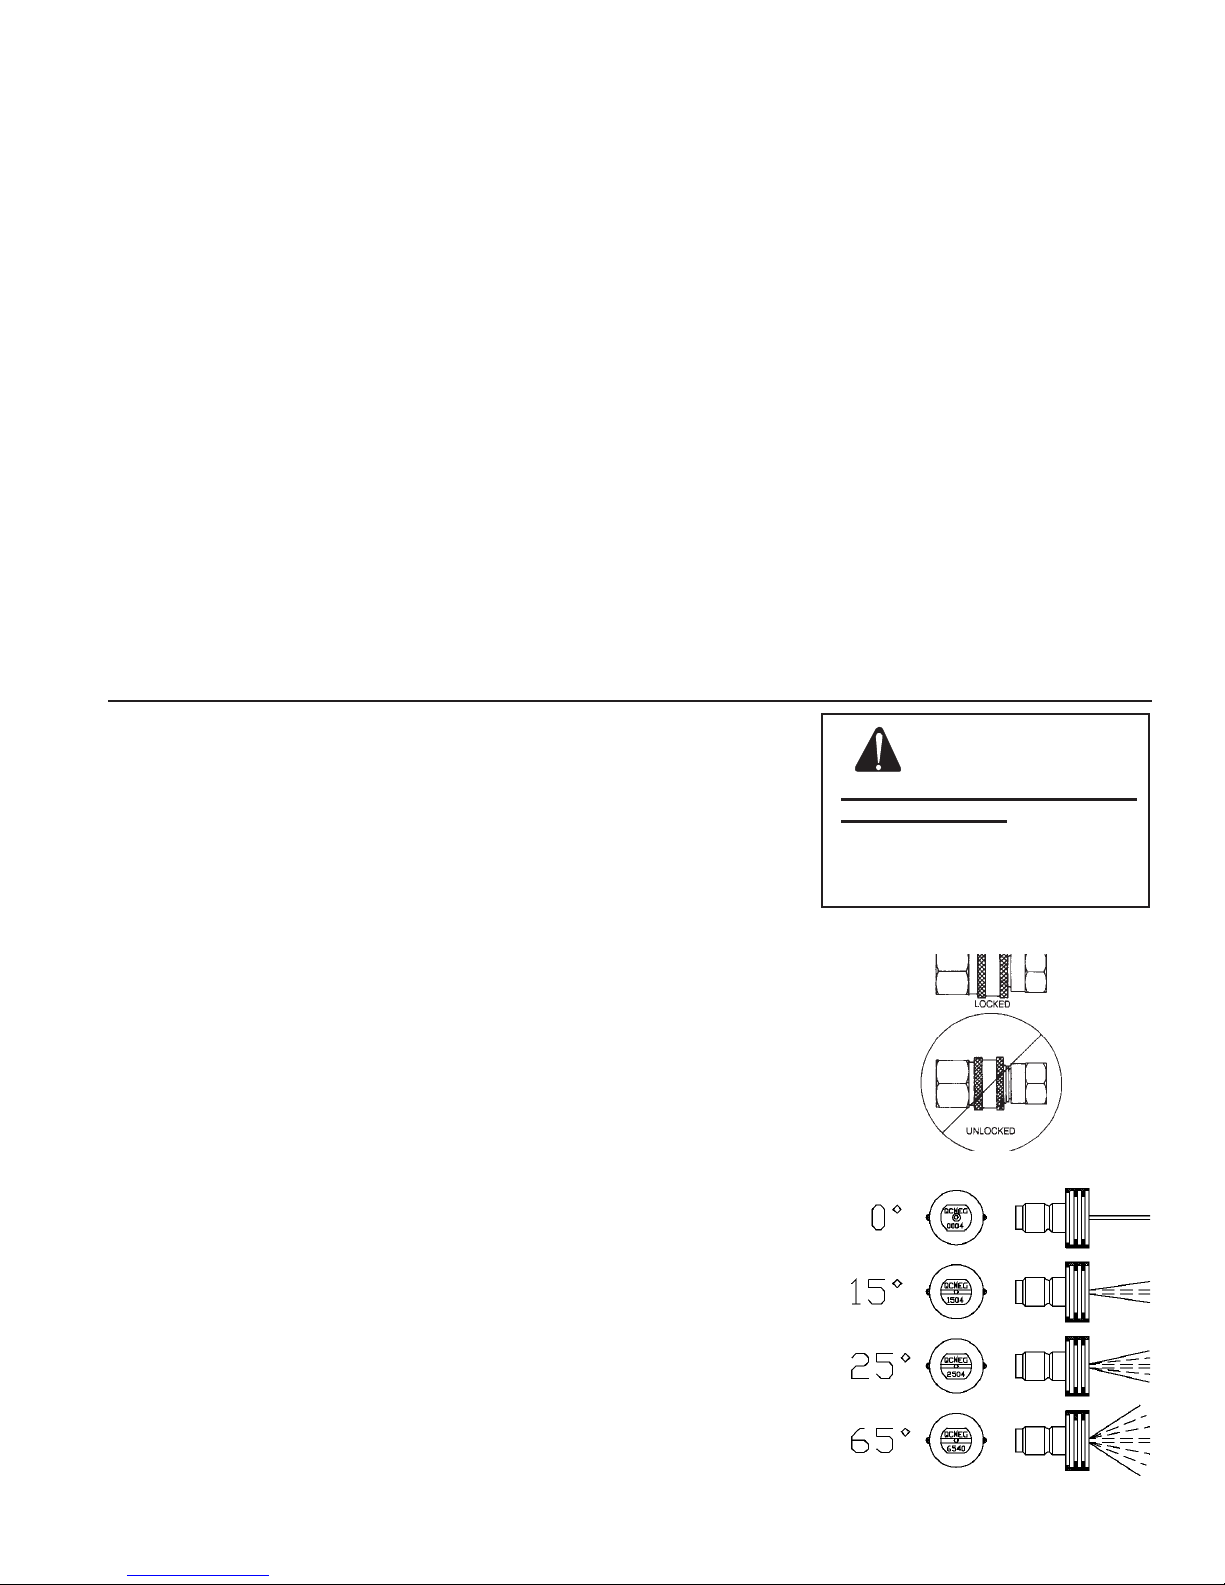
NOzzLE REVIEw:
Various nozzles may be quick-connected into the end of the wand to change
the spray pattern or use the detergent feature. When using Quick Connects
(Q.C.), be certain the connection is securely locked. If not, the high pressure
water may shoot the nozzle from the wand, causing severe injury or serious
damage. To determine spray fan, refer to the actual number stamped on the
nozzle. The rst two digits indicate the spray fan in degrees, i.e.; 00=0”, 15=15°,
25=25°, 65=detergent/low pressure.
1. The 0” nozzle (RED): This is a blasting nozzle. It delivers a very concentrated
stream of water. Be cautious when using the straight narrow stream. It is
not recommended for use on painted or wood surfaces, or items attached
with adhesive backings. Uses: Removing weeds from sidewalk cracks,
stubborn stains from concrete, masonry, aluminum and steel, caked mud
from equipment, and cleaning lawn mower undersides.
2. The 15° nozzle (YELLOw): This is a chiseling nozzle. The spray should
be directed at a 45° angle to the surface and used like a scraper to remove
paint, grease and dirt. Uses: Surface preparation (removing mildew stains
and paint chips).
3. The 25° nozzle (GREEN): This is a ushing nozzle. This pattern is best
suited for ushing dirt, mud, and grime. Uses: Wet sweeping leaves from
walks, curbs and driveways, cleaning stable oors, washing swimming pool
bottoms, degreasing engines.
4. The 65° nozzle (bLACK): This is a low pressure detergent application
nozzle. This broad spray pattern distributes solution over vast areas under
low pressure. Uses: Detergent application, misting or rinsing.
WARNING
RISK OF INJECTION CAUSING
SEVERE INJURY!
NEVER LOOK DIRECTLY AT THE
NOzzLE ORIFICE UNLESS IT IS
DISCONNECTED FROM THE
GUN/wAND ASSEMbLY!
CONNECTION OF Q.C. NOzzLES
QUICK-CONNECT (Q.C.)
Mi-T-M JP-Electric Operator's Manual 13
Page 14
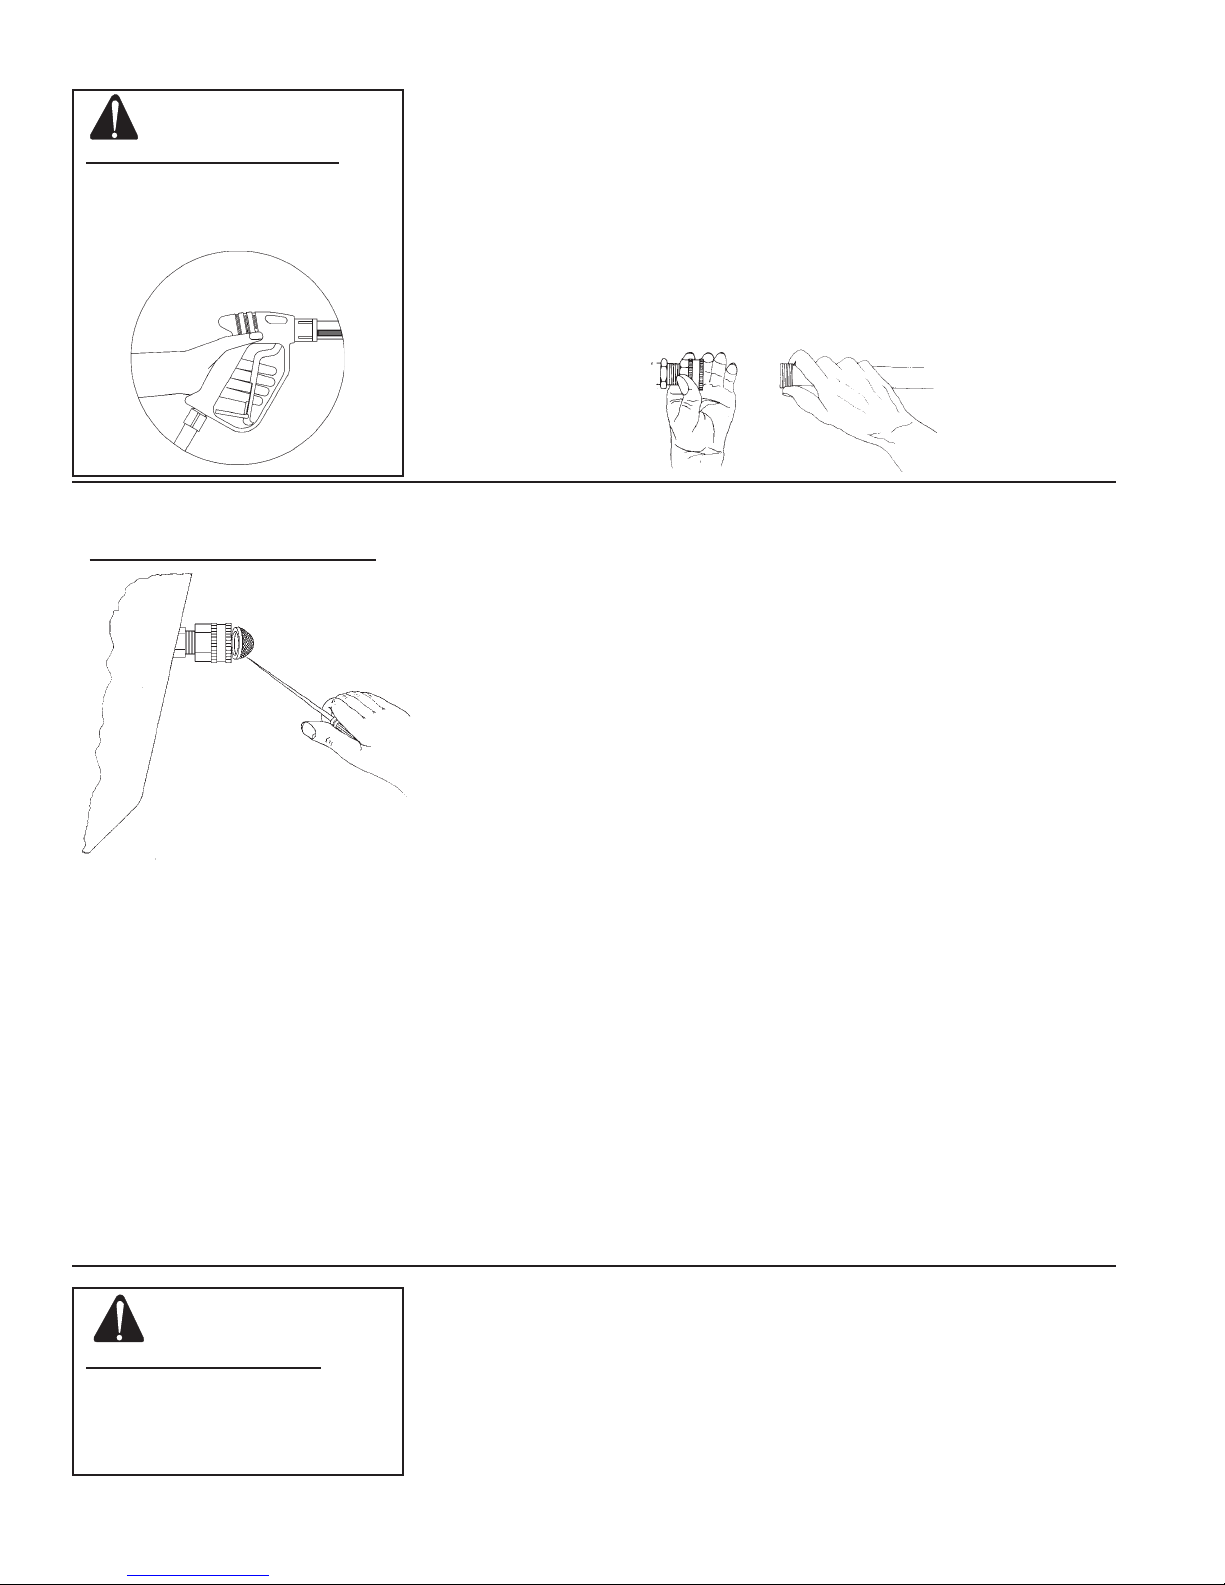
WARNING
INSTALLATION & PREPARATION
RISK OF SEVERE INJURY!
THE TRIGGER GUN SHOULD
ALwAYS bE LOCKED IN THE OFF
POSITION wHEN NOT IN USE!
CHECK wATER INLET STRAINER
NOzzLE CONNECTION:
1. Be certain the trigger gun is locked in the "OFF" position. See WARNING,
left.
2. The nozzle assembly should be disconnected from the gun/wand assembly
at this by retracting the locking ring on the quick-connect tting to remove
the nozzle.
QUICK-CONNECT FITTING
wATER SUPPLY:
1. Select a water supply hose which is a quality grade of garden hose measuring
at least 3/4" ID and no longer than 50 feet.
2 Check the water inlet strainer to ensure it is clean and free of any obstructions.
Periodic cleaning of the water strainer will help prevent pump problems. As
a strainer becomes obstructed, it restricts proper ow of water to the pump.
This can cause cavitation which will result in premature failure of pump
packings and valves. Using a screw driver, remove the screen; clean or
replace with Mi-T-M #19-0001 if necessary.
3. Connect the hoses.
a. Connect one end of the water supply hose to the water inlet of the
unit.
b. Connect the other end of the hose to your pressurized water supply.
NOTE: Do not use a non-pressurized water supply (i.e. from a well or pond)
with this unit.
c. Connect the high pressure discharge hose to the water outlet of the
unit.
4. Follow the incoming water requirements listed below:
a. Water pressure must be a minimum of 20 pounds per square inch (PSI)
and a maximum of 125 PSI. (A typical outdoor faucet will generally
supply this PSI if turned completely "ON".)
b. Incoming GPM must be approximately one gallon more than the outgoing
GPM stated on the pressure washer nameplate. (You can check GPM
by timing how long it takes to ll a 5 gallon container.
c. Incoming water temperature must not exceed 140°F (78°C). Excessive
pump damage may result if the water temperature exceeds this acceptable
level.
5. Never allow the unit to operate without the incoming water line attached and
the water supply turned all the way on.
CAUTION
RISK OF UNIT DAMAGE!
DO NOT OVERTIGHTEN THE
UNLOADER. bREAKAGE wILL
RESULT IN IMMEDIATE LOSS OF
wATER PRESSURE AND COSTLY
REPAIRS.
14 Mi-T-M JP-Electric Operator's Manual
UNLOADER:
The unloader valve on your machine is equipped with an adjustment knob
to adjust the pressure. Should less pressure be required, simply turn the
adjustment knob counterclockwise. To set back to maximum, turn adjustment
knob completely clockwise. DO NOT OVERTIGHTEN!
Page 15
INSTALLATION & PREPARATION
THERMAL RELIEF VALVE:
To ensure the water temperature does not exceed acceptable levels, never allow
the pressure washer to operate in the bypass mode (with the unit running and
the trigger closed) for more than three minutes.
A thermal relief valve has been added to this unit to protect the pump. This valve
will open and release water if the water temperature in the pump has exceeded
140° F. This will allow fresh, cool water to enter the system, preventing premature
failure of pump packings.
PRE-START INSPECTION PROCEDURES:
Before starting the unit, perform the following procedures:
1. Inspect electrical cord for cuts. If a cut is found, DO NOT TOUCH OR USE
ELECTRICAL CORD! Replace cord before starting the unit.
2. Check the oil level in the pump.
3. Inspect the inlet water strainer. Clean or replace if necessary. See "Water
Supply", #2, pg. 15.
4. Check all hose connections to ensure they are securely tightened. See
"Water Supply", #3, pg. 15.
5. Inspect for system water leaks and oil leaks. Be sure that all damaged
parts are replaced and that the mechanical problems are corrected prior to
operation of the unit. If service is needed, contact Customer Service.
6. Inspect high pressure hose for kinking, cuts or leaks. If a cut or leak is
found, DO NOT USE HOSE! Replace hose before starting unit. Be sure
that all damaged parts are replaced and that the mechanical problems are
corrected prior to operation of the unit. If you need service, contact Customer
Service.
END OF PREPARATION INSTRUCTIONS
wARNING
THE FOLLOwING PAGES CONTAIN OPERATING AND MAINTENANCE
INSTRUCTIONS
DO NOT ATTEMPT TO OPERATE THIS PRESSURE wASHER UNTIL
YOU HAVE READ AND UNDERSTOOD ALL SAFETY PRECAUTIONS
AND INSTRUCTIONS LISTED IN THIS MANUAL.
INCORRECT OPERATION OF THIS UNIT CAN CAUSE SERIOUS INJURY!!
DO NOT ALTER OR MODIFY THIS EQUIPMENT IN ANY MANNER!
Mi-T-M JP-Electric Operator's Manual 15
Page 16
WARNING
RISK OF INJECTION CAUSING
SEVERE INJURY!
-KEEP CLEAR OF NOzzLE! NEVER
PLACE HAND OR FINGERS IN
FRONT OF NOzzLE!
-DO NOT DIRECT DISCHARGE
STREAM AT PEOPLE OR PETS!
-bE CERTAIN THE NOzzLE IS
SECURELY CONNECTED TO
THE wAND TO PREVENT AN
ACCIDENTAL DISCHARGE!
OPERATING INSTRUCTIONS
PRIMING THE PUMP:
1. It is essential to prime the pump on initial start-up and each time the water
supply is disconnected from the unit after initial use.
2. Lay the high pressure hose out to remove any loops. Water ow will constrict
the hose, creating tight loops if the hose is not straight.
3. Securely connect the gun assembly to the high pressure hose.
NOTE: The nozzle should NOT be connected to the gun assembly at this time.
See "Nozzle Connection" pg. 14.
4. With the trigger gun locked in the "OFF" position, turn the water supply
completely on. Pointing the gun in a safe direction, unlock the trigger gun
and squeeze the trigger.
5. Low pressure water will begin owing from the hose/gun assembly. This
allows the unit to prime and purge any air from the system. The unit is
primed when water ow is uninterrupted by air.
6. Once the unit is primed, release the trigger and lock the gun in the "OFF"
position. Securely connect the nozzle assy. (See "Nozzle Connection" pg.
14.)
START-UP:
1. Refer to the "Safety Precautions" pgs. 4-7 before starting the unit.
2. Locate the Safety Decals on your unit and heed their warnings.
3. With the gun locked in the "OFF" position, point the trigger gun away from
yourself or anyone else. Ensure water supply is turned completely on.
4. Disengage the safety lock-off on the gun and squeeze the trigger. Low
pressure water will begin owing from the nozzle.
5. Before starting the unit, brace yourself as the gun will kickback from the
high pressure created by the pump once the unit has started.
6. Move the switch to the "ON" position. This switch includes a circuit breaker
for protection of the motor. In case of excess load, the circuit breaker will
automatically move the switch to the "OFF" position. To restart, move the
On/Off Switch to the "ON" position again.
7. Once the unit is turned on, perform the following procedures with the gun
open:
a. Inspect for system water leaks and oil leaks. If a leak is found, TURN
UNIT OFF IMMEDIATELY! Be sure that all damaged parts are replaced
and that the mechanical problems are corrected prior to operation of
the unit. If you require service, contact Mi-T-M Customer Service.
b. Inspect high pressure hose for kinking cuts and leaks. If a cut or leak is
found, DO NOT TOUCH HOSE AT CUT OR LEAK!!! TURN UNIT OFF
IMMEDIATELY! Replace hose before restarting the unit. Be sure that
all damaged parts are replaced and that the mechanical problems are
corrected prior to operation of the unit. If you require service, contact
Mi-T-M Service.
c. Inspect electrical cord for cuts. If a cut is found, DO NOT TOUCH OR
USE ELECTRICAL CORD! Replace cord before starting the unit.
CAUTION
RISK OF DAMAGE.
DO NOT ALLOw SPRAY PATTERN
TO REMAIN ON A FIXED AREA
FOR AN EXTENDED PERIOD OF
TIME. POSSIbLE DAMAGE MAY
OCCUR TO THE AREA.
16 Mi-T-M JP-Electric Operator's Manual
8. Trigger the gun several times. be certain to LOCK the trigger gun in the
"OFF" position whenever changing the nozzle. NEVER look directly into
the nozzle! High pressure water creates a risk of severe injury!
9. Do not allow unit to operate in bypass mode (with trigger closed) for more
than three minutes without triggering the gun. Failure to follow this simple
rule can cause premature failure of pump packing seals, resulting in costly
pump repair.
10. Because your pressure washer delivers a high pressure spray and a variety
of spray patterns, there are many cleaning jobs that can be done without
the use of detergents. If a cleaning agent is required, see "Cleaning With
Detergents" pg. 17 for the correct procedures.
Page 17
OPERATING INSTRUCTIONS
CLEANING wITH DETERGENTS:
1. Refer to "Detergent Cleaning Precautions" pg. 7 before working with
detergents. Be certain to wear protective safety attire as stated on pg.
12.
2. Prepare detergent solution according to label directions. Never pump
acids, alkaline, abrasive uids or solvents through the unit.
3. Your injector is equipped with an adjustment knob on the pump head,
you may adjust the amount of detergent desired by turning the knob
completely counterclockwise to set at the maximum siphon rate.
4. Immerse the detergent strainer into the detergent solution to allow
detergent to siphon.
5. With the trigger gun locked in the "OFF" position, securely quick-connect
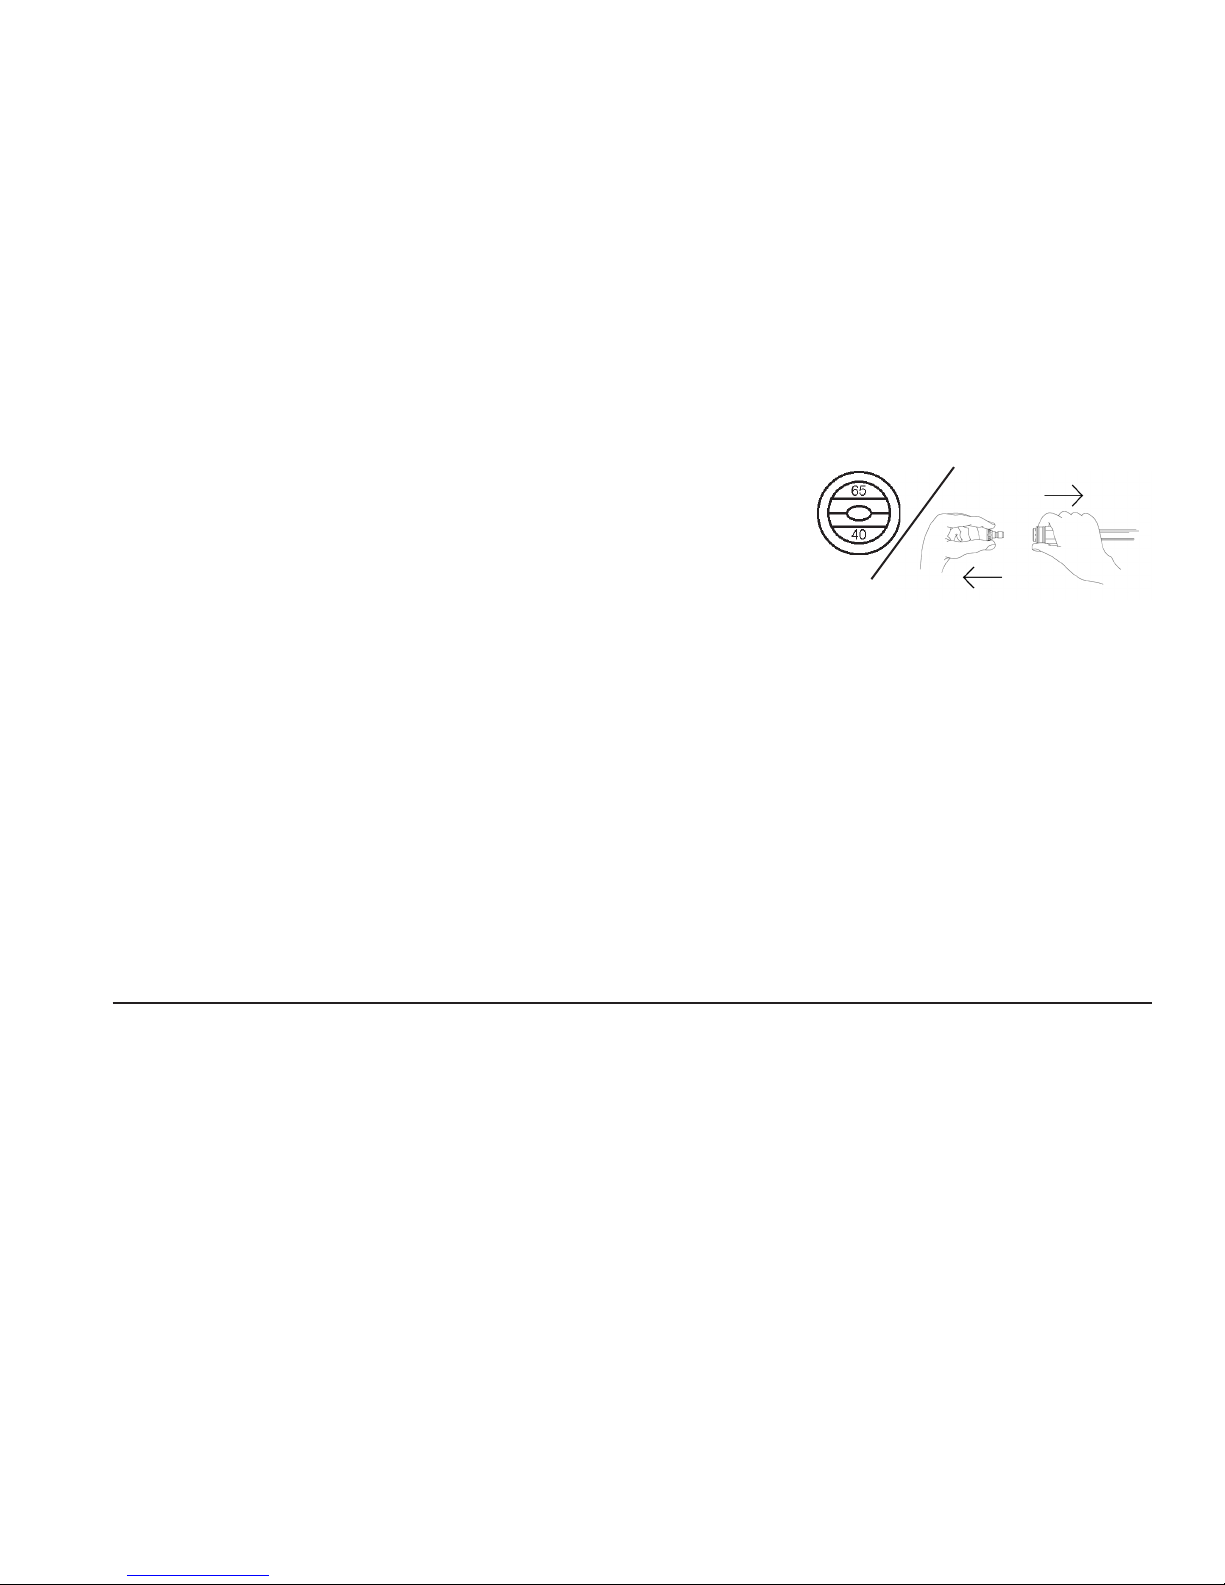
the detergent spray nozzle (#6540° BLACK) into the end of the wand.
NOTE: This injection system is designed to apply detergents under
low pressure only. It will not allow detergent solutions to be
introduced into the system unless the detergent nozzle (6540
Black) is installed.
6. To apply solution; unlock the trigger gun and squeeze the trigger. In a
few moments a detergent/water mixture will exit the low pressure nozzle.
Start spraying the lower portion of the surface being cleaned and move
up, using long overlapping strokes. Applying from the bottom up helps
avoid streaking. Allow to soak briey. DO NOT allow detergent solution
to dry on the surface. (Avoid working on hot surfaces or in direct sunlight
to minimize the chances of the detergent drying, which may result in
damaging painted surfaces.) Be certain to rinse a small section at a
time.
7. To rinse; lock the trigger gun in the "OFF" position, securely quick-connect
the desired high pressure nozzle into the end of the wand. Unlock the
trigger gun and spray. It will take about 30 seconds to purge all detergent
from the line. For best rinsing results, start at the top and work down.
8. Siphon a gallon of water through the low pressure detergent injection
system after each use. This prevents the possibility of corrosion or
detergent residue causing mechanical problems during the next use.
QUICK CONNECT DETERGENT
SHUTDOwN:
1. Move the switch to the "OFF" position to turn unit off.
2. Turn the water supply off.
3. Pointing the gun in a safe direction, trigger the gun momentarily to relieve
any trapped pressure.
4. Once pressure is relieved, disconnect the nozzle.
5. Disconnect the unit from the power source.
6. Disconnect and drain gun, wand and hoses.
7. Wipe unit clean and store with gun, wand and hoses in a safe area.
Mi-T-M JP-Electric Operator's Manual 17
Page 18
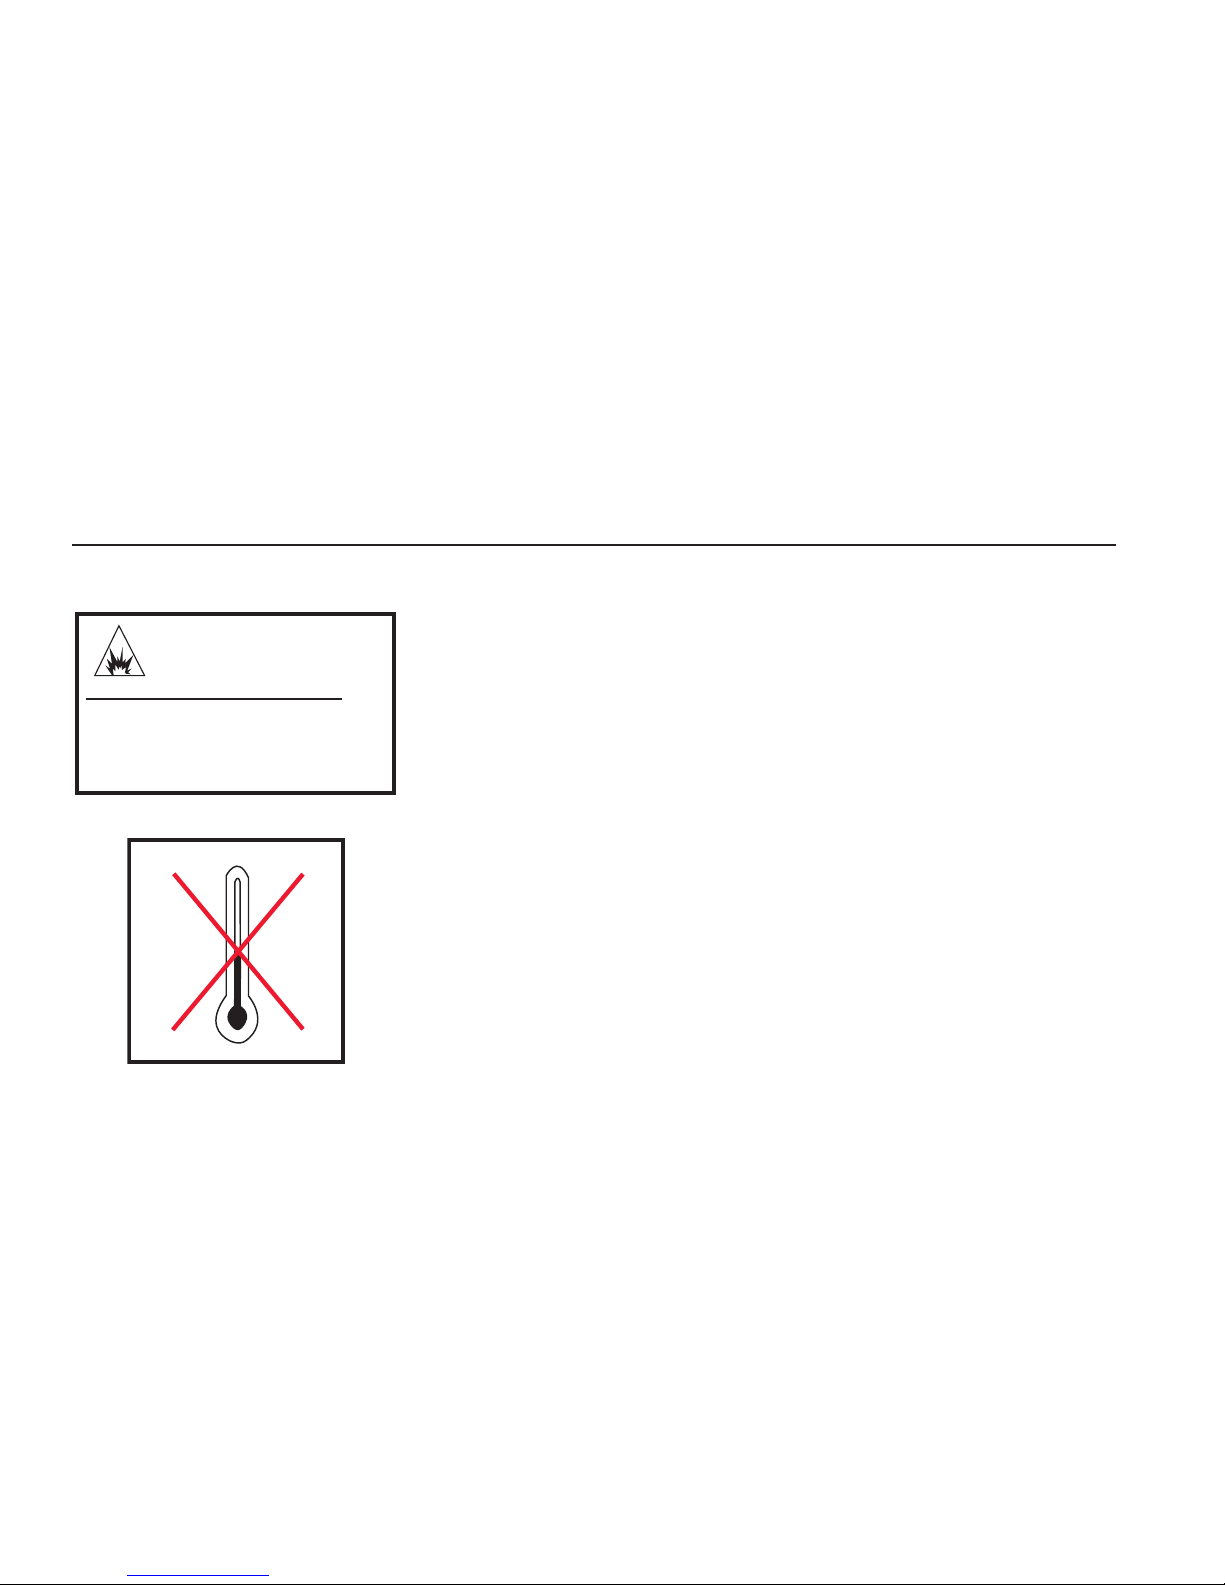
WARNING
32˚F 0˚C
RISK OF UNIT bURSTING!
DO NOT STORE OR OPERATE
UNIT IN A FREEzING ENVIRONMENT!
STORAGE & MAINTENANCE
SPECIFIC MAINTENANCE:
PUMP: The pump oil must be changed after the rst 25 hours of operation.
Once the initial oil change has been completed, it is recommended the
oil be changed every 3 months or 250 hour intervals. If oil appears
dirty or milky, changes may be required at a greater frequency. Use
Mi-T-M pump oil #AW-4085-0016 and ll only to the center of the
oil sight glass. DO NOT OVERFILL!
NOZZLES: Water ow through the spray nozzle will erode the orice, making
it larger, resulting in a pressure loss. Nozzles should be replaced
whenever pressure is less than 85% of the maximum. The
frequency of replacement will depend upon such variables as
mineral content in the water and number of hours the nozzle is
used.
QUICK COUPLERS: There is an o-ring seal inside the female quick coupler.
This o-ring will deteriorate or, if the unit is allowed to pump without
the high pressure hose or nozzle attached, the o-ring may be blown
out occasionally. Simply insert a replacement o-ring to correct the
leak. (Additional o-rings can be purchased from your dealer.)
wINTERIzING:
For storage and transportation purposes in subfreezing ambient temperatures,
it will be necessary to winterize this unit. This unit must be protected to the
lowest incurred temperature for the following reasons:
1. If any part of the pumping system becomes frozen; excessive pressure may
build up in the unit which could cause the unit to burst resulting in possible
serious injury to the operator or bystanders.
2. The pumping system in this unit may be permanently damaged if frozen.
FREEZE DAMAGE IS NOT COVERED BY WARRANTY.
If you must store your unit in an area where the temperature may fall below 32°F,
you can protect your unit by following the procedure outlined below.
1. Gather the following items:
a. Two 5 gallon containers.
b. One gallon of antifreeze. (Mi-T-M recommends an environmentally safe
antifreeze.)
c. Water supply.
d. Three foot hose, 1/2-3/4 I.D. with a 3/4 inch male garden hose tting.
2. Procedure:
a. To start winterizing, unit must be run and primed according to the "Start-
up Procedures" listed on page 16.
b. After running and priming, shut off the unit and water supply.
c. Relieve system pressure by pointing the trigger gun in a safe direction
and squeezing the trigger until water ow ceases to exit the nozzle.
d. Lock the trigger gun in an OFF position and remove the nozzle.
e. Remove the water supply hose from the unit and attach the 3 foot hose
securely to the inlet connection.
f. Shut off the detergent injector if applicable.
g. Fill one 5 gallon bucket with water.
h. Holding the 3 foot hose in an upright position, completely ll the hose
with water. Then plug the hose outlet with your thumb or nger. Place
the plugged end into the 5 gallon bucket of water.
i. Turn the unit on. Trigger the gun several times until all the air is worked
out of the system (unit is primed).
18 Mi-T-M JP-Electric Operator's Manual
NOTE: Proper winterizing is based on the recommended manufacturer's
instructions listed on the "Protection Chart" shown on the back label of
most antifreeze containers.
CONTINUED
Page 19

STORAGE & MAINTENANCE
wINTERIzING, CONT'D:
j. With the trigger gun held open, siphon enough water out of the 5 gallon
bucket until there is just enough water left to mix with the antifreeze.
k. Point the wand into the empty container and start the unit.
l. Trigger the gun until the antifreeze begins to exit the wand. Release
the trigger for 3 seconds, then trigger the gun for 3 seconds. Continue
cycling the gun several times until all the antifreeze mixture is siphoned
from the container.
m. Detach the 3 foot hose from the unit and drain any excess antifreeze
back into the 5 gallon container.
n. Disconnect the hose/gun/wand assembly from the unit and drain any
excess antifreeze back into the 5 gallon container.
o. Store the hose, gun and wand with the unit in a safe area.
p. Store antifreeze solution for next use or dispose of according to state
EPA laws.
3. Optional Procedure:
a. Shut the unit off.
b. Relieve system pressure by pointing the trigger gun in a safe direction
and squeezing the trigger until water ow ceases to exit the nozzle.
c. Disconnect and drain the hose, gun and wand.
d. Start the unit and allow it to run until all the water exits the unit. Once
the water has stopped owing from the unit, turn off.
NOTE: When using this procedure, caution should be used as ice chips can
form from drops of water which could cause the unit to burst if starting
before completely thawed.
STARTING UNIT AFTER EXTENDED STORAGE:
1. BE CERTAIN the unit is NOT plugged into the power source.
2. Prior to restarting the unit, thaw out any possible ice from the wand, gun,
hose and unit.
3. After following all "PREPARATION" instructions, start the unit momentarily
and immediately turn "OFF" to ensure all parts are lubricated before
operation.
Mi-T-M JP-Electric Operator's Manual 19
Page 20

TROUbLESHOOTING
SYMPTOM PROBABLE CAUSE REMEDY
Pump motor will not start, or stops GFCI tripped. Turn unit "OFF". Test GFCI by
while operating. pressing reset button.
Loose or disconnected plug. Reconnect plug.
Circuit overload. Tripped circuit breaker Disconnect all other plugs on the
or fuse blown in circuit fuse box. circuit being used and reset circuit
breaker OR check and replace fuse.
Tripped circuit breaker in unit. Allow to cool and restart unit.
Motor overload. Reset thermal overload button on
pump motor or inside electrical control
panel.
Unit is frozen. Allow to thaw. If any part of the unit
becomes frozen; excessive pressure
may build up in the unit which could
cause the unit to burst resulting in
possible serious injury to the operator
or bystanders.
Circuit breaker trips or fuse blows in the Circuit overload. Ensure electrical supply is identical
to the specications listed on the
pressure washer data plate.
Disconnect all plugs on the circuit.
When connecting to a circuit protected
by fuses, use time delay fuses only.
Extension cord is too long or wire Electrical requirements on extension
is too small. cord should comply with the
specications listed on the pressure
washer data plate.
Too much pressure. Use Adjusting Knob on Unloader to
reduce pressure.
GFCI trips. Incorrect voltage. Ensure electrical supply is identical
to the specications listed on the
pressure washer data plate.
Electrical short to ground. Contact Customer Service
Motor runs but there is no discharge Water supply is not turned on. Turn water supply completely on.
at nozzle when trigger mechanism is
squeezed.
Kink in water inlet hose. Remove kink.
Kink in high pressure discharge hose. Replace hose.
Low or uctuating pressure. Water inlet screen obstructed. Remove screen, clean or replace.
Pump sucking air. (Prime lost) Tighten all water intake connections.
Eliminate leaks in intake line.
Not in high pressure mode. Insert high pressure nozzle.
Obstructed or worn orice. Remove and clean, or replace.
Damaged or obstructed valve assembly Remove, clean or replace.
on pump.
Pump packings worn. Replace packings.
Unloader valve not operating correctly. Repair or replace.
20 Mi-T-M JP-Electric Operator's Manual
Page 21

TROUbLESHOOTING
SYMPTOM PROBABLE CAUSE REMEDY
Water is leaking from Thermal Relief Valve. Water inlet temperature is too high. Incoming water temperature must be
less than 140°.
Water temperature in unit is too high. Do not allow unit to operate in bypass
mode (with the trigger gun closed) for
more than three minutes.
Defective valve. Replace.
Oil appears milky or foamy. Water in oil. Change pump oil. Fill to proper level.
Oil leaking from unit. Worn seals or o-rings. Contact Customer Service.
Detergent will not siphon into Low Detergent strainer is not completely Check; submerge if necessary.
Pressure Detergent mode. submerged in detergent solution
Detergent strainer is obstructed. Inspect, clean or replace.
Detergent hose is obstructed, cut Inspect, clean or replace.
or kinked.
Detergent adjusting knob turned to the Open adjusting knob.
closed position.
Not in Low Pressure mode. Insert 6540° (BLACK) nozzle.
Nozzle assembly is plugged. Clean or replace.
Too many high pressure hose Use one extension maximum.
extensions attached to the water outlet.
Ball & Spring in detergent strainer stuck. Remove, clean or replace.
Water ows back into detergent Ball & Spring in Venturi reversed, Remove, clean or replace.
container. missing or corroded.
Water ows from the nozzle when the Gun is malfunctioning. Repair or replace.
trigger gun is in the "OFF" position.
Mi-T-M JP-Electric Operator's Manual 21
Page 22

ACCESSORIES
15-0006 Supply Hose ¾ in.
50-0136 Hose Reel 13 in. (Holds 100 ft. of Hose)
50-0143 Hose Reel Bracket (Mounts to Baseplate)
851-0007 3000 PSI Extension Hose 50 ft.
851-0006 4000 PSI Extension Hose 50 ft.
AW-3000-0000 Sandblaster Carbide Nozzle (Consult Factory)*
AW-3020-0000 Sandblaster Ceramic Nozzle (Consult Factory)*
AW-4085-0016 Pump Oil 16 oz.
AW-7003-1500 Rotary Brush
AW-7015-1200 Extension Wand 12 ft.
AW-7015-1800 Extension Wand 18 ft.
AW-7015-2400 Extension Wand 24 ft.
AW-7103-1800 Extension Wand 18 in.
AW-7103-3600 Extension Wand 36 in.
AW-7103-7200 Extension Wand 72 in.
AW-7300-0003 Rotating Nozzle #3.0 (Consult Factory)*
AW-7300-0035 Rotating Nozzle #3.5 (Consult Factory)*
AW-7300-0004 Rotating Nozzle #4.0 (Consult Factory)*
AW-7300-0045 Rotating Nozzle #4.5 (Consult Factory)*
AW-7300-0005 Rotating Nozzle #5.0 (Consult Factory)*
*PSI and GPM must be specied when ordering.
Mi-T-M All Purpose Cleaner, Paint Surface Prep, House and Deck
Wash, and Heavy Duty Degreaser are specially formulated detergents
for use with all Mi-T-M pressure washers and are packaged in one (1),
ve (5), and fty-ve (55) gallon containers. Contact Mi-T-M Customer
Service Department at (800) 553-9053 for more information.
22 Mi-T-M JP-Electric Operator's Manual
Page 23

STATEMENT OF wARRANTY
Mi-T-M warrants all parts, (except those referred to below), of your new pressure washer to be free from
defects in materials and workmanship during the following periods:
For Five (5) Years from the date of original purchase:
High Pressure Pump
For Two (2) Years from the date of original purchase:
Cart Assembly
Plumbing
For One (1) Year from the date of original purchase:
GFCI Selector Switch
For Ninety (90) days from the date of original purchase:
Trigger Gun/Wand High Pressure Hose
Unloader Valve Strainer/lter
Defective parts not subject to normal wear and tear will be repaired or replaced at our option during the
warranty period. In any event, reimbursement is limited to the purchase price paid.
EXCLUSIONS
1. The motor is covered under separate warranty by its respective manufacturer and is subject to the terms
set forth therein.
2. Normal wear parts:
Pump Packings Spray Nozzles
Pump Valves Detergent Valves
Quick Couplings/Screw Connects O-rings
3. This warranty does not cover parts damaged due to normal wear, misapplication, misuse, operation at
other than recommended speeds, pressures or temperature. Parts damaged or worn because of the use
of caustic liquids or by operation in abrasive or corrosive environments or under conditions causing pump
cavitation are not warranted. Failure to follow recommended operating and maintenance procedures
also voids warranty.
4. The use of other than genuine Mi-T-M repair parts will void warranty. Parts returned,
prepaid to our factory or to an Authorized Service Center will be inspected and replaced
free of charge if found to be defective and subject to warranty. There are no warranties
which extend beyond the description of the face hereof. Under no circumstances shall
Mi-T-M bear any responsibility for loss of use of the unit, loss of time or rental, inconvenience, commercial
loss or consequential damages.
For Service or Warranty Consideration, contact Customer Service.
563-556-7484 / 800-553-9053 / Fax 563-556-1235
Mi-T-M JP-Electric Operator's Manual 23
Monday - Friday 8:00 a.m. - 5:00 p.m. CST
 Loading...