

Page 1

MITEL
Single-Line
Phone User Guide
Page 2

Page 3

Single-Line Phone Quick Reference Guide
This guide provides information for frequently used features. For more information about these and other features,
refer to the user guide. For voice mail information, refer to the voice mail user guide for your system.
Commonly Used Feature Codes
Contact your system administrator for more information
about system features.
Feature Code
Account Code – Following Calls 391
Account Code – Optional 390
ACD Agent – Log In/Out 328
ACD Agent – Wrap-Up Terminate 329
Agent Help Request 375
Answer (Ringing Call) 351
Automatic IC Call Access – On/Off 361
Automatic Trunk Call Access – On/Off 360
Background Music – On/Off 313
Call Forward All Calls 355
Call Forward No Answer/Busy 358
Conference 5
Do-Not-Disturb – On/Off 372
Hold – Individual 336
Hookflash (Recall in Europe) 330
Hunt Group – Remove/Replace 324
Message – Delete Message 368
Message – Leave Message 367
Page 7
Personal Call Routing – On/Off 364
Program Station Password 392
Queue (Callback) Request 6
Record-A-Call 385
Redial 380
Remote Programming 359
Reverse Transfer (Call Pick-Up) 4
Ring Intercom Always On/Off 377
Routing Off 304
Station Speed Dial 382
System Forward – On/Off 354
System Speed Dial 381
Transfer to Hold 346
Transfer to Ring 345
Answering Calls
Lift the handset.
Placing Emergency Calls
Dial the emergency number (911 U.S. or 999/112
Europe). The system immediately places the
emergency call as soon as you dial the number,
even if you do not select an outside line.
Placing Internal (Intercom) Calls
1. Lift the handset, and then dial the extension
number.
2. If your call goes through handsfree to a phone’s
speaker, speak after you hear a double tone.
If you hear continuous ringing, wait for the call to
be answered.
Placing a Call on Hold
To place a call on hold, perform a hookflash, and
then dial 336. To return to the call, perform a
hookflash and dial 336.
Placing Emergency Calls
Dial the emergency number (911 U.S. or
999/112 Europe). The system immediately places
the emergency call as soon as you dial the
number, even if you do not select an outside line.
Placing External Calls
1. Lift the handset and dial the Outgoing Call
feature code (8 is the default code).
2. Dial the number.
Redialing External Numbers
Lift the handset and dial 380. The line is
automatically selected and the number is dialed.
Mitel® Single-Line Phone User Guide – Issue 13, September 2009
Page 4

T ransferring Calls to Other Extensions
1. While on the call, perform a hookflash. You hear
two short tones.
2. Dial an extension number.
If desired, wait for an answer and announce the
call.
3. Hang up.
If the number is busy, there is no answer, or the
transfer is refused, hookflash twice to return to
the caller.
Forwarding Calls
1. Lift the handset, and then enter one of the
following feature codes:
• 355: Call Forward All Calls
• 356: Call Forward If No Answer
• 357: Call Forward If Busy
• 358: Call Forward If No Answer/Busy
2. Dial an extension number, or select an Outgoing
line, and then dial the telephone number.
3. Hang up.
Placing Conference Calls (Internal)
1. While on the first call, perform a hookflash, and
then dial 5.
2. Place another call, and then hookflash, and then
dial 5.
3. Perform another hookflash, and then dial 5 again
to join all of the calls together in the conference.
Retrieving Messages
When you lift the handset, you hear six quick
tones followed by intercom dial tone. Dial 365 to
automatically place a call to the station or
message center that left the message.
To Turn on Do-Not-Disturb
1. Lift the handset, and then dial 370.
2. Enter the default DND message number.
3. Enter the optional second-line message text.
4. Hang up.
Placing a Page Announcement
1. Lift the handset, and then dial 7.
2. Enter the page-zone number (0 to 9).
3. After the tone, make your announcement, and
then hang up.
Responding to a Waiting Call
To respond to a waiting call, do one of the
following:
• End the call by hanging up. When the
waiting call rings, lift the handset to answer.
• Place the current call on hold.
Using Reverse Transfer
1. Lift the handset, and then dial 4.
2. Dial the extension or hunt group number where
the call is ringing or holding.
Placing Conference Calls (External)
1. While on the first call, perform a hookflash. You
hear two short tones.
2. Select an outgoing line and dial the number.
If desired, wait for an answer and announce the
call.
3. Hang up.
If the number is busy, there is no answer or the
transfer is refused, hookflash twice to return to
the caller.
Mitel® Single-Line Phone User Guide – Issue 13, September 2009
Page 5

Notice
Enter provider information above.
This guide is released by Mitel Networks Corporation and provides information necessary to use single-line phones.
The guide contents, which reflect current Mitel standards, are subject to revision or change without notice.
Some features or applications mentioned may require a future release and are not available in the initial release.
Future product features and applications are subject to availability and cost. Some features or applications may
require additional hardware, software, or system administrator assistance.
For sales, service, or technical support, contact your local authorized provider:
If you do not know the contact information for your local provider, use the “Partners” link at the top of the Mitel home
page (www.mitel.com) to find a location near you.
If you have any questions or comments regarding this user guide or other technical documentation, contact the
Technical Publications Department (USA) at:
tech_pubs@mitel.com
®
is a registered trademark of Mitel Networks Corporation.
Mitel
All other trademarks mentioned in this document are the property of their respective owners, including Mitel Networks
Corporation. All rights reserved.
© 2003–2009 Mitel Networks Corporation
Personal use of this material is permitted. However, permission to reprint/republish this material for advertising or
promotional purposes or for creating new collective works for resale or redistribution to servers or lists, or to reuse
any copyrighted component of this work in other works must be obtained from Mitel.
Mitel® Single-Line Phone User Guide – Issue 13, September 2009 Page i
Page 6
Important Safety Instructions and Precautions
Remember the following safety guidelines when using the phone.
Programming Emergency Numbers
Make sure to do the following when programming emergency numbers and/or making test calls to emergency
numbers:
• Remain on the line and briefly explain to the dispatcher the reason for the call.
• Perform tests during off-peak hours such as early morning or late evenings.
Safety Notices
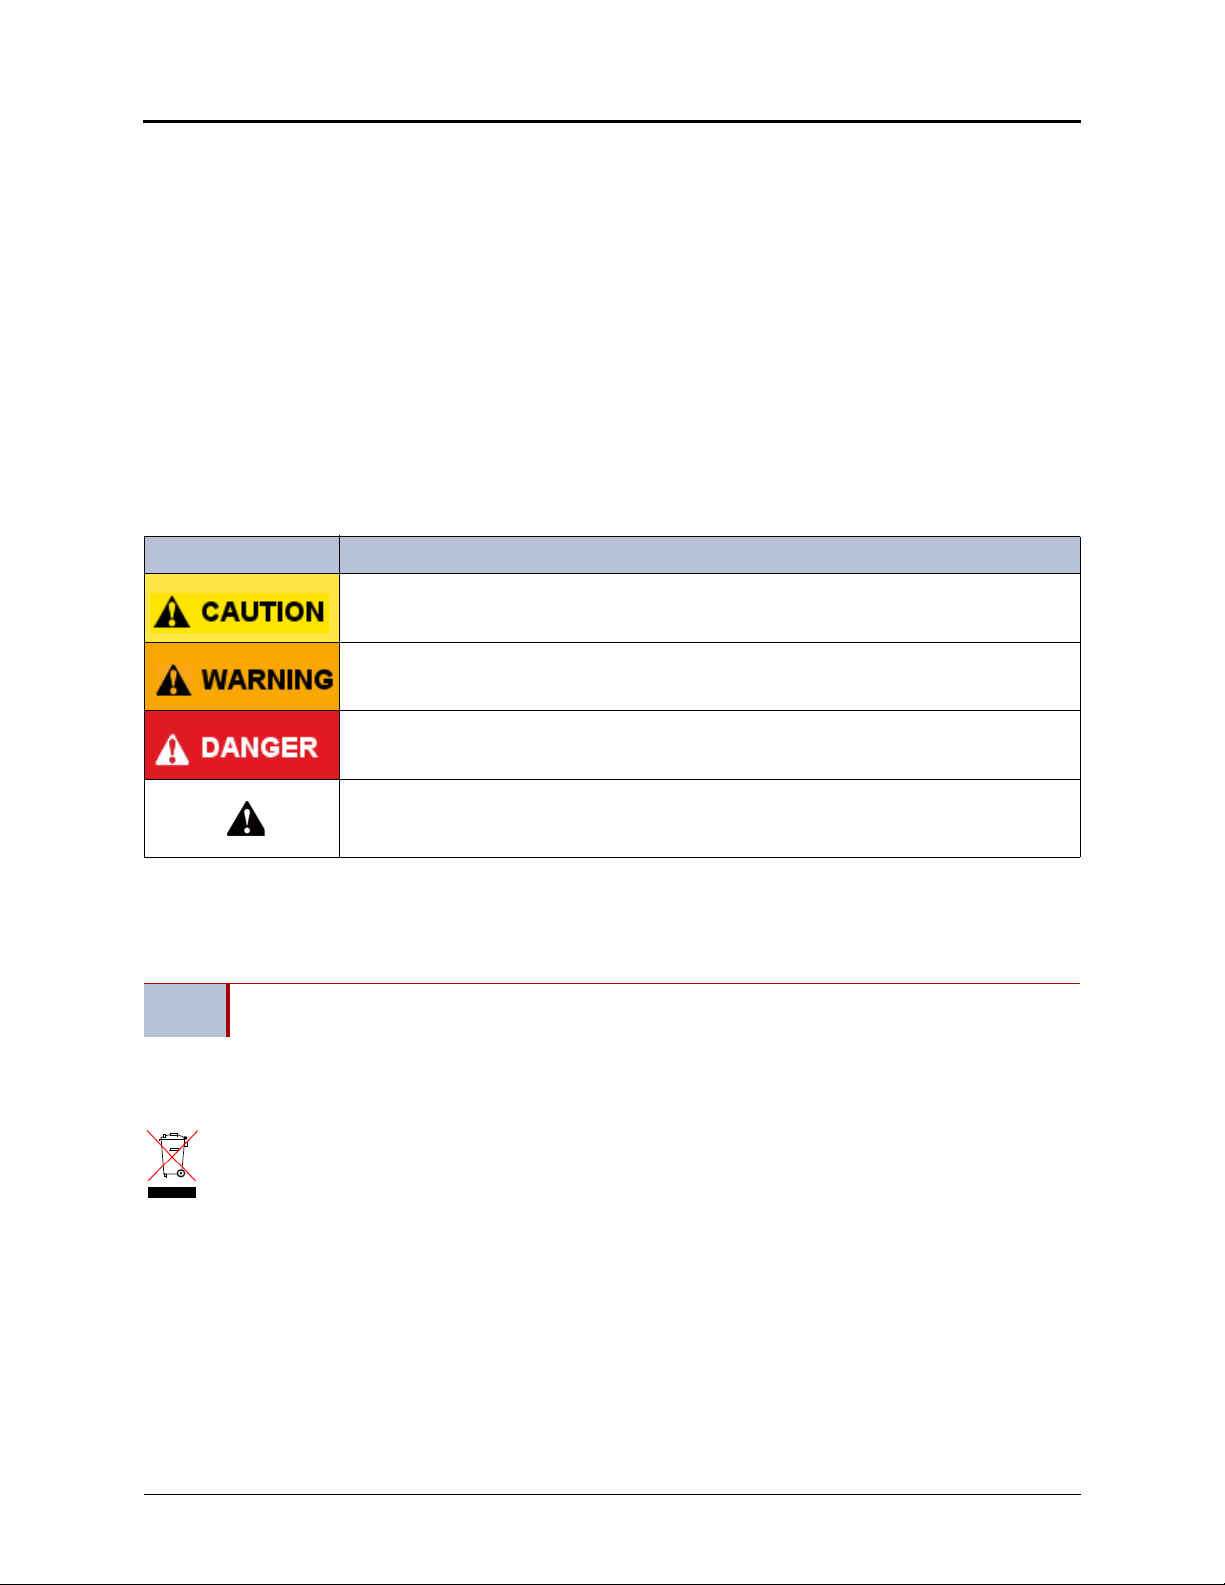
The following notices may appear on the product or in the technical documentation.
Notice Description
Caution indicates a potentially hazardous situation which, if not avoided, may result in minor
or moderate injury and/or damage to the equipment or property.
Warning indicates a potentially hazardous situation which, if not avoided, could result in
death or serious injury.
Danger indicates an imminently hazardous situation which, if not avoided, will result in death
or serious injury.
The exclamation point within an equilateral triangle indicates that important operating and
maintenance (servicing) instructions are included in the literature accompanying the
product.
Maintenance and Repair
There are no user serviceable parts inside the phones. For repairs, return the phone to an authorized Mitel provider.
NOTE
Changes or modifications not expressly approved by Mitel may void the user’s right to operate the
equipment.
Product Disposal Instructions
This symbol indicates that the product is classified as electrical or electronic equipment and should not be disposed of with
other commercial or household waste at the end of its working life. For appropriate disposal and recycling instructions,
contact your local Mitel provider.
The Waste of Electrical and Electronic Equipment (WEEE) Directive (2002/96/EC) was established by the European Union to
minimize negative impact on the environment, control hazardous substances, and curtail landfill expansion by using the best
available recovery and recycling techniques.
Software Compatibility
Depending upon which software version your telephone system is using, some of the features included in this guide
may not be available for your phone. Check with your system administrator to see which software version your
telephone system currently uses and if there ar e any feature restrictions for your system.
Page ii Mitel
®
Single-Line Phone User Guide – Issue 13, September 2009
Page 7
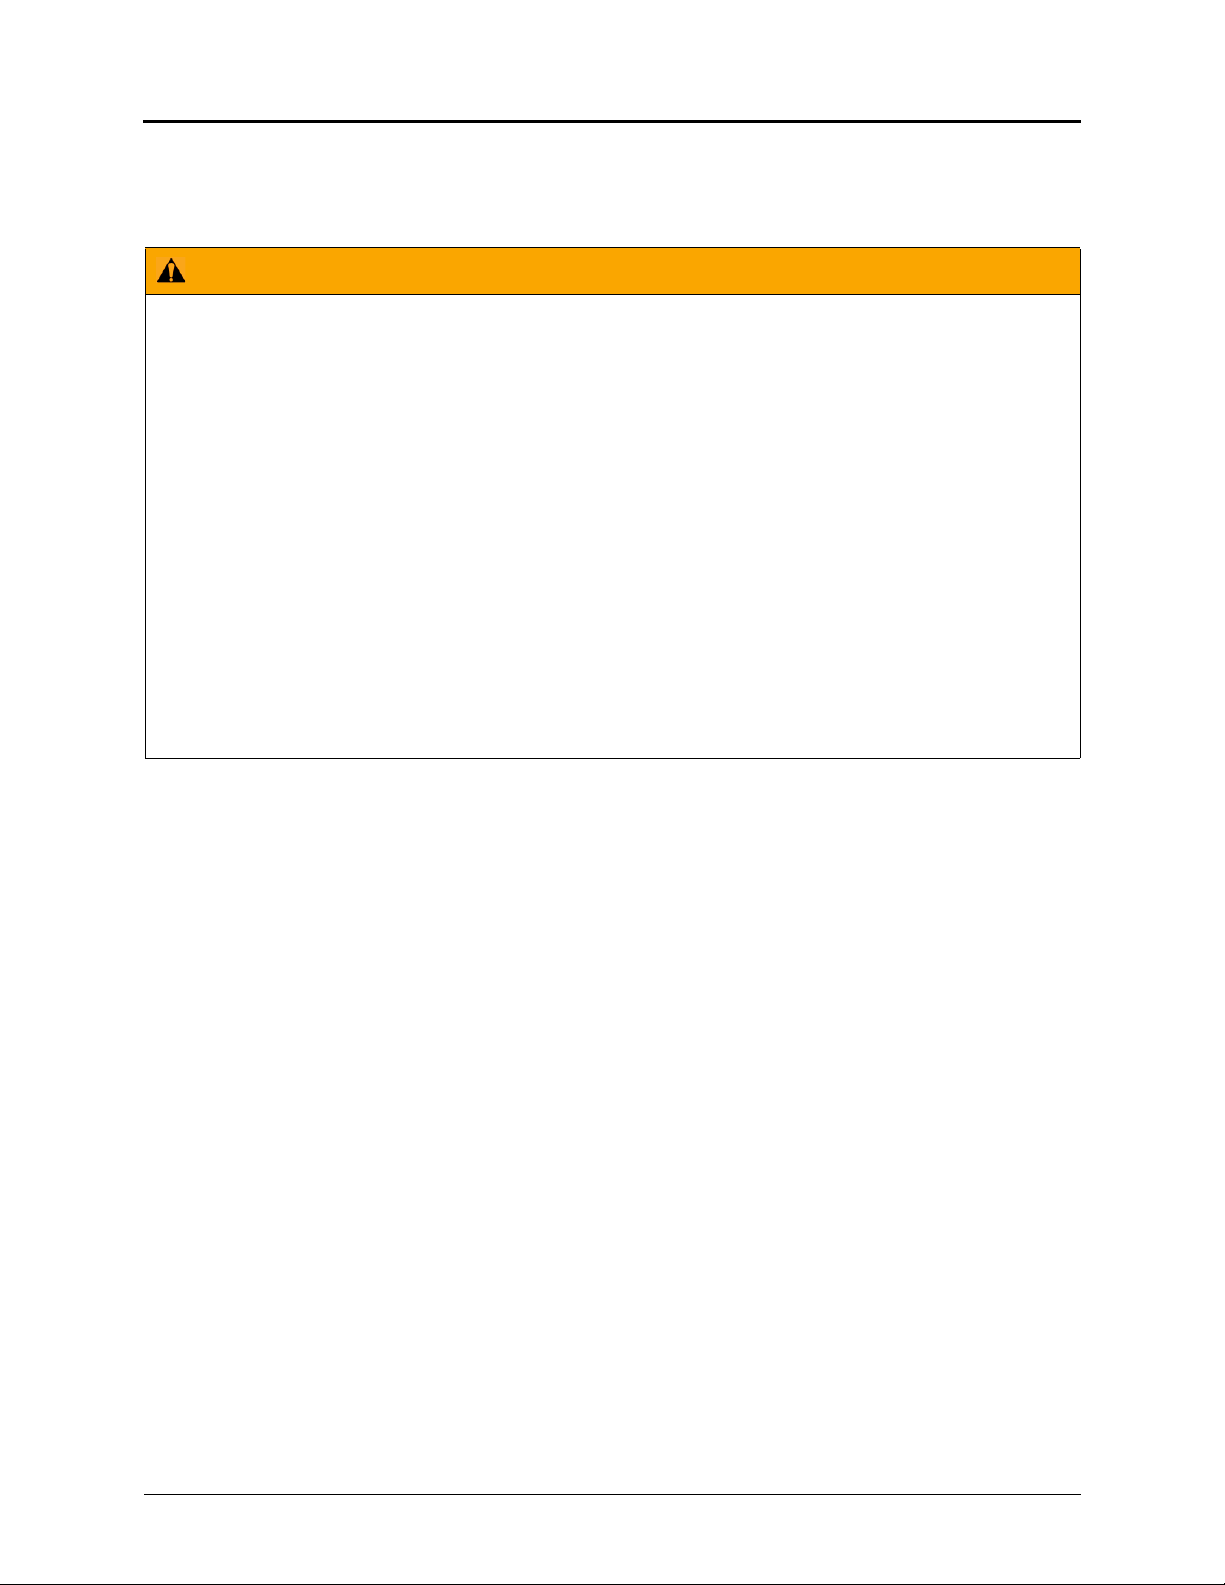
Phone Usage
This equipment is not for connection to the telephone network or public coin phone service. It is only for use when
connected to Mitel systems.
WARNING
When using your phone equipment, basic safety precautions should always be followed to reduce the risk of fire,
electric shock and injury to persons, including the following:
• Do not use this product near water, for example, near a bath tub, wash bowl, kitchen sink or laundry tub, in a
wet basement, or near a swimming pool.
• Avoid using a phone (other than a cordless type) during an electrical storm. There may be a remote risk of
electric shock from lightning.
• Do not use the phone to report a gas leak in the vicinity of a leak.
• Do not connect directly to the Public Switched Telephone Network (PSTN). Any connection of this phone to an
off premise application, an out of plant application, any other exposed plant application, or to any equipment
other than the intended application may result in a safety hazard, and/or defective operation, and/or
equipment damage. “Exposed plant” means where any portion of the circuit is subject to accidental contact
with electric lighting or power conductors operating at a voltage exceeding 300 volts between conductors or is
subject to lightning strikes.
• The socket outlet, if used, shall be located near the equipment and shall be easily located by the user.
• Use only Mitel approved power adaptors.
• The handset supplied with the phone is not certified for use with any other phone. Use of the handset with any
other phone may have the potential to cause hearing loss in the event of a lighting strike on the outside plant
wiring.
Regulatory Approvals
For regulatory information (for example, FCC approvals), see the manufacturer’s regulatory information included with
your phone.
Mitel® Single-Line Phone User Guide – Issue 13, September 2009 Page iii
Page 8

Page 9

Contents
Contents
Getting Started 1
Welcome. . . . . . . . . . . . . . . . . . . . . . . . . . . . . . . . . . . . . . . . . . . . . . . . . . . . . . . . . . . . . . . . . . . . . . . 1
Things to Know . . . . . . . . . . . . . . . . . . . . . . . . . . . . . . . . . . . . . . . . . . . . . . . . . . . . . . . . . . . . . . . . . 1
Contact Information. . . . . . . . . . . . . . . . . . . . . . . . . . . . . . . . . . . . . . . . . . . . . . . . . . . . . . . . . . . . . . 2
Returning to Default Operation . . . . . . . . . . . . . . . . . . . . . . . . . . . . . . . . . . . . . . . . . . . . . . . . . . . . 2
Default Access Codes . . . . . . . . . . . . . . . . . . . . . . . . . . . . . . . . . . . . . . . . . . . . . . . . . . . . . . . . . 3
Outside Line Access Codes. . . . . . . . . . . . . . . . . . . . . . . . . . . . . . . . . . . . . . . . . . . . . . . . . 3
Extension Numbers . . . . . . . . . . . . . . . . . . . . . . . . . . . . . . . . . . . . . . . . . . . . . . . . . . . . . . . 3
Default Feature Codes. . . . . . . . . . . . . . . . . . . . . . . . . . . . . . . . . . . . . . . . . . . . . . . . . . . . . . . . . 3
Using Account Codes . . . . . . . . . . . . . . . . . . . . . . . . . . . . . . . . . . . . . . . . . . . . . . . . . . . . . . . . . . . . 5
Answering and Placing Calls 7
Answering Calls. . . . . . . . . . . . . . . . . . . . . . . . . . . . . . . . . . . . . . . . . . . . . . . . . . . . . . . . . . . . . . . . . 7
Answering Waiting Calls. . . . . . . . . . . . . . . . . . . . . . . . . . . . . . . . . . . . . . . . . . . . . . . . . . . . . . . . . . 7
Placing Calls . . . . . . . . . . . . . . . . . . . . . . . . . . . . . . . . . . . . . . . . . . . . . . . . . . . . . . . . . . . . . . . . . . . 8
Placing Emergency Calls. . . . . . . . . . . . . . . . . . . . . . . . . . . . . . . . . . . . . . . . . . . . . . . . . . . . . . . 8
Placing Internal Calls . . . . . . . . . . . . . . . . . . . . . . . . . . . . . . . . . . . . . . . . . . . . . . . . . . . . . . . . . . 8
Requesting a Callback (Queuing the Phone). . . . . . . . . . . . . . . . . . . . . . . . . . . . . . . . . . . . . . . . 8
Placing External Calls . . . . . . . . . . . . . . . . . . . . . . . . . . . . . . . . . . . . . . . . . . . . . . . . . . . . . . . . . 8
Redialing a Number . . . . . . . . . . . . . . . . . . . . . . . . . . . . . . . . . . . . . . . . . . . . . . . . . . . . . . . . . . . 9
Using Speed Dial . . . . . . . . . . . . . . . . . . . . . . . . . . . . . . . . . . . . . . . . . . . . . . . . . . . . . . . . . . . . . . . . 9
Using System Speed Dial . . . . . . . . . . . . . . . . . . . . . . . . . . . . . . . . . . . . . . . . . . . . . . . . . . . . . . 9
Using Station Speed Dial. . . . . . . . . . . . . . . . . . . . . . . . . . . . . . . . . . . . . . . . . . . . . . . . . . . . . . 10
Dialing Station Speed-Dial Numbers . . . . . . . . . . . . . . . . . . . . . . . . . . . . . . . . . . . . . . . . . 10
Deleting Speed-Dial Entries. . . . . . . . . . . . . . . . . . . . . . . . . . . . . . . . . . . . . . . . . . . . . . . . 10
Call Features 11
Using Ring Intercom Always . . . . . . . . . . . . . . . . . . . . . . . . . . . . . . . . . . . . . . . . . . . . . . . . . . . . . 11
Using Off-Hook Voice Announce . . . . . . . . . . . . . . . . . . . . . . . . . . . . . . . . . . . . . . . . . . . . . . . . . . 11
Placing Calls On Hold . . . . . . . . . . . . . . . . . . . . . . . . . . . . . . . . . . . . . . . . . . . . . . . . . . . . . . . . . . . 11
Transferring Calls . . . . . . . . . . . . . . . . . . . . . . . . . . . . . . . . . . . . . . . . . . . . . . . . . . . . . . . . . . . . . . 12
Transferring Calls to Other Extensions . . . . . . . . . . . . . . . . . . . . . . . . . . . . . . . . . . . . . . . . . . . 12
Transferring Calls to External Numbers. . . . . . . . . . . . . . . . . . . . . . . . . . . . . . . . . . . . . . . . . . . 12
Using Reverse Transfer. . . . . . . . . . . . . . . . . . . . . . . . . . . . . . . . . . . . . . . . . . . . . . . . . . . . . . . 12
Mitel® Single-Line Phone User Guide – Issue 13, September 2009 Page v
Page 10

Contents
Forwarding Calls . . . . . . . . . . . . . . . . . . . . . . . . . . . . . . . . . . . . . . . . . . . . . . . . . . . . . . . . . . . . . . . 13
Manual Call Forwarding. . . . . . . . . . . . . . . . . . . . . . . . . . . . . . . . . . . . . . . . . . . . . . . . . . . . . . . 13
System Forwarding . . . . . . . . . . . . . . . . . . . . . . . . . . . . . . . . . . . . . . . . . . . . . . . . . . . . . . . . . . 13
Using Personal Call Routing . . . . . . . . . . . . . . . . . . . . . . . . . . . . . . . . . . . . . . . . . . . . . . . . . . . . . 14
Placing Conference Calls . . . . . . . . . . . . . . . . . . . . . . . . . . . . . . . . . . . . . . . . . . . . . . . . . . . . . . . . 16
Dropping Out of a Conference. . . . . . . . . . . . . . . . . . . . . . . . . . . . . . . . . . . . . . . . . . . . . . . . . . 16
Ending a Conference and Placing all Parties on Hold. . . . . . . . . . . . . . . . . . . . . . . . . . . . . . . . 16
Using Record-A-Call . . . . . . . . . . . . . . . . . . . . . . . . . . . . . . . . . . . . . . . . . . . . . . . . . . . . . . . . . . . . 16
Remote Programming . . . . . . . . . . . . . . . . . . . . . . . . . . . . . . . . . . . . . . . . . . . . . . . . . . . . . . . . . . . 17
Entering a Remote Programming Password . . . . . . . . . . . . . . . . . . . . . . . . . . . . . . . . . . . . . . . 17
Using Remote Programming . . . . . . . . . . . . . . . . . . . . . . . . . . . . . . . . . . . . . . . . . . . . . . . . . . . 17
Messages 19
Using Messages. . . . . . . . . . . . . . . . . . . . . . . . . . . . . . . . . . . . . . . . . . . . . . . . . . . . . . . . . . . . . . . . 19
Leaving Messages at Other Extensions . . . . . . . . . . . . . . . . . . . . . . . . . . . . . . . . . . . . . . . . . . 19
Retrieving Messages . . . . . . . . . . . . . . . . . . . . . . . . . . . . . . . . . . . . . . . . . . . . . . . . . . . . . . . . . 19
Canceling Messages Left at Other Extensions . . . . . . . . . . . . . . . . . . . . . . . . . . . . . . . . . . . . . 20
Deleting Messages . . . . . . . . . . . . . . . . . . . . . . . . . . . . . . . . . . . . . . . . . . . . . . . . . . . . . . . . . . 20
Paging Other System Users . . . . . . . . . . . . . . . . . . . . . . . . . . . . . . . . . . . . . . . . . . . . . . . . . . . . . . 20
Using Do-Not-Disturb . . . . . . . . . . . . . . . . . . . . . . . . . . . . . . . . . . . . . . . . . . . . . . . . . . . . . . . . . . . 21
Hunt Groups 23
UCD and ACD Hunt Groups . . . . . . . . . . . . . . . . . . . . . . . . . . . . . . . . . . . . . . . . . . . . . . . . . . . . . . 23
Hunt Group Calls Enabled/Disabled . . . . . . . . . . . . . . . . . . . . . . . . . . . . . . . . . . . . . . . . . . . . . . . 23
Logging in to ACD Hunt Groups . . . . . . . . . . . . . . . . . . . . . . . . . . . . . . . . . . . . . . . . . . . . . . . . 23
Logging out of ACD Hunt Groups . . . . . . . . . . . . . . . . . . . . . . . . . . . . . . . . . . . . . . . . . . . . . . . 24
Stopping the ACD Hunt Group Wrap-up Timer . . . . . . . . . . . . . . . . . . . . . . . . . . . . . . . . . . . . . 24
Requesting Agent Help . . . . . . . . . . . . . . . . . . . . . . . . . . . . . . . . . . . . . . . . . . . . . . . . . . . . . . . 25
Index 27
Page vi Mitel
®
Single-Line Phone User Guide – Issue 13, September 2009
Page 11

Getting Started
Welcome
The instructions in this guide are for using the single-line phone. The Quick Reference Guide
located at the beginning of this user guide is an overview of frequently used features.
Your phone should be powered on and ready to use. If you have any questions on the operation
of your phone, contact your system administrator for assistance.
Because a variety of voice mail products work with the Mitel 5000 Communicatio ns Platform
(CP), this guide does not include voice mail instructions. For voice mail instructions, refer to the
voice mail user guide for your system. For example, refer to the Enterprise Messaging, Basic
Voice Mail, and Embedded Voice Mail Card User Guide, part number 835.3205, or the NuPoint
Unified Messaging User Guide on the Mitel Web site
system administrator for more information about your voice mail system.
Because many phone features can be programmed to perform various tasks,
NOTE
some features may work differently than the descriptions in this guide. Contact
your system administrator for more information.
Getting Started
(http://edocs.mitel.com). Contact your
Things to Know
Your single-line phone and telephone system come equipp ed with many features. To help you
understand what everything means, read the following information before you use your phone:
• Your telephone system may be programmed for one or two dial tones. Systems with two
dial tones have one for intercom calls and one for outside calls.
• Many features “time out” if you wait too long before performing the next step. If this
happens, you must hang up and start over.
• If you hear four fast tones or repeating fast tones, you have done one of the following:
o Pressed an invalid button combination
o Tried to select a restricted line
o Dialed a restricted or invalid number
o Dialed too slowly between digits
o Waited too long before performing the next step.
• “Off-hook” means that the handset is lifted. “On-hook” indicates that the handset is in the
cradle. For example, you must first go “off-hook” to make a call, but you must go “on-hook”
to end a call.
• Some instructions require you to perform a “hookflash,” which is a quick hang up and
release.
Hang up and try again.
Mitel® Single-Line Phone User Guide – Issue 13, September 2009 Page 1
Page 12

Getting Started
Contact Information
Your system administrator can help you with items such as changing your settings or modifying
phone features. System administrator duties include:
• Adding new user accounts.
• Setting the date and time.
• Programming System Speed-Dial numbers.
• Making system changes, such as changing user names and extension numbers.
Contact your system administrator with questions that are not covered in this user guide If you
need further assistance, you can find provider information on the Mitel Web site
www.mitel.com. All sales, service, and support are coordinated at the local level.
Returning to Default Operation
You can return your phone to default levels at any time. This feature cancels Do-Not-Disturb,
manual call forwarding, and queue requests and restores hunt group calls and system
forwarding all at once.
To return your phone to default:
Lift the handset, and then dial 394.
at
Page 2 Mitel
®
Single-Line Phone User Guide – Issue 13, September 2009
Page 13

Default Access Codes
The following are default system access codes. If your system uses different codes, record the
codes in the “New Code” column for reference.
Outside Line Access Codes
Code Type Code New Code
Emergency Call 911 (999/112 Europe)
Outgoing Call (Default) 8
Select Line Group 1 to 208 92001 to 92208
Automatic Route Selection 92000
Extension Numbers
Code Type Code New Code
Attendant 0
Phone Extensions 1000 to 1999
Hunt Groups 2000 to 2299
Getting Started
Default Feature Codes
The following table lists default feature codes.1 If your system administrator changes any of the
default codes, you can record the new codes for reference in the “New Code” column.
Account Code – Follow Calls 5 391
Account Code – Optional 5 390
ACD Agent – Log In 23 326
ACD Agent – Log In or Log Out 23 328
ACD Agent – Log Out 23 327
ACD Agent – Wrap-up Terminate 24 329
Agent Help – Reject 25 376
Agent Help – Request 25 375
Answer Ringing Call 7 351
Automatic IC Call Access – On and Off 361
Automatic Trunk Call Access – On and Off 360
Automatic Trunk Answer 13 350
Background Music – On and Off 313
Barge-in 386
Call Forward – All Calls 13 355
Feature Page Code New Code
1. These features shown may or may not be enabled for your system.
Mitel® Single-Line Phone User Guide – Issue 13, September 2009 Page 3
Page 14

Getting Started
Feature Page Code New Code
Call Forward – If Busy 13 357
Call Forward – If No Answer 13 356
Call Forward – No Answer/Busy 13 358
Conference 16 5
Default Station 394
Do-Not-Disturb 20 370
Do-Not-Disturb – Cancel 20 371
Do-Not-Disturb – On and Off 20 372
Do-Not-Disturb – Override 20 373
Group Listen 312
Hold – Individual 11 336
Hookflash (Recall in Europe) 330
Hunt Group – Remove/Replace 324
Message – Cancel Left Message 20 366
Message – Delete Message 20 368
Message – Leave Message 19 367
Page 20 7
Page Receive – On and Off 20 325
Personal Call Routing On 16 363
Personal Call Routing Off 16 362
Personal Call Routing On/Off 16 364
Personal Call Routing Handoff 16 388
Program Station Password 17 392
Queue (Callback) Request 8 6
Record-A-Call 16 385
Redial 9 380
Remote Programming 17 359
Reverse Transfer (Call Pick-Up ) 12 4
Ring Intercom Always – On and Off 11 377
Station Speed Dial 382
Station Speed Dial – Programming 383
System Forward – On and Off 13 354
System Speed Dial 9 381
Transfer To Hold 12 346
Transfer To Ring 12 345
Page 4 Mitel
®
Single-Line Phone User Guide – Issue 13, September 2009
Page 15

Using Account Codes
If your telephone system is programmed to use the Station Message Detail Recording (SMDR)
feature, you may be required to enter account codes when placing a call. Account codes record
information for telephone record reports. You may be required to enter account codes when
placing calls. Contact your system administrator for more information about using account
codes.
There are three types of account codes:
• Standard account codes: Automatically entered into the telephone record report
whenever you place a call.
• Forced account codes: Entered before you can place an outside call.
• Optional account codes: Entered at any time during a call.
To enter an optional account code:
1. Perform a hookflash, and then dial 390.
2. Enter the optional account code. If the optional account code is not immediately
accepted, press #.
To set an account code for all calls placed from your phone:
Lift the handset, dial 391, and then the account code. If the account code is not
immediately accepted, press #. This code is used for all calls made from your phone until
it is disabled.
Getting Started
T o disable the code:
Lift the handset, dial 391, and then press #.
Mitel® Single-Line Phone User Guide – Issue 13, September 2009 Page 5
Page 16

Page 17

Answering and Placing Calls
With your single-line phone you can make and receive internal (intercom), external, and
emergency calls. The following sections describe how to answer and place calls and how to use
related features.
Single-line phones sometime require you to perform a hookflash (a quick
NOTES
Answering Calls
Extension numbers allow people in your telephone system to place internal calls easily without
dialing any extra codes.
NOTE Ask your system administrator for a list of extensions.
To answer a call:
To place an internal call:
1. Lift the handset, and then dial an extension number.
2. If your call goes through handsfree to a phone’s speaker, listen for the double tone and
The telephone system allows you to place a non-handsfree call that will override handsfree
mode on the extension you are calling. If you use the Ring Intercom Always feature to always
send non-handsfree calls, the called party must pick up the handset to answer the call.
To place a non-handsfree call that will ring at the other phone until answered:
To program your phone to always send non-handsfree calls using the Ring Intercom
Always feature:
hang-up and release) as part of the instructions for using the feature.
A “Hookflash” is known as a “Recall” in Europe.
Lift the handset.
then speak.
If you hear continuous ringing, wait for the call to be answered.
Press # before dialing the extension number.
Lift the handset, and then dial 377.
Answering and Placing Calls
Answering Waiting Calls
If you receive a call while you are on another call, you hear a “call waiting” tone.
To answer a waiting call:
When you hear a single tone, do one of the following:
• End the current call by hanging up. When the waiting call rings, lift the handset to answer.
• Place the current call on hold (see “Placing Calls On Hold” on page 11). You are
automatically connected to the waiting call.
Mitel® Single-Line Phone User Guide – Issue 13, September 2009 Page 7
Page 18

Answering and Placing Calls
Placing Calls
The following instructions describe how to place calls and related features.
Placing Emergency Calls
To place an emergency call:
Dial the emergency number (911 U.S. or 999/112 Europe). The system immediately places the
emergency call as soon as you dial the number, even if you do not select an outside line.
Placing Internal Calls
Internal calls are calls placed to other system extensions. Contact your system administrator for
a list of extension numbers.
To place an internal call:
1. Lift the handset, and then dial the extension number.
2. If your call goes through handsfree, listen for the double tone, and then begin to speak
(see “Answering Calls” on page 7).
If there is no answer or if the extension is busy, you can do the following:
• Request a callback (queue). See “Requesting a Callback (Queuing the Phone)” bel ow.
• Leave a message. See “Leaving Messages at Other Extensions” on page 19.
Requesting a Callback (Queuing the Phone)
When you request a callback (queue the phone), the system automatically calls to connect you
to the extension when it becomes available.
T o request a callback:
If there is no answer or if the extension is busy, perform a hookflash, dial 6, and then
hang up. When the extension becomes available, your extension rings.
T o cancel the callback request:
Lift the handset, and then press 6.
Placing External Calls
The following sections describe features used when placing external calls.
To place an external call:
1. Lift the handset and dial the Outgoing Call access code (8 is the default code).
2. Dial the number.
NOTES
Depending on system configuration, you may also be able to use one of the following methods
to select an outgoing line:
• Enter the Select Line Group feature code. The default codes are 92001 to 92208.
• Enter the Automatic Route Selection (ARS) feature code. The default code is 92000.
If you hear a single progress tone, you must dial an account code before you can
place your call (see “Using Account Codes” on page 5).
Contact your system administrator for more information about using Select Line Group or ARS
access codes.
Page 8 Mitel
®
Single-Line Phone User Guide – Issue 13, September 2009
Page 19

Redialing a Number
You can quickly redial the last external number dialed. Although most phones are programmed
to redial the last number dialed, your system administrator can program your phone to redial the
last number saved. You cannot redial extension numbers.
To use Redial:
Lift the handset, and then dial 380. The system automatically selects a line and dials the
number.
T o use the Last Number Saved feature:
• To save the last number dialed: Lift the handset, and then dial 380.
• To redial the saved number: After selecting a line, perform a hookflash, and then dial 380.
The number is redialed automatically.
Using Speed Dial
You can use speed dial to quickly dial stored phone numbers. Speed-dial numbers are either
stored in the system (System Speed Dial), or in your phone (Station Speed Dial) and are
identified by a location number. Once programmed, you can quickly dial these numbers by
entering a feature code and dialing the desired location number.
Using System Speed Dial
Answering and Placing Calls
Your system administrator assigns Speed-Dial location numbers, which are available to
everyone in the system. Contact your system administrator for more information.
T o Dial System Speed-Dial numbers:
1. Lift the handset and select an outside line.
2. Perform a hookflash, and then dial 381.
3. Dial the speed-dial location (000 to 999 or 0000 to 4999).
Mitel® Single-Line Phone User Guide – Issue 13, September 2009 Page 9
Page 20

Answering and Placing Calls
Using Station Speed Dial
You can use Station Speed Dial to store up to 10 phone numbers for your personal use. Other
system users do not have access to your Station Speed-Dial numbers.
You can store up to 10 Station Speed-Dial numb ers.
To store a Station Speed-Dial number:
1. Lift the handset, and then dial 383.
2. Dial the location (0 to 9) to be programmed.
3. Dial the extension or telephone number to be stored.
NOTE
4. Hang up.
NOTE
Dialing Station Speed-Dial Numbers
To dial a Station Speed-Dial number:
1. Lift the handset. If you are placing an outside call, select an outgoing line.
2. Perform a hookflash, and then dial 382.
3. Dial the desired location (0 to 9).
You cannot use hyphens or colons in the telephone number. If desired, you
can perform a hookflash once to enter an asterisk (*), twice for a pound (#),
three times for a hookflash, or four times for a pause.
To dial outside telephone numbers without first selecting an outgoing line,
enter the Outgoing Call access code (8 is the default code), before dialing
the outside telephone number.
Deleting Speed-Dial Entries
To delete a Station Speed-Dial entry:
1. Lift the handset, and then dial 383.
2. Enter the speed-dial location (0 to 9).
3. Enter a hookflash, and then hang up.
Page 10 Mitel
®
Single-Line Phone User Guide – Issue 13, September 2009
Page 21

Call Features
The following sections describe call-related features.
Using Ring Intercom Always
The telephone system allows you to place a non-handsfree call that will override handsfree
mode on the extension you are calling. If you use the Ring Intercom Always feature to always
send non-handsfree calls, the called party must pick up the handset to answer the call.
To place a non-handsfree call that will ring at the other phone until answered:
1. Before you enter the extension number, press #.
2. Dial the extension number.
To program your phone to always send non-handsfree calls using the Ring Intercom
Always feature:
Lift the handset, and then dial 377.
Using Off-Hook Voice Announce
Call Features
Off-Hook Voice Announce1 allows you to talk to the phone user on his or her handsfree
speakerphone, even though the user already has a call in progress on the handset. This feature
is not available if your phone has the Ring Intercom Always feature enabled.
To use Off-Hook Voice Anno unc e :
1. Do not hang up. After the busy signal stops, you are automatically connected and may
speak.
2. If you hear music or if the phone is in Do-Not-Disturb (DND) mode, your off-hook voice
announce call will not go through.
Placing Calls On Hold
To place a call on hold:
1. Perform a hookflash, and then dial 336.
2. Hang up or place another call.
To return to a call that is on hold:
1. Lift the handset or perform a hookflash.
2. Dial 336.
1. This feature may or may not be enabled for your system.
Mitel® Single-Line Phone User Guide – Issue 13, September 2009 Page 11
Page 22

Call Features
Transferring Calls
You can transfer calls to other extensions or external numbers.
Transferring Calls to Other Extensions
T o transfer a call to another extension:
1. While on the call, perform a hookflash. You hear two short tones.
2. Dial an extension number.
If desired, wait for an answer, and then announce the call.
3. Hang up.
If the number is busy, there is no answer, or the transfer is refused, hookflash twice to
return to the caller.
Transferring Calls to External Numbers
To transfer a call to an external number:
1. While on the call, perform a hookflash. You hear two short tones.
2. Select an outgoing line, and then dial the number.
If desired, wait for an answer, and then announce the call.
3. Hang up.
If the number is busy, there is no answer, or the transfer is refused, hookflash twice to
return to the caller.
Using Reverse Transfer
You can use Reverse Transfer (Call Pick Up) to answer calls that are ringing or holding at other
extensions. For example, if you receive a call while you are away from your desk, you can pick
up the call from another extension.
NOTE
To use Reverse Transf er :
1. Lift the handset, and then press 4.
2. Dial the extension or hunt group number where the call is ringing or holding. The call is
If the Group Call Pickup feature is enabled, you can pick up a call ringing at any
station in a hunt group by dialing the hunt group’s extension number.
transferred to the phone you are using, and you are connected to the caller. See “Hunt
Groups” on page 23.
Page 12 Mitel
®
Single-Line Phone User Guide – Issue 13, September 2009
Page 23

Forwarding Calls
You can use Manual Call Forwarding or System Forwarding to forward calls.
Manual Call Forwarding
You can use Manual Call Forwarding to send incoming calls to another extension or external
number. The following table describes Manual Call Forwarding options.
Call Forward Feature Description Code
Call Features
Call Forward All Calls All incoming calls are forwarded without
Call Forward If No
Answer
Call Forward If Busy When your phone is busy, all incoming
Call Forward If No
Answer/Busy
To use Manual Call Forwarding:
1. Lift the handset, and then dial one of the feature codes from the table above.
2. Dial the extension number, or select an outgoing line, and then dial the telephone
number.
T o cancel a Call Forwarding request:
Do one of the following:
1. Lift the handset, and then dial any of the call forwarding feature codes from the table
above.
2. Hang up.
System Forwarding
ringing at your phone.
All incoming calls are forwarded if not
answered. (The timer is set by the
system administrator.)
calls are forwarded without ringing.
All incoming calls are forwarded if your
phone is busy or if you do not answer.
355
356
357
358
System Forwarding allows your system administrator to route calls based on the type of call and
the idle or busy status of your phone. You cannot program the System Forward destination—
you can only turn it on or off. Contact your system administrator for more information.
To turn System Forwarding on or off:
Lift the handset, and then dial 354.
Mitel® Single-Line Phone User Guide – Issue 13, September 2009 Page 13
Page 24

Call Features
Using Personal Call Routing
When you enable Personal Call Routing on your phone, your incoming calls are automatically
routed to one or more preprogrammed associated destinations according to the routing steps
programmed for you.
Typically, your desk phone is configured to be your main extension. You may be programmed
for up to five associated destinations including:
• softphone
• home IP phone
• voice mail
• mobile phone
• home phone
Your desk phone, softphone, home IP phone and voice mail extensions are already
programmed in the system, so your system administrator can easily include them in your routing
steps. To include your mobile and home phone numbers in your routing steps, you will need to
provide these numbers to your system administrator.
Personal Call Routing also includes the Handoff feature, which includes the following functions:
• Push: The Handoff “push” function allows you to move an active call from your main
extension, typically your desk phone, to an associated destination without disconnecting
audio. The push function is useful if you are leaving the work area, but want to remain
connected to an active call. The push function rings all associated destinations (excep t
voice mail) and you select which device to use to answer the call. When you answer the
call, you are immediately connected to the other parties at the new destination. When the
call is switching over to the new destination, there may be a momentary break in audio,
which may be noticeable to the other parties on the call.
• Pull: The Handoff “pull” function allows you to pull a call that was previously routed to your
mobile or home phone back to the main extension. The pull function is useful if you
answer a call on your mobile phone and then return to your desk. After you pull a call back
to the main extension, the call is connected immediately and you can then access system
features such as conference, hold, and transfer.
The Handoff feature is only supported on your ma in extension, typically your
NOTE
Personal Call Routing includes the following feature codes:
desk phone. However, if you share a desk phone with one or more coworkers
and your main extension is a phantom extension, you cannot use the Handoff
feature.
• Personal Call Routing On: 363
• Personal Call Routing Off: 362
• Personal Call Routing On/Off: 364
• Personal Call Routing – Handoff (push and pull): 388
The following call types do not follow Personal Call Routing:
• Hunt group calls
• Hunt group announcement/overflow calls
• Transfer recalls, Hold recalls, Conference recalls, and Attendant recalls
A recall occurs when a feature cannot be completed or the feature times out,
NOTE
Page 14 Mitel
and the call returns to the originating extension. For example, a holding call
will recall the extension where it was placed on hold when the hold timer
expires.
®
Single-Line Phone User Guide – Issue 13, September 2009
Page 25

Call Features
When you enable Personal Call Routing, your incoming calls are routed as specified by the
routing type programmed for you by your system administrator. The table below provides
descriptions for the default routing types.
Routing Type Description
Mobile Twinning Calls simultaneously ring your desk phone and mobile phone, before
going to voice mail.
Delayed Mobile
Twinning
Check with your system administrator to see which routing type has been programmed for you.
Your administrator can modify these routing types by adding or removing routing steps, adding
or removing destinations, and changing the ring timers, if required.
To ensure that calls are routed correctly to your mobile and home phones, inform your system
administrator if either of these phone numbers change.
To enable Personal Call Routing:
1. Lift the handset, and then dial 363 or 364.
2. Hang up.
T o disabl e Person al Call Routing:
1. Lift the handset, and then dial 362 or 364.
2. Hang up.
To answer a call routed to your mobile or home phone:
1. Answer the call when it rings your phone. After you speak, the Personal Call Routing
prompt is played.
2. Do one of the following:
Calls ring your desk phone first, and then ring both your desk phone and
mobile phone, before going to voice mail.
• Press # to accept the call.
NOTE
You do not need to wait for the prompt to accept the call. You can
accept the call immediately by pressing the # button.
• Press * to send the call to the voice mailbox associated with your main extension
(not your mobile phone or home phone voice mailbox). If you do not have a voice
mailbox, the “Press *...” prompt is not played and the call is routed to your main
extension.
If you hang up, the call continues to follow your programmed routing steps.
To use the Personal Call Routing – Handoff “push” feature:
1. While on an active call at your phone, perform a hookflash, and then dial 388. The call
rings all of your associated destinations (except voice mail).
2. Answer the call at one of your associated destinations. For mobile and home phones,
press # to accept the call.
To use the Personal Call Routing – Handoff “pull” feature:
While on an active call on an associated destination device, lift the phone handset and
dial 388. A confirmation tone is played and the call is pulled back to your phone.
NOTE
To cancel the Personal Call Routing – Handoff feature:
If you enter the handoff feature code (388) and hear reorder tone, the call cannot be
handed off.
While the handoff is in-progress, perform a hookflash, and then dial 388.
Mitel® Single-Line Phone User Guide – Issue 13, September 2009 Page 15
Page 26

Call Features
Placing Conference Calls
You can place a conference call with up to three internal or external parties, for a total of four
parties, including yourself.
To place a conference call:
1. While on a call, perform a hookflash, and then dial 5.
2. Place another call, then hookflash and dial 5. (If necessary, repeat this step to place one
more call on hold.)
3. Perform a hookflash, and then dial 5 again to join all of the calls together in the
conference.
Dropping Out of a Conference
You can drop out of a conference and return to the conference later.
To drop out of a conference:
Perform a hookflash and hang up. This removes your phone from the conference, but
leaves the other parties connected. To return to the conference, lift the handset, and then
dial 5.
Ending a Conference and Placing all Parties on Hold
You can end a conference and place all conference parties on Individual Hold, allowing you to
toggle between the held parties and speak to one party at a time.
To place a call on hold:
1. Perform a hookflash, and then dial 336.
2. Hang up or place another call.
To return to a call that is on hold:
1. Lift the handset or perform a hookflash.
2. Dial 336.
Using Record-A-Call
If your telephone system is equipped with a voice processor (voice mail), you may have access
to the Record-A-Call feature. If so, you can record an ongoing call as a mailbox message. You
can then retrieve the message just as you would any other mailbox message.
NOTE
To use the Record-A-Call feature while on a call:
1. Perform a hookflash, and then dial 385.
2. If required, dial the desired mailbox number. (Your phone may be programmed to select
You hear a confirmation tone when the Record-A-Call feature is activated.
T o turn off Record-A-Call:
The Record-A-Call feature remains active after the other party hangs up. This
allows you to append the recorded call with your own message.
the mailbox, or you may be required to dial it.)
Do one of the following:
• Perform a hookflash, and then dial 385.
• Hang up.
Page 16 Mitel
®
Single-Line Phone User Guide – Issue 13, September 2009
Page 27

Remote Programming
You can use Remote Programming to access the Do -Not-Disturb (DND) and Call Forwarding
features from another system phone or an external phone.
Entering a Remote Programming Password
Before using Remote Programming, you should enter a new password.
T o enter a Remote Programming password:
1. Lift the handset, and then dial 392.
2. Enter your current password (the default password is your extension number), followed
by #.
3. Enter the new password followed by
4. Enter the new password again foll owed by #. You hear a confirmation tone.
To change the station password from another phone, see “Using Remote Programming” below.
Using Remote Programming
T o use Remote Programming:
1. Do one of the following:
• Call your Direct Inward System Access (DISA) number (provided by your system
administrator). If necessary, enter your DISA password.
• Use any phone on the system.
2. Dial 359.
3. Enter your extension number.
4. Enter your password followed by #. You can use Remote Programming to access any of
the following features:
To change the station password using Remote Progra mmin g:
a. Dial 392.
b. Enter the new password followed by
c. Enter the new password again fo ll o w ed by #.
T o turn on DND:
a. Dial 370.
b. Enter the DND message number (01 to 20), and then enter the second-line message
text (if applicable).
T o turn off DND:
Dial 371.
#. You hear a confirmation tone.
Call Features
#.
Mitel® Single-Line Phone User Guide – Issue 13, September 2009 Page 17
Page 28

Call Features
To turn on Call Forwarding:
a. Enter one of the following Call Forward feature codes:
o 355: All Calls
o 356: If No Answer
o 357: If Busy
o 358: If No Answer or Busy
b. Enter an extension number, or enter an outside line access code followed by a
telephone number.
T o turn off Call Forwarding:
Lift the handset, and then dial 355.
5. Hang up.
Page 18 Mitel
®
Single-Line Phone User Guide – Issue 13, September 2009
Page 29

Messages
The following sections describe how to use system messaging features, including:
• Inter-station messages: Inter-station messages are alerts sent to your phone by other
internal parties, notifying you to contact the party who left the message. You can then
either delete the message or reply to the message, which automatically places a call to the
party who left the message.
• DND messages: Messages that other internal parties see when your phone is in DND.
See “Paging Other System Users” on page 20.
• Pages: Announcements sent over phone speakers or external speakers. See “Paging
Other System Users” on page 20.
Using Messages
NOTE
Messages
Because a variety of voice mail products work with the 5000 CP, this guide
does not include voice mail instructions. For voice mail instructions, refer to
the voice mail user guide for your system. For example, refer to the Enterprise
Messaging, Basic Voice Mail, and Embedded Voice Mail Card User Guide,
part number 835.3205, or the NuPoint Messenger Messaging User Guide (on
the Mitel Web site
for more information about your voice mail system.
(http://edocs.mitel.com). Contact your system administrator
Following are instructions on how to use system messaging features.
Leaving Messages at Other Extensions
You can leave inter-station or voice messages for other internal parties.
T o leave an inter-station message while on an internal call:
1. Perform a hookflash, and then dial 365.
2. Hang up.
To leave a message with the message center while on an internal call:
1. Perform a hookflash, and then dial 365.
2. Wait for the message center to answer, and then leave a message.
If there is no answer, or if the phone is busy when you place an internal call, you can do
the following:
Stay on the line and wait for the phone to become available. Do not hang up. After a
system timer expires, you hear music until the phone is available. (You cannot do this if
the called phone is in DND mode.)
Retrieving Messages
To respond to an inter-station message:
When you lift the handset, you hear six quick tones followed by the intercom dial tone. Dial 365
to automatically place a call to the station or message center that left the message.
To cancel an inter-station message:
1. Lift the handset, and then dial 368.
2. Hang up.
Mitel® Single-Line Phone User Guide – Issue 13, September 2009 Page 19
Page 30

Messages
Canceling Messages Left at Other Extensions
You can cancel messages left at other extensions.
T o cancel a message left at another extension:
1. Lift the handset, and then dial 366.
2. Dial the extension number where you left the message.
3. Hang up.
Deleting Messages
You can delete waiting messages.
NOTE To delete waiting voice messages, you must connect to your voice mailbox.
To delete inter-station messages:
Lift the handset, and then dial 368.
Paging Other System Users
You can place page announcements through phone speakers or external speakers (if
applicable). Y our system may use page zones to prevent announcements from transmitting
through every phone in the system. Each page zone contains a different combination of
extensions and external paging equipment.
Contact your system administrator for page zone information. You can use the following table to
save the page zone information for future reference.
Page Zone Name Number Description
To place a page announcement:
1. Lift the handset, and then dial 7.
2. Enter the page-zone number (0 to 9).
3. After the tone, make your announcement, and then hang up.
Page 20 Mitel
®
Single-Line Phone User Guide – Issue 13, September 2009
Page 31

Using Do-Not-Disturb
You can use Do-Not-Disturb (DND) to stop calls and pages to your extension. DND does not
block queue callbacks, recalls, and incoming external calls. When other users call your phone,
they hear a repeating signal of four fast tones. If other users have a display phone, they see the
DND message you selected.
Your telephone system can have up to 20 different DND messages, each of which can be
changed by the system administrator, installer, or programmer. The following table shows the 20
default DND messages. If your system administrator changes your DND messages, you can
record the new messages in the “New Message” column for reference.
Code Default Message New Message Code Default Message New Message
01 Do-Not-Disturb 11 Out of Town ‘Til
02 Leave a Message 12 Out of Office
03 In Meeting Until 13 Out Until
04 In Meeting 14 With a Client
05 On Vacation/
Holiday ’Til
06 On Vacation/
Holiday
07 Call Me At 17 In Conference
08 At the Doctor 18 Away from Desk
09 On a Trip 19 Go ne Home
10 On Break 20 Out to Lunch
Messages
15 With a Guest
16 Unavailable
Because the system DND message only uses one line of the display, you can enter a second
line of text, up to 16 characters. For example, if you select 03 (IN MEETING UNTIL) as your first
line of text, you can enter “3:30” as your second line. Callers with a display phone will see, “IN
MEETING UNTIL 3:30.”
T o turn on DND:
1. Lift the handset, and then dial 372.
2. Dial a two-digit number for the DND message from the table above.
3. Hang up.
T o turn off DND:
1. Lift the handset, and then dial 372.
2. Hang up.
Mitel® Single-Line Phone User Guide – Issue 13, September 2009 Page 21
Page 32

Page 33

Hunt Groups
This chapter describes what Hunt Groups are and how to use them.
UCD and ACD Hunt Groups
Hunt groups are groups of internal parties (agents) who share a common (hunt group)
extension number. Calls can either be placed to the hunt group (using the hunt group extension
number) or to a specific agent (using the agent’s extension number). Hunt groups are
programmed by the system administrator.
Hunt Group Calls Enabled/Disabled
If you are a member of a hunt group, you can enable or halt hunt group calls to your extension.
To turn on or off hunt group calls:
Lift the handset, and then dial 324.
Hunt groups types are either “UCD” or “ACD.”
• UCD Hunt Groups: Uniform Call Distribution (UCD) agents do not log in to the hunt group
to receive calls.
• ACD Hunt Groups: Automatic Call Distribution (ACD) agents log in to the ACD hunt group
to receive calls. The system distributes calls to ACD hunt groups as follows:
o Agent IDs: Each agent is assigned an Agent ID number for logging in to the hunt group
(see the next section). Hunt group calls are distributed to logged-in agents according to
their Agent ID number instead of their extension number. Agents can log in to any ACD
hunt group phone.
o Extensions: Hunt group members do not use Agent IDs, and calls are distributed to
phones where the agents are logged in.
Hunt Groups
Logging in to ACD Hunt Groups
Agents can log in to and out of the ACD hunt group at any time. While logged in, the agent
receives calls through the ACD hunt group. When the agent is logged out, calls to that ACD
hunt group bypass the agent.
To log in to or out of all ACD hunt groups in which you are a member:
Lift the handset, and then dial 328. This feature code acts as a toggle. If you are already
logged in, you hear a single tone.
Mitel® Single-Line Phone User Guide – Issue 13, September 2009 Page 23
Page 34

Hunt Groups
To log in to one or more ACD hunt groups:
1. Lift your handset, and then dial 326.
2. Do one of the following:
• Enter the ACD hunt group number.
• Press # to log in to all of your ACD hunt groups.
NOTE If you entered an invalid hunt group number, you hear repeating tones.
3. Do one of the following:
• To log into one or more ACD hunt groups using Agent IDs: Enter your Agent ID.
You are logged into the ACD hunt group(s) using Agent IDs.
If another Agent ID is already logged in at this phone, you hear
NOTE
repeating tones. Y ou must have the other agent log out before you can
use that phone.
• To log into one or more ACD hunt groups that do not use Agent IDs: Press #. You
are logged into the ACD hunt group that does not use Agent IDs.
NOTE
4. Hang up. Repeat this procedure to log into additional ACD groups, if necessary.
If you are not a member of the entered hunt group, you hear repeating
tones. Start over.
Logging out of ACD Hunt Groups
You can log out of all ACD hunt groups at once or log out of each hunt group one at a time.
T o log out of one or more ACD hunt group:
Do one of the following:
• Lift the handset, and then dial 328 to log out of all of your ACD hunt groups.
• Lift the handset, and then dial 327 to log out of one hunt group at a time.
Stopping the ACD Hunt Group Wrap-up Timer
Each time you end an ACD hunt group call, a wrap-up timer starts. Until this timer expires, you
will not receive another hunt group call. However, you can stop the wrap-up timer to allow calls
to your extension.
T o stop the wrap-up timer:
Lift the handset on-hook, dial 329.
Page 24 Mitel
®
Single-Line Phone User Guide – Issue 13, September 2009
Page 35

Requesting Agent Help
You can use Agent Help to request help from a designated “Agent Help Extension”1 (usually
your supervisor) during a call. When your request call rings at the Agent Help Extension, the
supervisor can join the call or reject the request.
T o use Agent Help:
1. While you are on a hunt group call, perform a hookflash, and then dial
If you hear repeating tones, one of the following has occurred:
NOTE
2. If not preprogrammed, dial the Agent Help Extension number.
3. If the Agent Help Extension accepts the call, you hear the Agent Help tone, and the
supervisor can monitor or join your call.
If the Agent Help Extension rejects the call, you hear a confirmation tone.
Hunt Groups
375.
• The feature is not available at your phone.
• You already have four parties in your call.
• Not enough system circuits are currently available.
• The Agent Help Extension is in DND.
1. This feature may or may not be enabled for your system.
Mitel® Single-Line Phone User Guide – Issue 13, September 2009 Page 25
Page 36

Page 37

Index
Index
A
Account Codes, using 5
ACD Hunt Group Wrap-up Timer, stopping 24
ACD Hunt Groups
logging in 23
logging out 24
Agent Help, requesting 25
Agent, ACD hunt group 23
C
Call Forward
Manual 13
using 13
Callback (Queuing the Phone), requesting 8
Calls
answering 7
conference, placing 16
endpoint, queuing for 8
external, placing 8
forwarding 13
picking up (reverse transferring) 12
placing 8
placing internal (IC) 8
transferring 12
to external numbers 12
to other extensions 12
waiting 7
Calls On Hold, placing 11
Codes
account 5
default system access 3
feature, default 3
Outgoing Call access 8
Conference Calls
dropping out of 16
ending 16
placing 16
Contact Information 2
D
Default
access codes 3
feature codes 3
system access codes 3
Default Operation, returning to 2
Do-Not-Disturb, using 21
E
Emergency Calls, placing 8
Extension Numbers 3
External Calls, placing 8
External Numbers, redialing 9
F
Feature Codes, using 3
H
Hunt Group Calls Enabled/Disabled 23
Hunt Groups
Agent Help, requesting 25
agent IDs 23
Automatic Call Distribution (ACD) 23
logging out of 24
types 23
Uniform Call Distribution (UCD) 23
wrap-up timer 24
I
Internal Calls, placing 8
Inter-Station Messages
canceling 20
deleting 20
M
Manual Call Forwarding 13
Members, hunt group 23
Messages
canceling 20
deleting 20
Do-Not-Disturb 21
leaving 19
pages 20
retrieving 19
using 19
Messages at Other Extensions, leaving 19
Messages Left at Other Extensions, canceling 20
Mitel® Single-Line Phone User Guide – Issue 13, September 2009 Page 27
Page 38

Index
N
Number, redialing 9
Numbers, redialing external 9
O
Off-Hook Voice Announce, using 11
Other System Users, paging 20
Outgoing Call Access Code 8
Outside Line Access Codes 3
P
Paging, using 20
Parties on Hold, placing 16
Password, Remote Programming
entering 17
Personal Call Routing
enabling and disabling 15
handoff 15
S
Speed Dial
entries, deleting 10
Station, using 10
System, using 9
using 9
Station Messages
leaving 19
Station Speed Dial
numbers
deleting 10
dialing 10
storing 10
numbers, dialing 10
using 10
System Forwarding 13
System Speed Dial, using 9
U
UCD and ACD Hunt Groups 23
R
Record-A-Call, using 16
Remote Programming 17
password, entering 17
using 17
Reverse Transfer (Call Pickup), using 12
Ring Intercom Always, using 11
V
Voice Messages
deleting 20
leaving 19
Volume Levels, changing 3
W
Waiting Calls, answering 7
Welcome 1
Wrap-Up Timer, stopping 24
Page 28 Mitel
®
Single-Line Phone User Guide – Issue 13, September 2009
Page 39

Page 40

Part No. 550.8107
Issue 13, September 2009
A661/9218A
 Loading...