

Page 1

Chapter 1
General information
Page 2

Chapter 1 Contents
1-1 General.............................................................................................................................................. 1-3
1-2 Product description ......................................................................................................................... 1-4
1-2-1 Original packing list......................................................................................................................... 1-4
1-2-2 Names of parts.............................................................................................................................. 1-5
1-2-3 Installing the stabilizers................................................................................................................... 1-6
1-2-4 Affixing the fabric fastener tape ...................................................................................................... 1-7
1-2-5 Affixing the tape .............................................................................................................................. 1-8
1-3 Precautions on service and maintenance ..................................................................................... 1-9
1-3-1 Power source.................................................................................................................................. 1-9
1-3-2 Static............................................................................................................................................. 1-10
1-3-3 Replacement parts........................................................................................................................ 1-10
1-4 Paper ............................................................................................................................................... 1-11
1-5 Specifications................................................................................................................................. 1-12
Page 3

1-1 General
The bulk stacker model ST-20 is intended for use with the following printer models:
FS-1200
FS-1700/FS-1700+/FS-1750
FS-3700/FS-3700+/FS-3750
When the ST -20 is installed under the printer , it will accommodate up to 1,500 pages (paper thickness:
0.1 mm) at a time. Paper is output to the bulk stacker with the printed side facing down. Topics
covering the installation and operations of the printer are fully detailed in the bulk stacker's User's
Manual.
For the FS-1750, the ST-20 must be used together with paper feeders and/or the duplexer because
the ST-20 does not directly support the 14-ppm printer.
1-3
ST-20
Page 4
1-2 Product description
This section describes how to install the stacker, precaution, and specifications. For more information
on user operation, refer to the ST-20 Instruction Manual.
1-2-1 Original packing list
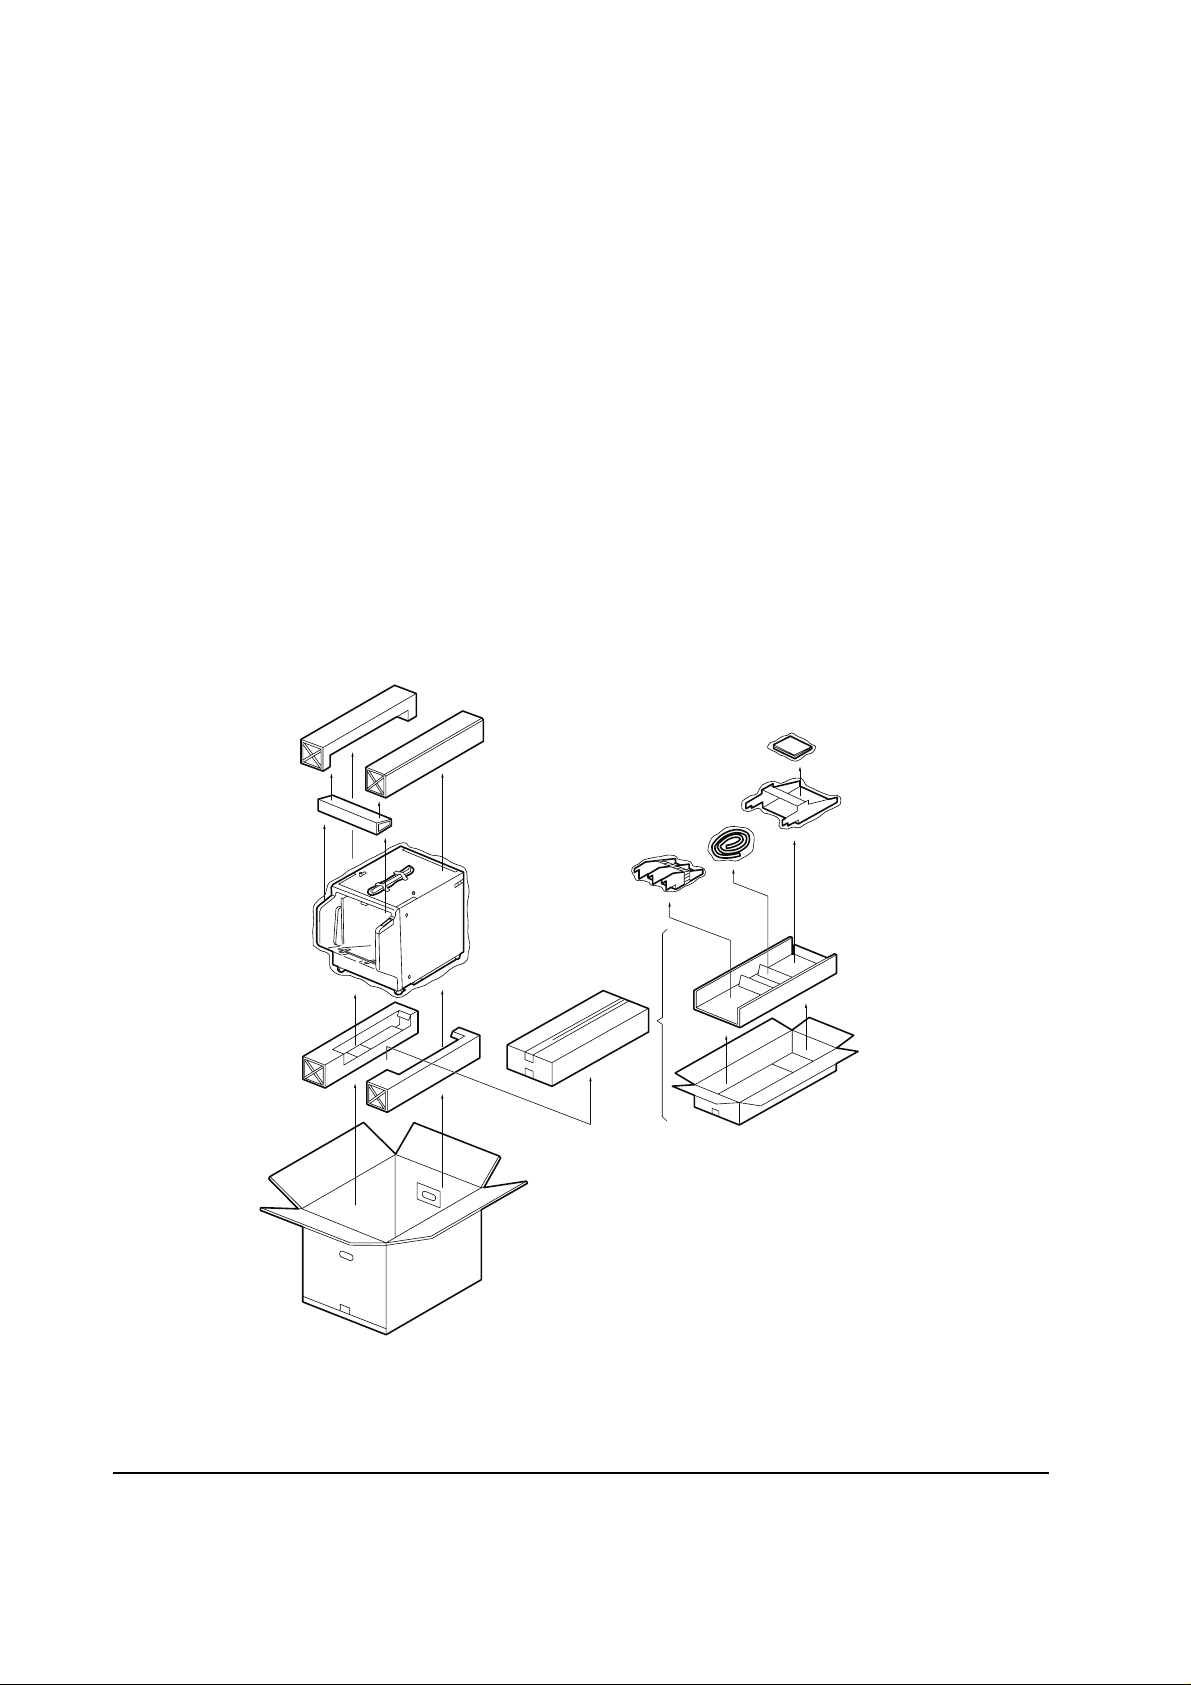
The bulk stacker package contains each of the following items in indicated quantities.
ST-20 bulk stacker, 1
Power cable, 1
Stabilizers (brackets), 3
Thumb screws for the stabilizers, 3
Fabric fastener tape, 12 (6 pieces of hook tape and 6 piece of loop tape)
Instruction manual, 1
ST-20
Figure 1-2-1 Unpacking
1-4
Page 5

1-2-2 Names of parts
The bulk stacker has the following parts. See figure 1-2-2 below.
1 Connector When you install the optional bulk stacker, this connector plugs into a
connector located inside the bottom of the printer (or of optional paper
feeder or duplexer, if used together with the optional bulk stacker).
2 Positioning pins When you install the optional bulk stacker, these pins fit into two holes in
the bottom of the printer (or of the optional paper feeder or duplexer, if
used together with the optional bulk stacker).
3 Paper tray This tray receives 1500 printed pages at a maximum, in face-down stack.
4 Indicate panel This indicates that the bulk stacker is powered (POWER), and that the bulk
stacker ready for use (READY).
5 Rear cover This cover opens to allow clearing paper jams.
6 Stabilizers These three stabilizers prevent the bulk stacker and the printer to accidentally
tumble down. The installation of the stabilizers must be made only by a
qualified Kyocera dealer.
7 Paper stopper The paper stopper is required to ensure that paper is output properly into
the bulk stacker.
4
1
2
7
3
5
6
Figure 1-2-2 Bulk stacker parts
1-5
ST-20
Page 6

1-2-3 Installing the stabilizers
T o ensure that the bulk stacker and the printer (and other option units, if installed together) will not
tumble down, the stabilizers must be mounting them are included with the bulk stacker package.
The installation of the stabilizers is to be performed only by a Kyocera-qualified service technician.
Kyocera shall not liable for any damage caused by improper installation of the equipment.
WARNING Do not use bulk stacker without first installing the stabilizers. If the stabilizers
are not installed, the printer and the bulk stacker unit may tumble, causing
injury to person or serious damage to the printer and the bulk stacker.
To install the stabilizers, proceed as follows.
Disconnect the bulk stacker's power cable from the AC outlet, if connected already.
Fit the stabilizer A to the left end of the base at the bottom of the bulk stacker, securing it using
the thumb screw.
Fit the stabilizer B to the front side of the base at the bottom of the bulk stacker, securing it using
the thumb screw.
Fit the stabilizer C to the front side of the base at the bottom of the bulk stacker, securing it using
the thumb screw. Insert the thumb screw into the hole located under the paper tray of the bulk
stacker.
Thumb screw
Stabilizer A
Thumb screw
Stabilizer B
Stabilizer C
Thumb screw
ST-20
Figure 1-2-3 Installing the stabilizers
1-6
Page 7

1-2-4 Affixing the fabric fastener tape
Affix the fabric fastener tape to the top and bottom surfaces of option units such as the DU-20/DU21 duplexer and the PF-20/PF-21 paper feeder when using these option units with the ST-20 bulk
stacker. The figure below shows option units to which the hook tape and loop tape should be
affixed for various combinations of option units.
NOTE Hook tape is affixed to the top side of the ST-20 at the time of shipment from the
factory.
HS-20
HS-21
Printer
PF-20/DU-20
ST-20
HS-20
HS-20
HS-21
PF-20
PF-20
ST-20
Hook tape (white)
Printer
Loop tape (black)
HS-21
PF-20
PF-20
DU-20
ST-20
Figure 1-2-4 Affixing the fabric fastener tape
Printer
1-7
ST-20
Page 8

1-2-5 Affixing the tape
Peel the backing material off of the fabric fastener tape and affix the tape to the option units as
shown in the figure 1-2-5 below.
Top
Hook tape
Rear cover
110 mm
10 mm
10 mm
110 mm
Rear cover
Bottom
Hook tape
Figure 1-2-5 Affixing the tape
ST-20
1-8
Page 9

1-3 Precautions on service and maintenance
Only a qualified technician should perform service on the bulk stacker, who is familiar with
fundamental safety countermeasures as dictated for all electronics technicians. Observe the following
precautions during service and maintenance of the bulk stacker. These are to prevent the possible
personal injuries to the technician and the damage to the equipment.
1-3-1 Power source
The bulk stacker has its own AC power inlet. AC power should be available near the equipment and
easily accessible. Observe the following precautions regarding AC power.
CAUTIONS The bulk stacker has no power switch provided as the printer's power switch
simultaneously turns on and off the bulk stacker. Therefore, before plugging in
the bulk stacker power cord, the printer's power switch must be turned off.
Use only the power source voltage conforming to the bulk stacker's rated
power voltage. Plugging the bulk stacker to an inappropriate voltage source
will severely damage the bulk stacker.
Disconnect both the printer's and the bulk stacker's power cord from power
before attempting removal or replacement of the electrical components and the
printed-circuit board in the bulk stacker.
In connecting the bulk stacker power, exercise an extreme care in handling the
power supply or any other electric parts which may give an electric shock.
To avoid possible electrical shock, extreme caution must be exercised in
handling the power cord and any other electrical part.
1-9
ST-20
Page 10

1-3-2 Static
Use antistatic (discharging) tools, e.g., an antistatic wrist belt, when handling the printed-circuit
boards to discharge the human body.
1-3-3 Replacement parts
Replace the components with only the Kyocera's recommended components. Use of nonrecommended parts will void the bulk stacker's warranty. For information of parts, refer to the
Parts Catalog.
ST-20
1-10
Page 11

1-4 Paper
The bulk stacker may not be used to receive the paper not satisfying the requirements below.
The special types of paper such as overhead-projection film (OHP), envelopes, adhesive-backed
label, etc., must not be delivered to the bulk stacker. These types can result in jam, misfeeds and
paper waste, and in extreme cases can damage the bulk stacker . The paper having a strong tendency
of curl in one direction should also be avoided.
NOTE Kyocera assumes no liability for problems that occur when paper not satisfying these
requirements is used with the bulk stacker.
Table 1-4-1 Paper specifications
Item Specifications
Weight*
Thickness
Dimensional accuracy
Squareness of corners
Moisture content
Direction of grain
Pulp content
60 to 90 g/m2 (16 to 24 lbs./ream)
0.086 to 0.110 mm (3.4 to 4.3 mils)
±0.7 mm ( ±0.0276 inches)
90±0.2 °
4 to 6 %
Long grain
80 % or more
* If the duplexer is used with the bulk stacker, the weight of paper
to be used should be 70 g/m2 or greater.
1-11
ST-20
Page 12

1-5 Specifications
Item Specifications
Applicable printers
Table 1-5-1 Specifications
See section 1-1.
Number of paper trays
Paper size
Paper capacity
Environmental requirements
Power requirements
Power consumption
1 bulk tray
Letter (81/2 × 11")
ISO A4 (210 × 297 mm)
Legal (81/2 × 14")
JIS B5 (128 × 257 mm)
JIS A5 (148 × 210 mm)
1500 pages (thickness 0.1 mm)
Temperature: 10 to 35 °C (50 to 90.5 °F)
Humidity: 20 to 80 % RH
Optium conditions: 20 °C, 65 % RH
Altitude: Max. 2000 m (6500 feet)
Illumination: Max. 1500 lx
120 V, 60 Hz, max. 1 A
220-240 V AC, 50 Hz/60 Hz, max. 0.5 A max.
max allowable voltage fluctuation; ±10 %
max allowable Frequency fluctuation; ±2 %
Max. 31 W
Noise
Dimensions (wide × high × deep)
Weight
ST-20
Max. 55 dB (A) when operating (excl. peak values)
(Measured 1 m from the outside of the bulk stacker)
34.5 cm (133/8") × 44.6 cm (179/16") × 58.0 cm (2213/16")
25 kg (55 lbs.)
1-12
 Loading...