

Page 1
Service info. PI-002
-
SUBJ.: UP-GRADE PF-30, ST-30, SO-30 AND DF-31 IN ORDER
TO LET THEM WORK WITH FS-8000C
1. TECHNICAL EXPLANATION
1-1 PF-30
It is necessary to exchange one Gear and its mounting bracket, in order to up
grade PF-30 to PF-30A. Then PF-30A can work with FS-8000C and of course
with FS-9000, FS-7000+ and FS-7000.
[NOTE]
Since December 2000, only PF-30A is being produced at Manufacture side
(No need to Up-grade)
1-2 ST-30, SO-30, DF-31
It is necessary to Up-date EP-ROM version of ST-30, SO-30 and DF-31, in
order to make them possible to work with FS-8000C.
After up dating EP-ROM, all those 3 options can work with FS-8000C and of
course with FS-9000, FS-7000+ and FS-7000.
[NOTE]
Since following production date of each option, new EP-ROM had been implemented
at Manufacture side. (No need to Up-grade)
>ST-30: August 2001 and onwards
>SO-30: August 2001 and onwards
>DF-31: October 2001 and onwards
2. UP-GRADE KIT
Following 4 UP-GRADE KIT is necessary to Up-grade each option.
>> UP-GRADE KIT for PF-30
>> UP-GRADE KIT for ST-30
>> UP-GRADE KIT for SO-30
>> UP-GRADE KIT for DF-31
3. Contents of each UP-GRADE KIT
>>UP-GRADE KIT for PF-30
a) 1x Gear b) 1x Gear mounting bracket
c) 1x E-ring d) 1x Screw
>>UP-GRADE KIT for ST-30
a) 1x EP-ROM b) 2x Joint Brackets
c) 1x New Installation Guide of ST-30
>>UP-GRADE KIT for SO-30
a) 1x EP-ROM b) 1x New Installation Guide of SO-30
>>UP-GRADE KIT for DF-31
a) 1x EP-ROM b) 2x Joint Brackets
c) 1x Ferrite core d) 1x New Installation Guide of DF-31
4. How to exchange the Gear and EP-ROM
Please refer supplement information in following pages.
[NOTE]
Only DF-31 needs to be done the Home position alignment after exchanging EPROM. Please refer supplement information of DF-31.
ISSUE DATE: 06.12.2001
1/1
Page 2
PF30a-manual.doc
PF-30aModification Procedure
This procedure provides information on how to modify the PF-30 Paper Feeder. This modification
is required so that the PF-30 is operative with the FS-8000C.
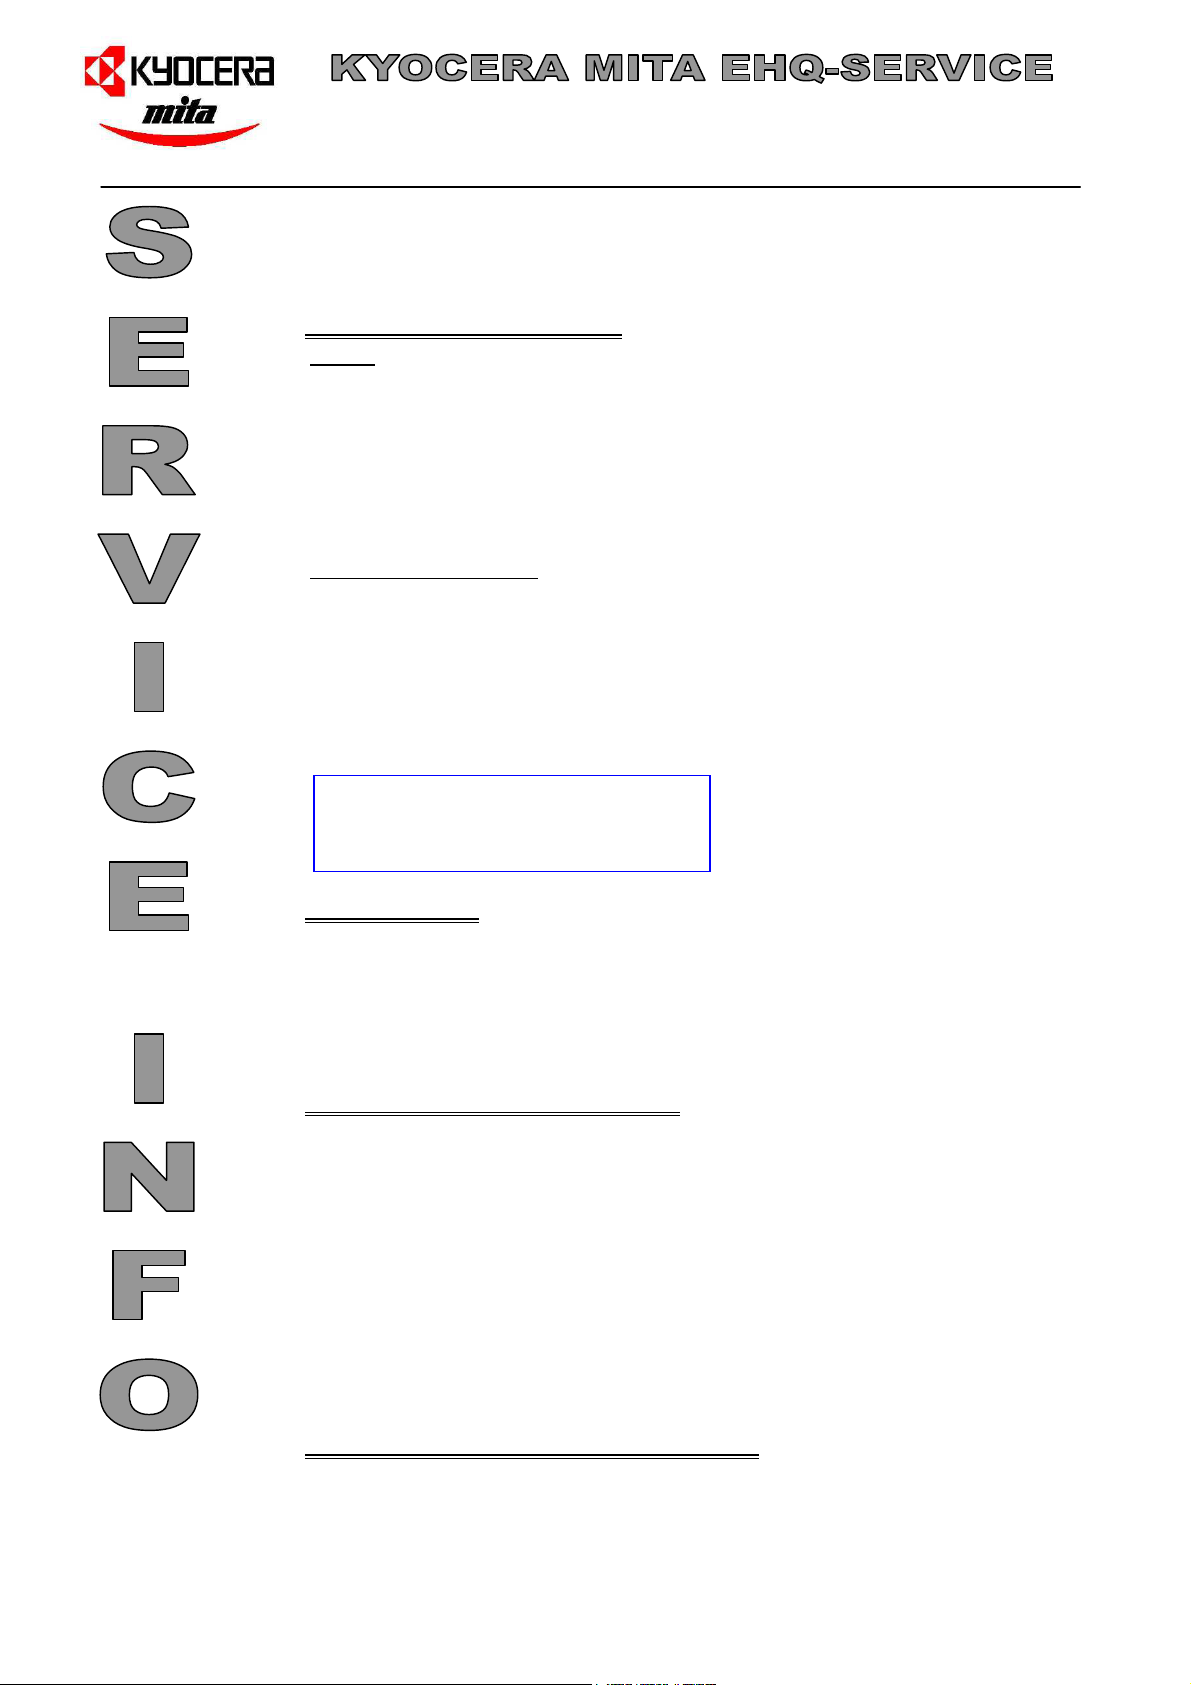
Modification Kit
The following parts are required:
♦ Gear
♦ Gear mounting bracket
♦ E ring
♦ Screw
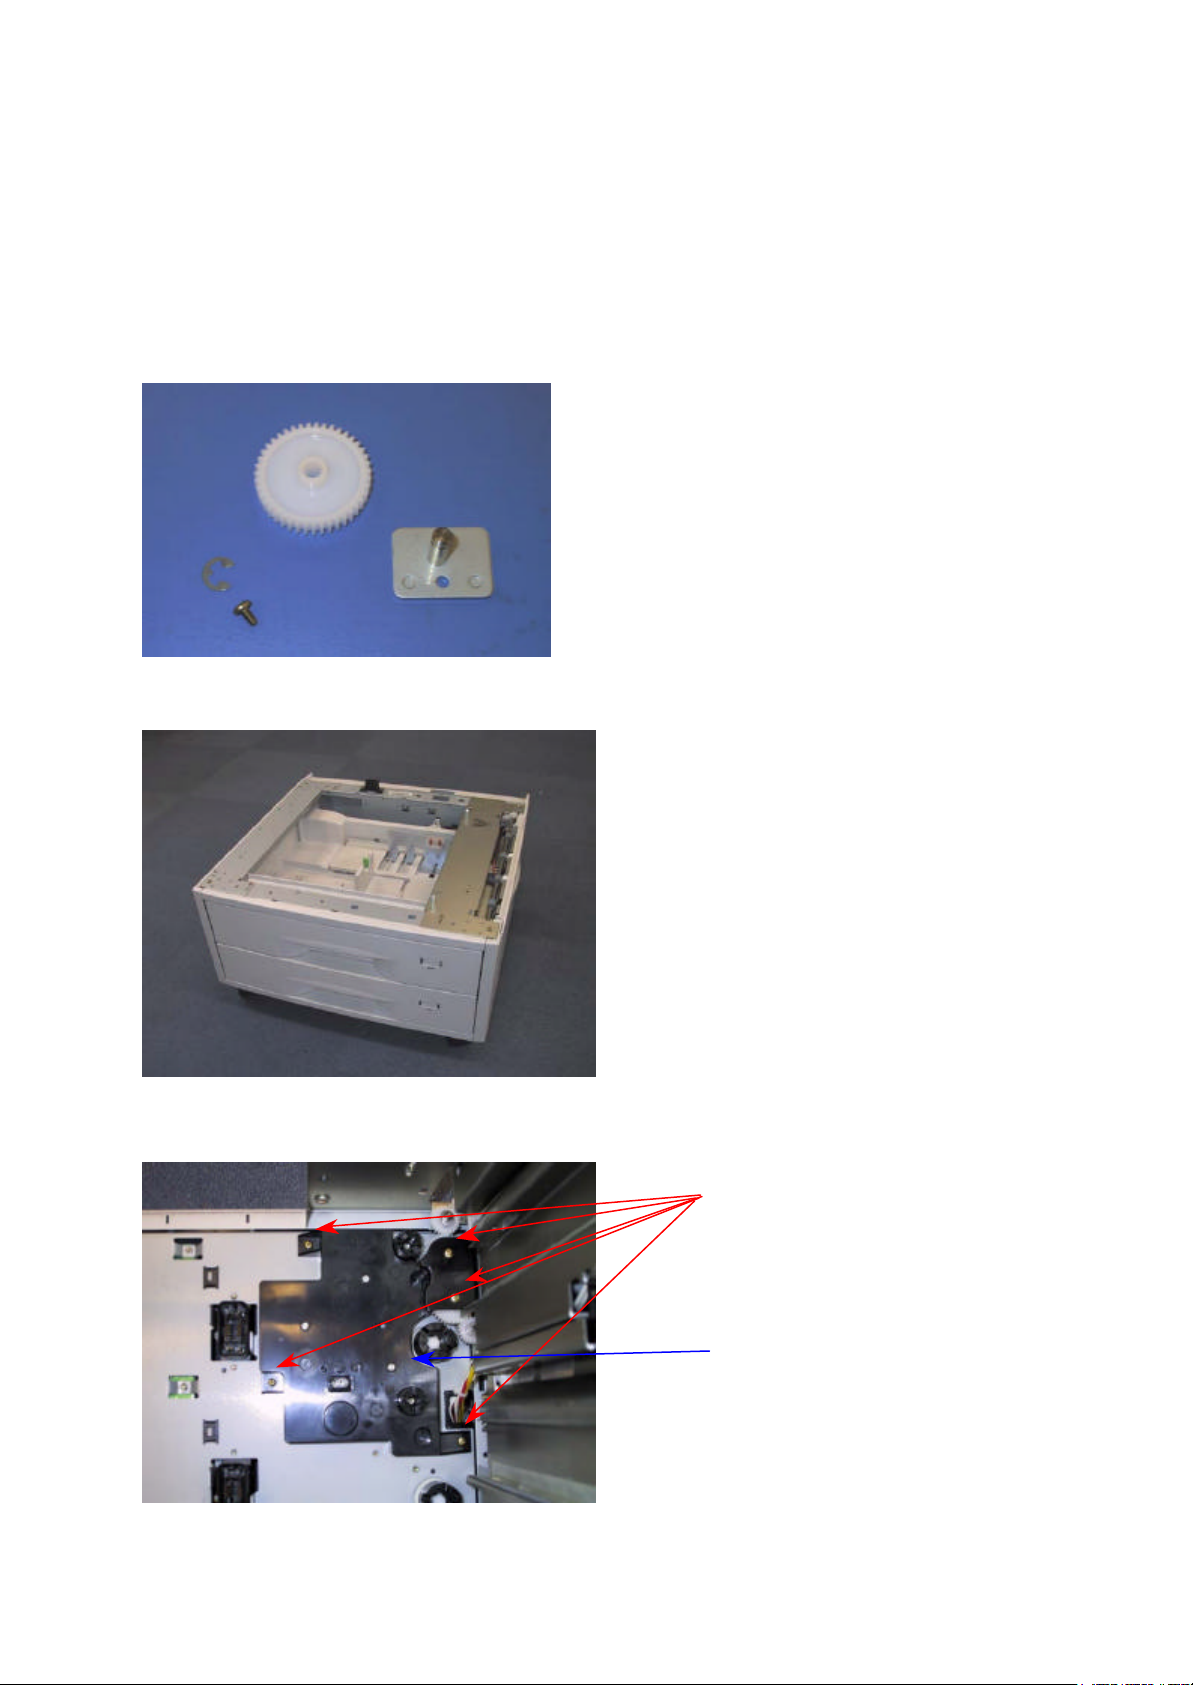
Step 1
Step 2
Remove the paper cassettes from the
paper feeder.
Remove five screws.
Remove this plastic cover.
1/4
Page 3
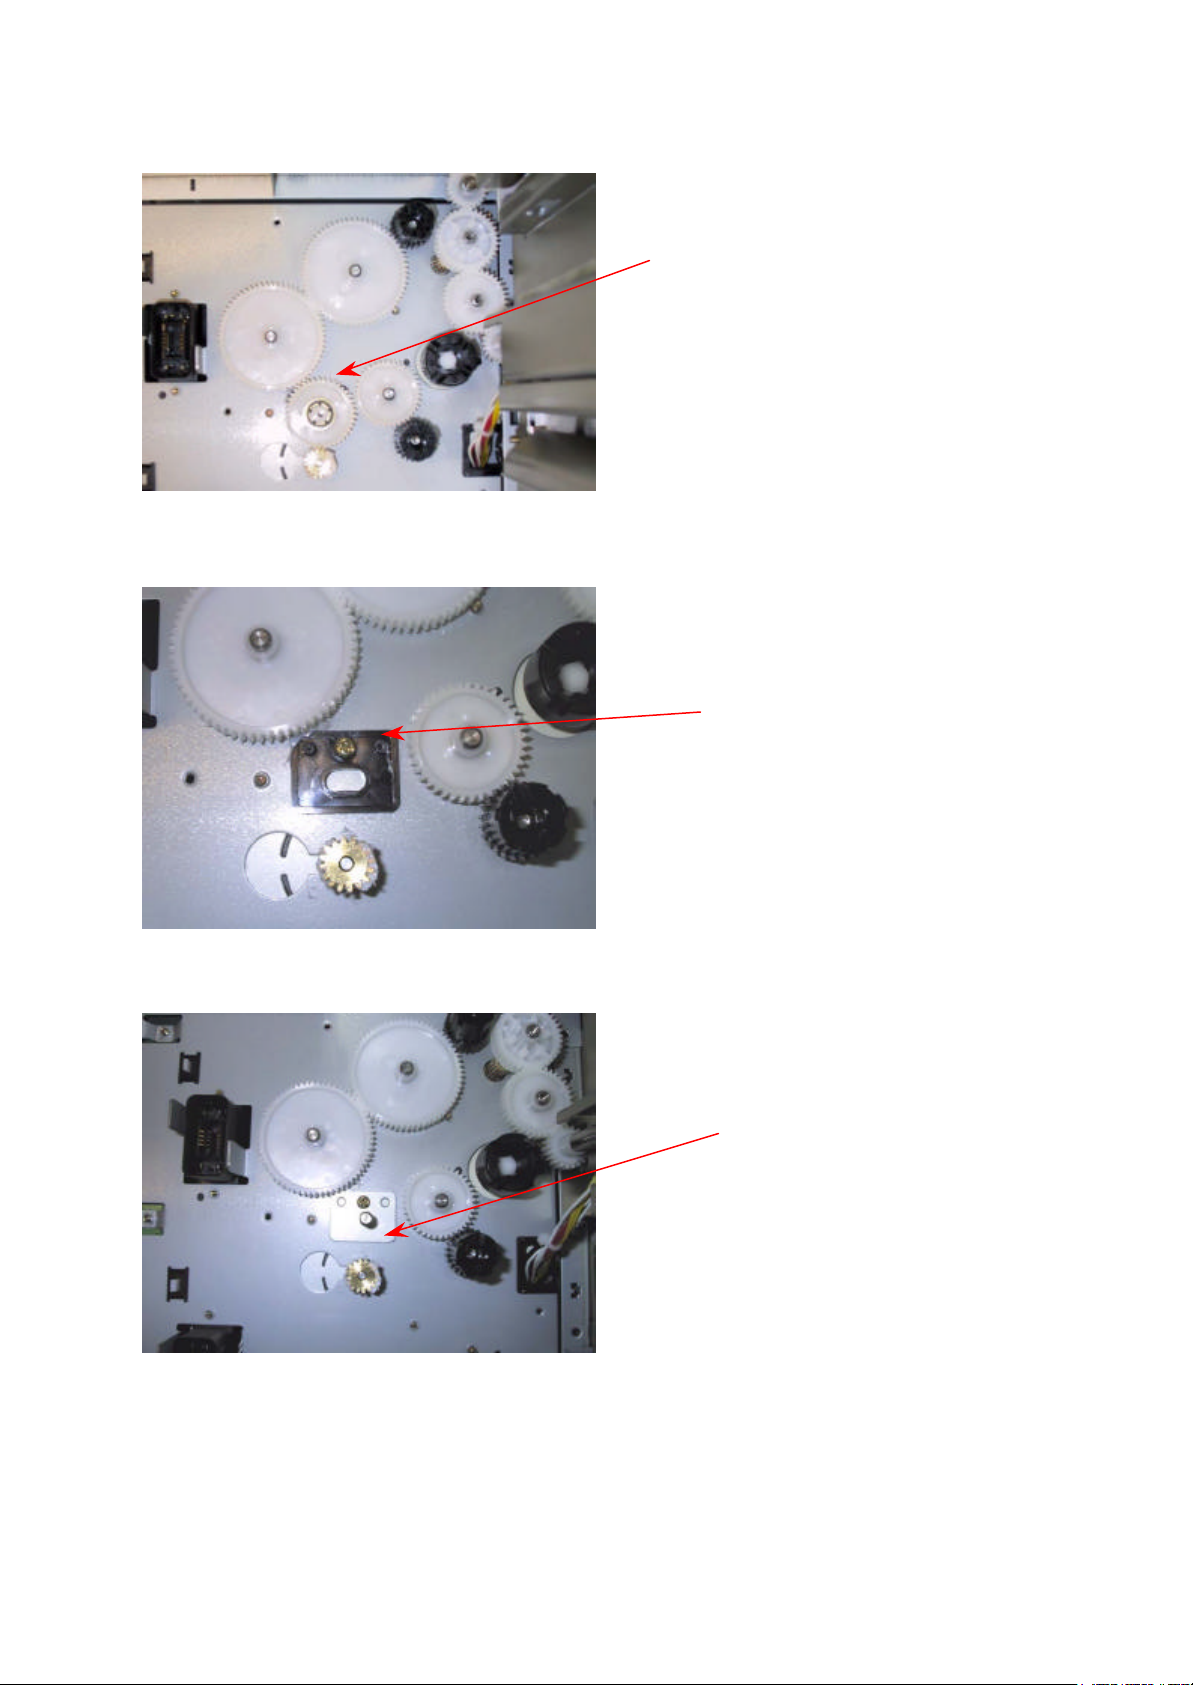
Step 3
Mount the gear to the bracket
Step 4
PF30a-manual.doc
Remove the planetary gear.
Step 5
Remove this plastic plate.
Fit the mounting bracket as
shown using the screw.
using the E ring.
2/4
Page 4

Step 6
PF30a-manual.doc
Remove this plastic plate.
3/4
Page 5

Step 7
Removed Parts
PF30a-manual.doc
Fit the plastic cover and
secure it with five screws.
4/4
Page 6

Supplement to the DF-31 Installation Guide
This kit contains the parts which are required when installing the DF-31 with the FS-8000C printer. These are:
Brackets, 2 (On how to use these brackets, refer to the separate Installation Guide.)
Installation Guide, 1
Ferrite core, 1
EPROM, 1 (See below on how to use this EPROM.)
Replacing the EPROM in the DF-31
In order for the DF-31 to work with the FS-8000C, the EPROM in the DF-31 must be replaced with the one supplied in
this kit. To replace the EPROM, proceed as follows:
Caution: To protect the EPROM against static discharge, wear an anti-static wrist strap, etc. while handling the
EPROM.
1. Turn printer power off.
2. Disconnect the DF-31 from the printer.
3. Open the top cover 1.
4. Remove three screws 2 and then remove the rear cover 3.
5. Replace the EPROM 4.
C
1
2
4
3
B
Home-position alignment
The DF-31 needs to be mechanically aligned with the correct home position of the trays when its EPROM has been
replaced. If the DF-31 is operated with an incorrect home position alignment, it will not operate, cause paper jam, or
damage will result. To perform alignment of the trays for the home position, proceed as follows:
1. Make sure the DF-31 has been properly installed with the FS-8000C.
2. Place a sheet of paper for each paper tray of the DF-31.
3. Set DIP switch [SW1] A bit No.4 to ON.
4. Press and hold pushswitch [SW2] B.
5. Turn printer power on. (Let go off of the pushswitch [SW2] B.) The trays will elevate to the top most
position, then descend to the bottom, the home position.
6. Check the LED1 C on the DF-31 board stays lit. (The LED1 C should be blinking while the trays are
moving.)
7. Turn printer power off.
8. Reset DIP switch [SW1] A bit No.4 to off.
9. Turn printer power on to start using the DF-31.
A
C
Kyocera corporation 2001
Page 7

Supplement to the SO-30 Installation Guide
This kit contains the parts which are required when installing the SO-30 with the FS-8000C printer. These are:
Installation Guide, 1
EPROM, 1 (See below on how to use this EPROM.)
Replacing the EPROM in the S0-30
In order for the SO-30 to work with the FS-8000C, the EPROM in the SO-30 must be replaced with the one
supplied in this kit. To replace the EPROM, proceed as follows:
Caution: To protect the EPROM against static discharge, wear an anti-static wrist strap, etc. while handling
the EPROM.
1. Turn printer power off.
2. Disconnect the SO-30 from the printer.
3. Remove six screws 1 and then remove the rear cover 2.
4. Replace the EPROM 3 and refit all the removed parts.
1
1
1
1
3
1
C
Kyocera corporation 2001
2
1
Page 8

Supplement to the ST-30 Installation Guide
This kit contains the parts which are required when installing the ST-30 with the FS-8000C printer. These are:
Brackets, 2 (On how to use these brackets, refer to the separate Installation Guide.)
Installation Guide, 1
EPROM, 1 (See below on how to use this EPROM.)
Replacing the EPROM in the ST-30
In order for the ST-30 to work with the FS-8000C, the EPROM in the ST-30 must be replaced with the one
supplied in this kit. To replace the EPROM, proceed as follows:
Caution: To protect the EPROM against static discharge, wear an anti-static wrist strap, etc. while handling
the EPROM.
1. Turn printer power off.
2. Disconnect the ST-30 from the printer.
3. Remove four screws 1 and then remove the top cover 2.
4. Remove four screws and washers 3 and then remove the rear cover 4.
5. Replace the EPROM 5 and refit all the removed parts.
3
1
2
1
4
5
3
C
Kyocera corporation 2001
 Loading...