

Page 1
FS-5900C Service Manual
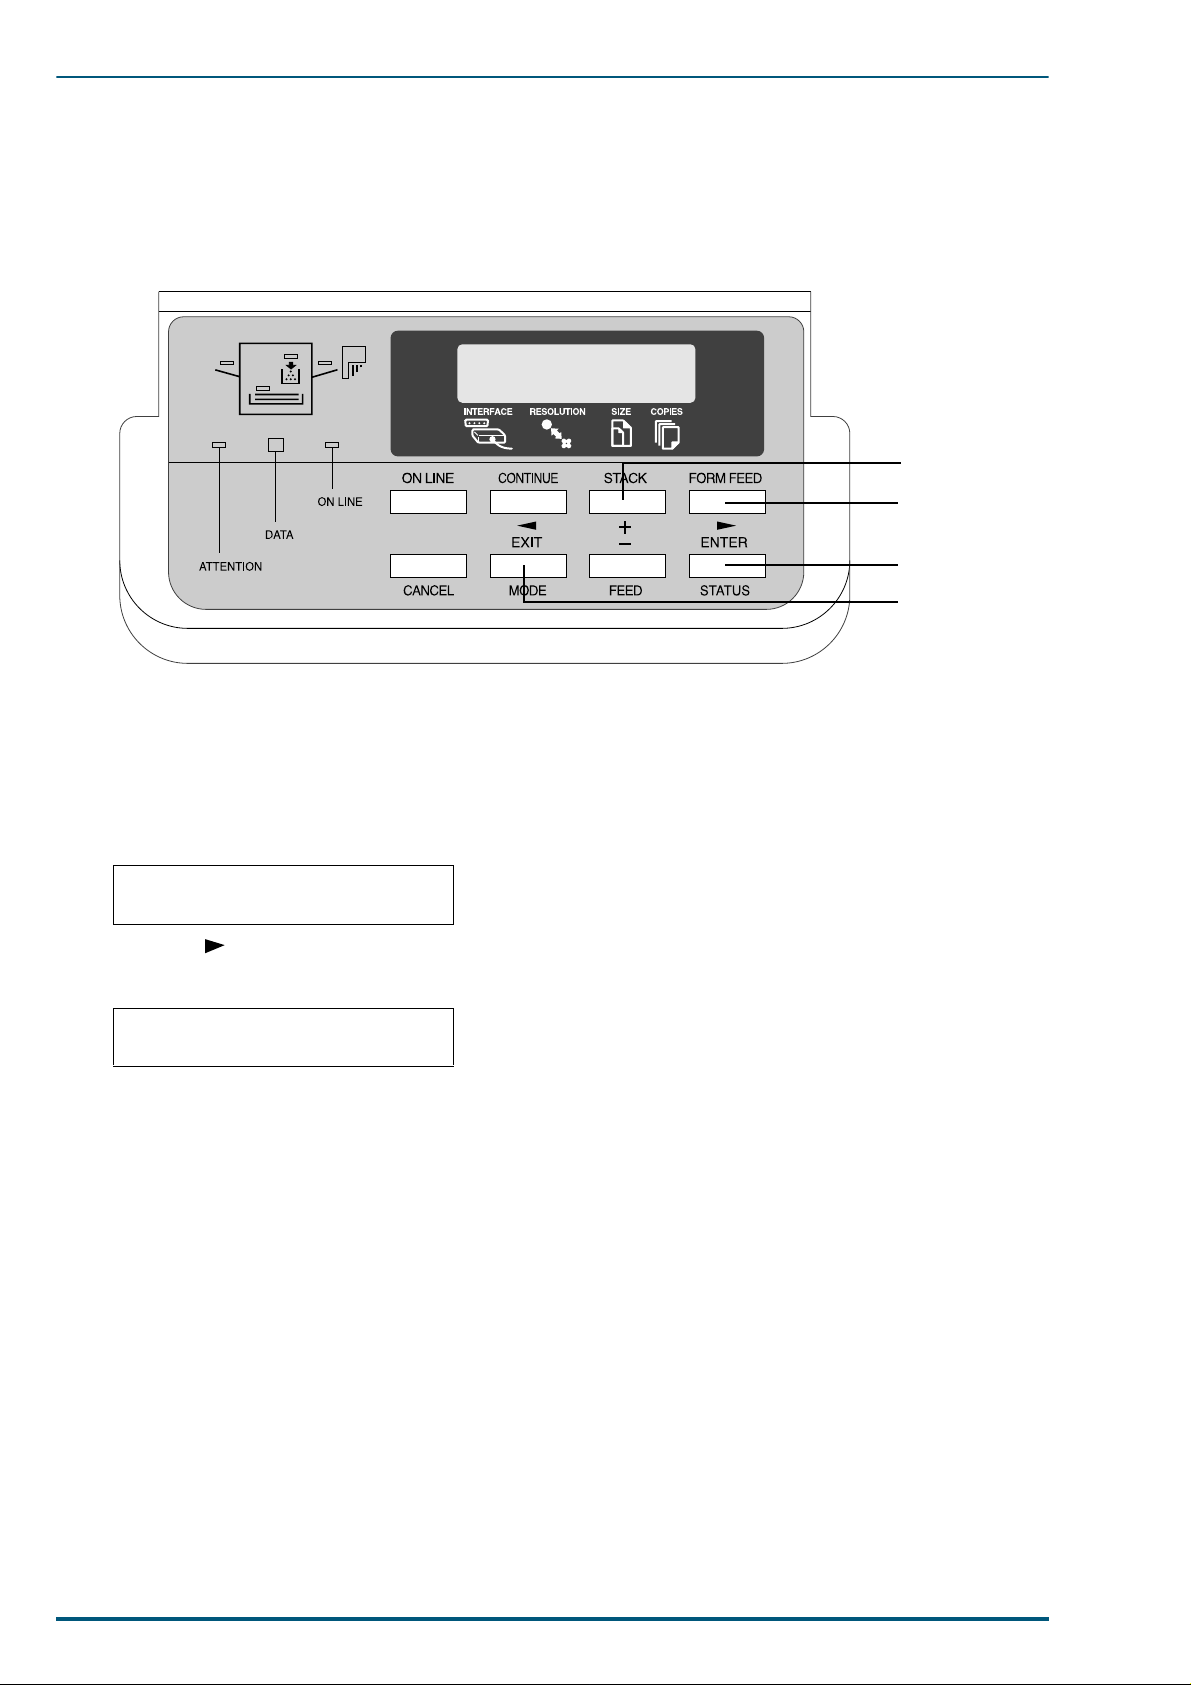
7. Setting the Colour Density
The printer panel provides an interfa ce to adjust the densi ty of the tone r applied to the media. Thi s feature
compensates for the changes in density that can occur as environmental conditions changes, tone r developers or the imaging u nit age.
2
3
4, 5
1
Perform the following steps to adjust the colour density:
Begin by printing a Colour Calibration Page. To print a Colour Calibration Page, proceed as follows:
1 Press the MODE key on the printer panel.
1.1. Press the + key repeatedly until the message display indicates Colour Calibration.
Colour >
Calibration
1.2. Press the key.
1.3. Press the + key until the message display shows > Print Calibration Page.
>Print Calibration Page
1.4. Press the ENTER key. The question mark (?) will appe ar.
1.5. Press the ENTER key again.
A Colour Calibration Page will be printed.
The current density setting for each colour is indicated by four stripes of cyan, magenta, yellow, and black
(from left to right). On the Colour Calibration Page as shown in the following example.
The factory default setting for each colour density is 10.
96
Page 2
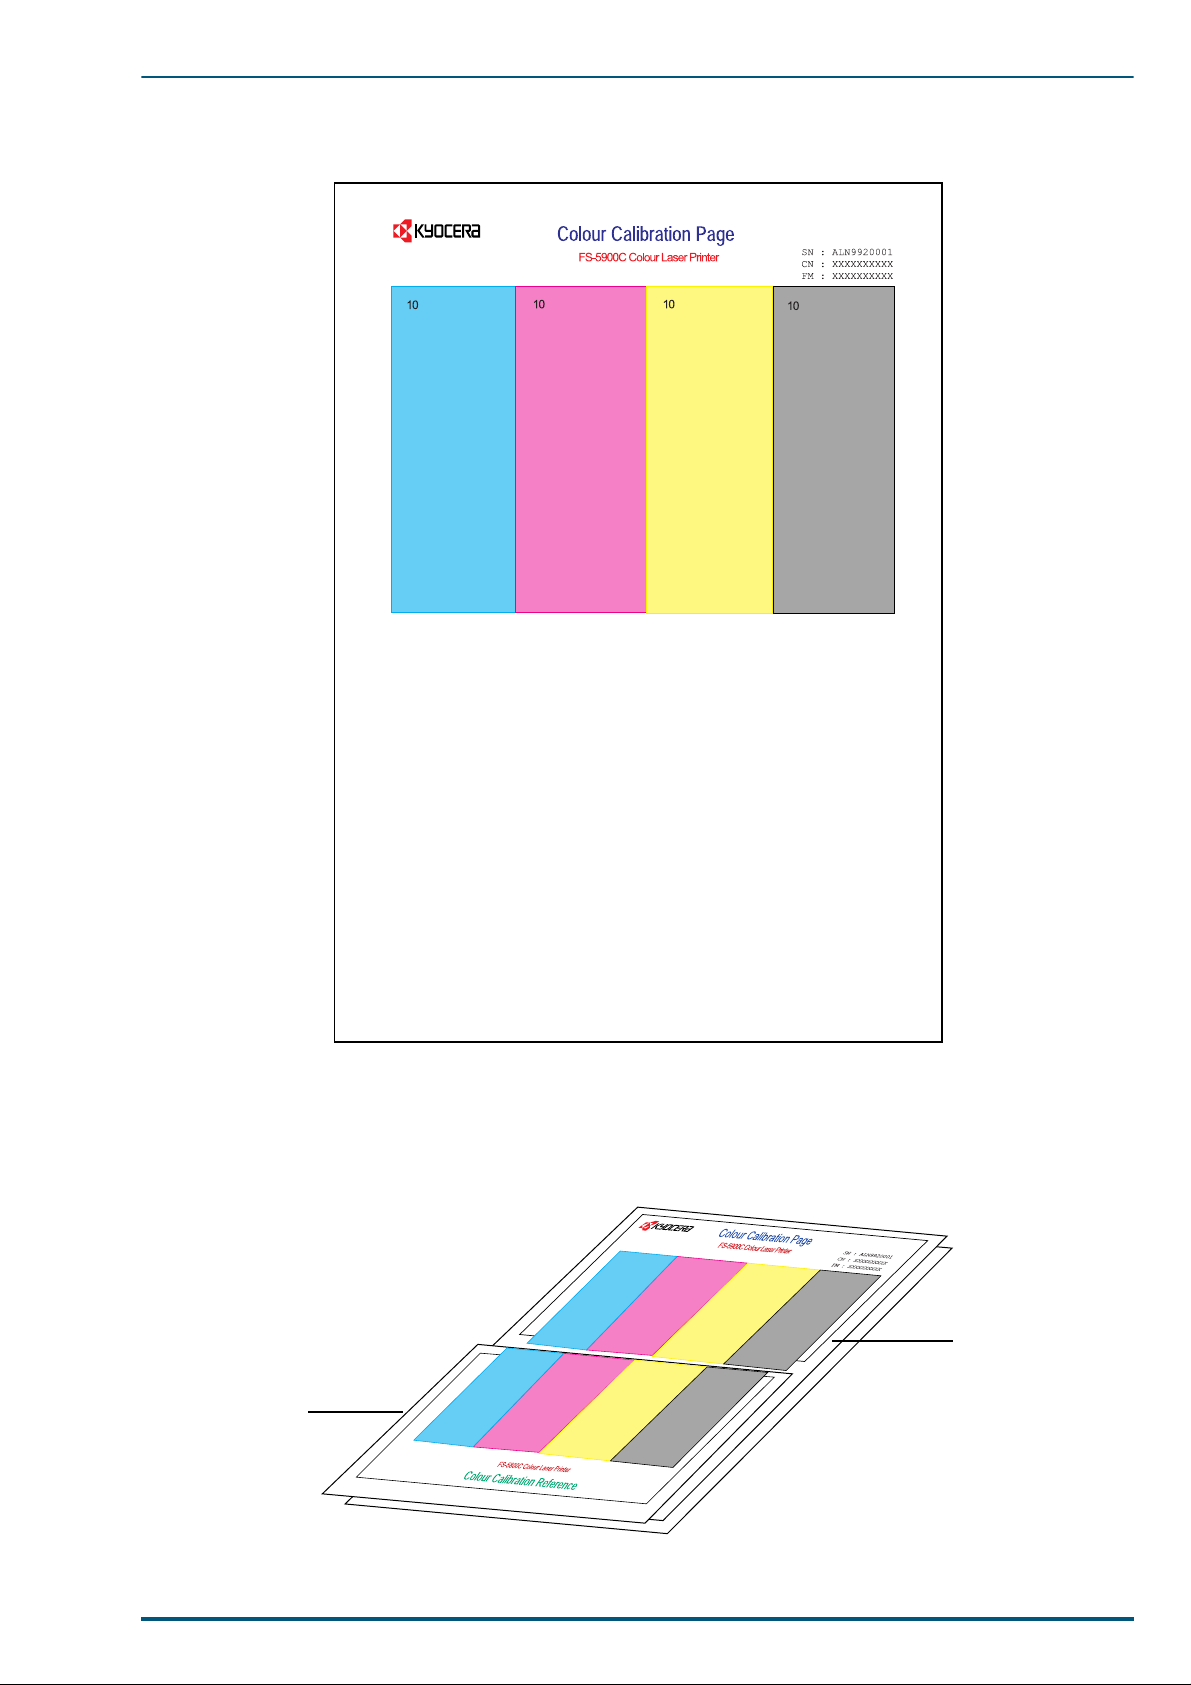
Colour Calibration Page (Example):
7. Setting the Colour Density
Compare the current colour density settin gs on the Colour Calibration Page with the colour density
2
samples on the Colour Calibration Reference to see if they match.
Place the Colour Calibration Page on at least 2 sheets of clean white paper in a well-lighted area.
10
10
Colour Calibration
Reference
10
10
Colour Calibration
Page
97
Page 3

FS-5900C Service Manual
If they match, you do not need to adjust the colour density. If they do not match, go to step 3.
3 Press the + key until the message display shows >Cyan. The current density setting for cyan is indi-
cated (the default is 10).
3.1. Press the ENTER key.
>Cyan
10
3.2. Press the + or – key to darken or lighten the cyan colour.
For example:
•If you wish to make the density setting darker:
– Press the + button (up to 20).
•If you wish to make the density setting lighter:
– Press the - button (to 00).
3.3. Press the ENTER key.
4 Press the + or – key until >Print Calibration Page is indicated.
5 Press the ENTER key twice to reprint the Colour Calibration Page.
•Repeat step 3 above, if necessary.
6 Repeat steps 3 through 5 for each colour (MAGENTA, YELLOW, BLACK).
•To skip a colour, press the + button.
•To return to a previous colour, press the – button.
7 When the Colour Calibration Page and the Calibration Reference match in all four colours, press the
MODE key to finalise the calibration procedure.
Notes:• The colour density setting affects the average life of toner.
• Save the Colour Calibration Reference for future calibrations.
98
 Loading...