

MistAway iMistAway Instructions Manual
iMistAway Setup Guide
Verify iMistAway Kit Contents
A7:D3
iMistAway
Gateway
iMistAway Node
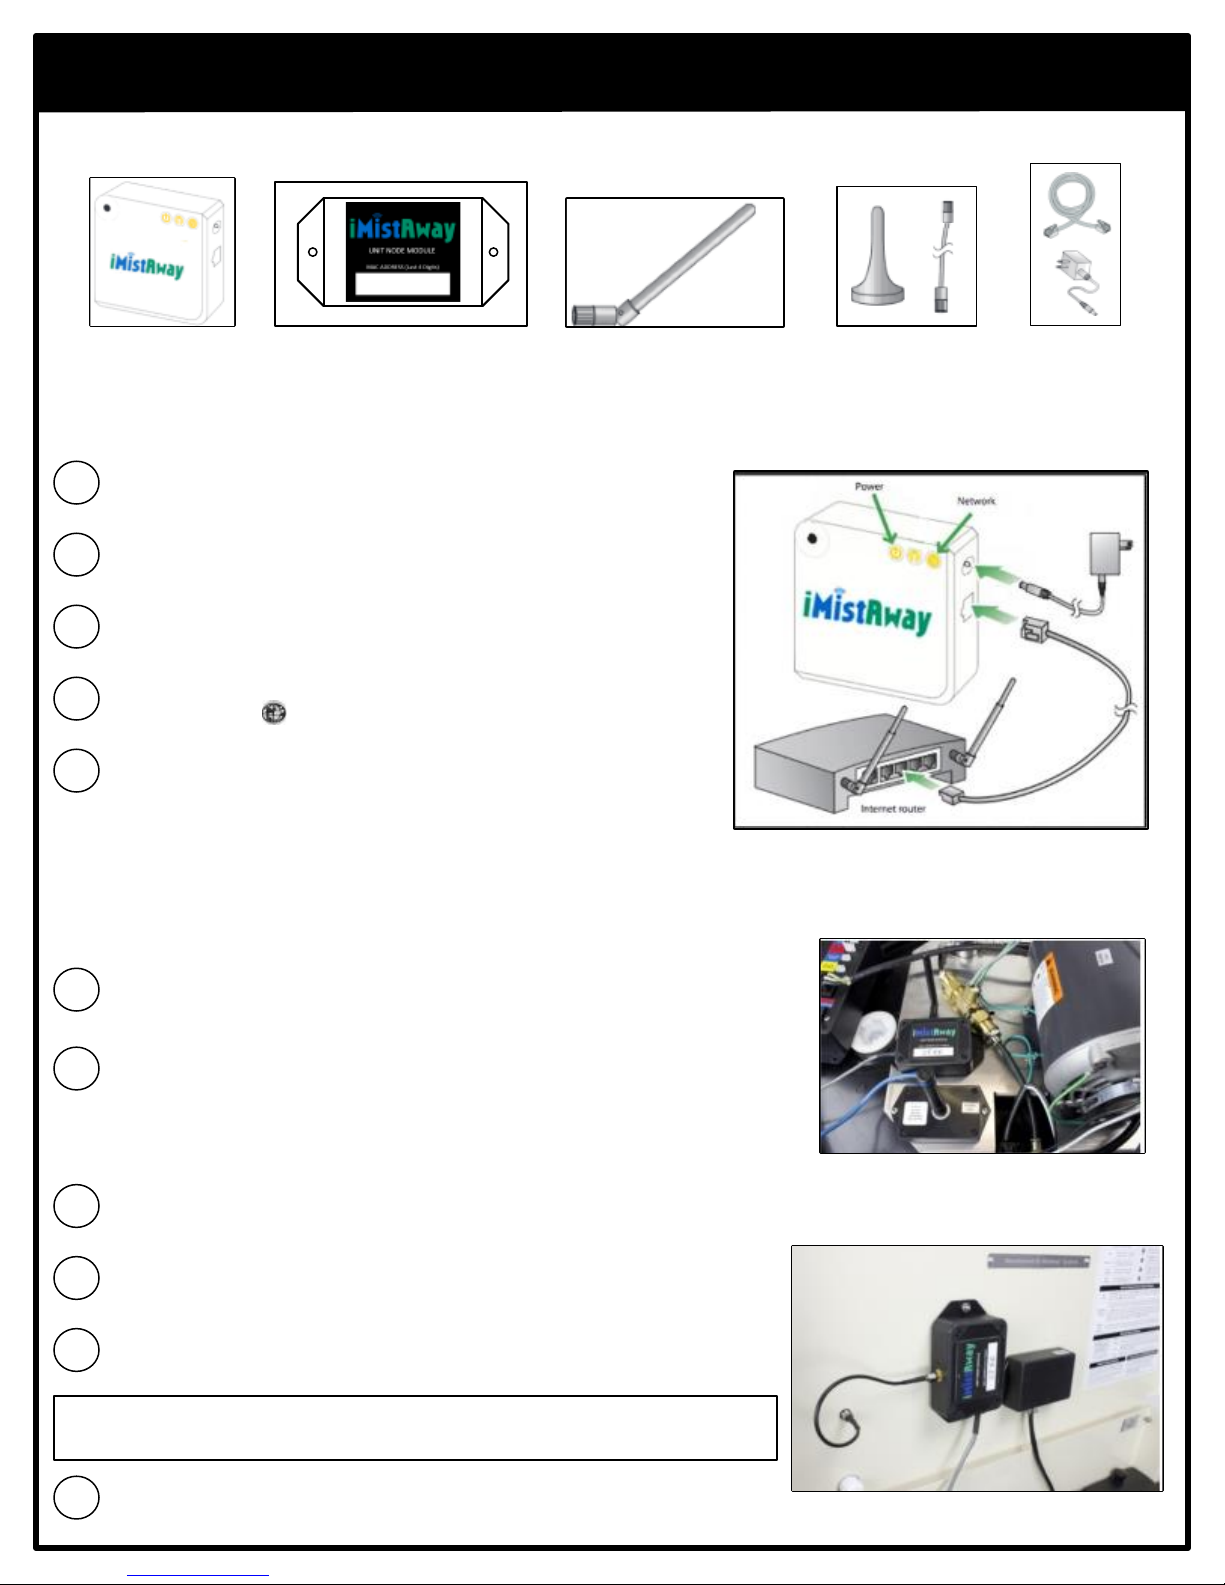
Step One – Install Gateway Unit
Connect the Gateway Uni t to your customer’s Internet router or modem
A
using the included CAT-5 cable.
Connect your iMistAway Gateway Unit to the power adapter.
B
Place the gateway in a position which is as elevated as possible and not in
C
a metal cabinet – this will help to maximize wireless signal strength.
When the Gateway Unit is connected to the iMistAway server, the
D
“globe” symbol ( ) will be lit up with a solid green light .
Record the MAC Address and PAN ID on the Gateway Unit label.
E
Step Two – Mount iMistAway Node on Misting Unit
Antenna (Gen 1.3)
Gen 3 Antenna Kit.
Contains 1 antenna, 1 antenna cable
and 2 mounting nuts (not pictured)
Ethernet Cable
and Power
Adapter
Gen 1.3 (Tank Unit)
Thread a ntenna onto iMistAway Node.
A
Mount node inside unit, next to t he remote receiver. The Node antenna
should point away from the remote reciever. The Node ships with red
B
mounting tape attached.
Gen 3 (Tankless Unit)
Mount iMistAway Node to underside of lid. Use the two nuts supplied in
A
the Antenna Kit to secure the iMistAway Node to the lid .
Connect supplied antenna cable to male connector on iMistAway Node
B
Push the male connector end of the supplied anten na cable through hole
C
in lid of misting unit. Secure cable using attached nut, w asher and o-ring.
IMPORTANT - O-Ring on antenna cable must be placed on t he top of the lid before
securing the cable us ing the attached nut.
Thread iM istAway antenna onto the antenna connector.
D
Gen 1.3 Mounting Location
Gen 3 Mounting Location
Step Three – Plug iMistAway Node into Controller and Set PAN ID
IMPORTANT! The misting unit must be POWERED OFF when connecting the Node to the controller .
A
Unplug or power do wn misting unit
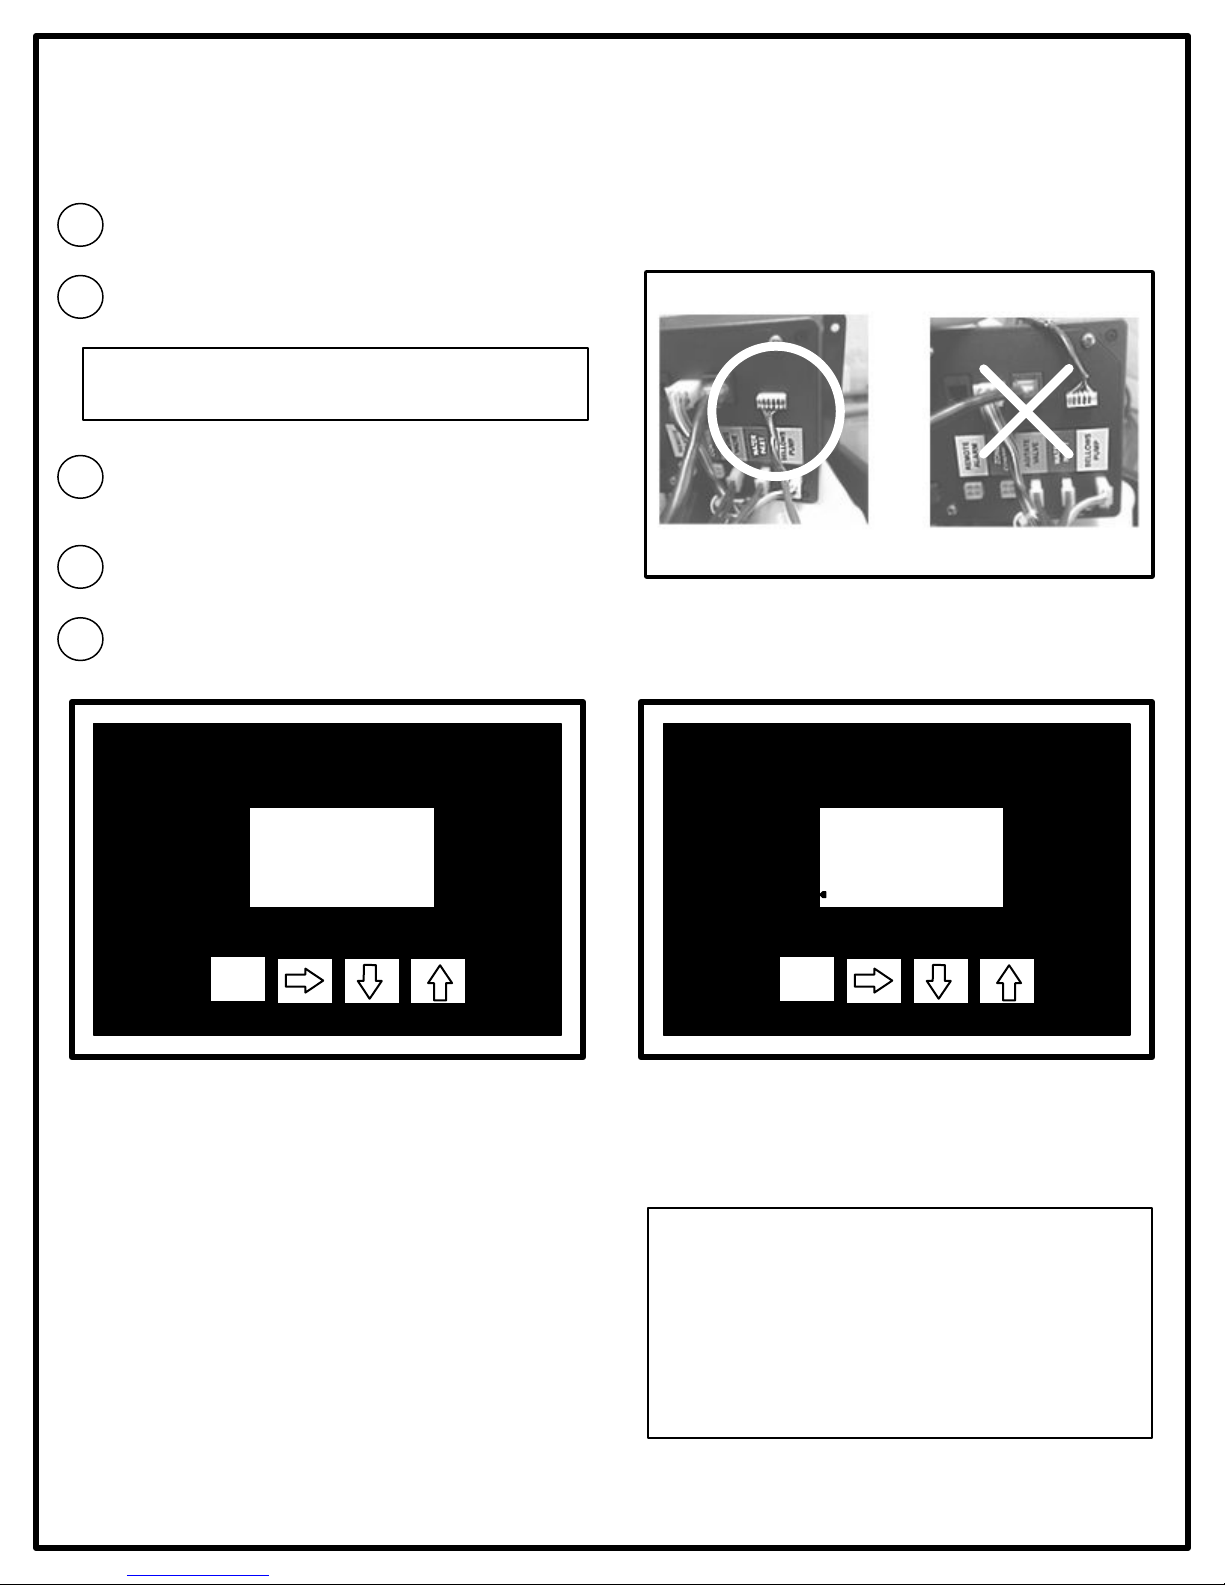
Plug the six pin connector from the node into the controller
data port as shown. The cable should point down toward
B
the colored labels.
If the connector is plugged in the wrong way, your
MistAway unit will not power on!
Restore power to misting unit . Confirm “Net On” appears
C
during controller boot cycle.
Navigate to the DATA menu and press the up a rrow until
PAN ID appears on the display. Press and hold the green
D
arrow key to set the PAN ID.
Select the PAN ID and press the green arrow key . When the PAN ID is set, the controller will display “DONE”.
E
B
C D
Day/Time
Cycles
Custom PGM
Set-Up
Maintenance
Data
MENU
STOP
PAN 27NET ON
Step Four – Contact MistAway for Activation
To activate the iMistAway, contact MistAway Technical
Support.
When calling support, please be sure to have the MAC
Address for your iMistAway unit.
You will need to provide this information when calling in.
The MAC Address is listed on the Gateway Unit as well as
the iMistAway box.
Day/Time
Cycles
Custom PGM
Set-Up
Maintenance
Data
MENU
STOP
PAN 27
iMistAway Activation
866-485-7255 or 713-468-6464
Extension 324
Log into iMistAway.com (or use the mobile app) to confirm wireless operation.
 Loading...