

SP Speech Series
Set-Up Instructions

Teleprompter Parts
Step #1
Place steel monitor housing on floor with the open side toward the podium.

Step #2
Insert pole into receiving tube at the back of the housing. Tighten knob in housing to help
prevent the pole from rotating.
Step #3
Connect VGA/Video cables and power cables to the LCD monitor, Splitter/Amplifier, and
computer. Place LCD monitor into steel housing with the screen base & buttons toward the pole
side (for SP-150 & SP-190). SP-160 & SP-220 allows the monitor to have the LCD buttons
toward the open side of the steel housing.

Step #4
Attach glass holder to the top of the pole. When attached, the glass will be tilted toward the
podium (appears to hover above the LCD).
Step #5
Slide attach rubber strip to the center edge of mirror. Place mirror into glass holder and tighten
knobs.
Step #6
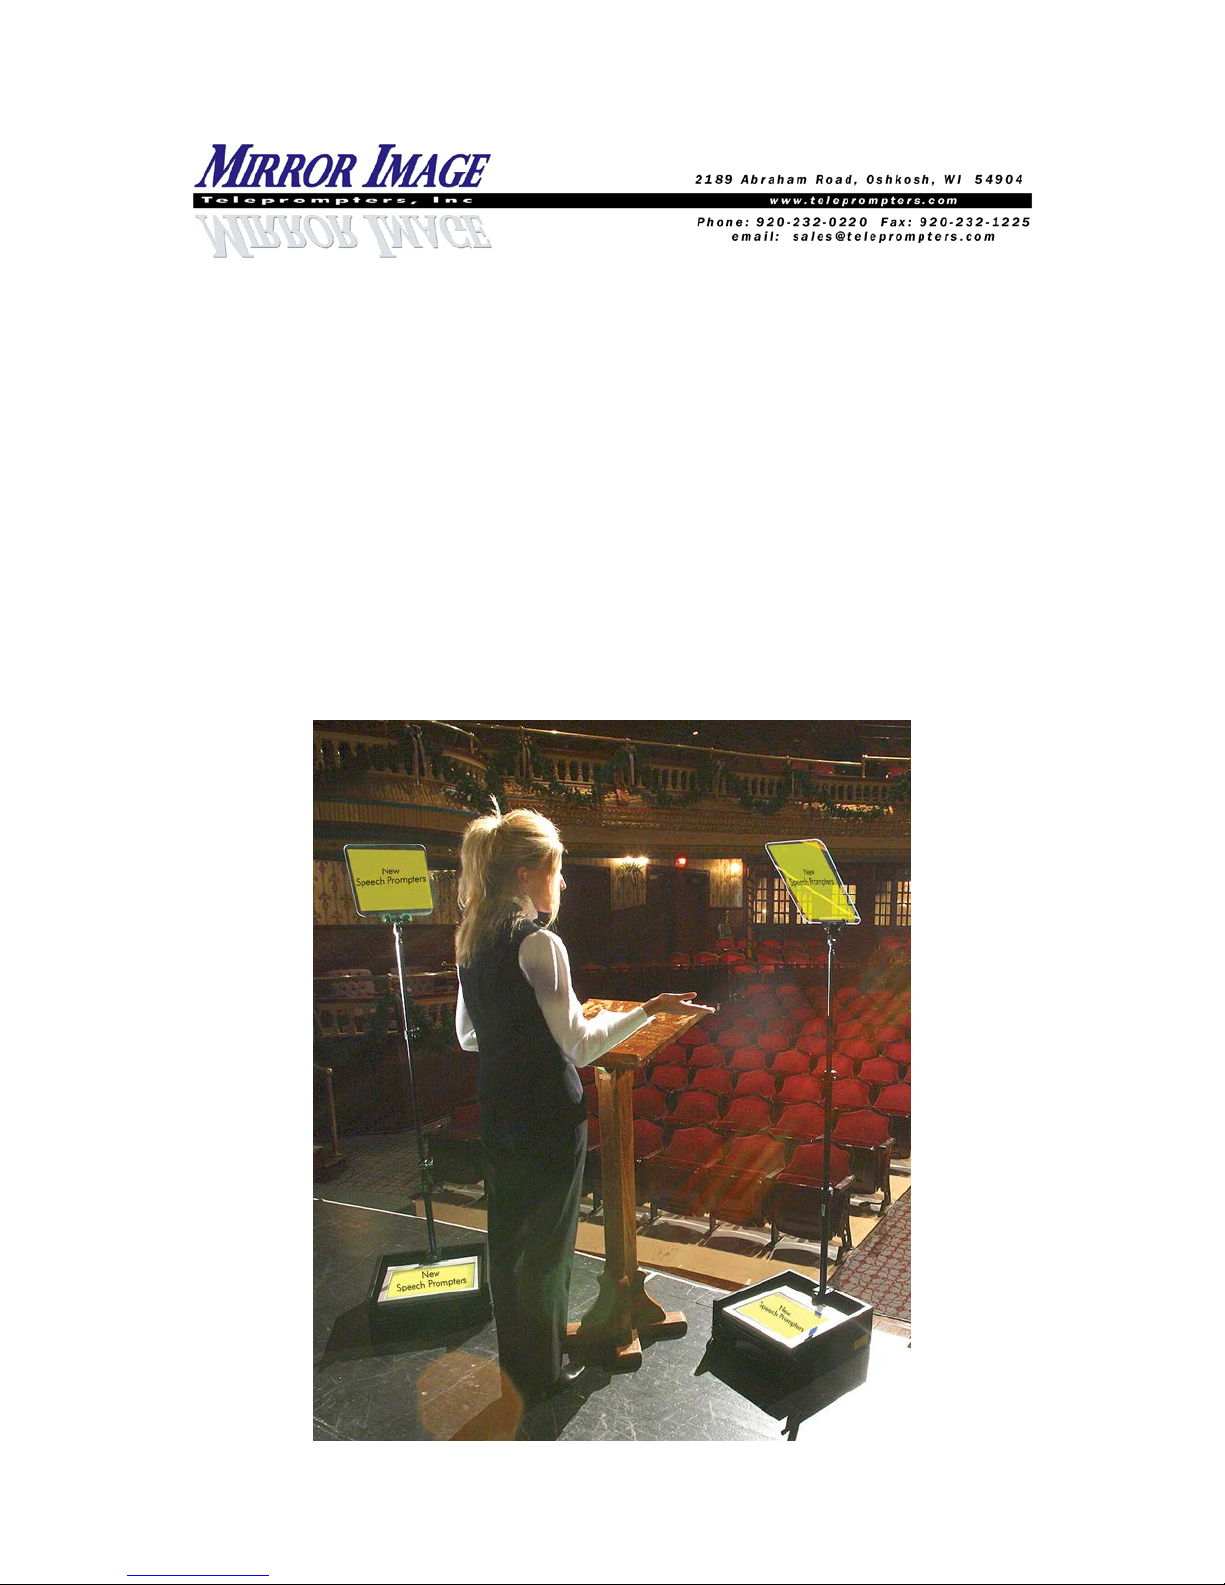
Position the system near the podium. Monitor/Mirror should be start at approximately 45 degree
angle and arms length in relation to the podium. Adjust left or right as needed. Raise or lower
pole until LCD image appears in the mirror. (see cover page for example).

SET-UP FOR EZPROMPT DUAL SCREEN
Before opening EZPrompt program (and while no other programs are running)…
-Open Control Panel / Display Properties / Settings
Select Monitor 2 (if this option is available – if not available, then your computer
can not handle Dual Screen)
Check the box labeled “Extend my Windows desktop onto this monitor”
Click Apply & OK
Close the Control Panel
-Start EZPrompt 5.0
Under the Prompter tab, choose General Options
Check the box labeled “Dual Screen”
-Operation of the EZPrompt program should now provide a reversed image on the
computer output only.***Note…if there is not a “Monitor 2” selection available, then this
computer will not operate as a Dual Screen***
-Now, you can click on General Option tab in EZPrompt again & select Mirror L/R to
reverse the images when prompting.
To return the laptop & monitor to normal usage…
-Close EZPrompt 5.0 and any other programs
-Open Control Panel / Display Properties / Settings
Monitor 2 should be selected
Un-check the box labeled “Extend my Windows desktop onto this monitor”
Click Apply & OK
Close the Control Panel
-Use the Function & Monitor buttons to turn on 1 or both of the external monitor and/or
laptop screen.

WARRANTY INFORMATION
MIRROR IMAGE TELEPROMPTERS OFFERS ALL CUSTOMERS A LIMITED 3YEAR WARRANTY**, FROM DATE OF PURCHASE, ON THE TELEPROMPTER
MONITOR AND HARDWARE (NOT INCLUDING MIRRORS). WE WILL REPAIR
OR REPLACE THESE ITEMS, AT OUR DISCRETION, WHEN DAMAGES OCCUR
DUE TO DEFECTS IN MATERIALS OR MANUFACTURING.
MIRROR IMAGE TELEPROMPTERS OFFERS ALL CUSTOMERS A LIMITED 1YEAR WARRANTY, FROM DATE OF PURCHASE, ON ALL ELECTRONIC
HARDWARE SUCH AS SCAN-CONVERTERS, DISTRIBUTION AMPS, ETC.
ANY & ALL TELEPROMPTER MIRRORS WILL BE REPLACED AT A COST TO
THE CUSTOMER ($100.00 TO $200.00 DEPENDING ON SIZE) UNLESS DAMAGED
IN THE INITIAL SHIPMENT.
REPLACEMENT PARTS FOR ITEMS THAT ARE LOST OR DAMAGED DUE TO
NORMAL WEAR CAN BE PURCHASED DIRECTLY FROM MIRROR IMAGE
TELEPROMPTERS.
CUSTOMERS SHOULD CONTACT MIRROR IMAGE DIRECTLY WITH
OPERATION, WARRANTY, REPLACEMENT, OR REPAIR QUESTIONS.
MIRROR IMAGE TELEPROMPTERS
2189 ABRAHAM LANE
OSHKOSH, WI 54904
920-232-0220
SALES@TELEPROMPTERS.COM
MODEL / PART #___________________________________
SERIAL #__________________________________________
PLEASE VISIT OUR WEB SITE WWW.TELEPROMPTERS.COM FOR PRODUCT
REGISTRATION.
**ALL PURCHASES MADE PRIOR TO APRIL 2005 CARRY THEIR ORIGINAL ONEYEAR WARRANTY**
 Loading...