

Miratron The Prospector 7-295-000108 Operation Manual
Radio Remote Control
Transmitter replacement
Operation Manual
Model: 7-295-000108, 4-function rollback
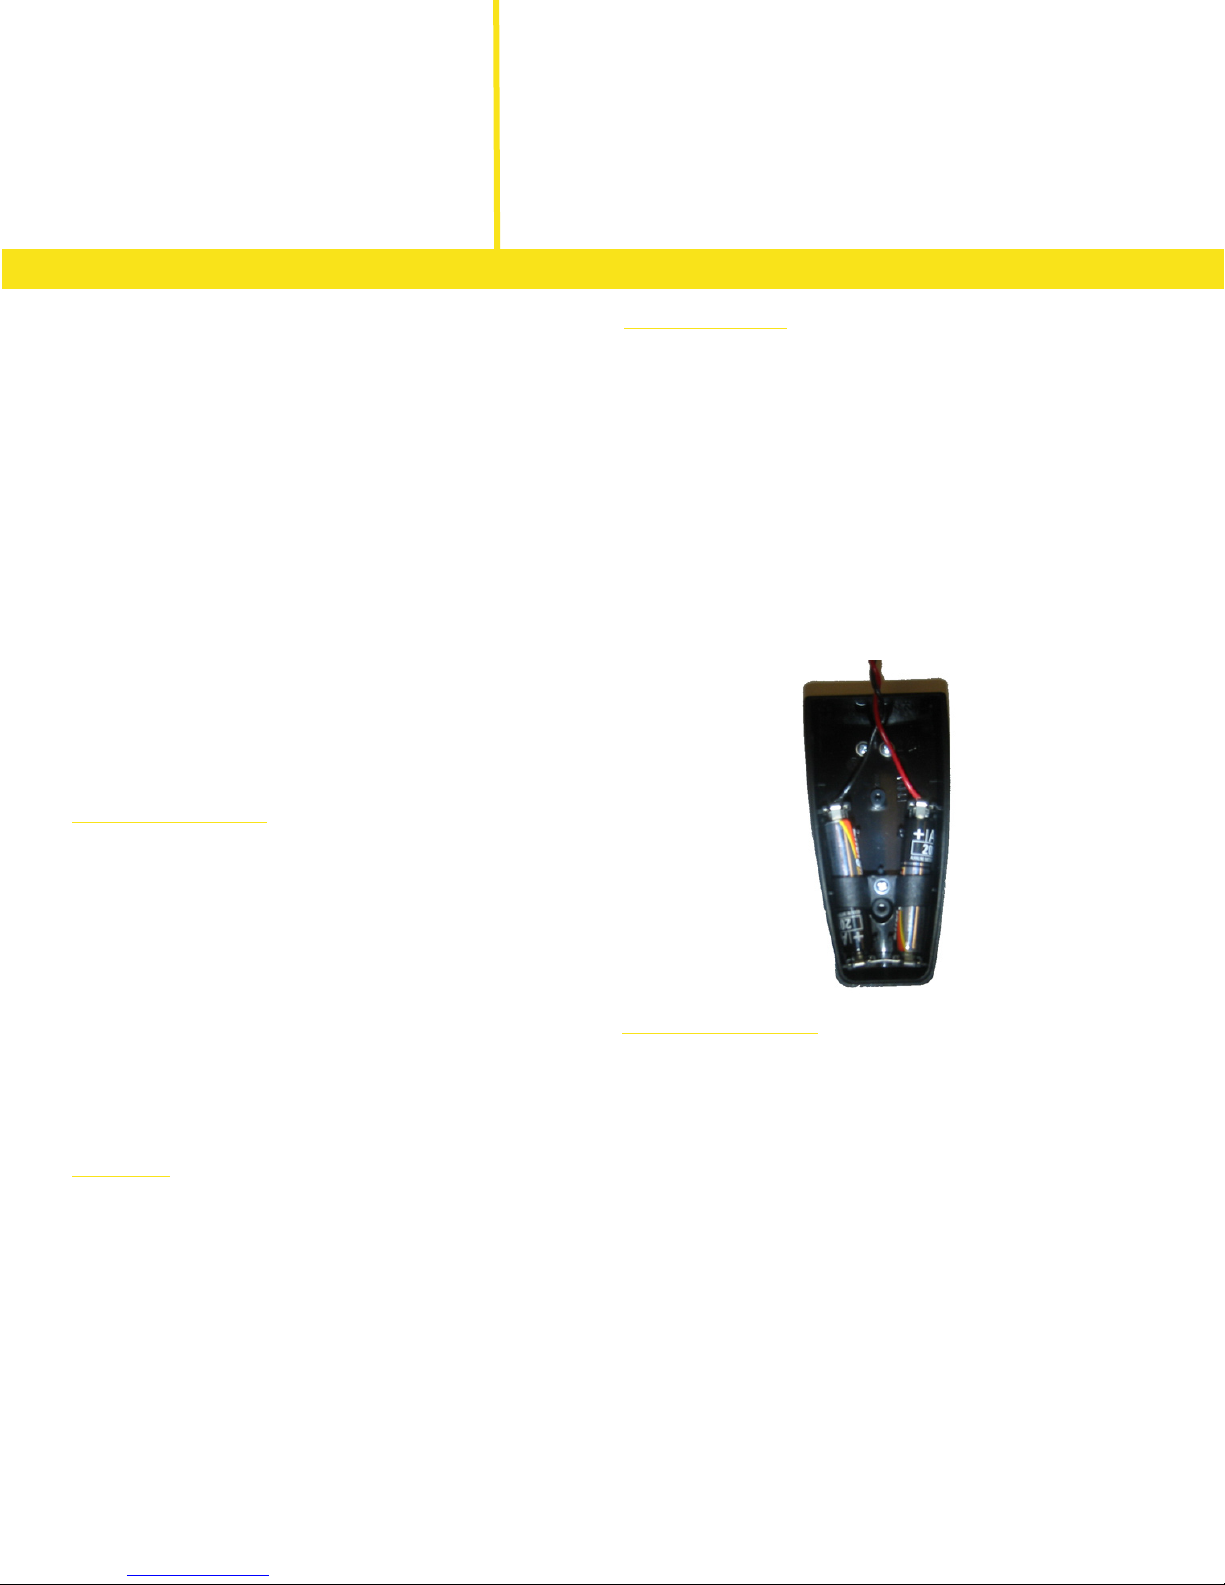
Battery replacement
e transmitter is powered by a pair of “AAA” batteries. To replace
the batteries, follow these steps:
1. Remove transmitter from protective rubber boot.
2. Using a small phillips screwdriver, remove the screw.
3. Gently open the enclosure and locate the two batteries.
4. Using a small phillips screwdriver, remove the battery bracket.
5. Replace batteries and reassemble.
Be sure to insert batteries in the correct orientation as shown:
OPERATION
Using the remote control
Press the green button on the transmitter.
e LED will blink to indicate that the transmitter is on.
Press the keys to operate remote functions.
When finished, press the red button to turn OFF.
+
+
To conserve battery life, always turn off when not in use.
Transmitter will turn off automatically after 5 minutes of inactivity.
In the event the transmitter is lost, stolen, or damaged. e receiver
must be programmed to the replacement transmitter. To program a
new transmitter, follow these steps:
MAINTENENCE
General care
e transmitter features a protective rubber boot. However, it is best
to avoid dropping the transmitter as damage may result.
hold MIDDLE two buttons (both AIR green and red). Sending this
Take care with the belt clip. It will break if it is pulled too hard.
Cleaning of transmitter is recommended periodically, and may be
done with a clean, damp cloth. Submerging in water or pressurewashing will damage the unit.
e receiver unit is encapsulated for protection, and has no serviceable parts inside.
1. Power the radio receiver (RF6) completely OFF then back ON
either by removing fuse, or Deutsch connector) to start a 10 second learn
window in the reciever.
2. During this 10 second window, press and momentarily (>1 sec.)
3. Immediately following these 2 steps the radio system should respond
normally

TROUBLESHOOTING
Receiver
Cable Harness
Transmitter LED not on
Possible problem/solution:
1. Transmitter off. Press green button to turn on transmitter.
2. Dead batteries. Replace with new, alkaline type.
3. Batteries in backwards. Check polarity + and -
REPLACEMENT PARTS
Complete system P1SP091
Transmitter P1SP081
Transmitter Rubber Boot P1SP092
Transmitter Belt Clip P1SP082
Transmitter Weather Bag P1SP084
Transmitter LED on, but functions not working at all
Possible problem/solution:
1. Receiver not powered on. Check electrical plug and fuse.
2. Receiver not programmed. See “Transmitter Replacement”
3. Out of range. Stand within 100 feet for best results.
4. Obstructions. Maintain line-of-sight to vehicle.
Functions operate intermittently
Possible problem/solution:
1. Out of range. Stand within 100 feet for best results.
2. Obstructions. Maintain line-of-sight to vehicle.
3. Interference. Make sure no other transmitters are operating in the
immediate area.
Other
Consult factory.
Miratron, Inc. 1-866-417-5008, Portland, Oregon
www.miratron.com
P1SP068
P1SP080
Call 1-317-831-2081 for replacement parts.
SPECIFICATIONS
Transmitter Frequency 433MHz
Modulation ASK/OOK
Range 100’ line-of-sight
RF power output 1mW
Battery Type 2 x “AAA” alkaline
Led indicator Red LED; Flash = normal
Dimensions 3.78” x 1.85” x 0.95”
Receiver Power requirement 12vdc, 100mA nominal + power to loads
Fuse Inline 10-amps, installed in wire harness
Frequency 433MHz, xed frequency
Outputs 5 x Solid state 7.5-amp sourcing
Connector Deutsch DT13-08P
Enclosure ABS, NEMA 4X with drain hole
Dimensions RF6; 5.5”L x 3.2”W x 2”H
Environmental Storage -50ºC to 82ºC
Operating (recommended) -40ºC to 70ºC
 Loading...