

Page 1

MGH-900
GSM (GPRS, MMS, Tri-mode) Handset
User Guide
Page 2

Contents
Safety information ..........................................................6
Phone specifications ........................................................6
Your phone (what is in the box).......................................7
Battery ........................................................................................... 7
Inserting a SIM card....................................................................... 7
Handset keypad............................................................................. 8
Menu Navigation............................................................................ 9
Powering on / off............................................................................ 9
Charging ........................................................................................ 9
Adjust the volume .......................................................................... 9
How to. ...........................................................................9
Lock and Unlock the keypad ......................................................... 9
Making a call.................................................................................. 9
Receive a call .............................................................................. 10
Make an emergency call.............................................................. 10
Using the Screen Saver............................................................... 11
Idle mode......................................................................11
Idle screen ................................................................................... 11
Idle mode shortcuts ..................................................................... 11
Navigation Arrow Keys............................................................... 11
Navigate menu structure by numbers............................................ 12
Speed dial .................................................................................. 12
Last numbers register.................................................................. 12
Text Editor modes ...................................................................... 12
Silent mode................................................................................ 12
Last numbers register .................................................................. 13
Incoming MMS or SMS/EMS....................................................... 13
Missed calls ................................................................................. 13
In Call options ..............................................................13
Putting a call on hold ................................................................... 13
Making a second call ................................................................... 14
Swapping between two calls ....................................................... 14
Answering an incoming call ......................................................... 14
Rejecting an incoming call........................................................... 14
Muting the microphone ................................................................ 14
Switching DTMF tones on during a call....................................... 14
Storing a number on the scratchpad ........................................... 14
Camera menu ...............................................................14
Take Picture................................................................................. 15
Save .......................................................................................... 15
Send via MMS ........................................................................... 15
Set as wallpaper.......................................................................... 16
Rotate........................................................................................ 16
Mirror........................................................................................ 16
Flip............................................................................................ 16
Settings........................................................................................ 17
Resolution.................................................................................. 17
Camera timeout .......................................................................... 17
Night mode ................................................................................ 18
Photo album................................................................................. 18
Phone Book menu .........................................................18
Search.......................................................................................... 19
Add new name............................................................................. 20
Delete........................................................................................... 20
Speed dial.................................................................................... 21
Copy............................................................................................. 22
Caller groups ............................................................................... 22
Memory status ............................................................................. 23
Save To... .................................................................................... 23
Own Numbers.............................................................................. 23
Messages menu .............................................................23
Traditional text input .................................................................... 23
Predictive text input ..................................................................... 24
Accented letters.......................................................................... 25
Deleting..................................................................................... 25
Word choices ............................................................................. 25
Using the SPACE Key ................................................................ 25
Inserting Punctuation .................................................................. 25
Inserting Symbols, Additional Punctuation, and Emoticons ............ 26
Typing Numbers......................................................................... 26
MMS............................................................................................. 26
Managing your messages............................................................. 27
Deleting all messages.................................................................. 28
Memory usage............................................................................ 28
SMS/EMS .................................................................................... 28
Messages setup........................................................................... 29
Page 3

Info message ............................................................................... 30
Voicemail ..................................................................................... 31
Get voicemail............................................................................. 31
Mailbox number......................................................................... 32
Voicemail SMS ID text............................................................... 32
Call info........................................................................33
Call lists ....................................................................................... 33
Clear call lists............................................................................. 33
Call duration................................................................................. 34
Last call..................................................................................... 34
All calls ..................................................................................... 34
Clear logs................................................................................... 34
Display ...................................................................................... 34
Call costs ..................................................................................... 34
Alerts menu ..................................................................34
Incoming call................................................................................ 35
Ring volume................................................................................. 35
Incoming call tone........................................................................ 36
Message ...................................................................................... 36
Vibrator ........................................................................................ 36
Keypad tones............................................................................... 37
Connect tone ............................................................................... 37
1 minute beep .............................................................................. 37
Auto redial.................................................................................... 38
Auto Answer ................................................................................ 38
Any key answer ........................................................................... 38
Power on handset........................................................................ 38
Settings menu ...............................................................39
Call settings ................................................................................. 39
Divert ........................................................................................ 39
Cancel All Diverts ...................................................................... 40
Call Waiting............................................................................... 41
Own Number Display ................................................................. 41
Show number if diverted ............................................................. 42
Main Display ................................................................................ 42
Greeting..................................................................................... 42
Wallpaper .................................................................................. 43
Screensaver................................................................................ 43
Contrast..................................................................................... 44
Backlight level ........................................................................... 45
Sub Display.................................................................................. 45
Security........................................................................................ 45
PIN code request ........................................................................ 45
Phone lock ................................................................................. 46
Call barring................................................................................ 46
Fixed dialling ............................................................................. 47
Change codes ............................................................................. 48
Auto keypad lock........................................................................ 49
Limit incoming calls ................................................................... 49
Closed User Group ..................................................................... 49
Network........................................................................................ 50
Network Search.......................................................................... 50
Preferred Network ...................................................................... 50
Clock and Alarms......................................................................... 50
Set Time .................................................................................... 50
Set Date..................................................................................... 51
Set time format........................................................................... 51
Set date format ........................................................................... 52
Display Time and Date................................................................ 52
Set alarm.................................................................................... 52
Auto power off........................................................................... 53
NITZ (network time)................................................................... 53
Set Timezone ............................................................................. 54
Language..................................................................................... 54
Restore settings........................................................................... 54
Organizer menu............................................................55
Make a note ................................................................................. 55
View today notes ......................................................................... 56
View all notes............................................................................... 57
Go to date .................................................................................... 57
Extras menu .................................................................57
Games ......................................................................................... 58
Setup............................................................................................ 58
Fillip.............................................................................................. 58
About the game .......................................................................... 58
Controls..................................................................................... 58
Playing the game ........................................................................ 59
Finishing the game...................................................................... 59
Hurricane ..................................................................................... 59
About the game .......................................................................... 59
Controls..................................................................................... 60
How to play the game ................................................................. 60
Playing the game ........................................................................ 60
Page 4

Classic Rally ................................................................................ 61
About the game .......................................................................... 61
Controls..................................................................................... 61
Controls..................................................................................... 63
Completing the game .................................................................. 63
Calculator..................................................................................... 64
Audio recorder ............................................................................. 64
Record....................................................................................... 65
Audio notes................................................................................ 65
File Viewer ................................................................................... 66
SAT (operator specific menu)...................................................... 66
WAP (Wireless Application Protocol) menu ..................67
WAP settings ............................................................................... 67
Data connections ......................................................................... 68
Home and Resume...................................................................... 69
Bookmarks................................................................................... 70
Push messages inbox.................................................................. 71
Empty Temp files ......................................................................... 71
Modifying a Profile ....................................................................... 72
Index ............................................................................75
Page 5

Page 6
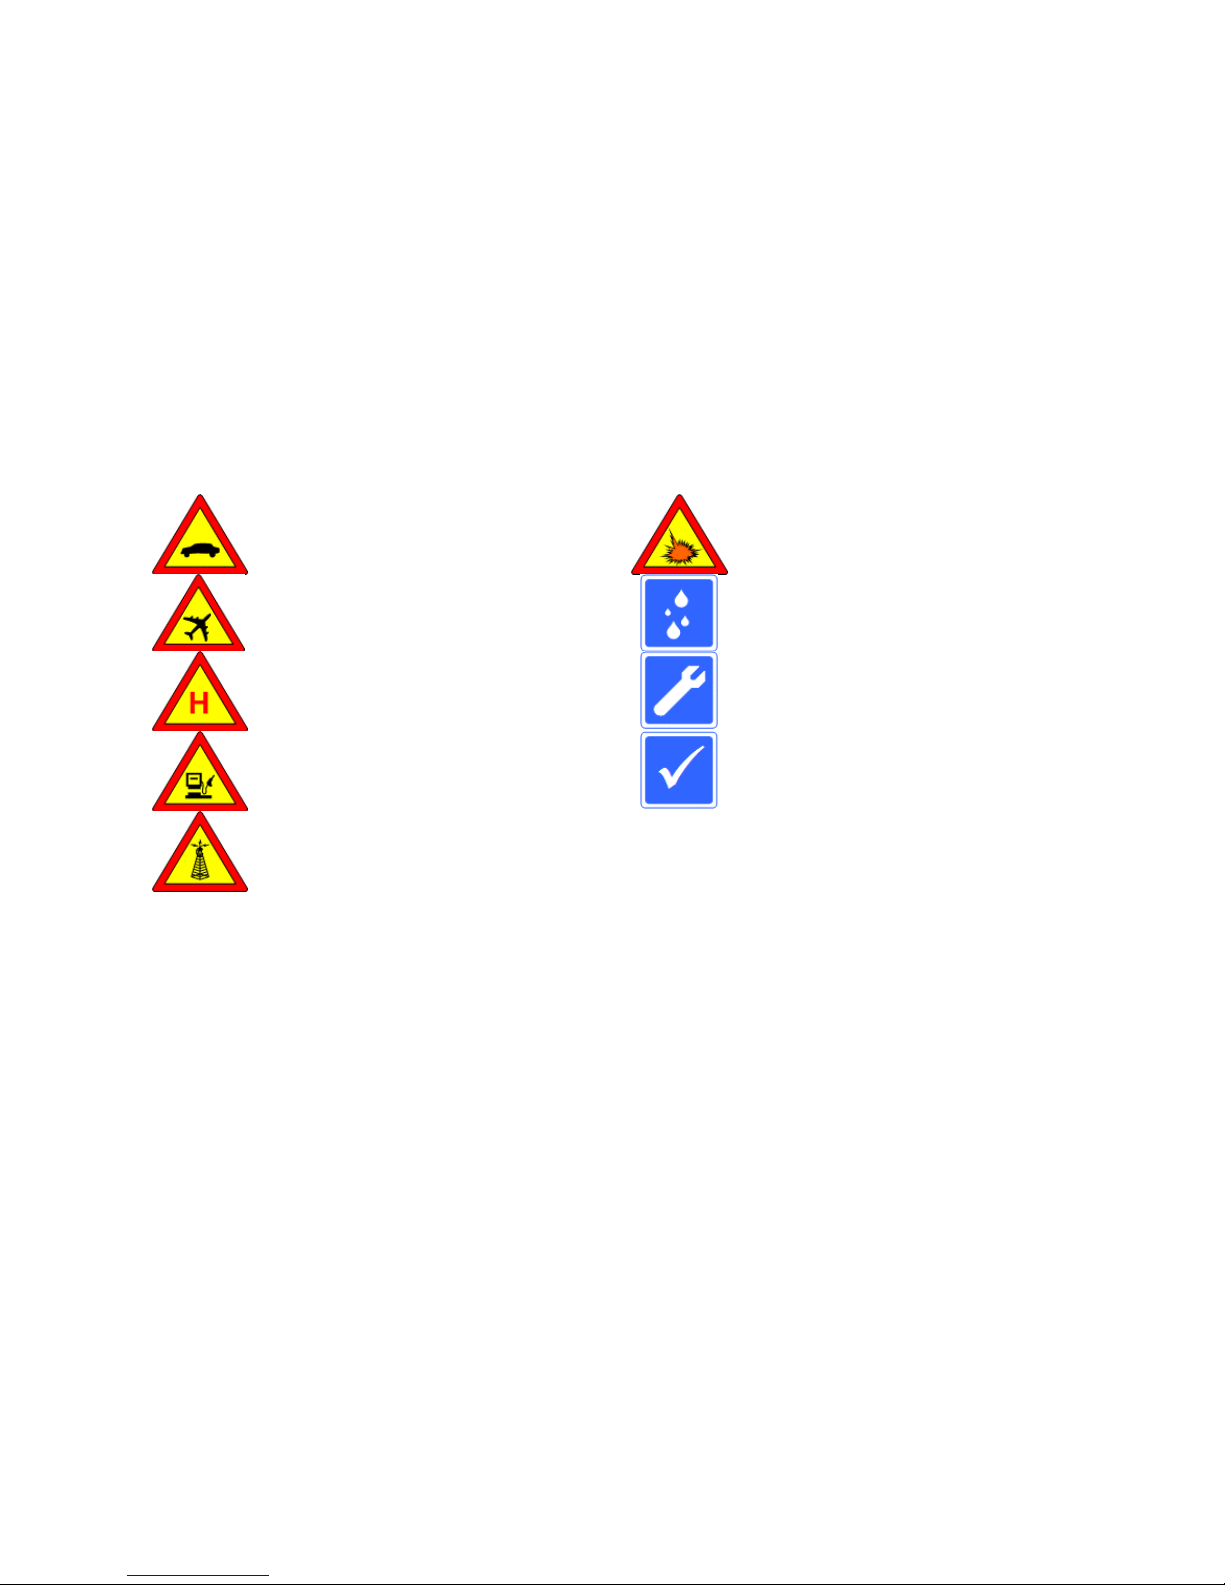
Safety information
Please follow the safety guidelines listed below:
DO NOT use a handheld mobile phone whilst driving. This
could cause serious or critical injury to yourself and other road
users.
SWITCH OFF THE HANDSET where blasting is in
progress. Please observe all regulations near these areas.
TURN OFF all wireless devices when on board any aircraft.
These devices interfere with other sensitive equipment vital to the
safe operation of aircraft.
DO NOT let your handset get wet. The handset is not water
resistant. Keep the handset dry.
TURN OFF all wireless devices when in a hospital or near
medical devices. Observe all regulations as these devices may
cause interference.
ONLY QUALIFIED PERSONNEL may service, install or
repair the handset.
DO NOT USE your mobile handset when refuelling. Keep the
handset away from chemicals or other fuels liable to ignite.
USE THIS HANDSET SENSIBLY. Only use the handset
in the normal position and try not to touch the antenna
unnecessarily.
ALL wireless devices may experience interference, which may
affect their performance.
-
TO REDUCE THE RISK OF FIRE OR ELECTRIC SHOCK, CAREFULLY FOLLOW THESE INSTRUCTIONS.
For connection to a supply not in the U.S.A., use an attachment plug adapter of the proper configuration for the power outlet.
- Caution: Risk of explosion if battery is replaced by an incorrect type. Dispose of used batteries in accordance with local legislation.
Phone specifications
The MGH-900 GSM handset incorporates these features:
• Colour LCD display
• Integral Digital Still Camera (DSC)
• Advanced Messaging (SMS, EMS and MMS)
• Embedded high-quality colour games (WGE)
• 40 Polyphonic tone ringer
Page 7

• Voice Memo
• Selectable screen-savers and screen wallpaper
• WAP 1.2.1 Browser
• SIM Toolkit, Release 99
• Triband (900MHz/1800Mhz/1900MHz)
• GPRS Multislot Class 10. Class B operation
• Circuit Switched Voice (EFR/FR/HR)
• Circuit Switched Data (up to 14,400kbit/s),
• Circuit Switched Fax (up to 9,600kbit/s)
• Output Power Class 4 (EGSM),
Class 1 (1800MHz,1900MHz).
Your phone (what is in the box)
Before using your MGH-900 ensure that the package contains the following:
• One MGH-900 GSM handset
• One standard battery for the MGH-900 (700mAh)
• One handset charger
• One user Guide (this document)
• Warranty card
Battery
The removable Lithium-Ion (Li-Ion) battery pack incorporates a protection circuit. Under normal conditions the standard battery provides 2 hours of talk time
and 150 hours on standby. These figures are given only as an approximation and are subject to variation. The handset supports only one battery pack type.
Note: IMPORTANT
Before using the MGH-900, ensure the battery is fully charged. If the handset is being used for the first time, allow the phone to be charged for
approximately 15 hours before use.
Inserting a SIM card
Ensure that a valid SIM card is inserted into the phone and access is available to an operators network. To insert a SIM card into the phone, the battery has to be
removed. Slide the SIM card into the slot noting the cut out in one corner of the card. If a SIM card is not inserted, or has a problem, ‘ Insert SIM’ will be
displayed on LCD screen. Reinsert the SIM card and power the phone back on. If the display still indicates a problem, please contact Customer Services. If
the SIM card is properly inserted, the idle screen should appear as normal.
7
Page 8
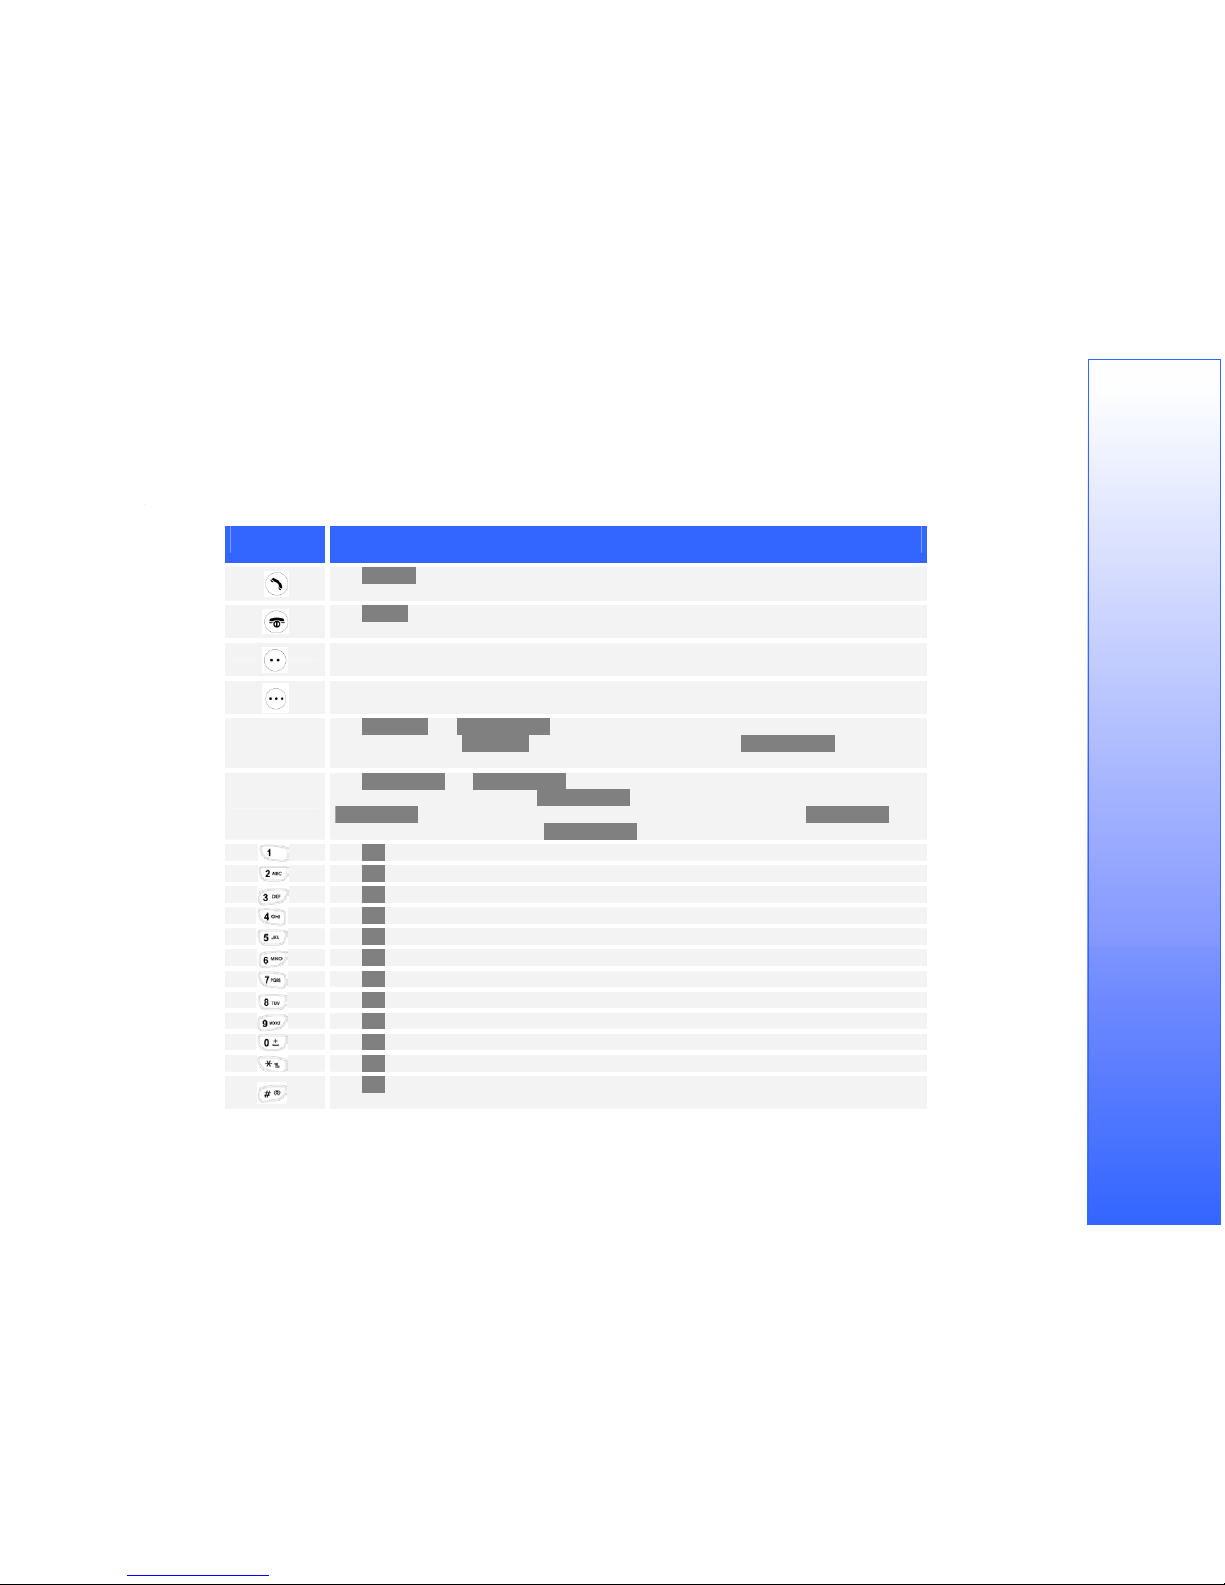
Handset keypad
The keypad on the handset performs the following functions:
Key Icon Key Function
The <SEND> key is essentially a “yes” key. It answers an incoming call or initiates an outgoing
call. In Idle mode, it lists the last numbers dialled.
The <END> key ends a call in progress and acts as the Power On/Off key. It also exits the option
displayed on the screen.
In idle mode, Soft Key 1 is labelled [Menu]. This soft key changes function within each context
sensitive menu option.
Soft Key 2 is labelled [Names] in idle mode. This soft key also changes function within each
context sensitive menu option.
▲ ▼
The <Navi UP> and <Navi DOWN> keys move the cursor in the direction indicated. When pressed
at the idle screen, the <Navi UP> key launches the WAP tool and the <Navi DOWN> key launches
the MMS tool.
◀ ▶
The <Navi LEFT> and <Navi RIGHT> keys move the cursor in the direction indicated. When
navigating through the menus, the <Navi RIGHT> key is used to enter the next menu level and the
<Navi LEFT> key is used to return to the previous menu level. In Idle Mode the <Navi LEFT> key
enters the SMS Text Editor and the <Navi RIGHT> key enters the Organizer.
The <1> key generates the number 1.
The <2> key generates the number 2 and letters: A B C Ä Å
The <3> key generates the number 3 and letters: D E F É é
The <4> key generates the number 4 and letters: G H I or g h i ì
The <5> key generates the number 5 and letters: J K L or j k l
The <6> key generates the number 6 and letters: M N O Ñ or m n o ñ
The <7> key generates the number 7 and letters: P Q R S or p q r s
The <8> key generates the number 8 and letters: T U V Ü or t u v ü
The <9> key generates the number 9 and letters: W X Y Z or w x y z
The <0> key generates a space.
The <*> key shifts between Tegic T9, Multi-Tap and Symbol modes in text entry mode.
The <#> key generates a pause character for DTMF dialling at the idle screen, or moves the user
between cases during text entry.
8
Page 9

Menu Navigation
Navigating through the menus can be performed using a variety of methods. Use the numeric keypad to jump straight to a menu option, or the Navi key to scroll
through a list.
Powering on / off
To power on/off the handset, press the key and hold for approximately 2 seconds. The handset display will show the powering up/down animation.
Charging
To charge the battery in the handset, connect the supplied AC adaptor to a suitable AC outlet. Insert the connector into the socket on the bottom of the MGH-
900 handset. If the handset is powered off then the “charging animation” indicates the battery is charging.
Adjust the volume
When using the MGH-900, the volume of the speaker may be adjusted using the side and buttons
How to.
Lock and Unlock the keypad
In idle mode the keypad of the handset may be locked and unlocked to stop unintentional button presses. To lock the handset keypad:
Step Action
1
To lock the keypad, press the key followed by the key. The lock icon is
shown in the display.
2
To unlock the handset keypad, repeat step 1.
Making a call
To make a call on the MGH-900, the following procedure can be followed:
Step Action
1
If the contact is not stored in the Phone Book, enter a valid telephone number into the
handset using the numeric keys.
+
9
Page 10
country code and the remaining digits of the phone number, dropping the 0 from the
area code.
If the contact is stored in the phone book, this may be used as a more convenient
method than entering the number manually.
2
Press the key. The display will show the number being dialled and
the call progress.
3
When finished, end the call by pressing the key.
Receive a call
To receive a call on the MGH-900, refer to the following procedure:
Step Action
1
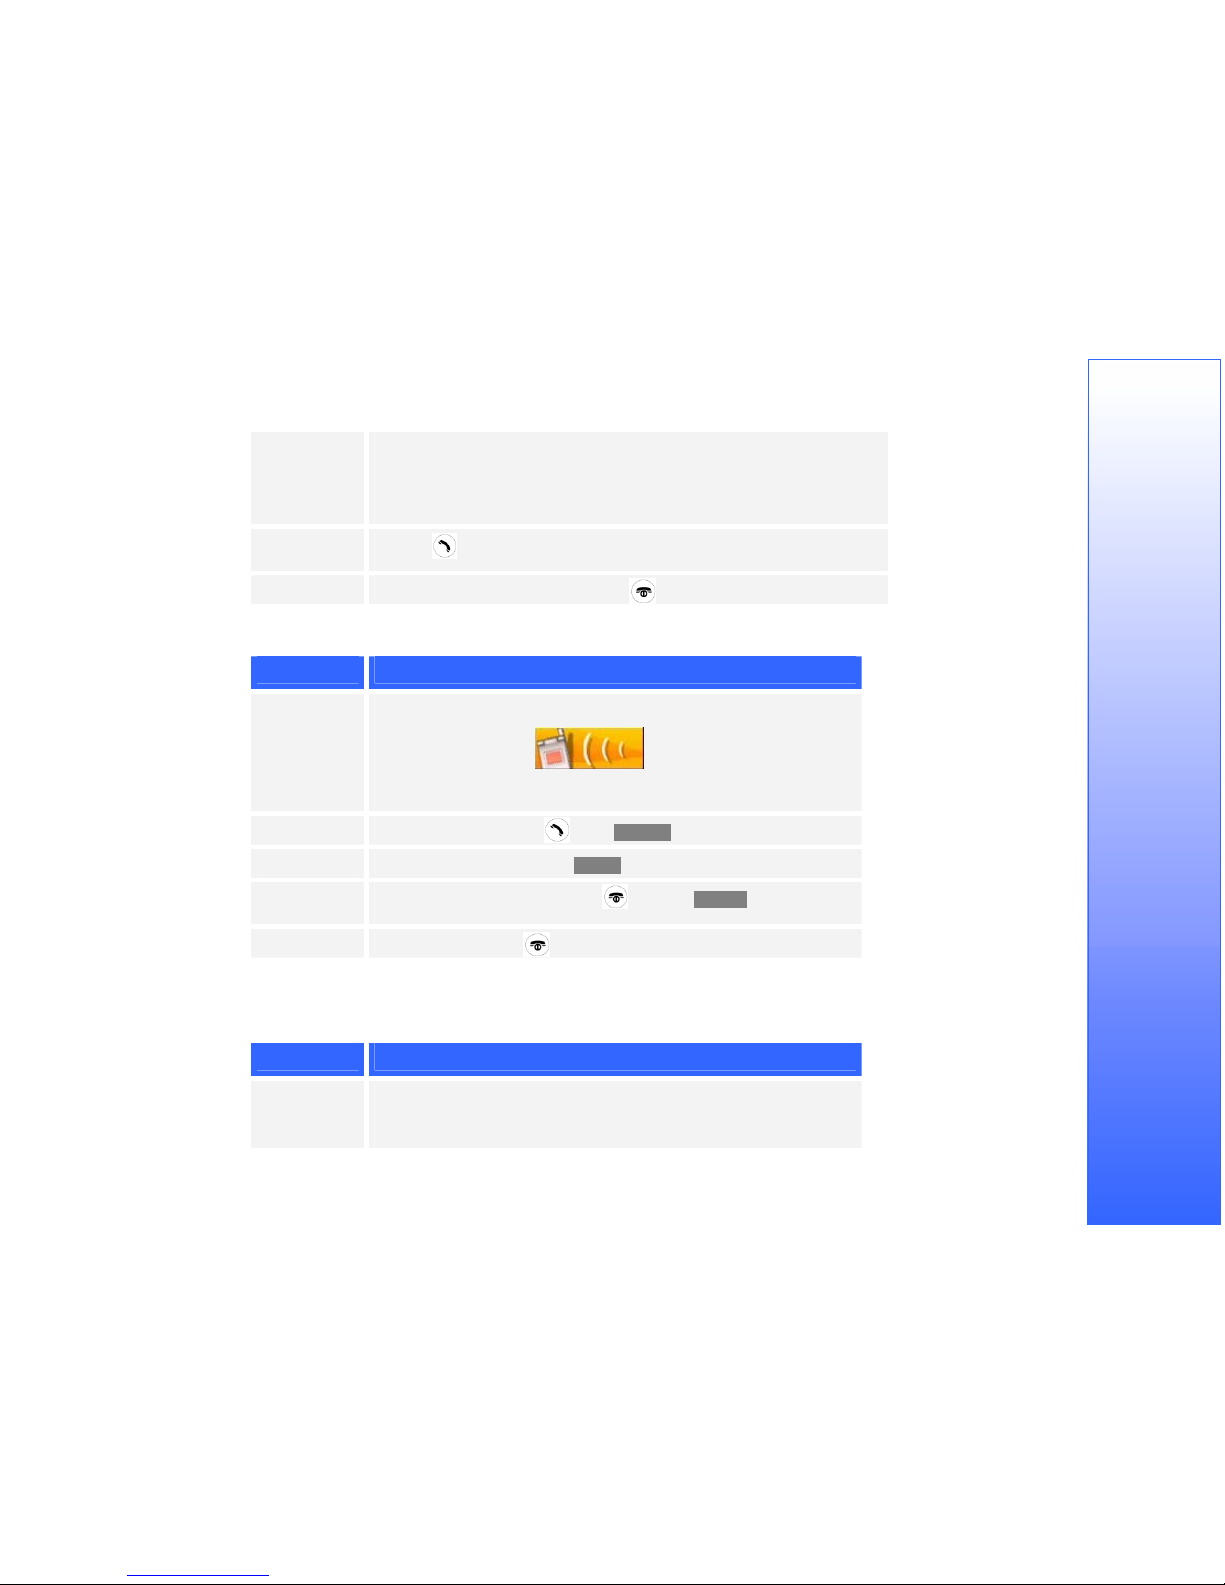
When a call is received, the display will show the following image momentarily.
The calling number is displayed, along with the contact name if it is stored in the
phone book.
2
To answer the call, press the or the <Accept> soft key.
3
To silence the ring tone, press the <Mute> soft key.
4
To reject the call completely, press the key or the <Reject> soft key. If
configured, this will divert the call to voicemail.
5
To end the call, press the key.
Make an emergency call
To make an emergency call on the MGH-900, perform the following procedure:
Step Action
1
Enter the international emergency access number into the handset (e.g. 112 or an
official emergency access number).
If the phone is outside the coverage area of the home network, an emergency call
10
Page 11

may still be made.
2
Press the key.
3
Once the emergency call has completed, press the key to end the call.
Using the Screen Saver
A screen saver may be used to cycle the handset display. To de-activate the screen saver and view the Idle screen, the following buttons may be used:
• <Soft Key 1>
• <Soft Key 2>
• <Menu Select>
The screensaver will be active for a predefined period before switching the display to a blank screen to conserve battery power. The screen saver can also be
cancelled by other events such as the following:
• Incoming call
• Incoming message (SMS& EMS, MMS, Voice)
• Alarm or Organizer reminder
• Low battery warning
• Insertion into car kit
• Attachment of charger
• Attachment of headset or earpiece
Idle mode
Idle screen
Once the handset has been charged sufficiently and powered on, a welcome screen is displayed. A network will be discovered and the following idle screen is
displayed. The functional areas are:
• Signal level : The display shows four levels of signal strength depending on network coverage.
• Battery charge level : The indicator shows four levels of battery charge. This icon flashes when the handset battery is being charged.
• Message indication : A small envelope icon is displayed when a text message is received.
• Network identifier: The display shows the network identifier currently assigned.
• Time display : Displays current time and date.
• Soft key for [Menu] and [Names] : When the Idle screen is displayed, the left key operates the [Menu] menu option. The right key operates the menu
[Names].
Idle mode shortcuts
There are several shortcuts that are available to you from the Idle screen.
11
Navigation Arrow Keys
In Idle screen the navigation arrow keys can be used to go directly to important menu functions:
Page 12

▲ Up Arrow : WAP Menu
◀ Left Arrow : Alarms Menu
▶ Right Arrow : MMS, SMS & EMS messages
Menu Select Key : Camera
Navigate menu structure by numbers
From the Idle screen you can go to a main menu by keying [Menu] followed by a number from 1 to 9. For example, [Menu] and 3 will take you to the
Messages menu items. The number keys work as follows :
1 Camera
2 Phone Book
3 Messages
4 Call info
5 Alerts
6 Settings
7 Organizer
8 Extras
9 WAP
Speed dial
You can assign phone numbers from the phonebook to each of the numeric keys on the keypad (0 to 9). When the handset is in the Idle Screen a long push of a
numeric key will automatically dial the number assigned to that key.
Last numbers register
The last 10 numbers are stored in a list within the handset. To access the last numbers register press the key. The last dialled, received and missed numbers
are shown. If the number is stored in the phonebook, the contact name is displayed. The up and down arrow keys allow you to scroll through this list. You can
highlight a number and call, save, obtain details or remove the number from the list.
Text Editor modes
Editors are used at various places in the handset menu structure (for example entering a name in a phonebook). The key is used as a shortcut to cycle
through the editor modes. The modes are [T9 Editor], [T9 Multi Tap], [123] and [Symbol page].
When in [T9 Editor] or [T9 Multi Tap] modes the key can be used to cycle between [ABC], [abc] and [Abc] modes.
Silent mode
To activate silent mode for incoming calls:
Step Action
1
Navigate to [Alerts] from the main menu and press the key.
2
Select [1. Set profile] and press the <Select> soft key.
3
A list of configured profiles is displayed. Navigate to the [Silent] profile and press
the <Select> soft key.
12
Page 13
4
Press <Back> to return to the previous menu. A confirmation message is
displayed.
Last numbers register
To access the last numbers register press the key. The last dialled, received and missed numbers are shown. If the number is stored in the phonebook, the
contact name is displayed.
Incoming MMS or SMS/EMS
When a new message is received, a pop up window is displayed on the screen.
Below is the procedure to read a message stored in your inbox:
Step Action
1
Press the [Menu] button to activate the main menu.
2
Select the [Messages] menu.
3
Select either the [MMS] or [SMS/ EMS] menu depending on the type of message.
4
Select [Inbox] to view a list of messages. Recently received messages will be at
the top of the list. Press the [Read] soft key to view the message.
5
When finished, select the [Back] soft key to return to the list of messages.
6
Press the [Exit] soft key to return to the main menu.
Missed calls
When a call is missed, it is added to the missed calls list. Scroll through the list using the ▲ and ▼ keys. To view details of a particular missed call, press the
<List> button.
In Call options
The In Call options available when a call is in progress are as follows:
Putting a call on hold
You can place a call on hold while a second call is made or answered by selecting the [Hold] key. To make the call active again, press the [Retrieve] key. These
options are also available on the In Call menu, which is accessed by pressing the key during a call.
13
Page 14

Making a second call
You can make a second call while you are already in a call. To do this, key in the second phone number and press the key. When the second call is
answered, the first call is automatically put on hold.
Swapping between two calls
To switch between two calls, select the [Swap] key. To end a call, make the call active (not on hold), then press the [Menu Select] key and select [End current].
Pressing the key also ends the current call.
Answering an incoming call
The handset is able to alert you of an incoming call while you are already in a call. A tone sounds in the earpiece, and the display shows that a second call is
waiting. This feature, known as Call Waiting, is only available if supported by the network and activated by the user. For details of how to activate Call
Waiting, please refer to Call Waiting. If Call Waiting is active, the first call can be put on hold allowing the second call to be answered by pressing the key
or by pressing the [Menu Select] key and selecting [Answer]. You can end the current call and answer the waiting call by pressing the [Menu] key and
choosing [End & next].
Rejecting an incoming call
An incoming call can be rejected without answering it by simply pressing the key. When in a call you can reject an incoming call by pressing the [Menu
Select] key and selecting [Multiparty/Reject]. Alternatively, you can inform the caller you are busy by pressing the [Menu Select] key and selecting
[Multiparty/I am busy] which sends a ‘busy’ tone to the caller.
Muting the microphone
You can mute the microphone during a call by selecting the key, and selecting the [Mute] option. The handset can be un-muted by pressing and
selecting [Unmute]. When the handset is muted, the caller cannot hear you but you can still hear them.
Switching DTMF tones on during a call
To turn DTMF tones on during a call, for example, to allow your handset to make use of an automated switchboard, select the key, then [DTMF On].
Repeating this operation will turn off DTMF tones.
Storing a number on the scratchpad
To store a number during a call, type in the number while you are in the call. After the call is ended, the number entered will be displayed on the idle screen.
You can dial it immediately by pressing the key or clear the number using the key.
Camera menu
The camera menu has three options:
14
• [1. Take picture]
• [2. Settings]
Page 15

• [3. Photo album]
Take Picture
To take a picture from idle mode:
Step Action
1
Activate the camera by selecting button from the main menu.
2
This activates the viewfinder mode, where a preview of the image is shown on the
colour display screen.
3
To take a picture, press the key.
4
The picture is momentarily displayed on the colour display screen. You now have
the following menu options:
• [1. Save]
• [2. Send via MMS]
• [3. Set as wallpaper]
• [4. Rotate]
• [5. Mirror]
• [6. Flip]
Save
To save a picture captured with the camera to the handset memory:
Step Action
1
Select [Save] from the [Camera] menu and press the <Select> soft key.
2
Navigate to the [images] folder and press the <Select> soft key.
3
Navigate to the <<save here>> prompt and press the <Select> soft key.
4
Select the <Ok> soft key.
5
A message confirming that the image has been stored is displayed. Press <Back>
to return to the image preview mode.
Send via MMS
To send a picture captured with the camera via an MMS message:
15
Step Action
Page 16

1
Select [Send via MMS] to insert the picture into an MMS message.
2
The MMS editor is launched and text may be entered.
3
4
5
Select the [Ok] soft key.
Address your message by editing the [To:] and [Subject] options.
Select [Send] to send the MMS message with picture inserted.
Set as wallpaper
To set the captured image as the display wallpaper:
Step Action
1
Select [Set as wallpaper] to assign the captured image as the display wallpaper.
2
Select the <Back> soft key to return to the previous menu.
Rotate
To rotate the captured image:
Step Action
1
Select [Rotate] from the [Snapshot] menu. The following menu is displayed:
• [1. 90]
• [2. 180]
• [3. 270]
2
Select the <Back> soft key to return to the previous menu.
Mirror
To Mirror the captured image:
Step Action
1
Select [Mirror] from the [Snapshot] menu and press <Select>.
2
Select the <Back> soft key to return to the previous menu.
Flip
16
To Flip the captured image:
Page 17

Step Action
1
Select [Flip] from the [Snapshot] menu and press <Select>.
3
Select the <Back> soft key to return to the previous menu.
Settings
The [Settings] menu shows the following options:
• [1. Resolution]
• [2. Camera timeout]
• [3. Night mode]
Resolution
The resolution of the images captured can be changed:
Step Action
1
Select [Resolution] from the [Settings] menu.
2
The following menu is displayed:
• [1. Normal]
• [2. Low]
3
Select the <Back> soft key to return to the main menu.
Camera timeout
The camera can shutdown to preserve battery life when it is not being used. To activate this feature:
Step Action
1
Select [Camera] from the main menu.
2
Select [2. Camera timeout] from the [Settings] menu.
3
The following menu is displayed:
• [On]
• [Off]
Choose the appropriate setting and press the <Select> soft key.
17
Page 18

4
Select the <Back> soft key to return to the main menu.
Night mode
Night mode is an image-enhancing feature for use in low light conditions. To activate Night mode:
Step Action
1
Select [Camera] from the main menu.
2
Select [3. Night mode] from the [Settings] menu.
3
The following menu is displayed:
• [On]
• [Off]
Choose the appropriate setting and press the <Select> soft key.
4
Select the <Back> soft key to return to the main menu.
Photo album
Photo album allows you to view the images captured by the phone. These are displayed as a list of thumbnails. To activate the photo album:
Step Action
1
Select the [Photo album] option from the [Camera] menu.
2
Navigate to the required image and select the <Options> soft key.
3
The following menu is displayed:
• [View]
• [Send To MMS]
• [Wallpaper]
• [Details]
• [Rename]
• [Delete]
Phone Book menu
18
The Phone Book menu option provides contact information of all the stored names and numbers in the handset. Phonebook entries can either be stored on the
SIM card or in Handset memory. The number of SIM card entries will be determined by the specific SIM card. The handset memory can support a maximum of
Page 19
200 entries. SIM card phonebook entries only support one number whereas handset phonebook entries will support thee numbers per entry (two phone numbers
and a fax number).
Names can be added, edited and deleted from the Phonebook. Memory status will inform the user of the number of entries in both SIM and Handset memory.
Entries can be copied between SIM and handset memory and bulk copying is also supported. Speed dial and Voice dial is also supported. Handset operations
that access the SIM card tend to be slow.
Search
This option prompts the user to enter a letter or series of letters to identify a contact in the phonebook. The Phone Book then moves to the closest match.
Step Action
1
Select [Search] from the [Phone Book] menu. A [Search for?] Prompt is
displayed.
2
Enter a letter or series of letters to identify the contact. For example, enter the two
letters “J” and “O” to locate a contact named JOHN.
3
Click <Search>.
4
The screen will display the corresponding section of your Phonebook. Scroll to
the required contact using the ▲ and ▼ keys.
5
Press the <Options> key to display the following menu options:
• [1. Details]
• [2. Call]
• [3. Edit]
• [4. Copy]
• [5. Delete]
• [6. Send SMS/EMS]
6
Pressing the key displays the contact’s details:
• [Name]
• [Telephone number]
• [Email]
• [Picture]
• [Web address]
If no search string is entered then the whole list of names in the phonebook is displayed (similar to selecting NAMES in the Idle Screen). The user can then
scroll up and down through the phonebook. An Icon is displayed per phonebook entry which indicates whether the name is a SIM card entry or a handset
memory entry. A Phonebook entry from handset memory can have more than one number. When the Call option is selected then the user is prompted to select
one of the three numbers.
19
Page 20

Note : when fixed dialling is enabled, the Fixed Dialling list will be searched and displayed
Add new name
This option adds new contact details to the phone book. Contact names can be saved in SIM memory or Handset Memory. ‘Save to ..’ feature allows the user
to select whether the new name is saved to SIM or handset memory. To add a new entry:
Step Action
1
Select [Add new name] from the [Phonebook] menu. An empty contact field is
displayed showing the following entries:
• [Name]
• [Number 1]
• [E-Mail]
2
Navigate to the appropriate field and press .
3
Enter the appropriate details in each entry and press <OK>.
4
Once complete, select <Back> and a confirmation message indicates that the entry
has been saved.
Add Country code allows access to a list of country codes. A simple search feature is supported to index into this list. Set Group allows the phonebook entry to
be assigned to a group. An Email ID and a Web Address can be assigned to a phonebook entry. When the phonebook entry is stored in handset memory then
two phone numbers and a fax number can be assigned to a single name. Add country code will add the selected code to all three numbers. Insert Picture allows a
BMP or a JPEG to be assigned to a phonebook entry. If a picture is assigned then this image will be displayed on the Idle screen during and incoming call
assertion.
Note : new names cannot be added when fixed dialling is enabled (see Settings/Security).
Delete
This option deletes a single contact or all entries from the phone book. When All at once is selected a note of the number of records deleted will be displayed
upon completion To delete entries from the phone book:
Step Action
1
Select [Delete] from the [Phonebook] menu.
2
Two choices are shown. These are:
• [One by one]
• [All at once]
20
Page 21
Note: For [All at once] proceed to step 5.
3
The entries stored in the phonebook are displayed. Use the ▲ and ▼ keys to scroll
to the required entry and select <Delete>.
4
Select [Yes] to confirm deletion or [No] to cancel.
5
After selecting the [All at once] option, the following options are displayed:
• [Handset Memory]
• [SIM card]
Select the required option.
6
A confirmation pop up window is displayed. Select [Yes] to continue or [No] to
cancel.
7
Once complete, select <Back> to return to the main menu.
Speed dial
This option assigns speed dial keys (the keys 0 to 9 on the keypad) to frequently dialled contact numbers. This enables quicker access to these numbers.
When in the Idle Screen a long press of a numeric key will automatically dial the phone number assigned to that key without further input.
To assign speed dials:
Step Action
1
Select [Speed dials] from the [Phonebook] menu.
2
A list of the available Speed dial slots is shown. These are numbered 0 to 9 and if
a Speed dial entry is assigned to a contact, the name is displayed next to the
appropriate slot.
3
Navigate to an appropriate slot.
4
Press [Options] to display the following menu options:
• [1. Assign]
• [2. Remove]
5
Select the appropriate option to add a new speed dial or remove an existing entry.
Note : the Speed dial list is stored in handset memory irrespective of the ‘Save to ..’ setting.
21
Page 22

Copy
This menu option allows phonebook entries to be copied between the SIM memory and the handset memory. This can be performed for individual phonebook
entries or the whole phonebook. This feature can be particularly useful when swapping SIM cards or upgrading your handset. At completion of an All at Once
copy a message will be displayed which details the number of records copied. To copy phone book entries:
Step Action
1
Select [Copy] from the [Phonebook] menu.
2
The next menu options are displayed:
• [1. SIM to Handset]
• [2. Handset to SIM]
3
The next menu option allows the user to select:
• [1. One by one]
• [2. All at once]
4
A message is displayed asking if the user wants to keep the original entry or
entries either on the SIM or the phone.
5
A confirmation prompt is then displayed to confirm the copy operation.
Caller groups
This function may be used to categorise contacts into groups (e.g. family, friends, business contacts etc). To activate Caller groups:
Step Action
1
Select [Caller group] from the [Phonebook] menu.
2
A list of the defined caller groups on the handset is displayed. By default, these
are:
• [FAMILY]
• [VIP]
• [FRIENDS]
• [GROUP 4]
• [GROUP 5]
3
Navigate to the required Caller Group and press the <Options> soft key. The next
menu options are displayed:
22
Page 23

• [1. Ring Type]
• [2. Graphic]
• [3. Rename]
• [4. View Names]
• [5. Assign Names]
• [6. Remove Names]
4
Once complete, select <Back> to return to the previous menu.
Memory status
This menu option displays the status of the SIM card and handset memory. This can be used to view the amount of empty space available for storing contact
details.
Save To...
This menu option allows new contacts to be added to either:
• The SIM memory
• The Handset memory
• To prompt the user each time a new contact is added.
When a choice has been selected, the user returns to the previous menu.
Own Numbers
This option displays the number assigned to the SIM card installed in the handset for both voice, data and fax. Some network operators assign a separate phone
number for data calls. An alphanumeric name can be assigned to each of these numbers. In practical terms these fields are just used to store this information for
you to view – a sort of aide memory if you forget your phone number. Menu options are:
• Voice Number
• Data Number
Messages menu
This menu option allows the user to send and receive multimedia messages (MMS), enhanced messages (EMS) and simple (SMS) messages. These messages
are composed using the numeric keypad to generate letters, numbers and symbols. A destination number can be entered into the phone or chosen from the
numbers stored in the Phonebook. Text can be entered in two different ways, traditional and predictive text.
Traditional text input
Otherwise known as Multi-Tap text input, this allows you to enter letters and numbers by pressing the appropriate key repeatedly, until the desired character is
displayed. For example, to enter the word MGH-900 into a text message:
23
Step Action
Page 24
1
Select [SMS/EMS] from the [Messages] menu.
2
Select [1. Write New] to create a blank message.
3
Ensure Multi-Tap mode is activated by pressing the key on the keypad to
toggle between the text entry modes.
4
For example, press the key once to generate the letter P
5
Press the key twice to generate the letter Q
6
Press the key three times to generate the letter R
7
Press the key four times to generate the letter S
To insert a number into a message, press and hold the appropriate key to instantly generate the desired number.
Predictive text input
Tegic T9 allows text to be entered in a quick and easy way, with only one key press per character. Based on word libraries T9 examines the key presses and
checks for matching words in the selected language dictionary. These matching words are placed in a selection list with the word that is most likely appearing
first. The word can then be selected using the ▲ and ▼ arrow keys from the list. When the handset is in T9 mode, the T9 icon is visible in the status line at the
top of the display. To select T9 mode, press until the T9 option is visible. The T9 Text Input system analyses letters as they are typed, and tries to create a
word. The word changes as letters are typed - ignore what's on the screen until the word is typed completely. If the word is still incorrect after typing it
completely, press the ▲ and ▼ arrow keys one or more times to cycle through other word options.
T9 Text Input provides four modes for entering text, numbers, symbols and punctuation:
• [T9] – T9 predictive text. This is the default mode.
• [Sym] – Insert symbols and punctuation.
• [123] – Type numbers using one keystroke per number.
• [ABC] – Use multi-tap to enter words.
The current mode is displayed in the status line at the top of the handset display, as shown. These text entry modes can be cycled through by using the <*> key.
T9 and Multi-tap text entry modes have three different case states. These are:
• [ABC] – All letters upper case
• [abc] – All letters lower case
These case states may be cycled through by using the key. To enter text into a message using T9:
24
Step Action
Page 25

1
Select [SMS/EMS] from the [Messages] menu.
2
Select [1. Write New] to create a blank message.
3
Ensure T9 is activated by pressing the key on the keypad to toggle between
the text entry modes.
4
To type the word good:
Press the key
Press the key
Press the key
Press the key
5
If the desired word is missing from the selection list, add it to the T9 dictionary
using ABC multi-tap mode
Accented letters
Words in most of the T9 linguistic databases include accented letters. In T9 mode, the words you type will be displayed with accented letters where appropriate.
In ABC (Multi-tap) mode, accented letters are included among the letter choices for each key.
Deleting
To erase mistakes, press to backspace and delete a single character. In T9 mode, press and hold the ◀ key to repetitively backspace. In 123 and ABC
modes, press and hold ◀ key to repetitively backspace.
Word choices
Many words share identical sequences of key presses. T9 Text Input initially displays words in their order of frequency of use in the language. For example, in
English, the words “of” and “me” share the same key sequence. Since the word “of” is used more frequently than “me” in English, T9 displays “of” first. This
order is automatically adjusted, however, to reflect the user’s language patterns and preferences. For example, if the user selects “me” more often than “of”, this
word will be promoted to the first position over time. As you type, the word in the display changes, so enter the complete word before scrolling through the
word choices.
Using the SPACE Key
Press the key to complete a word and insert a space before the beginning of the next word.
Inserting Punctuation
Press the key to insert common punctuation marks including the period, hyphen, and apostrophe. Press the key to see additional punctuation choices.
When inserting punctuation into a word, the correct symbol will automatically appear when the word is complete. This version of T9 also supports “smileys”
also known as emoticons such as :-) and :-(. To retrieve an emoticon from the database, press the key two or three times to see the first emoticon. Press the
▲ and ▼ arrow keys to see additional emoticons comprised of the same number of symbols.
25
Page 26
Inserting Symbols, Additional Punctuation, and Emoticons
Press the key to cycle and select from a page of symbols. Symbols mode is also available on the Text Input menu. Scroll through the pages using the ▼key.
To return to the previous mode without inserting punctuation, press the <Exit> soft key.
Typing Numbers
To insert a number press to cycle and select [123] (Numbers) mode. When the handset is in this mode, the icon appears in the status line at the top of the
display. In [123] mode, each single stroke of a number key inserts a number into your message. Press to cycle back to T9 text entry mode.
MMS
To create a new MMS message:
Step Action
1
Navigate to [1. New message] and press the key.
2
The MMS editor is displayed. Enter text using the letters on the numeric keypad.
To enter numbers, press the key to change to numeric mode. Press this
button again to change back to character mode.
3
Once a message has been composed, press the key. The following menu
options are displayed:
• [Done]
• [Add picture]
• [Add sound]
• [Add attachment]
• [Delete page] †
• [Delete object]
• [Object properties] ‡
• [Page properties] ‡
• [Apply template]
• [Preview]
• [Previous page] †
• [More] or [Reduce Menu] ‡
appears after a new page is added.
appears after selecting the [More] option.
4
To add a picture, sound or attachment, select the appropriate option from the
menu. Select the file to be added from the handset memory and it will be inserted
into the MMS message.
26
Page 27

5
When complete, press the <Done> soft key.
6
The next menu that is displayed is as follows:
• [Send]
• [Send later]
• [To]
• [Subject]
• [CC]
• [BCC]
• [More]
Selecting the [More] menu option displays the following additional options:
• [Priority]
• [Lifetime]
• [Receipts]
7
Select [To] and press the <Edit> soft key.
8
Select the [Add Address] option from the next menu and the [Editor Options]
menu will appear.
9
Select either [New number] to enter a phone number or email address of the
recipient.
Note: To add an @ symbol, press the key once followed by the key
a number of times until the correct symbol appears. To toggle between
upper case, lower case and numeric characters, use the key.
10
You may also select [Phone book] to add the contact details of a recipient already
stored on the handset.
11
Select [Send] to send the message immediately or [Send later] to save the message
in the Drafts folder.
Managing your messages
Any message stored on the handset can be viewed directly by highlighting it and pressing the <Read> soft key. When a message is being read, the following
menu can be displayed by pressing the [Options]soft key.
• [1. Delete]
• [2. Text Reply]
27
• [3. Forward]
• [4. Voice Call]
• [5. Extract Number]
Page 28

• [6. Save Sender Number]
• [7. Details].
Deleting all messages
Within each folder, the last option in the menu is [Delete all] to clear the folder.
Memory usage
When an MMS message is sent, by default, the message is saved in the [Sent] folder. To disable this feature, change the [Save message] option within [MMS
settings]. Alternatively, clear the folder periodically as MMS messages can consume a large amount of memory.
SMS/EMS
Short Message Service (SMS) and Enhanced Message Service (EMS) enable text-based messages to be sent and received. EMS allows images, emoticons and
tones to be included in the message. A maximum of 160 characters can be sent as a single SMS message. However, the MGH-900 supports SMS concatenation
up to a maximum of 1024 characters. To create and send an SMS:
Step Action
1
Select [SMS/EMS] from the [Messages] menu.
2
The following menu is displayed:
• [1. Write new]
• [2. Inbox]
• [3. Outbox]
• [4. Settings]
3
Select the [1. Write new] option.
4
Compose the message and using the soft key labelled <Options>, select from the
following options:
• [1. Send]
• [2. Send & Save]
• [3. Save]
• [4. Text input]
• [5. Preset text]
• [6. Text emoticon]
• [7. Insert graphic]
• [8. Anim. Emoticon]
• [9. Insert tone]
• [10. Animation]
• [11. Start Selection]
• [12. Format Text]
28
Page 29
5
When the message is complete, choose [Send] or [Send and Save] to deliver the
message and optionally save it to the phone memory or the SIM.
6
To view messages in the Inbox, navigate to [2. Inbox] and press the key.
7
To view messages in the Outbox, navigate to [3. Outbox] and press the key.
Messages setup
To configure MMS messaging options on the MGH-900, the following menu options are available:
Step Action
1
Select [MMS] from the [Messages] menu.
2
Select [8. MMS Settings] from the [MMS] menu:
3
The following menu options are displayed:
• [1. Save messages]
• [2. Read Reports]
• [3. Deliver Receipts]
• [4. Message Centre]
• [5. WAP Profile]
• [6. MMS lifetime]
• [7. MMS download]
• [8. Spam filter]
4
When all the options are correctly configured, select the <Back> key to return to
the previous menu.
To configure SMS/EMS messaging options on the MGH-900, the following menu options are available:
Step Action
1
Select [SMS/EMS] from the [Messages] menu.
2
Select [4. Settings] from the [SMS/EMS] menu.
29
Page 30

5
The following menu options are displayed:
• [1. Save messages]
• [2. Reply path]
• [3. Message centre]
• [4. Delivery report]
• [5. Format]
• [6. Lifetime]
• [7. Signature]
6
When all the options are correctly configured, select the <Back> key to return to
the previous menu.
The [Save messages] option allows you to define what happens to incoming messages. You can decide to save them or discard them or set the handset to prompt
you on a message by message basis. A total of 100 messages can be stored.
The [Reply path] option allows you to select how a reply message is routed. If you select YES then your own message centre will be used and the cost of the
reply is charged to your bill. If you select NO then the recipients message centre is used and they pick up the bill for the reply.
The [Message centre] options defines the phone number of the message centre This field usually comes on the SIM provided by the network service provider.
This option allows you to change this number.
The [Delivery report] option allows you to request that a reply message is sent to you when the sent message has arrived at the destination.
SMS/EMS is a transport mechanism and can be used to send messages to devices other than handsets. When you want to forward a message to a device such as
a pager you can instruct the message centre to perform a format conversion suitable for the target device. The [Format] options supports Text, Fax, Voicemail,
ERMES, National Paging, X.400 and Internet format.
The [Message lifetime] option allows you to specify how long the message will be stored at your network message centre while it attempts to deliver the
message to the destination. Available options are : 1 hour, 6 hours, 12 hours, 24 hours, 3 days, 1 week and maximum allowed by the network message centre.
The [Signature] option allows you to define a signature text string. When you [Write new] this text string will automatically appear in the SMS message editor.
It is a sort of template and is usually used to store your name and other details.
Info message
Information messages provide the user of the handset with personalised information on topics such as News, Weather and Sport. This service is operator
dependant. To enable info messages:
Step Action
1
Select [Info message] from the [Messages] menu.
30
Page 31
2
The following menu will be displayed:
• [1. Enable]
• [2. Read]
• [3. Settings]
3
• Select [1. Enable] and select <On> to activate info messages.
To configure info messages:
Step Action
1
Select [Info message] from the [Messages] menu.
2
Select [Settings] to display the following menu:
• [1. Language]
• [2. Topics]
3
Select [Language] to configure the appropriate language for the info message to
be displayed in.
4
Select [Topics] to display the following menu:
• [1. Add new]
• [2. Select topic]
Note: If any topics are already configured, they will be displayed instead of
this menu. At this point, pressing <Options> will display this menu.
5
Choose [2. Select topic] to view the Info message categories. These are operator
dependant.
6
Scroll to the required menu option and press the <Options> key. This adds the
topic to the list of info message subjects.
Voicemail
(Voicemsil Icon)
Voicemail is an answering machine service provided by the network operator. This allows callers to leave a message when you
are unreachable. The menu options provided are:
31
Get voicemail
To retrieve a voicemail message:
Page 32

Step Action
1
Select [Voicemail] from the [Messages] menu.
2
Select [Get voicemail] from the [Voicemail] menu.
3
The voicemail number is automatically dialled to retrieve messages.
Mailbox number
To configure the mailbox number (dependant on the network operator):
Step Action
1
Select [Voicemail] from the [Messages] menu.
2
Select [Mailbox number] from the [Voicemail] menu.
3
The voice mailbox number is displayed and may be edited using the key
and entering a new number.
Note: If the mailbox is protected with a PIN, this can be included in the
number for convenience. The PIN must be followed by a pause tone
(P).
Voicemail SMS ID text
This is the text displayed when a new voicemail has been recorded. An SMS message notifies the user that a new voicemail message has been recorded. To
view or modify this text:
Step Action
1
Select [Voicemail] from the [Messages] menu.
2
Select [Voicemail SMS ID text] from the [Voicemail] menu.
3
The text is displayed. To modify the text, use the ◀ and ▶ keys to scroll, and the
key to delete characters. Enter new characters with the numeric keypad.
Note: To cycle between alphabetical, numeric and symbol characters, use
the key.
32
Page 33
Call info
Call lists
The Call Lists contain detailed information regarding:
• The last 10 Missed calls
• The last 10 Received calls
• The last 10 Dialled calls
The Calling Line Identity (CLI) or dialled number is stored along with the time and date of the call. For either Missed, Received or Dialled calls:
Step Action
1
Select [Call lists] from the [Call info] menu.
2
The following menu is displayed:
• [1. Missed calls]
• [2. Received calls]
• [3. Dialled numbers]
• [4. Clear Call Lists]
Navigate to the required option and press the key.
3
A list of either missed, received or dialled numbers is displayed.
4
Navigate to the required entry and press the <Options> soft key.
5
The following menu is displayed:
• [1. Details]
• [2. Save]
• [3. Remove]
6
Navigate to the required option and press the <Select> soft key to activate the
option.
Clear call lists
To clear the missed, received and dialled call lists:
Step Action
1
Select [Call lists] from the [Call info] menu.
33
Page 34

2
Select [Clear call lists] from the [Call lists] menu.
3
A confirmation message is displayed..
Call duration
This menu option lists the following categories:
• [1. Last call]
• [2. All calls]
• [3. Clear logs]
• [4. Display]
Last call
This menu option displays the duration of the last call to be dialled from the handset. Navigate to the menu option and press the < Select> soft key.
All calls
This menu option displays the duration of all calls to be dialled from the handset. Navigate to the menu option and press the < Select> soft key.
Clear logs
This option clears the log of call durations from the handset memory. When this menu option is selected, a confirmation message is displayed to confirm the
clear operation. Select <Yes> to continue or <No> to return to the menu option. If <Yes> is selected, a message confirming the clear operation is displayed.
Display
Each time a call is made or received, the duration of the call is displayed during (and for several seconds after) the call. This option can be turned [On] or [Off].
Call costs
The Call costs menu is network dependent and provides information for the following options:
• [1. Last call] – Displays the cost of the last call.
• [2. All calls] – Displays the cost of all calls made since the last time the counter was reset.
• [3. Clear counters] – Clears the call cost counter.
• [4. Currency] – Assigns a currency
• [5. Maximum cost] – Defines a maximum call cost.
• [6. Call units spend] – Displays the call units spent.
• [7. Display call units] – Displays the call units.
Alerts menu
The MGH-900 handset has a number of pre-defined profiles, which may be used to rapidly configure alert tones in different environments. For example, if the
user is in a meeting or somewhere quiet, the Silent or Meeting profile may be selected without having to change alert tones.
34
Step Action
Page 35

1
Select [Alerts] from the main menu.
2
Select from one of the following menu options:
• [1. Set profile]
• [2. Edit profile]
3
Select [Set profile] to display the following pre-defined profiles:
• [Meeting]
• [Outdoor]
• [Silent]
• [VIP]
• [Headset]
• [In Car Mode]
4
A confirmation message appears on the display to verify the setting has been
changed.
5
To change a particular setting in a profile, choose [2. Edit profile] and select the
profile you wish to change. This will allow modification of any of the options
detailed in the following section.
Incoming call
To adjust how the handset responds to an incoming call:
Step Action
1
Select [Incoming call mode] from the [Edit profile] option of the [Alerts] menu.
2
Select from one of the following menu options:
• [Ring]
• [Ascending]
• [Ring Once]
• [Beep once]
• [Displaylight only]
• [Quiet mode]
3
Press < Select> to activate the alert type.
Ring volume
35
To adjust the ring volume:
Page 36

Step Action
1
Select [Ring volume] from the [Edit profile] option of the [Alerts] menu.
2
The volume scale is displayed and the ◀ and ▶ keys can be used to
adjust the volume of the current ring tone.
3
Select <Ok> to confirm the new setting or the <Back> key to cancel.
Incoming call tone
To change the ring tone:
Step Action
1
Select [Incoming call tone] from the [Edit profile] option of the [Alerts] menu.
2
A list of ring tones is displayed. Scroll through the list using the ▲ and ▼ keys.
Note: When selecting a ring tone, pause before pressing and a sample
of the ring tone will be heard.
3
Press <Select> to activate the ring tone.
Message
To change the alert tone heard when a message is received:
Step Action
1
Select [Message] from the [Edit profile] option of the [Alerts] menu.
2
Select from the following menu options:
• [1. Standard]
• [2. Beep once]
• [3. Special]
• [4. Silent]
Vibrator
36
In addition to an audible alert, the MGH-900 handset can vibrate to alert the user of a call or message. This is configured using the following option:
Step Action
Page 37

1
Select [Vibrator] from the [Edit profile] option of the [Alerts] menu.
2
Select either [Incoming call] or [Message].
3
For [Incoming call], select from the following menu:
• [Off]
• [Vibrate only]
• [Vibrate then ring]
• [Ring then vibrate]
• [Ring and vibrate]
4
For [Message], the vibrator can be turned [Off] or [On] only.
5
Activate the required option using the <Select> key.
Keypad tones
A tone may be enabled to give notification when a button is pressed. To activate keypad tones:
Step Action
1
Select [Keypad tones] from the [Edit profile] option of the [Alerts] menu.
2
Select either [Click] or [Silent] to activate or deactivate the keypad tones.
Connect tone
A connect tone may be configured to give an audible warning that a call has been connected. To activate the Connect tone:
Step Action
1
Select [Connect tone] from the [Edit profile] option of the [Alerts] menu.
2
Select either [On] or [Off] to activate or deactivate the Connect tone.
1 minute beep
When a call is in progress, it is sometimes useful to know how long the call has lasted. For this, an audible warning may be configured to announce a small beep
after each 60 seconds of connection. This will let the user know how long the call has lasted. To activate 1 minute beep:
37
Page 38

Step Action
1
Select [1 minute beep] from the [Edit profile] option of the [Alerts] menu.
2
Select either [On] or [Off] to activate or deactivate the 1 minute beep feature.
Auto redial
When a call is made to a number and a busy (engaged) tone is received, the number may be redialled automatically:
Step Action
1
Select [Auto Redial] from the [Edit profile] option of the [Alerts] menu.
2
Select either [On] or [Off] to activate or deactivate the Auto redial feature.
Auto Answer
This function answers incoming calls automatically without having to press a key. To activate the Auto Answer feature:
Step Action
1
Select [Auto Answer] from the [Edit profile] option of the [Alerts] menu.
2
Select either [On] or [Off] to activate or deactivate the Auto Answer feature.
Any key answer
This function answers incoming calls automatically by pressing any key on the handset. To activate the Any Key Answer feature:
Step Action
1
Select [Any Key Answer] from the [Edit profile] option of the [Alerts] menu.
2
Select either [On] or [Off] to activate or deactivate the Any Key Answer
feature.
38
Power on handset
The power on handset is used to automatically power the handset up at a preset time. Simply set an Alarm to the desire time and activate the feature. The
handset will power up and prompt you to continue, if you wish to continue the PIN number will be requested. If PIN is not enabled then the handset will
Page 39

continue powering up to the Idle screen. This function can be used with Auto power off (see Alerts menu) – automatically power on your handset in the
morning and power it down in the evening. This can be used to escape from unwanted calls and optimise battery life. To activate the Power On Handset
feature:
Step Action
1
Select [Power on Handset] from the [Edit profile] option of the [Alerts] menu.
2
Select either [On] or [Off] to activate or deactivate the Power On Handset
feature.
Settings menu
The Settings menu gives access to settings for Calls, Display, Security, Network, Time and Date features. These settings can be individually configured to
enable various functions designed to provide more flexibility in the use of your handset. The menu options displayed are:
• [1. Call settings]
• [2. Main Display]
• [3. Sub Display]
• [4. Security]
• [5. Network]
• [6. Clock & Alarms]
• [7. Language]
• [8. Restore settings]
Call settings
The Call settings menu consists of the following options:
• [1. Divert]
• [2. Call waiting]
• [3. Own number display]
• [4. Show number if diverted]
Divert
Incoming calls may be diverted to another telephone under a number of conditions. When diverting a call, a valid number must be entered to divert to and, in
some cases, a time-period after which the call will be diverted.
Step Action
1
Select [Call Settings] from the [Settings] main menu.
2
Select [Divert] from the [Call Settings] menu.
39
Page 40

3
Select from the following menu options:
• [1. Divert all calls]
• [2. Divert when busy]
• [3. Divert when no answer]
• [4. Divert when not found]
• [5. Cancel all]
4
If you are activating diverts, select the appropriate divert condition and press the
<Select> soft key.
5
The menu options displayed are:
• [On] – Use this option to activate the divert
• [Off] – Use this option to deactivate the divert
• [Status] – Displays the status of the divert. Press the <Numb> soft
key to display the telephone number to which the call will be
diverted.
6
Navigate to [On] and press the <Select> soft key.
7
Select the type of calls for which the divert is required by pressing the <Select>
soft key at the following options:
• [All services]
• [Voice calls]
• [Data]
• [Fax]
• [Messages]
• [All except messages]
8
Enter a valid phone number for the call to be diverted to and press the <Ok>
soft key.
9
When the network successfully registers the divert, the message [Done] is
displayed.
Note: When entering the divert number, the phonebook can be accessed by pressing the key.
Cancel All Diverts
Individual call diverts may be cancelled by repeating the activate procedure and selecting [Off] for each divert function or alternatively all call diverts may be
cancelled by:
Step Action
40
Page 41

1
Select [Call Settings] from the [Settings] main menu.
2
Select [Divert] from the [Call Settings] menu.
3
Select the [Cancel all] menu option.
4
When the network successfully registers the divert as cancelled, the message
[Done] is displayed.
Call Waiting
Call waiting allows incoming calls to be taken whilst in a call. If an active call is in progress, a small beep will be heard in the earpiece (or speaker if on hands
free) to alert the user to another incoming call. The active call can be put on hold and the second call taken. Once this has completed, the first call can be made
active once again. This function is dependant on the operator network. To activate call waiting:
Step Action
1
Select [Call Settings] from the [Settings] main menu.
2
Select [Call Waiting] from the [Call Settings] menu.
3
The menu options displayed are:
• [Set] – Use this option to activate call waiting
• [Clear] – Use this option to deactivate call waiting
• [Status] – Displays the status of call waiting.
Navigate to the required status and press the <Select> soft key.
4
When the network successfully registers the call waiting activation, the message
[Done] is displayed.
Own Number Display
To transmit the Calling Line Identify (CLI) of the handset when making calls:
Step Action
1
Select [Call settings] from the [Settings] main menu.
2
Select [Own number display] from the [Call settings] menu.
41
Page 42

3
The menu options displayed are:
• [On] – Use this option to activate CLI transmit
• [Off] – Use this option to deactivate CLI transmit
• [Network default] – Uses the default network setting for
transmitting CLI.
Navigate to [On] and press the <Select> soft key.
3
When the network successfully registers the own number sending activation, the
message Done is displayed.
Show number if diverted
When a call is made to a number that has a call divert activated, the CLI of the handset may be transmitted or withheld:
Step Action
1
Select [Call settings] from the [Settings] main menu.
2
Select [Show number if diverted] from the [Call settings] menu.
3
Select [On] to display the telephone number or [Off] to withhold the number.
4
The network displays the message [Done].
Main Display
The Display menu consists of the following options:
• [1. Greeting]
• [2. Wallpaper]
• [3. Screensaver]
• [4. Contrast]
• [5. Backlight level]
Greeting
To activate a text greeting, which is displayed when the handset is powered on:
Step Action
1
Select [Main Display] from the [Settings] main menu.
2
Select [Greeting] from the [Main Display] menu.
42
Page 43
3
Select [On] to activate the greeting or [Off] to deactivate. Navigate to [On] and
press the <Select> soft key.
4
Enter the text greeting using the editor. To cycle between upper case, lower case
and numeric text, use the key.
5
Press the <Save> soft key to activate the greeting.
Wallpaper
Wallpaper can be displayed on the handset when in idle mode. There are sixteen(16) pre-defined wallpapers. To assign a wallpaper:
Step Action
1
Select [Main Display] from the [Settings] main menu.
2
Select [Wallpaper] from the [Main Display] menu.
3
The menu options displayed are:
• [None]
• [Wallpaper 1]
• [Wallpaper 2]
• [Wallpaper 3]
• [Wallpaper 4]
• [Wallpaper 5]
• [Wallpaper 6]
• [Wallpaper 7]
• [Wallpaper 8]
• [Wallpaper 9]
• [Wallpaper 10]
• [Wallpaper 11]
• [Wallpaper 12]
• [Wallpaper 13]
• [Wallpaper 14]
• [Wallpaper 15]
• [Wallpaper 16]
• [Load from file]
4
Navigate to a wallpaper and press the <Preview> soft key to preview.
5
Use the key to activate.
43
Screensaver
A screensaver can be animated on the colour display when the handset has not been used for a pre-defined time-period. To activate a screen saver:
Page 44
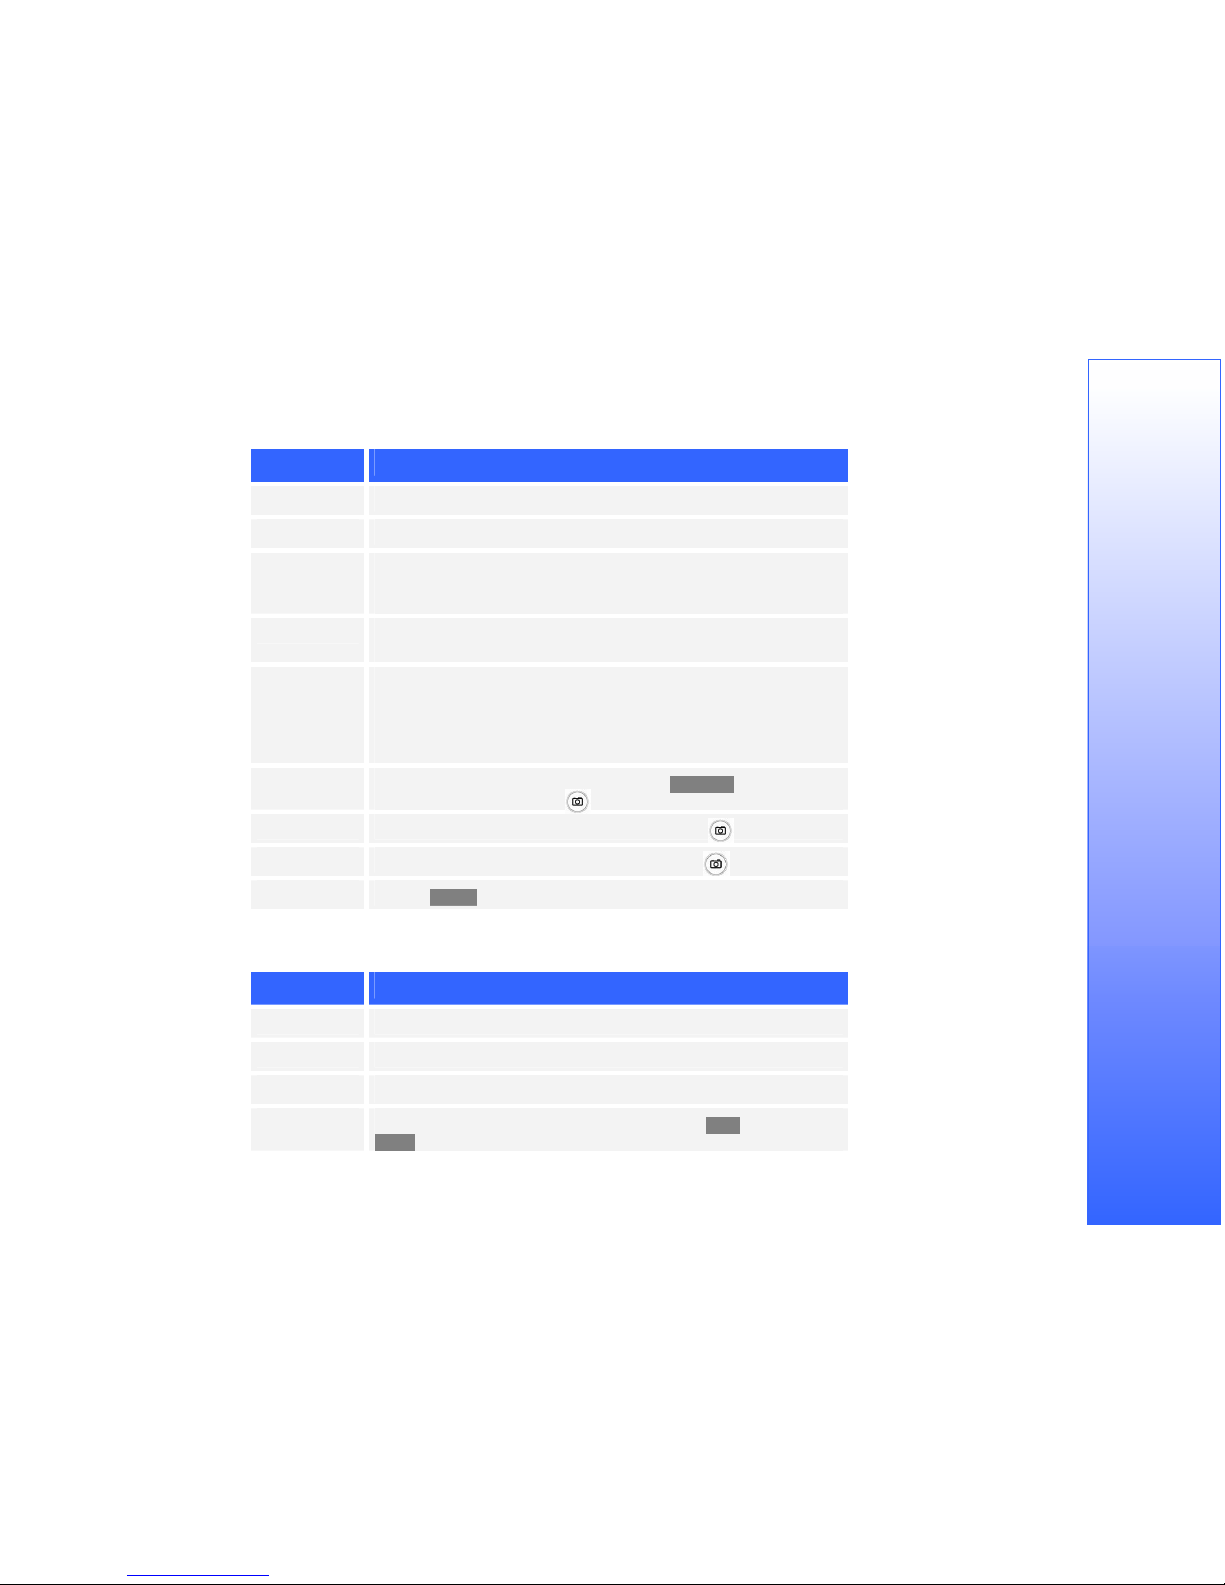
Step Action
1
Select [Main Display] from the [Settings] menu.
2
Select [Screensaver] from the [Main Display] menu.
3
The following menu options are displayed:
• [1. Timeout]
• [2. List]
4
Select [1. Timeout] and use the ◀ and ▶ keys to change the time period (from
1 to 7 minutes) for the Screensaver to be activated.
5
Select [2. List] to display the following menu options:
• [None]
• [Screensaver 1]
• [Screensaver 2]
• [Screensaver 3]
6
Navigate to the required screensaver and press the <Preview> soft key to view.
To exit preview mode, press the key.
7
To activate, select the required screensaver and press the key.
8
To deactivate a screensaver, select [None] and press the key.
9
Press the <Back> soft key to return to the previous menu.
Contrast
To adjust the contrast of the colour display:
Step Action
1
Select [Main Display] from the [Settings] main menu.
2
Select [Contrast] from the [Main Display] menu.
3
Use the ◀ and ▶ keys to alter the contrast.
4
When the required contrast level is configured, press the <Ok> soft key or the
<Exit> soft key.
44
Page 45

Backlight level
To adjust the backlight level of the colour display:
Step Action
1
Select [Main Display] from the [Settings] main menu.
2
Select [Backlight level] from the [Main Display] menu.
3
Use the ◀ and ▶ keys to alter the backlight level.
4
When the required backlight level is configured, press the <Ok> soft key or the
<Back> soft key.
Sub Display
The Sub Display menu consists of the following options:
• [1. Date]
• [2. User Text]
• [3. Image]
Security
PIN code request
The SIM is protected by PIN (Personal Identification Number) codes. All SIMs have a primary PIN code (PIN1) and others support a secondary PIN code
(PIN2). The PIN2 code is usually used to enable security and advanced handset features. The PIN code will be blocked after three incorrect PIN code entries. If
this event happens then the PIN code will need to be unblocked. To achieve this a Personal Unblocking Key (PUK) will be required. The PUK code will have to
be obtained from the network operator or the provider of the SIM. These PIN and PUK codes can only use numbers 0 to 9.
A PIN code is stored on the SIM card inserted in the handset. It is good security practise to request a PIN code before the handset can be used. To change the
PIN1 and PIN2 codes please see [Change codes].
To activate the PIN code request:
Step Action
1
Select [Security] from the [Settings] main menu.
2
Select [PIN code request] from the [Security] menu.
3
To activate the PIN code request, select [On].
45
Page 46

4
Enter the PIN code assigned to the SIM and press the <Ok> soft key.
5
When the correct code is entered, a confirmation message is displayed. The next
time the handset is powered on the PIN code will be requested before the
handset is activated.
Note: This does not include emergency calls, which can be made even if
the code is not entered correctly.
6
Press the <Back> soft key to return to the previous menu.
Phone lock
The Phone lock is used to lock the handset when it is powered on. This level of security is provided in addition to the PIN code request. The PIN code is used to
protect the SIM and the Phone lock code is used to protect the Handset. The default phone lock code is “1234”. To change the Phone lock code please see
[Change codes]. To activate the phone lock:
Step Action
1
Select [Security] from the [Settings] main menu.
2
Select [Phone lock] from the [Security] menu.
3
Select [On] to activate the phone lock and [Off] to deactivate it.
Call barring
The Call barring function is a Network Service and allows the user to restrict calls to and from the phone. A barring password will be required from the network
service provider in order to use this function. Please contact your network service provider for this password.
Note : when enabled calls can still be made to the 112 emergency number.
To activate call barring:
Step Action
1
Select [Security] from the [Settings] main menu.
2
Select [Call barring] from the [Security] menu.
46
Page 47

3
The following menu options are displayed:
• [1. Outgoing calls]
• [2. Incoming calls]
• [3. International calls]
• [4. Int. except homeland]
• [5. Incoming if roaming]
• [6. Cancel all barrings]
4
When activating any call barring (options 1 through 5), the menu options
displayed are:
• [On] – Used to activate Call barring
• [Off] – Used to deactivate Call barring
• [Status] – Used to provide the status of the current call barring
setting
5
Navigate to the required option and press the <Select> soft key.
6
A prompt to enter the network password is displayed. Enter the correct
password to activate or de-activate the call barring.
7
When a valid network password has been accepted, the following menu is
displayed:
• [All services]
• [Voice calls]
• [Data]
• [Fax]
• [Messages]
• [All except messages]
8
Navigate to the required service type and press the <Select> soft key.
9
A confirmation message is displayed. Press the <Exit> soft key to return to the
previous menu.
10
Press the <Back> soft key to return to the previous menu.
Fixed dialling
The Fixed dialing feature is used to restrict outgoing calls from the handset to a list of user selected phone numbers. A PIN2 code will be required in order to
enable this function. This function is a Handset service whereas Call barring is a Network Service. To enable fixed dialling:
47
Page 48

Step Action
1
Select [Security] from the [Settings] main menu.
2
Select [Fixed dialling] from the [Security] menu.
3
Navigate to [On] and press the <Select> soft key.
4
Enter the correct PIN2 code and press the <Ok> soft key.
When this feature is successfully enabled, the user can build a list of numbers using Add New names, Edit names and Remove options. The fixed dialling list is
stored on the SIM and size is limited. Most SIM cards support a maximum of 10 entries.
Calls can only be made to numbers on this Fixed Dial number list. A “Call Fail” message is displayed when an attempt is made to make a call to a number not
on the list .
Note : when Fixed dialling in enabled calls can still be made to the 112 emergency number.
Change codes
When you change PIN or Phone Lock codes please keep a note of the new codes in a safe place. To change any of the security codes assigned to the SIM card
and phone:
Step Action
1
Select [Security] from the [Settings] main menu.
2
Select [Change codes] from the [Security] menu.
3
The following menu is displayed:
• [PIN1 code]
• [PIN2 code]
• [Phone code]
• [Barring password]
4
Select the security code to be changed and press the [Ok] button.
5
Enter the old security code and press the <Select> soft key.
Note: If an incorrect number is entered, simply delete it using the
<Back> soft key.
6
Enter the new security code and press the [Ok] key.
48
Page 49

7
Enter the new security code again when prompted and press the [Ok] key.
8
If the new PIN code is entered incorrectly the second time, a message [Invalid
PIN] is displayed. Press the [Ok] key to continue and enter the code correctly.
9
When the new code has been entered correctly, a confirmation message is
displayed to verify the code change. Press the <Back> key to continue.
Auto keypad lock
The Auto keypad lock activates the keypad lock after a period of no usage. The keypad can be unlocked by the and key sequence.
Note : when the keypad is locked calls can still be made to the 112 emergency number. To activate the Auto keypad lock:
Step Action
1
Select [Security] from the [Settings] main menu.
2
Select [Auto keypad lock] from the [Security] menu.
3
Select [On] to activate the auto keypad lock or [Off] to deactivate.
Limit incoming calls
This menu option effectively bars incoming calls from certain contact numbers stored in the phonebook. This function is a Handset service whereas Call barring
is a Network Service. 없으면 지울 것 신동조 Herman 에게 알아 볼 것.
Closed User Group
The Closed User Group (CUG) service is a Network service which allows the restriction of calls to and from a selected user group. Not all network service
providers support this service. Please contact your network service provider for details of how to create and activate user groups. This function is typically used
when an organisation issues SIM cards to it’s employees and wants to restrict calls to members of teams within this organisation. With this handset you may be
a member of up to 10 groups. This is set in the CUG menu - the following options are displayed:
• [1. Add new] – Adds a new number, including a name, to the CUG list
• [2. List] – Displays the current CUG list
• [3. No call limits] – Removes any call limits.
The [List] function will list all 10 User groups in the CUG List. Any CUG Group can be enabled, renamed, edited or removed. When a specific CUG is enabled
then all others will be disabled – only one CUG can be active at any one time. An existing Group must be removed before Add new can be used. Trying to Add
new when the list is full will result in a CUG List Full message being displayed.
49
Page 50

This function is typically used when an organisation issues SIM cards to it’s employees and wants to restrict calls to members of teams within this organisation.
Network
The cellular networks, which may be used by the handset, can be configured using this menu option. After selecting [Network] from the [Settings] menu, the
following menu options are displayed:
• [1. Network Search]
• [2. Preferred]
Network Search
This configures the handset to search for mobile networks either automatically or manually. The menu options displayed are:
• [1. Automatic]
• [2. Manual]
The [Automatic] option allows the phone to look for networks automatically as it moves between coverage areas. This is particularly useful when roaming
internationally. This is the default setting and should not be changed unless advised by Technical Support personnel.
Preferred Network
This menu option allows preferred networks to be assigned to the handset. This means that when roaming or using several networks, the operators stored in the
preferred list will be given higher priority over other networks which have been discovered. The menu options displayed are as follows:
• [1. Set preferred network]
• [2. Define network]
Clock and Alarms
The Clock and Alarms menu displays the following options:
• [1. Set Time]
• [2. Set Date]
• [3. Set time format]
• [4. Set date format]
• [5. Display Time and Date]
• [6. Set alarm]
• [7. Auto power off]
• [8. NITZ (Network time)]
• [9. Set timezone]
Set Time
To set the handset time:
50
Page 51

Step Action
1
Select [Clock and Alarms] from the [Settings] main menu.
2
Select [Set Time] from the [Clock and Alarms] menu.
3
The time is displayed. Enter the new time as four digits including preceding
zeros, or use the navigation buttons adjust the time.
4
Select [Ok] to continue.
Set Date
To set the handset date:
Step Action
1
Select [Clock and Alarms] from the [Settings] main menu.
2
Select [Set Date] from the [Clock and Alarms] menu.
3
The date is displayed in the month view. Enter the date, or use the navigation
buttons to move to a new date
4
Select [Ok] to set the new date.
Set time format
To change the time display format:
Step Action
1
Select [Clock and Alarms] from the [Settings] main menu.
2
Select [Set time format] from the [Clock and Alarms] menu.
3
The following menu options are displayed:
• [12 hour (am/pm)]
• [24 hour]
4
Navigate to the required option and press the <Select> soft key.
51
Page 52

Set date format
To change the date display format:
Step Action
1
Select [Clock and Alarms] from the [Settings] main menu.
2
Select [Set date format] from the [Clock and Alarms] menu.
3
The following menu options are displayed:
• [dd:mm:yy]
• [mm:dd:yy]
• [yy:mm:dd]
• [dd:mm]
4
Navigate to the required option and press the <Select> soft key.
Display Time and Date
Step Action
1
Select [Clock and Alarms] from the [Settings] main menu.
2
Select [Display Time and Date] from the [Clock and Alarms] menu.
3
The following menu options are displayed:
• [Off]
• [Time Only]
• [Date Only]
• [Date & Time]
4
Navigate to the required option and press the <Select> soft key.
Set alarm
The handset supports 5 alarms. When an Alarm is active and enabled then an Alarm Icon will be displayed on the Idle Screen. The alarm event can have text,
melody, graphic information assigned to it. This information will be displayed when the alarms becomes activated. To setup an alarm follow the following
sequence :
52
Step Action
Page 53

1
Select [Clock and Alarms] from the [Settings] main menu.
2
Select [Set Alarm] from the [Clock and Alarms] menu.
3
The five alarms are listed as follows:
• [Alarm 1]
• [Alarm 2]
• [Alarm 3]
• [Alarm 4]
• [Alarm 5]
4
Navigate to the required alarm and press [Select] to change the alarm properties.
5
The alarm status is shown as either:
• [On]
• [Off]
6
Select [On] to display the following menu:
• [Alarm]
• [Set tone]
• [Graphic]
• [Set Date]
• [Set Time]
• [Repeat]
7
Alter the required alarm properties and select [Back] to return to the previous
menu.
When the alarm event occurs the text and graphic will be displayed on the Idle Screen and the selected Melody will be played. When the alarm event triggers it
can be cleared using OK . Snooze will re-arm and the alarm will re-trigger 3 minutes later. BMP graphic images (created by Bitmap Editor) and JPEG images
(captured by Camera) can de attached to an alarm event
Auto power off
This option allows the handset to automatically power off at a configured time. Menu settings are:
• [On] – Selecting this option allows a time and date to be set for the handset to power off.
• [Off] – Disables auto power off.
NITZ (network time)
Network time allows the handset clock to be updated periodically from the operator network. This feature is not supported by all Network service providers.
Please consult your Network service provider regarding this feature. Menu settings are:
53
• [On] – Activates network time update and returns to the previous menu.
• [Off]– Disables network time update.
Page 54

Set Timezone
To set the timezone:
Step Action
1
Select [Clock and Alarms] from the [Settings] main menu.
2
Select [Set Timezone] from the [Clock and Alarms] menu.
3
A world map is displayed. Use the ◀ and ▶ buttons to alter the time zone. The
timezone location is also displayed as the cursor is moved.
4
Select <Set> soft key to assign the timezone.
Language
The MGH-900 handset can display text in several languages. When the [SIM default] option is chosen , the language is automatically selected according to the
country of your SIM card. To alter the language for the handset:
Step Action
1
Select [Language] from the [Settings] main menu.
2
Select the required language from the list of available languages:
• [Chinese]
• [English]
• [Espanol]
• [SIM default] – sets the language as defined on the SIM card.
3
Press the [Select] key to activate the new language.
Restore settings
To restore all menu settings to the factory default values:
Step Action
1
Select [Restore settings] from the [Settings] main menu.
2
Confirm the restore settings operation (this ensures non-accidental activation).
54
Page 55

Organizer menu
The Organizer application allows management of calendar based events and reminders. Selecting the Organizer menu option displays the current month view, as
shown:
The current date is indicated by a white flashing box. Use the four navigational keys to move to the required date in the calendar. The Volume buttons on the
side of the handset move the current view forward and backward by one calendar month. By pressing the <Options> soft key, the following menu is displayed:
• [1. Make note]
• [2. View today notes]
• [3. View all notes]
• [4. Go to date]
To return to the calendar view, press the <Back> soft key.
Make a note
The option [Make note] allows the user to create a new event or appointment. Four different types of notes are available:
• [1. Call]
• [2. Meeting]
• [3. Birthday]
• [4. Other]
[Call], [Meeting] and [Birthday] contain fields preformatted for the subject purpose, whereas the [Other] note has no dedicated purpose. The user can create an
unlimited number of notes per date and past notes must be manually removed through the [View notes] – [Delete/ Delete all] menu options. Creating a note
activates a graphic indicator in the calendar matrix view. Creating more than one note does not affect this indicator. Each note allows the definition of fields
that can be selected and edited by the user. All notes contain the following general fields:
• [Subject]
• [Time]
• [Date]
• [Repeat]: Daily, Weekly, Monthly (specific Day or Date), Annual and Repeat limit
• [Reminder]: On/ Off, Tone, Graphic, Advance time
If a field has a value assigned, this is displayed instead of the original field text. To create a note for a selected date:
Step Action
1
Select [Organizer] from the main menu.
55
Page 56

2
Navigate to the required date, then select [Options]. The following menu is
displayed:
• [1. Make note]
• [2. View today notes]
• [3. View all notes]
• [4. Go to date]
3
Select [Make note] and choose from the following note types:
• [1. Call]
• [2. Meeting]
• [3. Birthday]
• [4. Other]
4
The following information is displayed:
• [Subject]
c m b o
• [Number] c
• [Detailed notes]
m o
• [Location]
m o
• [Date]
c m b o
• [Start Time]
c m o
• [Duration]
m o
• [Reminder]
c m b o
• [Repeat]
c m b o
c
on [call] option
m
on [meeting] option
b
on [birthday] option
o
on [other] option
5
To edit a field, press the [Select] soft key. The appropriate editor will be launched.
6
Select the [Done] soft key when all the note information is complete.
7
If the note is in the past, a message will be displayed. Confirm the note by
selecting <Ok> or choose <Exit> to discard the information and add another note.
View today notes
Selecting this menu option displays a list of notes for the current date:
56
Step Action
Page 57

1
Select [View today notes] from the [Options] menu.
2
A list of notes for the current date is displayed. Navigate to the appropriate note
and press the [Options Soft Key] button. The following menu is displayed:
• [Edit]
• [Delete]
• [Delete all]
View all notes
Selecting this menu option displays a list of ALL notes stored in the phone:
Step Action
1
Select [View all notes] from the [Options] menu.
2
A list of notes for the current date is displayed. Navigate to the appropriate note
and press the [Options] button. The following menu is displayed:
• [Edit]
• [Delete]
• [Delete all]
Go to date
To move to a specific date:
Step Action
1
Select [Go to date] from the [Options] menu.
2
Use the numeric pad to enter a date.
Extras menu
The [Extras] menu provides the following options:
• [1. Games]
• [2. Calculator]
• [3. Audio Recorder]
• [4. Fileviewer]
57
• [5. SAT]
Page 58

Games
The MGH-900 provides a selection of games – the games menu is displayed below:
• [1. Fillip]
• [2. Hurricane]
• [3. Classic Rally]
Launch the game : For example, to launch Fillip:
Step Action
1
Select [Games] from the [Extras] menu.
2
The following menu is displayed:
• [1. Fillip]
• [2. Hurricane]
• [3. Classic Rally]
3
Navigate to [Fillip] and press the <Select> soft key. The following screen is
displayed:
Setup
The following options can be configured when playing the games on the handset:
• Trembler
• Audio
• Backlight
To enter Setup, select [Games] from the [Extras] menu. Choose a game and press the Key. Use [Select] to edit settings.
Fillip
About the game
Having crash-landed in the jungle, Fillip must collect the parts of his plane and assemble them to continue his voyage. When Fillip touches an animal, he loses
energy – if he runs out of energy, he loses a life. Fillip has three lives. However, if Fillip jumps and hits the animal from above, it dies (with the exception of
piranha fish).
Controls
The default keys for controlling Fillip are:
Key Action
▼
Move Left
58
Page 59
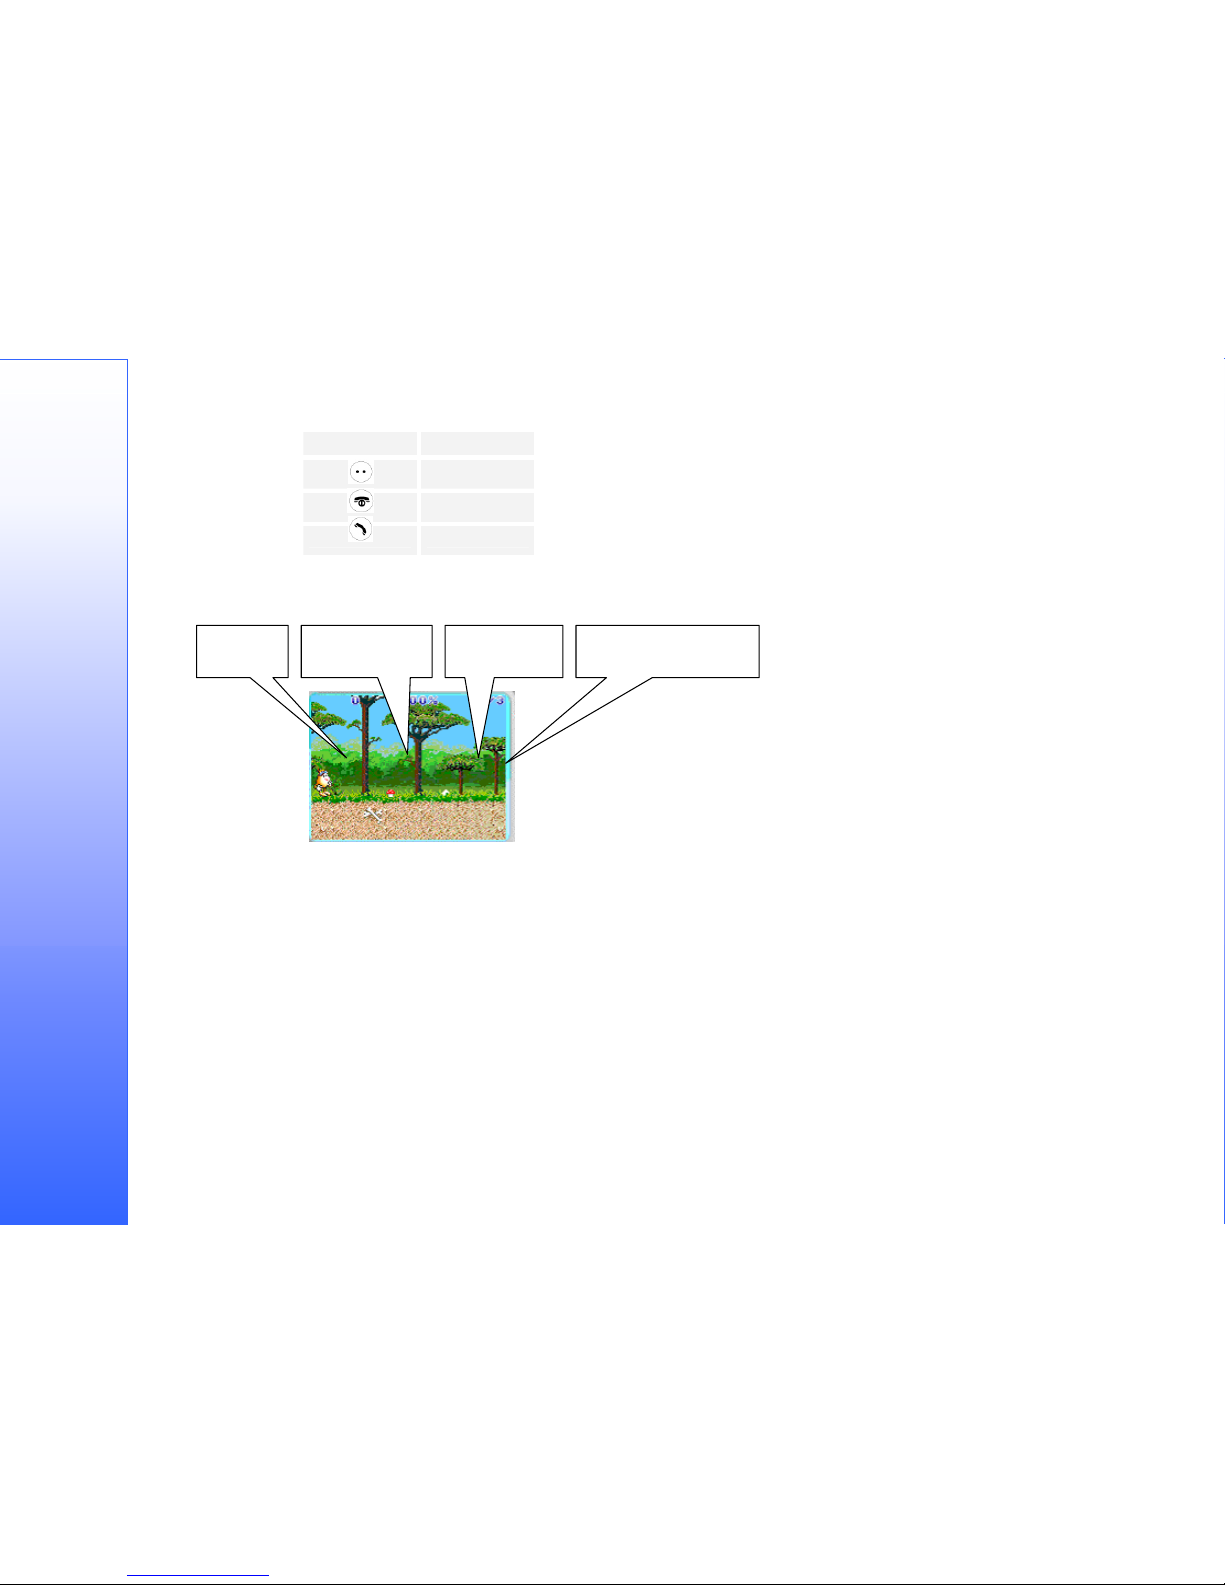
▲
Move Right
Jump
Jump Left
Jump Right
Playing the game
When the game starts the following screen is displayed:
The number of parts you
need to collect on this level
The number of
parts collected
Your health statusYour score
The top line displays your current score, your health (measured in %), the number of aeroplane parts you have collected so far and the total number of airplane
items you must collect before you can proceed to the next level. All levels begin at the far left and progress to the right. Use the left and right keys to move and
three jump keys to jump. Fillip does not lose energy by falling from great heights. Three parts must be collected to complete level 1, two parts on level 2 and
three parts on level 3. Collect as many coins as you can in order to maximize your score. There is a time bonus for each level and the faster you complete a
level, the bigger bonus is awarded. Collect eggs to score extra points and gain health points – Fillip’s health cannot exceed 100%.
Finishing the game
If you manage to collect all parts on all levels you can watch the game end-sequence. The sequence can be interrupted at any time by pressing a key. If you have
scored enough points to enter the high score list you will be prompted for your name.
Hurricane
About the game
The evil Zorac and his mindless followers are terrorising the universe. They are developing devices that disturb communication and interfere with human
brainwaves. The Hurricane Space Fighters are mankind's only chance to survive. As a pilot, you will need to manoeuvre through their fierce defence system and
destroy their headquarters on planet Ivon to ensure continued prosperity of the human race.
59
Equipped with guns and missiles your objective is to kill as many enemies as possible while at the same time avoiding being hit. If you do get hit you will loose
one life. Initially you start with 3 lives but if you last long enough you will eventually be rewarded with additional lives and more powerful weapons.
Page 60
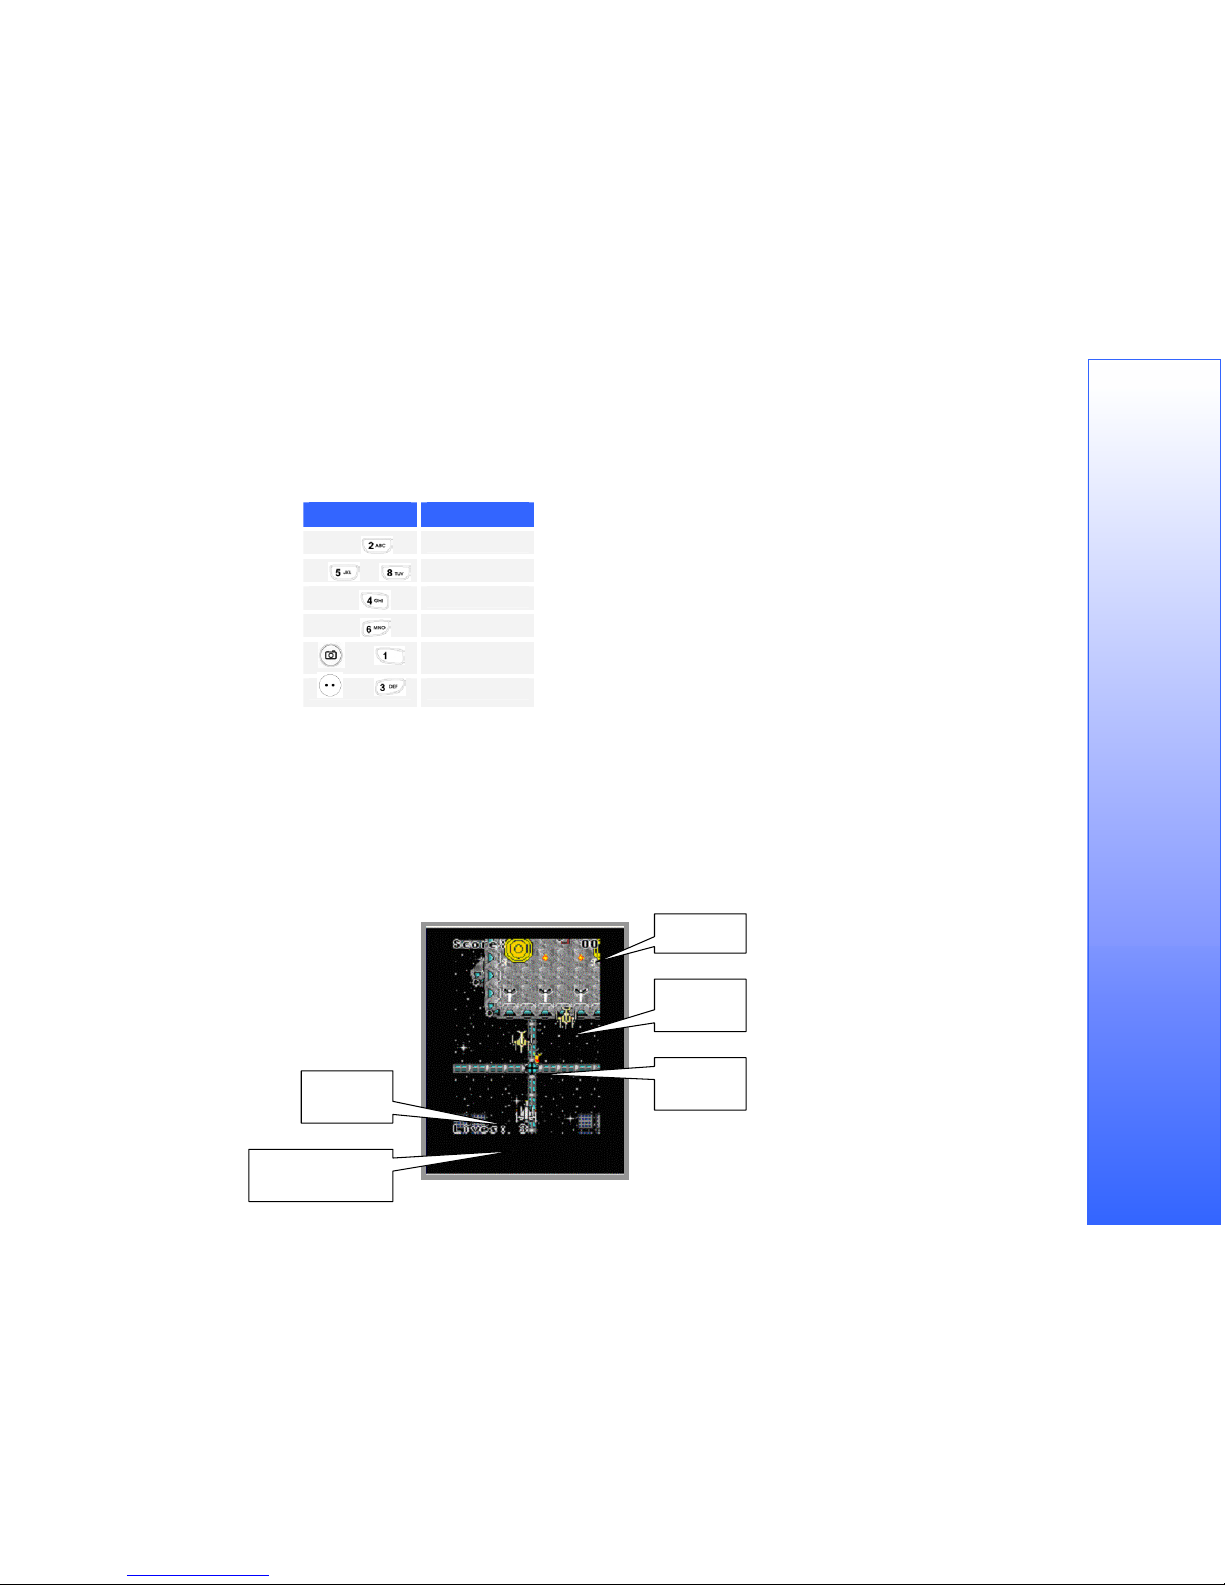
Controls
The default key configuration is as follows:
Key Action
▲ or
Move Up
▼, or
Move Down
◀ or
Move Left
▶ or
Move Right
or
Fire Guns
or
Fire Missiles
How to play the game
When the game is launched, the following title screen is displayed. In order to start the game, press any key on the keypad. The game has 3 different levels and
each level is divided into stages. The further you venture into the game the more resistance you will encounter. If you manage to stay alive long enough, you
will be rewarded with extra lives and power-ups. The power-ups increase the number of missiles you fire.
Playing the game
When the game starts you will be given control of your spaceship. You will rapidly encounter enemies that fire upon you. The enemies you encounter will fly in
formation and try to hit you using their homing missiles. The further you venture into the game, the more aggressive your enemies become. To exit the game,
press the right hand soft key.
The number of lives
you have left
Your space
ship
Enemy
missile
Enemy
fighters
Your score
60
Page 61
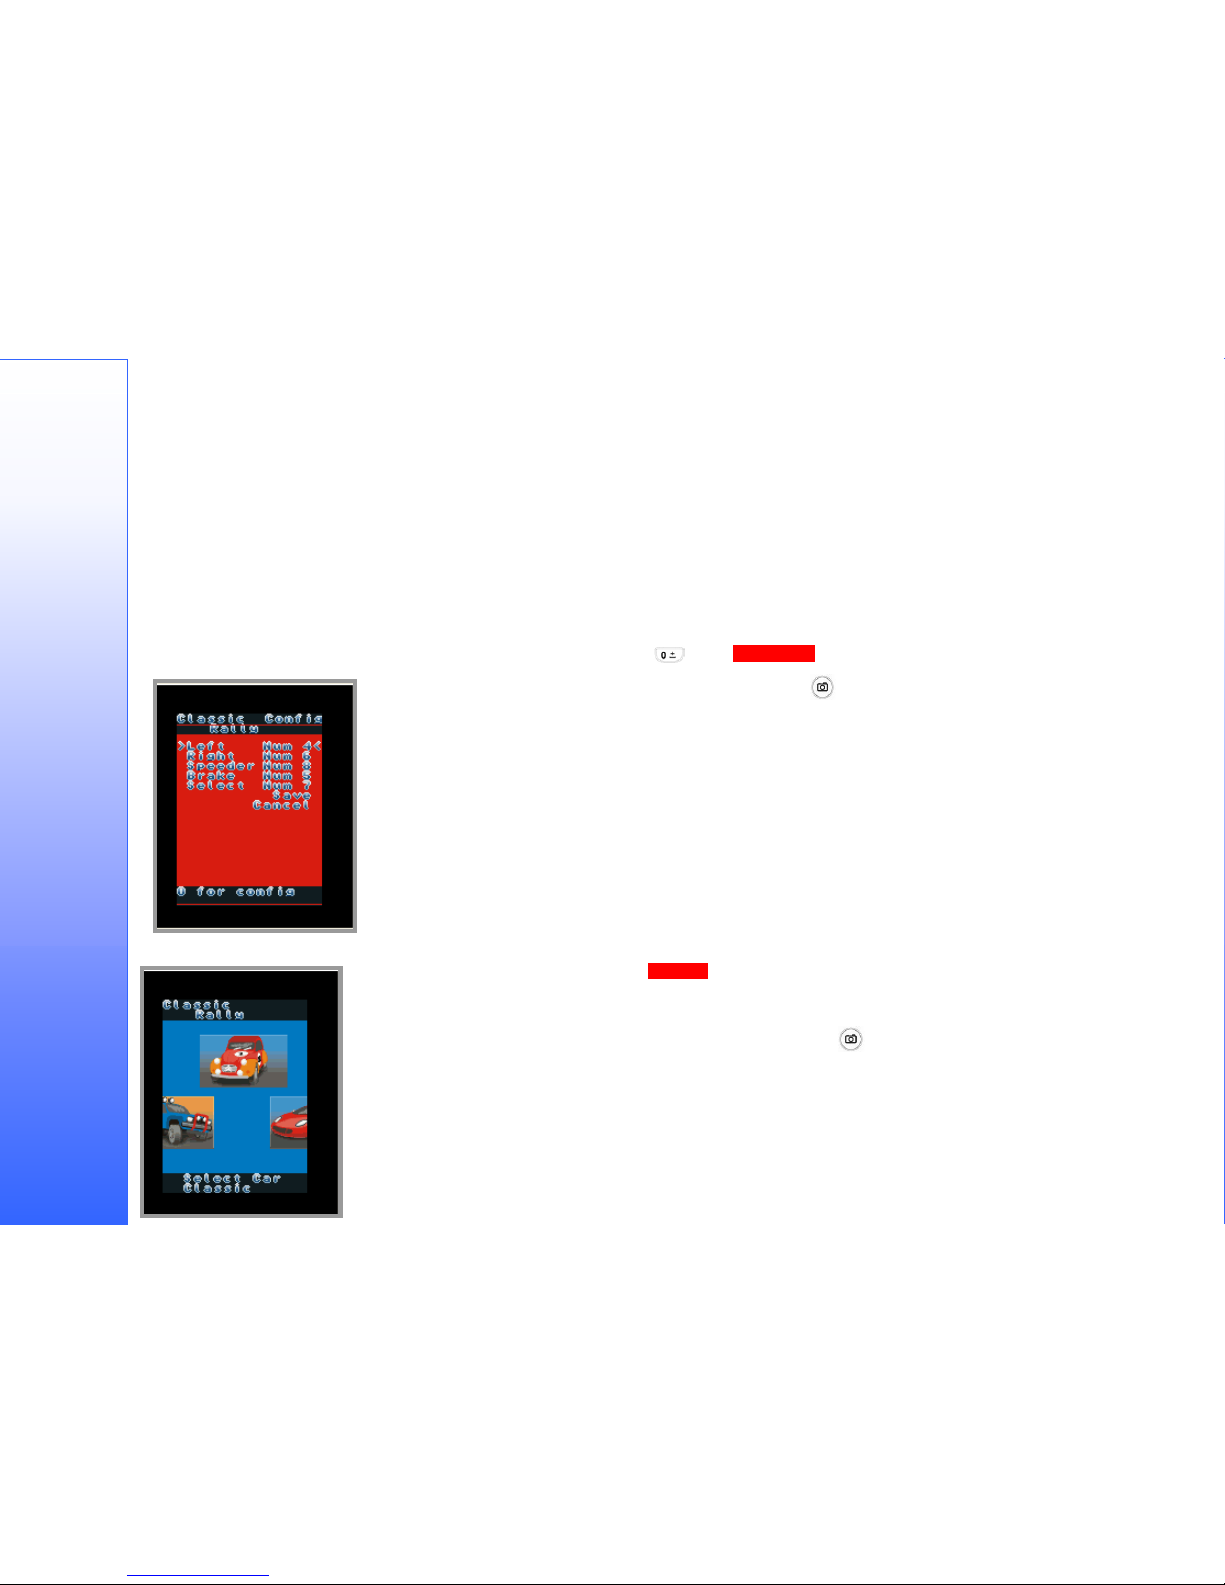
Classic Rally
About the game
Ever imagined being a hard-core rally driver seated snugly in a super fast racing car? Well here is your chance. Classic Rally lets you choose from a range of
different cars, each with its own driving capabilities. The objective of the game is to race against the computer and complete each track as fast as possible
without damaging the car.
To activate the game:
Controls
Press any key to begin playing Classic Rally. To configure the game controls, press the key and the left screen will be displayed:
Use the Navigational keys to move the cursor to the required option. Press to make a selection. Press the key you
wish to assign to the function. Repeat the procedure for other functions if necessary and select [Save] to store the new
configuration or [Cancel] to discard any changes.
Playing the game
Having started the game from the main menu, the left screen is shown, displaying three cars. Each of these cars represents a
different category, these being Classic, Truck and Sports. The car relating to each category has different motoring
characteristics with respect to speed, acceleration, handling and other factors.
Browse between the cars by using the ◀ , ▶ keys and select a car by pressing the .This will display the track
selection screen, as shown below.
61
Page 62
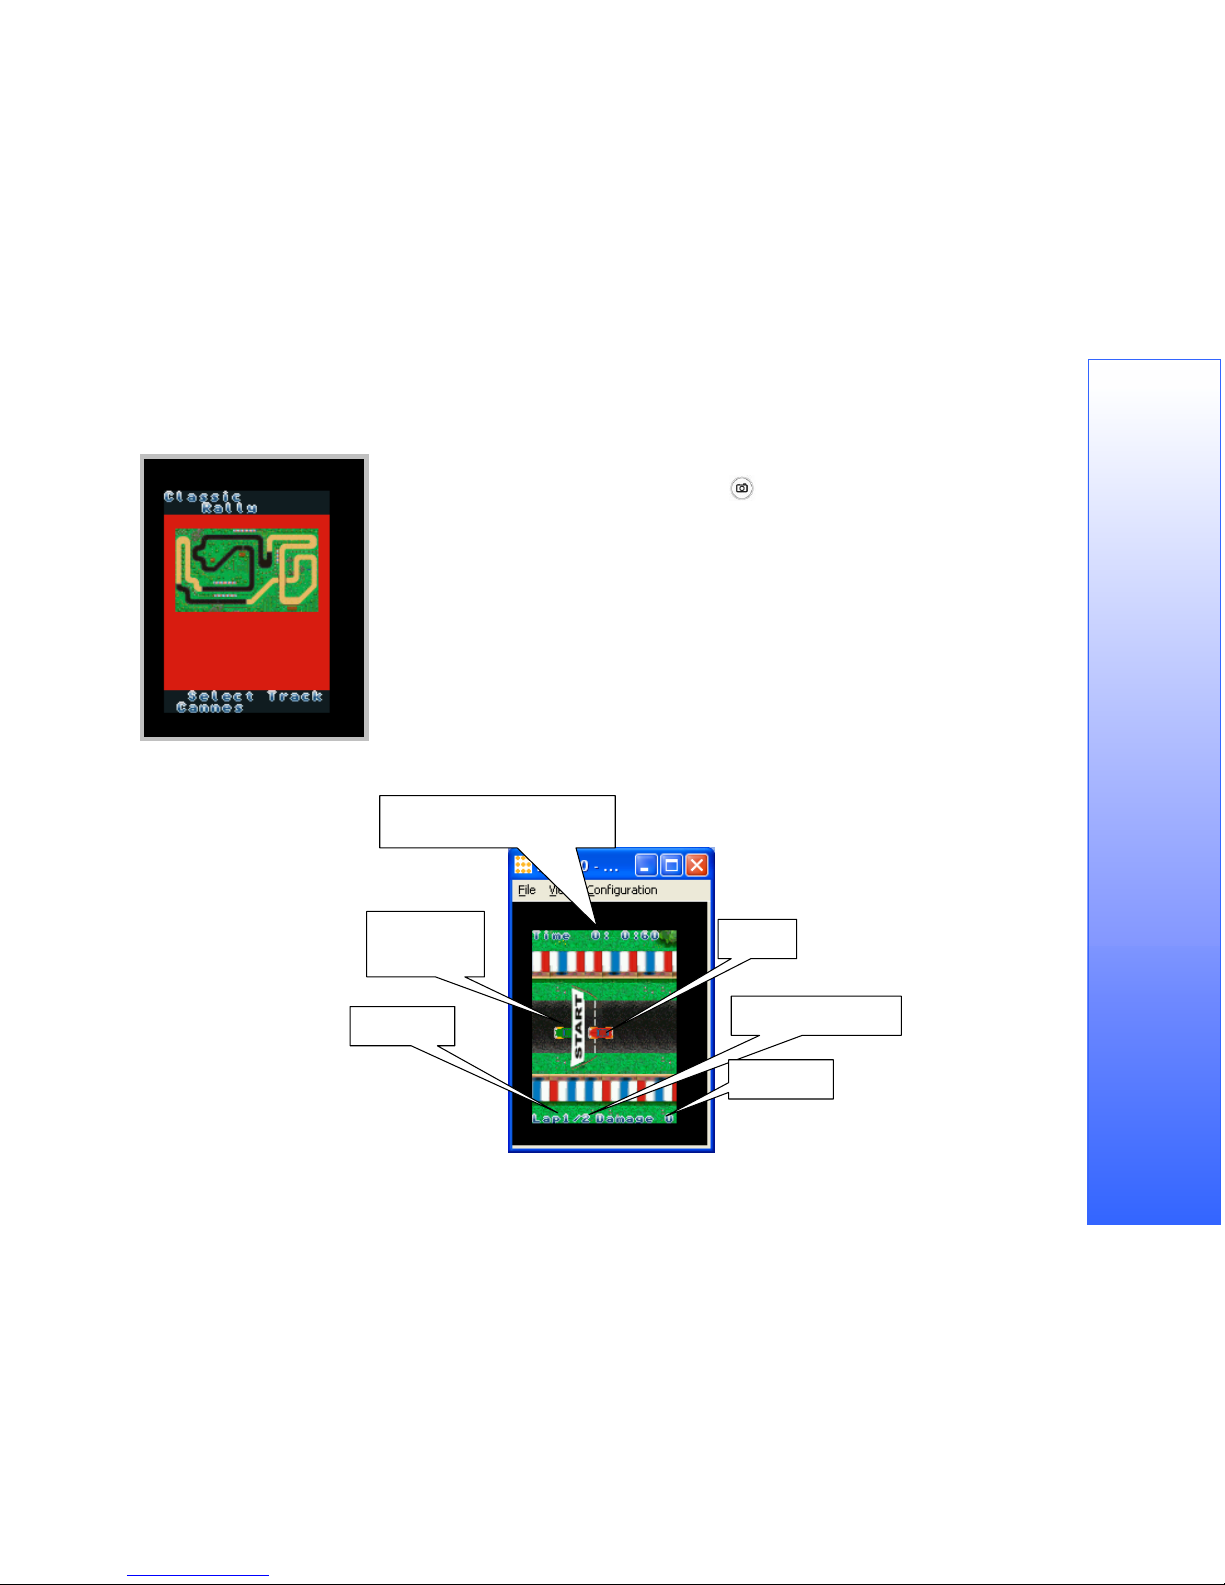
A choice of three race tracks is included and these are Cannes, Nevada and St. Petersburg. Browse through the tracks
using the ◀ and ▶ keys and select a track by pressing the key.
When the game starts you should see something like this:
Time elapsed: Minutes, seconds and
1/100th seconds
Your opponent.
Controlled by
the computer.
Your car
The total number of laps
Current lap
Damage level
62
Page 63
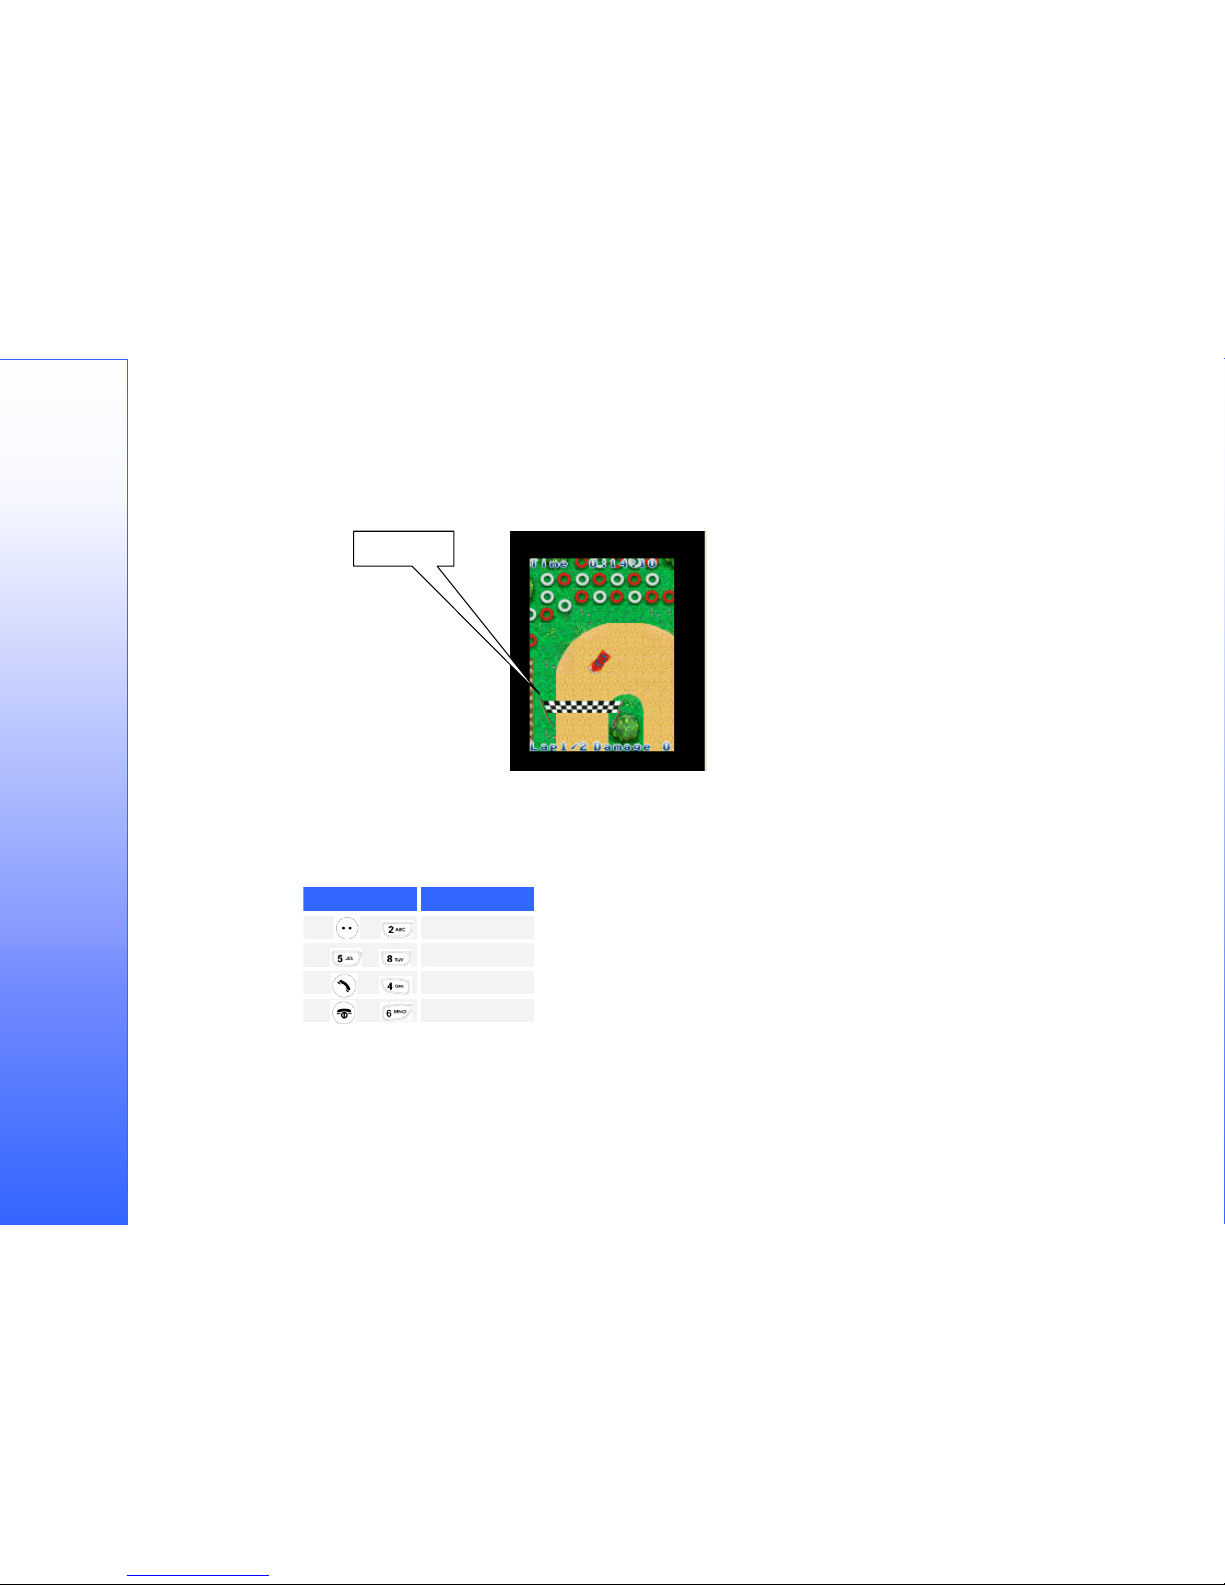
Each time you bump into something (e.g. a wall) your car takes damage. An exception to this rule is tires; bumping into a tire will not inflict damage on your
car. If the damage level reaches 100 your car will explode and be positioned at the last checkpoint you passed.
Checkpoints
In order to successfully complete a lap you must pass all checkpoints on the track.
Checkpoint
If a checkpoint is missed, a notification is displayed. Each checkpoint must be completed before the lap can be completed. Your opponent will attempt to
complete each lap before your car. However, it will choose a similar car for itself with similar motoring characteristics.
Controls
The default key configuration is as follows:
Key Action
▲ , or
Forward
▼, or
Back
◀, or or
Move Left
▶, or
Move Right
Completing the game
If you manage to complete the track and beat the track time you will be allowed to enter your name for the high score list:
63
Page 64
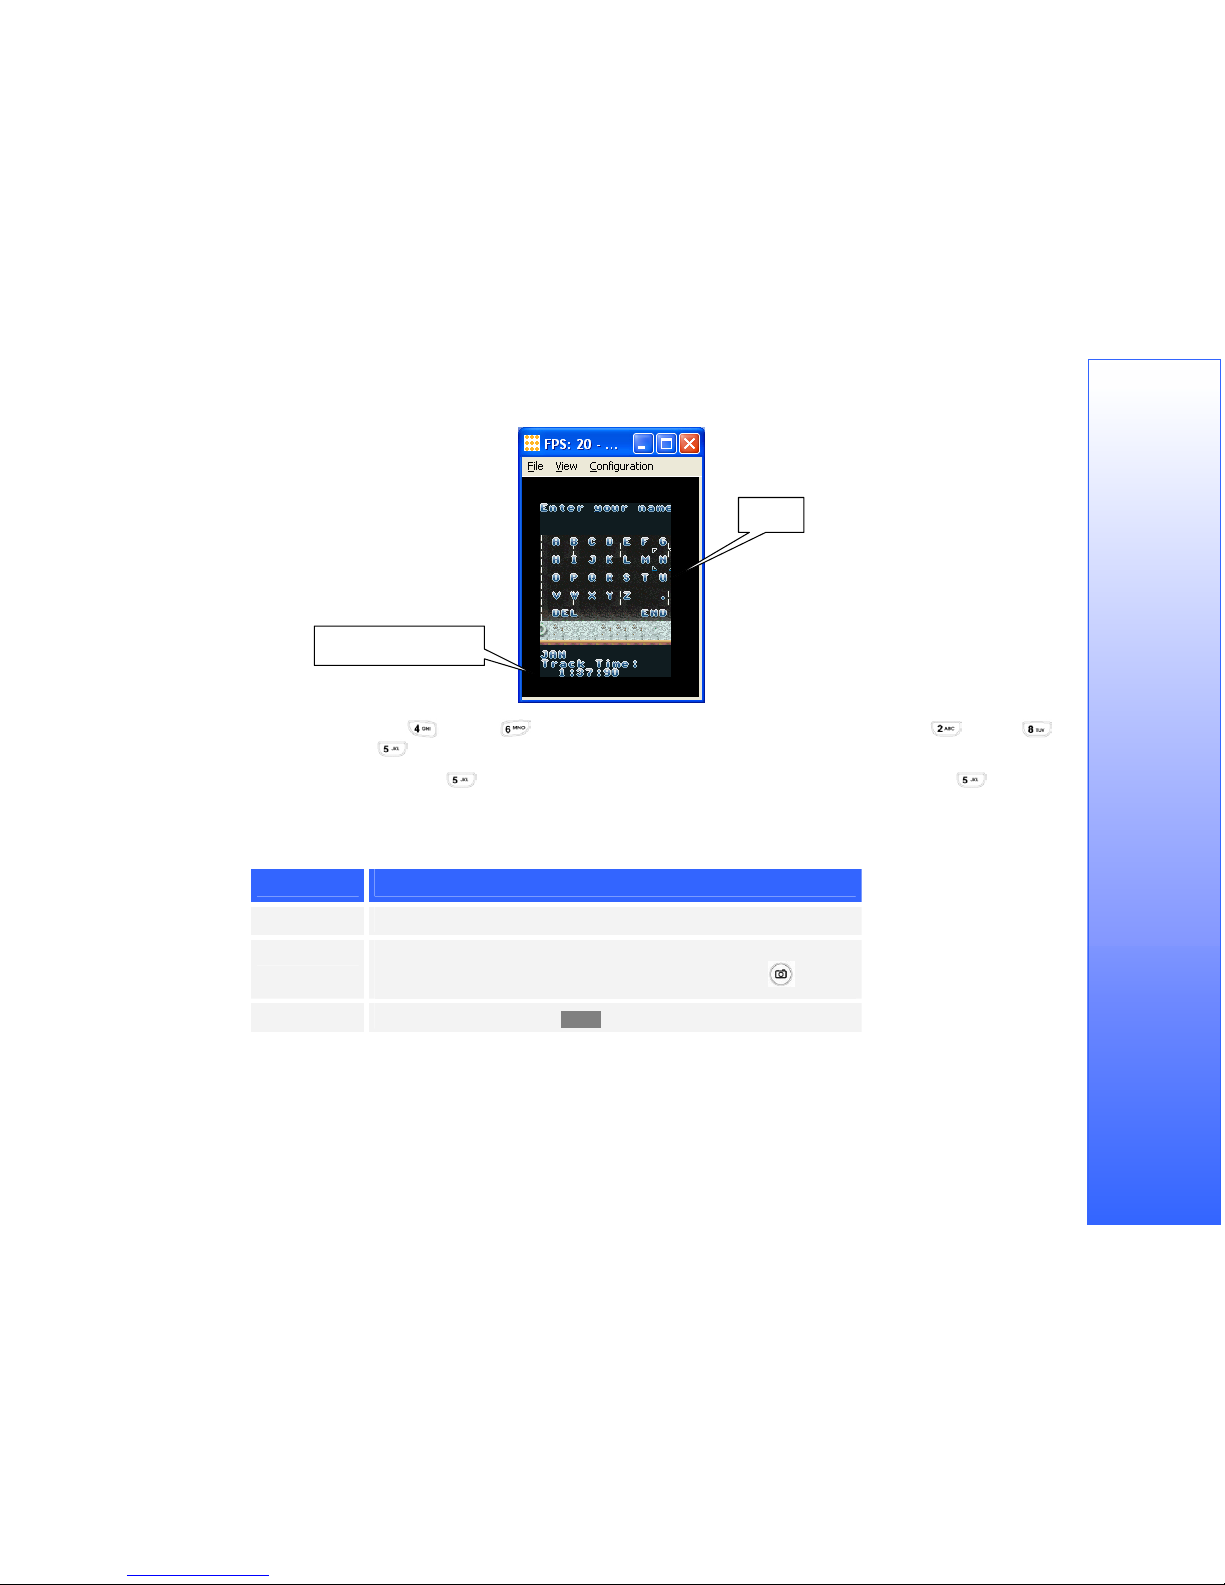
Cursor
The name being entered
Move the cursor left and right by using ◀ or and ▶ or , respectively. To move the cursor upwards or downwards, use ▲ or and ▼ or
respectively. Select a letter by pressing .
To delete a letter move the cursor to
DEL and press . When you have finished entering your name, move the cursor to END and press .
Calculator
To activate the calculator:
Step Action
1
Select [Calculator] from the [Extras] menu.
2
A screen is displayed with plus, minus, divide, multiply, equals and decimal point
buttons. These can be activated using the navigational keys and the button.
Numbers can be typed using the keypad.
3
To exit the calculator, press the <Exit> soft key.
Audio recorder
This menu option allows the user to record a voice memo. The options for this menu are:
• [1. Record]
64
• [2. Audio notes]
Page 65
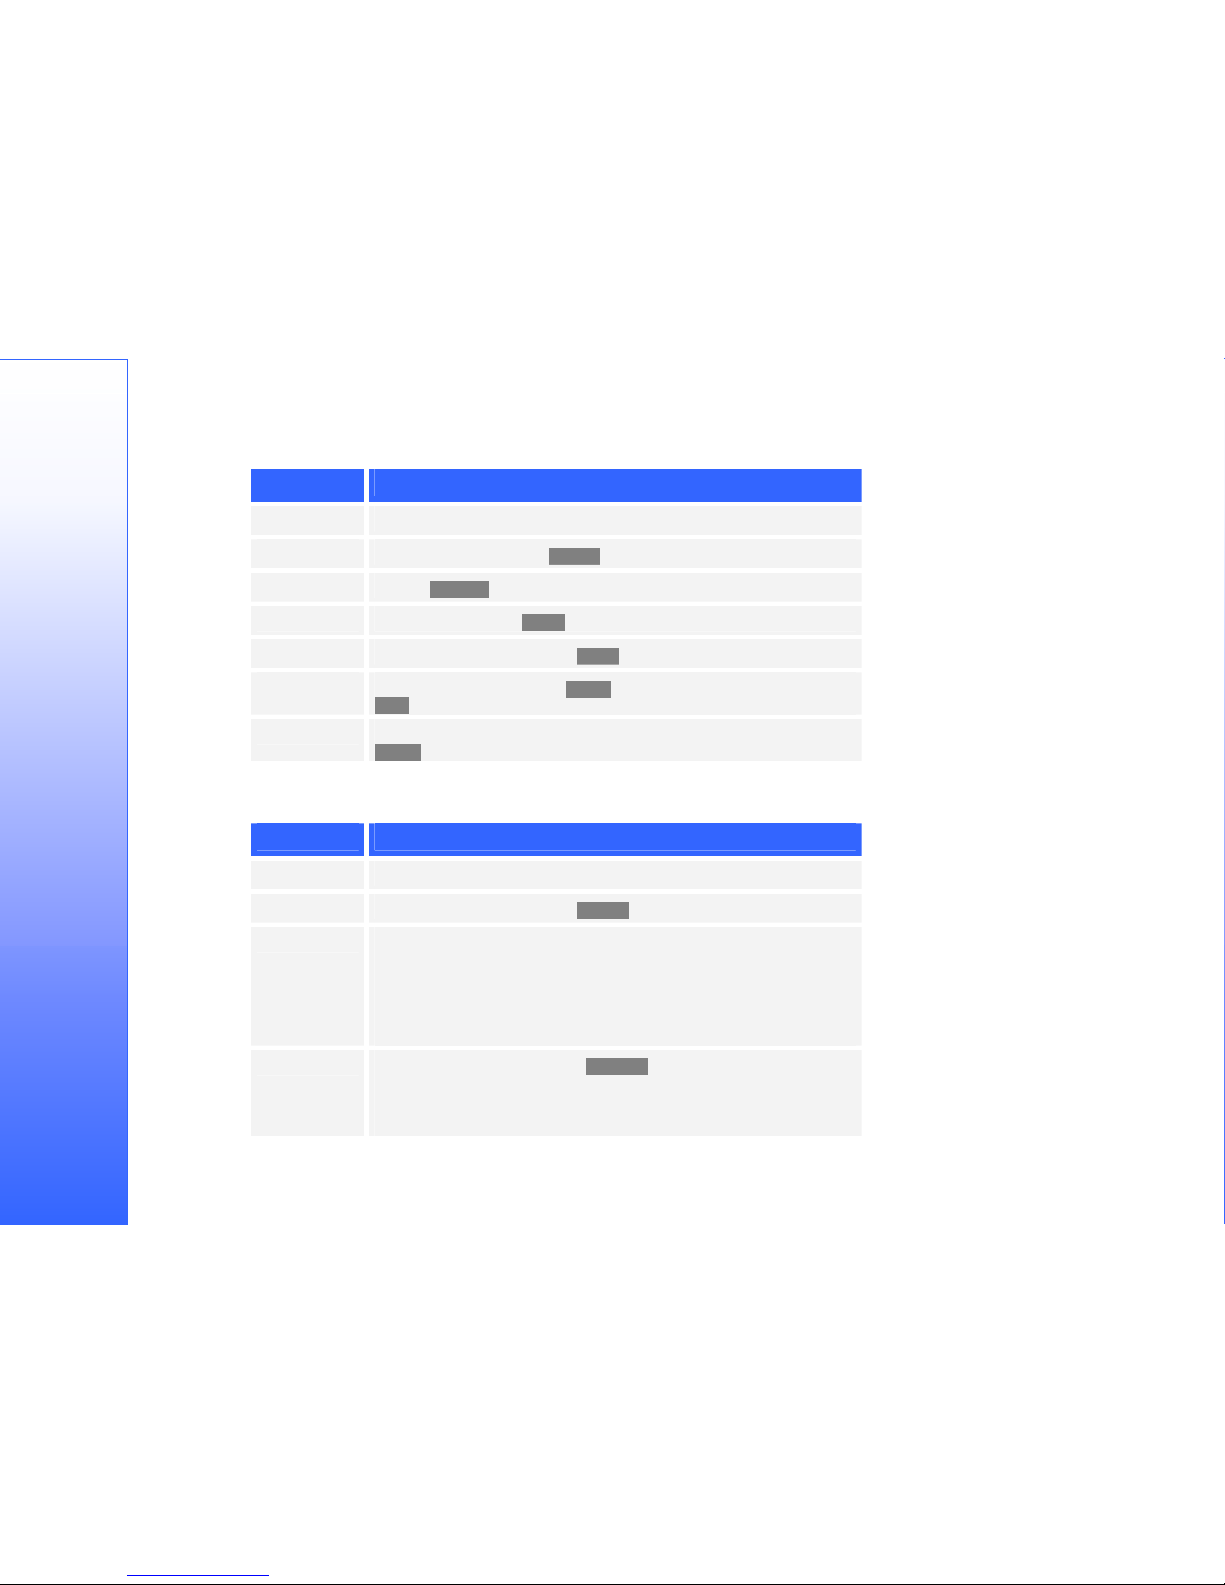
Record
To record a sound sample:
Step Action
1
Select [Audio recorder] from the [Extras] menu.
2
Select [Record] and press the <Select> key.
3
Press the <Record> soft key and speak into the microphone.
4
When finished, press the <Stop> soft key.
5
To replay the recording, select the <Play> soft key.
6
To save the recording, select the <Save> key, enter a filename and select the
<Ok> key.
7
A confirmation message is displayed, indicating the file has been saved. Select
<Back> to return to the previous menu.
Audio notes
To display a list of all the Audio notes stored on the handset:
Step Action
1
Select [Voice recorder] from the [Extras] menu.
2
Select [Audio notes] and press the <Select> key.
3
A list of three menu items is displayed, as shown:
1. 04.06.03 11:34
2. Empty
3. Empty
4
Navigate to an empty slot and press <Options>. The following menu is displayed:
• [1. Record]
• [2. Details]
65
Page 66
5
To begin the voice recording, navigate to the [1. Record] option and press
<Select>.
6
Select <Record> to begin the recording or <Exit> to cancel.
7
Record the sound and once complete, press the <Stop> key. The next menu offers
you the chance to listen to the recording before saving it under the appropriate slot
number.
8
Press <Save> to store the recording.
9
If a slot contains a voice recording, the name of the recording is displayed.
Pressing the <Options> soft key displays the following menu:
• [1. Record]
• [2. Playback]
• [3. Details]
• [4. Erase]
• [5. Rename]
File Viewer
This menu option allows the user to navigate the files stored on the handset. The file types that may be listed include melodies, messages, Organizer notes and
pictures taken with the camera. To activate the viewer:
Step Action
1
Select [File viewer] from the [Extras] menu
2
The [A:] storage area is displayed. Press the key to continue.
3
All files stored in this area are displayed. Use the ▲, ▼ and buttons to view
information on the files listed.
SAT (operator specific menu)
Menu options displayed are:
[1. Help]
66
[2. Information]
[3. Leisure]
[4. Answer Phone]
Page 67

[5. Phone Service]
This option is operator specific.
WAP (Wireless Application Protocol) menu
WAP is a technology that was created to allow mobile communication devices to provide fast and easy access to Internet information The MGH-900 can
display WAP web pages using a micro browser which is resident in the handset. There are WAP services currently available, such as reservation services,
news, sports and weather, gaming and banking. You must select a WAP data connection profile before embarking on a WAP session. A WAP profile consists
of a group of network settings. Once they have been setup you simply switch between the different profiles rather than re-enter the settings each time you want
to change the network connection. The handset has six data connection profiles already setup and ready to use (see the WAP and GPRS settings appendix). The
WAP Settings menu provides the [Set data connection] function to select the desired profile. The [Data Connection] function allows profiles to be Edited,
Deleted and new ones added.
Once the user has selected a connection profile then there are three main ways to access a WAP page ;
• Select Homepage
• Select a page from a list in Bookmarks
• Enter an address for a page directly
You can store the addresses of your favourite sites as Bookmarks. These can then be used to access WAP pages.
Note (1) : WAP 1.2.1 displays pages are written in the Wirelss Markup Language (WML) . Standard Internet Hypertext Markup Language (HTML) pages are
not supported by this browser.
Note (2) : The user must have a GPRS enabled SIM. Please contact you network service provider for more information.
To access the WAP browser select [WAP] from the main menu to display the following options:
• [1. Homepage]
• [2. Resume]
• [3. Bookmarks]
• [4. Push messages inbox]
• [5. WAP settings]
• [6. Empty Temp Files]
WAP settings
Before visiting any WAP pages, ensure that a connection has been defined and all the necessary settings have been configured. To configure WAP settings:
Step Action
1
From the [WAP] menu select [5. WAP settings].
67
Page 68

2
Select [Set Data connection] from the [WAP settings] menu.
3
Navigate to a data connection profile from the options listed. If a valid data
connection is not shown, please refer to WAP and GPRS settings.
4
Press <Select> to choose a data connection profile.
5
Press <Back> to return to the previous menu.
The [Set Data Connection] option allows you to select a WAP profile from the stored list.
The [Data Connection] allows you to edit, delete or add a new data connection profile.
The [Security Certificate] function displays a list of trusted root certificates that are stored in the handset for secure mode server connection. Secure certificates
are used for applications like banking services. You can download certificates from a WAP page if the WAP service supports this function. After downloading
you can save or delete the certificate. When the certificate is saved it is added to the security certificate list
The [Cache mode] option is used for storing temporary data :
- Always check :
- Check on start :
- Never check :
The [Push Security] option is used for Filtering the received push messages. Filters supported are :
- Accept All : you will receive all push messages
- Trusted Only : you will only receive authenticated (trusted) push messages
- Accept None : you will not receive any push messages
Data connections
To add a data connection to the list of available data connections for WAP access:
Step Action
1
Select [WAP settings] from the [WAP] menu
2
Select [Data connections] from the [WAP settings] menu. A list of pre-defined
connections is displayed.
68
Page 69

3
Press the <Select> soft key to display the following menu:
• [1. Add new]
• [2. Edit]
• [3. Delete profile]
Select [Add New] to add a new data connection profile.
Note: A maximum of six data connection profiles exist. If adding more than
six, an existing profile has to be deleted.
4
Enter all the necessary information for the new connection from the following
menu option:
• [1. Change Name]
• [2. Home]
• [3. WAP settings]
• [4. Connection type]
• [5. Connection security]
• [6. Bearer]
• [7. Data Bearer Settings] or [7.GPRS Settings]
Note: Option 7 is dependant on the option 6 setting.
5
When complete, press the <Back> soft key to return to the previous menu.
Home and Resume
To visit the home page:
Step Action
1
Select [Home] from the [WAP] menu
2
If a data call is not already in progress, there will be a small delay in displaying
the home page until the connection is active.
69
Page 70

3
Navigate through the pages using the navigational keys. Pressing displays
the following menu:
• [Stop]
• [Go back]
• [Bookmarks]
• [Add bookmarks]
• [Enter address]
• [Home]
• [Top]
• [Refresh]
4
To visit a particular WAP page, select [Enter Address] and type in the WAP
address using the keypad.
Note: You may omit the http:// in some cases and the page will still load.
5
Once finished browsing, select [Exit] to disconnect the data connection.
6
To resume from the last WAP page that was visited, select [Resume] from the
[WAP] menu instead of [Home].
Bookmarks
Bookmarks are WAP locations (URLs), which are stored so that the user may visit these locations directly without having to navigate through search engines or
links from other sites. Typically, these may contain the user’s favourite sites, frequently visited pages or sites with complicated names. If there are no stored
bookmarks then the “Bookmark list empty” message will be displayed.
Bookmarks may be added when at a WAP page URL:
Step Action
1
When the page is displayed, press the key.
2
Select [Add bookmark].
3
Enter a name for the bookmark to be stored under.
4
The URL is now added to the bookmark list.
To open a page that has been bookmarked:
70
Step Action
Page 71

1
Press the [Menu Select] key.
2
Select [Bookmarks] from the [WAP] menu and press the < Select> soft key.
3
The following menu is displayed:
• [1. Select]
• [2. Edit name]
• [3. Edit address]
• [4. Add Bookmark]
• [4. Add Bookmark]
4
Press [Empty Temp Files] to go to the bookmark and the page will be loaded.
Push messages inbox
A push message is a sort of notification from the network such as a news bulletin. You can receive push messages sent by your network service provider in the
Push messages inbox.
When a push message arrives the handset displays a “New Push Message” in the Idle screen.
These are stored in an inbox and this can be viewed using the [Push messages inbox] menu option from the [WAP] menu. If there are no messages, a pop up
message is displayed.
When scrolling through the Inbox the following options are available :
• Show Information : allows you to view the received push message
• Load URL : allows you to go to the site linked to the received push message
• Delete : allows you to delete the received push message
Empty Temp files
When navigating WAP pages, a variety of information is stored on the handset information is located in a temporary area called a cache. If you have accessed
confidential information (such as banking information) then it is wise to clear the cache after each WAP session. This menu allows you to clear the cache :
Step Action
1
Select [Empty Temp Files] from the [WAP] menu.
2
The next menu shown is:
• [Empty cache]
• [Empty Cookies]
• [Empty Passwords]
71
Page 72

3
Navigate to the required option and press the <Select> soft key. A confirmation
message is displayed.
Modifying a Profile
The handset has the 6 profile s (outline above) already in the handset. To modify a profile edit the following elements :
1. Change Name (text edit profile name)
2. Homepage (text edit Homepage name)
3. WAP Settings
Display images (simply select Yes or No)
Update images (simply select Yes or No)
4. Connection type (simply select Temporary or Continuous)
5. Connection security (simply select None or Secure)
6. Bearer (simply select CSD or GPRS)
7. GPRS Settings
IP Address (numeric IP address, for example 192.168.71.35)
APN (text edit access point text string)
User Name (text edit username)
Password (text edit password)
To edit a specific profile setting:
Step Action
1
Select [WAP Settings] from the [WAP] menu
2
Select [Data connections]
3
Select a specific profile from the list of 6 and the following options will appear :
• [Add New]
• [Edit]
• [Delete Profile]
Note : to add a new profile a vacant slot must exist. To achieve this an unused slot
must be Deleted.
Select <Edit>
72
Page 73

4
Navigate through the list of options using the navigational keys and edit each
profile element in turn to complete the required profile:
• [Change Name]
• [Homepage]
• [WAP settings]
• [Connection type]
• [Connection security]
• [Bearer]
• [GPRS Settings]
5
Once profile has been edited, select [Back] to retrun.
It is best to contact your Network service provider for suitable GPRS and WAP settings.
Safety Guidelines
Do not expose your phone to extreme low and high temperatures
Avoid holding the phone or headset close to your ear while pressing the keys to prevent hearing impairment
Do not expose the phone to open flames or lit tobacco products
Do not leave the phone in direct sunlight, or a humid, dusty or hot area
Do not drop or throw the phone
Do not paint the phone
Do not place the phone in the area above your car’s airbag
Caution: Risk of explosion if battery is replaced by an incorrect type. Dispose of used batteries in accordance with local legislation
Do not incinerate or dispose of the battery as ordinary trash.
Always charge your battery in a well ventilated area
Check with your local authorities for information on recycling any packing materials or old equipment
Always read the operating instructions and safety precautions of the equipment which you connect to the phone
Do not expose the battery pack to liquid
Turn off the phone before removing the battery
Do not short circuit the metal contact of the battery pack
Keep the battery pack out of children’s reach
Consumer Information on SAR(Specific Absorption Rate)
73
THE MIRAE MGH-900 MEETS THE EUROPEAN UNION REQUIREMENTS FOR EXPOSURE TO RADIO WAVES
Your mobile phone is a radio transmitter and receiver. When it is turned on, it emits low levels of Radio Frequency (RF) energy. The Mirae MGH-900 is
designed and manufactured not to exceed the limits for exposure to RF energy recommended by the Council of the European Union.
Page 74

These limits are part of comprehensive guidelines and establish permitted levels of RF energy for the general population. The limits include a substantial safety
margin designed to assure the safety of all persons, regardless of age and health and to account for any variations in measurements.
Specific Absorption Rate (SAR) is the unit of measurement for the amount of RF energy absorbed by the body when using a mobile phone. The SAR value is
determined at the highest certified power level in laboratory conditions, but the actual SAR level of the mobile phone while operating can be well below this
value.
This phone has been tested and conforms to the European SAR limit of 2.0 W/Kg relevant to a spatial peak SAR limit averaged over a mass off 10 g.
This phone has been tested and conforms to the FCC SAR limit of 1.6 W/Kg relevant to a spatial peak SAR limit averaged over a mass off 1 g.
When used with a carry accessory that contains no metal this phone should not be used within 1.5 cm/0.59 in of the body at any time in order to comply to the
safe working levels laid down by the FCC.
Declaration of conformity
Seoul, January 2004
We, Miraecomm Co.Ltd, 1516-3 Seocho-3 Dong, Seocho-Gu, Seoul, Korea
Declare under our sole responsibility that our product:
MIRAE MGH-900
And in combination with our accessories, to which this declaration relates is in conformity with the appropriate standards: EN 301
511, EN 301 419-1, EN 301 489-1, EN 301 489-7, EN 50360, EN 50361, EN 60950 following the provisions of Radio Equipment
and Telecommunication Terminal Equipment directive 99/5/EC.
We fulfil the requirements of the R&TTE Directive (99/5/ec)
74
Page 75

Index
1800Mhz...................................................................................................... 7
900MHz....................................................................................................... 7
AC adaptor................................................................................................... 9
Battery charge............................................................................................ 11
Digital Still Camera .....................................................................................6
EFR.............................................................................................................. 7
emergency...................................................................................... 10, 11, 46
EMS............................................................................................................. 6
FR ................................................................................................................7
GPRS ...........................................................................................................7
Idle mode ................................................................................................... 11
Menu Select11, 13, 14, 19, 20, 26, 29, 33, 37, 41, 45, 57, 58, 65, 67, 71, 72,
73
MMS........................................................................ 6, 11, 13, 24, 25, 26, 30
Organiser........................................................................................ 11, 55, 56
Phonebook................................................................................ 19, 20, 21, 22
Screen Saver...............................................................................................11
Signal level.................................................................................................11
SIM .................................................................... 7, 21, 22, 23, 29, 46, 49, 55
SMS .............................................................................................................6
Soft Key 2 ..............................................................................................8, 11
Soft Key1 ............................................................................................... 9, 11
Unlock.......................................................................................................... 9
Voice Memo.................................................................................................7
voicemail.............................................................................................. 32, 33
Wallpaper....................................................................................... 43, 44, 46
WAP.............................................................................................................7
WGE ............................................................................................................6
Reproduction, transfer, distribution or storage of part or all of the contents of this document in any form without the prior written consent of MiraeComm Co.
LTD is strictly prohibited.
Java is a registered trademark of Sun Microsystems Inc. All Rights Reserved.
75
 Loading...