

MioWork Z100 Quick Start Manual
Snelstartgids nl
Guida rapida it
Guide de mise en route fr
Guía de inicio rápido
es
Schnellstartanleitung de
Quick Start Guide
en
Z100 Series
1
en
Welcome
Thank you for purchasing a Mio product. This Quick Start Guide guides you through the successful
setup of your device and familiarizes you with the basic skills of using the device.
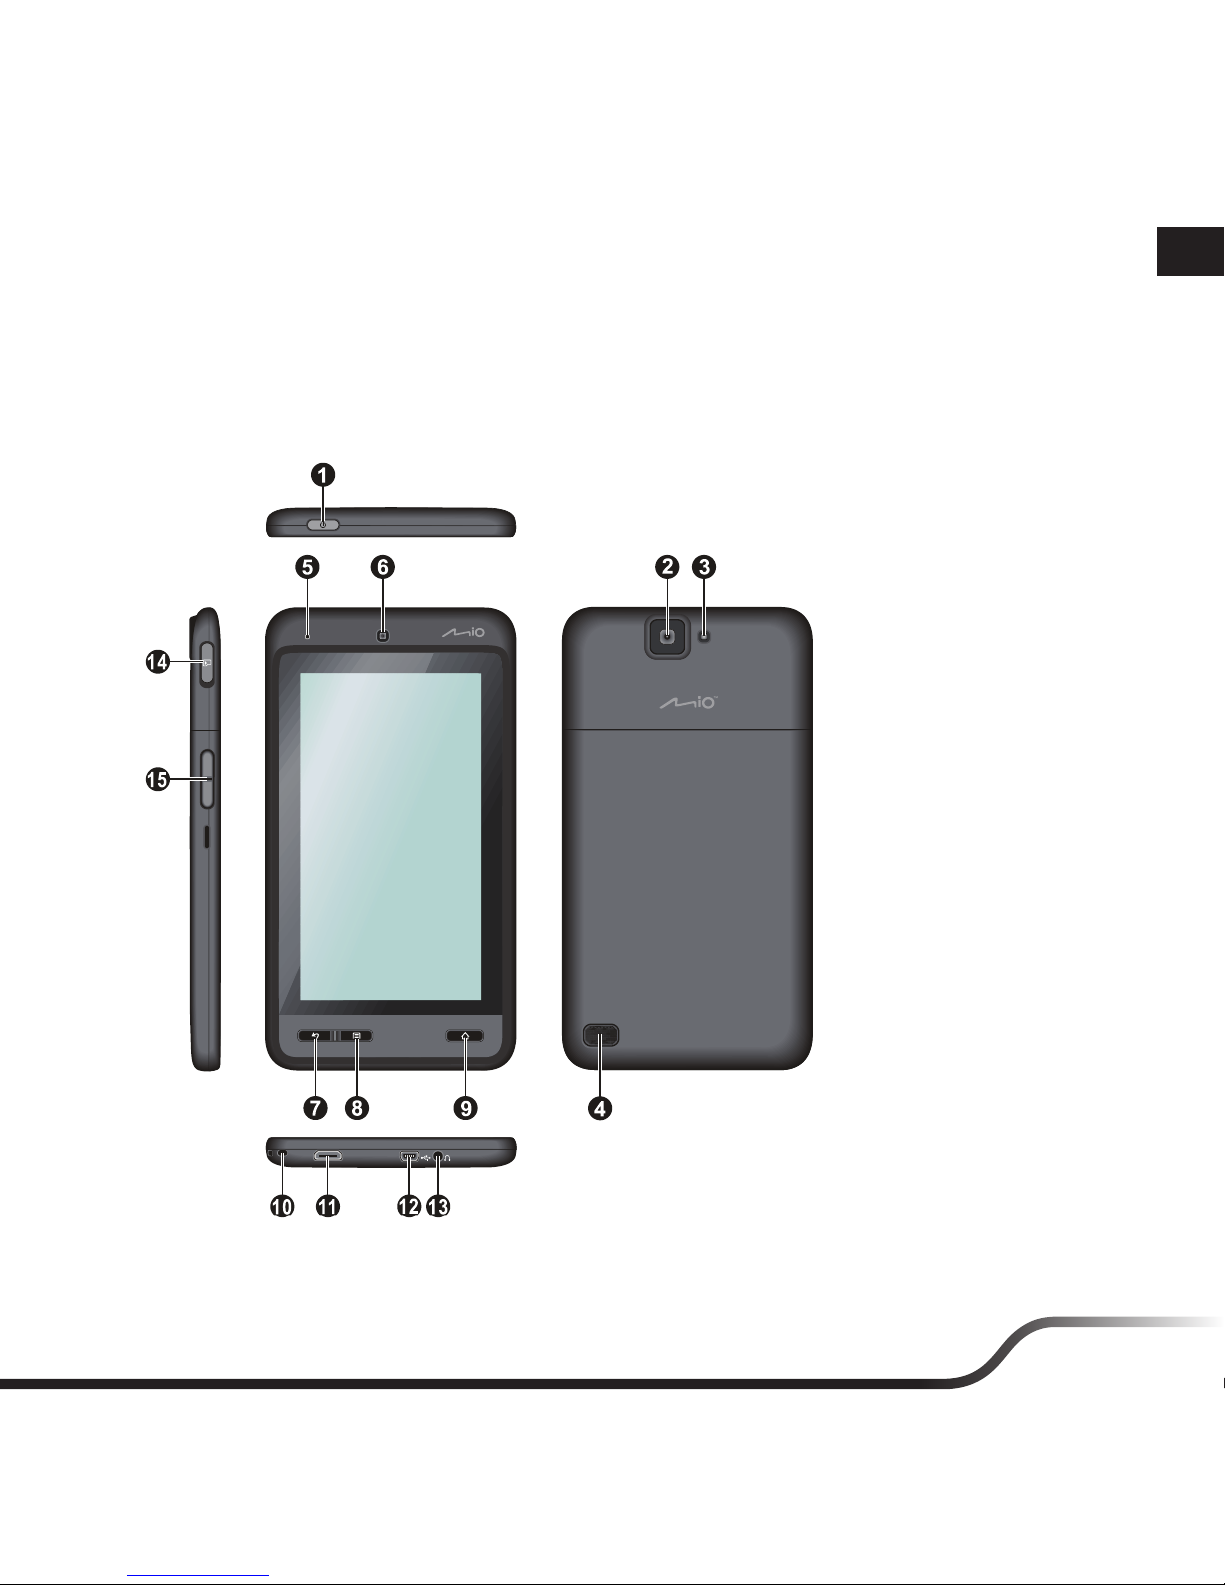
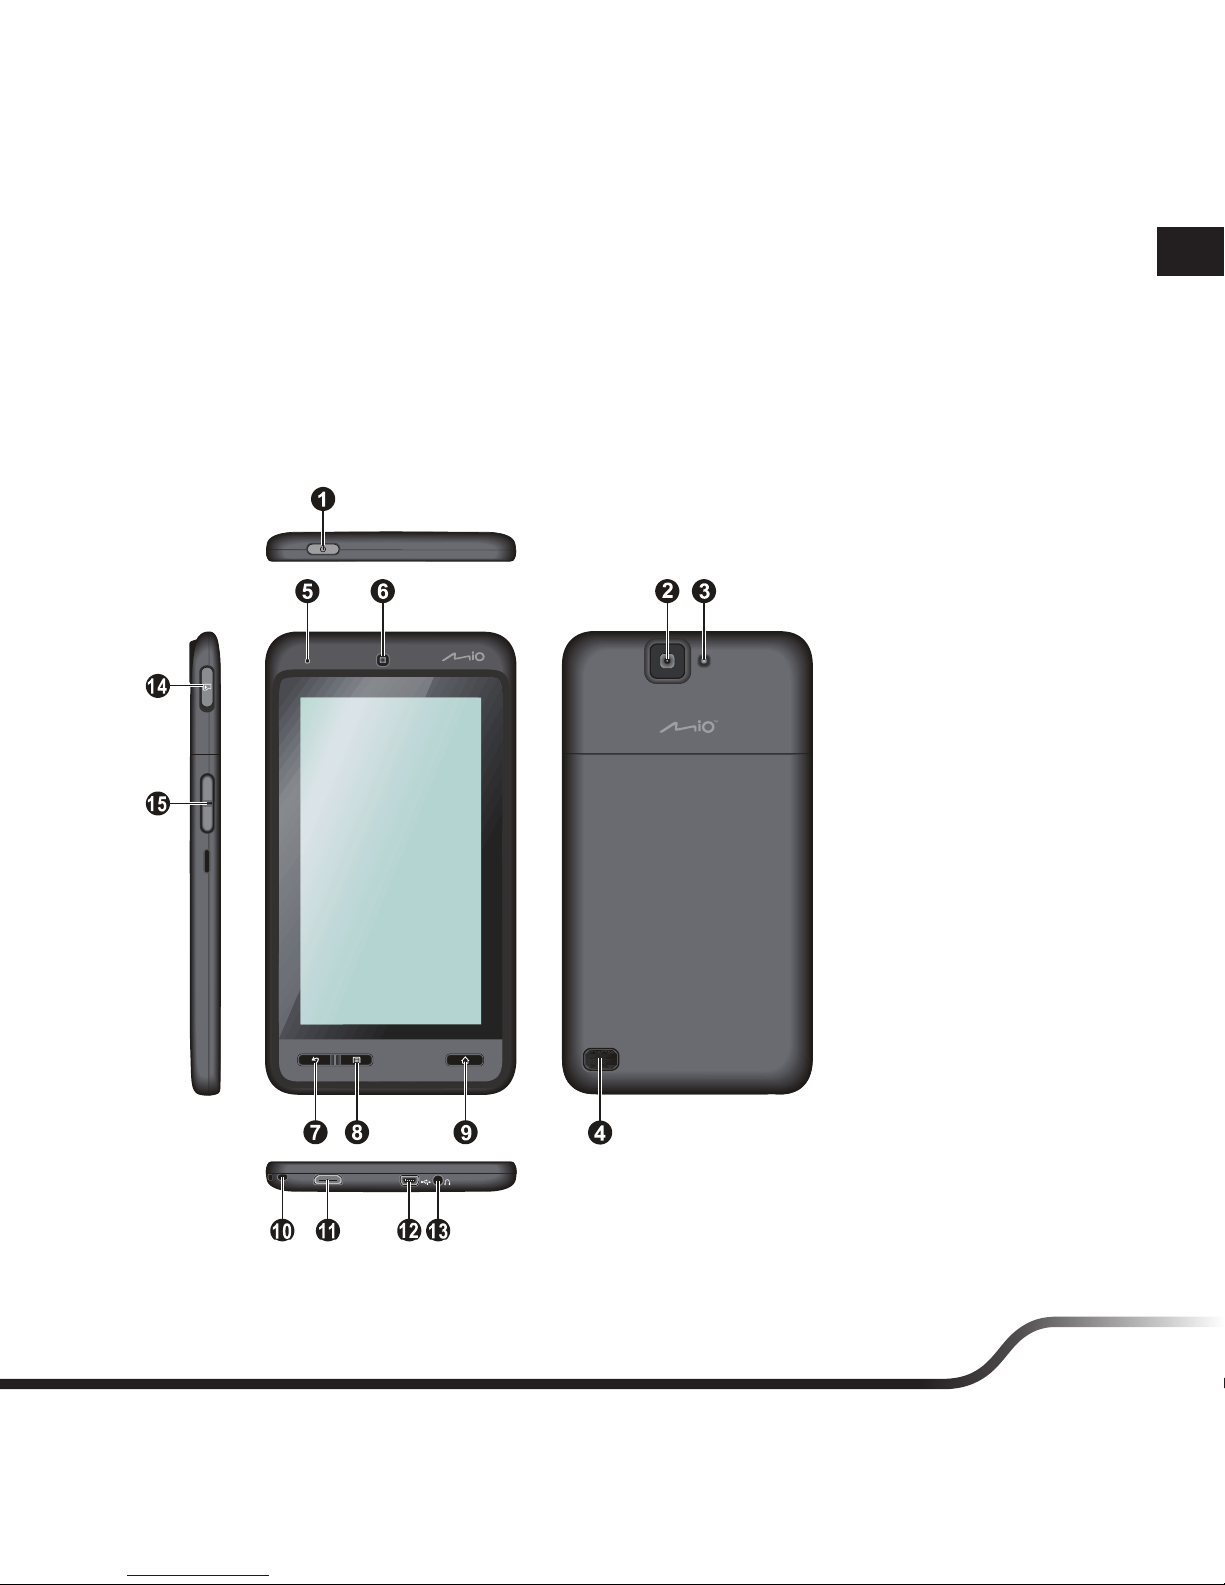
Knowing your device
1. POWER button
2. Rear camera
3. Flash
4. Haut-parleur
5. Microphone
6. Front camera
7. BACK button
8. MENU button
9. HOME button
10. Lanyard holder
11. HD connector
12. Mini-USB port
13. Headphone socket
14. Memory card slot
15. Volume buttons

2
en
Getting started
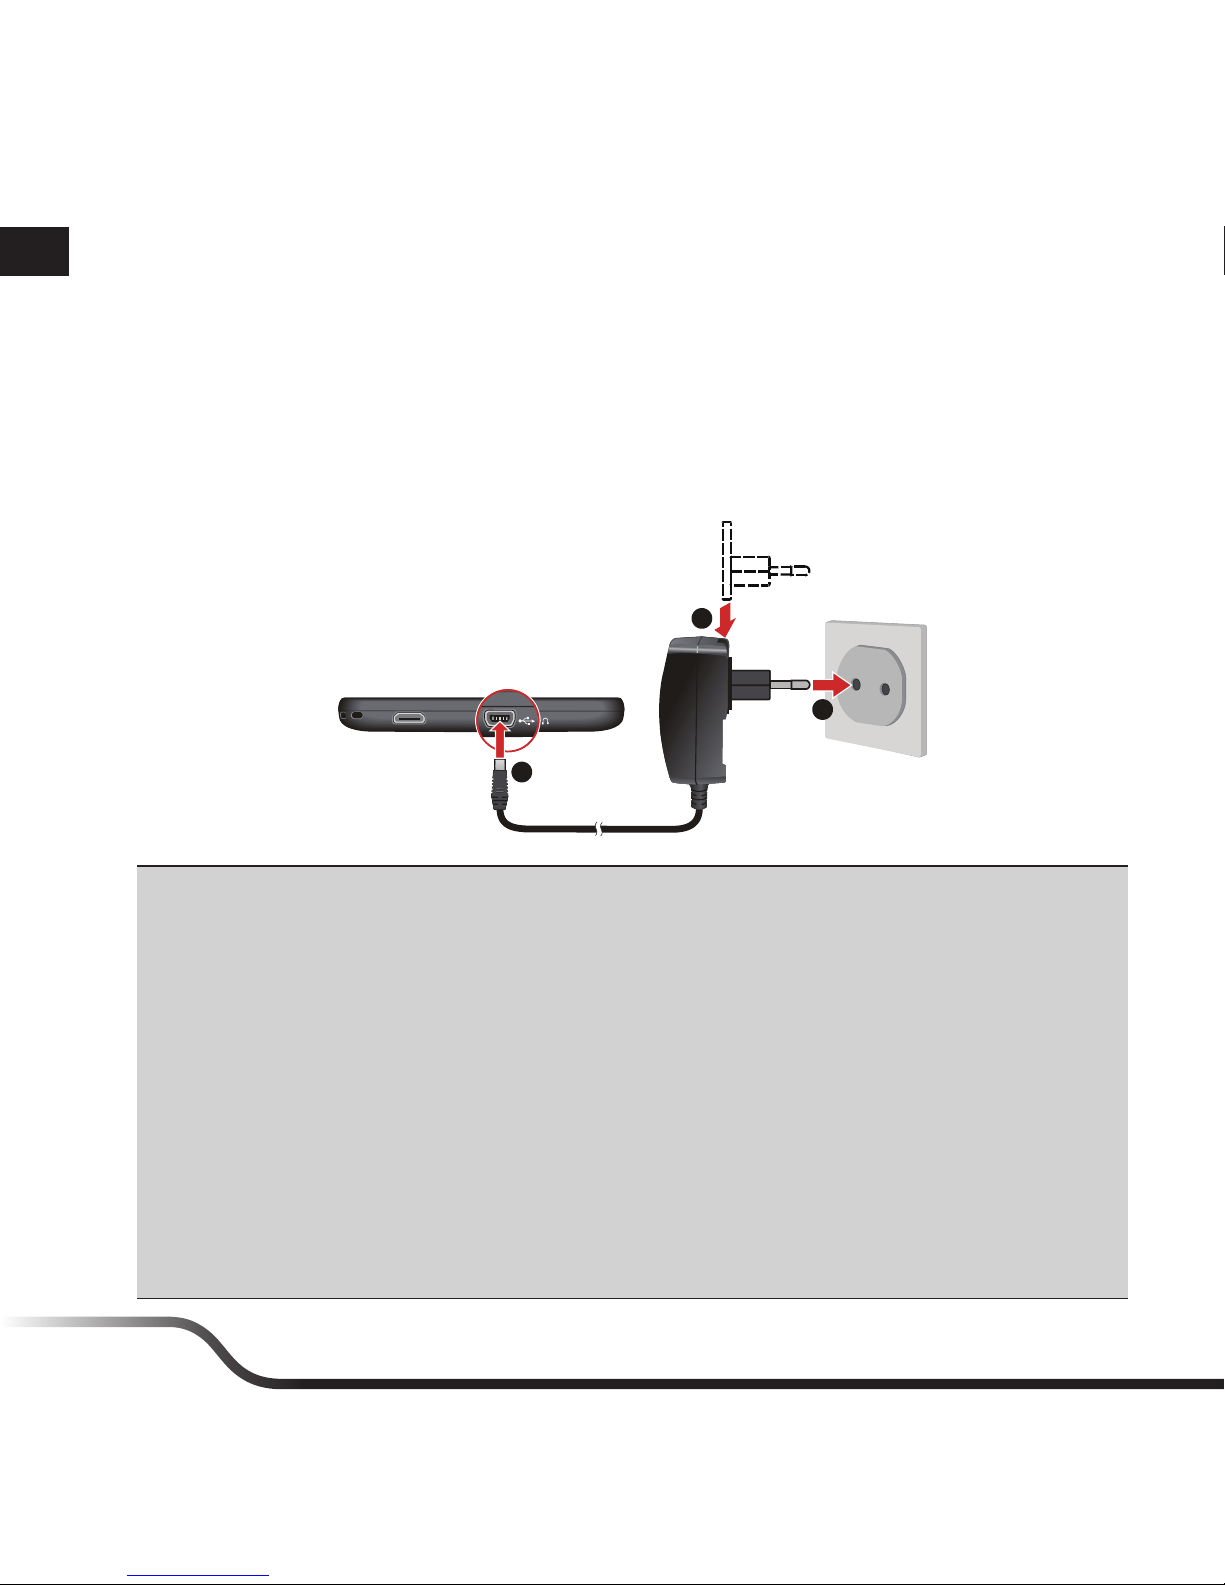
Charging the battery
Your device has an internal battery that may not be fully charged when you purchase it. You should
charge the battery for at least 8 hours before you start using it for the very first time.
To charge the battery, plug the home charger cable into the USB connector on the bottom of your
device and the mains power charger into the power socket.
1
3
2
CAUTION!
For optimal performance of the lithium battery, note the following:
• Do not charge the battery where the temperature is high (e.g. in direct sunlight). The battery
will stop charging when the ambient temperature is less than -10ºC (14ºF) or more than 60ºC
(140ºF).
• Recharge the battery when it is nearly discharged. When recharging, make sure that the battery
is fully charged. Doing so can extend the battery life.
• If the device has not been used for over a month or if you find the discharge/recharge time has
been shortened, be sure to fully discharge the battery first before recharging it. You are also
advised to fully discharge and recharge the battery once every 1~2 months.
• Failure to follow the battery usage instructions can cause damage to your device, battery and
even bodily injury or property damage and will void the warranty.
3
en
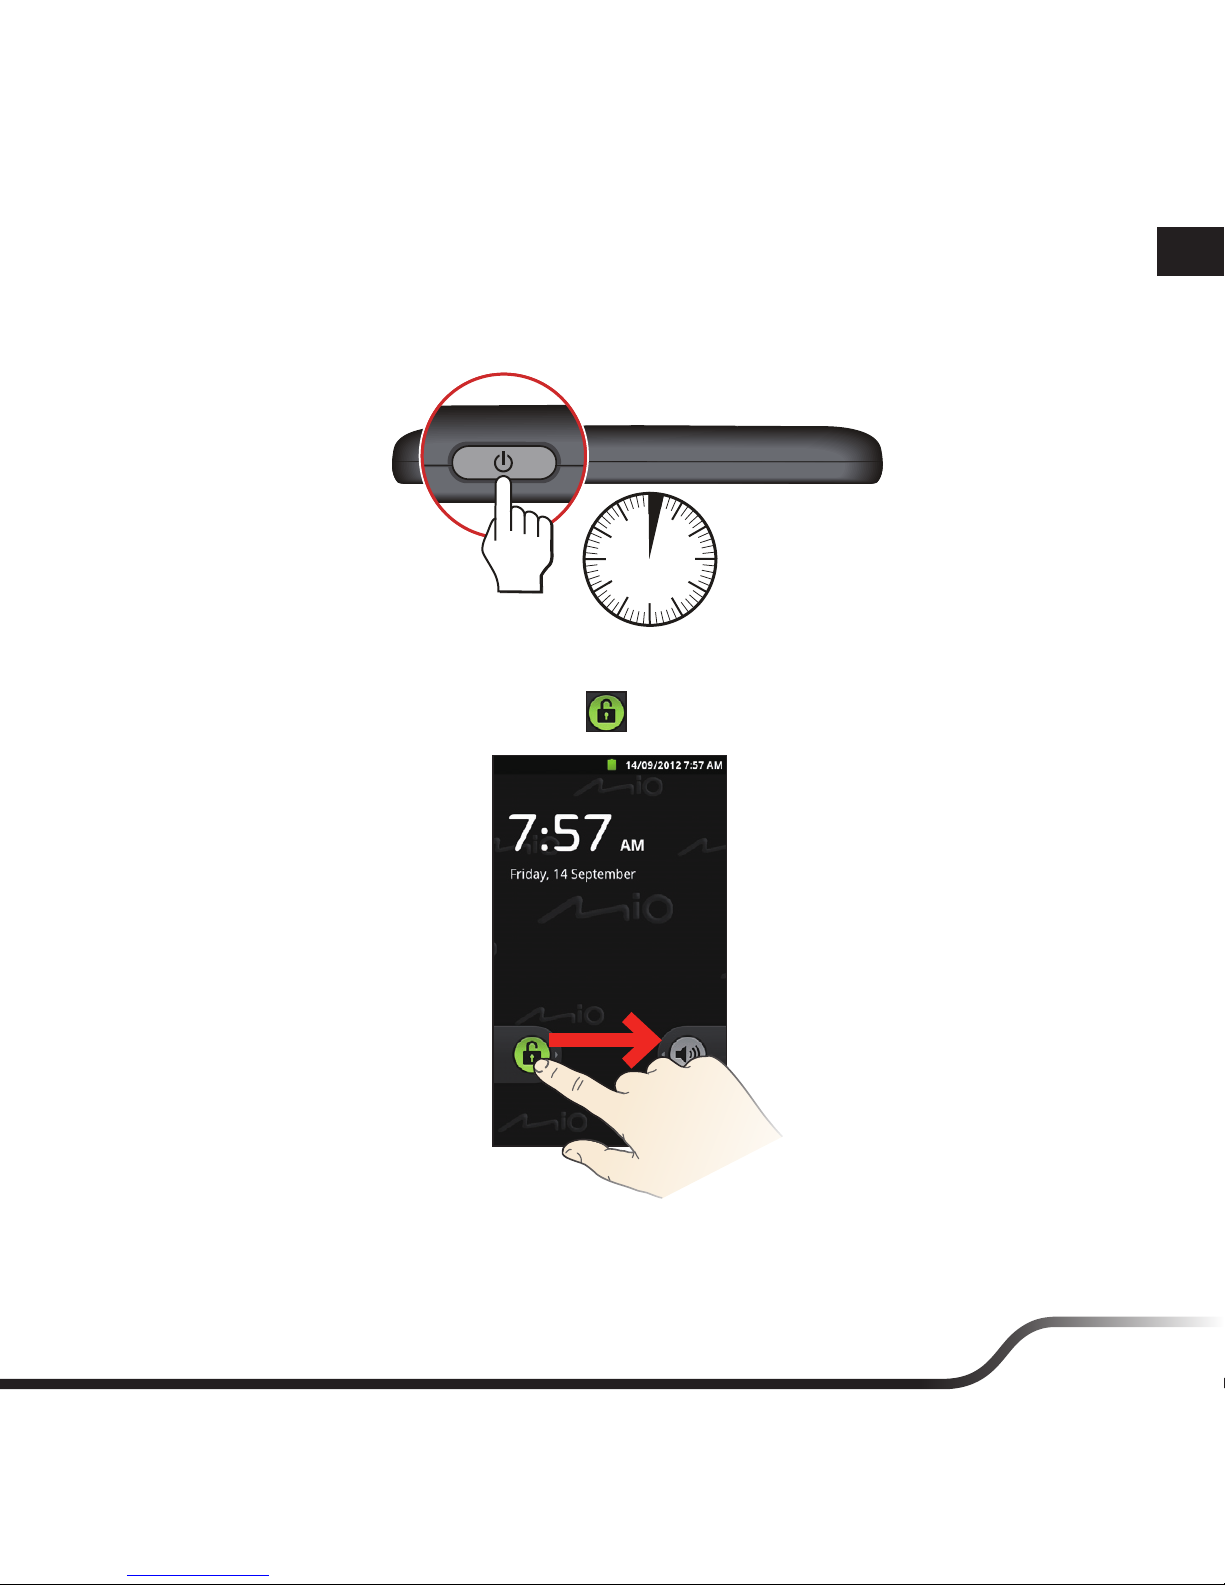
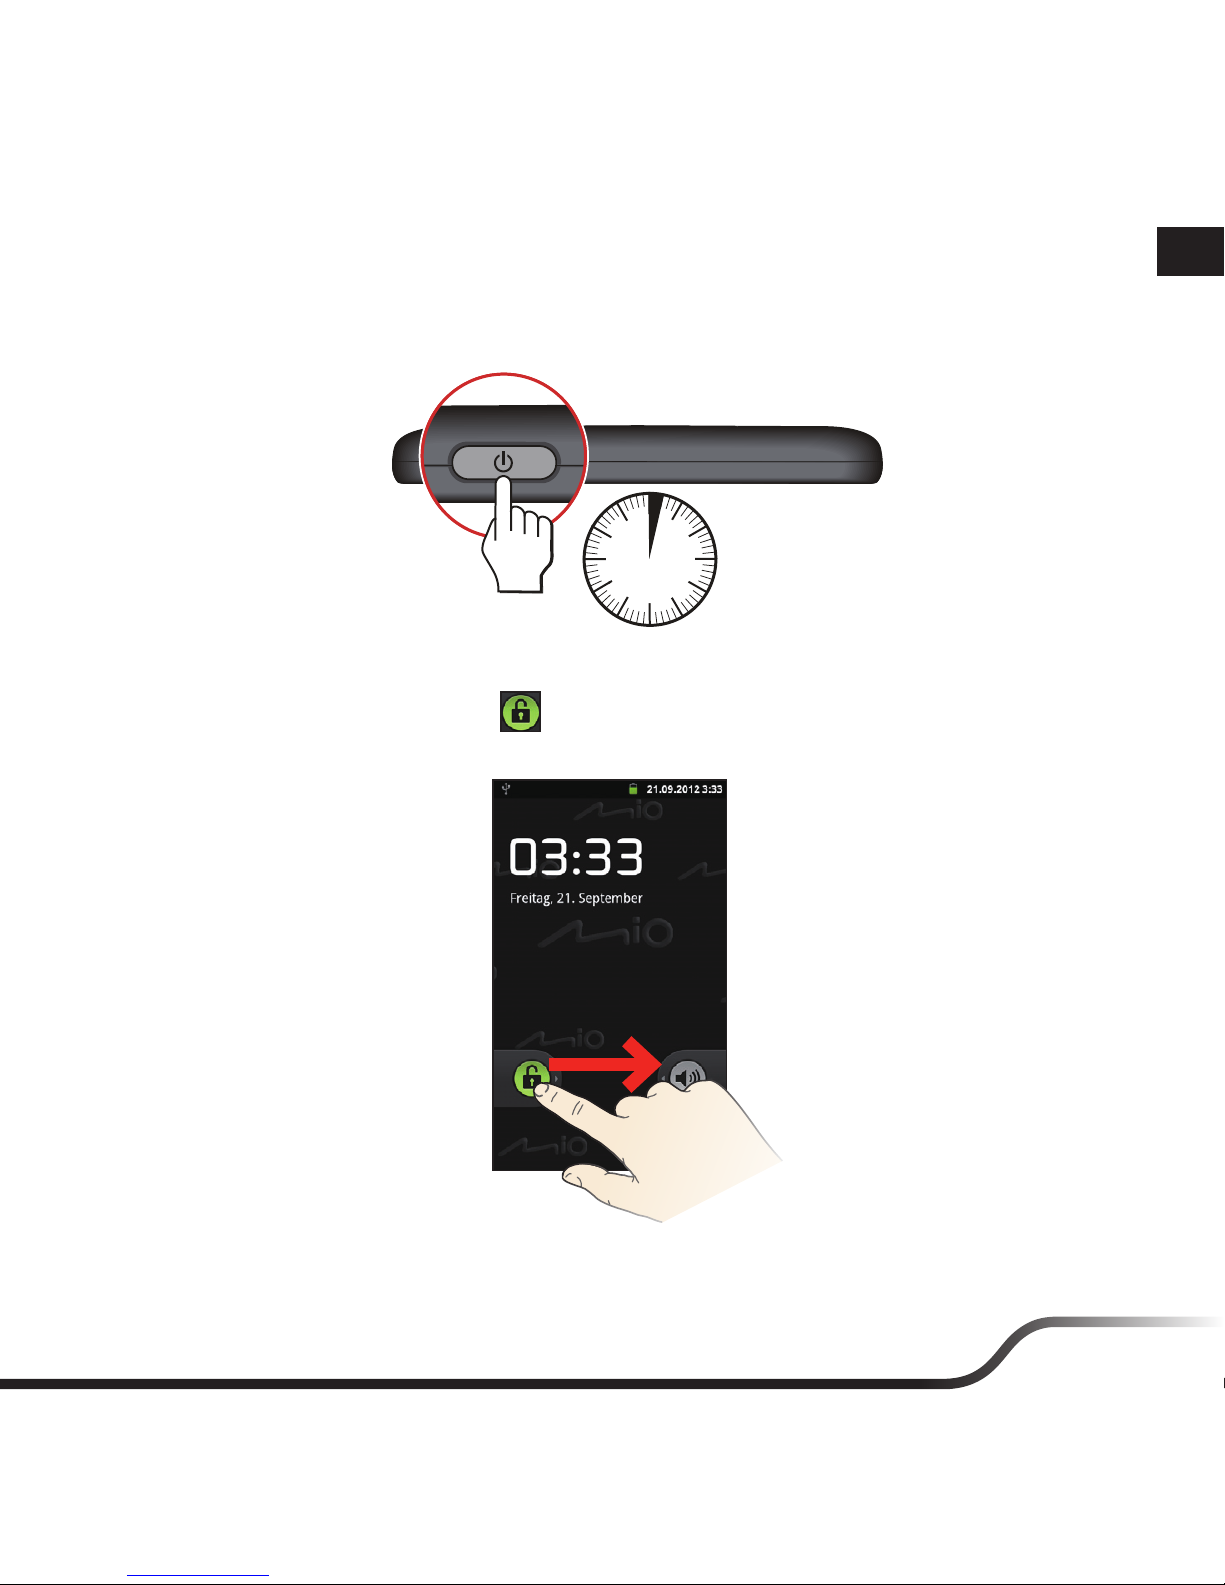
Performing the initial start-up
1. Press and hold the POWER button for 2 seconds to turn the device on.
2 sec
2. The Home screen will be displayed and the device is in Lock mode by default.
3. To unlock the device, drag the Lock icon (
) to the right. You can now use your device.
4
en
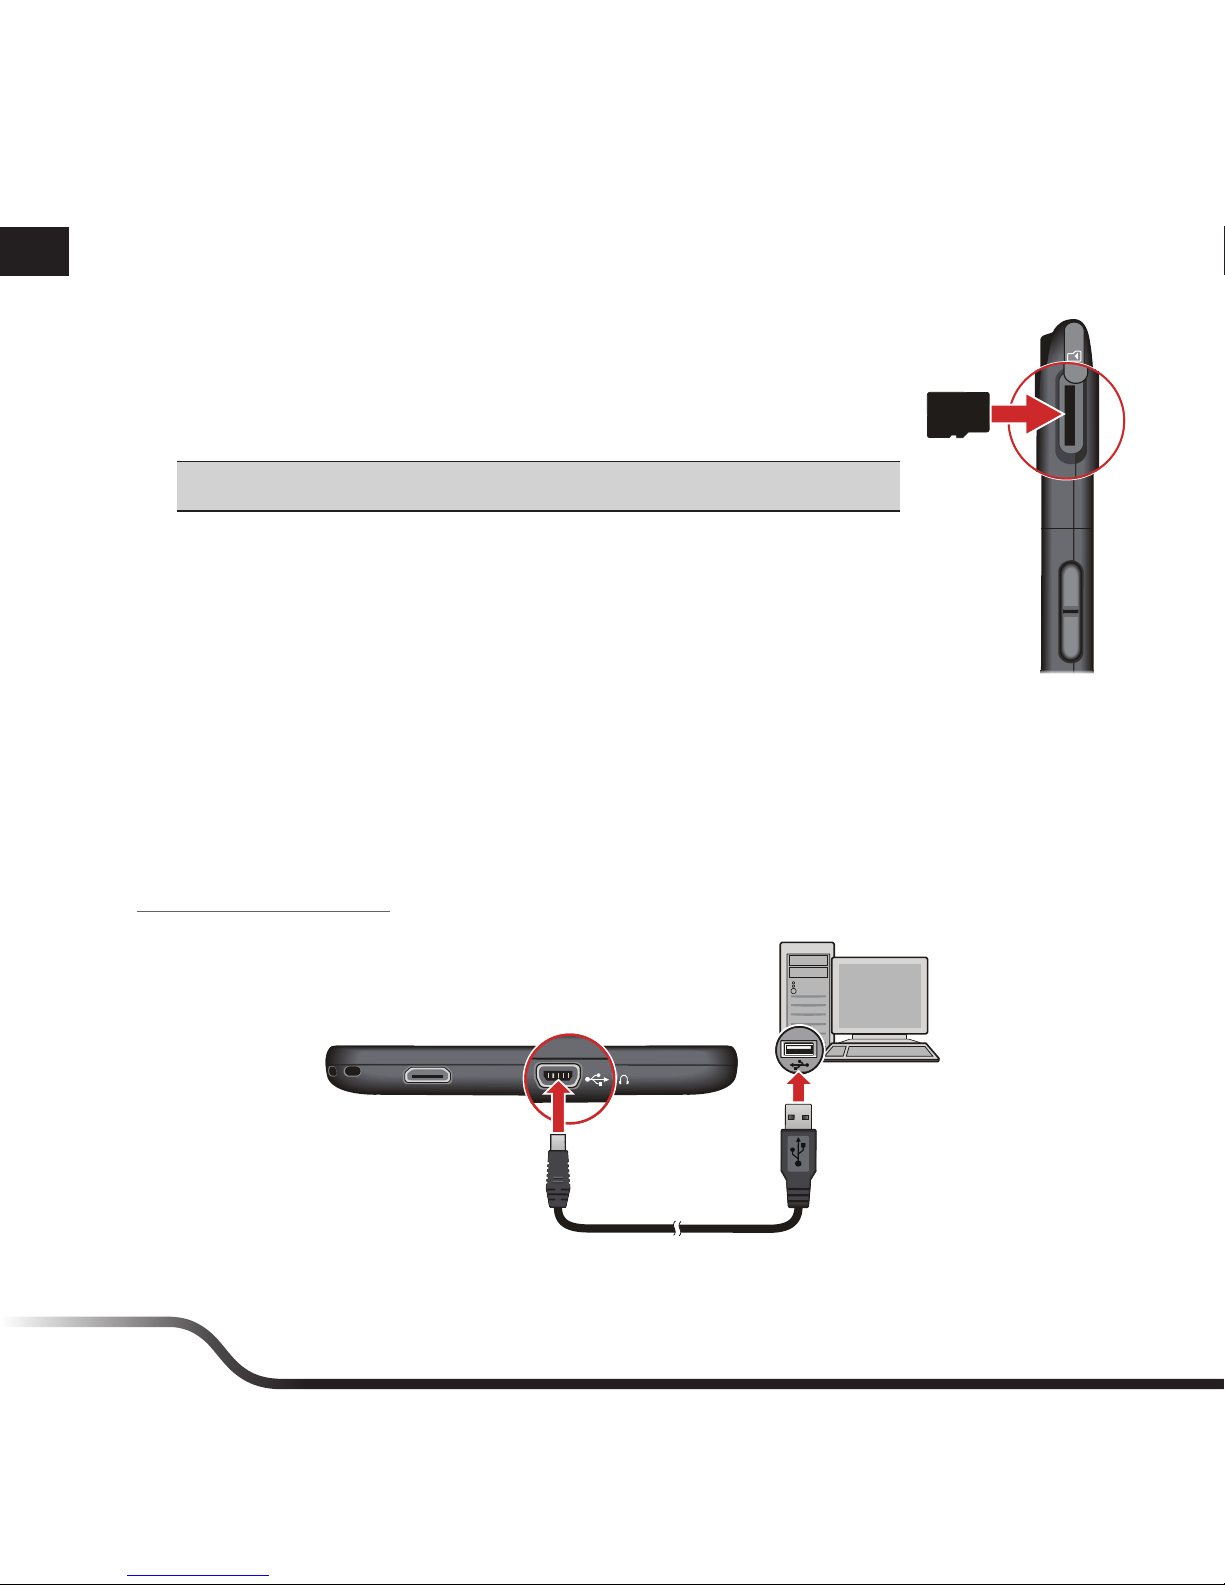
Installing the memory card
1. Open the cover on the left side of the device to locate the memory card
slot.
2. Hold the microSD card by the edges and gently insert it into the slot with
the label facing the front of your device.
CAUTION! Do not apply pressure to the centre of the memory card.
3. To remove a card, gently push the top edge of the card inwards to release
it, and then pull it out of the slot.
IMPORTANT! Before removing the memory card, you are recommended to
unmount it from the system. To unmount the memory card, tap Storage >
Unmount memory card from the Settings menu.
Connecting your device to a computer
Connect the mini-USB end of the USB cable to your device and the other end to a USB port in your
computer.
Tip: If this is the first time you connect the device to your computer, you need to install the USB
driver on your computer when prompted. The device’s USB driver is available from Mio’s website:
http://miowork.mio.com/
5
en
Operating basics
Using the POWER button
• Turning on the device
Press and hold the POWER button for 2 seconds to turn it on.
• Switching on/off the screen
Your device will automatically switch off the screen after 2 minutes (by default) of inactivity.
You can manually switch off the screen by pressing the POWER button briefly.
To turn the screen on, press the POWER button briefly and then unlock the device by dragging
the Lock icon (
) to the right.
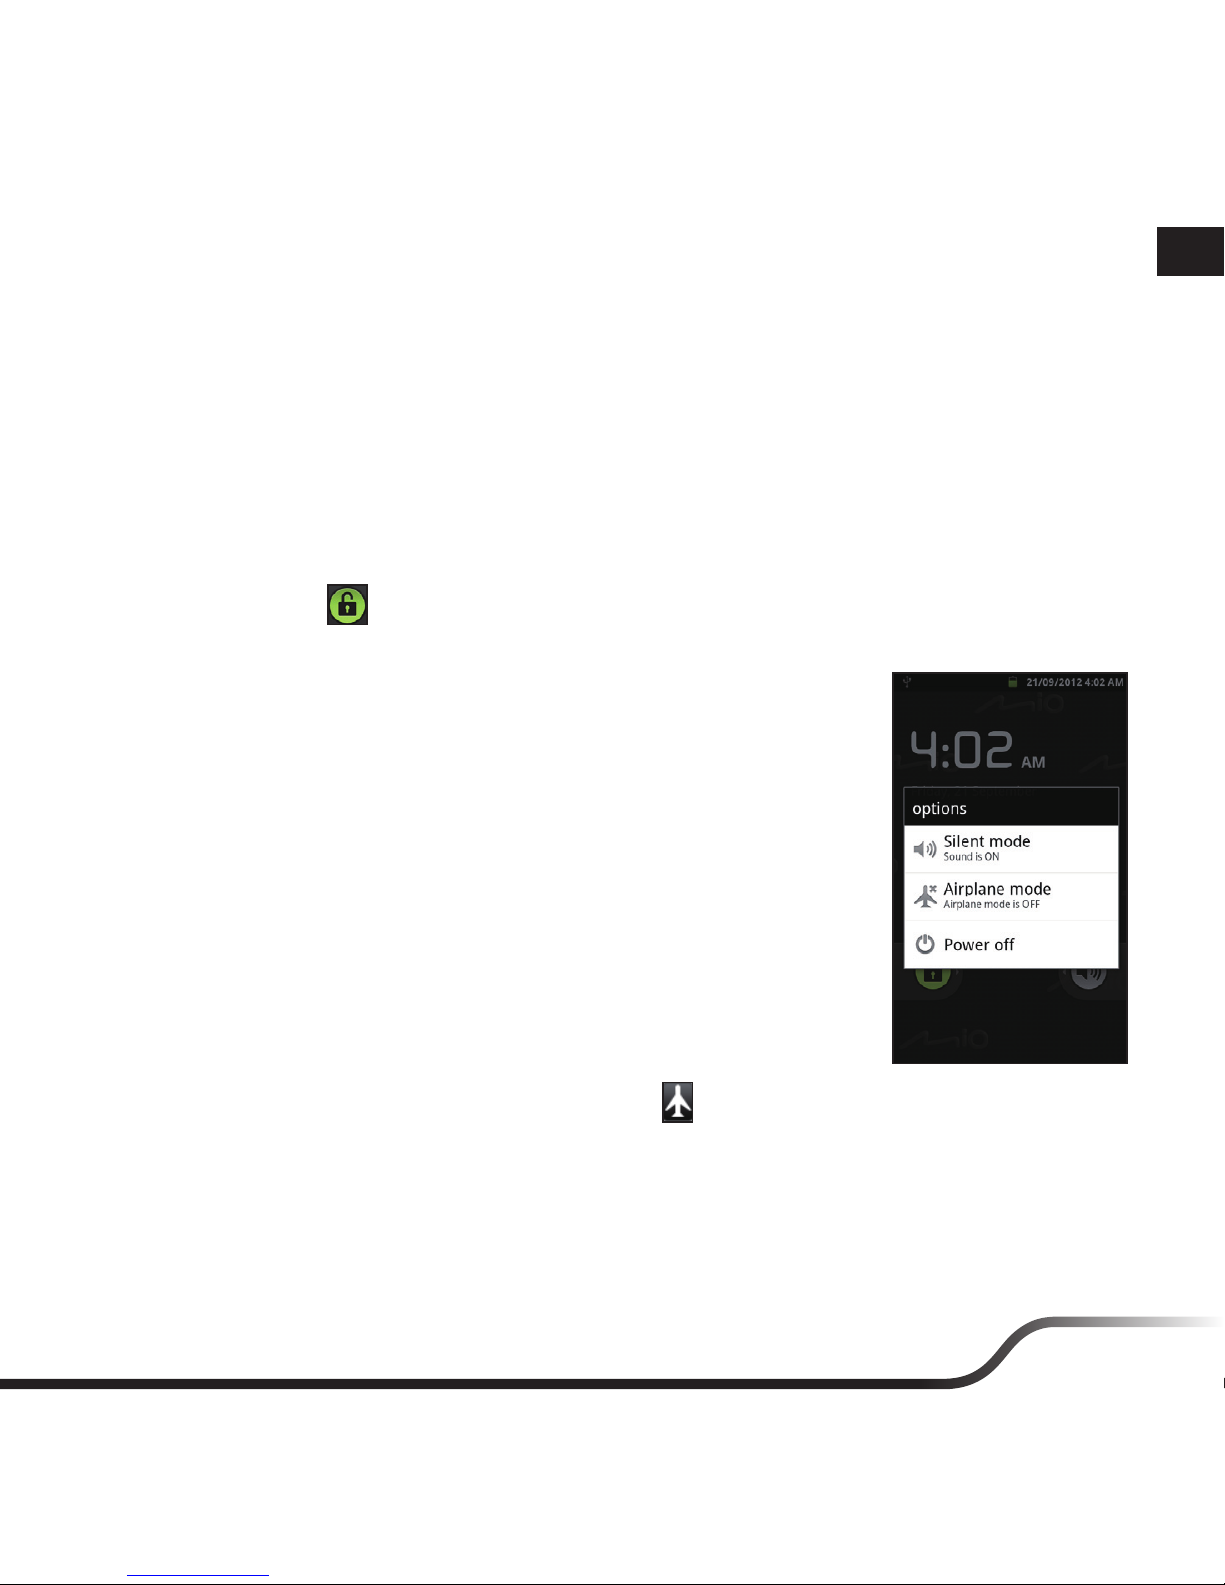
• Turning off the device
If you are not using your device, follow these steps to turn the device
off:
1. Press and hold the POWER button for 2 seconds to open the
options window.
2. Tap the Power off option and then tap OK to turn the device off.
• Using the device in Airplane mode
When you are in an airplane or in the area where the use of wireless
radio is prohibited, enable the Airplane mode. Many of your devices
applications will continue to work (e.g. playing games or listening
music) but all wireless radios, including wireless network and
Bluetooth, on the device are turned off – it cannot send or receive
data.
1. Press and hold the POWER button for 2 seconds to open the
options window.
2. Tap Airplane mode. The Airplane mode icon (
) appears in the
status bar indicating that Airplane mode is on.
6
en
Navigating on the screen
To operate your device, touch the screen with your fingertip. You can perform the following actions:
• Tap
Touch the screen once with your fingertip to open items or select onscreen buttons or options.
• Tap and hold
Tap and hold on the desired item to open the pop-up menu that contains the available options
for the item.
• Drag
Tap and hold on the item and then move it to the target position without releasing your fingertip.
• Slide
Drag to the left/right (or the top/bottom) to switch to the next/previous item on the list.
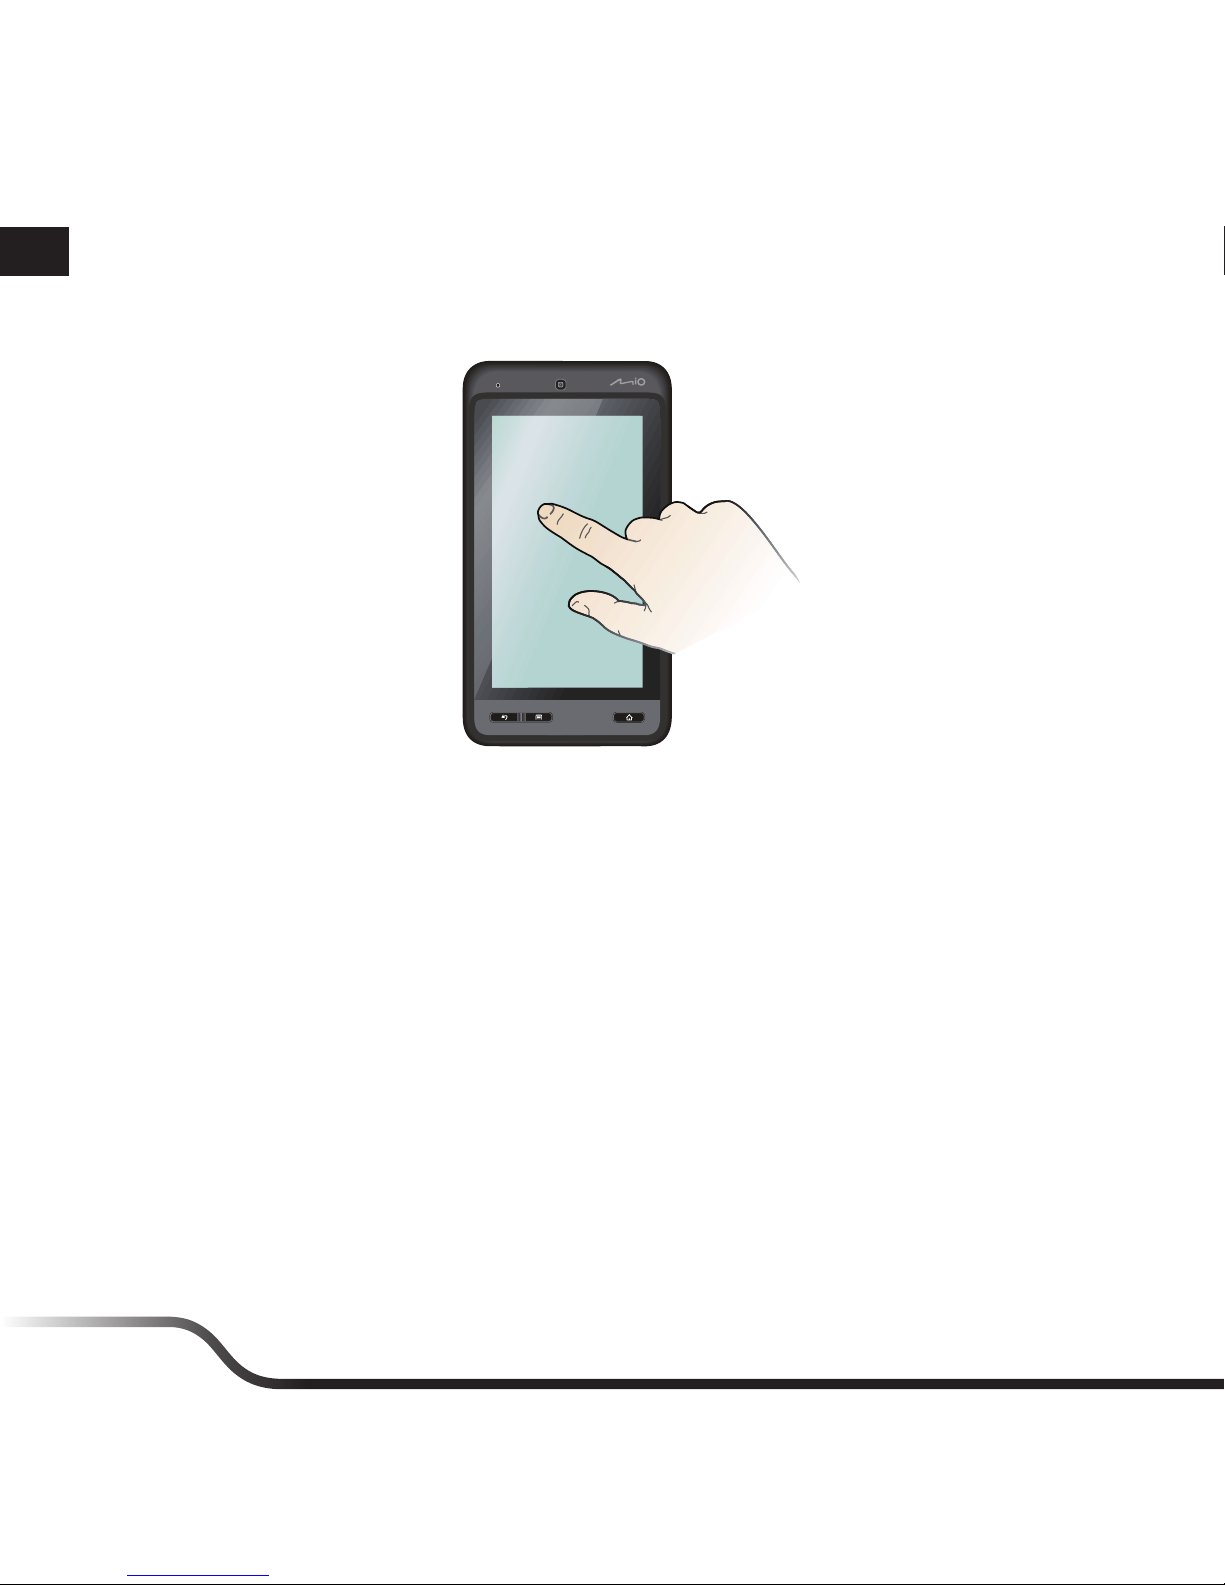
• Multi-touch gestures
Move your fingertips apart or together on the screen to zoom in or out while viewing a picture or
a web page.
• Rotating the screen
For most applications, you can automatically change the screen orientation (from portrait to
landscape, and vise versa) by turning the device sideways.

7
en
Home screen
The Home screen is your starting place for tasks, providing quick access to frequently used
applications and settings.
Tip: To display the Home screen, press the HOME button on your device at any time.
Status Bar
Desktop
Shortcuts
Widgets
All Applications
button
Quick Launcher
buttons

8
en
Customising your device
You can customise the device through the Settings menu, including personalising the Home screen,
changing the display and sound settings, configuring the connection settings, and more.
Accessing the Settings menu
From the desktop, do one of the following to access the Settings menu:
• Tap the All Applications button (
) > Settings.
• Press the MENU button and then tap Settings.
Getting connected
Your device can access the Internet through wireless networks. You can also connect to the other
devices to share files via Bluetooth.
• WLAN
WLAN is a term used for certain types of wireless local area networks, which lets you access
the Internet through a wireless connection. To use WLAN on your device, you need access to a
wireless access point.
1. From the Settings menu, tap Wireless & networks.
2. Tap the WLAN option to turn WLAN on. The device will automatically scan for available
wireless networks.
3. Tap the WLAN settings option to display the network names and security settings (Open
network or Secured with WEP) of the detected wireless networks. The available wireless
networks will be listed in the WLAN networks section.
9
en
4. Tap a wireless network to connect.
• If you selected an open network, you will be automatically connected to the network.
• If you selected a network that is secured with WEP, enter the key and then tap Connect.
5. When your device is connected to a wireless network, the WLAN icon (
) will appear in
the Status Bar indicating the signal strength (number of bands that light up).
The next time your device connects to a previously accessed secured wireless network, you will
not be prompted to enter the WEP key again, unless you reset your device to its factory default
settings.
• Bluetooth
Bluetooth on your device operates in three different modes:
• Off: (default) Bluetooth is turned off. You cannot send/receive data using Bluetooth.
• Discoverable: Bluetooth is turned on, and all other Bluetooth-enabled devices can detect your
device.
• On: Bluetooth is turned on, and the device will be able to detect the other Bluetooth-enabled
devices, but not vice versa.
To turn Bluetooth on:
a. From the Settings menu, tap Wireless & networks.
b. Tap the Bluetooth option to turn Bluetooth on. When Bluetooth is turned on, the
Bluetooth icon (
) appears in the Status Bar.
To pair the Bluetooth devices:
1. From the Settings menu, tap Wireless & networks > Bluetooth settings.
Tip: Tap Discoverable to make the device discoverable to other Bluetooth devices that are
within range
2. From the Bluetooth settings screen, tap Scan for devices. Your device will start scanning and
then display a list of in-range Bluetooth devices.
3. Tap a device from the list to initiate pairing.
4. When prompted, enter the PIN code and then tap OK.
5. On the other device, enter your device’s PIN code to accept the pairing.
6. Once the pairing is completed, you can now start sharing data between the devices.
10
en
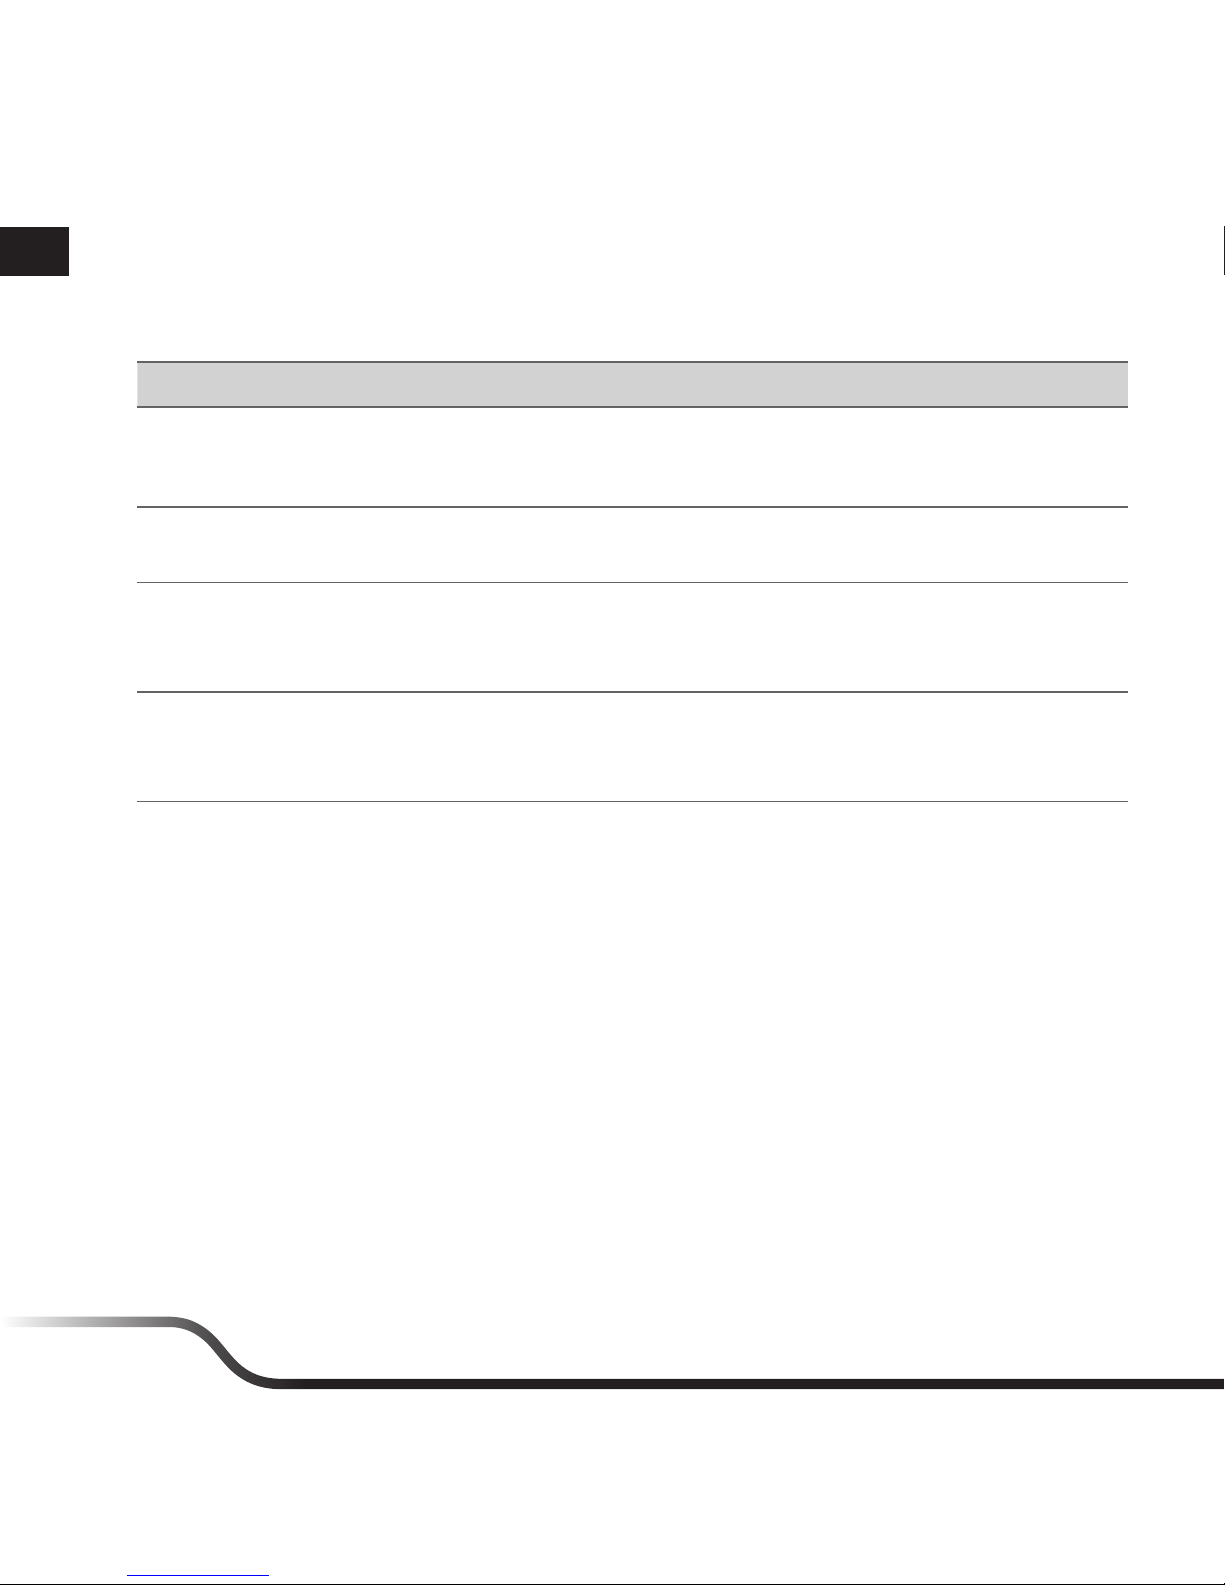
Managing the available memory
You can check and manage the device memory, including the external and internal memory.
If you want to... Then...
Check the memory status, 1. From the Settings menu, tap Storage.
2. Check the memory status from the following section: Memory
card, Data storage, and Internal storage.
Remove applications, 1. From the Settings menu, tap Applications > Manage applications.
2. Select the application you want to remove and then tap Uninstall.
Stop running services, 1. From the Settings menu, tap Applications > Running services.
2. Select the process item you want to stop.
3. Read the warning message and then tap Stop.
Erase the device contents, 1. From the Settings menu, tap Privacy > Factory data reset.
2. Read the warning message and then tap Reset device.
3. Tap Erase Everything.

11
en
For more information
Support
Please regularly check the website http://miowork.mio.com/ for more information.
Regulatory information
For regulatory identification purposes, MioWORK Z100 is assigned a model number of N379.
Marking labels located on the exterior of your device indicate the regulations that your model
complies with. Please check the marking labels on your device and refer to the corresponding
statements in this section. Some notices apply to specific models only.
Products with the CE marking comply with Radio & Telecommunication Terminal Equipment
Directive (R&TTE) (1999/5/EC), the Electromagnetic Compatibility Directive (2004/108/EC) and
the Low Voltage Directive (2006/95/EC) - issued by the Commission of the European Community.
Compliance with these directives implies conformity to the following European Standards:
EN 301 489-1: Electronic compatibility and Radio spectrum Matters (ERM), Electromagnetic
Compatibility (EMC) standard for radio equipment and services; Part 1: Common technical
requirements.
EN 301 489-17: Electronic compatibility and Radio spectrum Matters (ERM), Electromagnetic
Compatibility (EMC) standard for radio equipment and services; Part 17: Specific conditions for 2.4
GHz wideband transmission systems and 5 GHz high performance RLAN equipment.
EN 300 328: Electromagnetic compatibility and Radio spectrum Matters (ERM); Wideband
Transmission systems; Data transmission equipment operating in the 2.4 GHz ISM band and using
spread spectrum modulation techniques; Harmonized EN covering essential requirements under
article 3.2 of the R&TTE Directive.
EN 50332: Prolonged listening of music in maximum volume can damage the ears.
EN 55022: Radio disturbance characteristics
EN 55024: Immunity characteristics
EN 61000-3-2: Limits for harmonic current emissions
EN 61000-3-3: Limitation of voltage fluctuation and flicker in low-voltage supply system
IEC 60950-1/A1:2009: Product Safety
The manufacturer cannot be held responsible for modifications made by the User and the
consequences thereof, which may alter the conformity of the product with the CE Marking.
12
en
Declaration of Conformity
Hereby, Mio Technology declares that this N379 is in compliance with the essential requirements and
other relevant provisions of Directive 1999/5/EC.
Bluetooth
Bluetooth QD ID B018158
SAR information
The radio wave exposure guidelines employ a unit of measurement known as the Specific Absorption
Rate (SAR), which adopts the limit of 2 W/kg averaged over ten (10) gram of tissue. Your device has
been designed to comply with applicable safety requirements for exposure to radio waves.
SAR < 0.306 W/kg
WEEE
This product must not be disposed of as normal household waste, in accordance with the
EU directive for waste electrical and electronic equipment (WEEE - 2002/96/EC). Instead,
it should be disposed of by returning it to the point of sale, or to a municipal recycling
collection point.
de
13
Willkommen
Vielen Dank, dass Sie ein Mio-Produkt erworben haben. Diese Schnellstartanleitung führt Sie
durch die erfolgreiche Einrichtung Ihres Gerätes und stellt Ihnen grundlegende Fähigkeiten der
Gerätenutzung vor.
Ihr neues Gerät
1. Ein-/Austaste
2. Rückseitige Kamera
3. Blitz
4. Lautsprecher
5. Mikrofon
6. Frontseitige Kamera
7. Zurück-Taste
8. Menü-Taste
9. Startseite-Taste
10. Tragebandhalter
11. HD-Anschluss
12. Mini-USB-Port
13. Kopfhöreranschluss
14. Speicherkartenschlitz
15. Lautstärketasten
de
14
Erste Schritte
Akku laden
Ihr Gerät ist mit einem internen Akku ausgestattet, der beim Kauf eventuell nicht vollständig geladen
ist. Laden Sie den Akku mindestens 8 Stunden lang auf, bevor Sie das Gerät zum ersten Mal benutzen.
Schließen Sie zum Aufladen des Akkus das Kabel des Heimladegerätes am USB-Anschluss an der
Unterseite Ihres Gerätes und den Netzanschluss an eine Steckdose an.
1
3
2
VORSICHT!
Bitte beachten Sie zur Optimierung Ihrer Akkuleistung folgende Hinweise:
• Laden Sie den Akku nicht bei hohen Temperaturen auf (z. B. im direkten Sonnenlicht). Bei
Umgebungstemperaturen unter -10 °C und über 60 °C wird das Aufladen des Akkus ausgesetzt.
• Laden Sie den Akku nach, wenn er nahezu entleert ist. Achten Sie beim Aufladen darauf, dass
der Akku grundsätzlich komplett geladen wird. Auf diese Weise lässt sich die Akkulaufzeit
verbessern.
• Falls Sie das Gerät längere Zeit (länger als einen Monat) nicht genutzt haben oder deutlich
verkürzte Lade-/Entladezeiten bemerken, entleeren Sie den Akku unbedingt vollständig, bevor
Sie ihn wieder aufladen. Wir empfehlen, den Akku alle 1 – 2 Monate komplett zu entladen und
anschließend wieder vollständig aufzuladen.
• Bei Nichtbeachtung der Hinweise zum richtigen Umgang mit dem Akku können Beschädigungen
des Gerätes, des Akkus bis hin zu Sachschäden und Verletzungen eintreten; zusätzlich erlischt die
Garantie.
de
15
Zum ersten Mal einschalten
1. Halten Sie die Ein-/Austaste zum Einschalten des Gerätes 2 Sekunden gedrückt.
2 sec
2. Der Startbildschirm wird angezeigt, das Gerät ruft standardmäßig den Sperrmodus auf.
3. Ziehen Sie das Schloss-Symbol (
) zur Freigabe des Gerätes nach rechts. Jetzt können Sie Ihr
Gerät benutzen.
de
16
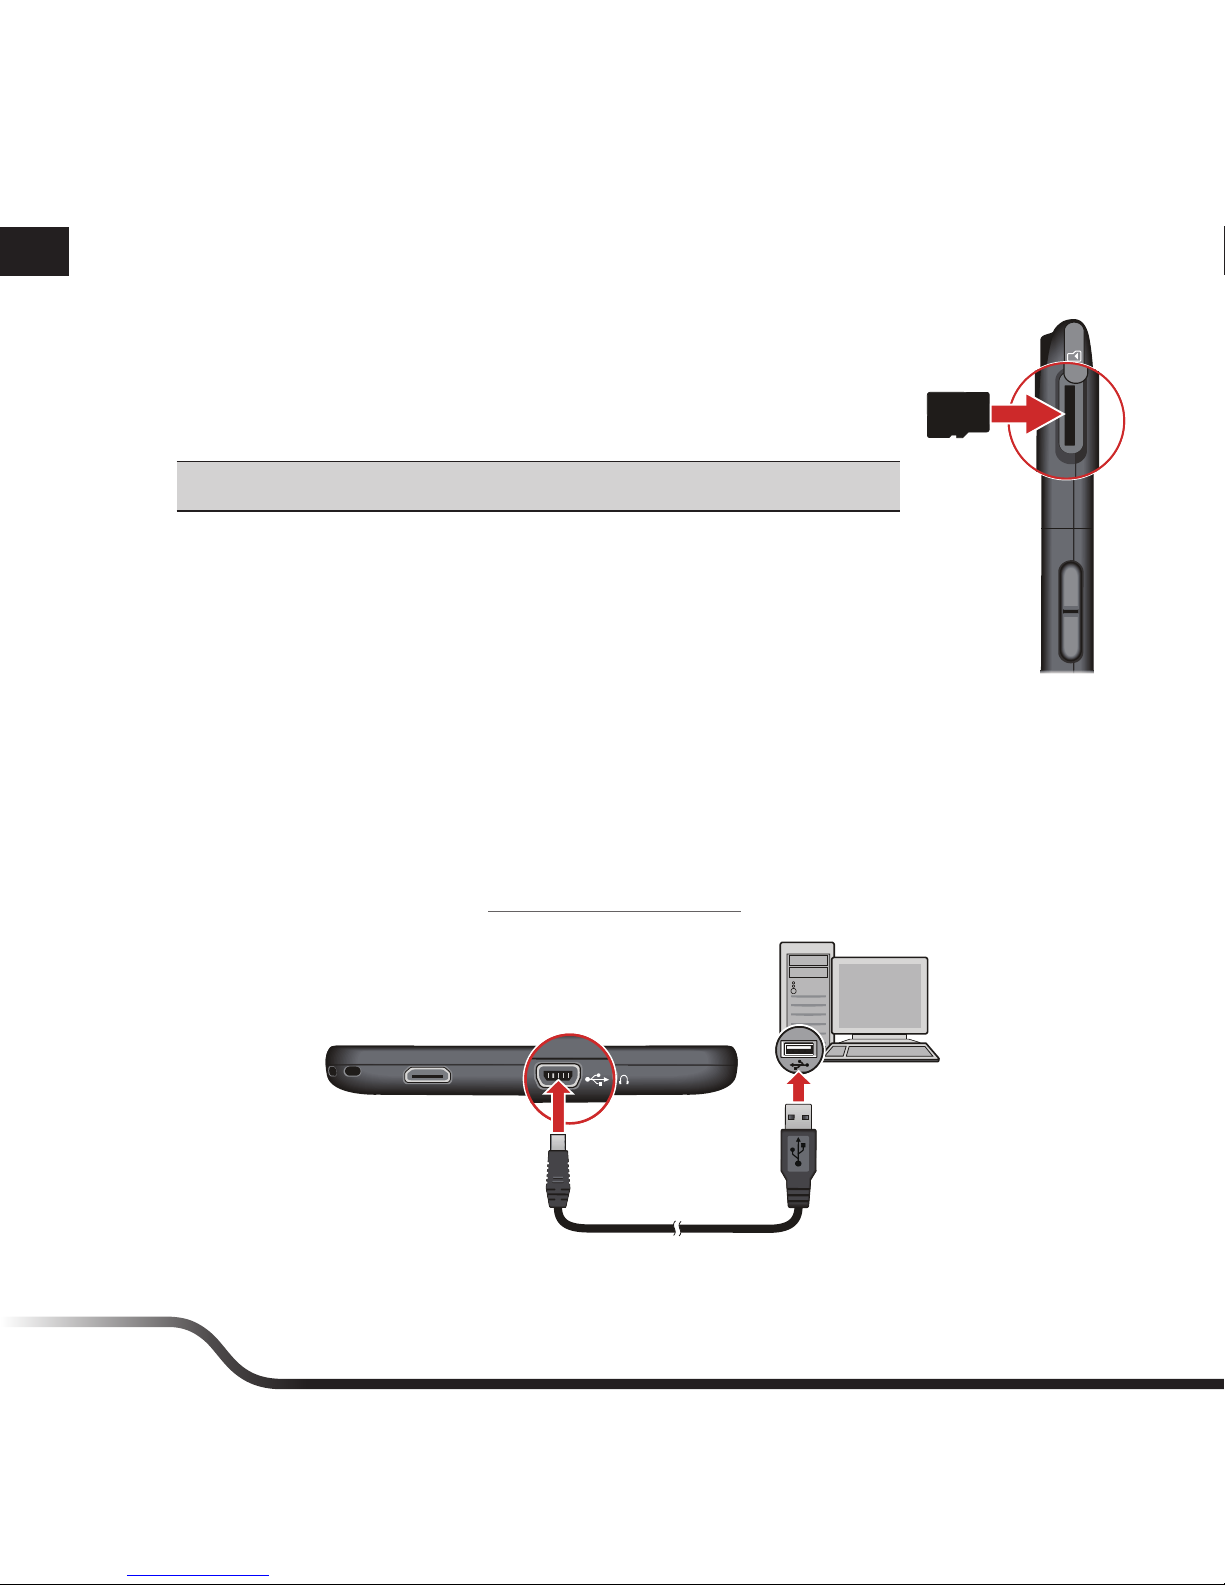
Speicherkarte installieren
1. Öffnen Sie die Abdeckung an der linken Geräteseite; darunter befindet sich
der Speicherkartenschlitz.
2. Halten Sie die microSD-Karte an den Kanten, stecken Sie sie vorsichtig in
den Schlitz, wobei das Etikett in Richtung Vorderseite Ihres Gerätes zeigt.
VORSICHT! Üben Sie keinen Druck auf die Mitte der Speicherkarte aus.
3. Drücken Sie zum Entfernen sanft auf die Kante der Karte; dadurch springt
diese ein Stück heraus. Ziehen Sie sie aus dem Steckplatz.
Wichtig! Bevor Sie die Speicherkarte entfernen, sollten Sie sie aus dem
System auswerfen. Tippen Sie zum Auswerfen der Speicherkarte im
Einstellungsmenü auf Speicher > Speicherkarte auswerfen.
Ihr Gerät an einen Computer anschließen
Schließen Sie das Mini-USB-Ende des USB-Kabels an Ihr Gerät und das andere Ende an einen USBPort Ihres Computers an.
Tipp: Falls Sie das Gerät zum ersten Mal mit Ihrem Computer verbinden, müssen Sie den USB-Treiber
auf Ihrem Computer installieren, sobald Sie dazu aufgefordert werden. Der USB-Treiber des Gerätes
ist auf der Mio-Webseite verfügbar: http://miowork.mio.com/
de
17
Grundbedienung
Ein-/Austaste
• Gerät einschalten
Halten Sie die Ein-/Austaste zum Einschalten 2 Sekunden gedrückt.
• Bildschirm ein-/ausschalten
Ihr Gerät schaltet sich nach 2 Minuten (standardmäßig) Inaktivität aus. Sie können den
Bildschirm durch kurzes Drücken der Ein-/Austaste manuell ausschalten.
Drücken Sie zum Einschalten des Bildschirms kurz die Ein-/Austaste, geben Sie das Gerät dann
durch Ziehen des Schloss-Symbols (
) nach rechts frei.
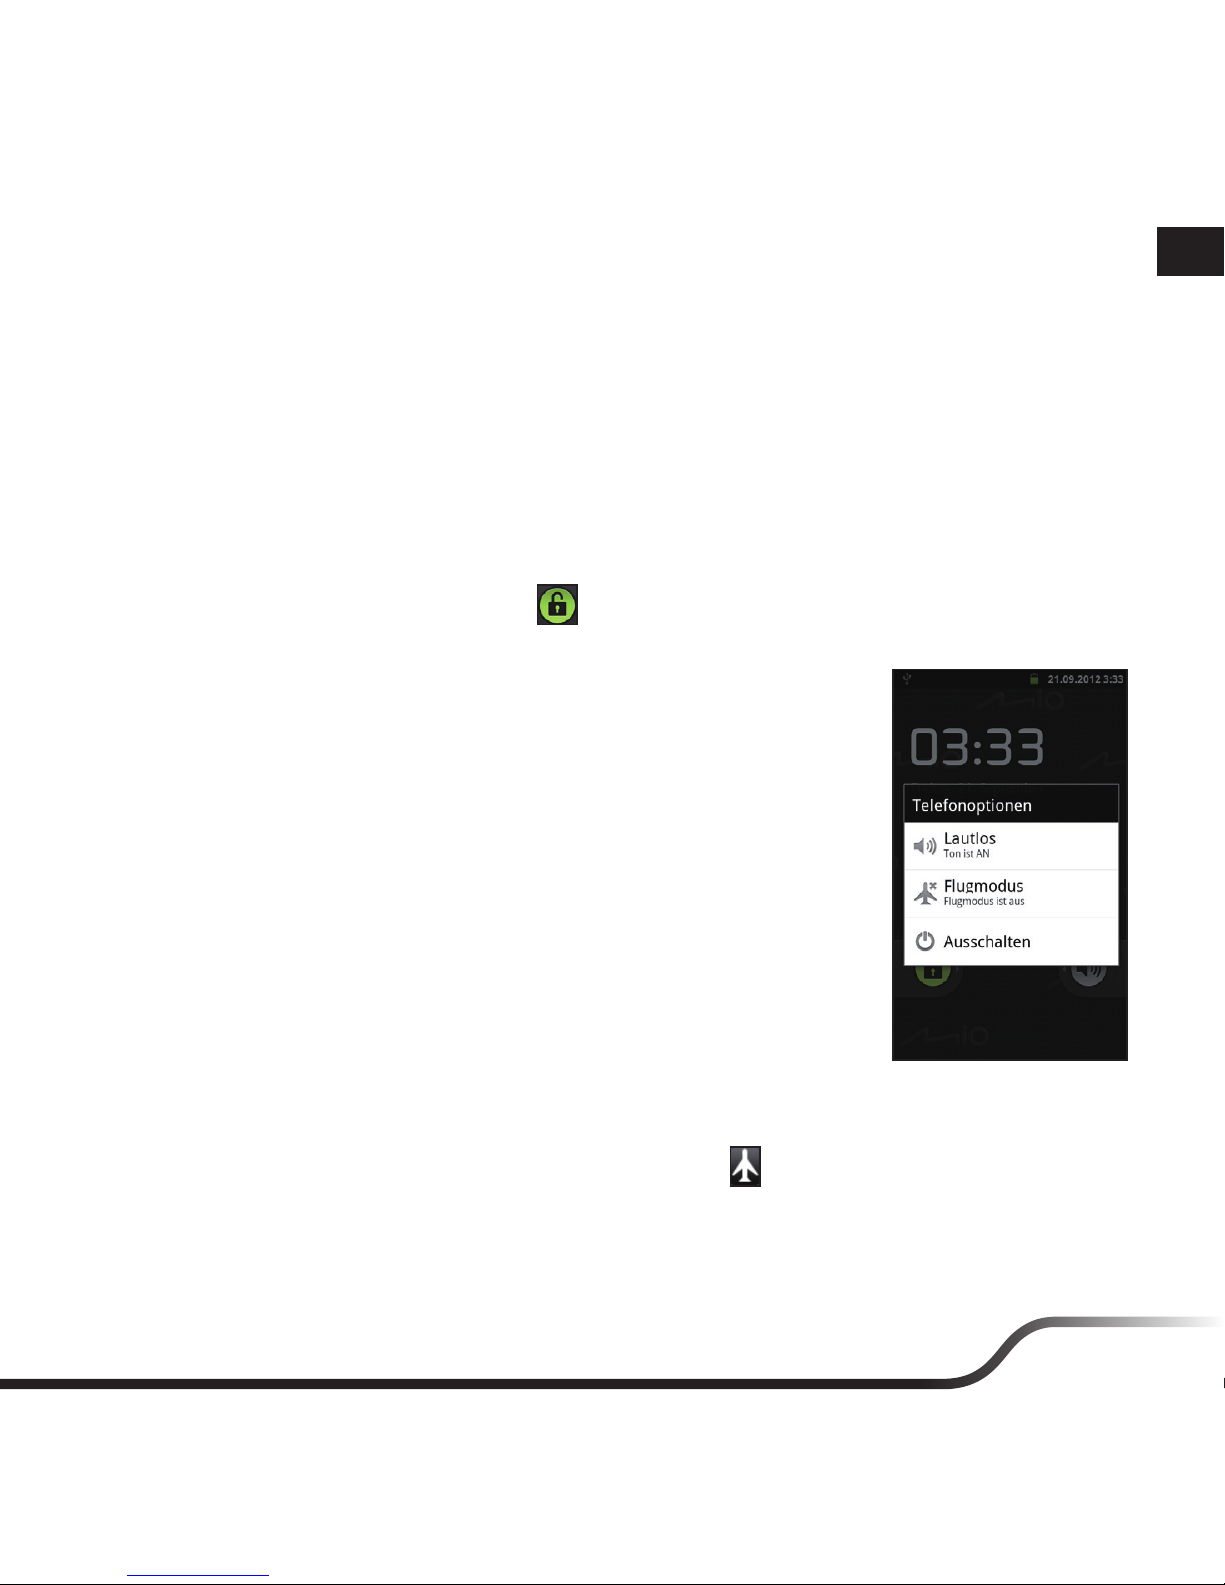
• Gerät abschalten
Falls Sie Ihr Gerät nicht benutzen, befolgen Sie zum Ausschalten diese
Schritte:
1. Halten Sie die Ein-/Austaste zum Öffnen des Optionen-Fensters 2
Sekunden.
2. Tippen Sie auf die Option Ausschalten und dann zum Abschalten
des Gerätes auf OK.
• Gerät im Flugzeugmodus verwenden
Wenn Sie sich in einem Flugzeug oder einer Umgebung befinden, in
der die Nutzung von Drahtlosfunk verboten ist, aktivieren Sie bitte
den Flugzeugmodus. Viele Ihrer Geräteanwendungen funktionieren
weiter (z. B. Spiele oder Musikwiedergabe), doch der gesamte
Drahtlosfunk am Gerät, inklusive WLAN-Netzwerk und Bluetooth,
wird ausgeschaltet – es können keine Daten empfangen oder gesendet
werden.
1. Halten Sie die Ein-/Austaste zum Öffnen des Optionen-Fensters 2
Sekunden.
2. Tippen Sie auf Flugmodus. Das Flugmodus-Symbol (
)
erscheint in der Statusleiste und zeigt an, dass der Flugzeugmodus
aktiviert ist.
de
18
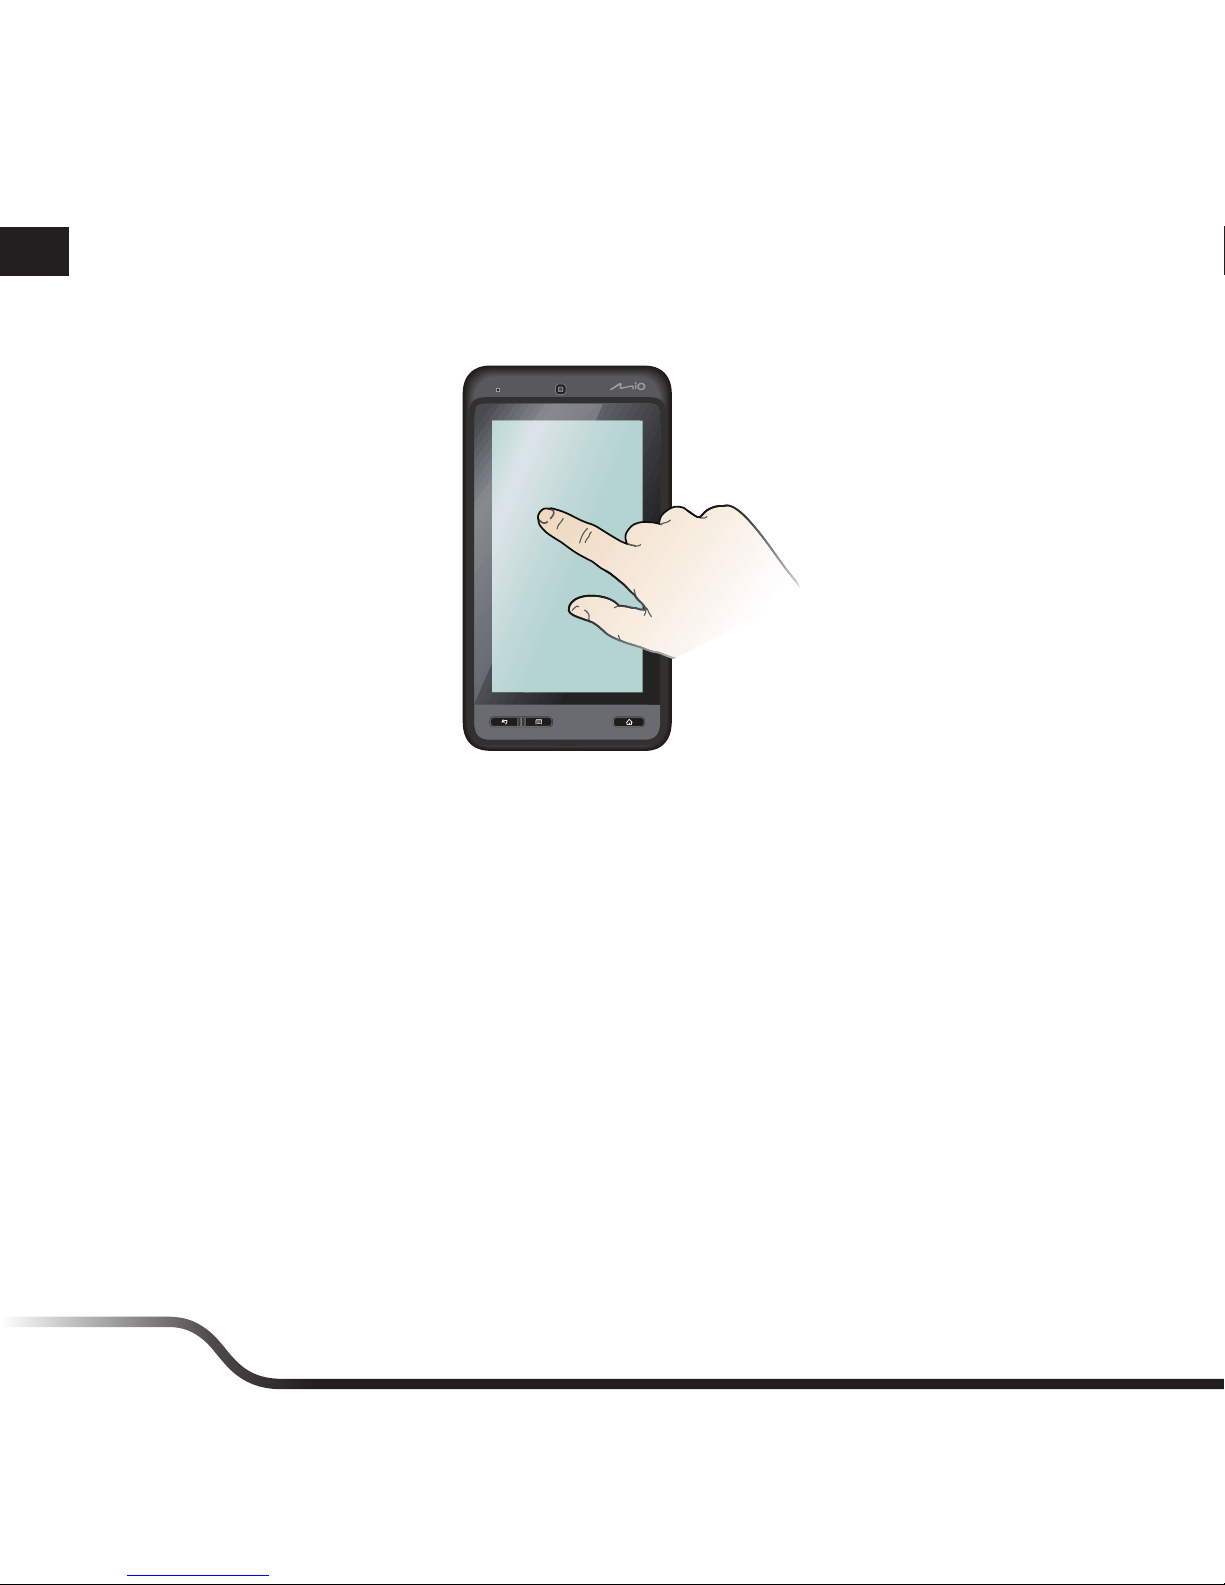
Bildschirmnavigation
Berühren Sie den Bildschirm zum Bedienen Ihres Gerätes mit Ihrer Fingerspitze. Sie können folgende
Aktionen durchführen:
• Tippen
Berühren Sie den Bildschirm zum Öffnen von Elementen oder Auswählen von
Bildschirmschaltflächen oder Optionen einmal mit Ihrer Fingerspitze.
• Tippen und halten
Tippen und halten Sie das gewünschte Element zum Öffnen des Kontextmenüs, das die zum
Element verfügbaren Optionen enthält.
• Ziehen
Tippen und halten Sie das Element, verschieben Sie es dann an die Zielposition, ohne Ihre
Fingerspitze vom Bildschirm zu lösen.
• Wischen
Ziehen Sie zum Aufrufen des nächsten/vorherigen Elements in der Liste nach links/rechts (bzw.
oben/unten).
• Multitouch-Gesten
Bewegen Sie Ihre Fingerspitzen beim Betrachten eines Bildes oder einer Webseite zum Vergrößern
oder Verkleinern auseinander oder zusammen.
• Bildschirm drehen
Bei den meisten Anwendungen können Sie die Bildschirmausrichtung durch Drehen des Gerätes
automatisch ändern (vom Hoch- ins Querformat und umgekehrt).

de
19
Startbildschirm
Der Startbildschirm ist Ihr Startpunkt zur Durchführung von Aktionen; er bietet schnellen Zugriff auf
häufig verwendete Anwendungen und Einstellungen.
Tipp: Zur Anzeige des Startbildschirms können Sie jederzeit die Startseite-Taste drücken.
Statusleiste
Desktop
Verknüpfungen
Widgets
Alle AnwendungenSchaltfläche
SchnellzugriffSchaltflächen
de
20
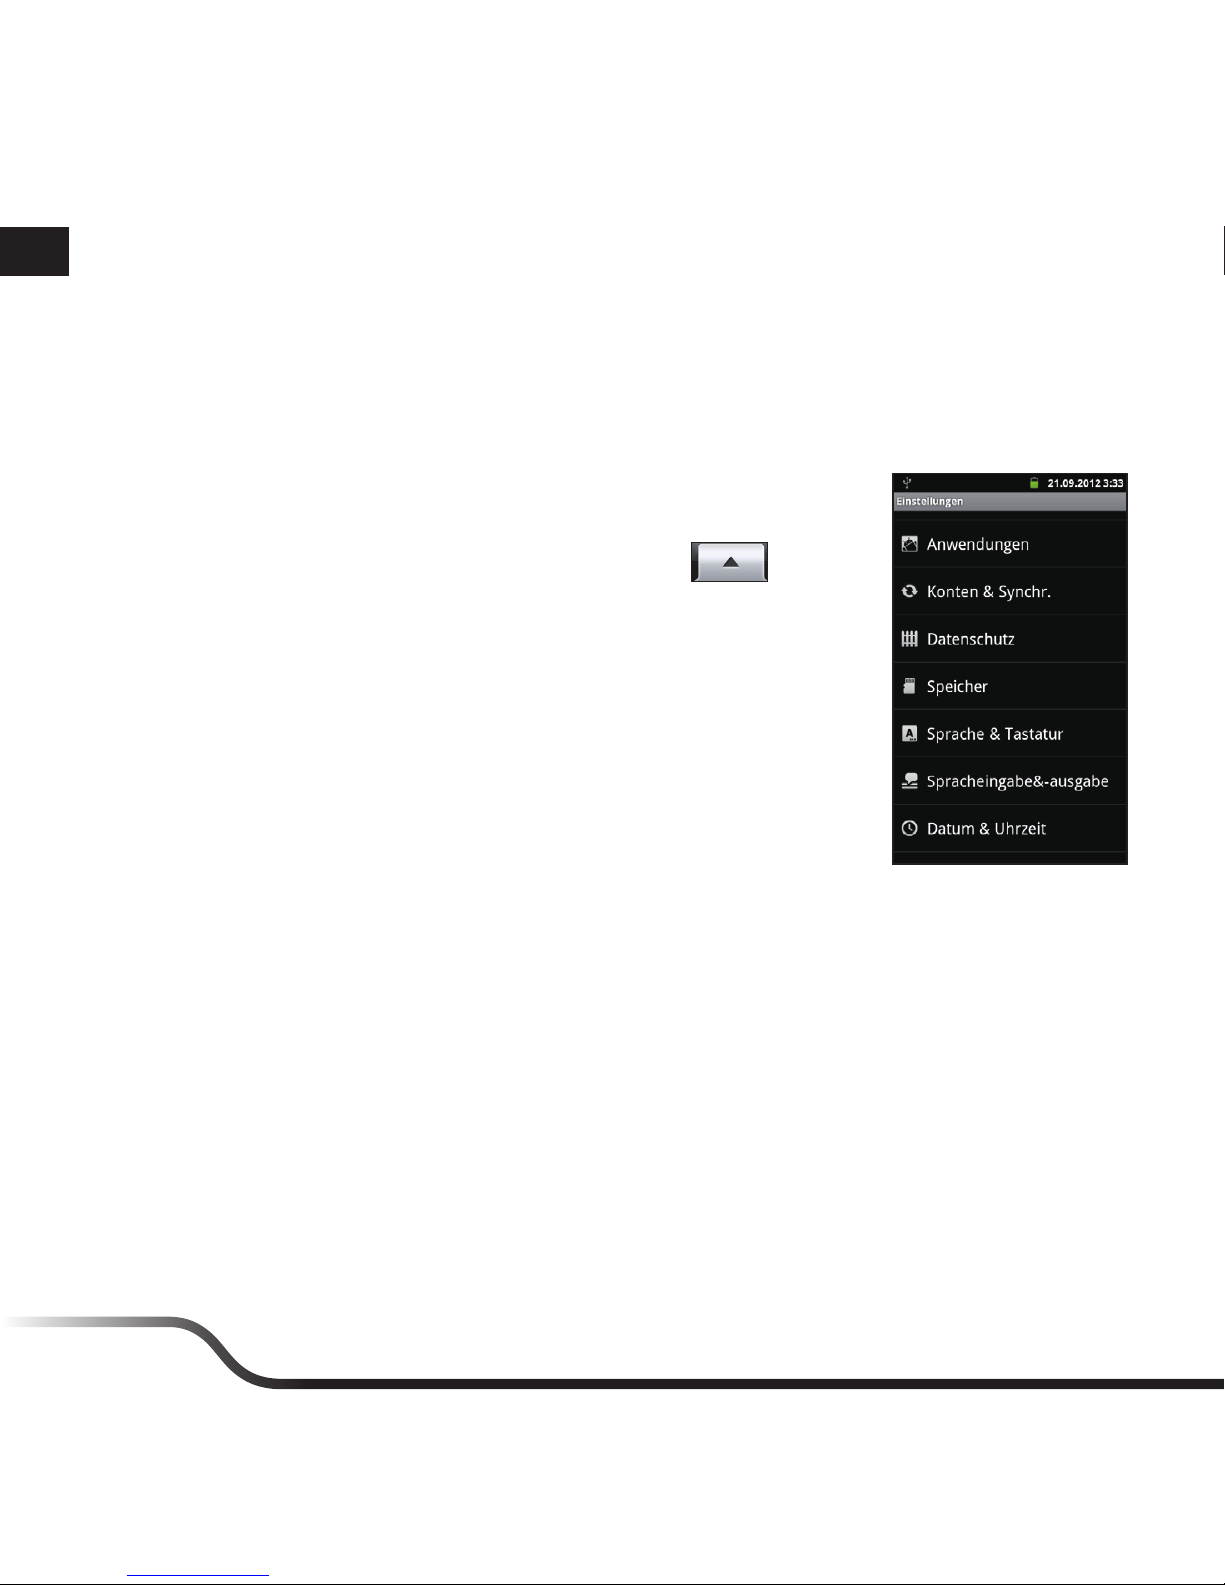
Ihr Gerät anpassen
Sie können das Gerät über das Einstellungsmenü anpassen, inklusive Personalisierung
des Startbildschirms, Änderung der Anzeige- und Toneinstellungen, Konfiguration der
Verbindungseinstellungen und mehr.
Auf das Einstellungsmenü zugreifen
Führen Sie über den Desktop zum Zugreifen auf das Einstellungsmenü
eine der folgenden Aktionen aus:
• Tippen Sie auf die Schaltfläche Alle Anwendungen (
) >
Einstellungen.
• Drücken Sie die Menü-Taste, tippen Sie dann auf Einstellungen.
Verbindung herstellen
Ihr Gerät kann über WLAN-Netzwerke auf das Internet zugreifen. Außerdem können Sie zur Freigabe
von Dateien per Bluetooth eine Verbindung zu anderen Geräten herstellen.
• WLAN
WLAN ist ein Begriff, der bestimmte Arten kabelloser lokaler Netzwerke bezeichnet, über die
Sie per Drahtlosverbindung auf das Internet zugreifen können. Zur Nutzung von WLAN an Ihrem
Gerät benötigen Sie Zugang zu einem WLAN-Zugangspunkt.
1. Tippen Sie im Einstellungsmenü auf WLAN & Netzwerke.
2. Tippen Sie zum Einschalten von WLAN auf die WLAN-Option. Das Gerät sucht automatisch
nach verfügbaren WLAN-Netzwerken.
3. Tippen Sie zur Anzeige von Netzwerknamen und Sicherheitseinstellungen (offenes oder mit
WEP gesichertes Netzwerk) der erkannten WLAN-Netzwerke auf WLAN-Einstellungen. Die
verfügbaren Drahtlosnetzwerke werden im Bereich WLAN-Netzwerke aufgelistet.

de
21
4. Tippen Sie zum Verbinden auf ein WLAN-Netzwerk.
• Wenn Sie ein offenes Netzwerk ausgewählt haben, werden Sie automatisch mit dem
Netzwerk verbunden.
• Wenn Sie ein mit WEP gesichertes Netzwerk ausgewählt haben, geben Sie den Schlüssel
ein, tippen Sie dann auf Verbinden.
5. Wenn Ihr Gerät mit einem WLAN-Netzwerk verbunden ist, erscheint das WLAN-Symbol
(
) in der Statusleiste und zeigt die Signalstärke an (Anzahl der leuchtenden Segmente).
Wenn sich Ihr Gerät das nächste Mal mit einem gesicherten WLAN-Netzwerk verbindet, auf das
Sie zuvor bereits zugegriffen haben, müssen Sie den WEP-Schlüssel nicht erneut eingeben, sofern
Sie Ihr Gerät nicht auf die werkseitigen Standardeinstellungen zurückgesetzt haben.
• Bluetooth
Bluetooth arbeitet an Ihrem Gerät in drei verschiedenen Modi:
• Aus: (Standard) Bluetooth ist ausgeschaltet. Sie können keine Daten per Bluetooth senden/
empfangen.
• Sichtbar: Bluetooth ist eingeschaltet und alle anderen Bluetooth-fähigen Geräte können Ihr
Gerät erkennen.
• Ein: Bluetooth ist eingeschaltet und das Gerät kann andere Bluetooth-fähige Geräte erkennen,
selbst jedoch nicht erkannt werden.
So schalten Sie Bluetooth ein:
a. Tippen Sie im Einstellungsmenü auf WLAN & Netzwerke.
b. Tippen Sie zum Einschalten von Bluetooth auf die Bluetooth-Option. Wenn Bluetooth
eingeschaltet ist, erscheint das Bluetooth-Symbol (
) in der Statusleiste.
So koppeln Sie Bluetooth-Geräte:
1. Tippen Sie im Einstellungsmenü auf WLAN & Netzwerke> Bluetooth-Einstellungen.
Tipp: Tippen Sie auf Sichtbar, damit das Gerät von anderen Bluetooth-Geräten in der Nähe
erkannt werden kann.
2. Tippen Sie im Bildschirm Bluetooth-Einstellungen auf Nach Geräten suchen. Ihr Gerät
beginnt mit der Suche und zeigt eine Liste in der Nähe befindlicher Bluetooth-Geräte an.
3. Tippen Sie zum Start der Kopplung auf ein Gerät aus der Liste.
4. Geben Sie bei Aufforderung den PIN-Code ein, tippen Sie dann auf OK.
5. Geben Sie an dem anderen Gerät zum Akzeptieren der Kopplung den PIN-Code Ihres Gerätes ein.
6. Sobald die Kopplung abgeschlossen ist, können Sie mit der Datenaustausch zwischen den
Geräte beginnen.

de
22
Verfügbaren Speicher verwalten
Sie können den Gerätespeicher prüfen und verwalten, inklusive externen und internen Speichers.
Wenn Sie... Dann...
Speicherstatus prüfen 1. Tippen Sie im Einstellungsmenü auf Speicher.
2. Prüfen Sie den Speicherstatus über folgenden Bereich:
Speicherkarte, Datenspeicher und Interner Speicher.
Anwendungen entfernen 1. Tippen Sie im Einstellungsmenü auf Anwendungen >
Anwendungen verwalten.
2. Wählen Sie die Anwendung, die Sie entfernen möchten, tippen Sie
dann auf Deinstallieren.
Laufende Services
beenden
1. Tippen Sie im Einstellungsmenü auf Anwendungen > Laufende
Services.
2. Wählen Sie den Vorgang, den Sie beenden möchten.
3. Lesen Sie die Warnmeldung, tippen Sie dann auf Stopp.
Geräteinhalte löschen 1. Tippen Sie im Einstellungsmenü auf Privatsphäre >
Werksrücksetzung.
2. Lesen Sie die Warnmeldung, tippen Sie dann auf Gerät rücksetzen.
3. Tippen Sie auf Alles löschen.
 Loading...