

Page 1
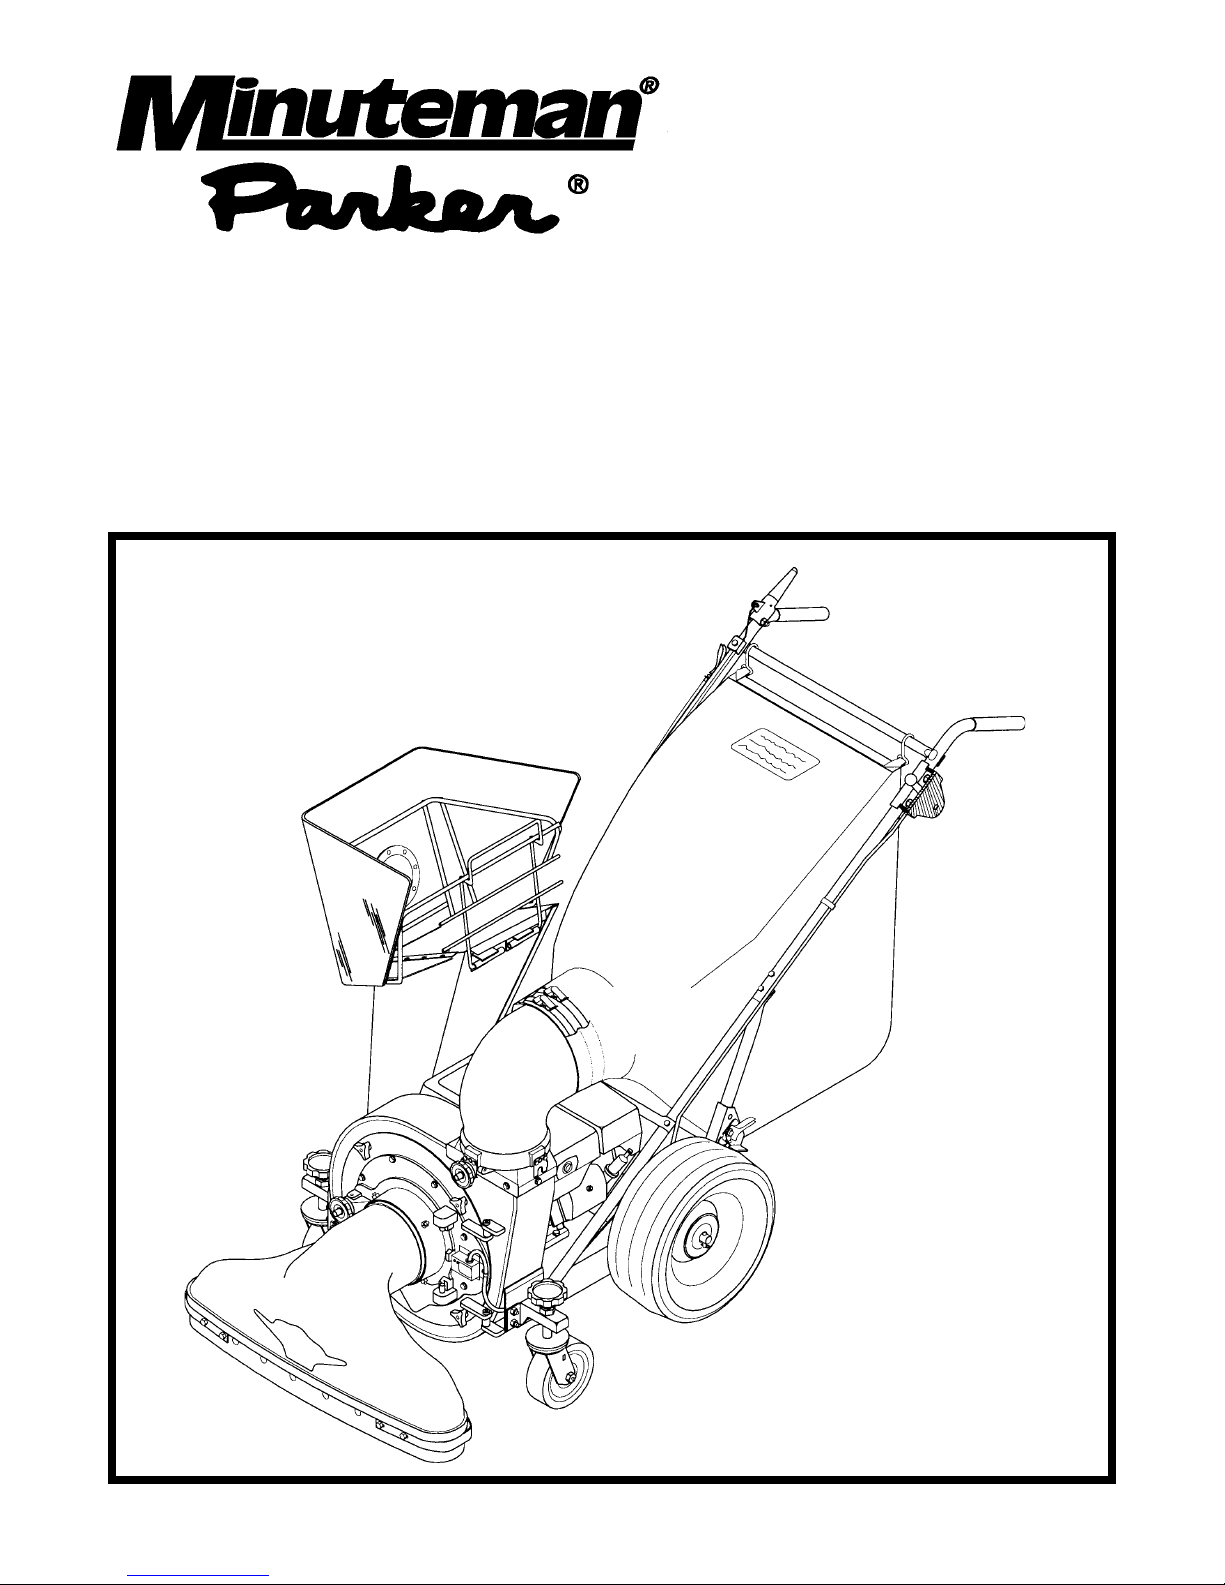
Chipper/Shredder Vac
OPERATION & CARE
Model:
CV-9408BSP
CV-9408HSP
Revised 7/95
Page 2
TABLE OF CONTENTS
1 -7 General Safety Instructions
8 & 9 Assembly Operating Instructions
10, 11 Features & Accessories
12 - 18 Operation
19 - 25 Service & Maintenance
Model # __________________________ Serial # ________________________
Page 3

IMPORTANT SAFETY INSTRUCTIONS
READ ALL INSTRUCTIONS BEFORE USING
WARNING
• To prevent personal injury or property damage, do not attempt to start engine until all assembly
steps are complete and you have read and understand the safety and operating instructions in this
manual.
• Under California law, and under laws of several other states, you are not permitted to operation
internal combustion’s engine using hydrocarbon fuels on any forest covered, brush covered, or
grass covered land, or on land with grain, hay, or other flammable agricultural crop, without an
engine spark arrester in continuous effective working order. The engine on your power equipment,
like most outdoor power equipment, is an internal combustion engine that burns gasoline, a
hydrocarbon fuel. Therefore, your power equipment must be quipped with a spark arrester muffler
in continuous effective working order. The spark arrester must be attached to the engine exhaust
system in such a manner that flames or heat from the system will not ignite flammable material.
Failure of the owner/operator of the equipment to comply with this regulation is a misdemeanor
under California law, and may also be a violation of other state and/or federal regulations, laws,
ordinances, or codes. Contact your local fire marshal or forest service for specific information
about what regulations apply in your area.
• Wear approved safety glasses when operating this equipment. The operation of any powered
machine can result in foreign objects being thrown by high-speed rotating parts.
• Wear work gloves, sturdy footwear, and hearing protection when operating this equipment.
• Remove hearing protection and watch for traffic when operating near, or when crossing roadways.
• Before inspecting or servicing any part of equipment, shut off engine, disconnect spark plug wire
from spark plug, and make sure that all moving parts have come to a complete stop. Be aware that
rotating blades slow down gradually after engine is shut off.
• Exercise extreme caution on slopes and avoid excessively steep slopes.
• Never leave equipment unattended when engine is running. Shut off engine and disconnect spark
plug wire from spark plug before leaving equipment. Turn off fuel shut-off if equipped.
• Do not vacuum any burning or smoldering materials such as cigars, cigarettes, ashes, or cinders.
• Do not vacuum areas that have been recently treated with fertilizers, pesticides, or herbicides.
Follow chemical manufacturer’s safety instructions regarding contact with treated areas.
• Do not vacuum flammable liquids such as gasoline, kerosene, diesel fuel, paint thinner, etc.
• Do not operate this equipment on a paved, gravel, or hard surface unless the collection bag is
installed. Discharged material may bounce from a hard surface.
• Never pick up or carry equipment while the engine is running.
• Walk, never run.
• Never allow children or untrained adults to operate this equipment.
• Keep the area of operation clear of all persons, particularly small children, and pets. Keep bystanders
at least 25 feet away from the area of operation.
1
Page 4

• Do not run engine in an enclosed area. Engine exhaust contains carbon monoxide gas, a deadly
poison that is odorless, colorless, and tasteless.
• Do not operate this equipment near buildings, windows, or air conditioners.
• Do not allow hands or any other part of the body or clothing inside the vacuum inlet.
• Do not start engine or operate this equipment with any safety guards or housing removed.
• Before removing or installing collection bag, shut off engine, disconnect spark plug wire from spark
plug, and allow all moving parts to come to a complete stop.
• Empty the collection bag after each use. Decomposing debris could generate enough heat to
catch fire. Before emptying the collection bag, shut off engine, disconnect spark plug and allow all
moving parts to come to a complete stop.
• If equipment jams or becomes clogged, immediately shut off engine, disconnect spark plug and
allow all moving parts to come to a complete stop. Use only a wooden stick to clear away debris.
DANGER
Gasoline is highly flammable and its vapors are explosive. To prevent personal injury or property
damage:
• Do not add fuel if engine is running or still hot from recent operation. Allow engine to cool for at least
three minutes.
• Do not fill fuel tank indoors. After filling, wipe up any spills and move away from gasoline fumes
before starting engine.
• Do not allow open flame, matches, or smoking in area.
• Fill fuel tank with fresh, clean unleaded regular automotive gasoline, (leaded regular and unleaded
or leaded premium grades of gasoline are acceptable substitutes).
• Do not mix oil with gasoline.
• Clean the area around the fuel fill cap and remove the cap from the fuel tank. Insert a clean funnel
into the fuel tank.
• Fill the tank to 1/2 inch below the bottom of the filter neck to provide space for any fuel expansion.
• Reinstall the fuel fill cap securely and wipe up any spilled gasoline.
SAVE THESE INSTRUCTIONS
2
Page 5

OPERATION AND SAFETY
1. Read this Owner/Operator Manual and the separate Engine Owner’s Manual carefully before
operating this equipment. Be completely familiar with the controls and the proper use of this
equipment.
2. Never allow children or untrained adults to operate this equipment.
3. Keep the area of operation clear of all persons, particularly small
children, and pets. Keep bystanders at least 25 feet away from
the area of operation.
4. Familiarize yourself with all of the safety and operating decals on this equipment and on any of its
attachments or accessories.
5. Do not run engine in an enclosed area. Engine exhaust contains carbon monoxide gas, a deadly
poison that is odorless, colorless, and tasteless. Do not operate this equipment near buildings,
windows, or air conditioners.
6. Do not allow hands or any other part of body or clothing inside the vacuum inlet,
chipper chute, discharge deflector, or near any moving part. Cutting blades begin
to rotate when engine starts and slow down gradually after engine is shut off.
7. Before starting this equipment, make certain that the chipper chute, vacuum inlet,
and discharge deflector are empty. Disconnect spark plug wire before making these checks.
8. Never carry passengers on this equipment. They could fall and be seriously injured, or they could
interfere with safe operation.
9. Do not allow hands or any other part of the body or clothing inside the vacuum inlet, chipper
chute, discharge deflector, or near any moving part.
10. When vacuuming or chipping, be extremely careful that pieces of metal, rocks, bottles, cans, or
other foreign objects are not included.
11. Before vacuuming, inspect the area where the equipment is to be.
12. If equipment strikes any foreign object or starts making an unusual noise or vibration, immediately
shut off engine, disconnect spark plug wire from spark plug and allow all moving parts to come to
a complete stop. Then take the following steps:
a. Inspect for damage.
b. Replace or repair any damaged parts.
c. Check for and tighten any loose parts.
13. If equipment jams or becomes clogged, immediately shut off engine, disconnect spark plug wire
from spark plug, and allow all moving parts to come to a complete stop. Use only a wooden stick
to clear away debris.
14. Before changing vacuuming attachments or screens, or before adjusting fan cover, shut off engine,
disconnect spark plug wire from spark plug, and allow all moving parts to come to a complete
stop.
15.Keep all guards, covers, and deflectors in place and in good working condition.
16. Do not operate the equipment unless the chipper chute and the fan cover assembly are securely
installed.
17. Always stand clear of discharge area when operating equipment without collection bag installed.
Material exits at high speed from the discharge deflector.
3
Page 6

OPERATION AND SAFETY
18. Keep your face and body safely away from chipper chute. When chipping, stand on either side of
chute and keep arms perpendicular (at a 90° angle) to chute inlet.
19. Do not overreach when feeding material into chipper chute. Keep proper balance and footing at
all times.
20. Do not operate equipment with vacuum snout unless collection bag is installed.
21.Shut off the engine and disconnect the spark plug wire from the spark plug before transporting
the machine in a vehicle or trailer.
22.Before removing or installing collection bag, shut off engine, disconnect spark plug wire from
spark plug, and allow all moving parts to come to a complete stop.
23.Empty the collection bag after each use. Decomposing debris could generate enough heat to
catch fire. Before emptying the collection bag, shut off engine, disconnect spark plug wire from
spark plug, and allow all moving parts to come to a complete stop.
24.Exercise extreme caution on slopes and avoid excessively steep slopes. On the self propelled
model, do not shift gears on slopes.
25. Never operate this equipment at high transport speeds on slippery surfaces.
26.Do not allow any part of the engine, especially around the cooling fins and muffler, to become
clogged with leaves, oil, grease or any other combustible material.
27.When operating without the collection bag installed, do not use your hands or feet to remove
material from the ground beneath the discharge area. Use a long-handled shovel or a long stick
to safely remove materials.
28. Remove hearing protection and watch for traffic when operating near, or when crossing roadways.
29. Never leave equipment unattended when engine is running. Shut off engine and disconnect spark
plug wire from spark plug before leaving equipment.
30. Use only attachments and accessories that are approved for use with this equipment.
31. Operate equipment only in daylight or in good artificial light.
32.Do not operate equipment unless the rubber retainer flap inside the chipper chute is in good
condition , is securely installed, and is hanging freely inside the chute.
33.Do not tamper with the engine governor settings. The governor controls the maximum safe
operating speed and protects the engine and all moving parts from damage caused by excessive
speed. Authorized service shall be sought if a problem exists.
34. This equipment is provided with a safety interlock system which prevents the engine from starting
unless a vacuuming attachment and the fan cover are installed. It is also designed to shut off the
engine if the operator attempts to remove a vacuuming attachment or the fan cover while the
engine is running. Never attempt to disconnect or to otherwise defeat the purpose of this system.
If the interlock system fails to operate properly, shut off the engine and do not operate this
equipment until the system has been repaired and is functioning properly. Before using the
equipment each day, check the operation of the safety interlock system as explained in this
Manual.
4
Page 7
SAFETY INTERLOCK SYSTEM
Your machine is equipped with a safety interlock system which prevents the engine from starting
unless a vacuuming attachment and the fan cover are installed.
The system also stops the engine if the operator attempts to remove an attachment or the fan cover
while the engine is running.
If the safety interlock system fails, shut off the engine and do not operate the machine until the system
has been repaired. Contact your local servicing dealer or the factory for assistance.
Testing the Safety Interlock System
The following test should be performed prior to each day’s use of your machine.
1. Start the engine.
2. Disconnect the three-pronged connector (on end of cord extending from attachment) - See fig. 1.
• If the engine begins to stall, the system is working properly. Reconnect the three-pronged connec-
tor by gently but firmly pushing the connector onto the switch. The two longer prongs fit on either
side of the switch button housing; the shorter prong depresses the switch button.
• If the engine does not begin to stall, it means that the system is not functioning properly (Briggs &
Stratton.) Stop the engine by moving the Engine Throttle Control (on right side handlebar) to the
STOP position. (Honda) Turn switch on side of engine to off position. Refer to Figure 1, Page 19.
Disconnect the spark plug wire from the spark plug. Do not operate the machine until the safety
interlock system has been inspected and repaired.
WARNING
To avoid personal injury or property damage, do not operate machine unless
safety interlock system is functioning properly.
5
Page 8
SAFETY DECALS
6
Page 9
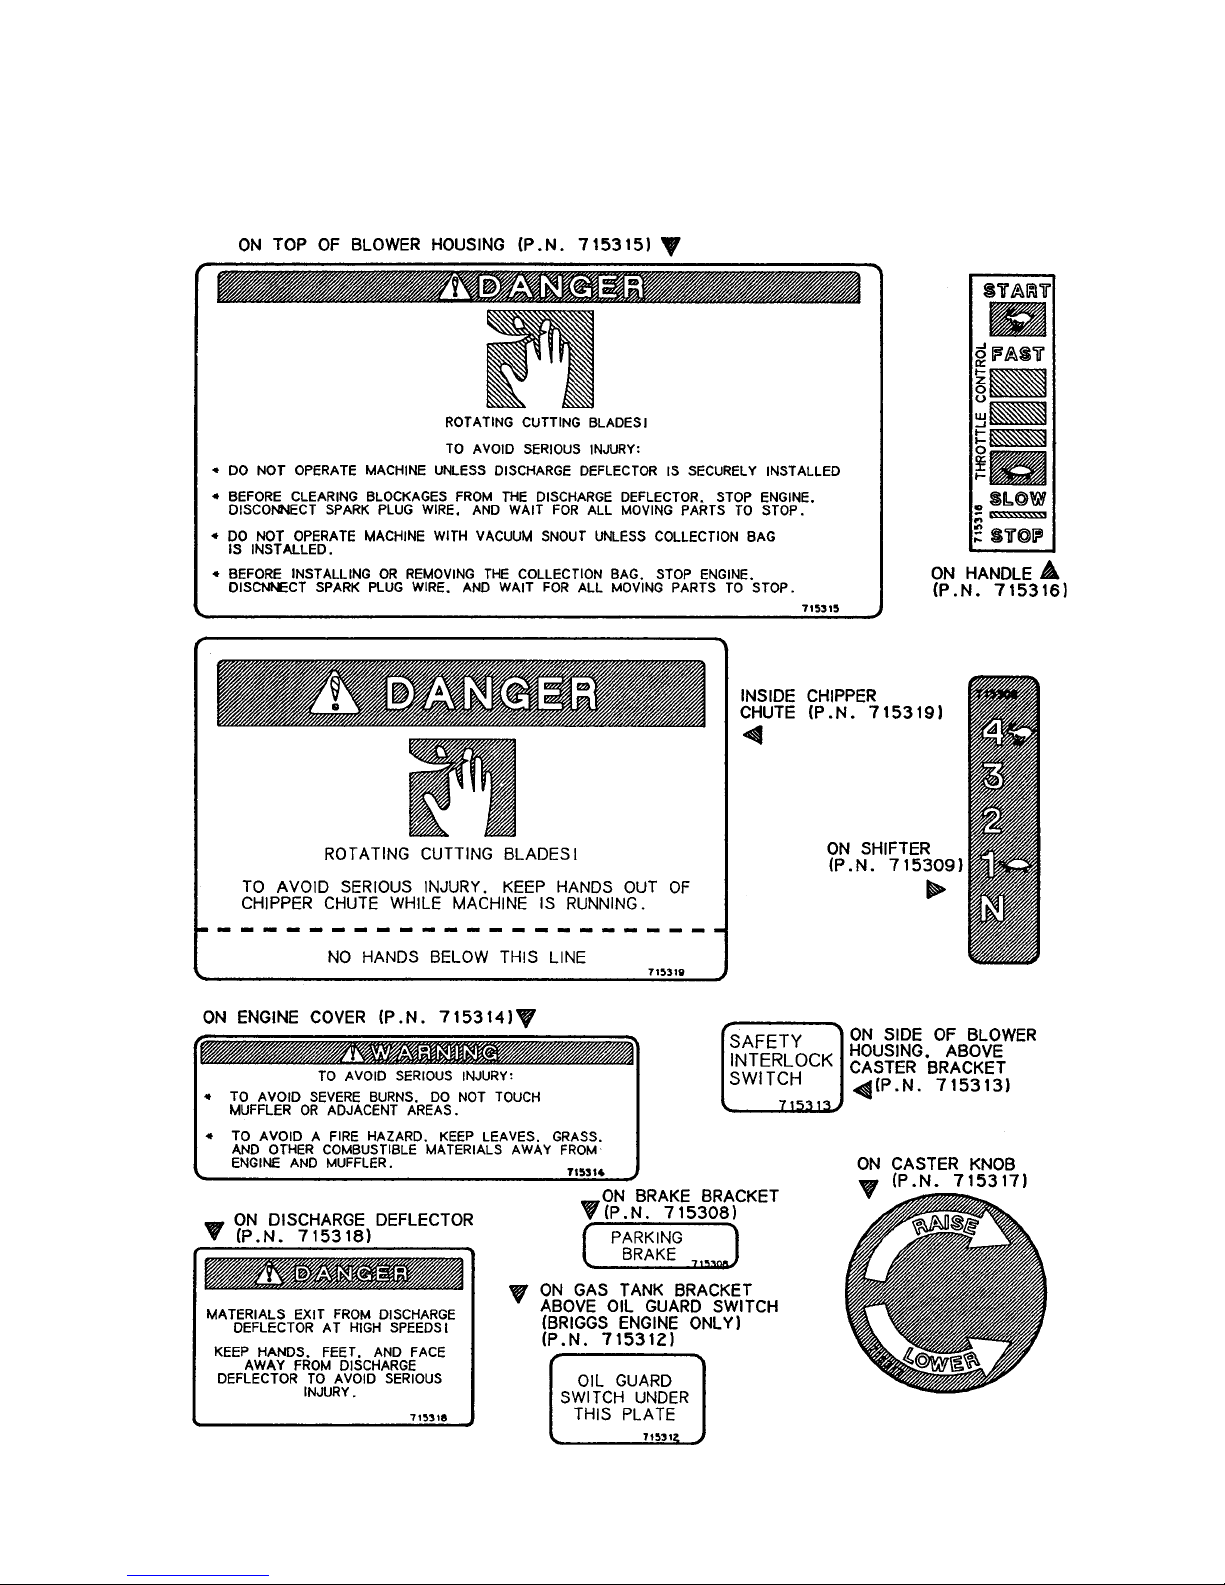
SAFETY DECALS
7
Page 10

INSTALLATION OF HANDLE AND SHIFT LEVER
8
Page 11

TO INSTALL COLLECTION BAG
9
Page 12

COMPONENT IDENTIFICATION
10
Page 13

OPTIONAL AND STANDARD ACCESSORIES
11
Page 14

OPERATION
VACUUMING ATTACHMENTS AND SHREDDER SCREENS IDENTIFICATION
To install shredder screen, remove
faceplate (ref. Figure 1) by removing (4)
knobs on front of machine. Insert shredder
screen as shown and reinstall knobs.
Shredder Screens
The shredder screen (see Figure
2) fits inside the chamber,
completely surrounding the vacuum
fan blades. Material that has been
chipped or vacuumed must pass
through the slots in the screen
before it is discharged. The size of
the slots in the screen determine
how finely materials are shredded.
The standard, 1 1/8" slotted screen
supplied with all machines will
produce up to an 8:1 reduction of
material. The optional, 3/4" slotted
screen will produce more finely
shredded material at a ratio of up
to 11:1.
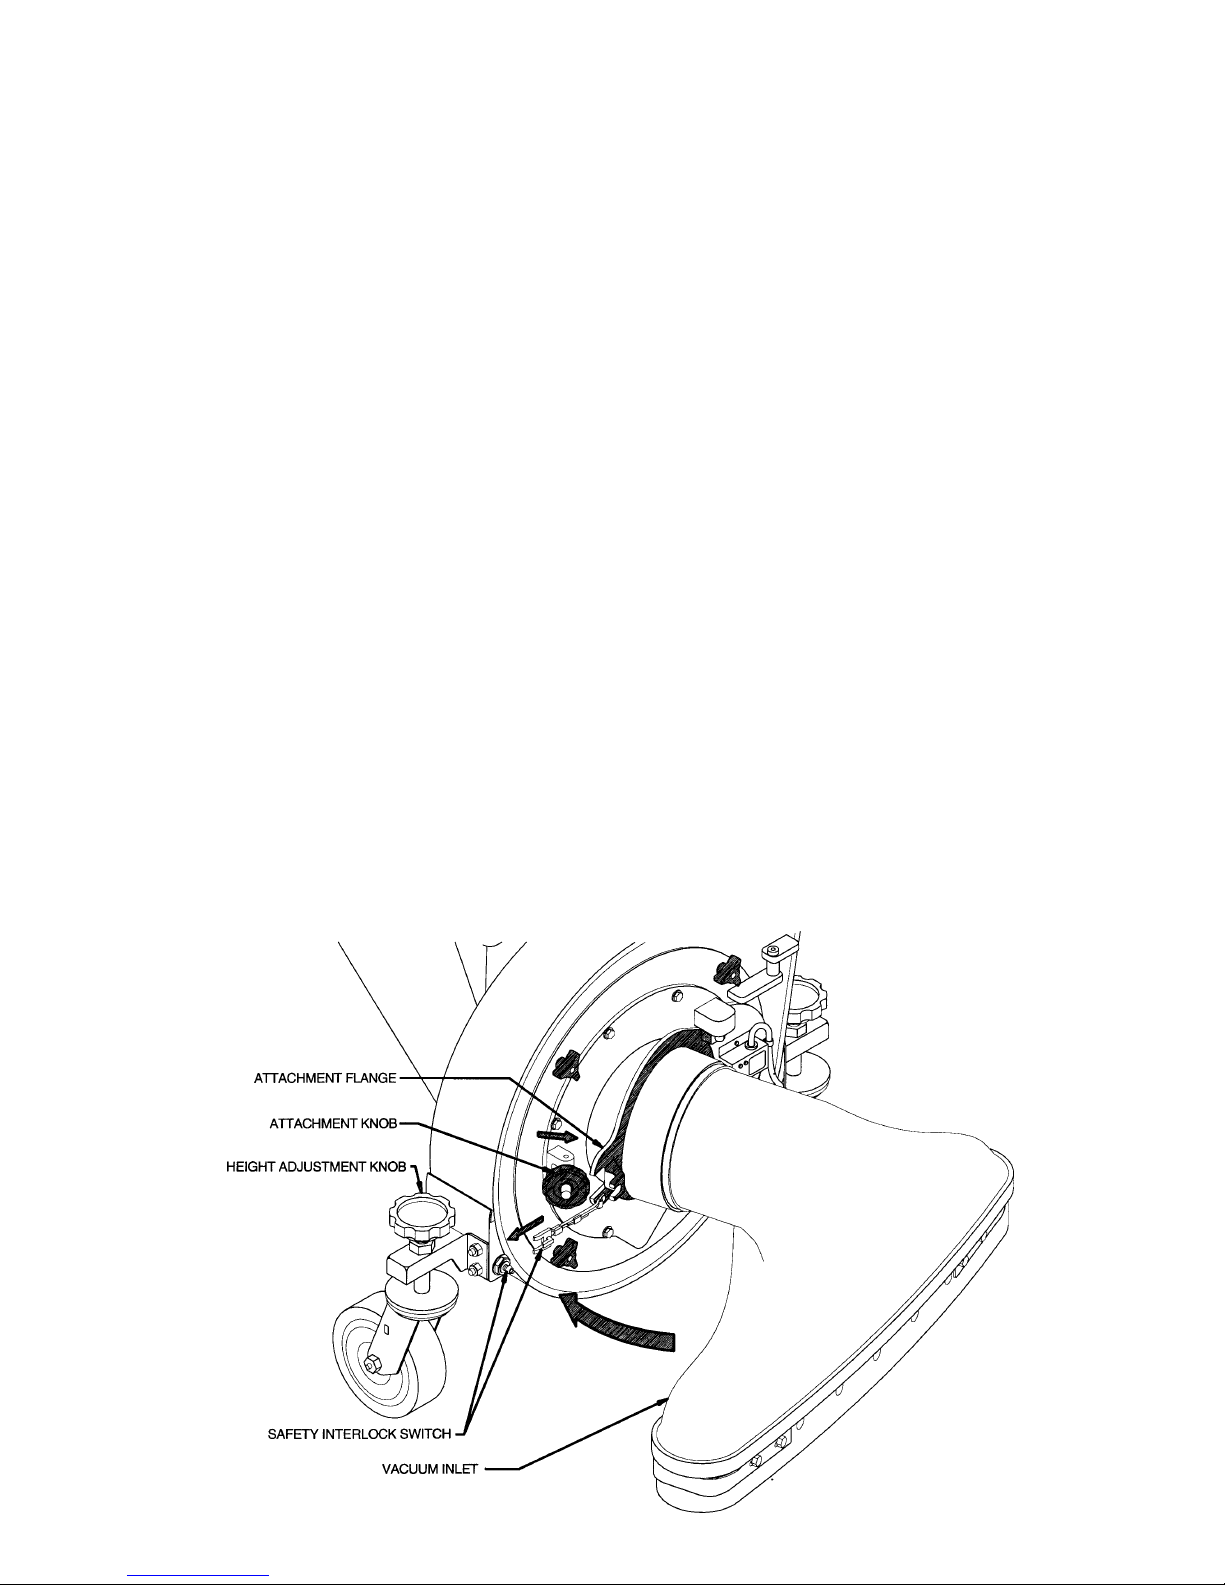
Vacuum Inlet/Chipper Adapter
For vacuuming, install vacuum inlet
as shown in Figure 3, Page 13. For
chipping and/or shredding without the
vacuum inlet assembly, use chipper
adapter Figure 4 as shown on Page
13.
12
Page 15

Vacuum Attachment
The vacuum inlet assembly can be adjusted
to varying heights by raising or lowering the
two front casters. Then the front edge of the
housing should be about 2" off the ground.
Chipper Adapter
The chipper adapter is used instead of the
vacuum inlet assembly when large volumes
of material are being chipped. The use of this
adapter aids in the self-feeding
characteristics of the chipper shoot.
13
Page 16

14
WARNING: When operating without the collec-
tion bag, or when the collection bag flap is open,
be aware that the shredded material will scatter
over a fairly large area. Check your surround-
ings before beginning operation.
Page 17

Operation
Tips for Using the Chipper
Your experience is vitally important to
successful chipping. We suggest that you start out
slowly by feeding limited quantities of material into
the chipper. Bulk and lengths can be gradually
increased if the Material is being processed
without difficulty.
The chipper is designed to be self-feeding.
However, the physical characteristics of materials
vary and will therefore require different operating
techniques, as explained in the chipper operating
instructions.
Always avoid overfeeding materials into
the chute. Overfeeding causes the engine to labor
and slow down which reduces chipper
performance. Best results are obtained when the
engine is running at or near full speed.
Whenever possible, process branches
while they are still fresh - green wood chips more
easily than dry wood.
Extremely crooked branches, or bunchy
material such as pine boughs should be cut or
trimmed so that they will feed easily into the
chipper chute.
Alternating dry materials with wet or green
materials helps prevent clogging of the shredder
screen.
Keep the chipper cutting blade sharp.
Severe vibration or slow progress when you feed
material into the machine is a sign that the blade
may be dull. (Extremely hard wood, stringy wood,
or wood containing knots can be difficult to chip
even with a freshly sharpened blade. Try
processing some softer wood. If the chipping
performance is still poor then the blade is probably
dull.)
Certain types of thin, flexible shoots may
slip past the chipper blade without being cut. To
avoid clogging the collection bag or discharge
chute, empty the collection bag more frequently
when processing shoots. The shoots can be easily
separated from the wood chips, and discarded.
Positioning the Chute Extension for
Light or Heavy-Duty Chipping
A chute extension (shown in Figure 1) is
attached to the top of the chipper chute.
The chute extension is hinged to allow
folding for compact storage and easier
maneuverability of the machine.
In the folded position, the chute extension
has an opening that permit light brush and
thin branches to be fed into the
chipper chute. In the upright position, the
chute extension accepts larger, bulkier
material. Refer to Figure 1 for instruction on
how to unfold and fold the chute extension.
IMPORTANT: Be sure to lock the chute
extension with the latch when the chute
extension is in the upright, unfolded
position.
15
Page 18

Operation
Chipper Operating Instructions
1. Make sure that a vacuuming attachment and the collection bag are properly installed. The vacuum inlet cap (page
13, figure 4) is recommended for use when performing large-scale chipping projects.
2. Make sure you are wearing safety goggles, work gloves, sturdy footwear, and hearing protection.
3. Start the engine. The chipper blade (and the vacuuming attachment) are now in full operation.
4. Park the machine on level ground. Place the GEAR SHIFT LEVER in neutral and set parking brake.
5. To feed material into the chipper chute, stand a foot or two away from either side of the chipper chute. Do not stand
near the hot engine exhaust or muffler.
• Do not point your arms into the chute keep them perpendicular (a 90° angle) to the branch.
• Keep your face and body safely away from the chipper chute and branches.
• Drop light brush, stalks, vines, or branches up to about 2" in diameter into the chute and the self-feeding action
will pull them downward. If necessary, help guide the material downward until your hands begin to come near the
top of the chute and then let go! NEVER PUT YOUR HANDS INSIDE THE CHIPPER CHUTE! If necessary, push
the material further downward with a long stick or branch.
• Larger branches, particularly hard wood may require that you control the rate of feed. Hold one end of the branch
firmly with one or both hands and feed the branch slowly into the chipper chute (rotating the branch may help it
to feed more easily). If the engine labors, pull the branch upward to allow the engine to regain speed. Continue
to alternately feed and retract the branch until your hands begin to come near the top of the chute and then let
go! NEVER PUT HANDS INSIDE THE CHIPPER CHUTE!
• Do not reach into the chipper chute to retrieve material that is below the top of the chute. Shut off the engine,
disconnect the spark plug wire, and wait for all moving parts to stop before attempting to retrieve any materials.
6. If a piece of wood is too large or hard to be processed, you should put it aside for firewood.
7. If a branch causes the engine to stall, remove the branch and restart the engine. Stalling does not harm the engine.
8. Empty the collection bag frequently when using the chipper.
9. To stop the engine, Briggs & Stratton equipment, move the Engine Throttle Control to the STOP position. For Honda
equipment, reduce engine speed to slow, turn engine STOP control to off, on side of engine. Remove any hearing
protection and listen for all moving parts to come to a complete stop.
Clearing the Machine of Clogs and Jams
A clog or jam in the machine can cause the vacuuming and chipping operations to decrease or even stop completely.
If this occurs, take the following steps:
1. STOP THE ENGINE IMMEDIATELY and disconnect the spark plug wire from the spark plug. Wait for all moving
parts to come to a complete stop.
2. Check (and clean, if necessary) the following areas in this order:
• Check that the collection bag is not overfilled. To remove and empty bag, see Page 9.
• While the bag is removed, check that the discharge deflector is not clogged or jammed. Use a stick to clear
away any debris.
• Check that the vacuuming attachment is not clogged or jammed. Remove the attachment and thoroughly clean
the opening. While the attachment is removed, check the inlet opening to the machine. Use a stick to clear
away any debris.
• Check that the shredder screen (if installed) is not clogged.
16
Page 19

OPERATION
VACUUMING AND CHIPPING GUIDE
The chart below lists some commonly available materials that can be processed with the various vacuuming attachments or the chipper. This chart is intended only as a general guideline. For complete vacuuming and chipping
operating instructions, be sure to read this entire Operation Section.
17
Page 20

TRANSPORT DRIVE/PARKING BRAKE
Transport Drive
• Operate the machine in a large, level, open area until you are familiar with its operation. Begin with
speed No. 1 and gradually work up to speed No. 4. (Figure 1)
• To avoid damaging the transmission, always release the Clutch Lever (Figure 2) and wait for the
wheels to stop before shifting gears.
• Forward momentum may cause the machine to gradually coast to a stop after the Wheel Drive is
released (especially when in 3rd or 4th gear). Allow for this coasting distance when stopping the
machine.
• Engage the Clutch Lever slowly when starting off in 3rd or 4th gear. The machine may hesitate
briefly before the wheels begin turning.
• Shift to a lower forward gear if the wheel lose traction when going up a slope (always avoid exces-
sively steep slopes). Before shifting, turn the machine sideways on the slope to prevent rolling of
the machine and to relieve strain on the transaxle.
• Never force the shift lever as damage may result. If shifting is difficult, it may be necessary to
manually move the machine a few inches forward or backward while moving the shift lever.
Parking Brake
Located on left side of machine. Lower
handle section - parking brake should be
used on level surfaces. The parking brake
not intended to hold machine on slopes
on inclines.
18
Page 21

SERVICE/MAINTENANCE
Fan Blade Replacement
19
Page 22

SERVICE/MAINTENANCE
20
Page 23

21
Page 24

22
Page 25

23
Page 26

24
Page 27

25
Page 28

LIMITED WARRANTY
The Parker Sweeper Company warrants to the original purchaser/user that this product is free from defects in workmanship
and materials under normal use and service for a period of two years from date of purchase. In addition, Parker Sweeper
Company will, at its option, honor labor warranty claims for the first 12 months from date of sale, provided such claims are
submitted through and approved by factory authorized repair stations. Parker Sweeper Company will, at its option, repair or
replace without charge, except for transportation costs, parts that fail under normal use and service when operated and
maintained in accordance with the applicable operation and instruction manuals.
This warranty does not apply to normal wear, or to items whose life is dependent on their use and care, such as belts, cords,
switches, hoses, rubber parts, electrical motor components or adjustments. Parts not manufactured by Parker Sweeper
Company such as engines, batteries, battery chargers, hydraulic pumps, and tires are covered by and subject to the warranties
and/or guarantees of their manufacturers. Please contact Parker Sweeper Company for procedures in warranty claims against
these manufacturers.
Special warning to purchaser — Use of replacement filters and/or prefilters not manufactured by Parker Sweeper Company
or its designated licensees, will void all warranties expressed or implied.
A potential health hazard exists without exact original equipment replacement.
All warranteed items become the sole property of Parker Sweeper Company or its original manufacturer, whichever the case
may be.
Parker Sweeper Company disclaims any implied warranty, including the warranty of merchantability and the warranty of fitness
for a particular purpose. Parker Sweeper Company assumes no responsibility for any special, incidental or consequential
damages.
This limited warranty is applicable only in the U.S.A. and Canada, and is extended only to the original user/purchaser of this
product. Customers outside the U.S.A. and Canada should contact their local distributor for export warranty policies. Parker
Sweeper Company is not responsible for costs or repairs performed by persons other than those specifically authorized by
Parker Sweeper Company. This warranty does not apply to damage from transportation, alterations by unauthorized persons,
misuse or abuse of the equipment, use of non-compatible chemicals, or damage to property, or loss of income due to
malfunctions of the product.
If a difficulty develops with this machine, you should contact the dealer from whom it was purchased.
This warranty gives you specific legal rights, and you may have other rights which vary from state to state. Some states do not
allow the exclusion or limitation of special, incidental or consequential damages, or limitations on how long an implied warranty
lasts, so the above exclusions and limitations may not apply to you.
A Minuteman International Company
World Headquarters Minuteman Canada, Inc.
Minuteman International, Inc. 2210 Drew Road
111 South Rohlwing Road Mississauga, Ontario
Addison, Illinois 60101 L5S 1B1
(630) 627-6900 (905) 673-3222
FAX (630) 627-1130 FAX (905) 673-5161
988229
Printed in U.S.A.
 Loading...