

MINOLTA-QMS PagePro 4100E, 4179-255 User Manual

Network Interface Card
User’s Manual
PagePro 4100E users:
Your printer does not come with a
Network Interface Card. A card is,
however, available as an option.
PagePro 4100GN users:
Your printer has network interface
functions built into its controller board.
4110-7722-01
for PagePro 4100E/4100GN

Foreword
Softw ar e Lic en se Ag re emen t an d Warranty
Software Lice nse Agr eement
Important:
Before installing the software please carefully read this License Agreement. The installation of this software indicates your acceptance of the
terms and conditions of this Li cense. If you do not agree with the terms and
conditions, you should return the software to Minolta Co., Ltd. for a full
refund.
1. SOFTWARE
Software means the computer program contained in this package (which
may include digitally encoded, machine readable, scalable outline font data
as encoded in a special format), together with all codes, techniques, software tools, format, design, concepts, methods and ideas associated with the
computer program and al l documentation related thereto.
2. LICENSE A GREEMENT
This is a Li cense A g re ement a nd no t an ag reeme n t for sale. Mi nolta own s ,
or has been licens ed from other owners, copyrights in the Software. Except
as stated in this Agreement, you are not granted any r ights to patents, copyrights, trade names, trad emarks (whether registered or unregistered), or any
other rights, franchises or license in respect of the Software. Title to the
Software and any copy m ade from it is retained by Minolta or such other
owne rs .
3. LICENSE
Minolta, hereby grants to you, and you agree to accept a non-exclusive, non
transfera ble and limite d license and you may:
(1) install and use the Softwa re on a single computer and one as so cia ted
print er.
(2) use the Softwar e only for your own customary business or personal
purposes.
(3) make a copy of the Software for backup or installation purposes only in
support of the normal and intended us e of the Sof tware.
i

Foreword
(4) transfer poss es s ion of copies of the Softw are to anot her party by
transferring a copy of this Agreement and all other docum entation along
with at least one complete unaltered copy of the Software, provided that
(i) you either transfer Software to such other party or destroy all your
other copies of the Software (ii) such tra ns f er of proc ession terminat es
your license from Minolta , and (iii) such other party shall accept and be
bound by these license terms by its initial use of the Software.
4. RESTRICTIONS
(1) You shall not without the written consent of Mino lta:
(i) use, copy, modify, merge or transfer copies of the Software except as
provided herein.
(ii) reve rse assemble or reverse compile the Software except a s permitted by
law; or
(iii)sublic ense, rent, lease or dis tribute the Software or any c opy thereof.
(2) You shall not export or re-export the Software in an y form under
violati on of export restrictions by the government of your country.
5. LIMITED WARRANTY
Minolta warrants the media on which the Software is recorded to be fre e
from defects in materials and workmanship under normal use. Warranty
details and limitations for the Software are described in the Statement of
Limited Warranty which was supplied with the hardware . With the exception of the foregoing express warranties applic able to hardwa re and media
only, the Software is not warranted but provided.
SUCH WARRANTIES ARE IN LIEU OF AL L OTHER WARRANTIES,
EXPRESSED OR IMPLIED, INCLUDING, BUT NOT LIMITED TO,
THE IMPLIED WARRANTIES OF MERCHANTABILITY AND FITNESS FOR A PARTICULAR PURPOSE.
6. LIMI TAT I ON OF R EMEDIES
IN NO E VENT W ILL MINOLTA BE LIABLE FOR ANY LOST PROFITS, LOST DATA, OR ANY OTHER INCIDENTAL OR CONSEQUENTIAL DAMAGES THAT RESULT FROM USE OR INABILITY TO USE
THE SOFTWARE, EVEN IF MINOLTA OR ITS AUTHORIZED
REMARKETERS HAVE BEEN ADVISED TO THE POSSIBILITY OF
SUCH DAMAGES OR FOR ANY CLAIM BY YOU BASED ON A
THIRD PARTY CLAIM.
ii

Foreword
7. TERMINATION
You may terminate your license at any time by destroying the Software and
all your copies of it or as otherwise described in these terms. Minolta may
terminate your license if you fail to comply with these term s. Upon such
termination, you agree to destroy all copies of the Software in your possession.
8. GOVERNING LAW
This Agreement shall be governed by the laws of the country where the
delivery is m a d e to th e or i g in al custom er.
9. GOVERNMENT END USERS
If you are acquiring the Software on behalf of any unit or agency of the
United States Government, the following provisions apply. Use, duplication or disclosure by the Government is subject to restrictions as set f or th in
the Rights in Technical Data and Computer Software clause at FAR
252.227-7013, subdivision(b)(3)(ii) or subparagraph (c)(1)(ii), as appropriate. Further use, duplication or disclosure is subject to restrictions applicable to restricted right s software as set forth in FAR 52.227-19(c)(2).
YOU ACKNO WLEDGE THAT YOU HAVE READ THIS AGREEMENT,
UNDERSTAND IT, AND AGREE TO BE BOUND BY ITS TERMS
AND CONDITIONS. NEITHER PARTY SHALL BE BOUND BY ANY
STATEMENT OR REPRESENTATION NOT CONTAINED IN THIS
AGREEMENT. NO CHANGE IN THIS AGREEMENT IS EFFECTIVE
UNLESS WRITTEN AND SIGNED BY PROPERLY AUTHORIZED
REPRESENTA TIVES OF EACH PARTY. BY INST ALLING THIS SOFTWARE, YOU AGREE TO ACCEPT THE TERMS OF THIS AGREEMENT.
iii
Foreword
USER INSTRUCTIONS (FOR U.S.A.)
FCC PART 15- RADIO FREQUENCY DEVICES WARNING
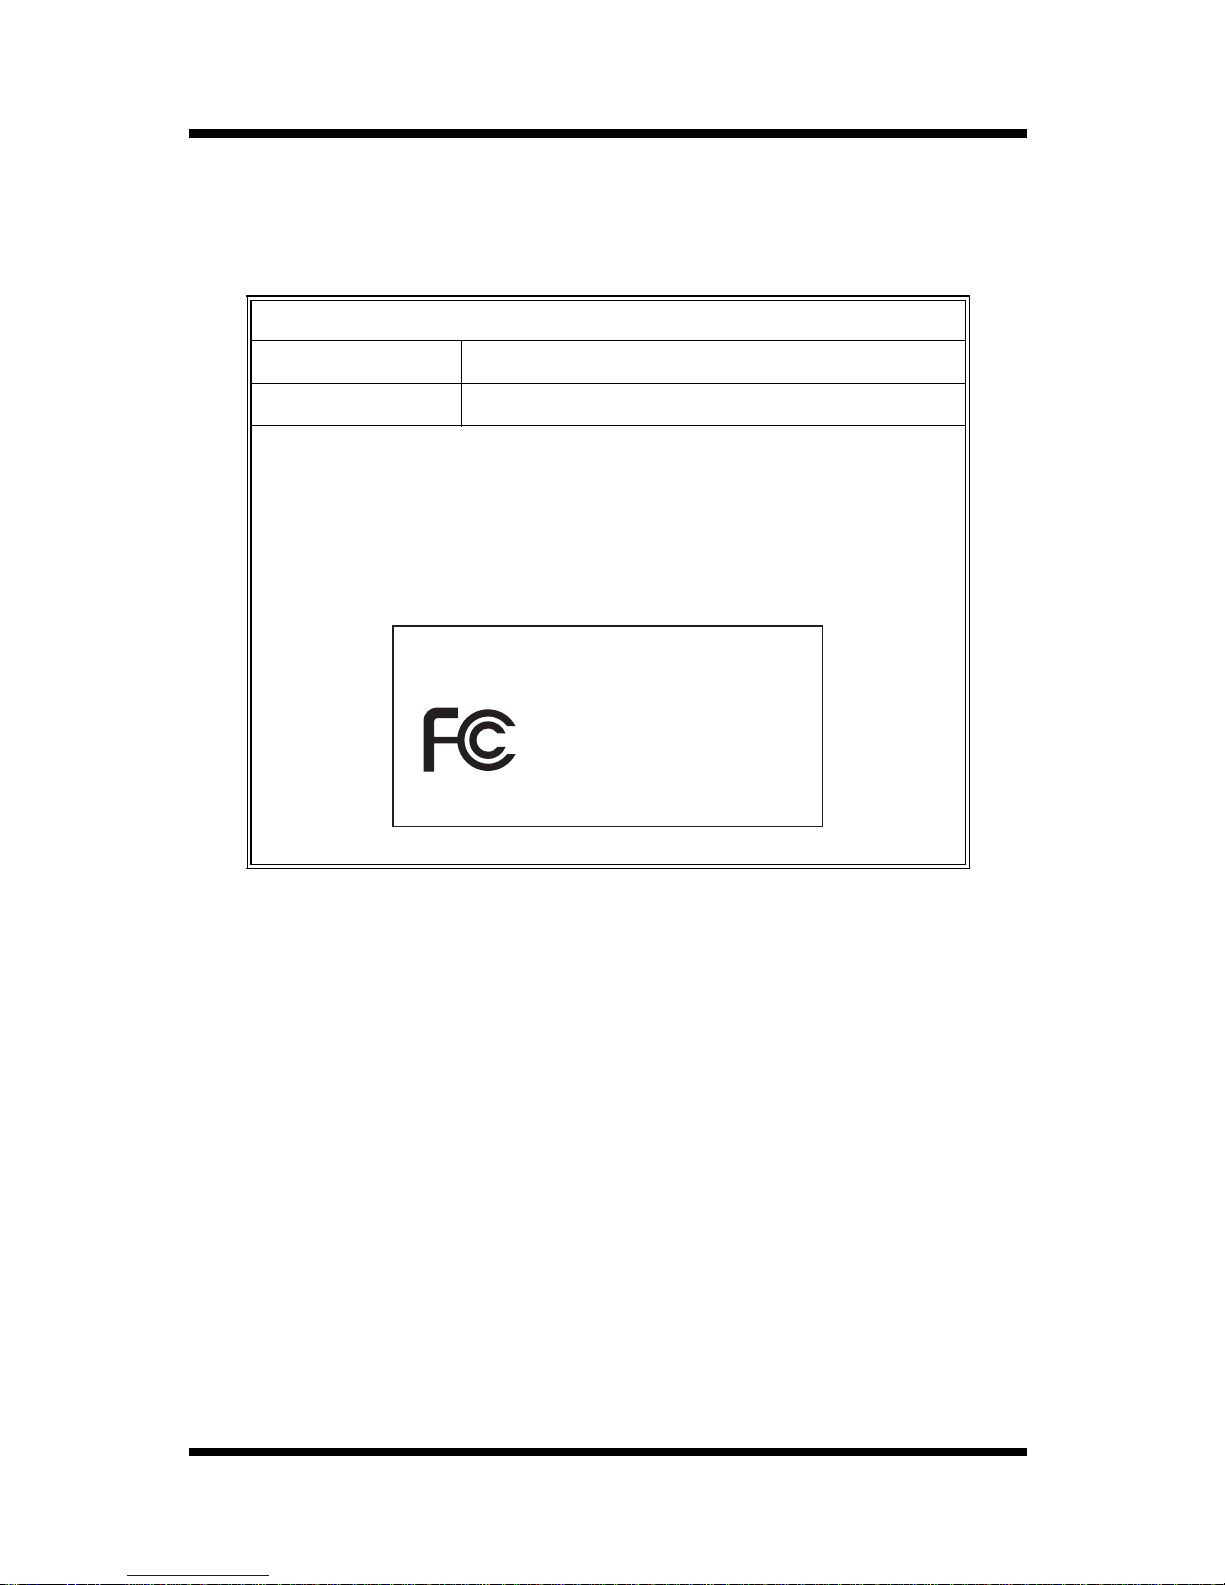
FCC: Declaration of Conformity
Product Type Network Interface Card
Product Nam e 4179-255
This device complies with Part 15 of the FCC Rules.
Operation is subject to the foll owing two conditions:
(1) this de vice may not cause har mfu l interference, and
(2) this devic e must accept any interference received,
including interference that may ca use undesired operation.
MINOLTA
4179-255
Tested To Comply
With FCC Standards
FOR HOME OR OFFICE USE
This equipment has been tested and found to comply with the limits for a
Class B digita l device, pursuant to Part 15 of the FCC Rules. These limits
are designed to provide reasonable protection against harmful interference
in a residential installation. This equipment generates, us es, and can radiate
radio frequency energy and, if not ins talled and used in accordance with the
instructions, may cause harmful interference to radio communications.
However, there is no gua rantee that interfe rence will not occur in a particular installation. If this equipment does cause harmful interference to radio
or televisi on reception, which can be determ ined by turning the equipment
off and on, the user is encouraged to try to correct the interference by one
or more of the following m easures:
●
Reorient or relocate the recei ving antenna.
●
Increa se the sep a ra t ion b etw een th e equipm ent and the receive r.
●
Connect the equipment to an outlet on a circuit different from
that to w hich the receive r is connected.
●
Consult the dealer or an experienced radio/TV technician for
help.
iv

Foreword
The design and production of this unit conform to FCC regulations, and
any changes or modi fications must be registered with the FCC and are subject to FCC control. Any changes made by the purchaser or user without
first contacting the manufacturer will be subject to penalty under FCC regulations.
This devic e m us t be used with shielde d network (10/100BASE-T) cable.
The use of non-shielded cables is likely to result in interference with radio
communications and is prohibited under FCC rules.
USER INSTRUCTIONS (Fo r Canada)
INTERFERENCE-CAUSING EQUIPMENT STANDARD
(ICES-003 ISSUE 3) WARNING
This Class B digital apparatus complies with Canadian ICE S-003.
Cet appareil numérique de la classe B est conforme à la norme NMB-003
du Canada.
v

Foreword
USER INSTRUCTIONS (FOR Europe)
CE Marking (Declaration of Conformity)
We declare under our sole responsibility that the Network Interface Card
for use with Minolta/QMS PagePro 4100 printer, to which this declaration
relates ar e in co n f or mity wi th th e specifi c ation s below.
This declaration is val id for the area of the European Union (EU) only.
Product Type Network Interface Card
Product Name 4179-255
Standard EMC: EN55 022 (Class B)/1998
:Lim its an d me thod for m ea su remen t of radio di st ur ba n ce
char acteristic of informatio n technology equipment (ITE)
EN61000 -3-2 (Class A)/1995 (A13)
:El ectromagneti c compatibil ity (EMC) - Part 3:Lim its
Section 2:Limits for harmonic currents emissions
(equipm ent input current≤16A pe r phase )
EN61000-3-3/1995
:El ectromagneti c compatibil ity (EMC) - Part 3:Lim its
Section 3:Limitation of voltage fluctuations and flicker in
low-voltage supply systems for equipment with rated
current≤16A
EN55024/1998
Inform ation technology equipment - Immunit y
characteristic s - Limits and methods of measurement
IEC61000-4-2/1995 A1
Elect ro m a gn etic co m p at ibilit y (E M C )
Part 4: Testing and measurement t echniques
Section 2: Electrostatic discharge immunity test
IEC61000-4-3/1995
Elect ro m a gn etic co m p at ibilit y (E M C )
Part 4: Testing and measurement t echniques
Section 3: Radiated, radio-frequ ency electromagnetic field
immunity test
IEC61000-4-4/1995
Elect ro m a gn etic co m p at ibilit y (E M C )
Part 4: Testing and measurement t echniques
Section 4: Electrical fast transient/burst immunity test
vi

Foreword
IEC61000-4-5/1995
Elect ro m a gn etic co m p at ibilit y (E M C )
Part 4: Testing and measurement t echniques
Section 5: Surge immunity test
IEC61000-4-6/1996
Elect ro m a gn etic co m p at ibilit y (E M C )
Part 4: Testing and measurement t echniques
Section 6: Conducted disturbances inducted by radiofrequency fields - Immunity test
IEC61000-4-8/1993
Elect ro m a gn etic co m p at ibilit y (E M C )
Part 4: Testing and measurement t echniques
Section 8: Powe r-frequency magnetic field im munity test
IEC61000-4-11/1994
Elect ro m a gn etic co m p at ibilit y (E M C )
Part 4: Testing and measurement t echniques
Section 11: Voltage dips, short int erruptions and voltage
va riations immunity test
EC Directive EMC: 89/336/EEC and 93/68/ EEC
This devic e m us t be used with shielde d network (10/100BASE-T) cable.
The use of non-shielded cables is likely to result in interference with radio
communications and is prohibited under 89/336/EEC rules.
vii

Foreword
Welcome
Congratulations on your selection of this quality Minolta/QMS
Network Interface Card for PagePro 4100.
This User’s Manual provides information about how to set up the Network Interface Card and operate the printer in a netwo rk environment.
Trademark Acknowledgements
PagePro is a trademark of MINOLTA CO., LTD.
Mino lta is a regist ere d trad em ark of MINO LTA CO. , LTD .
QMS and the QMS logo are registered trademarks of QMS, Inc.
Apple, AppleTalk, and Macintosh are registered trademarks of Apple
Compu t er, Inc.
Ethernet is a registered trademark of Xerox Corporation.
HP Lase rJ et III, HP Las er Je t IIISi , HP L as erJet 4 Si, are regist er ed
trademarks of Hewlett-Packard Company. HP UNIX is a trademark of
Hewlett-Pa ck ard Co m p any.
Microsoft is a registered trademark of Microsoft Corporation. Windows, Windows NT, and I nternet Explorer are tr ademarks of Microsoft
Corporation.
Netscape Communications, the Netscape Communications logo,
Netsc ap e Naviga tor, Netscap e Communi ca tor, and Netsca p e are tr ademarks of Netscape Communications Corporation.
Novell, Net Ware, and U NIX are regis tered trademarks of Novell, Inc.
PostScript is a registered trademark of Adobe Systems, Inc.
SCO UN IX is a trad em ark of The Sa nta Cr u z Ope rat io n, Inc .
SUN an d Solar is are t rademark s of SUN Micro s ys te ms, Inc .
ULTRIX is a trademark of Digital Equipment Corporation.
All other product names are trademarks or r egistered trademarks of
their resp ec tive holde rs.
Copyright 2000 MINOLTA CO., LTD
The information contained in this manual is subject to change without notice.
viii
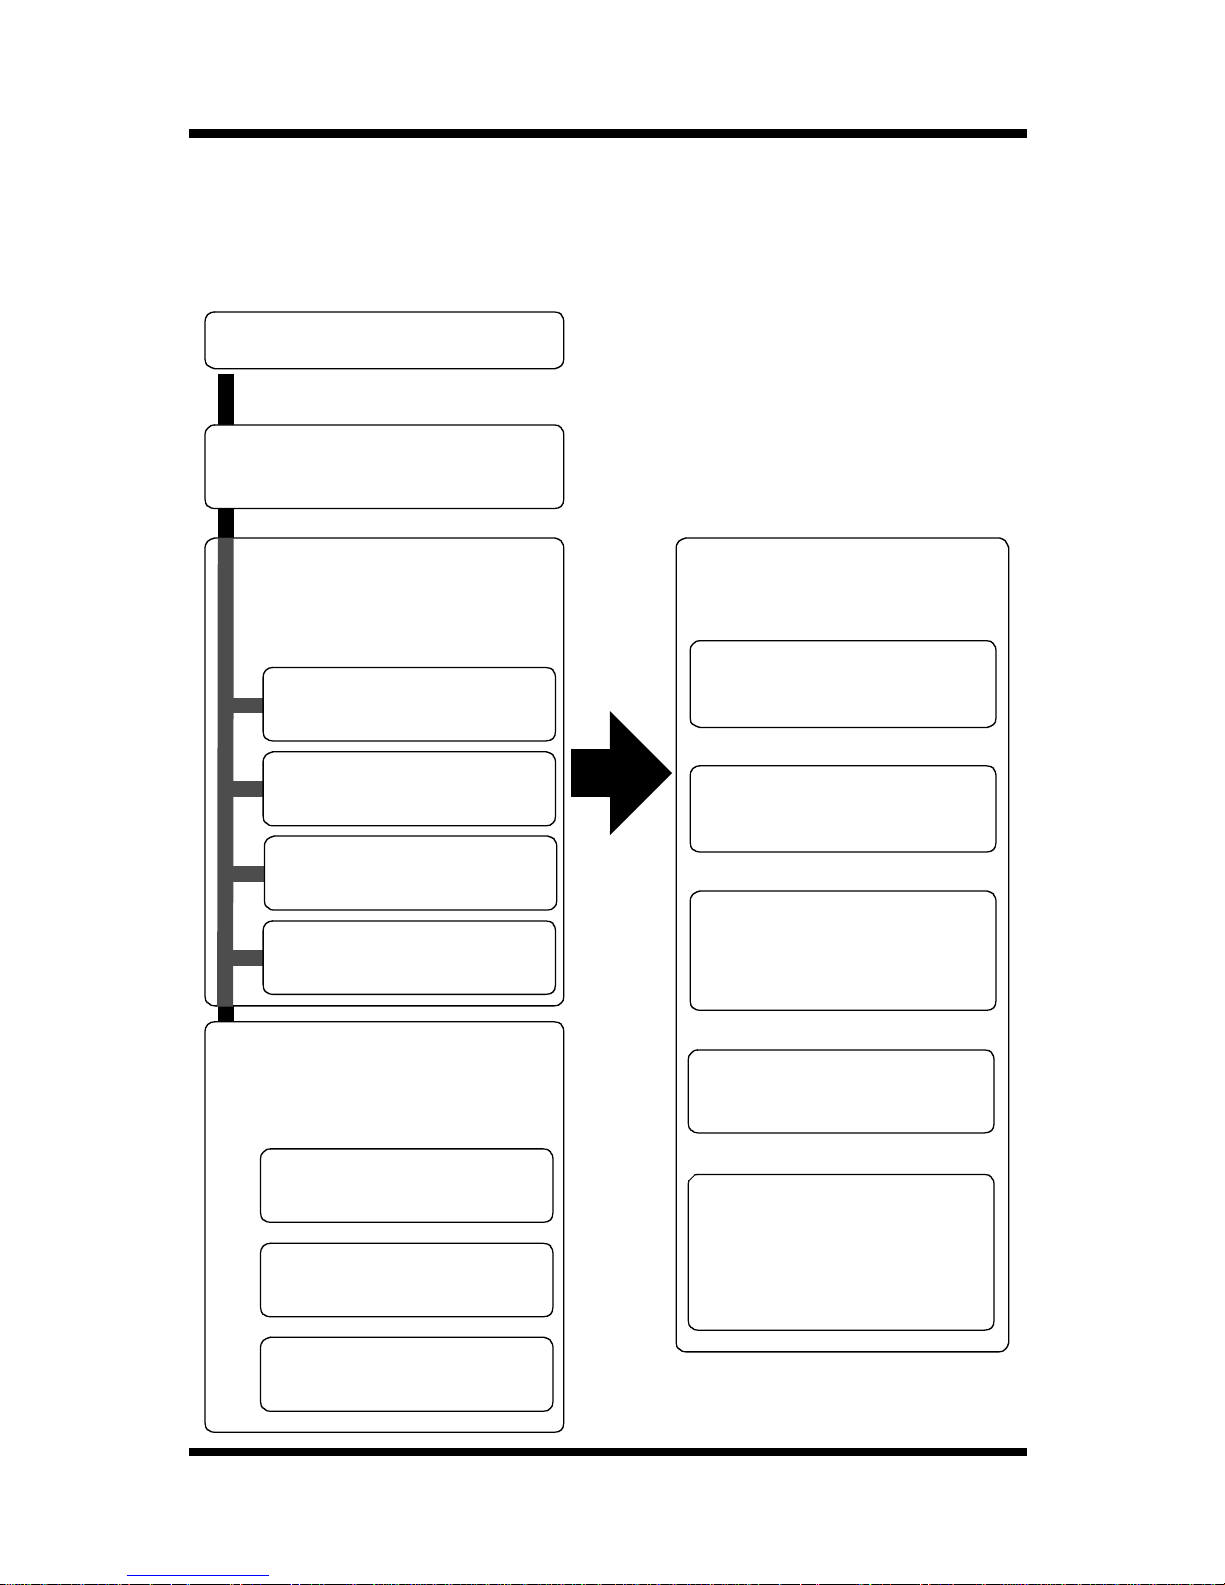
About This Manual
The following shows the general outline of this manual.
Chapter 1 - Getting Ready
Chapter 2 - Installing the
Network Card
Foreword
Read the section for
your particular
network enviro nm en t.
Chapter 3 - Windows
Configuration
Chapter 4 - NetWare
Configuration
Chapter 5 - Macintosh
Configuration
Chapter 6 - UNIX
Configuration
Read the following
chapters when
necessary.
Reference these
ch apters as required.
Chapter 7 - Setting Up IP
Parameters
Chapter 8 - Using the
Utility Software
Chapter 9 - Using a Web
Browser to Make Settings
Chapter 10 - Using Telnet to Make Settings
Chapter 11 - Troubleshooting
Chapter 12 - Jumper
Switch Settings
Chapter 13 - Specifications
Appendix A - Installing
and Setting Up Network Protocol (Windows)
ix

Contents
CONTENTS
Chapter 1: Getting Ready
1-1 Bundled Items.................................................. 1-2
1-2 System Requirements..................................... 1-4
Chapter 2: Installing the Network Card
2-1 Preparing the Printer....................................... 2-1
2-2 Connecting a Network Cable .......................... 2-2
2-3 Setting Up the Network Card.......................... 2-3
Chapter 3: Windo ws Config ur ati on
3-1 Windows 95/98................................................. 3-1
3-1-1 Peer-to-Peer Printing with TCP/IP ........... 3-2
3-1-2 Peer-to-Peer Printing with IPX/SPX......... 3-4
3-2 Windows NT ..................................................... 3-5
3-2-1 Peer-to-Peer Printing with TCP/IP ........... 3-5
3-2-2 LPR Printing ............................................ 3-7
3-3 Windows 2000.................................................. 3-9
3-3-1 Peer-to-Peer Printing with TCP/IP ........... 3-9
3-3-2 LPR Printing .......................................... 3-11
Chapter 4: NetWare Configuration
4-1 NetWa re 3.x Configuration.............................. 4-2
4-1-1 Starting up PCONSOLE and Selecting the
File Server............................................... 4-3
4-1-2 Creating a Print Queue............................ 4-4
4-1-3 Specifying the Print Server Name ........... 4-4
4-1-4 Configuring the Print Server .................... 4-5
x

Contents
4-1-5 Assigning Print Queues to the Printer ..... 4-6
4-1-6 Setting Up the Printer NOTIFY Options
(Optional)................................................. 4-7
4-1-7 Installing the Pr int Server on Multiple File
Servers .................................................... 4-8
4-1-8 Primary File Server.................................. 4-9
4-1-9 Pref er red File Server ............................... 4-9
4-2 NetWare 4.x Configuration Using Bindery
Emulation........................................................ 4-10
4-2-1 Confirming the Bindery Context............. 4-10
4-2-2 Configuring in the Bindery Mode........... 4-11
4-3 Configuration Usin g Novell Directory
Services.......................................................... 4-13
4-3-1 Creating a Printer Object....................... 4-15
4-3-2 Creating a Print Server Object............... 4-16
4-3-3 Creating a Print Queue Object .............. 4-16
4-3-4 Assigning a Printer Object..................... 4-18
4-3-5 Assigning a Print Server Object............. 4-19
4-3-6 Checking Assignments.......................... 4-20
4-3-7 Printer Configuration and Reset ............ 4-21
Chapter 5: Macintosh Configuration
5-1 Setting Up AppleTalk....................................... 5-1
5-2 Selecting and Settin g Up the Printer.............. 5-1
5-3 Network Card Configuration........................... 5-2
Chapter 6: UNIX Confi gu ration
6-1 Printer-based lpd Configuration..................... 6-3
6-1-1 BSD System ............................................ 6-4
6-1-2 AIX Version 2.5........................................ 6-5
6-1-3 AIX 4.0..................................................... 6-6
xi

Contents
6-1-4 HP-UX...................................................... 6-6
6-1-5 AS/400..................................................... 6-7
6-1-6 DEC ULTRIX 4.3 RISC, OSF1/ALPHA.... 6-8
6-1-7 SCO UNIX ............................................... 6-9
6-1-8 System V Release 4, Solaris 2.x ........... 6-10
6-2 Host-based lpd Configuration...................... 6-11
6-2-1 Loading the Program............................. 6-12
6-2-2 Selecting Filters..................................... 6-13
6-2-2-1Selecting a Filter Manually.............. 6-13
6-2-3 Solaris Version 1, OSF1 ........................ 6-14
6-2-4 DEC ULTRIX 4.3.................................... 6-16
6-2-5 HP-UX System....................................... 6-17
6-2-6 System V (Solaris Version 2), System V
Release 4/386 Base Machine ................ 6-19
6-2-7 SCO UNIX ............................................. 6-21
6-2-8 AIX RISC System/6000 ......................... 6-23
6-2-8-1Virtual Printer Commands............... 6-25
6-2-8-2AIX Print Command......................... 6-25
Chapter 7: Setting Up IP Parameters
7-1 Assigning IP Addresses Using ARP
(For Windows).................................................. 7-2
7-2 Assigning IP Addresses Using ARP
(For UNIX)......................................................... 7-4
7-3 Assigning IP Addresses Using the BOOTP
Daemon (For UNIX).......................................... 7-6
7-4 Assigning IP Addresses Using the RARP
Daemon (For UNIX).......................................... 7-7
7-5 Using the DHCP Daemon (For UNIX) ............. 7-9
xii

Contents
Chapter 8: Using the Utility Software
8-1 Management Access Program (Windows) .... 8-1
8-1-1 Installing MAP.......................................... 8-2
8-1-2 Using MAP...................... ......... ......... ....... 8-3
8-2 Peer-to-Peer Printing Program (Windows) .... 8-5
8-2-1 IP Peer-to-Peer Printing Program
(Windows)................................................ 8-5
8-2-1-1Insta lling the IP Peer-to-Peer Printing
Program............................................. 8-5
8-2-1-2Using the IP Peer-to-Peer Printing
Program............................................. 8-7
8-2-2 IPX Peer-to-Peer Printing Program
(Windows).............................................. 8-10
8-2-2-1 Ins talling the IPX Peer-to-Peer
Printing Program ............................. 8-10
8-3 BOOTP (Windows)......................................... 8-13
8-3-1 Using BOO TP.......................... .............. 8-14
8-4 NIManage for AppleTalk (Macintosh)........... 8-15
8-4-1 Using NIManage...................... ......... ..... 8-15
8-4-1-1Configuration.............................. ..... 8-17
8-4-1-2Error Log ......................................... 8-17
8-4-1-3Setting Up the Protocol ................... 8-18
8-4-1-4Setting Up the Status Page............. 8-19
8-5 NWSetup (Windows)...................................... 8-19
8-5-1 Installing NWSetup................................ 8-20
8-5-2 Using NWSetup....................... ......... ..... 8-21
8-5-2-1Selecting a Print Server................... 8-21
8-5-2-2Novell NetWare Settings................. 8-22
8-5-2-3Print Server Settings ....................... 8-24
8-5-2-4Setting Up Notification..................... 8-27
xiii

Contents
Chapter 9: Using a Web Browser to Make Settings
9-1 Operating Conditions...................................... 9-1
9-1-1 Supported Web Browsers ........................ 9-1
9-2 Access Methods............................................... 9-2
9-3 Printer Monitor................................................. 9-3
9-3-1 Printer Status........................................... 9-4
9-3-2 Summary ................................................. 9-4
9-3-2-1Input Tray.......................................... 9-5
9-3-2-2Output Bin ......................................... 9-6
9-3-2-3Others................................................ 9-6
9-3-2-4System .............................................. 9-7
9-3-3 Network.................................................... 9-8
9-3-4 Operationa l P an el.................... ......... ....... 9-9
9-3-5 About .............................. ......... ......... ....... 9-9
9-3-6 Network Card Setting............................. 9-10
9-4 Network Card Settin gs .................................. 9-10
9-4-1 TCP/IP Configuration............................. 9-12
9-4-2 NetWare Configuration.......................... 9-15
9-4-3 AppleTalk Configuration......................... 9-18
9-4-4 Print Option............................................ 9-19
9-4-5 IPP Printer Configuration....................... 9-21
9-4-6 Change Password.................................. 9-23
9-4-7 Reset ..................................................... 9-24
9-4-8 Network Information............................... 9-25
9-4-9 Languages............................................. 9-25
xiv

Contents
Chapter 10: Using Telnet to Make Settings
10-1 Establishing a Telnet Connection............... 10-2
10-2 Menu Items.................................................... 10-3
10-2-1 IP Parameters........................................ 10-3
10-2-2 LPD Printers .......................................... 10-3
10-2-3 Protocols................................................ 10-3
10-2-4 Reset Unit.............................................. 10-3
10-2-5 Restore Factory Defaults....................... 10-4
10-2-6 Change Password.................................. 10-4
10-2-7 Exiting Telnet (Exit)................................ 10-5
Chapter 11: Troubleshooting
11-1 LED Status Indicators.................................. 11-1
11-2 Troubleshooting ........................................... 11-3
11-2-1 General Troubleshooting Procedure...... 11-3
11-2-2 NetWare Troubleshooting Procedure..... 11-4
11-3 Resetting to Factory Defaults ..................... 11-6
Chapter 12: Jumper Switch Settings
12-1 Network Card and Jumper Pin Positions... 12-2
12-2 Resetting to Factory Defaults ..................... 12-2
12-3 Bus Handshaking......................................... 12-3
Chapter 13: Specifications
13-1 Network Card................................................ 13-1
13-2 10/100BaseT Cable....................................... 13-1
xv

Contents
Appendix A: Installing and Setting Up Network
A-1 In stalling and Setting Up TCP/IP
(Windows 95/98)...............................................A-1
A-2 Installing and Setting Up IPX/SPX-compatible
Protocol (Windows 95/98)...............................A-2
A-3 In stalling and Setting Up TCP/IP and TCP/IP
Printing (Windows NT 4.0) ..............................A-3
A-3-1 Installing and Setting Up the
TCP/IP Protocol.......................................A-3
A-3-2 Installing and Setting Up the Microsoft
TCP/IP Printing Service...........................A-4
A-4 In stalling and Setting Up TCP/IP
(Windows 2000)................................................A-5
Appendix B: Index
xvi

Chapter
Chapter 1
Getting Ready
Getting Ready
1

Chapter 1
Getting Ready

Introduction
This Network Interface Card is a multi-protoc ol ne twork card that
provides Ethe rnet connection for the Minolta/QMS PagePro 4100 and
offers the following f eatur es.
• Automatic Ethernet type detection (10Ba seT, 100BaseT)
• Fully transparent Apple Talk printing support for the Macintosh,
including support for binary PostScript printing.
• Peer-to-peer printing pr ogram allows pr inting on a network without going through a server
- Peer-to-Peer Printing with TCP/IP (Windows 95/98/2000/NT
4.0)
- Peer -to-Peer Printing with IPX/SPX (Windows 95/98)
• Novell NetWare PSERVER support under bindery base or Novell
Chapter 1
Getting Ready
Directory Services (NDS)
• lpr/lpd functions under TCP/IP
• SNMP control using MIB-II and priv ate MIB
SNMP support using standard MIB on a compatible printer or
printer-specific MIB
• Onboard HTTP server allowing net work function settings using a
Web browser
• Direct printing from a Web browser or other FTP client
• Direct printing from an IPP client
1-1

1-1 Bundled Items
1-1 Bundled Items
For PagePro 4100E user s
Chapter 1
This Network Card comes with the following items.
•Network Card
•Quick Guide
For PagePro 4100GN users
The PagePro 4100GN printer has a network interfa ce device on its
Getting Ready
controller board, so the above items are not bundled.
Utility software (on the CD-ROM)
The following items are contained in the
CD-ROM that comes with the printer.
nicutlty
folder on the
Network Interface Card User’s Manual (this manual)
Discovery Program
– IPX/IP Management Access Program (MAP)
Peer-to-Peer Printing Progr ams
– IP Peer-to-Peer Printing Program
– IPX Peer-to-Peer Printing Program
BOOTP Program
– BootPL32.ex e
NetWare Setup Utility Program
–NWSetup
Macintosh Utility Program
– NIManage (AppleTalk Utility)
UNIX TCP/IP Utility Programs
MIB Setting File
1-2

1-1 Bundled Items
The ReadMe fi le on t he CD-ROM contains the lat est infor mati on about
each of the network software applicat ions. Be sure to read the ReadMe
file before using the network softwa re.
The program for updating the flash ROM and documentation
explaining how to perform the update is not provided with this
package. The update and program are available as an update package.
Chapter 1
Getting Ready
1-3

1-2 System Requirements
1-2 System Requirements
The Netw o rk Interface Card hard wa re and softwa re req ui re t he
following:
Chapter 1
Getting Ready
Version of
Protocol or NOS
Novell NetWare Version 3.x, 4.x, or 5
Macintosh System 7.x, 8.x, or 9.x
UNIX, Wi ndows, or LAN Server systems
supporting lpr over TCP/IP
DEC ULTRIX 4.3 or 4.4, DEC OSF/1 2.0 or
3.0, Solaris 1.1.3 or 2.3, (SUN OS 4.1.3 or
5.3), Syste m V Release 4, HP-UX 9.01, IBM
AIX 3.2.5, or SCO UNIX 2 for DPI TCP/IP
port 10001
Novell NetWare printing requires NetWare
Capture, NPRINT and PCONSOLE (later
than 1.0) utilities.m
NWSetup requires Windows 95/98/2000 or
Windows NT4.0, and the Nove ll 32-bit client.
Software
The IP Peer-to-Peer utility requires Windows
NT 4.0; Windows 95/98/2000.
The IPX Peer-to-Peer utility requires
Windows 95/98.
The MAP utility requires Windows NT 4.0;
Windows 95/98/2000. MAP also requires a
browser such as Microsoft Internet Explorer
or Netscape.
TCP/IP setup and maintenance may be done
with T e lnet. Monitor ing and maintenance with
HTTP requires a suitable Internet Web
browser program supporting HTML.
AppleTalk printing requires printer P PD
appropriate to the printer. AppleTalk
NIManage Utility Program is provided for
setup and maintenance.
1-4

Hardware
1-2 System Requirements
Support for 10 or 1 00 megabi t Ethernet network s:
10/100BaseT (twisted pair cables) and hardware
CD-ROM drive
Chapter 1
Getting Ready
1-5

MEMO
Chapter 1
Getting Ready

Chapter
Chapter 2
Installing the Network Card
Installing the Network
Card
2

Chapter 2
Installing the Network Card

2-1 Preparing the Printer
2-1 Preparing the Pr inter
Important!
• The Network Card MAC address (network address) and seri al number
are marked on la bels above the port on the Netw ork Card. These numbers are required when making Ne twork Card settings, so be sure to
write them down somewhere before installing the c ar d .
Note
• If you are using the PagePro 4100E printer, install the optional Network Card following to the procedure desc ribed in this section.
If you are using the PagePro 4100GN printer, you don’t need to install
the Network Card, because the printer comes with a network interface
device on its controller board. Skip to the next section.
1. Confirm that the printer is operating normally.
2. Power down the printer and unplug it s power cord from the power
outlet.
3. Install the Netwo rk Card into the inte rf ace connector of the printer
controller board.
See the Quick Guide (Installing the Network Card) that comes with the
Network Card for full details about installation.
Important!
• Special care is required when handling the Network Card. The Network Card is des igned to protect components from electros tatic discharge during normal opera tion. Be sure to take proper electrostatic
protection measures whenever handling the Network Card.
Chapter 2
Installing the Network Card
2-1
Chapter 2
2-2 Connecting a Network Cable
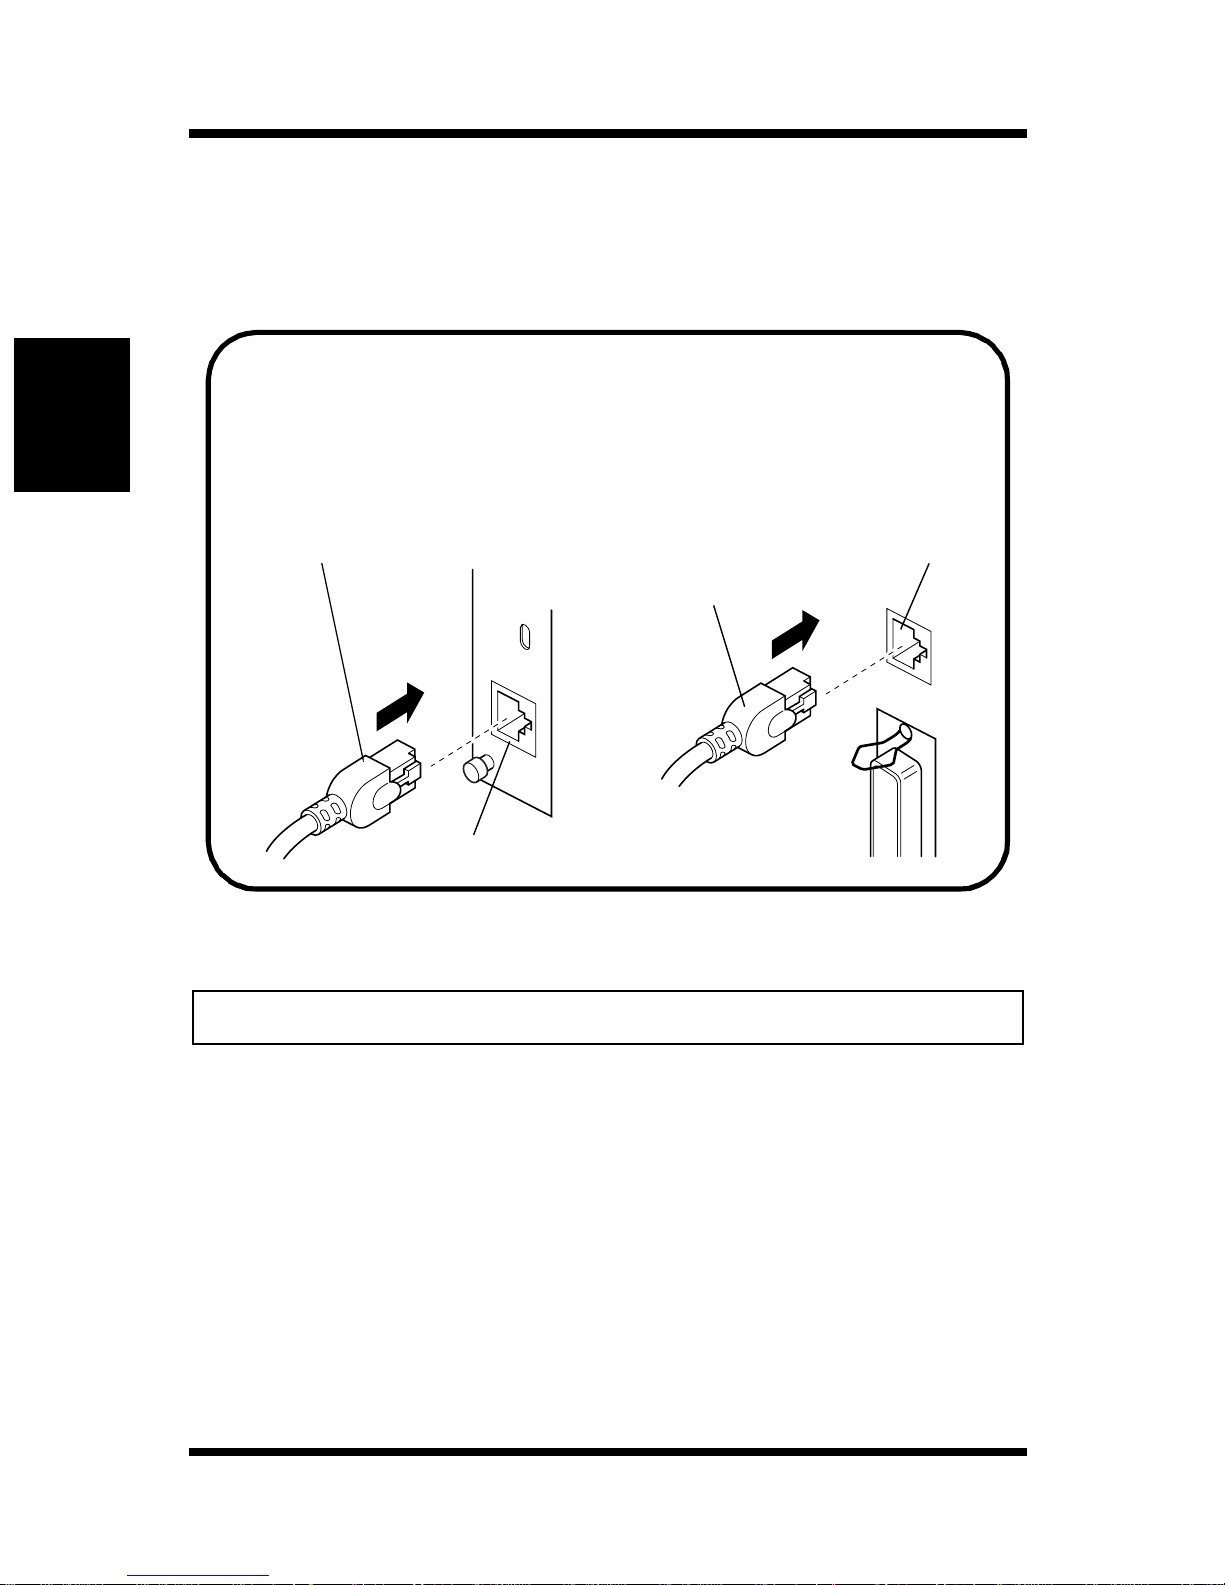
2-2 Connecting a Network Cable
1. Make sure that printer power is turne d off.
2. Connect the network cable to the Network Card.
Insert the plug into the 10/100BaseT port on the rear panel of
the Network Card and press it in until you hear it click securely
into place.
PagePro 4100E PagePro 4100GN
Installing the Network Card
Network Cable
Network Cable
10/100BaseT Port
10/100BaseT Port
3. Power up the printer and check for abnormalities.
Important!
• Use only Cate gory 5 shielded 10/100BaseT cable.
2-2

2-3 Setting Up the Network Card
2-3 Setting Up the Network Card
You must first configure the Network Card and your computer before
you can print using the Network Card. The settings you need to make
depend on the configuration of your networ k environment. Chapters 3
through 6 of this manual describe configurations for the environments
listed below. Follow the configurations procedure for the operating
system you are using.
Chapter 3 - Windows Configuration
Network printing in a Windows 95/98/2000/NT envir onment
Chapter 4 - NetWare Configuration
Network printing in a NetWare environment
Chapter 5 - Macintosh Configuration
Network printing in a Macintosh environment
Chapter 6 - UNIX Configuration
Network printing in a UNIX envir onment
Chapter 2
Installing the Network Card
2-3
 Loading...