

MINIMOTO ATV Instruction Manual
Important: You must
charge your MINIMOTO™
ATV a minimum
of 12 hou rs before you
can use it.
RECHARGE t he batt er y
EACH TIME yo u use it.
TO PROTECT THE LIFE
OF THE BATTERY,
rech arge the batt er y
at le ast on ce a month.
FOLLOW ALL SAFETY
RULES AND SET UP
INSTRUCT IONS I N THIS
MANUAL THOROUGHLY.
FAILURE TO DO SO
MAY VO ID YOUR
WARRANT Y.
DO NOT RETURN THE
MINIMOTO™ ATV
TO THE STORE!
IF YOU NEED REPAIR
PARTS GO TO:
www.ElectricScooterParts.com
OR CALL:
1-800-908-8082
8 AM TO 5 PM PST,
Mon day thro ugh Frid ay,
(excluding holidays)
OR contact us by
email at:
sales@electricscooterparts.com
23293 1.0(01/07)
23293 1.1(03/02)
23293 1.2(03/11)
23293 1.3(04/01)
23293 1.4(04/09)
23293 1.5(04/29
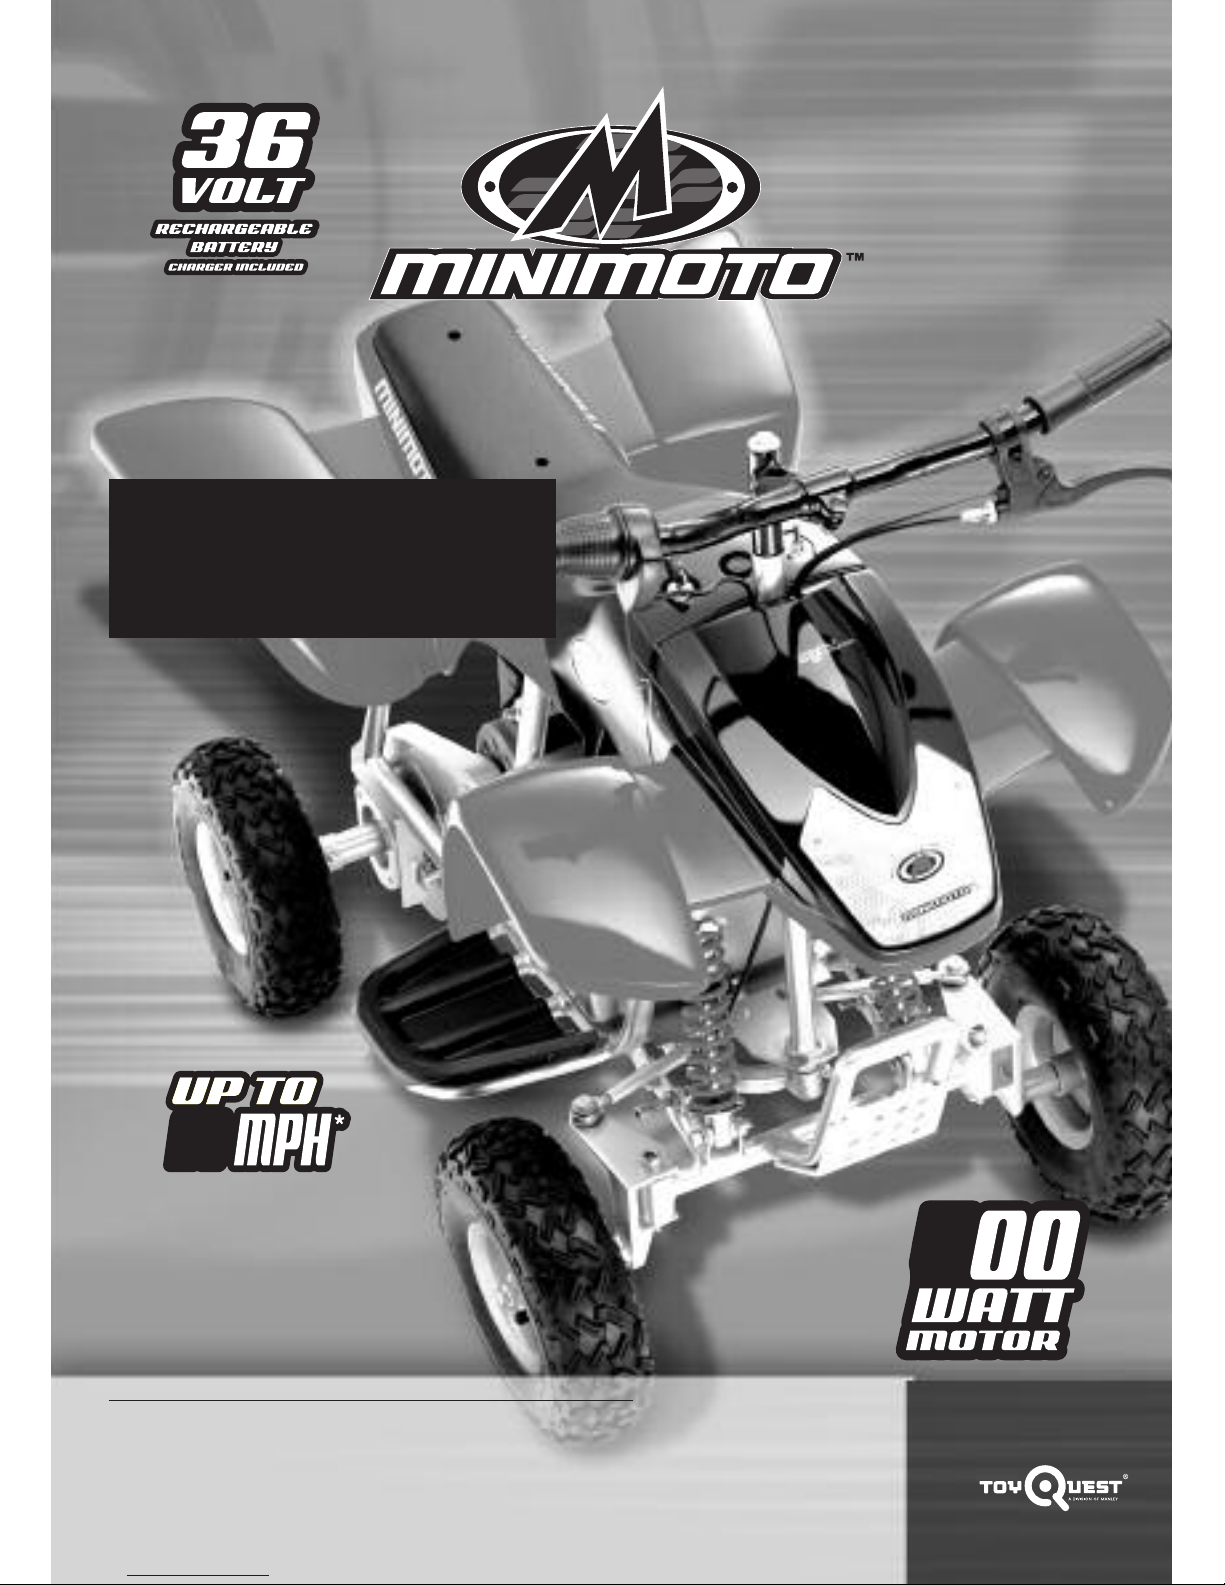
ATV
ELECTRIC POWERED
Please read this manual and save it with your original sales receipt.
Tools needed for assembly (included): Three Allen Keys, One Wrenches, and one Detachable Screwdriver.
Use only with included: One 36 Volt Lead-Acid Rechargeable Battery,
three Ignition Keys and one Battery Charger.
(Protective equipment not included)
INSTRUCTION
MANUAL
IMPORTAN T!
Read completely before
attempting to ride
ATV
14
5
ELECTRIC POWERED
Owners Manual Courtesy of ElectricScooterParts.com
MINIMOTO™ATV
1
Conte nts Page
MINIMINIMOTO™ ATV
Owner’s manual and safety instructions
2
Warnings
3 - 4
Electrical hazard
5
Vehicle set up and a ssembly
6
Battery charging information
7
Steps to charge battery
8
Battery care
9
Riding rules
10
Abuse detection warning buzzer, c ircuit breaker, and power shut down prote ction
14
How to ride your MI NIMOTO™ ATV
12 - 13
Pre-ride checklist / MINIMOTO™ ATV controls and switches
11
Low power LED Indicator / If you lose the key
15
Tire inflation procedure / Tire repair
16
Tire rotation
17
Replacing the battery
18 - 19
Battery disposal
19
Replacing the chain
20
Brake Adjustment
21
Rear disc brake ad justment
21 - 22
Limited warranty and registration policy
25
Trouble shooting
23 - 24
Registration card / V IN location
26
Appendix — spare part list
27 - 28
MINIMOTO™ATV
MINIMOTO™ ATV
Owner’s manual and safety instructions
Read this manual completely and carefully
before operating your electric MINIMOTO™
ATV. Keep this manual in a safe place for
future reference. Be sure you thoroughly
understand how to operate the compo-
nents of your MINIMOTO™ ATV.
NOTE: Throughout this manual there
are many “WARNINGS”. Be sure to
read and understand all of these “WARNINGS”. Please pa y extremely close attention to these areas as serious injury or
even death may result in failing to do so.
WARNING: This vehicle is a serious machine and should be treated with respect when riding it,
working on it, or simply being
near it.
This vehicle can obtain speeds that only
qualified riders of the proper age, size,
and maturity should attempt. That decision rests entirely on the observation and
discretion of the direct supervising adult.
IMPORTANT!!! Before we begin:
Like any wheeled vehicle, riding the MINIMOTO™ ATV can be extremely hazardous.
It is your responsibility to follow this manual for the proper set up, inspection, riding
procedure, protective gear required, and
rules of the road to reduce the risk of serious injury.
The age recommendation is only an estimate. If the rider is too small, too large,
or too old to comfor tably fit on the MINI MOTO™ ATV, he/she should not attempt to
ride it. The minimoto™ ATV is not
designed for or intended to be used b y of
anyone under the age of 10.
Keep away from small children.
2
FOR WEBSITE INFORMATION
www.teamminimoto.com
For Repair Parts and Accessories
Go To
www.ElectricScooterParts.com

MINIMOTO™ATV
WARNINGS:
This product is meant for outdoor use only
and only on private property. Never ride
your MINIMOTO™ ATV on public streets,
alleys, or other public roads or through-
fares. It must never be ridden in any area
that could potentially do harm to humans,
animals, or property damage.
Never ride around the vicinity of small chil-
dren who may enter your path.
Special notes for supervising adults of
the rider:
1) The decision to allow a rider to ride the
MINIMOTO™ ATV must be done with the
permission of a directly super vising adult.
The directly supervising adult must read
and follow all of the contents of the owners
manual before making this decision.
2) The rider must ha ve previous experience
in riding electric powered vehicles before
attempting to ride the MINIMOTO™ ATV. It
is the responsibility of the supervising adult
to ensure the rider has the specific talent,
physical ability, and training before allowing
them to attempt to ride the ATV.
3) The MINIMOTO™ ATV is never to be ridden indoors. Indoor flooring and carpets
can be damaged from abrasive contact with
the tires. The manufacturer will not be
responsible for an y indoor damage if the
MINIMOTO™ ATV is used in this manner.
4) The MINIMOTO™ ATV is designed to run
on off-road surfaces. Grass, packed dirt,
and moderate off-road ter rain are ideal riding surfaces by persons over the age of 10.
5) The rider of a MINIMOTO™ A TV should
always wear appropriate footwear. Opentoed shoes should ne ver be allowed. K eep
shoe laces and pant legs away and clear of
the wheels.
6) The rider must wear a safety helmet,
elbow and kneepads to avoid injury if
falling. Failure to wear a standard
approved helmet may result in serious personal injury or death.
7) The MINIMOTO™ ATV is never to be ridden by more than one person at a time. In
addition, it is not designed to pull or tow
anything behind it as it may result in serious
damage to the motor or internal parts. Do
not exceed the maximum capacity of 200
lbs (90 kg).
8) The MINIMOTO™ ATV cannot be used on
wet surfaces or in wet weather. Never
immerse any part of the MINIMOTO™ A TV in
water. Moisture can damage the motor,
switches, and drive components.
9) The MINIMOTO™ A TV should ne ver be
ridden in mud, water, ice, snow or sand. It is
not designed to be ridden in streets or on
paved surfaces either. Avoid riding on
extreme incline, declines, rocky surfaces,
curbs or jumps.
10) The electric motor can become hot
when in use. Do not touch it at an ytime and
handle it carefully.
11) Never use your MINIMOTO™ ATV while
using per sonal radios or headphones.
12) Do not use your MINIMOTO™ A TV for
stunt riding, ramp jumping, acrobatics or
similar activities.
3
MINIMOTO™ATV
13) Never inflate the tires beyond 30 psi.
Inflation of the tires should be performed by
adults only. Serious injury or death may
result in over inflation of the tires. Avoid filling the tires at a gas station. The greater
pressure of a gas station air pump makes a
blowout of the tire possible. This may
result in serious injury or death. Never use
non-MINIMOTO™ replacement parts.
14) If you need repair parts or accessories
the MINIMOTO ATV please contact
ElectricScooterParts.com toll-free at:
1-800-908-8082
Between the hours of 8 to 5 PST, Monday
through Friday (excluding holidays)
or by email:
sales@electricscooterparts.com
Do not return the product to the
store! Contact the Minimoto
Service Center. Authorized service is only available through the
official Minimoto Service Center.
Spare tires, inner tubes, batteries, and replacement parts can
be obtained through the
Minimoto Service Center.
15) SB 1918 (CALIFORNIA) DECLARATION:
YOUR INSURANCE POLICIES MAY NOT
PROVIDE COVERAGE FOR ACCIDENTS
INVOLVING THE USE OF THIS PRODUCT.
TO DETERMINE IF COVERAGE IS PROVID-
ED, CONTACT YOUR INSURANCE COMPANY
OR AGENT.
4
TTooyy QQuueesstt
cc// oo MMiinniimmoottoo SSeerrvv iiccee CCeenntteerr
11880000 NN.. 99tthh SSttrreeeett
IInnddiiaannoollaa,, IIoowwaa 5500112255
For Repair Parts and Accessories
Go To
www.ElectricScooterParts.com
™
ATV
ELECTRICAL HAZARD:
WARNING
CAUTION!
THIS IS AN ELECTRICALLY OPERATED
PRODUCT AND SHOULD BE OPERATED
WITH CARE. KEEP AWAY FROM SMALL
CHILDREN.
BEFORE RIDING, ALWAYS MAKE SURE
THAT THE BATTERY RETAINER IS FIRMLY IN
PLACE AND HOLDING THE BATTERY
SECURELY.
PREVENTING A FIRE:
a) Never modify the electrical system or
battery charger. Modifications of these
systems can result in fire, serious injury
and damage to the electrical components.
b) To avoid damaging the batteries, do not
use the charger if it has been str uck,
dropped or damaged in any way.
c) Do not expose the batteries to high
temperatures as this may cause the
battery to explode.
d) Never allow the batter y charger to
become wet or placed in w ater.
e) Use of the wrong type of batteries or
charger could cause a fire or explosion
resulting in serious injur y.
f) Never use Minimoto™ parts, batteries,
or components in any other products or
vehicles other than those of Minimoto™.
Replacing or substituting parts with other
vehicles can result in overheating, fire, or
explosion.
g) The battery is to be handled by ADULTS
ONLY. The battery is heavy and contains a
lead-acid electrolyte. Dropping the battery
can result in serious injury.
h) Never allow children to recharge the
battery. Charging the battery must be
done by ADULTS ONLY. A child could be
injured when involved in the operations of
battery charging or use of electrical
devices.
i) Make sure that all battery contacts or
connectors are clean and free of excessive
wear or damage whenever the battery is
charged. If ANY damage is detected, DO
NOT USE the charger or batteries until you
have replaced the worn or damaged part.
j) Always remove the Key when not in use
to ensure the power is off and prevent any
unauthorized riders from attempting to ride
the ATV.
5
MINIMOTO
™
ATV MINIMOTO
™
ATV
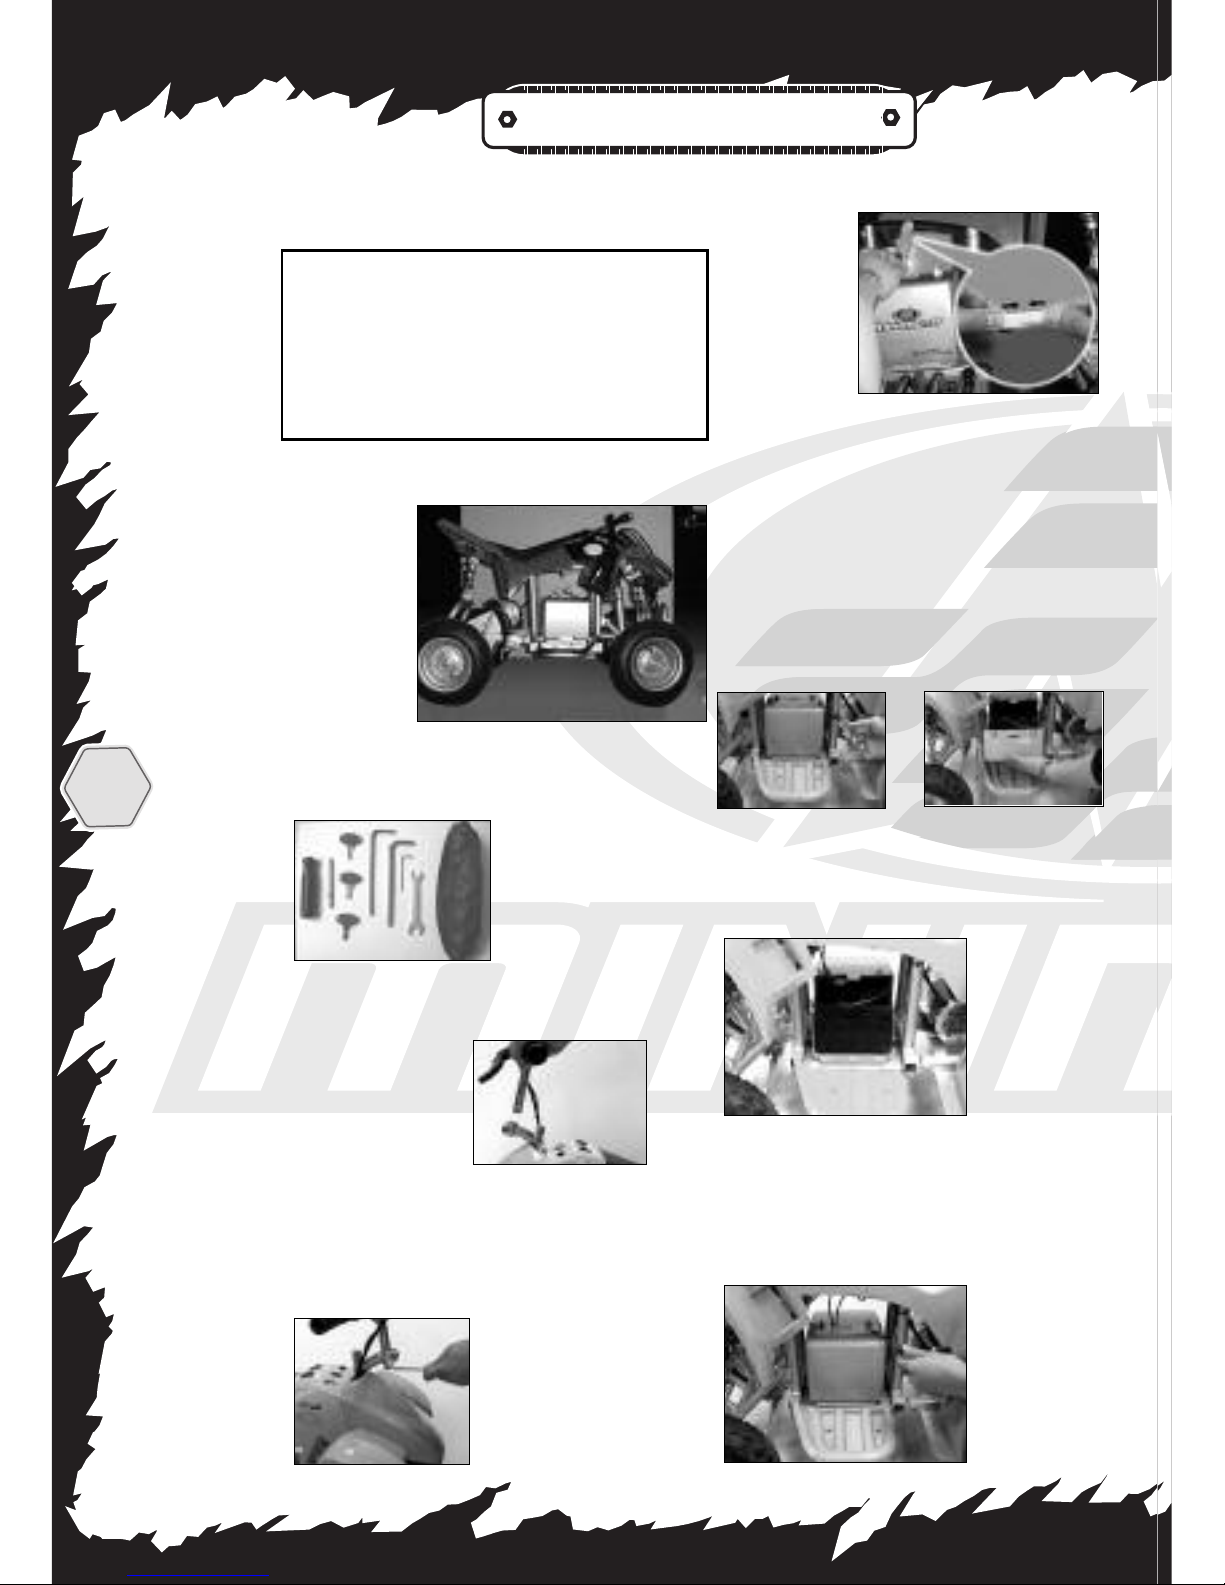
VEHICLE SET UP AND
ASSEMBLY:
CAUTION: The included tools to set up
and charge the Minimoto™ ATV should be
used by an ADULT ONLY. The package con-
tains some small parts. Keep away from
small children.
1) Completely remove the Minimoto™ ATV
and all
contents
from the
package.
(Fig 1)
Remove
and dis-
card the
protective
cardboard covering from the handlebars.
2) Find and identify
the following tools
and hardware (Fig 2)
3) Take the steering arm and place it in the
clamp (Fig 3)
4) Tighten the steering arm using the
Allen key in the tool kit (Fig 4).
5) Under the seat, remove the rubber band
that holds
the connec-
tors and
snap togeth-
er the two
connectors
(Fig 5).
6) From the left side of the vehicle, locate
the two screws holding the Battery box
together (Fig 6). Using a phillips head
screwdriver, unscrew these screws and
remove the left half of the battery box off
the vehicle (F ig 7).
7) Place the connector assembly inside
the battery
box with only a
wire protruding
from the top
(Fig 9).
8) Place the left half of the battery box
back on the vehicle and retighten the
screws (Fig 10).
6
Fig 1
Fig 2
Fig 3
Fig 4
Fig 6
Fig 7
Fig 9
Fig 5
Fig 10

™
ATV
7
BATTERY CHARGING
INFORMATION:
IMPORTANT! The new battery provided
in the Minimoto™ ATV MUST BE charged
for at least 12 hours before using for the
first time.
The charger MUST be used only in a clean,
dry area. In addition:
--Battery charging must be done by ADULTS
only.
--The battery must be upright when charging.
--The charger is not a to y.
--Do not shor t-circuit the battery.
--Do not charge the battery on any delicate
surfaces (such as a counter top).
--Only use the provided charger to charge the
battery.
--Only use a Minimoto™ ATV battery or batteries when operating.
--Remove old or dead battery from the
Minimoto™ ATV if they do not accept a
charge.
--Never use the charger in an enclosed
space. Alw ays ensure adequate ventilation.
--Never cover the Minimoto™ ATV or the
charger during charging.
--Should anything abnormal happen to the
Minimoto™ ATV or charger, switch off the
mains supply immediately and contact
Minimoto™ Service Center.
IMPORTANT!
Under normal conditions, the battery will
reach full charge in 8 to 12 hours of charg-
ing time. The difference in time depends
on the local power output in your area, the
type of outlet you use, and the condition of
the battery.
NOTE: Do not connect the charger to a
surge protector. You should only plug the
charger directly into a standard electric
wall outlet. Surge protectors can slow
down the charging process.
™
ATV
MINIMOTO
™
ATV MINIMOTO
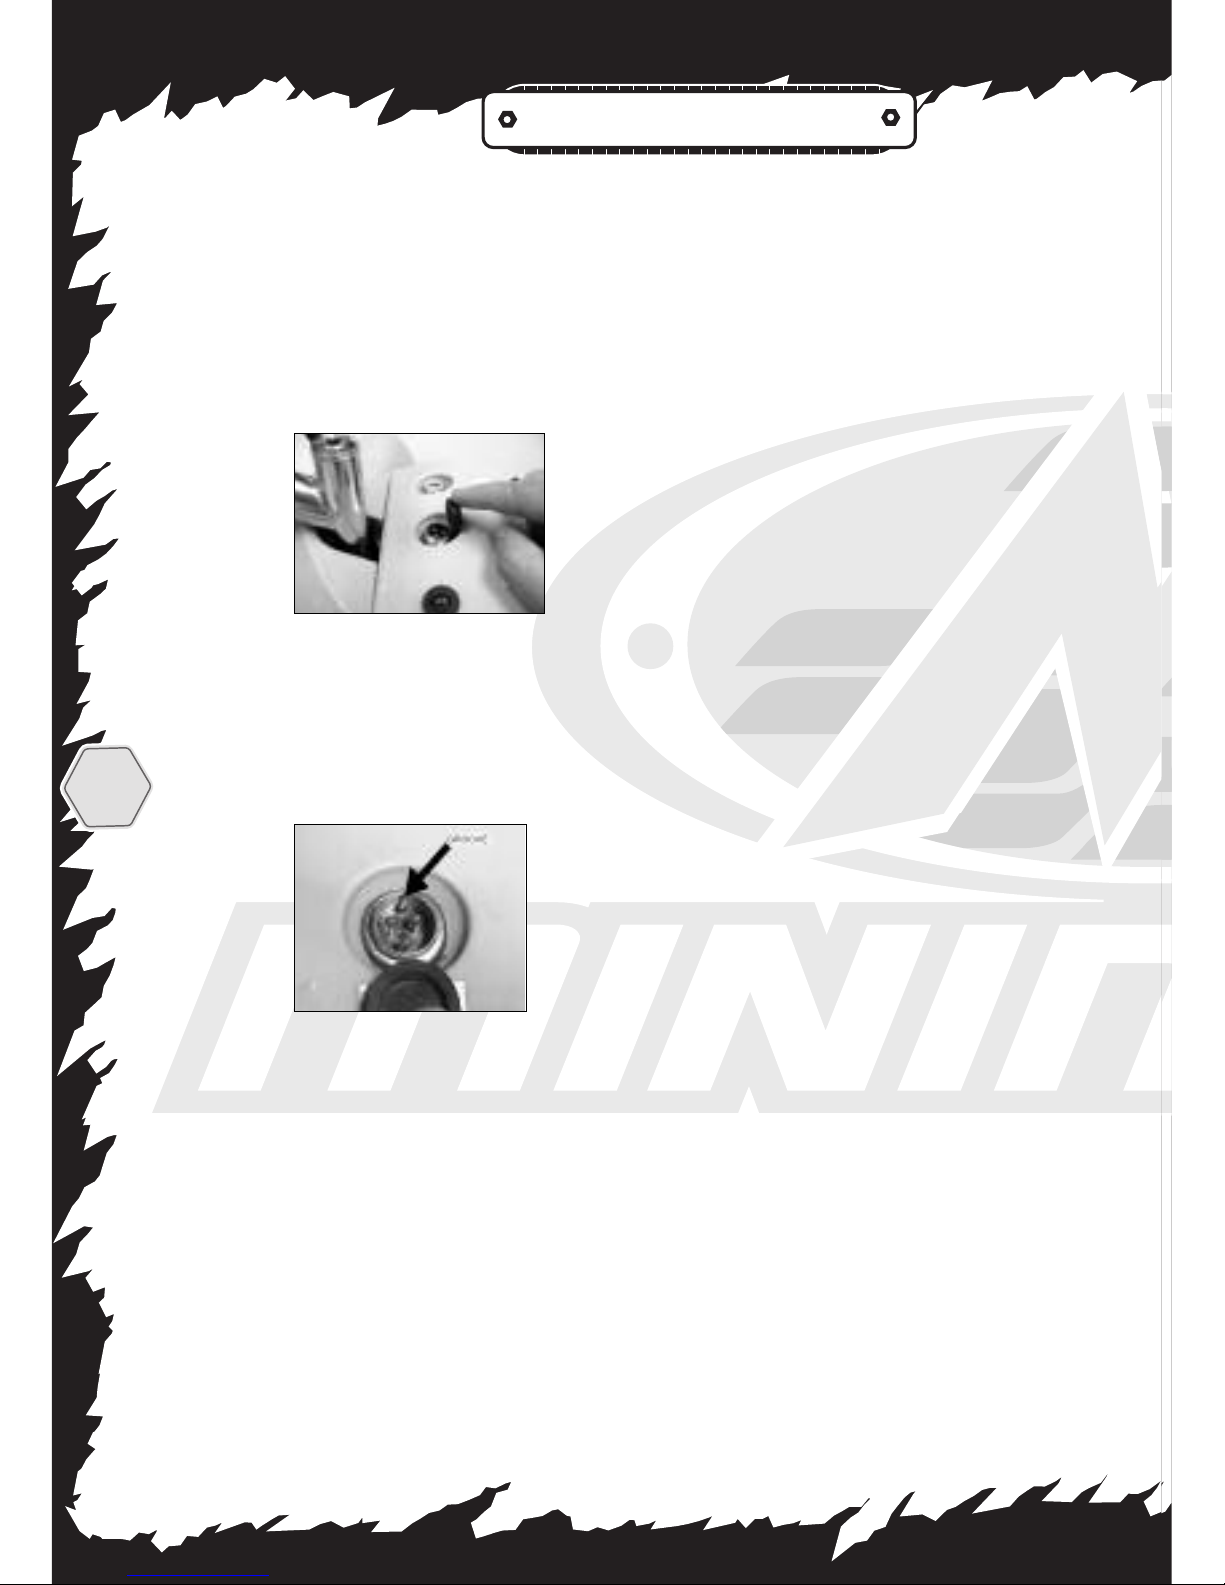
STEPS TO CHARGE BATTERY:
1) IMPORTANT: BEFORE YOU ATTEMPT
TO CHARGE THE MINIMOTO™ ATV,
REMOVE THE KEY FROM THE LOCK.
2) Lift up the rubber protective cover of
the charger receptacle (Fig 11)
3) Note that the charging port has a
“groove” inside (Fig 12). This allows the
plug to be inser ted in the proper orienta-
tion to the port. Plug the charger into the
port.
4) Plug in the charger into an electrical
outlet.
5) Inspect that the RED or GREEN LED is
On. If the RED LED is ON, the battery is
charging. When properly charging the LED
on the charger will change to red. After
the battery is fully charged the LED will
return to GREEN. If there is no GREEN or
RED LED on at all, check that the power is
on from the outlet and that the charger is
properly plugged into the charging port.
NOTE: When properly charging, the RED
indicator light on the charger will be ON.
You may hear a clicking sound. This is
normal. MAKE SURE ANY SWITCHES
CONNECTING THE ELECTRICAL OUTLET
ARE SET TO THE ON POSITION.
When the battery is fully charged, a
Green light will be indicated on the
charger.
6) Before using the Minimoto™ ATV for the
first time, charge the battery for at least
12 hour s. Never charge the battery for
more than 30 hours.
7) It is recommended that you alw ays
recharge the battery for a period of 8
hours. However, 80% of the power will be
charged into the batter y in 4 hour s. It is
possible to use the Minimoto™ ATV after
this period but the total running time will
be reduced.
8) Remove the charger plug from the
charging port. Replace the r ubber protec-
tive cover over the charging port.
8
Fig 11
Fig 12
 Loading...