

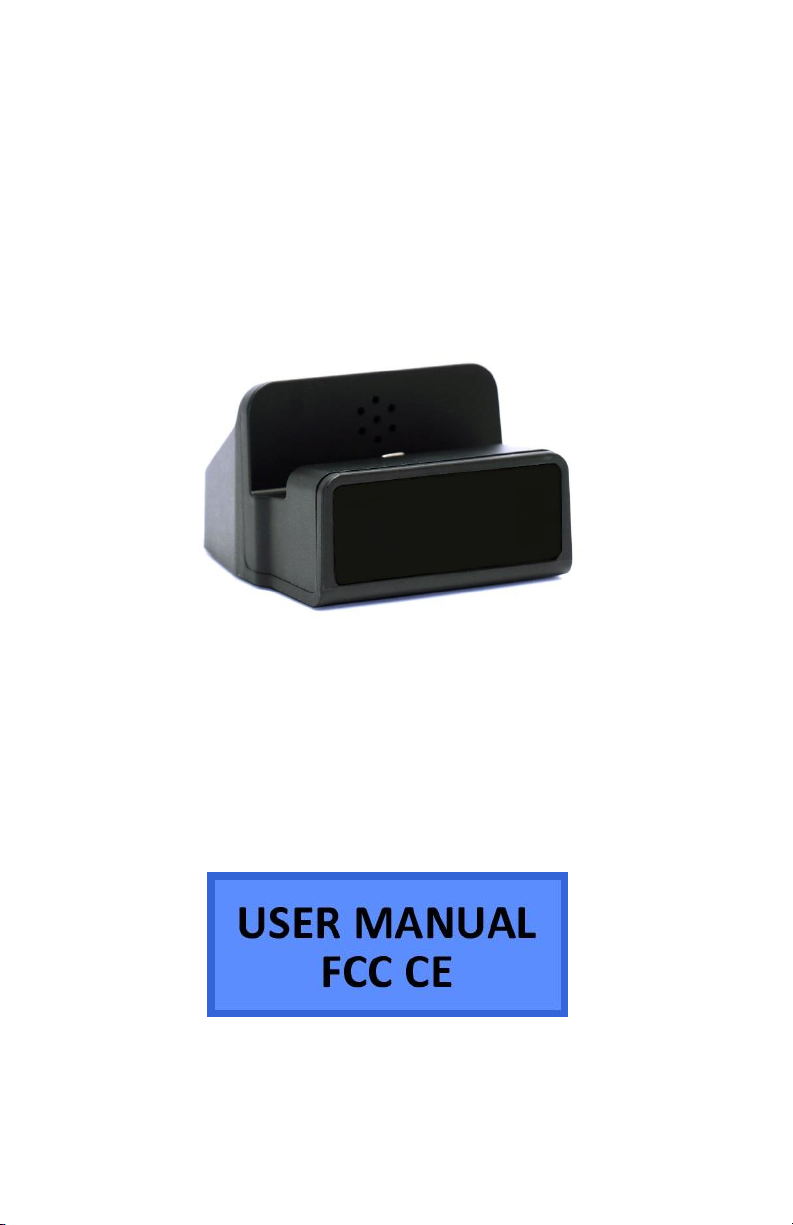
Phone Dock with Wifi Camera
SKU: HCWifiDock (Android/iPhone)
1 Version 1.0
THANK YOU FOR PURCHASING THE HCIPHONEDOCK
Please read this manual before operating the camera and keep it
handy.
Your purchase should include:
1 x HCWifiDock
1 x Manual
1 x MicroUSB Cable
1 x AC Adapter
2 Version 1.0
GET FAMILIAR WITH YOUR HCIPHONEDOCK
3 Version 1.0

OPERATING THE CAMERA
BEFORE YOU START
1. First you must download the BSTEYE app from the Google
Play Store or the iPhone App Store.
o Android:
https://play.google.com/store/apps/details?id=co
m.ltxd.bsteye&hl=en
o iPhone:
https://itunes.apple.com/ie/app/bsteye/id1173327
040?mt=8
IMPORTANT: Once the app downloads, open it up and
register an account. You must login before connecting to
your device in the next section.
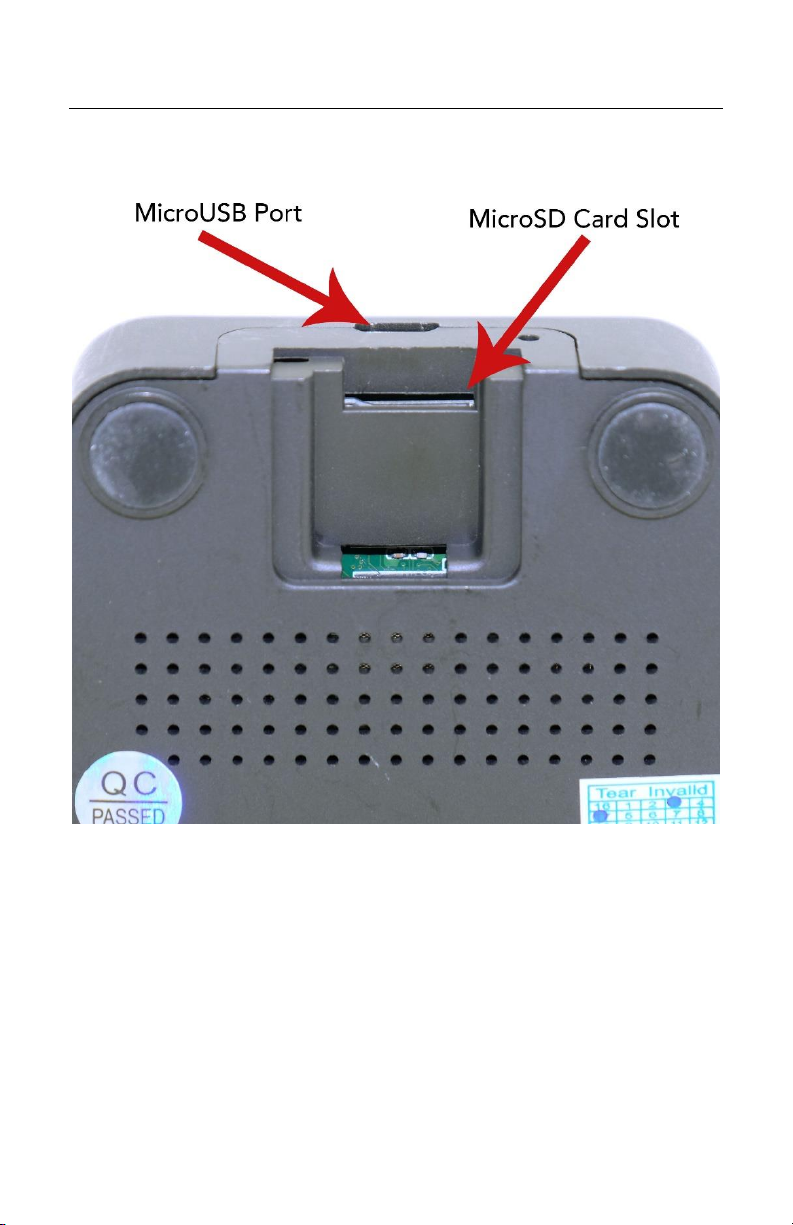
2. If you wish to enable SD Card recording, you must insert a
MicroSD card into the unit.
3. To do so, remove bottom cap to reveal the MicroSD card
slot.
4. Next you need to pair the camera with the app on your
phone.
5. To do so, open the BSTEYE app.
6. Click the + in the top right.
4 Version 1.0

7. Set a unique name for your camera and enter the camera
id and password which are on the back of the unit on the
white sticker.
CONNECTING TO YOUR DEVICE
1. Begin by plugging your device into a power outlet.
2. Turn on your phone’s Wi-Fi and look for the Wi-Fi signal
generated by the device. It may take up to 5 minutes for
the Wi-Fi to be generated.
o The Wi-Fi Signal name will be similar to this:
“ETxxxxxxxxx” The x’s will be a string of random
numbers unique to your device.
3. Once the device generates its Wi-Fi signal, connect to it via
the Wi-Fi settings on your phone.
o NOTE: Some Android devices may produce a
warning that the network has no internet access. If
you see this, choose to connect to the network
anyway.
4. After connecting to the Wi-Fi Signal with your mobile
device, open the BSTEYE App.
o NOTE: For iOS devices, you must wait until the Wi-
Fi Signal appears next to your Phone Carrier Name
in the status bar at the top of your phone screen.
5. Once the app opens, you should see your camera listed
and “Online”.
6. Tap the play icon to view a live stream of your app.
CONNECTING YOUR DEVICE TO YOUR WIFI NETWORK
If you wish to view your camera remotely, you must connect it to
the Wi-Fi at its location.
1. From the home screen of the app, tap the blue settings
gear below your camera.
2. Tap Wi-Fi Setting.
3. Switch Wi-Fi on.
5 Version 1.0

4. Tap the blue i with a circle around it and select your Wi-Fi
network from the list of available networks.
NOTE: Device is only compatible with 2.4Ghz Wi-Fi Networks.
5. Enter your network password.
6. Tap the Save button at the top right of the screen.
7. The device will reboot and connect to your Wi-Fi network.
8. During this period, the device will disappear from your list
of cameras.
9. To add back for remote streaming, click the + in the top
right of the app.
10. Enter in a name for your camera, the camera ID (found on
the bottom of the unit), and the default password (also on
bottom of unit) and click confirm.
11. Once the device finishes connecting to your network, it
will come “Online”.
NOTE: If you are unable to view your device remotely after
following these steps, please repeat steps 1-7 and take care to
enter the correct Wi-Fi password.
CHANGING THE DEVICE PASSWORD
We highly suggest you change your device’s login password. If you
do not, your camera may be accessible by other people.
1. Tap the blue settings gear near your camera name.
2. Tap on Modify the login password.
3. Enter the old password (9999). Then enter your new
password and confirm your new password.
4. Tap Save in the top right of the app.
HOW TO ENABLE RECORDING TO THE SDCARD
This device supports both continuous recording and motion
detection recording.
6 Version 1.0

1. Open the settings menu by tapping on the blue settings
gear below your device’s name.
2. Tap on “Recording Setting”.
3. Choose either Motion Detection Record or Continuous
Record.
4. Click the Save button at the top right of the screen.
NOTE: We suggest confirming that your choice was saved by reentering the Recording Setting Menu and checking. If your
choice was not saved, please repeat steps 1-4 above.
ENABLING MOTION DETECTION ALERTS
1. Open the settings menu by tapping the blue settings gear
below your device’s name.
2. Tap on “Alarm Setting”.
3. Turn on “Motion Detection” and set the sensitivity to your
liking.
4. Click “Save” in the top right.
VIEWING OR DELETING RECORDED VIDEOS USING THE APP
1. You must be directly connected to the device’s SSID to
watch videos on the microSD card. You cannot do this
while your camera is connected to Wi-Fi.
2. From the home screen of the app, tap the Video icon
below your camera. This icon is in between the settings
and trash icons.
3. You will see a list of the recorded videos on your SD card.
Tap the blue download icon next to a video to begin
downloading it so you can watch the playback.
4. Once downloading is complete, tap the video to start
playback.
NOTE: If the backup fails, force close the app and restart.
Then try again.
TRANSFER THE FILES TO YOUR PC
7 Version 1.0

1. Remove the SD card and insert it into an SD Card Reader
(not provided).
2. Locate “Removable Disk” inside the (My) Computer folder.
AutoPlay Removable Disk > Open folder to view
files
Or…
Go to Start > Computer > Removable Disk
3. Open the Removable Disk drive.
4. Open the folder containing the files.
5. Double click the file you want to view.
8 Version 1.0

TROUBLESHOOTING
HOW TO FACTORY RESET THE DEVICE
A factory reset will restore all settings to their original
factory settings.
To factory reset, press the reset button for longer than 10
seconds to begin the reset process. Wait up to 5 minutes
for the process to complete. When done, the unit will
generate its own Wi-Fi signal again, and you can begin
setting up the unit.
LOST DEVICE PASSWORD
Factory reset the device.
THE DEVICE WON’T GENERATE A WIFI SIGNAL
Factory reset the device and wait up to 5 mins for the
signal to be generated.
THE DEVICE WON’T CONNECT TO MY WIFI
Be sure your Wi-Fi network is 2.4ghz.
Be sure you are entering the correct wireless password.
Try changing your wireless security in your router to WPA2
if it is set to WEP.
Make sure the device is not too far away from your router.
Distance and the number of walls the signal travels
through greatly affect signal strength.
CANNOT RECORD TO SDCARD
Confirm you have inserted an SDCard into the unit.
OTHER PROBLEMS
Call our technical support at 770–694–6921
9 Version 1.0

SPECIFICATIONS
Video Resolution
1920 x 1080
Video Format
AVI
Frames per Second
30
Motion Detection
Yes
Type of Memory
MicroSD Card
Memory Capacity
Up to 128GB
Recording Capacity
100MB/10mins
USB Interface
2.0 USB
Player Software
VLC recommended
Operating Systems
Windows XP & Up
Mac OSX 10.5 & Up
Linux
Video Resolution
1920 x 1080 @ 30 FPS
Video Format
MOV
Type of Memory
MicroSD Card
Memory Capacity
Up to 128GB MicroSD Card
Default Password
9999
Motion Rec Length
2 mins
Recording Capacity
1.5GB ≈ 60 minutes
USB Interface
2.0 USB
Player Software
VLC
Time Date Stamp
Yes
Loop Recording
Yes
Operating Systems
Windows XP & Up
Mac OSX 10.5 & Up
Linux
10 Version 1.0
 Loading...