

Mini Gadgets HCWifiClock User Manual
HCWifiClock Manual
The HCWifiClock should include the following accessories:
AC Adapter
USB power cable
RJ45 Ethernet adapter (RJ45 Ethernet cable is not provided)
1 software disc.
Make sure you are not missing any of these accessories. If you find that one is missing please contact the
dealer you purchased the device from within 48 hours of receiving the clock.
It is recommended that you familiarize yourself with this full manual before setting up and using the
device.
Setup
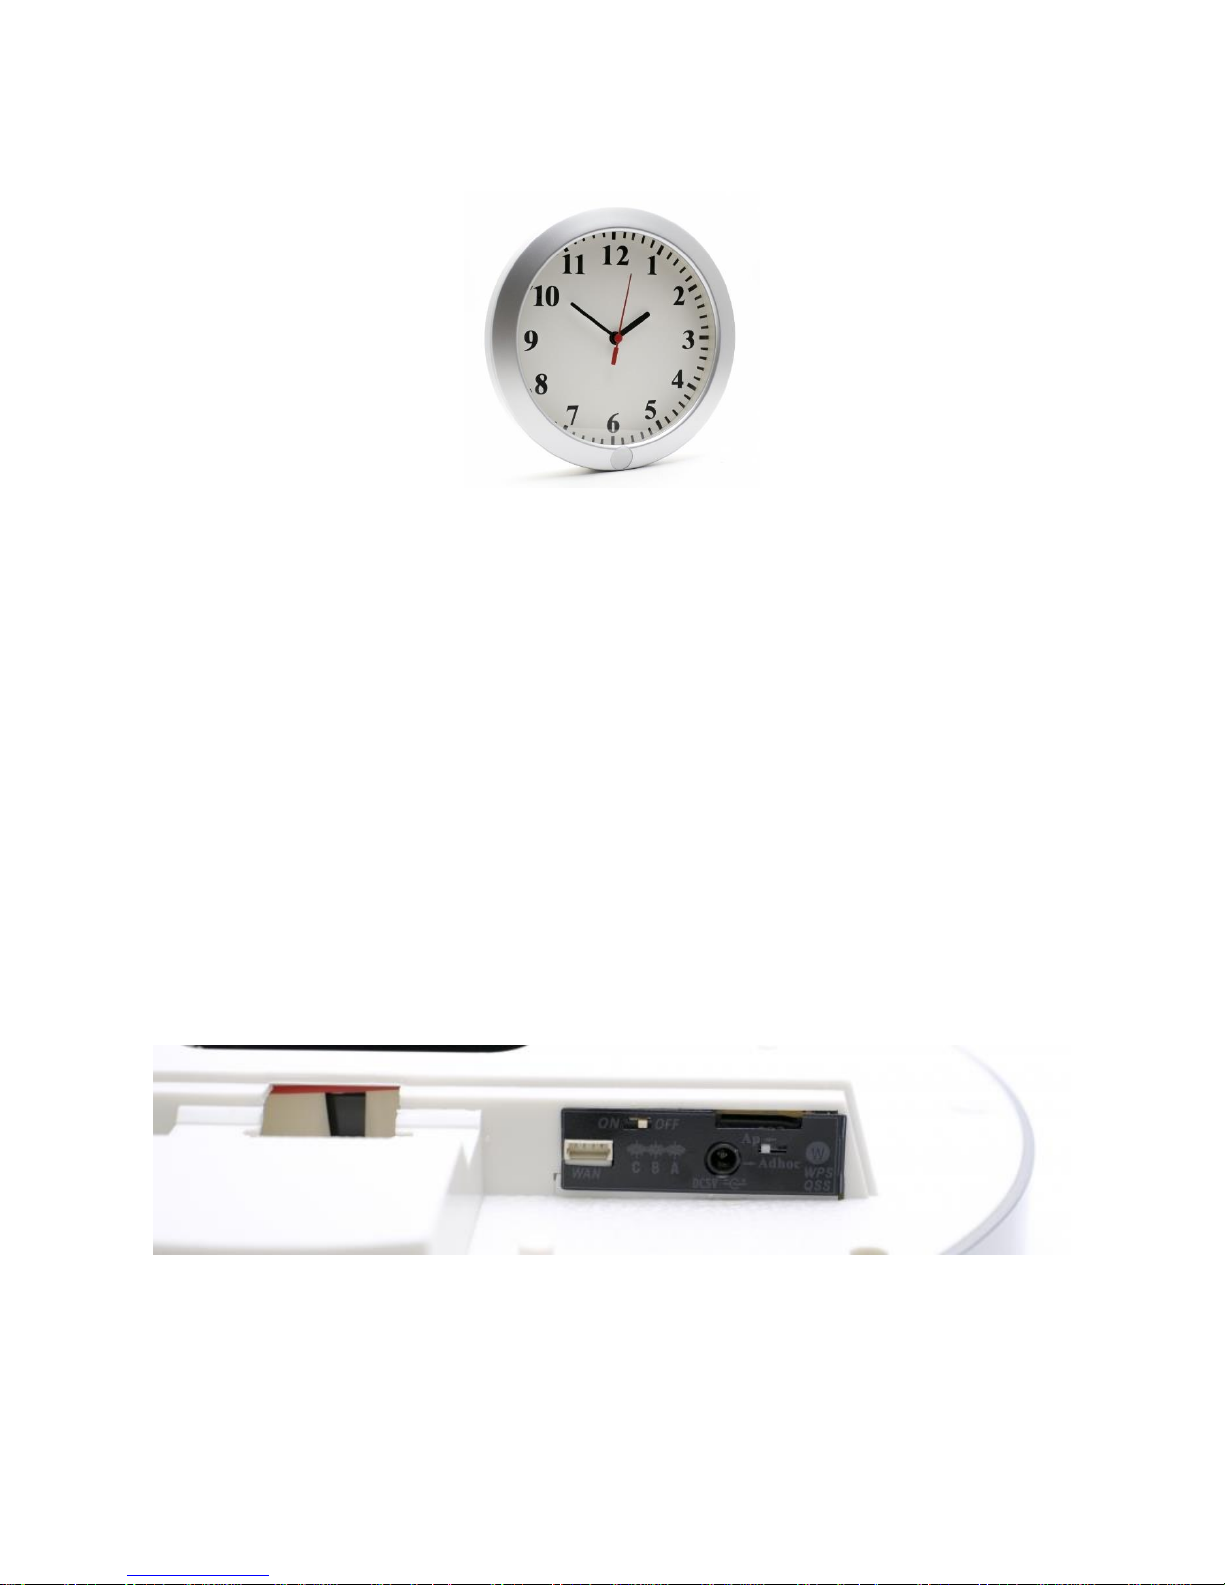
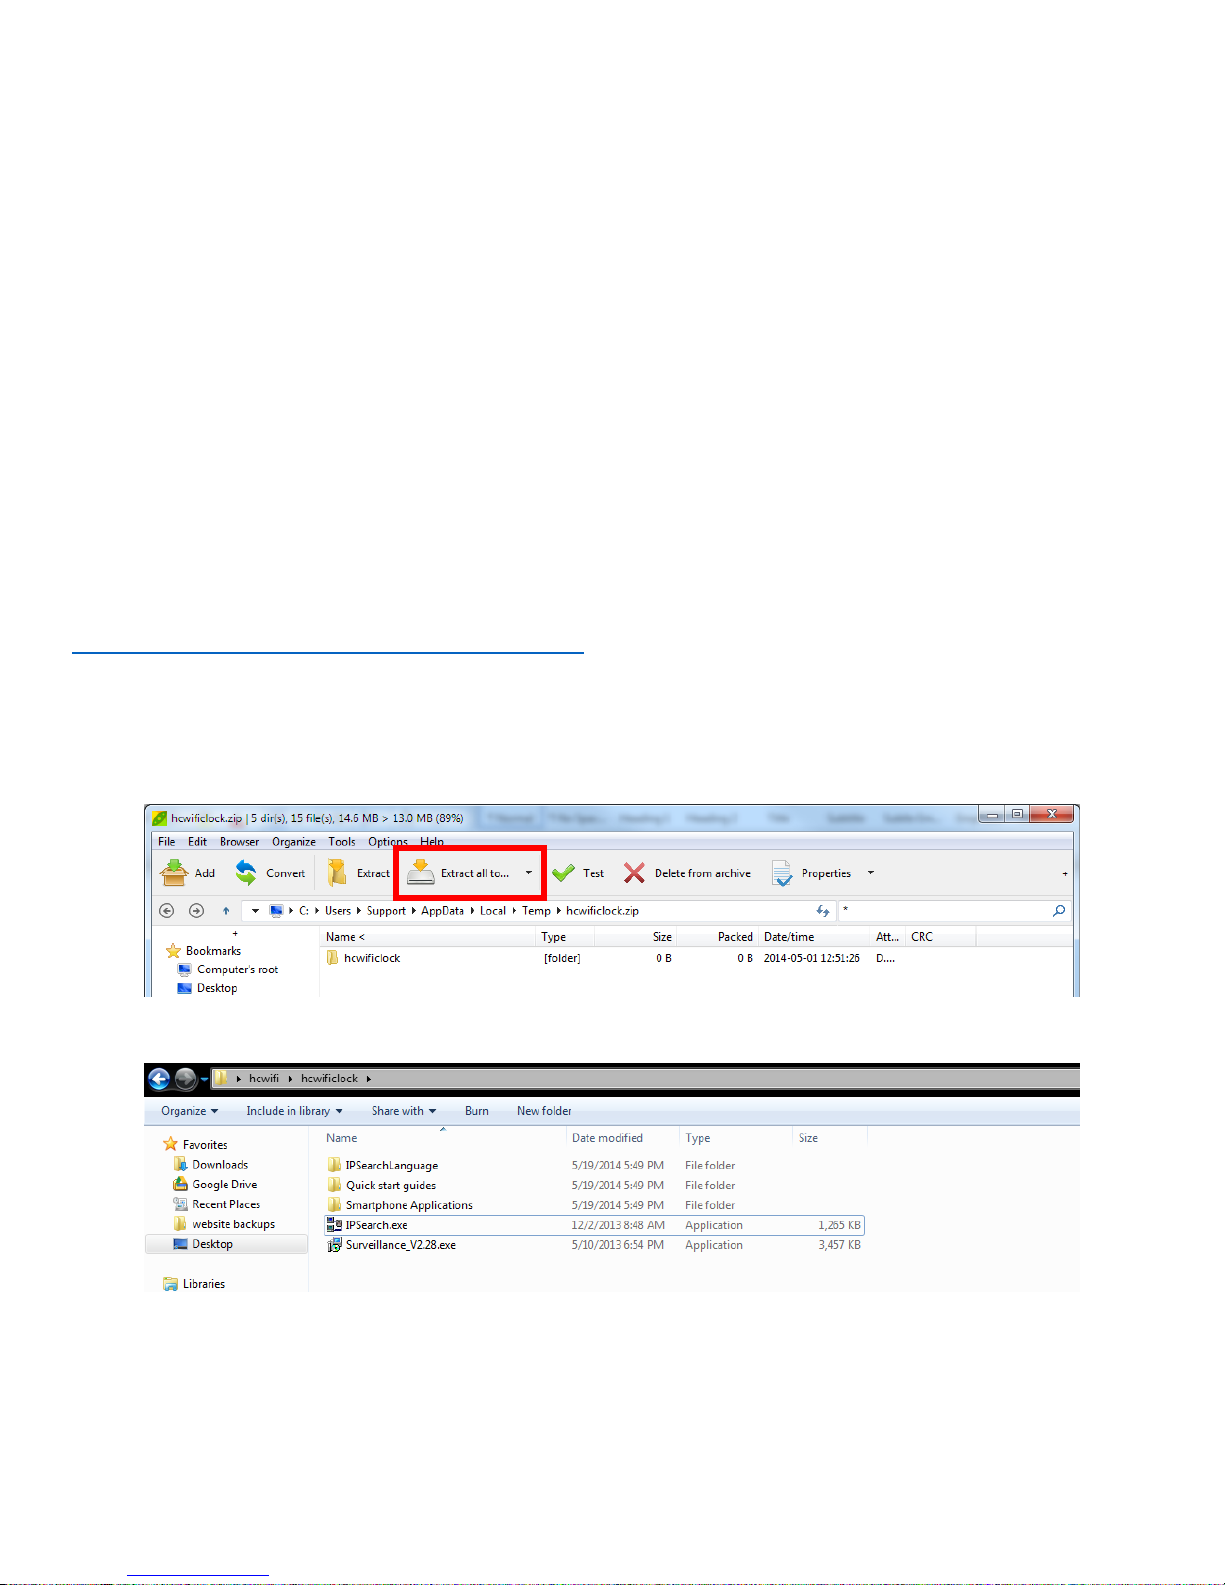
On the back of the clock, you will see a plastic covering with grooves. This piece will slide down so that it
can be removed and reveal the Wifi Clock controls. (Pictured below)
Here you can see the On and Off switch, Ethernet adapter connection (WAN), microSD card slot,
indication lights (A,B,C), 5v power connection, Wifi Protected Setup button (WPS), and the Wifi Mode
Switch (Ap / Adhoc).
You will first want to inset your microSD card into the microSD card slot. The gold contacts of the card
should face down towards the face of the clock. You will feel some spring resistance and the card should
click in to place. If this does not happen, do not force the card as this may cause damage to the clock or
to the card. Please check the card orientation and try again.
Next, make sure that the white AP / Adhoc switch is in the AP position (to the left).
If you will only be recording to the SD card and do not plan to use the Wifi functionality of the clock, you
can now plug in the power cable and turn the switch to the “On” position. The clock will now start to
record automatically to the SD card in continuous video recording mode.
To continue to setup the Wifi functionality, connect a RJ45 Ethernet cable (sold separately) to the Ethernet
adapter and connect the adapter to the WAN connection on the clock. The Ethernet cable should then be
connected to a port on the back of your Wifi router. Please consult your router manufacturer’s user
manual for detailed instructions of this procedure.
Make sure that the power cable is connected and that the switch is in the “On” position. You will see a
blinking red light at the “B” position to let you know that the camera portion of the clock is on.
Computer Setup (Windows Only)
On your computer, you will need to download the program zip file from
www.mgidownloads.com/Software/hcwificlock.zip
Once downloaded, open the file and extract all of the contents to a folder. We recommend you extract
the files to your Desktop for quick access.
(note: your program may look different. Look for the “extract all” button on a toolbar near the top.)
You will then want to open the extracted folder so that you can see your list of files.
In this folder, you will first want to run the “Surveillance_V2.28.exe” program. This will install the
surveillance program as well as other necessary programs on your computer.
After the program installation completes, you will then want to run the “IPSearch.exe” program.
(Depending on your computer’s settings, you may not see “.exe” at the end of the program name.)
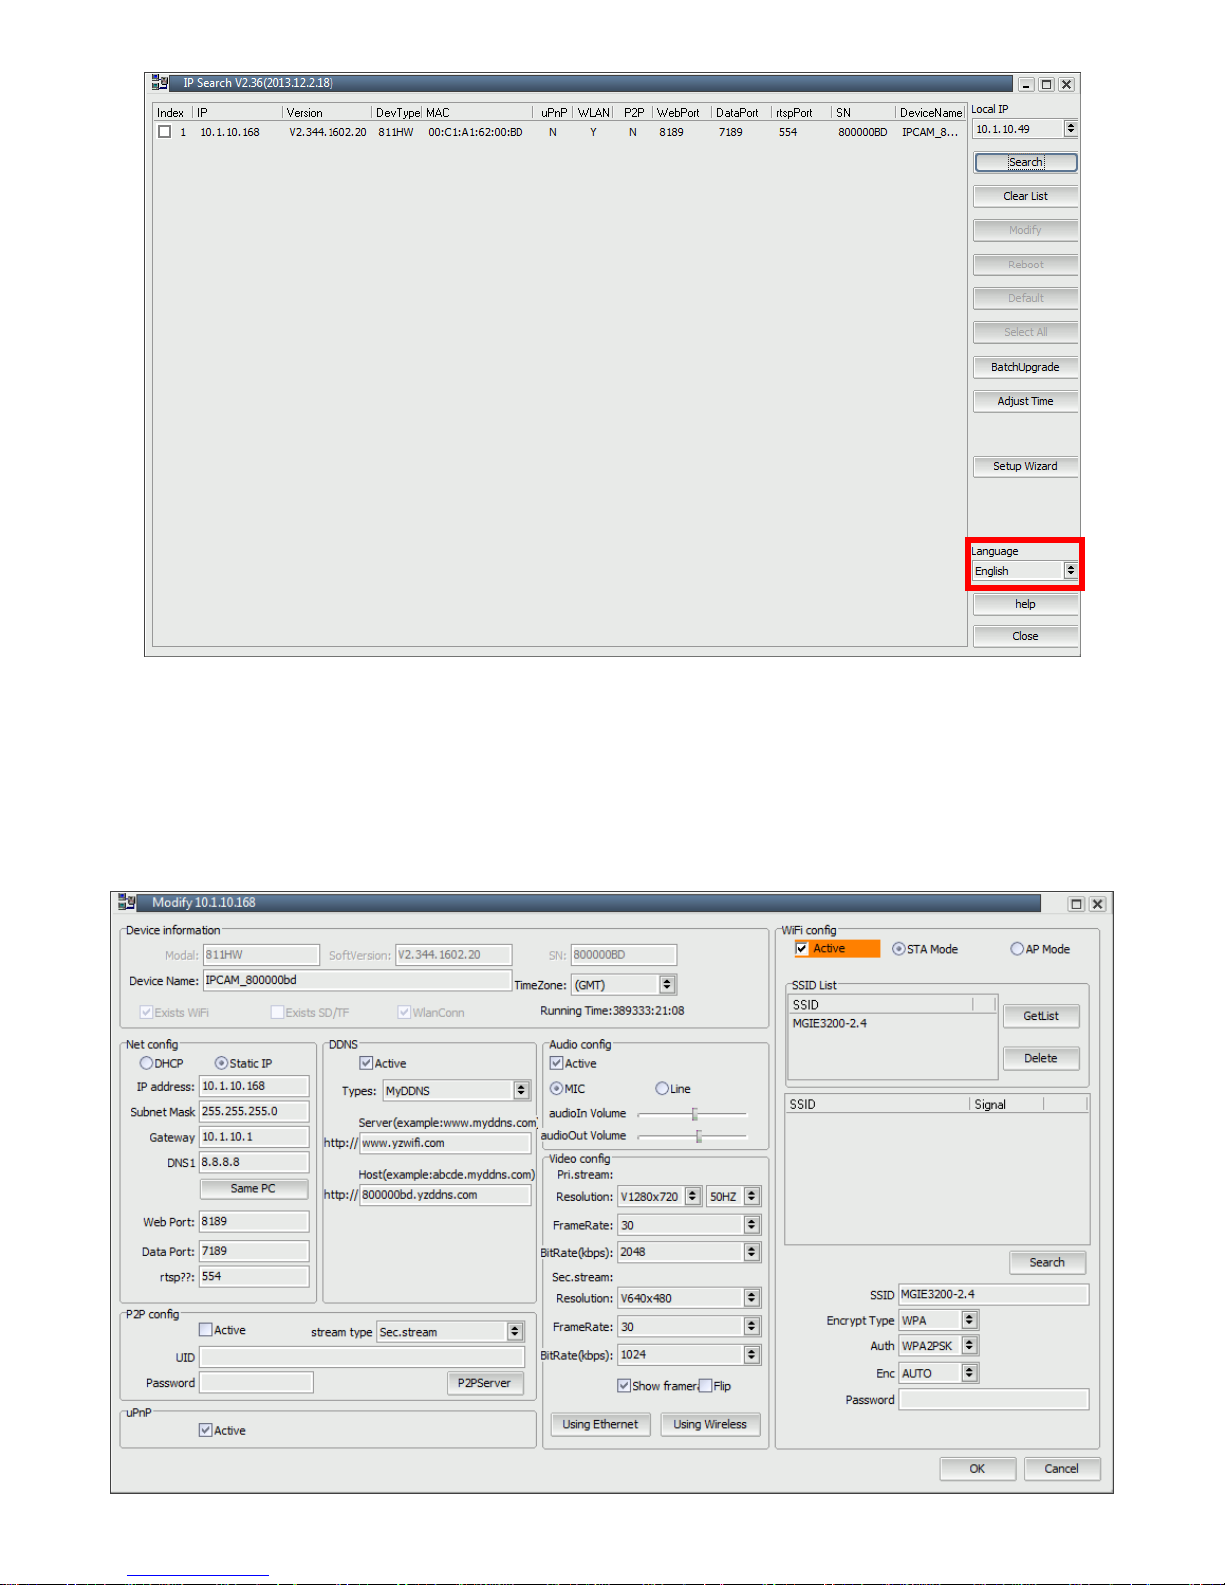
If your Wifi Clock is correctly connected to your network, you should see it listed here. If you do not see
words in this program and instead see a series of “????????”, please select “English” in the bottom right of
the program. If you do not see “English” listed as an option, make sure that you have the
“IPSearchLanguage” folder in the same location as the “IPSearch” program.
To modify settings of the Clock, select the device in the list and select the “modify” button on the right
hand side.
On this screen you will see various configuration settings for the camera. Most of the defaults should be
fine for most situations. On the left side, under “Net config”, click on “Same PC” so that the camera has
the proper network settings.
On the right side you will find your Wifi network settings. Make sure the “Active” box is checked and that
“STA Mode” is selected. Click on “Search” to retrieve a list of in range Wifi networks. Choose your home
network and input your security information in the bottom right. If your security information is not
correct the device will not connect over Wifi. Please check your router settings for proper configuration
information. Click “OK” to save your settings.
Special note: If your router’s SSID contains spaces, you will need to manually edit the SSID name to
correctly reflect the formatting of your router’s SSID. Spaces in SSID names are generally not
recommended, but they can be used.
In the main IPSearch screen, click “Reboot” to reboot the device. While the device is rebooting, disconnect
the Ethernet cable.
Let the device finish rebooting. If your settings were correct and saved successfully, your device will
reappear in the IPSearch program list. If you do not see your device, reconnect the Ethernet cable to the
router. You should then see the device appear in the list. If this is the case, that it appears with the cable
connection but not with the Wifi, it means your Wifi settings are incorrect. Please repeat the previous
steps and double check your wireless settings.
If your wireless settings are correct you can close the IPSearch program.
Surveillance Program Setup
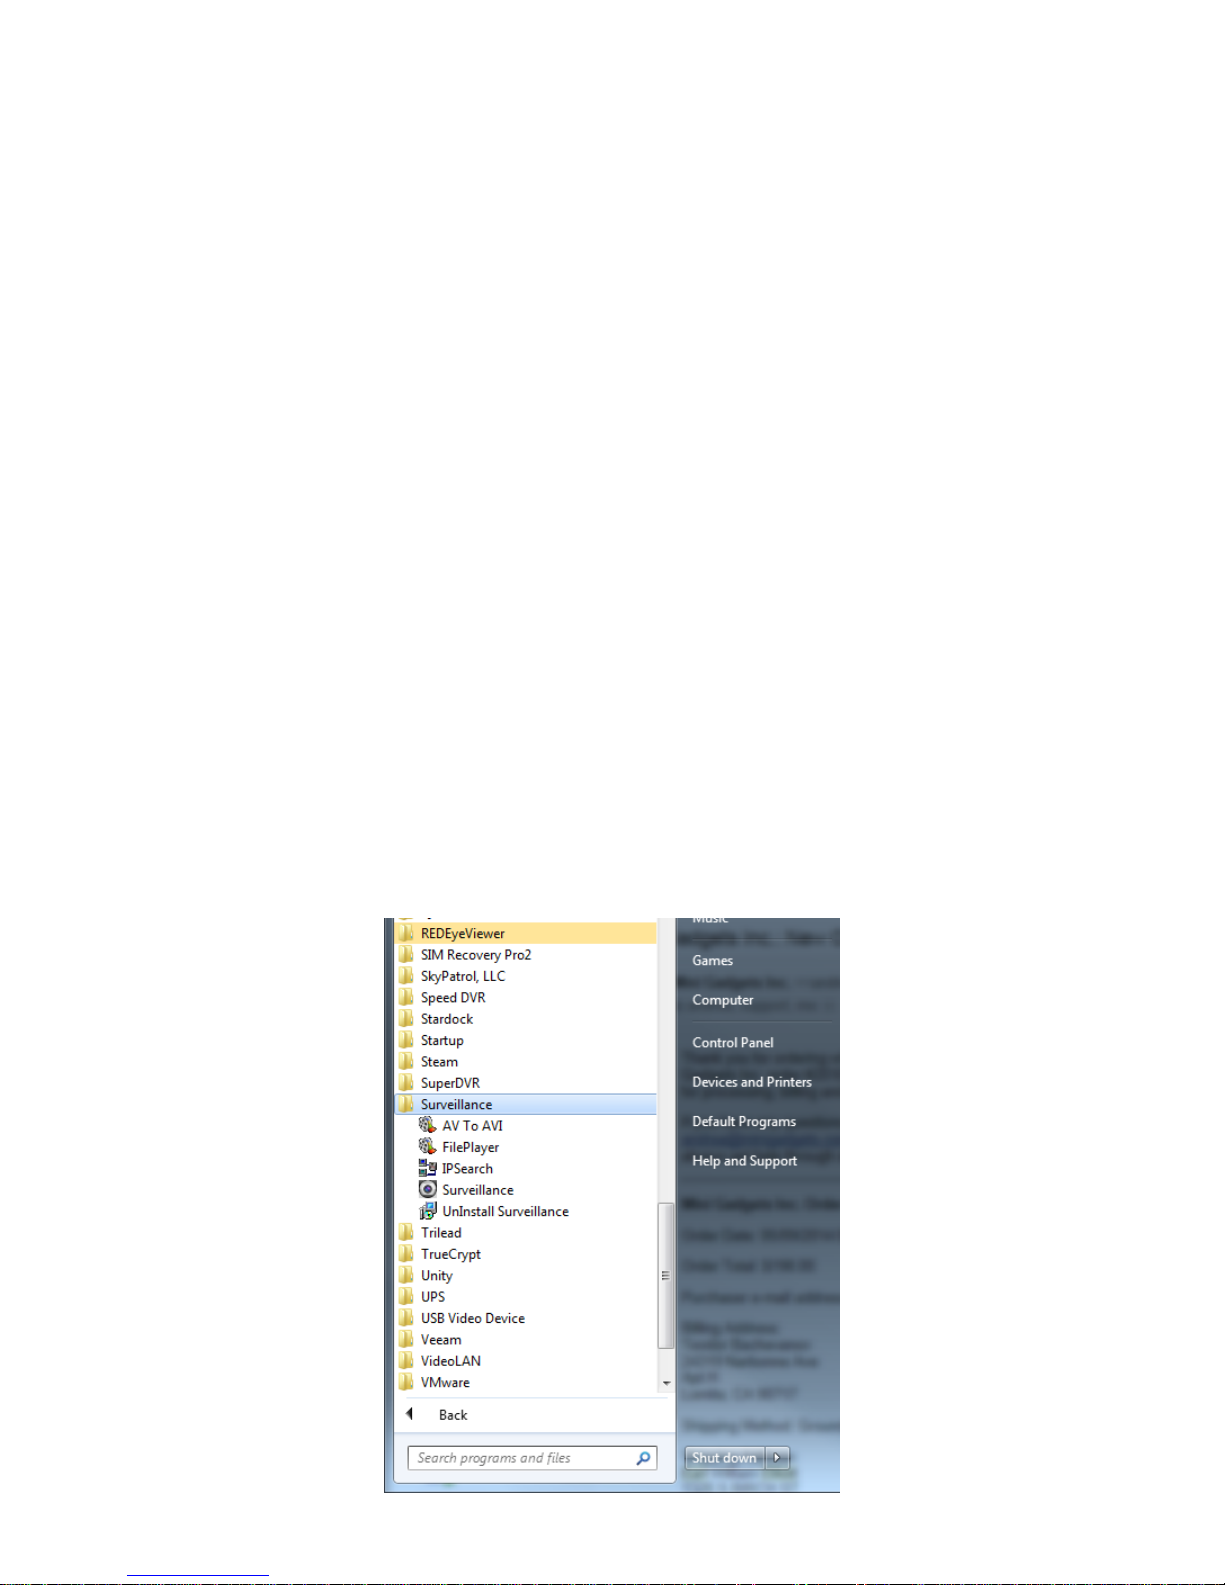
In the previous steps you should have successfully installed the “Surveillance” program on your
computer. You should now have multiple shortcuts located on your Start Menu program list.
You will want to open the “Surveillance” program by clicking on it one time. When you open the program
for the first time you will be asked to set up a user name and password to help control access to the DVR
software.
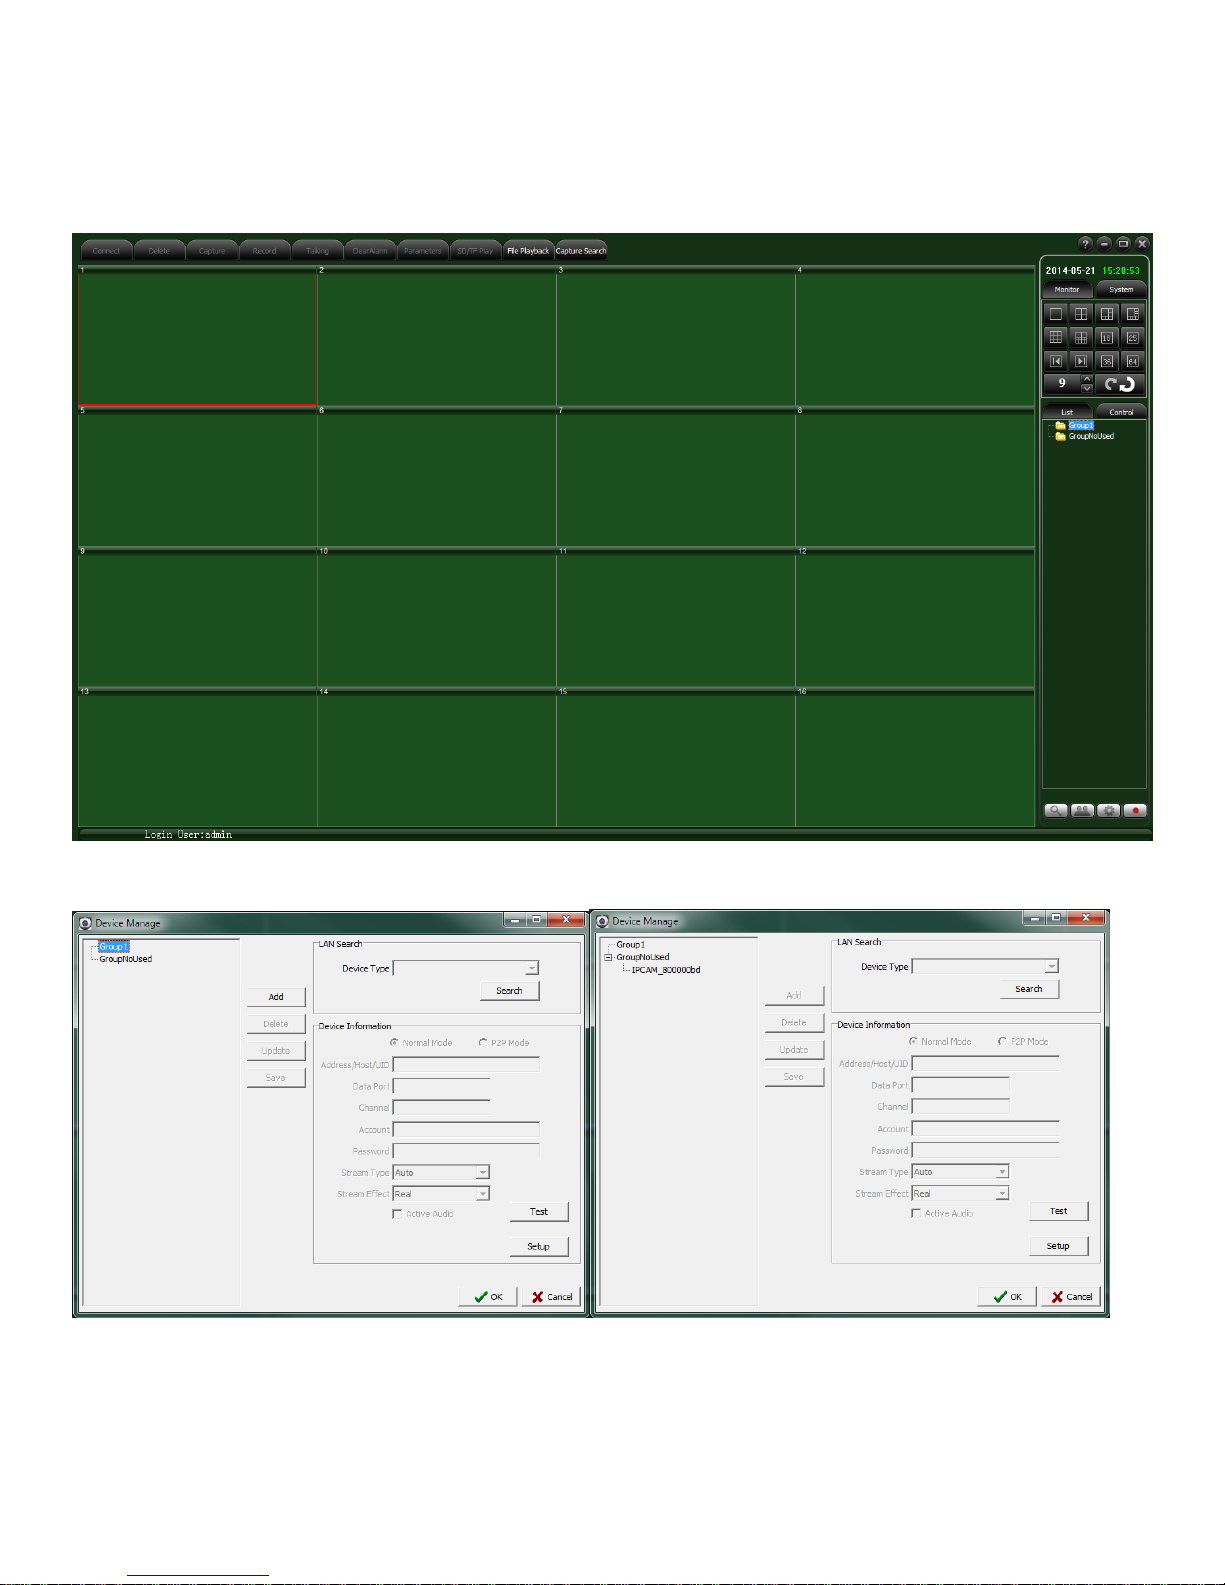
Once open, you should see the following screen:
In the bottom right, click on the “gear” icon to open your settings menu.
Make sure that “Group1” is highlighted and then click the “Search” button on the right side (left figure).
After a few seconds you will see your clock listed under the “GroupNoUsed” (right figure).
Click on the IPCAM name then click the “Setup” button in the bottom right. You should see the following
window appear.
 Loading...