

Page 1

......................................................................................................................................
MP10 Configuration Guide
v. 1.1-SNAPSHOT
Ref: MP10_CG_1.1-SNAPSHOT
......................................................................................................................................
Mine Site Technologies 2012-04-22
Page 2

i
Table of Contents
.......................................................................................................................................
1 Table of Contents . . . . . . . . . . . . . . . . . . . . . . . . . . . . . . . . . . . . . . . . . . . . . . . . . . . . . . . . . . . i
2
Introduction . . . . . . . . . . . . . . . . . . . . . . . . . . . . . . . . . . . . . . . . . . . . . . . . . . . . . . . . . . . . . . . . . 1
3
Charger Installation . . . . . . . . . . . . . . . . . . . . . . . . . . . . . . . . . . . . . . . . . . . . . . . . . . . . . . . . . 2
4
Phone Configuration . . . . . . . . . . . . . . . . . . . . . . . . . . . . . . . . . . . . . . . . . . . . . . . . . . . . . . . . 5
5
Maintenance . . . . . . . . . . . . . . . . . . . . . . . . . . . . . . . . . . . . . . . . . . . . . . . . . . . . . . . . . . . . . . . . 14
Page 3
1
1 I n troduction
1 Introduction
.......................................................................................................................................
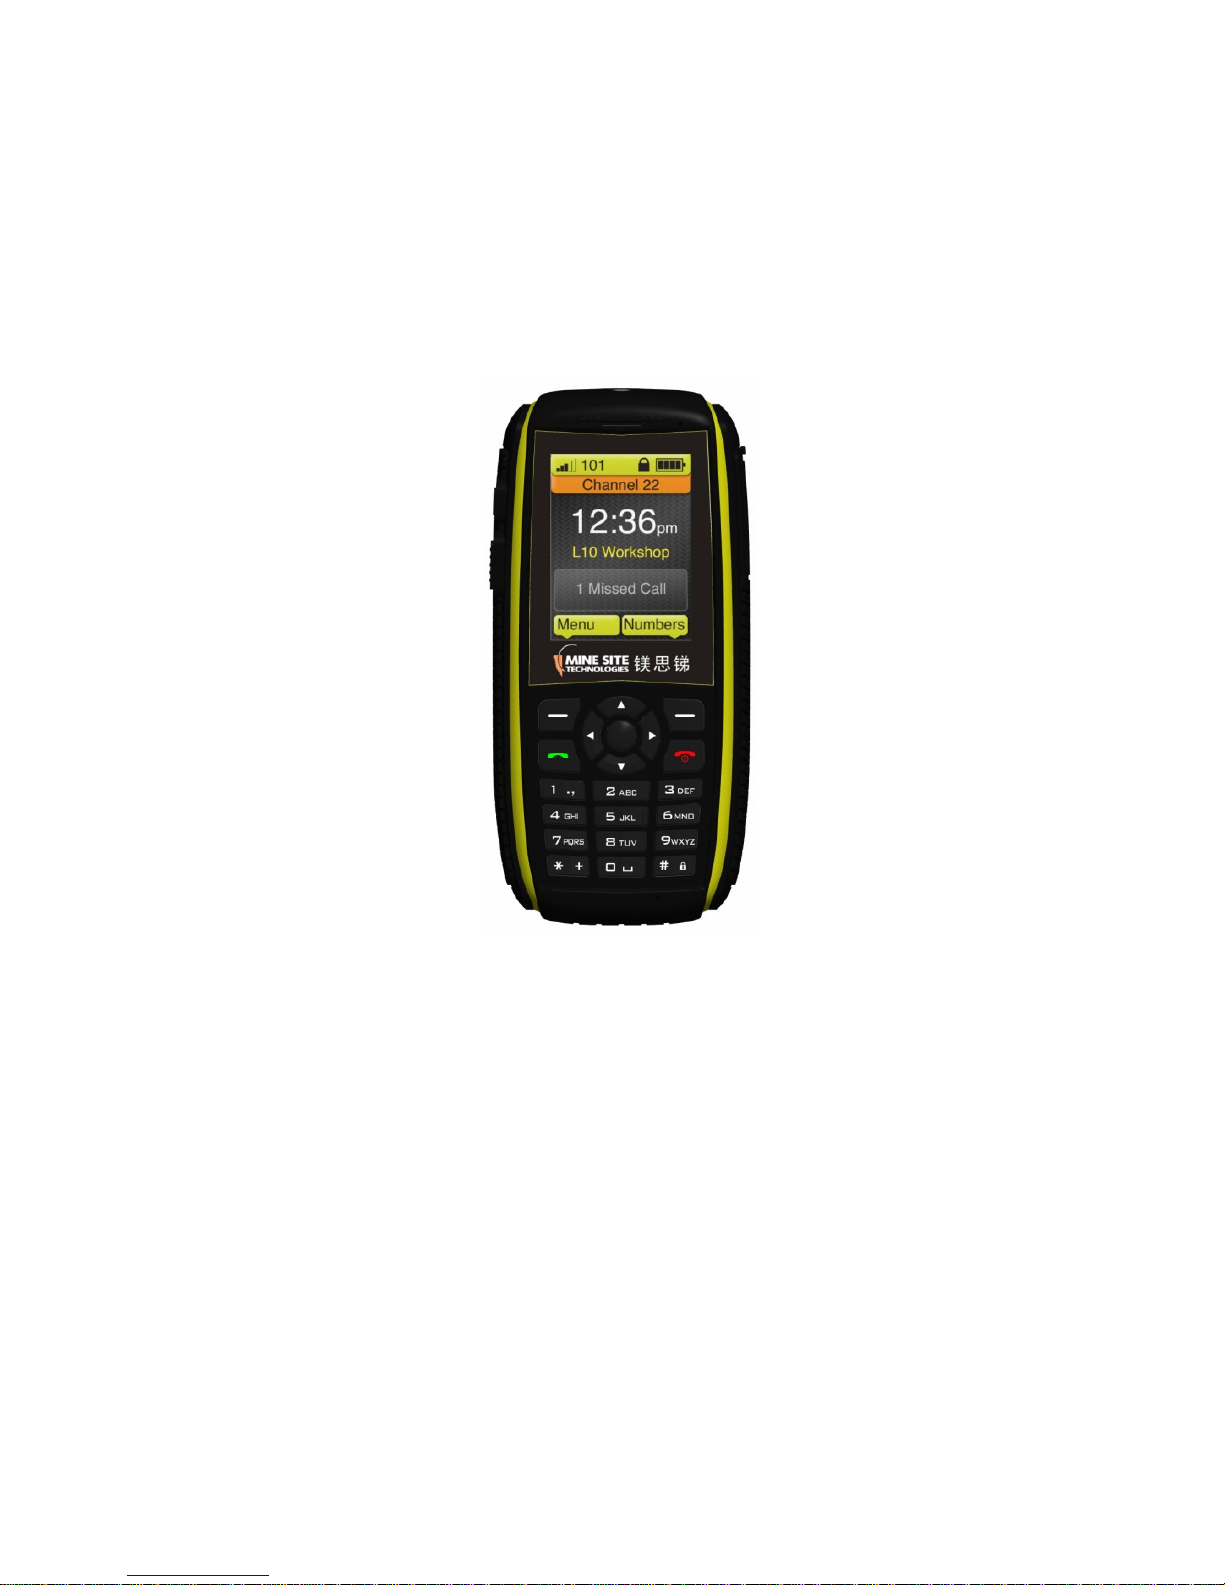
The Mine Site Technologies MinePhone MP10 is a Voice over Wireless LAN (VoWLAN) phone
designed for use in hazardous environments. It is an integral component in the MST ImPact Coal
product suite, allowing for two way voice and text communication over underground wireless
networks.
This document covers installation of charging infrastructure, network configuration of the handset,
server side configuration, and the recurring maintenance required for reliable operation.
MinePhone MP10
Page 4
2
2 C h a r g e r I n s t a l l a t i o n
2 Charger Installation
.......................................................................................................................................
The MinePhone is supplied with a charging block that the handset is placed within to initiate charging.
MinePhone MP10 in charging block
Correctly setting up a charger for the MinePhone requires consideration of a suitable location, and
ensuring power is correctly connected.
2.1 Positioning
The charger provided for the MinePhone is not approved for use in hazardous areas
MinePhone Chargers should be located in a well ventilated non-hazardous area, with access to a clean
Power supply. The ambient temperature should be within the range of 0 to 40 degrees Celcius.
Selecting a suitable charger position should account for the ease of physical access, and visibility of
charge indicators on the charger unit, and the handset's screen.
While handsets should slide easily into the charger, some users are likely to apply considerably more
force than required - the charger should be suitably supported to account for this.
2.2 Connectors
Due to regional differences there are several types of power connectors available for connecting the
MinePhone charger to a power source. You should confirm that you have been shipped connectors of
the appropriate voltage and type for your site prior to installation.
The power pack supplied will connect to either 110V or 240V AC power. The tail will terminate in a
2.5mm DC connector jack that fits into the charging block.
Page 5
3
Page 6

4
2 C h a r g e r I n s t a l l a t i o n
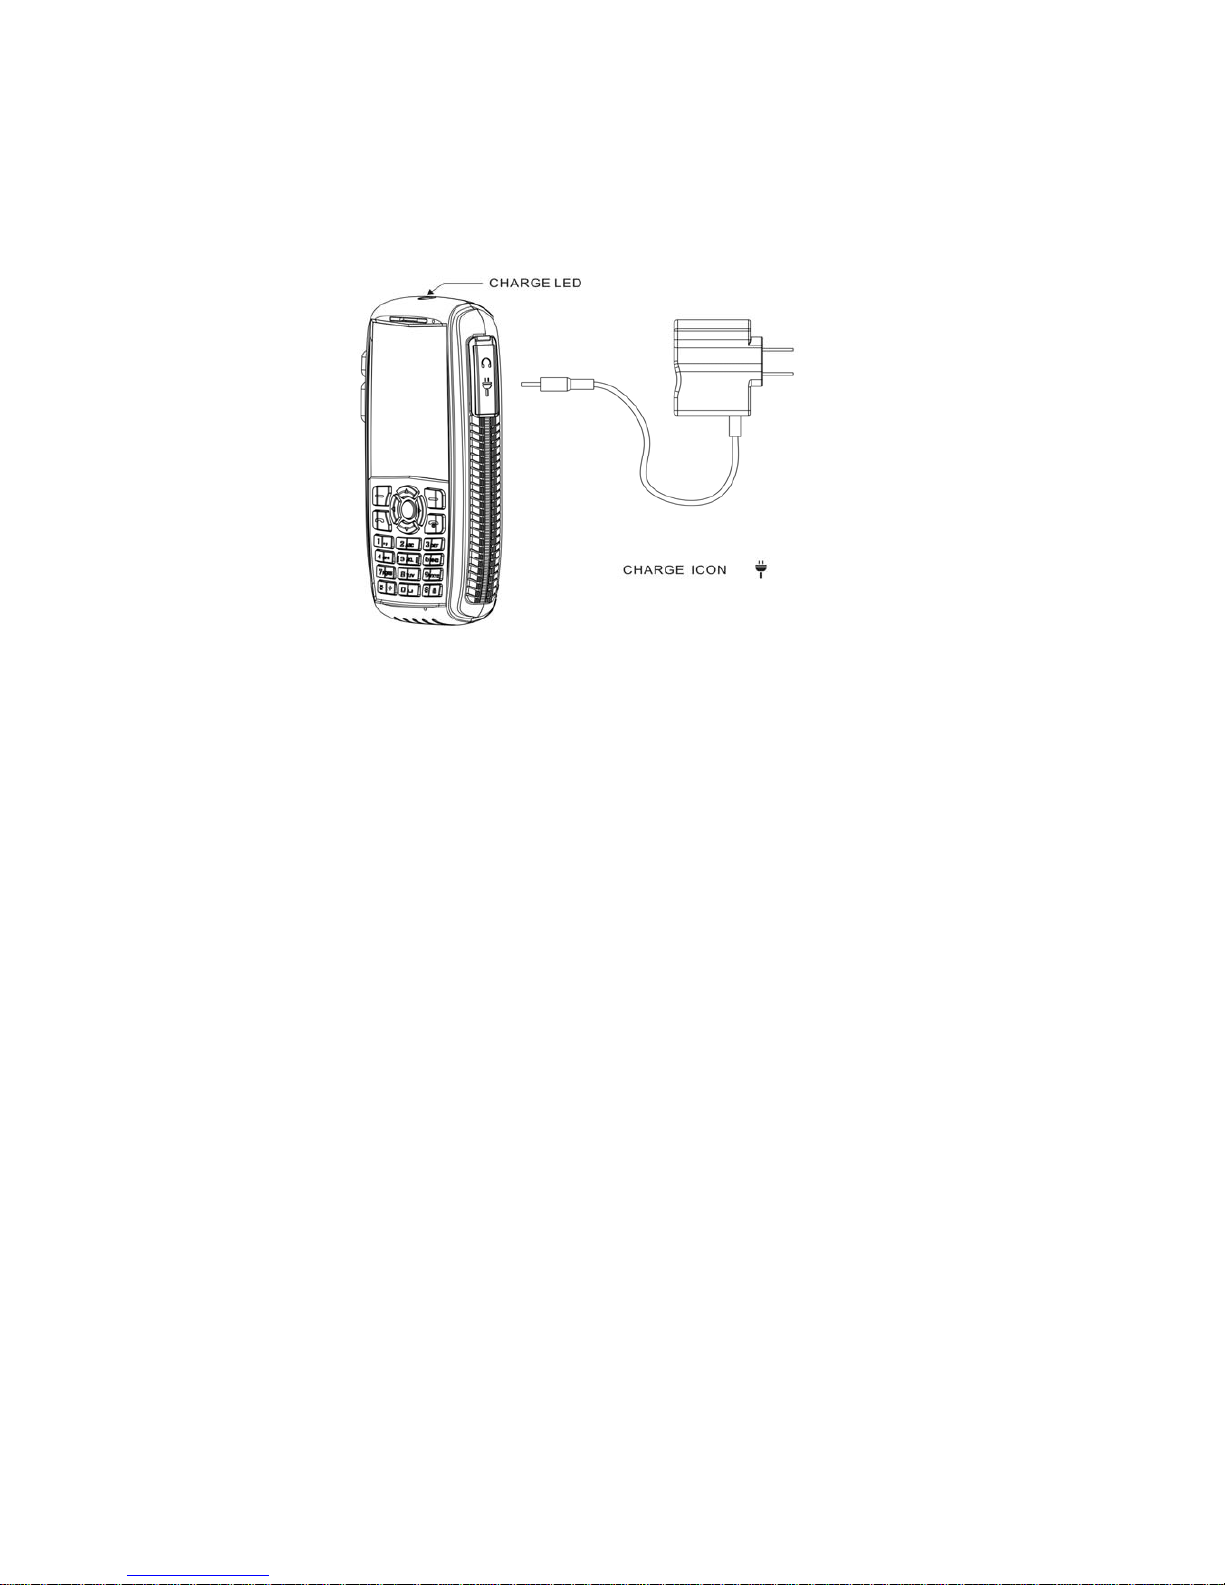
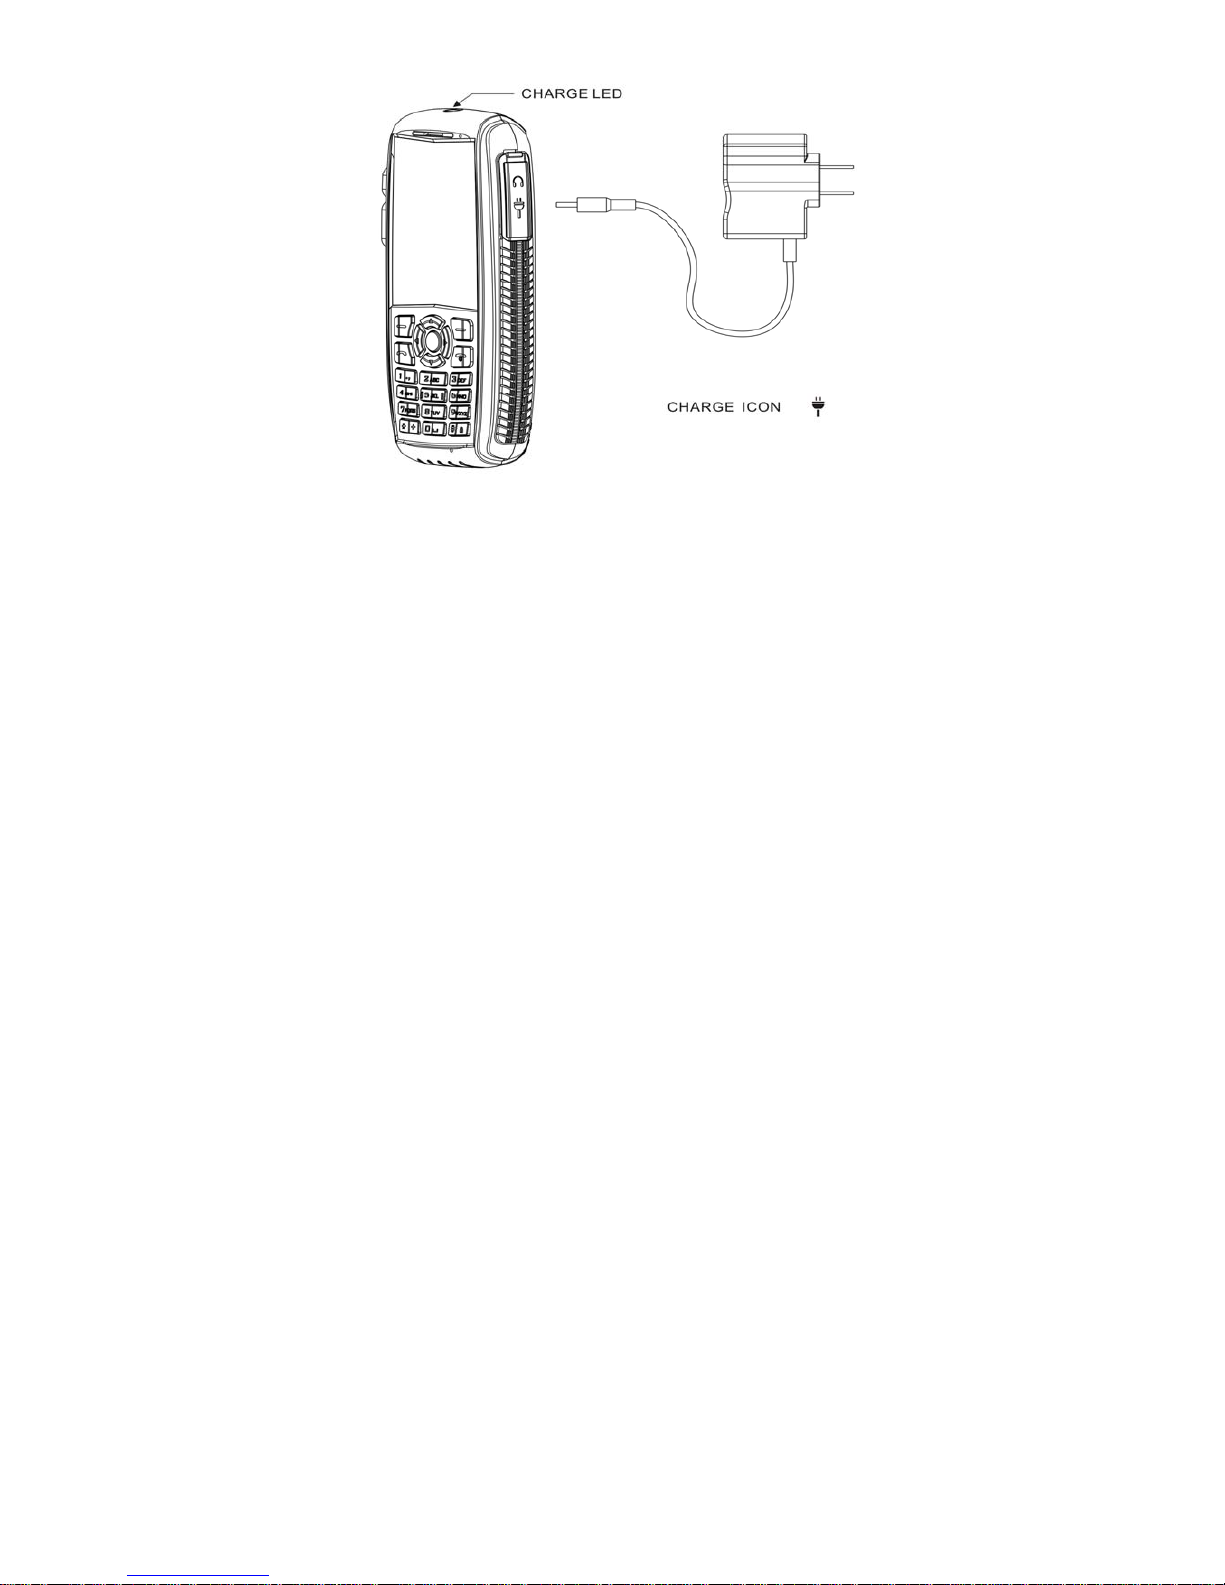
2.3 Indicators
The charger has one LEDs on the top to indicate status.
Showing Meaning
Red Charging in progress
Green Charging completed successfully
Neither Phone not in charger / Charger not connected to
power / A problem has occurred during charging
Charging Block showing LED positioning
Page 7

5
3 P h o n e C o n f i g u r a t i o n
3 Phone Configuration
.......................................................................................................................................
MinePhones are designed to be deployed as a fleet with centralised management software, which
reduces the configuration complexity operators are exposed to. Phones will by default attempt to
connect to a TFTP server and download site and device specific configuration files at startup.
The MinePhone does offer the ability for the network and configuration settings to be manually edited
from the device itself. This functionality is exposed only when the phone is started in Admin mode.
3.1 Powering Up
A newly commissioned MinePhone should receive a full battery charge before deploymen t.
Ensure that every new handset is charged for a minimum of eight hours before operation.
A MinePhone is powered on by holding down the power button, located on the top of the digital keyboard,
for 5 seconds. If the handset is charged, it will turn on and the display will light up to show an
introduction splash screen.
3.1.1 Administrator Mode
To power a unit into Admin mode, press the # key before pressing the power button and hold until
after the splash screen is shown.
Power buttons
# buttons
MinePhone power and # buttons
If started in Admin mode the text Admin will appear in the bottom left corner of the splash screen and
the Network and Configuration menus will be available from the Main Menu.
Page 8

6
3 P h o n e C o n f i g u r a t i o n
3.2 User Configurable Settings
The majority of settings for the phone are site specific and are managed centrally. Users may however
adjust volume and screen brightness during operation.
3.2.1 Volume
During operation a user may wish to adjust the volume of ringtone and communication. Changing the
volume does not require Admin access.
If on a call, the volume may be adjusted using the up and down navigation button on the keypad.
Alternatively the volume may be adjusted from the Sound Setting accessible from the main menu.
Select
Sound -> Volume Setting and use the Up and Down navigation buttons to adjust the
volume.
Sound configuration option in the main menu
3.2.2 Brightness
During operation a user may wish to adjust the brightness of the display, or change when the display
goes into power-saving mode. Changing screen brightness does not require Admin access.
Screen brightness settings are accessed under Settings from the Main Menu.
Page 9

7
3 P h o n e C o n f i g u r a t i o n
Setting
Backlight
Settings configuration option in the main menu
Value Notes
Menu select: 10s, 30s, 60s, Always Defines how long the backlight will
Backlight Brightness
Menu select: 5%, 10%, 20%, 40%,
60%, 80%, 100%
stay on without input, default is 30s
Controls the brightness of the main
display, lover values conserve
battery, default is 80%
3.3 Automatic Network Configuration
A MinePhone handset will use the last network settings it was configured with to attempt to connect
to a network. Once connected to the network, the handset will request updates to its configuration
from a TFTP server.
For a newly commissioned phone these settings are:
Setting
SSID
Security
WPA Key
Value
impact-voice
WEP128
impact-voice1
Page 10

8
3 P h o n e C o n f i g u r a t i o n
DHCP
Enabled
To assist with commissioning of new phones, it is suggested that sites have a Wireless Access Point
configured with the above network settings in a convenient location. This allows for new handsets to
be turned on in range of this Access Point (AP) and retrieve the mine's specific network settings.
3.4 Manually Configuring Network Settings
If not using an auto-configuration AP, or if auto-configuration fails then the Network settings may be
defined manually from the handset.
To do this, ensure that the phone is started in Admin mode as described above. This will give access to
the Network configuration menu from within the main menu.
Network configuration option in the main menu
The Network menu provides access to settings and modes specific to wireless connectivity and remote
server locations. Selecting a setting will open the current value in a text editable field, the following
controls can be used:
• OK to accept the current text and return to the last menu
• Back to backspace and edit the text.
• The * key to toggle between character and numeric entry
• Keypad buttons to enter numbers or cycle through characters
• The # key accesses extended punctuation
Page 11

9
3 P h o n e C o n f i g u r a t i o n
3.4.1 AP Config
The AP Config settings define the wireless network the handset will attempt to connect to.
Field
Values
Notes
SSID String of up to 32 ASCII characters The phone will scan channels 1,6,
and 11 for the best connection on
this SSID
Set Security
WEP Key
WPA/WPA2 Key
Activate
3.4.2 Signal Protocol
Menu select: Open, WEP, WPATKIP, WPA-AES, WPA2
Menu Select: 64 or 128 bit
encryption, string of up to 5 or 13
characters respectively
Up to 32 character string
Only one security model may be
defined and should be consistent
across all APs
Ignored if security set to Open or
WPA
Ignored if security set to Open or
WEP
Select to enable current AP setting
changes without requiring a restart.
Please wait up to 60 seconds for
changes to take effect.
The Signal Protocol settings define the locations of servers and protocols that the MinePhone handset
uses to communicate.
3.4.2.1 SIP
Session Initiation Protocol settings. These settings are currently loaded only at startup, the phone must
be restarted for changes to take effect. The SIP server and Port may be provided from a DHCP server.
field
SIP User Name
SIP Password
Auth User Name
SIP Server
SIP Port
Outbound Proxy Mode
Outbound Server
Outbound Port
Values
String of up to 50 characters
String of up to 50 characters
String of up to 50 characters
Server name or IP address
String of up to 5 digits
Menu select: Enable, Disable
Server name or IP address
String of up to 5 digits
Notes
Name of user as it appears to other
devices, traditionally same as Auth
User Name
Password used for authenticating
this user on the SIP server
Username for authenticating to the
SIP server
Location of SIP server
Port for accessing SIP server,
default is 5060
Default is Enabled
This must be set to same as SIP
server if not in use
This must be set to same as SIP
server if not in use
Page 12

10
3 P h o n e C o n f i g u r a t i o n
SIP Register Duration
3.4.2.2 RTP
String of up to 5 digits
Seconds duration between
registrations, default is 120
Real-time Transport Protocol settings. This settings here are specific to RTP as used by the Push to
Talk functionality, and should be consistent across all phones in a fleet. The phone will require a
restart to activate changes to these settings.
field
RTP Port
Codec Setting
DTMF Mode
3.4.2.3 TFTP
Values
String of up to 5 digits
Menu select: g.711a, g.711mu,
g.729a
Menu select: RFC2833, Inband
Notes
Default is 9090
Default is g.711a
Default is RFC2833
Trivial File Transfer Protocol settings. The phone uses TFTP to attempt to download firmware and
configuration settings at startup. A DHCP server can be configured to provide the TFTP server
address to the phone.
field
TFTP Mode
TFTP Server
TFTP Download
3.4.2.4 NTP
Values
Menu Select: Enable, Disable
Server name or IP address
Notes
Default is Enabled
Select to force a TFTP connection
and configuration download with
current settings
Network Time Protocol settings. This defines a remote server that the phone will attempt to retrieve
time and timezone settings from at startup. The RTP server address may be provided by a DHCP
server.
field
NTP Mode
NTP Server
3.4.2.5 Tracker
Values
Menu select: Enable, Disable
Server name or IP address
Notes
Default is Enabled
A Tracker Server is an MST appliance that can provide positioning information of RFID tags and
WiFi devices on the network. If enabled, the phone will display its current location on the home
screen and allow a phone operator to issue queries for the location of assets in the mine.
field
Values
Notes
Page 13

11
3 P h o n e C o n f i g u r a t i o n
Tracker Mode
Tracker Server
3.4.3 Internet Protocol
Menu select: Enable, Disable
Server name or IP address
Default is Enabled
Allows for the setting of the phone's IP address via either DHCP, or manually.
field
DHCP
IP Address
Subnet Mask
Default Gateway
Primary DNS
Secondary DNS
Activate
3.4.4 Advanced Settings
Values
Menu select: Enable, Disable
IP address
IP address
IP address
IP address
Notes
If enabled other settings defined
here are ignored, default is
Enabled
IPv4 only
Select to enable current IP setting
changes without requiring a restart.
Please wait up to 60 seconds for
changes to take effect.
These variables define 802.11 and hardware specific settings. Phones must be restarted for changes to
these settings to take effect.
field
Speed
Link Mode
Network Type
DTIM Setting
Roaming Policy
Values
Menu select: 1, 2, 5.5, 11, 24, 36,
54 Mbps
Menu select: Auto, 802.11b,
802.11g
Menu select: AP Mode, Adhoc
Mode
Number in range 1-16
Menu select: By RSSI, When
disconnect
Notes
Faster speeds can improve call
quality but will result in greater
network usage and lower battery
life, default is 11 Mbps
Default is Auto
Manually change from Adhoc to AP
connection, default is AP Mode
How often the phone will check the
AP for buffered packets, default is
1
Defines how the phone handles
need to transition between APs,
default is By RSSI
Channel Select Number, dash, number (eg 1-11) Allows limiting channels scanned
if network works on restricted
channel range, default is 1-11
Page 14

12
3 P h o n e C o n f i g u r a t i o n
PTT Status when Keylocked
Default Settings
3.4.5 Net Search
Menu select: Enabled, Disabled
Defines whether the PTT button
will still work if the phone has been
keylocked, default is Enabled
Select to restore all Advanced
settings to defaults
This will display a list of wireless networks the phone has detected along with current signal strength.
Selecting one of the listed networks and selecting Save will autofill the SSID value under the AP
Config menu to match.
3.5 Manually Configure Phone Settings
Phone Settings are designed to be set and managed from a central server using TFTP configuration
files. If these settings must be edited manually, the phone must be started in Admin mode.
Settings configuration option in the main menu
3.5.1 Phone Setup
These options control the screen and interface settings. Date and Time settings can be configured
using NTP. Changes here will take effect immediately.
field
Values
Notes
Page 15

13
3 P h o n e C o n f i g u r a t i o n
Set Date and Time
Date Format
Time Format
Language
Auto Lock Key
Adjust using navigation buttons
Menu select: Y/M/D, M/D/Y, D/M/Y
Menu select: 12h, 24h
Menu select: English, Chinese
Menu select: Enable, Disable
Default is 12h
Default is English
Defines whether the keypad will
Backlight
lock after backlight turns off, default
is Enabled
Menu select: 10s, 30s, 60s, Always Defines how long the backlight will
stay on without input, default is 30s
Backlight Brightness
Time Zone
Version
ON/OFF Time
3.5.2 Restore Factory Config
Menu select: 5%, 10%, 20%, 40%,
60%, 80%, 100%
Menu select: GMT offset
Non editable text
Non editable text
Controls the brightness of the main
display, lover values conserve
battery, default is 80%
Default is -8 hours
Displays the current hardware,
firmware and resource versions in
use
Lists the power up and power times
of this handset
This option will restore all configuration and network settings to factory default. User will be asked to
confirm action, after which changes will be immediate and the phone should be restarted.
Page 16

14
4 M a i n t e n a n c e
4 Maintenance
.......................................................................................................................................
The MinePhone is an important communication device that is relied upon for safety and productivity.
As such it should be treated with care and regularly maintained.
4.1 Pre-Use Inspection
Before taking a MinePhone into a hazardous environment, it is the responsibility of the user to ensure
that the hardware appears fit for use.
1 Check the integrity of the enclosure. Report any issues immediately
2 Check the screen legibility
3 Ensure it is wirelessly connected to a network
4 Ensure it has been assigned a phone extension
4.2 Battery Management
For safety the MinePhone has an inbuilt battery that should only be accessed by a qualified technician.
The phone battery has a life of 36 months, after which it is not assured to provide sufficient
operational runtime from a full charge.
It is recommended that a register be kept on site indicating the last date of battery change for each
device so that the 36 month replacement schedule can be adhered to.
 Loading...