

Mindeo CS2290 Quick Manual
CS2290 Cordless Image Scanner Quick Guide
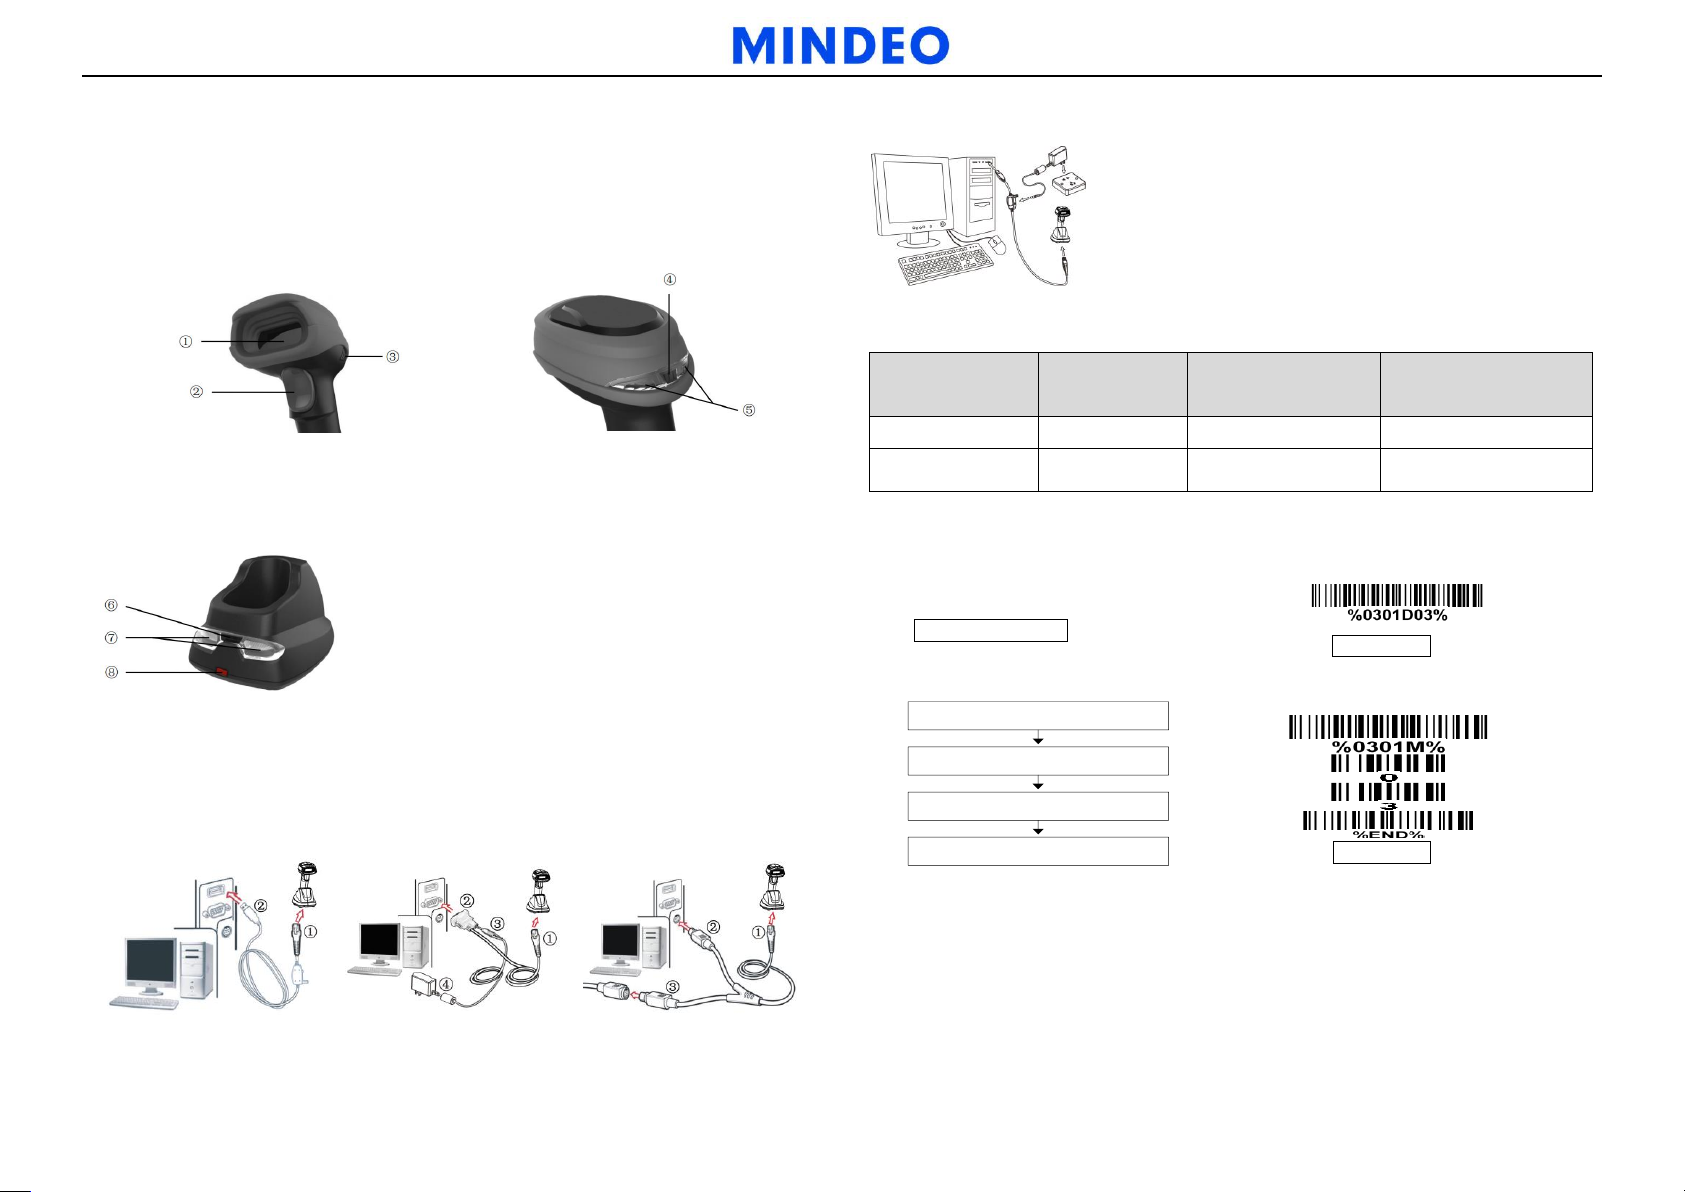
① Scan window ② Trigger (Press to triggr / Long press 2 seconds to turn on)
③ Beeper ④ Power indicator (Blue LED) ⑤ Successful decoding indicator
(Green LED) / Communication fail indicator (Red LED) / Charging (Red LED)
⑥ Power indicator (Blue LED)
⑦ Communication indicator (Green LED)
⑧ Key (Long press 2 seconds to restore factory default
setting of cradle)
USB cable
RS232 cable
PS/2 keyboard cable
1. Please charge the battery before the first time of use.
The charge indicator (Red LED) on the handheld unit is
turned on when the charging is in process. When the
charging process completes, the charge indicator (Red
LED) is turned off.
2. Charging time: 4 hours for fully charged.
3. You can charge the battery via a USB port on the device or
an optional 5 VDC adapter.
Successful
Transmission
Beeper
Red LED
Vibration
Yes
Off
Off
Off
No
Three beeps
Blinks 3 times, and
then turns off
Short vibrates 3 times,
and then turns off
Scan the appropriate
Single-scan setting
Example: To set Flow control to be XON/XOFF.
Scan “Option bar code”
Scan “The 1st character of option”
Scan “The 2nd character of option”
Scan “END”
Example: To set Flow control to be XON/XOFF.
A standard kit contains: a handheld unit, a cradle, a USB cable, and a CD-ROM
(containing software and manuals).
It is suggested to read the user manual in details before use.
Notice
Parts of the handheld unit
Parts of the cradle
Charge battery
Indication of handheld unit for wireless data transmission
Programming instruction and example
Two programming modes have been provided as bellows:
Single-scan setting
Installation of cradle
1. Switch off power of the host. Refer to the below pictures, connect the host with the
scanner with different cables firstly, and then connect the adaptor to the power socket.
2. Ensure that all connections are secure. Switch on the power of the host. After a few
seconds, if only the blue LED on the cradle is ON, it indicates the cradle is in normal
working mode.
Note: 1. See user manuals for more information. 2. For better readability, please print this document with laser printer. 3. Version: CS2290_QG_EN_V1.1.
Multiple-scan setting
Notes about radio communication
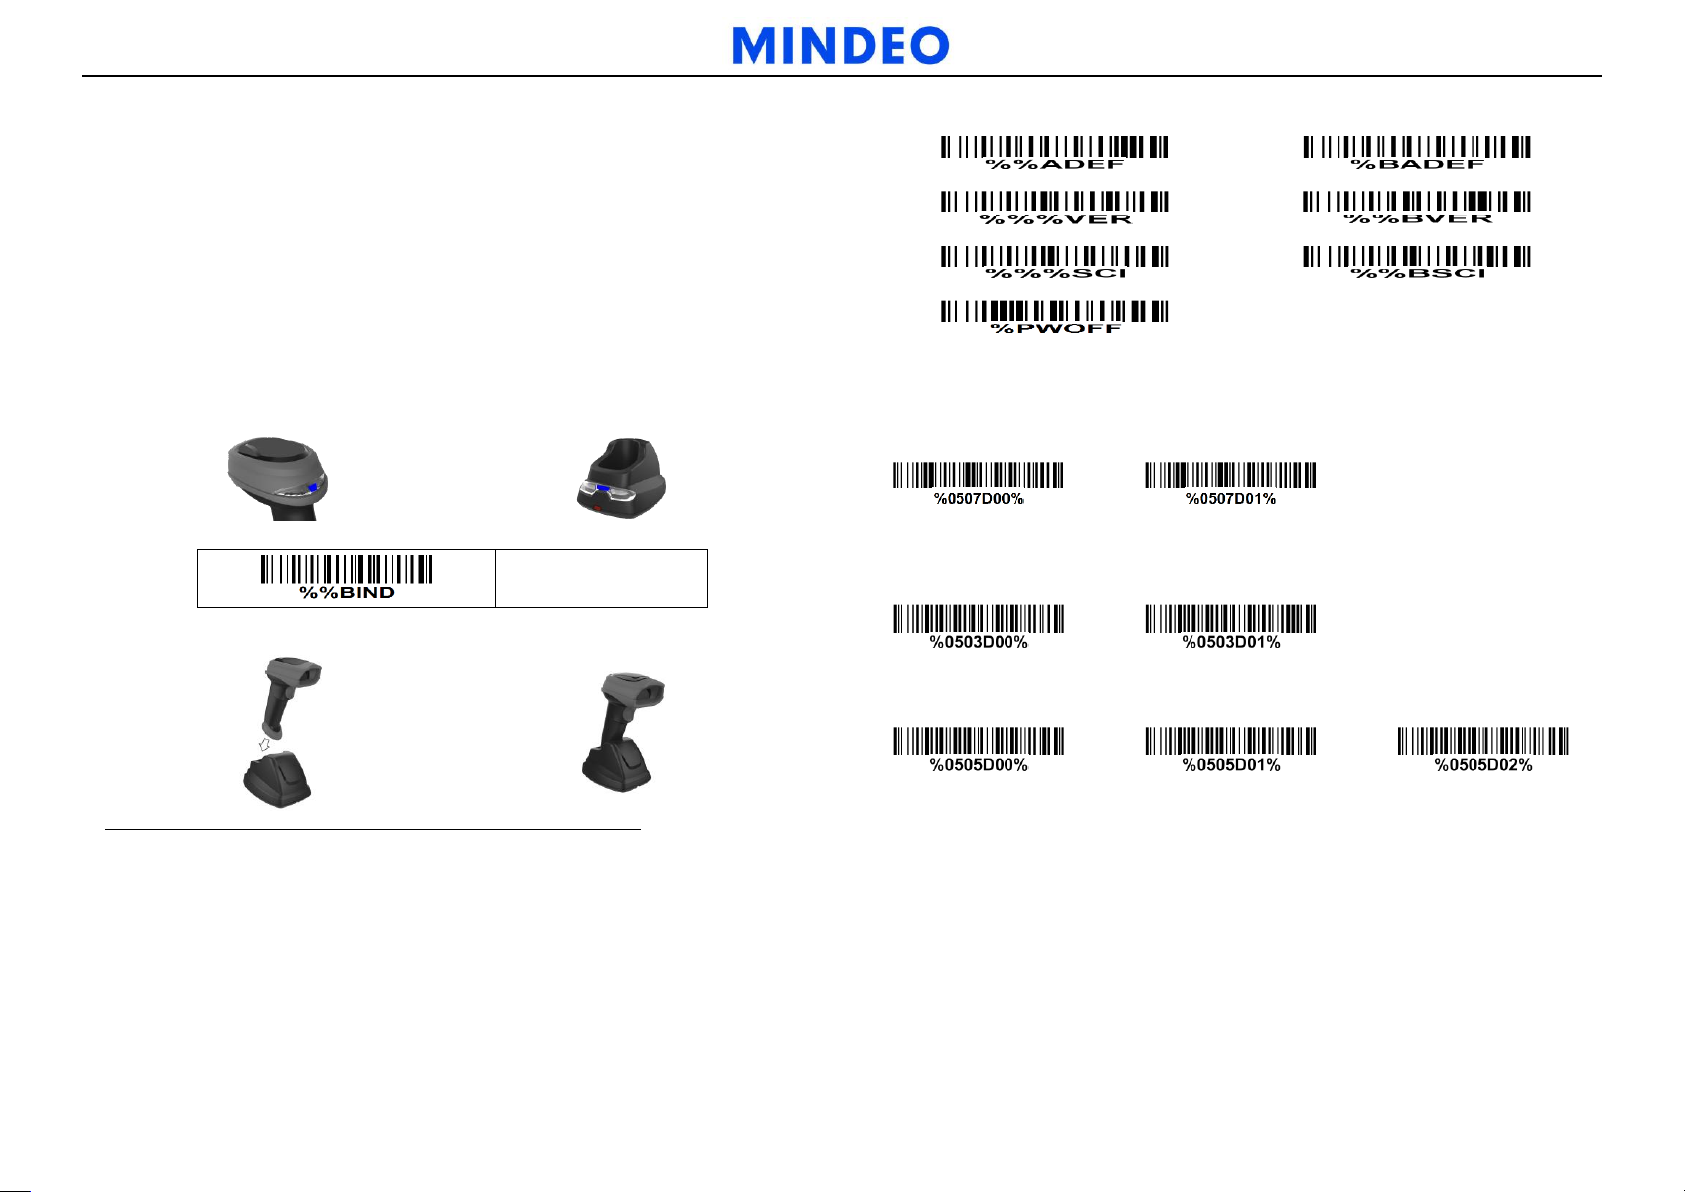
Quick binding
Initialize all parameters of handheld unit
Initialize all parameters of cradle
Handheld unit firmware version display
Cradle firmware version display
Handheld unit radio setting display
Cradle radio setting display
Turn off handheld unit
Note
Disable
Enable*
Disable
Enable*
Low
Middle
High*
1. If multi-clusters are working in the same area, it is strongly recommended that different
radio frequency channel numbers are applied to different clusters. While setting up, only
the radio frequency channel number of the first handheld unit of a single cluster is required
to be set.
2. In order to obtain constantly good communication quality, when in multi-clusters working
mode, the physical space between two cradles is required to be at least 2 meters. And it is
recommended to place the cradle on a higher location, generally more than 1 meter above
the ground. If working outdoor, the higher location the better.
Quick setting to wireless network
1. Make sure that both the handheld unit and the cradle are in normal working mode.
Normally it means that only the blue LED on the handheld unit and only the blue LED on the
cradle are ON as shown below.
Initialization settings and information display
Note: 1) If you want to turn on the handheld unit again, please keep the trigger key being
pressing for 2 seconds. 2) If you want to turn off the handheld unit via trigger key, please
press and hold the trigger key, after the laser beam turns off, wait for another 5 seconds, the
handheld unit will be turned off, then you can release the trigger key at this moment.
Vibration indication
2. Use the handheld unit to scan the following setting barcode.
3. The blue LED on the handheld unit will blink and the beeper will beep regularly to indicate
that the handheld unit is ready to be positioned onto the cradle.
4. Firmly position the handheld unit onto the cradle within 15 seconds. Two short beeps will
be emitted to indicate a successful setting; otherwise, two long beeps and a short beep will
be emitted to indicate a failed setting.
Note: The factory default settings are indicated with asterisks (*).
Beeper indication
Volume of beeper
Note: 1. See user manuals for more information. 2. For better readability, please print this document with laser printer. 3. Version: CS2290_QG_EN_V1.1.
 Loading...