

Mimo Monitors MCT-156QDS, MCT-156QDS-POE, MCT-156HPQ, MCT-156HPQ-POE User Manual
Adapt-IQ 15.6” User’s Manual
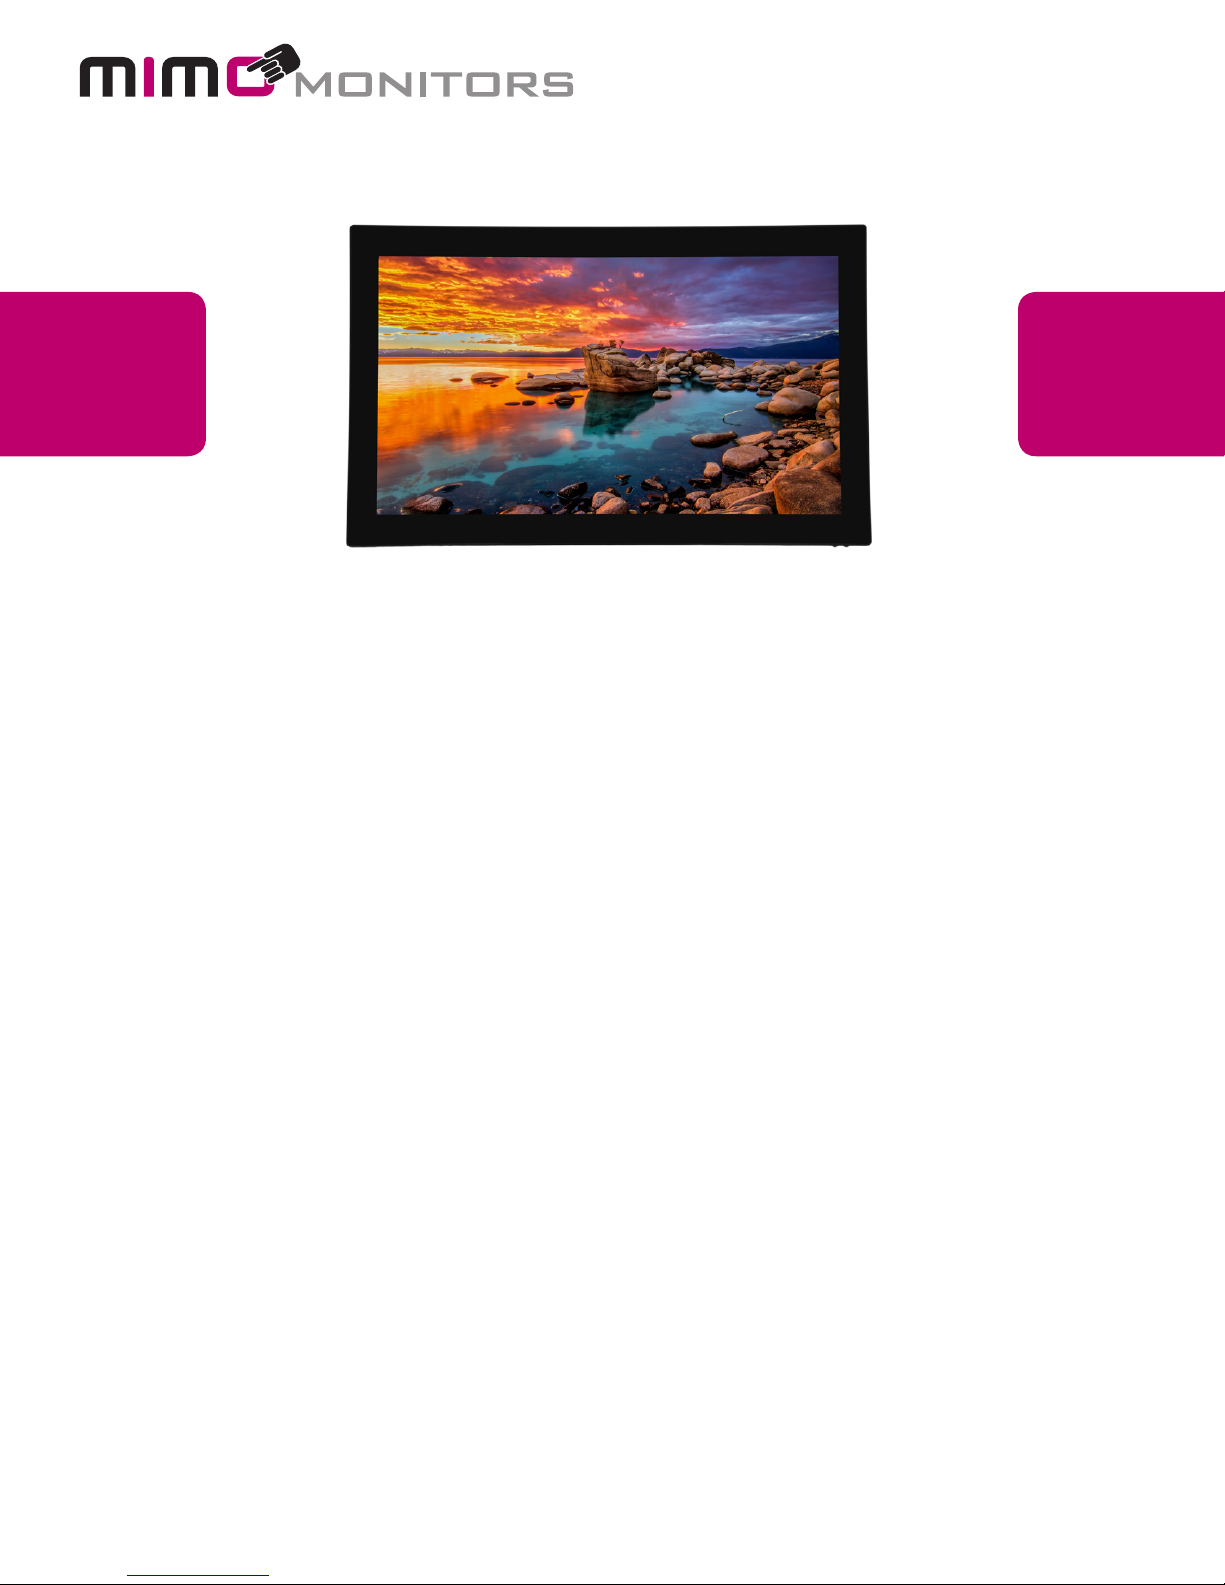
Model: MCT-156QDS, MCT-156QDS-POE, MCT-156HPQ, MCT-156HPQ-POE
Please keep this manual for future reference.
TABLE OF CONTENTS
PAGE
DECLARATION……………....…………………..............……………............…....1
PRODUCT INSTRUCTIONS……….......……..............…………………....………………1
POWERING ON THE PRODUCT………...........………………………...….....….……….2
INSERTING THE SD CARD.....………………….................………………………………2
INSERTING USB DEVICES……………..................……………......…………….……….2
HOME SCREEN.......………..…………….....................………….…......................……3
SYSTEM BAR….........................................................................................................6
APPLICATIONS.......................................................................................…9
LANGUAGE………………......…............................................................……10
DATE & TIME….…………….....….......….............................…...................................11
VOLUME………………......….......….............................…...................................12
BRIGHTNESS………………......….......…........................................................12
SCHEDULED POWER ON/OFF...................…........................................................13
WI-FI....................………………......….......….............................................17
ETHERNET....................………………......….......….............................................18
BLUETOOTH....................………………..….............................................19
VIRTUAL KEYBOARD....................…....……………......…........................................21
SWITCH INPUT METHODS......................………......….......…................................22
TAKE PHOTOS & SHOTS...............................…......….......…................................23
SURF ONLINE................………………......….......….................................................26
BROWSE FILES................………………......….......…...............................................27
PLAY MEDIA................………………......….......…...................................................28
INSTALL & UNINSTALL APPS................………………........….................................29
INSTALL APPS...................................................……........…......................29
UNINSTALL APPS...............................................................…....................32
RESET TO FACTORY DEFAULT................………....................................................33
Declaration
Back
Bottom
F ro nt
Please read the instructions carefully before equipment installation and
using the device.
Do not put the product in high temperature, humid or dusty environment.
Do not drop, crash or break down this product.
Do not power off the device when it’s formatting or upgrading, otherwise it
will cause operation system error.
This product is not waterproof.
Use only approved add-on enhancements.
Product Instruction
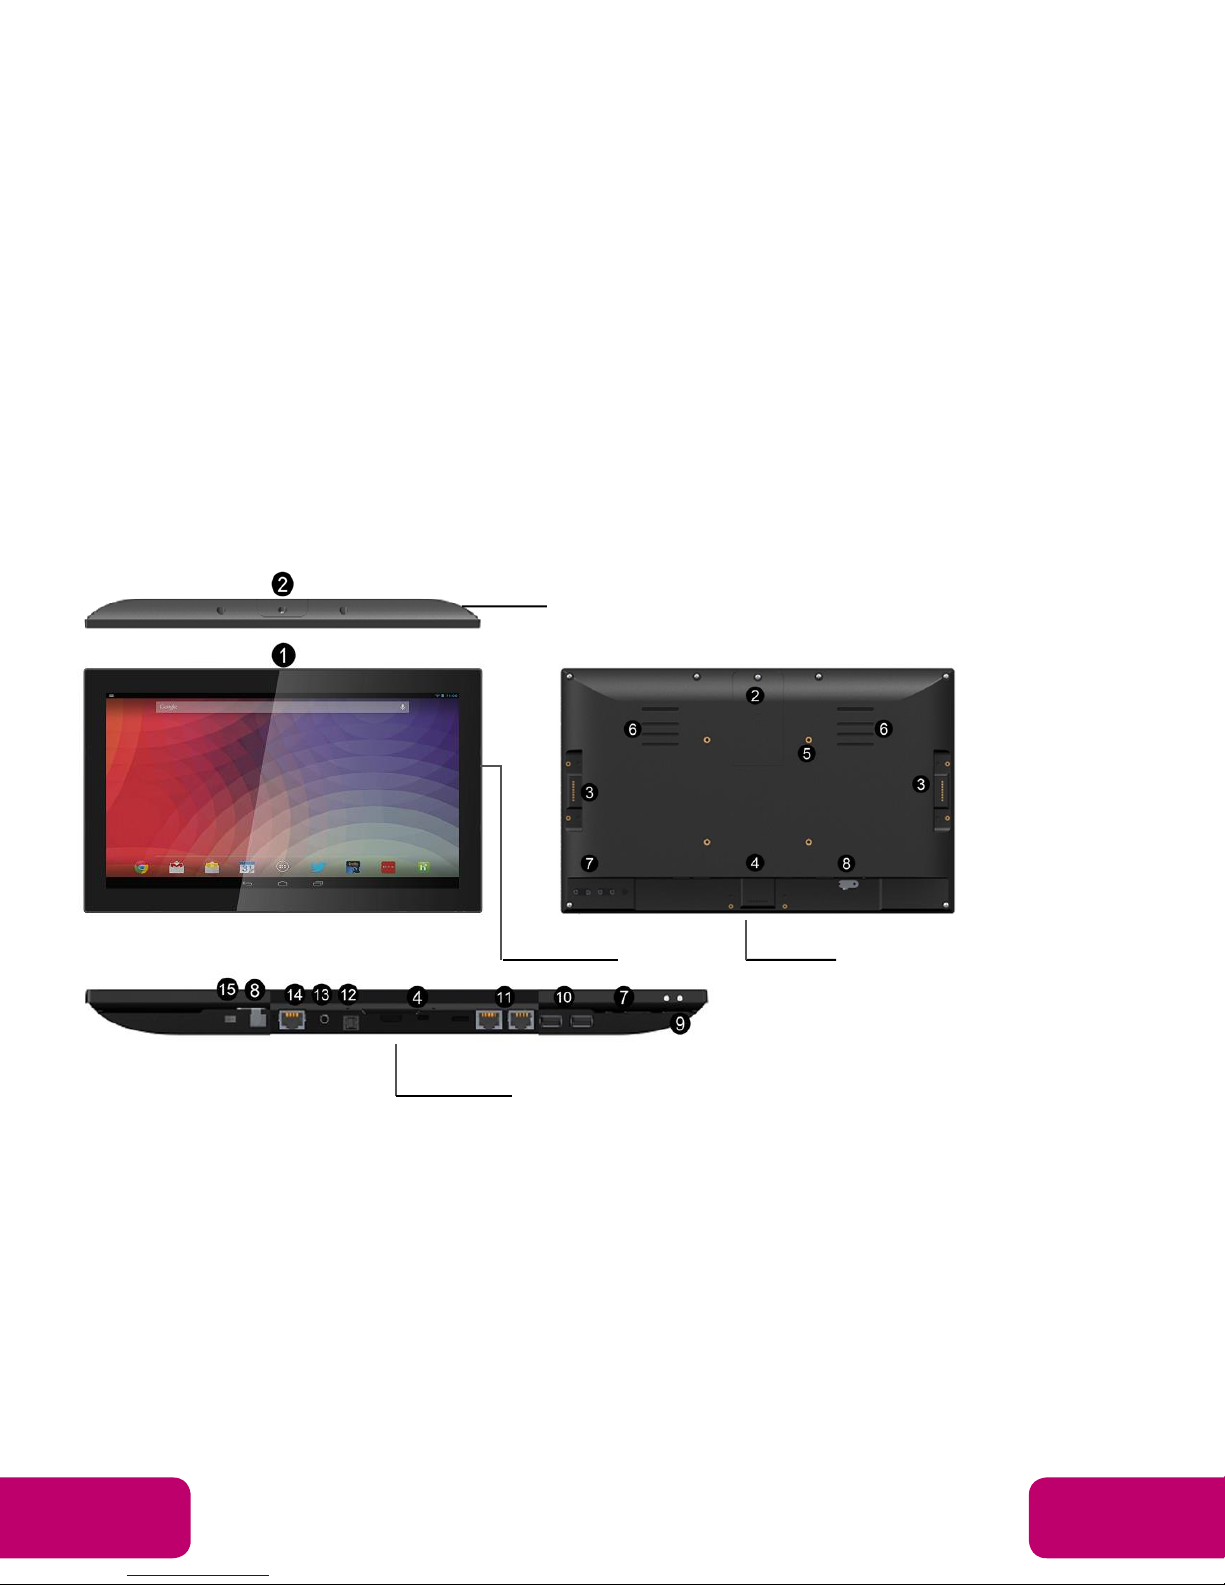
Top
1. Camera (optional): 2M pixels camera
2. SD Card Slot / Cover: support external SD card
3. Add-on module slot: to put optional add-on module
4. Micro-USB Port: support Micro-USB 2.0
5. VESA Mount Holes: for installing the bracket
6. Speakers: audio output
7. Function Keys (Vol+ / Vol- / Up / Down / Exit)
Sales: 1-855-YES-MIMO (937-6466)
Mimo Monitors
info@mimomonitors.com
1

8. AC/DC In Jack: powered by 12V/3A AC/DC input
9. IR Receiver & LED Indicator
IR Receiver: support remote control
LED Indicator:
Power supply ON
Power supply OFF
Red then turn Green after kernel boot up.
LED light off.
10. USB Port x 2: support USB 2.0 Host type A
11. RS232 Port x 2: in RJ45 connector form
12. S/PDIF Port: support S/PDIF audio output
13. Headset + Microphone Jack
14. 10/100Mbps RJ45 Ethernet Port: support Ethernet connection
15. Power Switch: switch power ON/OFF
Power on the Product
Step 1 Plug the power source into the AC/DC in jack (#8 in Product
Instruction).
Step 2 Switch the power switch (#15) on the bottom of this product to ON.
Insert SD Card
This product supports external SD card. Please insert your SD card into the
SD Card Slot (#2 in Product Instruction) on the top of this product.
Insert USB Devices
This product supports USB and Micro-USB to deal with your files.
USB
Plug your USB memory into the USB port (#10 in Product Instruction) on
the bottom of this product, and then you can do the file operations via the File
Browser. (See in Browse Files).
Micro-USB
Connect the Micro-USB port (#4 in Product Instruction) on the bottom of
this product and the USB port on your computer with a Micro-USB-to-USB
cable.
Sales: 1-855-YES-MIMO (937-6466)
Mimo Monitors
info@mimomonitors.com
2
Click the “Turn on USB storage” button in the “USB mass storage” window
that pops up automatically to make the device memory visible in your
computer.
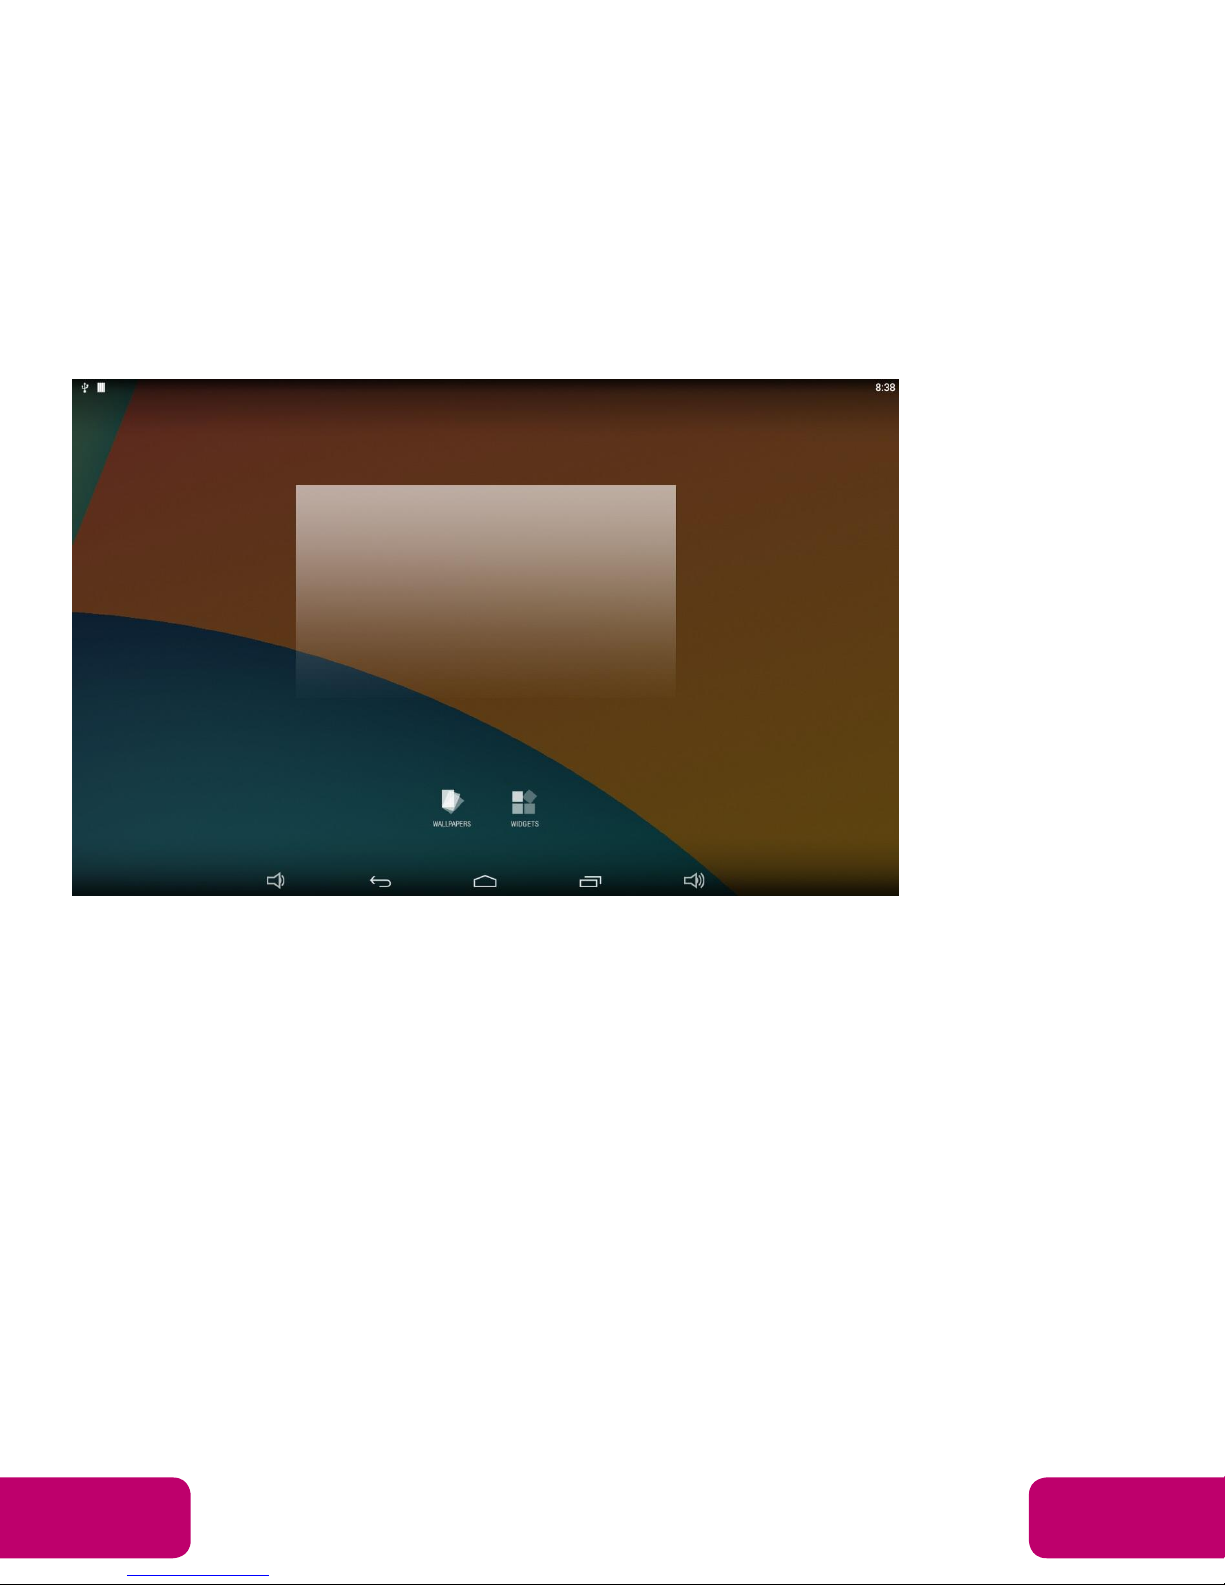
Home Screen
In the home screen, you can long-press the blank space to change the
wallpaper or drag widgets to desktop.
Change Wallpaper:
1. Click “WALLPAPER”.
Sales: 1-855-YES-MIMO (937-6466)
Mimo Monitors
info@mimomonitors.com
3
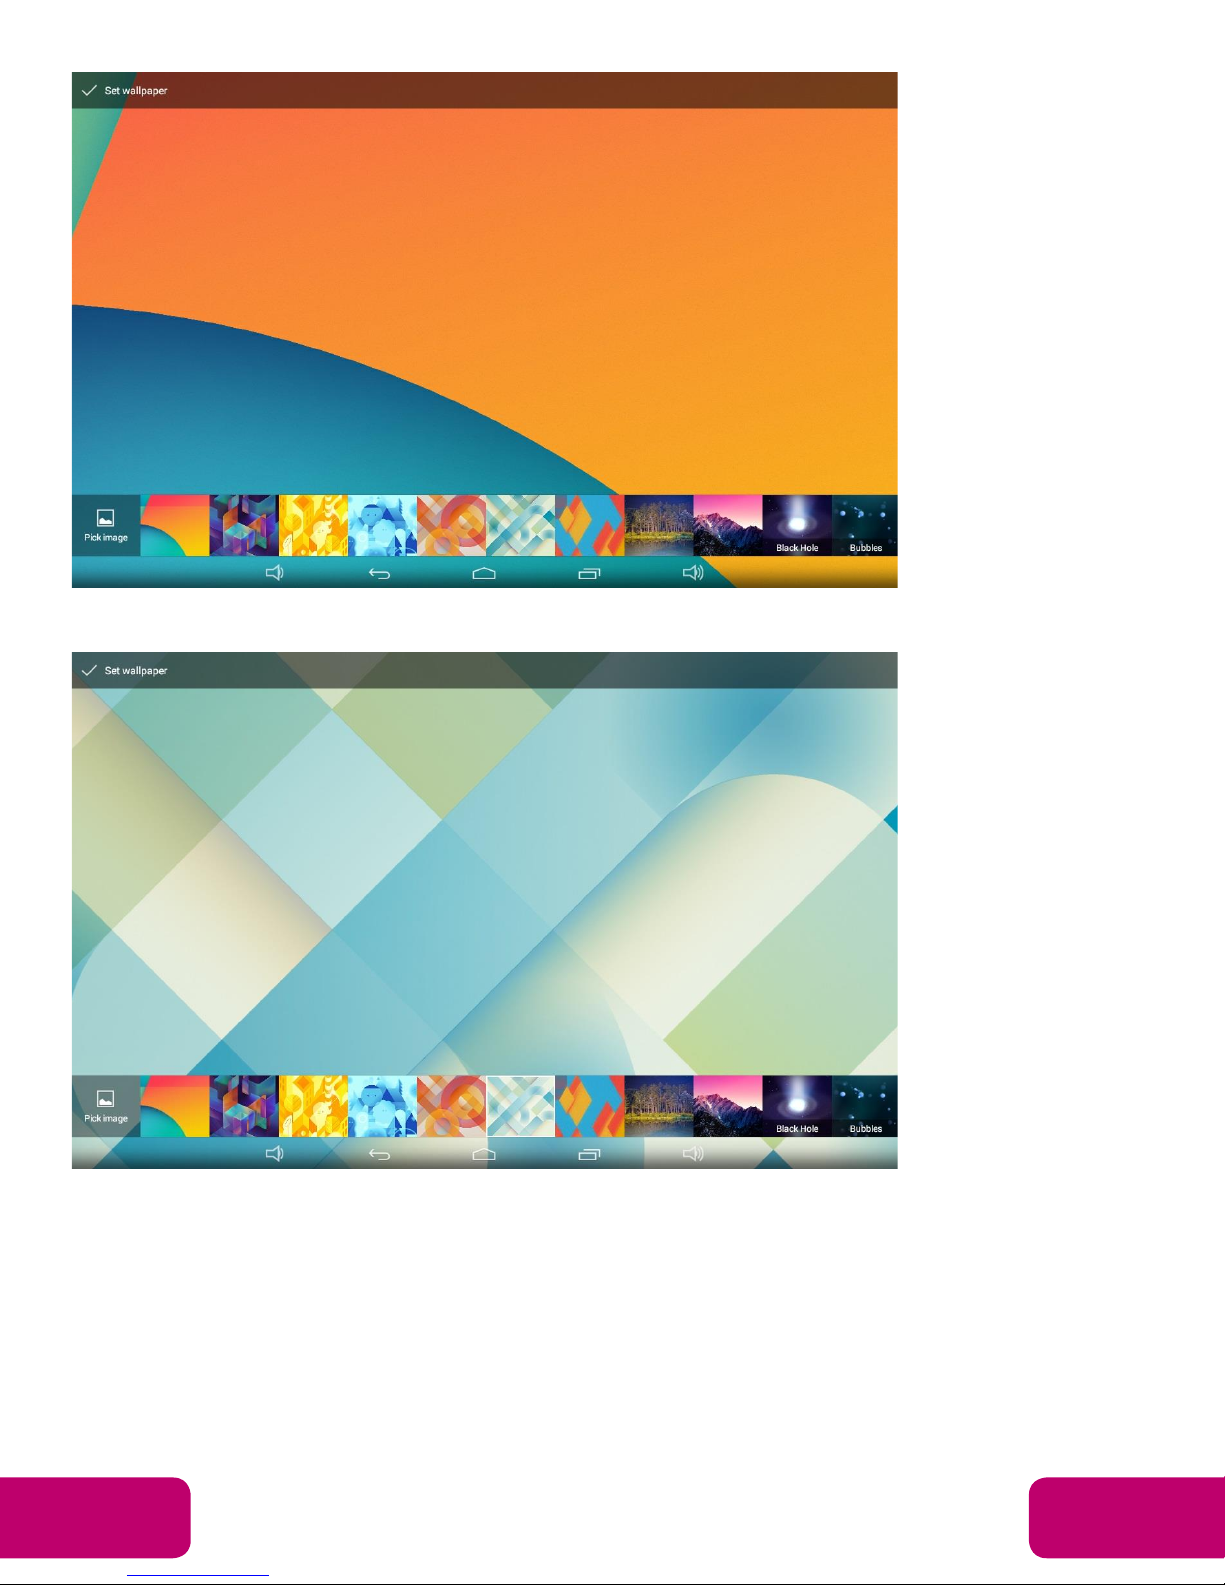
2. Select one picture from s ystem presets or your own pictures.
3. Click “Set wallpaper” on the upper-left corner of the screen to apply the
wallpaper.
Add Widgets:
1. Click “WIDGETS”.
Sales: 1-855-YES-MIMO (937-6466)
Mimo Monitors
info@mimomonitors.com
4
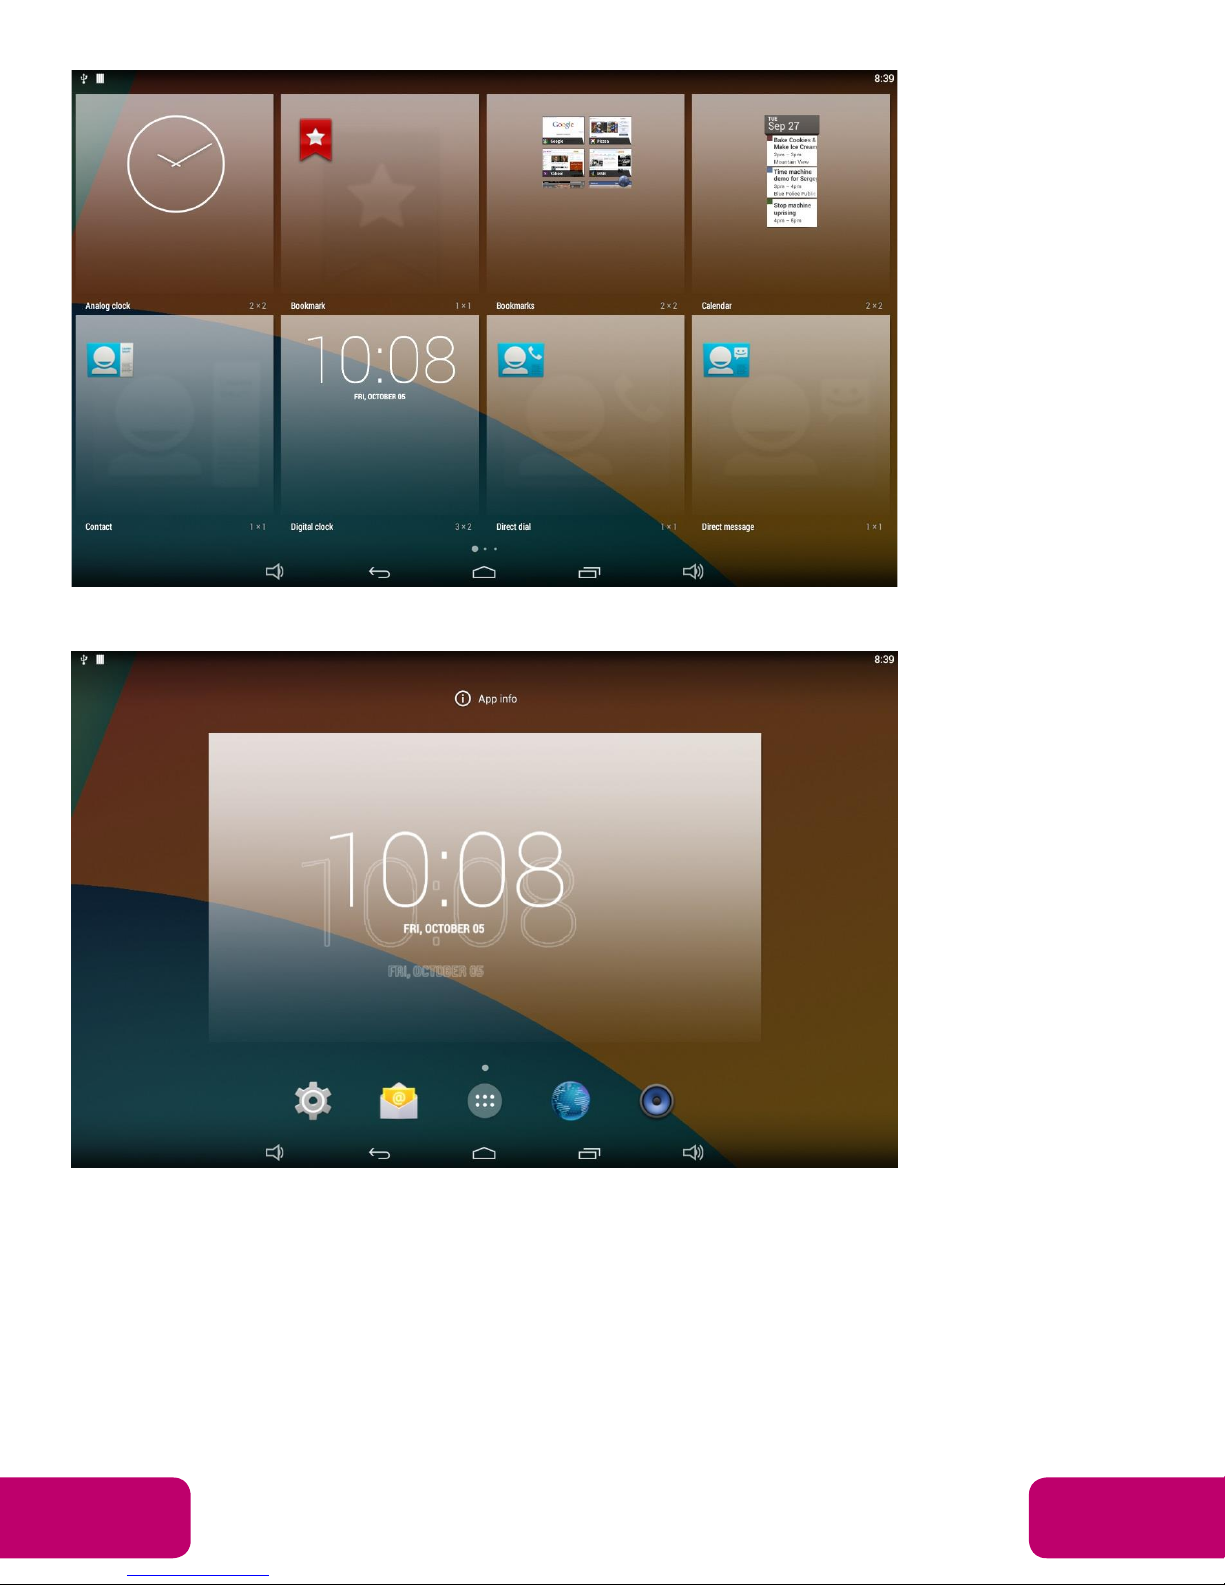
2. Long-press a widget and drag it to desktop.
3. A dialog prompts you to allow adding a widget for the first time. Check the
checkbox and then click “Create”.
Sales: 1-855-YES-MIMO (937-6466)
Mimo Monitors
info@mimomonitors.com
5
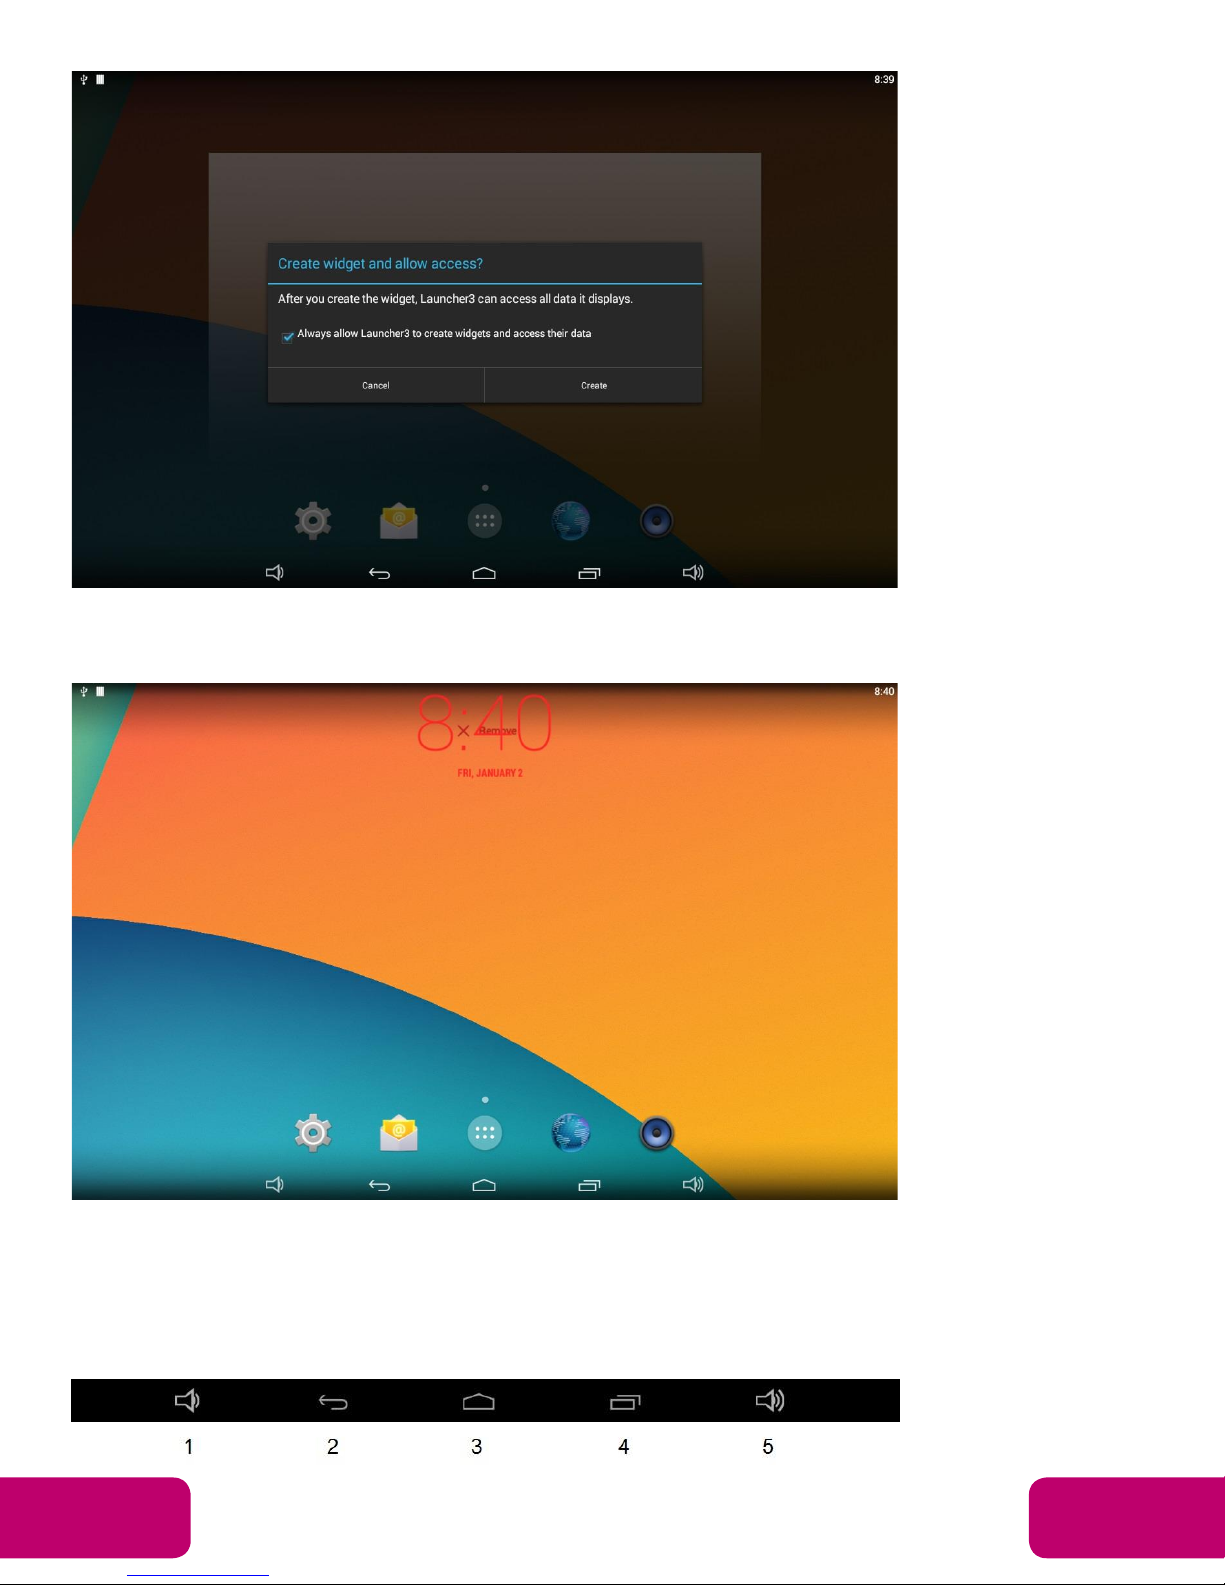
4. If you want to remove an icon, long-press the widget and drag it onto
“×Remove” at the top of the screen and drop it until it turns red.
System Bar
Navigation Buttons
Sales: 1-855-YES-MIMO (937-6466)
Mimo Monitors
info@mimomonitors.com
6
1. Volume-: Decrease the system volume.
2. Back: Return to the previous page.
3. Home: Return to the home screen.
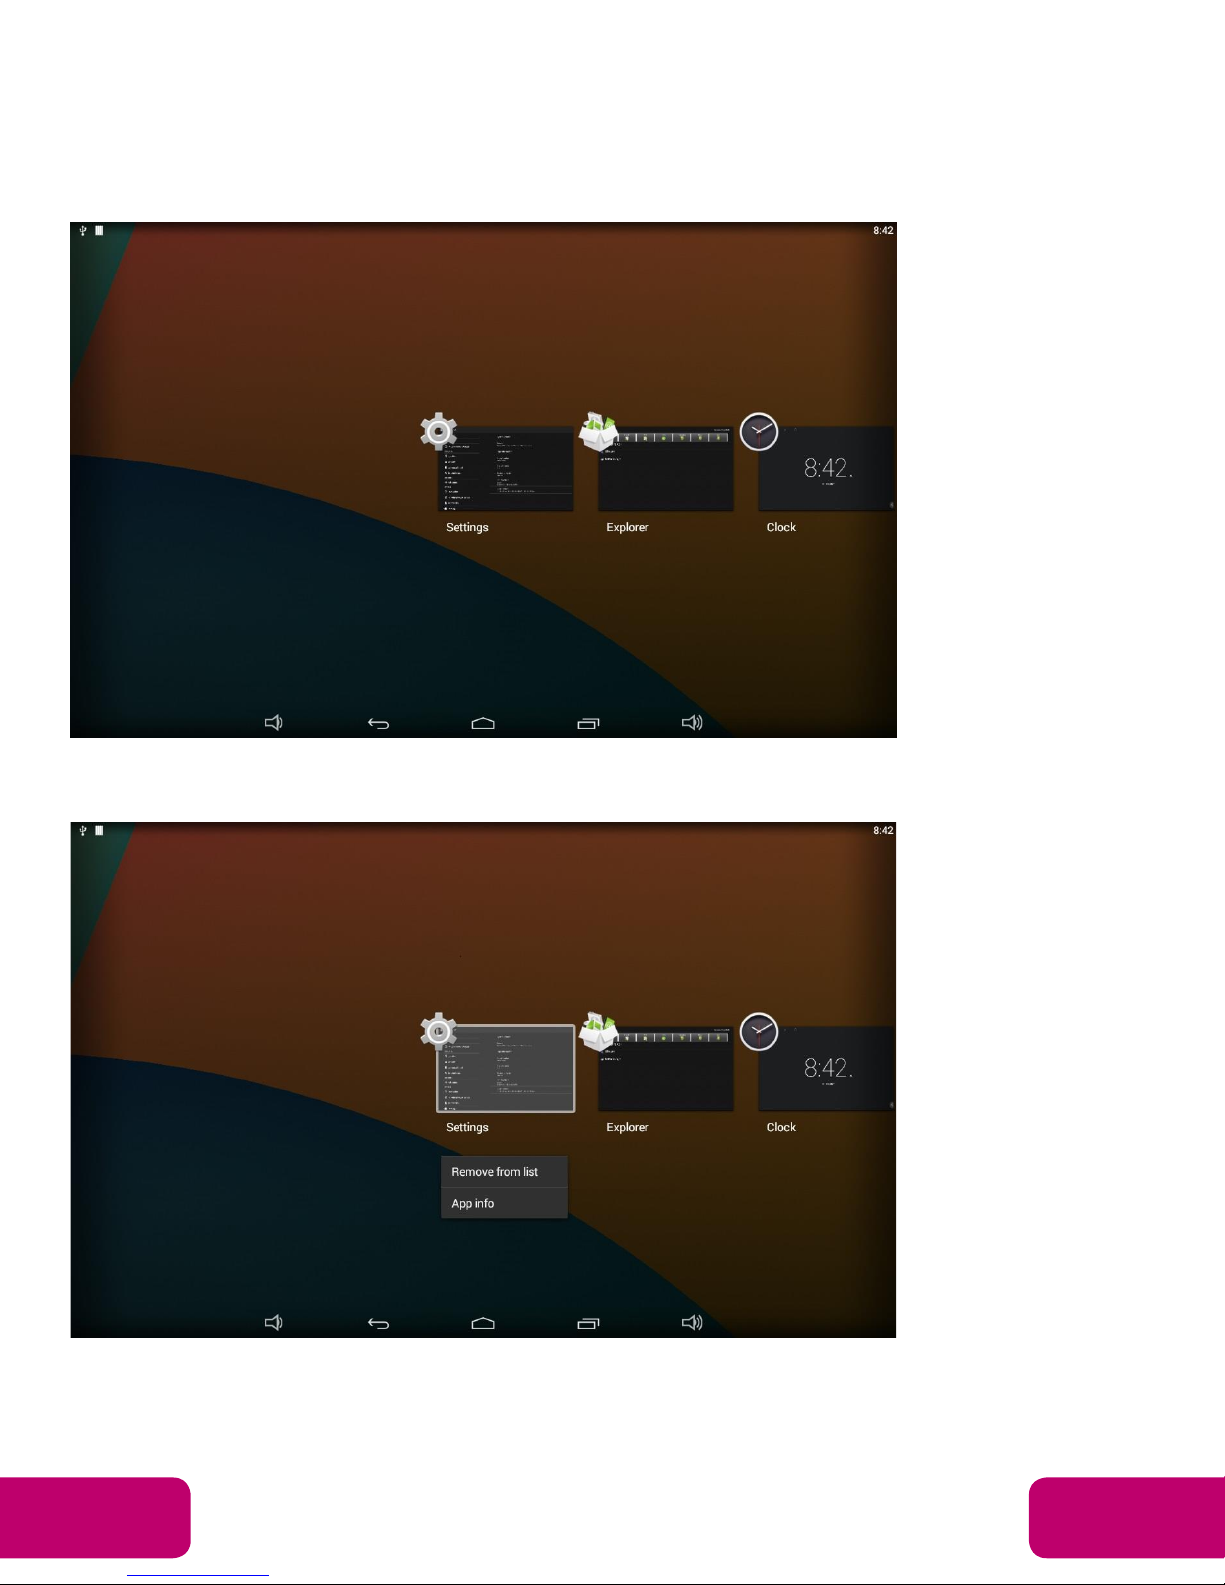
4. Recents: Switch between recently used apps.
To remove an app from the list, you could long-press the icon to select
“Remove from list”.
Or swipe the app item up or down to remove it.
Sales: 1-855-YES-MIMO (937-6466)
Mimo Monitors
info@mimomonitors.com
7
5. Volume+: Increase the system volume.
Status Notifications
Status bar at top of the screen displays system status, such as time, Wi-Fi,
SD card and USB connection etc.
Pull down the upper-left corner to open the status window.
Pull down the upper-right corner to open the shortcuts window which
contains brightness adjustment, Wi-Fi, auto rotate, airplane mode and
Sales: 1-855-YES-MIMO (937-6466)
Mimo Monitors
info@mimomonitors.com
8
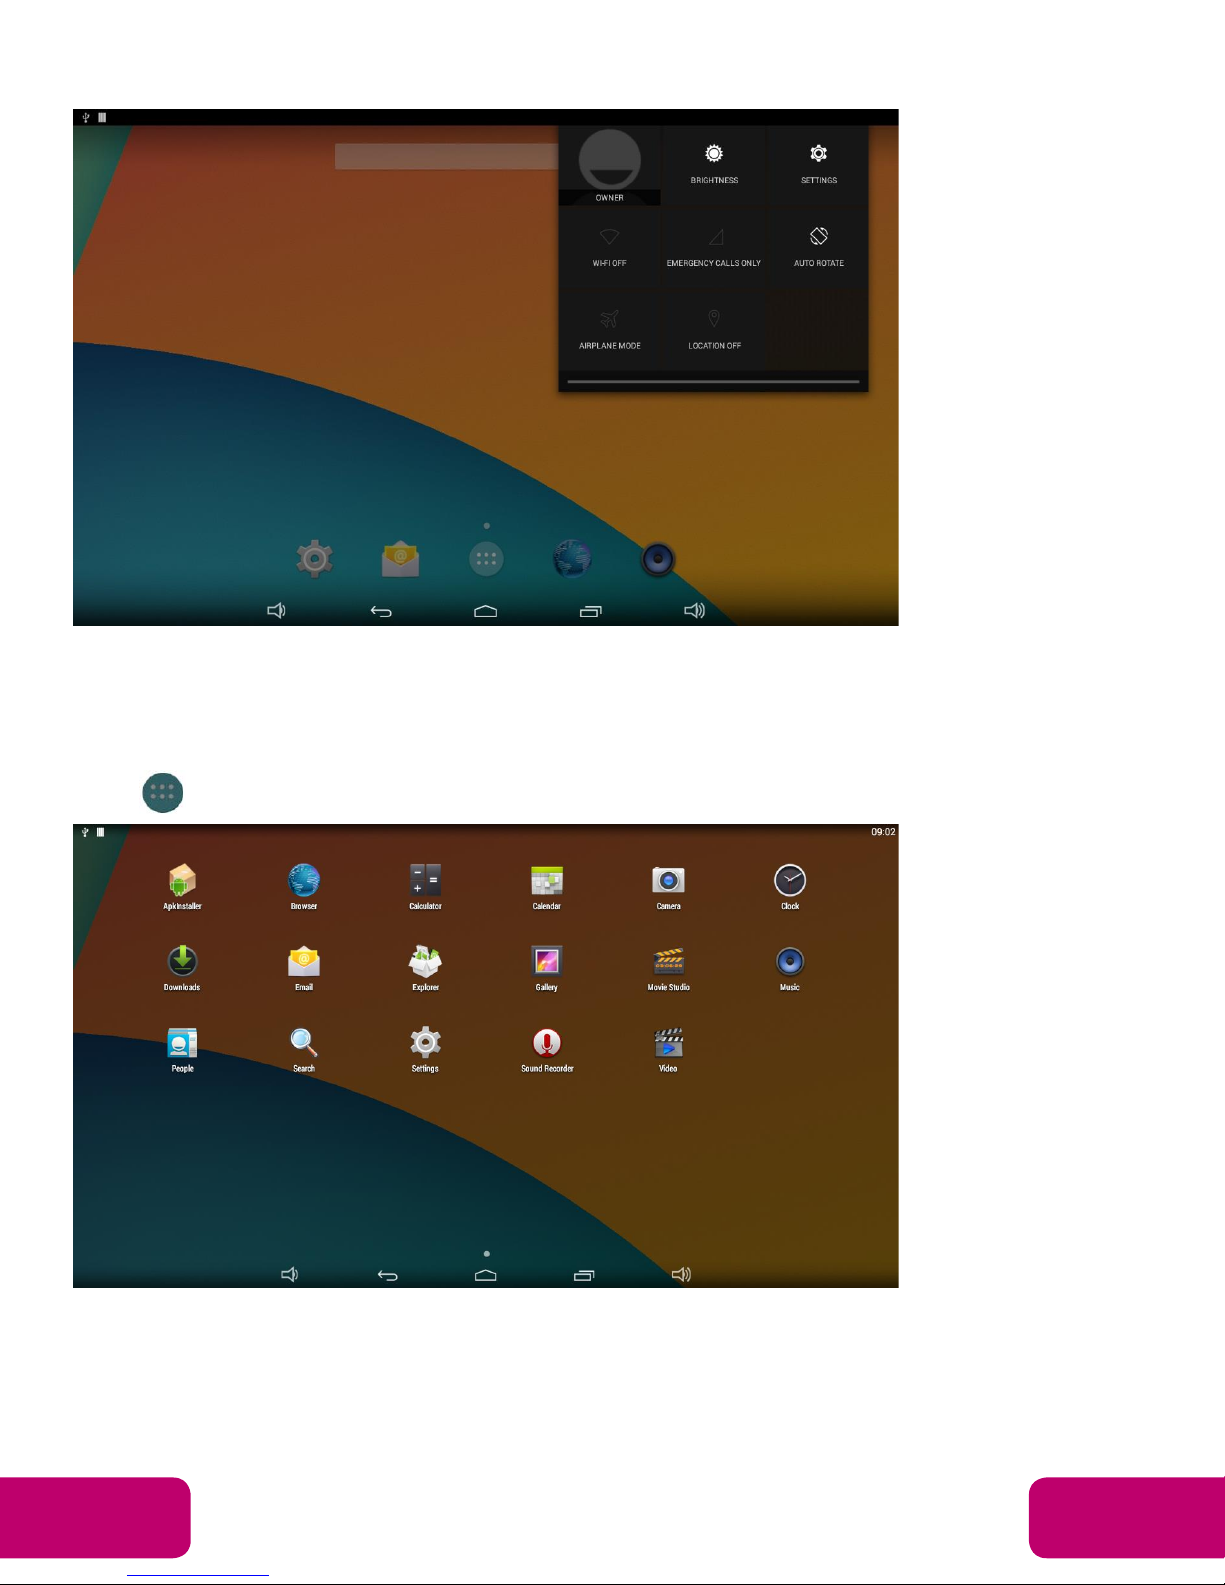
location switch, and system settings entrance.
Applications
Click at the bottom of home screen to enter the applications page.
The installed applications will be shown here and you can open an app by
clicking its icon.
To find an app easily, you can create a shortcut by long-pressing of the icon
and drag it to the home screen.
Sales: 1-855-YES-MIMO (937-6466)
Mimo Monitors
info@mimomonitors.com
9
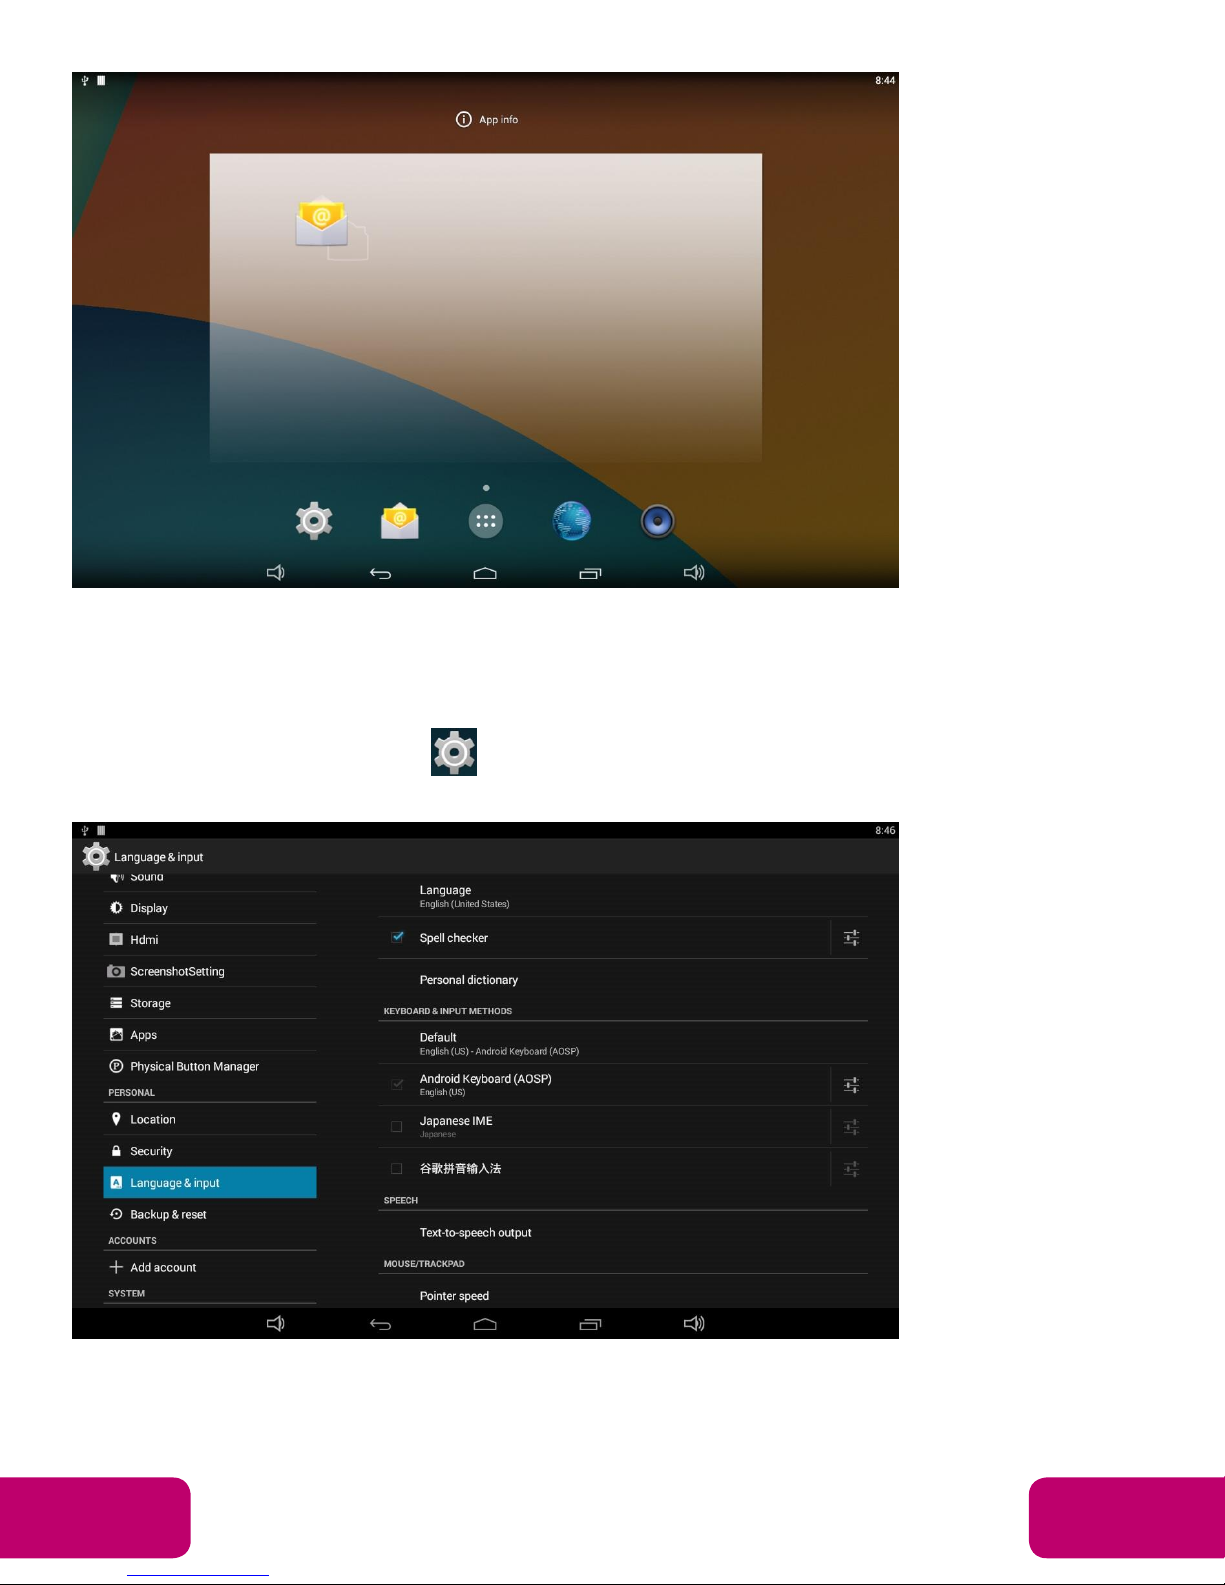
Language
In the App list, click “Settings” to open the system setting app, and
select the option “Language & input”.
Click the first option “Language” under “Language & input”, and then you
can change the system language according to your preference.
Sales: 1-855-YES-MIMO (937-6466)
Mimo Monitors
info@mimomonitors.com
10
 Loading...