

Page 1
Milwaukee
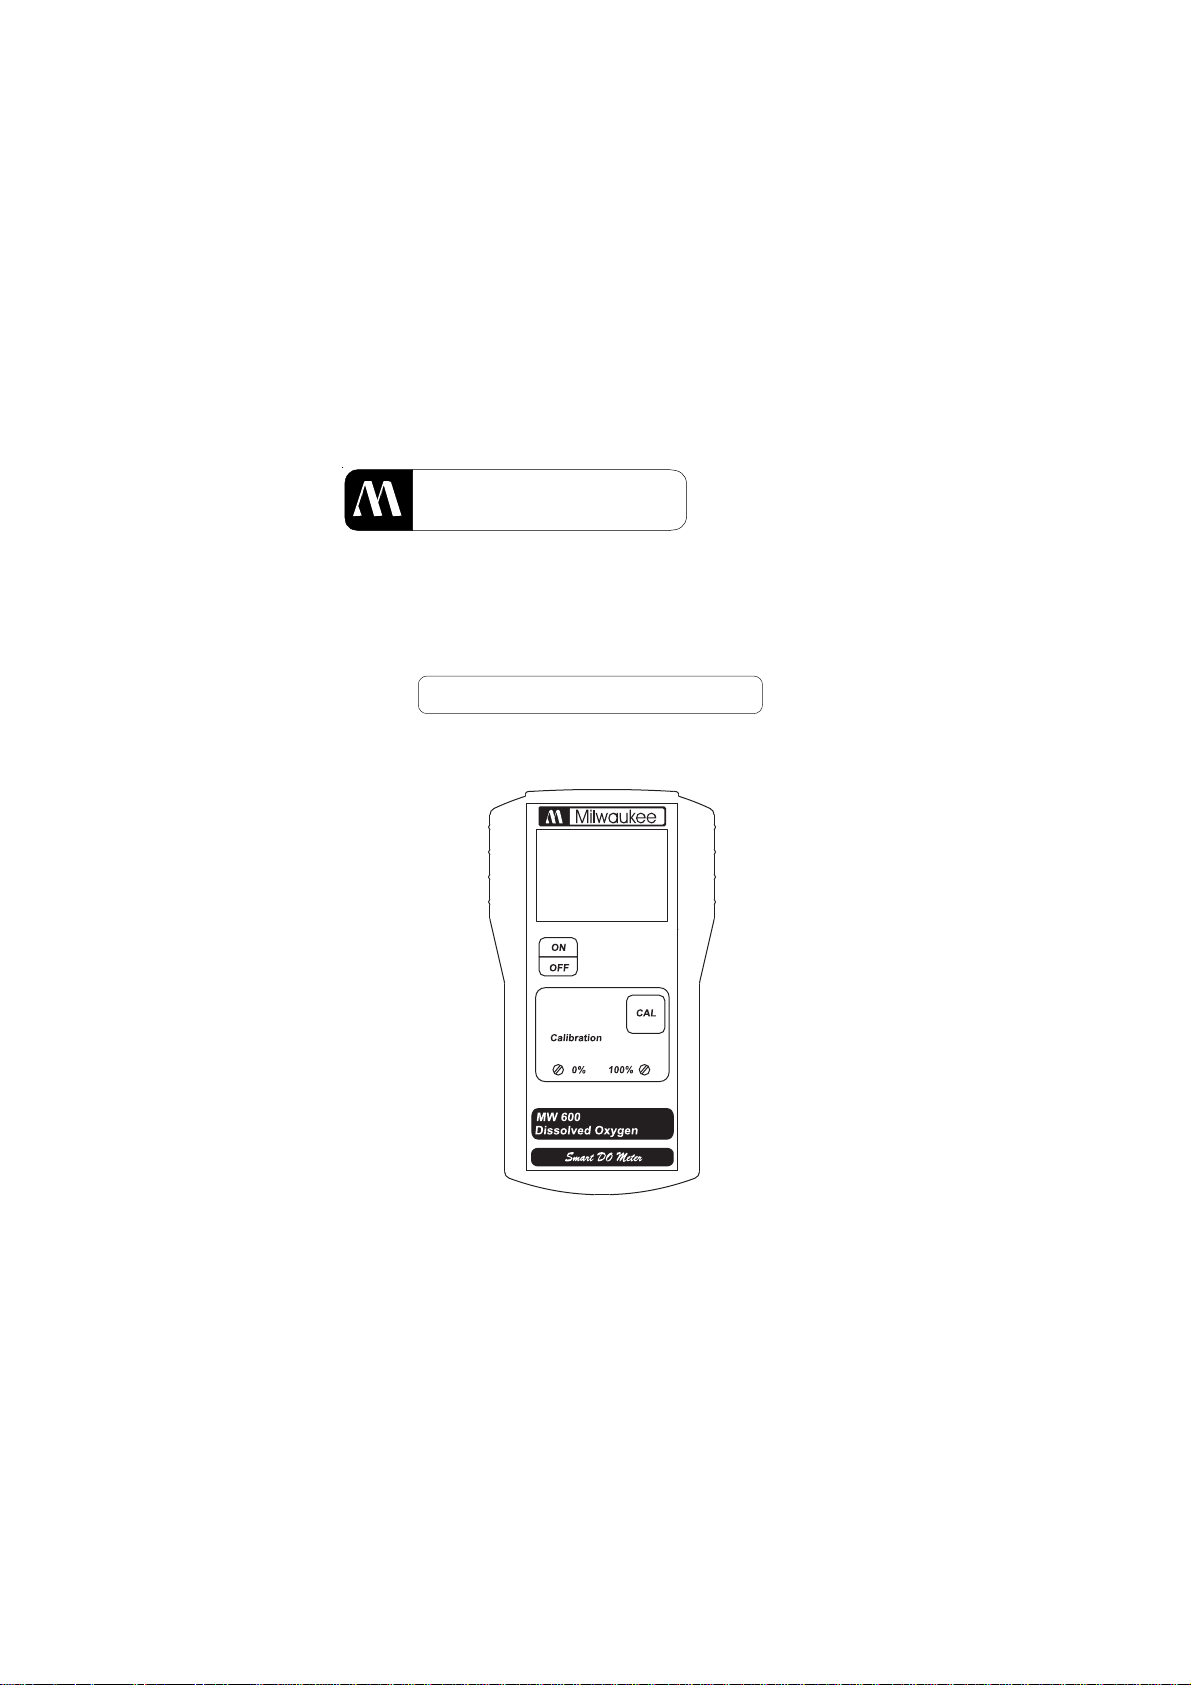
PORTABLE
DISSOLVED OXYGEN METER
MODEL: MW600
Smart DO Meter
USER MANUAL
Page 2
PROBE PREPARATION:
The meter is supplied with a 9V battery. Slide off the battery
compartment cover on the back of the meter. Install the battery
into the battery clip connector while observing polarity.
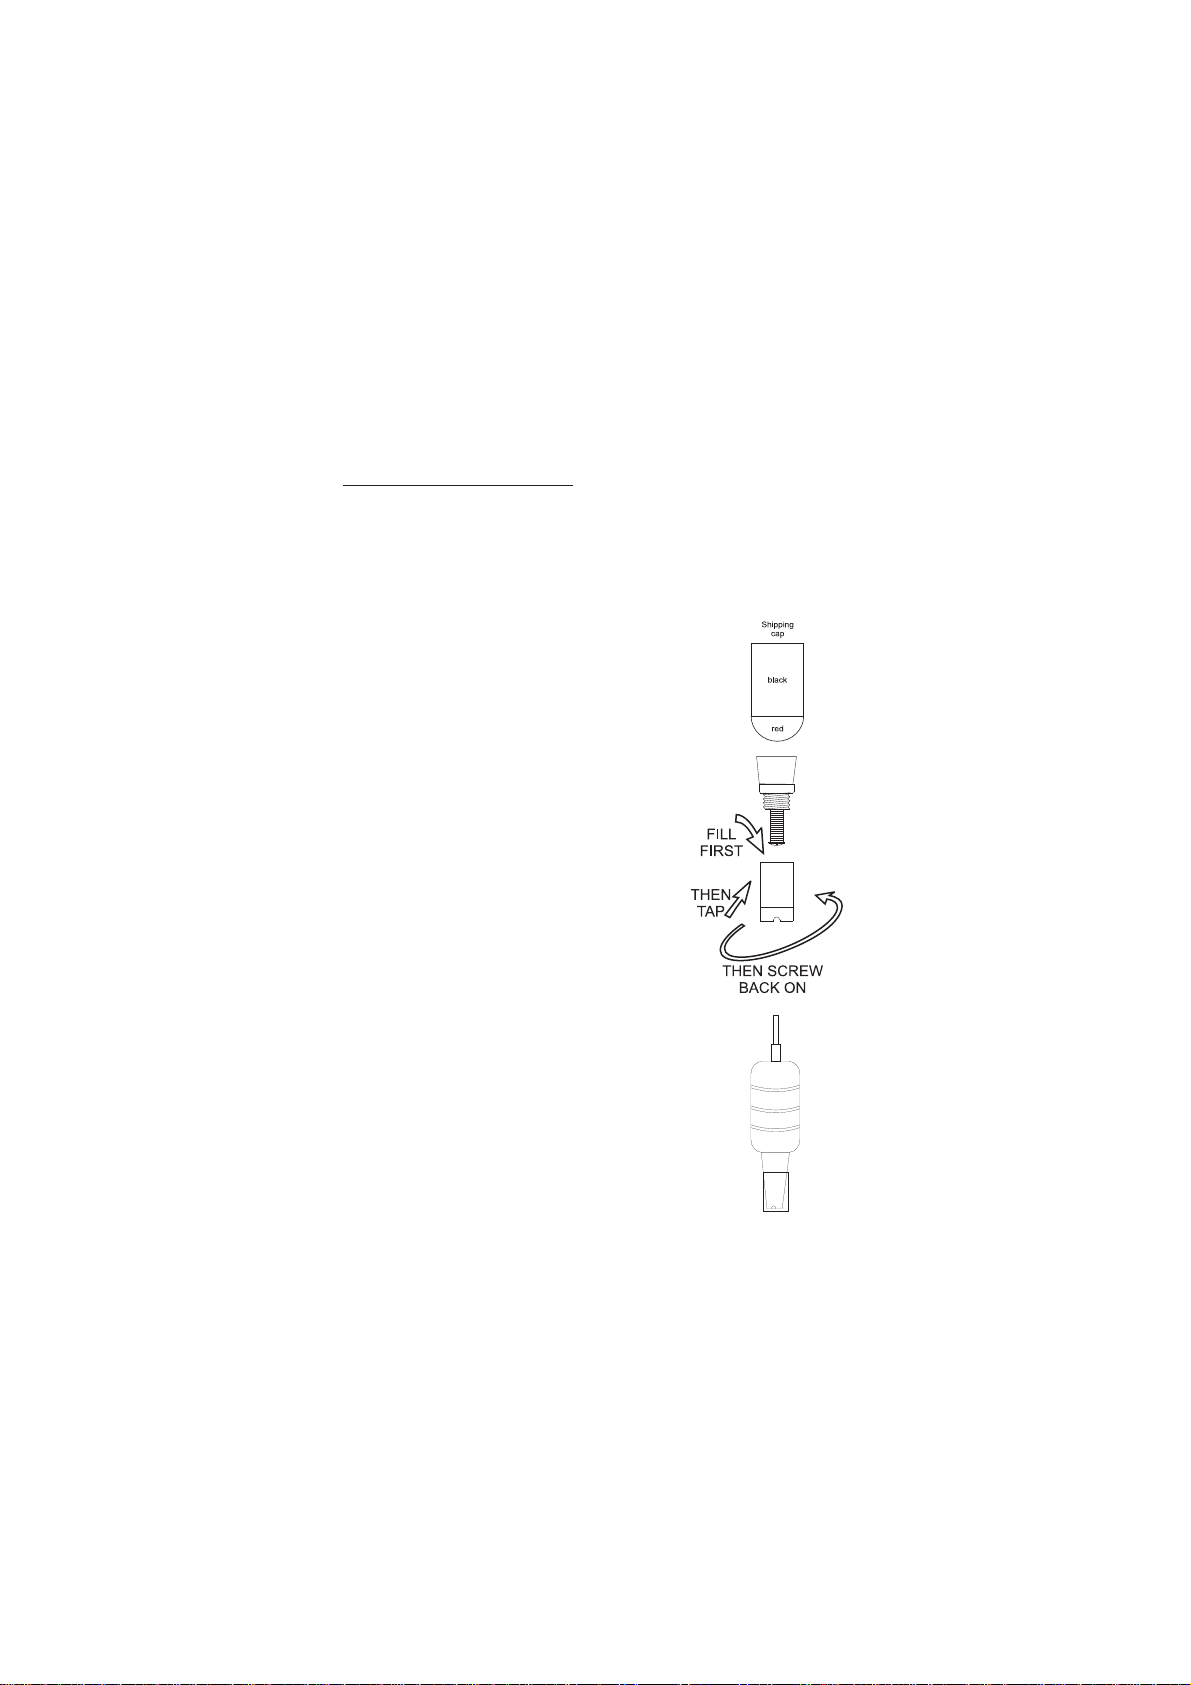
D.O. probes are shipped dry. Assemble the probe and prepare
it for use, connect it to the meter and proceed as follows.
1. Remove the red and black plastic cap.
This cap is used for shipping purposes
only and can be thrown away.
2. Wet the sensor by soaking the bottom
2½ cm of the probe in electrolyte
(MA9071) for 5 minutes.
3. Rinse the membrane (supplied with the
meter) with electrolyte while shaking it
gently. Refill with clean electrolyte.
4. Gently tap the sides of the membrane
with a pencil or a rod to disengage
air bubbles. To avoid damaging the
membrane, do not tap the membrane
directly on the bottom.
5. Install O-Ring properly inside the
membrane cap.
6. With the sensor facing down, screw
the cap clockwise. Some electrolyte will
overflow.
7. Examine membrane to verify air is not
trapped between the membrane and
electrode tip.
When probe is not in use and during
polarization, place the protective cap
supplied over the electrode tip.
1
Page 3
PROBE POLARIZATION:
• A dissolved oxygen probe must be polarized to function
properly.
• To polarize the probe, the fully assambled probe must be
connected to the meter and the meter must be on.
• During polarization (and during measurement), approximately
800 mV is applied to the cathode and anode inside the
membrane and a chemical reaction occurs. During the
polarization period excess oxygen in the electrolyte is
consumed. During this phase, probe movement that “moves”
the electrolyte will yield jumpy measurements. When a probe
is totally polarized moving the probe will not effect the
measurement.
• When the meter is turned off, the probe will revert to it’s
prepolarized state. Before using again, the probe will have
to be repolarized.
CALIBRATION PROCEDURE:
The calibration is very simple and fast.
• Make sure the probe is ready for measurements
(see Probe Preparation), i.e. the membrane is
filled with electrolyte and the probe is connected
to the meter.
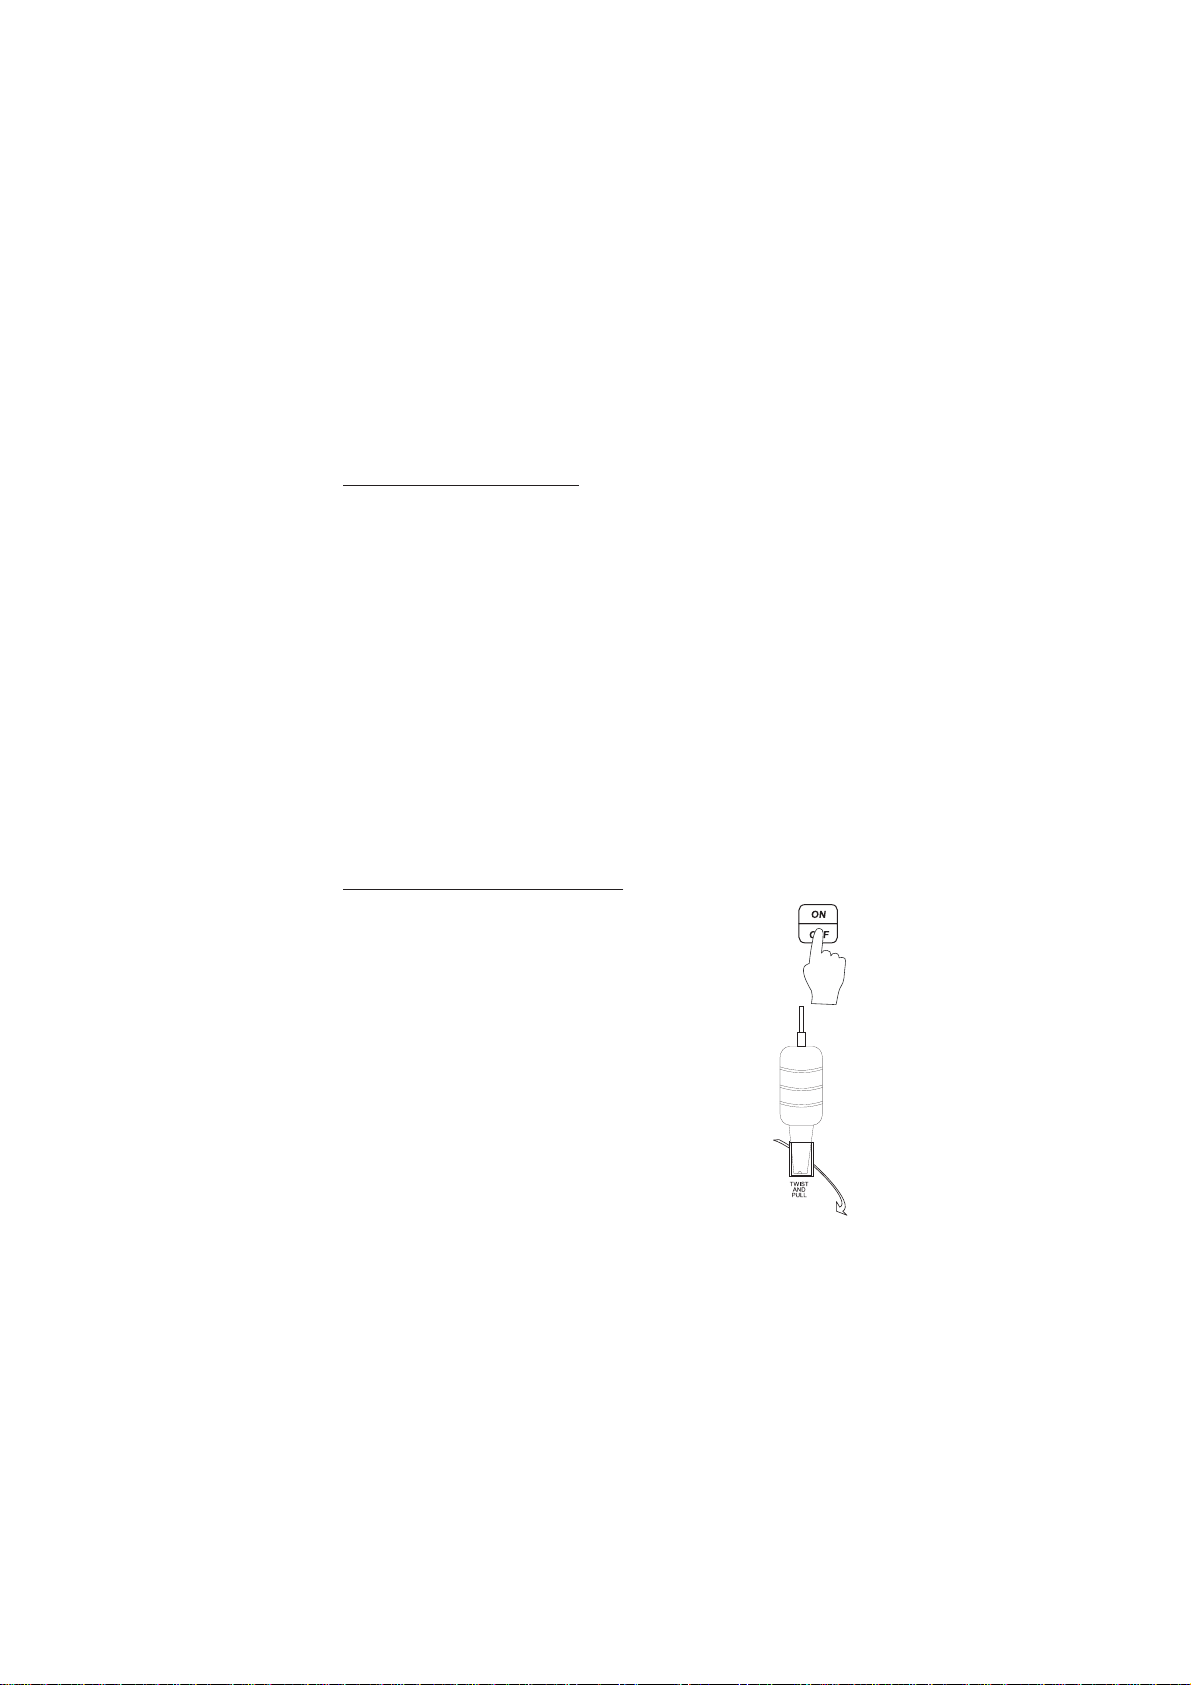
• Switch the meter on by pressing the ON/OFF
key.
• For an accurate calibration, it is recommended
to wait at least 15 minutes to ensure polarization
of the probe.
• Remove the protective cap from the D.O. probe.
2
Page 4
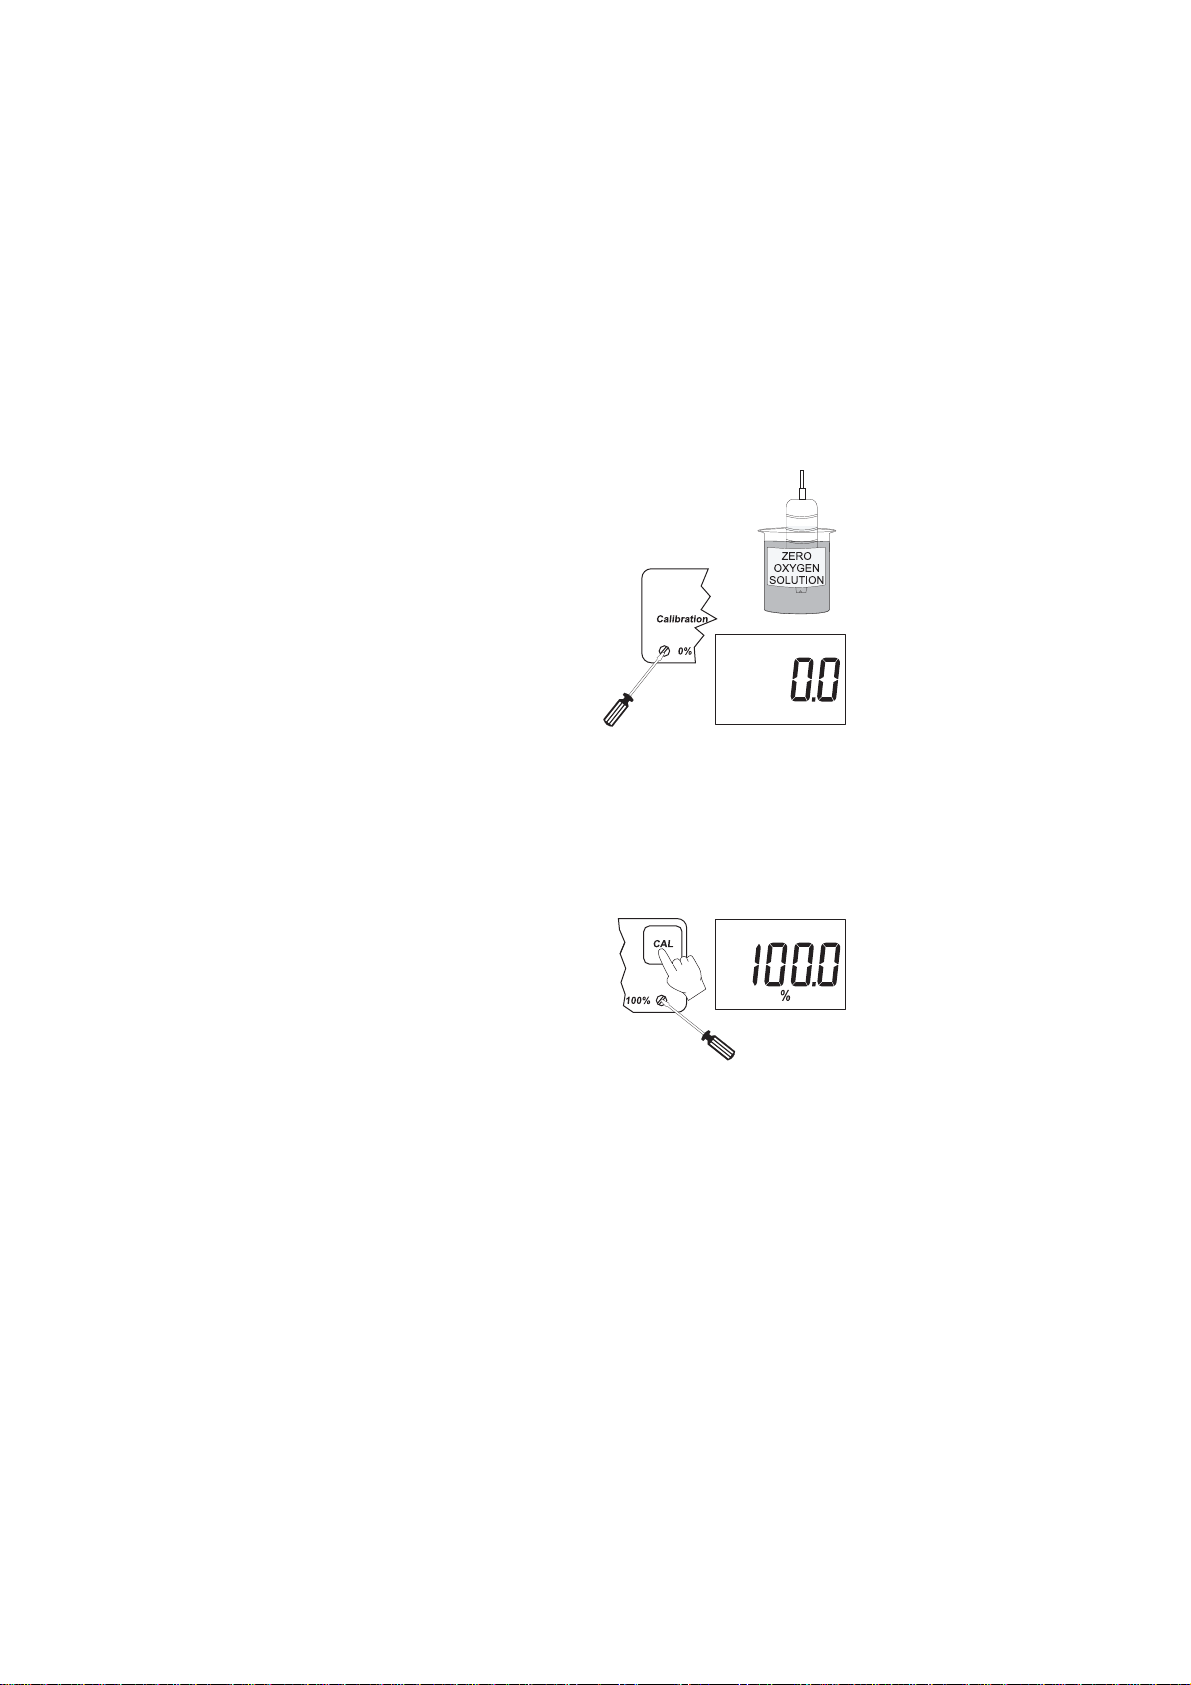
Zero Calibration:
• Dip the probe into MA9070 zero oxygen
solution and stir gently for 2-3 minutes.
• Wait for the probe to reach it’s lowest
stable reading.
• Adjust the zero D.O. calibration
trimmer (located on the front
panel) until the display reads
"0.0".
Slope Calibration:
It is suggested to perform the slope calibration in water saturated
air.
• Rinse the probe with a large amount of clean water to
remove any residual zero oxygen solution.
• Dry the probe tip and allow a few minutes for the D.O. probe
to stabilize while suspending over a container of water in the
air.
• Press and hold the CAL key.
• Adjust the slope trimmer on the
front panel of the meter to read
"100%" on the LCD (while still
holding the CAL button).
• Release the CAL key and the
LCD will display a value in ppm
of oxygen.
The zero calibration of the MW600 is very stable, therefore
this procedure needs only to be performed whenever the probe
is replaced. However, if most of the measurements are closer
to zero, more frequent zero calibration is advised.
Slope calibration can be easily performed on a weekly basis.
3
Page 5

TAKING MEASUREMENTS:
Verify the probe is polarized and the probe and
meter have been calibrated. Remove the protective
cap from probe. Immerse the tip of the probe in
the sample to be tested.
For accurate dissolved oxygen measurements a
minimum water movement of 0.3 m/sec is required.
This is to ensure that the oxygen-depleted
membrane surface is constantly replenished. A
moving stream will provide adequate circulation. To quickly
check if the water speed is sufficient, wait for the reading to
stabilize and then move the D.O. probe. If the reading is still
stable, the measurement conditions are right, while if the reading
increases, the water movement is not adequate.
During field measurements, this condition may be met by manually
agitating the probe. Accurate readings are not possible while
the liquid is at rest.
During laboratory measurements, the use of a magnetic stirrer
to ensure a certain velocity in the fluid is recommended. In this
way, errors due to the diffusion of the oxygen present in the air
into the solution are reduced to a minimum.
Always wait for thermal equilibrium to occur between the probe
and the sample before recording a measurement (a few minutes
for temperature difference of several degrees).
ALTITUDE & SALINITY COMPENSATION:
If the sample contains salts or if you are performing the
measurements at a higher altitude, the displayed reading must
be corrected to account for the lower degree of oxygen solubility.
4
Page 6

ALTITUDE COMPENSATION:
The displayed measurements are referenced to sea level pressures.
At higher elevations, oxygen solubility decreases (thus at higher
elevations actual oxygen concentrations are really lower than
the displayed value).
The table below illustrates the changes in the solubility of oxygen
in air saturated fresh water as a result of changes in elevation.
The table can also be used to correct the displayed measurement.
If the meter was calibrated at an elevation above sea level, you
multiply your reading by the ratio of:
(ppm at the elevation) / (the ppm at sea level)
For example: You are at 600 m above sea level and the meter
displays 3.2 ppm. The temperature is 14 °C.
T o correct your measurement multiply the displayed measurement
by the ratio of (ppm reading at 600 m) / (ppm reading at 0 m) =
3.2 ppm X (9.6 ppm/10.3 ppm) = 2.98 ppm (or 3.0 ppm altitude
corrected).
°C
0 m
14.6
0
13.8
2
13.1
4
12.4
6
11.8
8
11.3
10
10.8
12
10.3
14
9.9
16
9.5
18
9.1
20
8.7
22
8.4
24
8.1
26
7.8
28
7.5
30
7.3
32
7.1
34
6.8
36
6.6
38
6.4
40
Altitude, Meters above Sea Level
300 m
14.1
13.3
12.7
12.0
11.4
10.9
10.4
9.9
9.7
9.2
8.8
8.4
8.1
7.8
7.5
7.2
7.1
6.9
6.6
6.4
6.2
600 m
13.6
12.9
12.2
11.6
11.0
10.5
10.1
9.6
9.2
8.7
8.5
8.1
7.8
7.5
7.3
7.0
6.8
6.6
6.3
6.2
6.0
900 m
13.2
12.4
11.9
11.2
10.6
10.2
9.7
9.3
8.9
8.6
8.2
7.8
7.5
7.3
7.0
6.8
6.6
6.4
6.1
5.9
5.8
5
1200 m
12.7
12.0
11.4
10.8
10.3
9.8
9.4
9.0
8.6
8.3
7.9
7.7
7.3
7.0
6.8
6.5
6.4
6.2
5.9
5.7
5.6
1500 m
12.3
11.6
11.0
10.4
9.9
9.5
9.1
8.7
8.3
8.0
7.7
7.3
7.1
6.8
6.6
6.3
6.1
6.0
5.7
5.6
5.4
1800 m
11.8
11.2
10.6
10.1
9.6
9.2
8.8
8.3
8.0
7.7
7.4
7.1
6.8
6.6
6.3
6.1
5.9
5.8
5.5
5.4
5.2
°F
32.0
35.6
39.2
42.8
46.4
50.0
53.6
57.2
60.8
64.4
68.0
71.6
75.2
78.8
82.4
86.0
89.6
93.2
96.8
100.4
104.0
Page 7

SALINITY COMPENSATION:
The table below illustrates the change in the solubility of oxygen
in air saturated water as a result of chloride concentration or
salinity.
The table can also be used to correct the displayed measurement.
If you are making measurements in salt water and know the
chloride concentration (or salinity), you can multiply your reading
by the ratio of (ppm at the chloride concentration) / (the ppm at
0 g/L chloride) at the temperature of measurement to compensate
for the salt effect.
edirolhCL/g0L/g2L/g4L/g6L/g8L/g01L/g2
ytinilaSL/g0L/g6.3L/g3.7L/g9.01L/g5.41L/g1.81L/g7.12L/g3.52L/g9.82L/g5.23L/g1.63ytinilaS
° F°
C
06.412.419.316.313.319.216.213.219.116.113.110.23
28.315.312.319.216.213.210.216.113.110.117.016.53
41.318.215.212.219.116.114.111.1
64.212.219.116.113.111.118.015.013.010.017.98.24
88.116.113.111.118.016.013.011.018.96.93.94.64
013.110.118.016.013.011.
217.015.013.011.019.96.94.92.90.98.85.86.35
413.011.019.97.94.92.90.98.86.84.82.82.75
618.96.94.93.91.99.87.85.83.81.89.78.0
814.93.91.99.87.85.83.82.80.88.76.74.46
021.99.87.85.84.82.80.88.77.75.73.70.86
227.86.84.82.81.89.77.76.74.72.71.76.17
424.82.81.89.78.76.74.73.71.
522.81.89.78.76.75.73.71.70.78.67.60.77
621.89.78.76.75.73.72.70.79.67.66.68.87
828.77.75.74.72.71.79.68.66.65.63.64.28
036.74.73.71.70.78
1L/g41L/g61L/g81L/g02edirolhC
18.015.012.012.93
018.96.94.91.99.80.05
70.78.62.57
.66.65.63.62.60.60.68
6
levelaeS=rroT067erusserPytinilaSdnaedirolhCnoecnadnepedytilibuloSnegyxO
6
Page 8

For example, if the measurement displayed at 10°C is 5 ppm,
but the sample has 20 g/L of chloride, to correct your measurement
multiply the displayed measurement by the ratio of (ppm reading
at 20 g/L) / (ppm reading at 0 g/L) = 5.0 ppm X (8.9 ppm/11.3 ppm)
= 3.93 ppm (or 3.9 ppm Chloride or Salinity corrected).
PROBE & MEMBRANE MAINTENANCE:
The D.O. probe body is made of reinforced plastic for maximum
durability.
A thermistor temperature sensor provides temperature
measurements of the tested sample. It is always recommended
to keep the protective cap on the probe when not in use, to
protect the membrane against damage and dirt.
To replace the membrane or refill it with electrolyte, see page 1.
7
Page 9

The Platinum cathode
should always be bright
and untarnished. If it is
tarnished or stained, due
to contact with certain
gases or a damaged
membrane cap, the cathode
should be cleaned. You
can use a clean lint-free
cardboard or cloth. Rub
the cathode very gently
side to side 4-5 times. This
will be enough to polish
and remove any stains
without damaging the
platinum tip.
Rinse the probe with deionized or distilled water and install
a new membrane cap using fresh electrolyte (see page 1).
Recalibrate the instrument/probe.
Note: In order to obtain accurate and stable measurements, it
is important that the surface of the membrane be in
perfect condition. This gas-permeable membrane isolates
the sensor elements from the environment, but allows
oxygen to enter. If any dirt is observed on the membrane,
rinse it carefully with distilled or deionized water. If any
imperfections still exist, or any damage is evident (such
as wrinkles or tears-holes), the membrane cap should
be replaced. Make sure that the O-Ring is properly seated
in the membrane cap.
8
Page 10

BATTERY REPLACEMENT:
When the battery becomes weak the
meter will display the low battery
indicator " ".
When this appears, only a few hours
of battery life remain. A low battery will
result in unreliable measurements.
Prompt battery replacement is required.
Battery replacement must take place
in a non-hazardous area using an
alkaline 9V battery.
Turn the meter off, slide the battery
compartment cover located at the rear
of the meter off and replace the 9V
battery with a new one. Make sure
the battery contacts are fully engaged
in the connector, seat the battery in its
compartment and replace the cover.
OPTIONAL ACCESSORIES:
MA9070 Zero Oxygen calibration solution, 220 mL
MA9071 Refilling Electrolyte solution, 220 mL
MA841 Spare membrane, 5 pcs
MA840 D.O. probe
9
Page 11

SPECIFICATIONS:
MW600
RANGE 0.0 to 19.9 mg/L
RESOLUTION 0.1 mg/L
ACCURACY (@25°C) ±1.5% Full Scale
TEMPERATURE Automatic from 0 to 30°C
COMPENSATION
CALIBRATION Manual on 2 points
(zero and slope)
LCD 3½ digits with symbols
PROBE MA840 (included)
ENVIRONMENT 0 to 50°C, 95% RH max.
BATTERY TYPE 9V alkaline (included)
BATTERY LIFE approximately 70 hours of use
DIMENSIONS 143 x 80 x 32 mm
WEIGHT 220 g (with battery) meter only
WARRANTY:
This instrument is warranted from all defects in materials and
manufacturing for a period of two years from the date of purchase.
The probe is warranted for a period of 6 months.
If during this period, the repair or replacement of parts is
required, where the damage is not due to negligence or erroneous
operation by the user, please return the parts to either dealer
or our office and the repair will be effected free of charge.
Note: We reserve the right to modify the design, construction
and appearance of our products without advance notice.
10
Page 12

Authorized Dealer:
Milwaukee
ISTMW600 01/10
 Loading...