

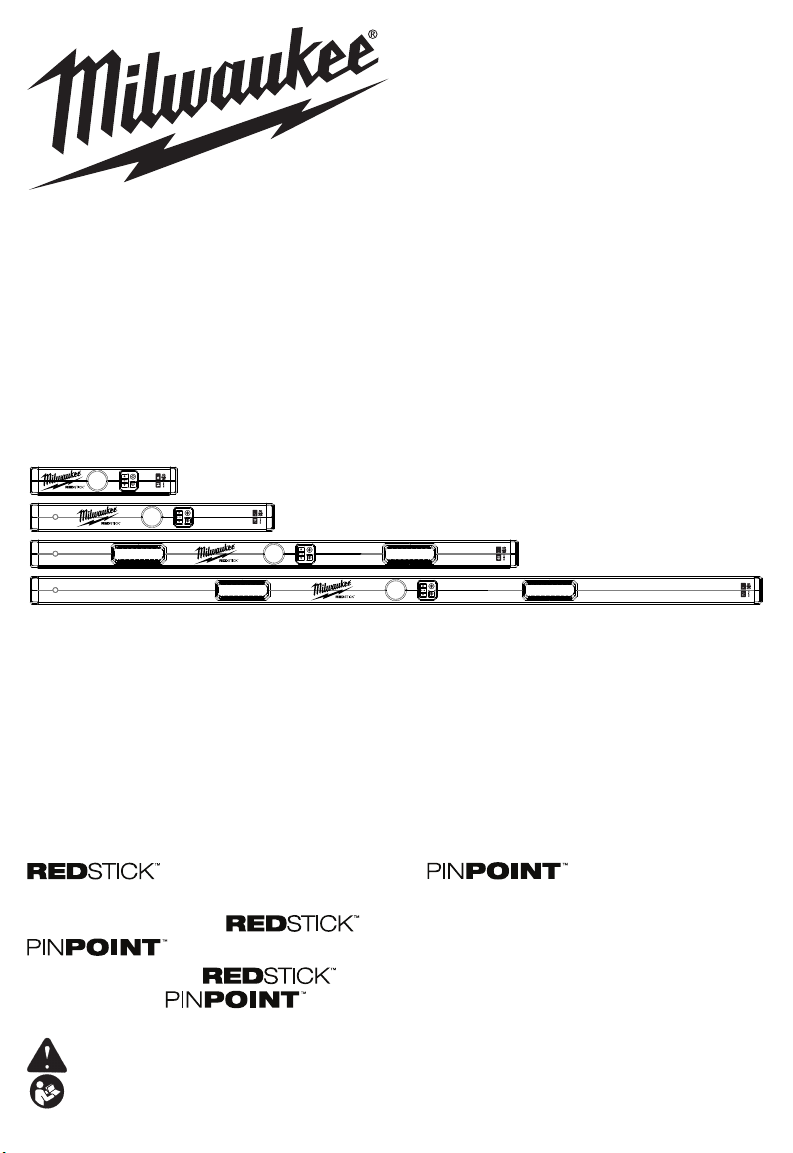
Milwaukee MLDIG14, MLDIG24, MLDIG48, MLDIG72 Operator's Manual
OPERATOR'S MANUAL
MANUEL de L'UTILISATEUR
MANUAL del OPERADOR
Cat. No. / No de cat.
MLDIG14, MLDIG24, MLDIG48, MLDIG72
DIGITAL LEVEL WITH MEASUREMENT
TECHNOLOGY
NIVEAU DIGITAL AVEC TECHNOLOGIE DE MESURE
NIVEL DIGITAL CON TECNOLOGÍA DE MEDICIÓN DE
PRECISIÓN
WARNING To reduce the risk of injury, user must read and understand operator's manual.
AVERTISSEMENT An de réduire le risque de blessures, l'utilisateur doit lire et bien
comprendre le manuel.
ADVERTENCIA Para reducir el riesgo de lesiones, el usuario debe leer y entender el manual.

GENERAL POWER TOOL
WARNING
SAFETY WARNINGS
READ AND UNDERSTAND ALL
instructions listed below, may result in electric shock,
re and/or serious injury.
1. SAVE THESE INSTRUCTIONS - THIS OPERATOR’S MANUAL CONTAINS IMPORTANT
SAFETY AND OPERATING INSTRUCTIONS
FOR THE REDLITHIUM® USB BATTERY
CAT. NO. 48-11-2130 AND REDSTICK™
DIGITAL LEVEL.
2. USE AND CHARGE ONLY REDLITHIUM® USB
BATTERIES IN THIS LEVEL. OTHER TYPES OF
BATTERIES MAY CAUSE PERSONAL INJURY
AND DAMAGE.
3. BEFORE USING THE BATTERY AND LEVEL,
READ THIS OPERATOR’S MANUAL AND ALL
LABELS ON THE BATTERY AND LEVEL.
4. AVOID DANGEROUS ENVIRONMENTS. Do not
charge battery in rain, snow, damp or wet locations.
Do not use battery or charger in the presence of
explosive atmospheres (gaseous fumes, dust or
ammable materials) because sparks may be generated when inserting or removing battery, possibly
causing re.
5. CHARGE IN A WELL VENTILATED AREA. Do not
block charger vents. Keep them clear to allow proper
ventilation. Do not allow smoking or open ames
near a charging battery. Vented gases may explode.
6. MAINTAIN CORD. When unplugging charger, pull
plug rather than cord to reduce the risk of damage to
the electrical plug and cord. Never carry charger by
its cord. Keep cord from heat, oil and sharp edges.
Make sure cord will not be stepped on, tripped over
or subjected to damage or stress. Do not use charger
with damaged cord or plug. Have a damaged charger
replaced immediately.
7. USE ONLY RECOMMENDED ATTACHMENTS. Use
of an attachment not recommended or sold by the
battery charger or battery manufacturer may result
in a risk of re, electric shock or personal injury.
8. TO REDUCE THE RISK OF ELECTRIC SHOCK,
always unplug charger before cleaning or mainte-
nance.
9. DO NOT OVERREACH. KEEP PROPER
FOOTING AND BALANCE AT ALL TIMES.
This enables better control of the level in unex-
pected situations.
10. ENSURE ADEQUATE SAFEGUARDS AT THE
WORK SITE (e.g. surveying site when measur-
ing on roads, construction sites, etc.)
11. MAINTAIN TOOLS. IF DAMAGED, HAVE THE
TOOL REPAIRED BEFORE USE. Accidents
may be caused by poorly maintained tools.
12. THIS TOOL IS DESIGNED TO BE POWERED BY A REDLITHIUM® USB PROPERLY
INSERTED INTO THE TOOL. Do not attempt
to use with any other voltage or power supply.
13. DO NOT LEAVE BATTERIES WITHIN THE
REACH OF CHILDREN.
14. PROPERLY DISPOSE OF USED BATTERIES
IMMEDIATELY.
INSTRUCTIONS. Failure to follow all
SAVE THESE INSTRUCTIONS.
15. DO NOT BURN OR INCINERATE BATTERY
PACKS. Battery may explode, causing person-
al injury or damage. Toxic fumes and materials
are created when batteries are burned.
16. DO NOT CRUSH, DROP, OR DAMAGE bat-
tery. Do not use a battery or charger that has
received a sharp blow, been dropped, run
over, or damaged in any way (e.g., pierced
with a nail, hit with a hammer, stepped on).
17. DO NOT DISASSEMBLE. Incorrect reassembly may
result in the risk of electric shock, re or exposure
to battery chemicals. If it is damaged, take it to a
MILWAUKEE service facility.
18. BATTERY CHEMICALS CAUSE SERIOUS
BURNS. Never allow contact with skin, eyes, or
mouth. If a damaged battery leaks battery chemicals,
use rubber or neoprene gloves to dispose of it. If
skin is exposed to battery uids, wash with soap and
water and rinse with vinegar. If eyes are exposed to
battery chemicals, immediately ush with water for
20 minutes and seek medical attention. Remove and
dispose of contaminated clothing.
19. DO NOT SHORT CIRCUIT. A battery pack will short
circuit if a metal object makes a connection between
the positive and negative contacts on the battery
pack. Do not place a battery pack near anything
that may cause a short circuit, such as coins, keys
or nails in your pocket. Do not allow uids to ow into
battery pack. Corrosive or conductive uids, such as
seawater, certain industrial chemicals, and bleach or
bleach containing products, etc., can cause a short
circuit. A short circuited battery pack may cause re,
personal injury, and product damage.
20. STORE in a cool, dry place. Do not store battery
where temperatures may exceed 120°F (50°C) such
as in direct sunlight, a vehicle or metal building dur-
ing the summer.
21. UNDER ABUSIVE CONDITIONS, LIQUID
MAY BE EJECTED FROM THE BATTERY,
AVOID CONTACT. IF CONTACT ACCIDENTALLY OCCURS, FLUSH WITH WATER.
IF LIQUID CONTACTS EYES, ADDITIONALLY SEEK MEDICAL HELP. Liquid ejected
from the battery may cause irritation or burns.
22. WATCH OUT FOR ERRONEOUS MEASUREMENTS IF THE TOOL IS DEFECTIVE OR IF IT
HAS BEEN DROPPED, MISUSED OR MODIFIED.
23. CARRY OUT PERIODIC TESTS MEASUREMENTS. Particularly after the tool has been
subject to abnormal use, and before, during and
after important measurements.
24. DO NOT DISPOSE OF TOOL OR BATTERIES
TOGETHER WITH HOUSEHOLD WASTE MATERIAL! Level and batteries that have reached
the end of their life must be collected separately
and returned to an environmentally compatible
recycling facility.
READ AND SAVE ALL INSTRUCTIONS FOR
FUTURE REFERENCE.
2
WARNING
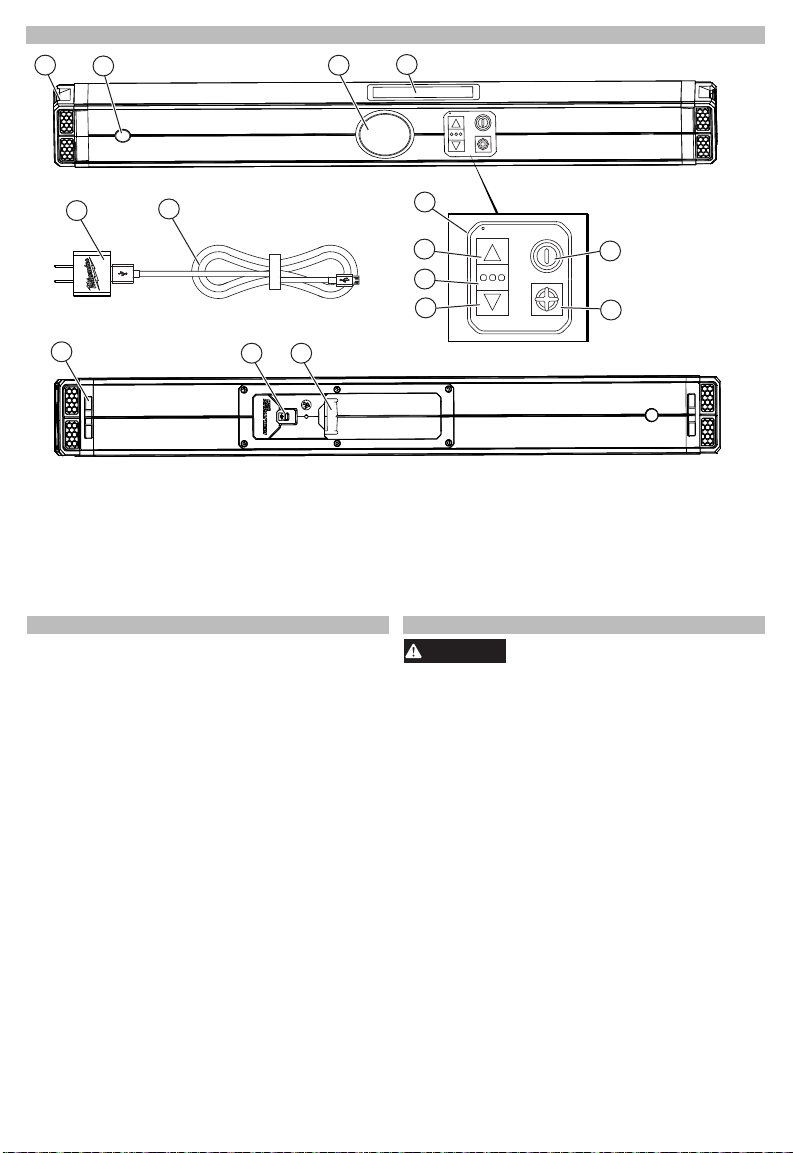
FUNCTIONAL DESCRIPTION
1
2
3
4
11
13
1. Removable End Cap
2. Hanghole*
3. Main Display
4. Top Read Display
5. Control Panel
6. Up Arrow
7. Menu/Select Button
*Not featured on MLDIG14
12
14 15
SPECIFICATIONS
Cat. No. ................................MLDIG14, MLDIG24,
Electronic Module Accuracy .. ± 0.03° at 0° and 90°
Recommended Ambient
Operating Temperature ....................14°F to 122°F
Storage Temperature Range ............. -
Charging Temperature Range ...........32
Operating Life ...................................up to 10 hours
Ingress Protection............................................ IP65
Battery Cat. No. ...................................48-11-2130
Volts ................................................................ 4 DC
Operating Temperature
Battery and Charger .......................40°F to 104°F
Battery and Tool .............................. -4°F to 140°F
Power Supply Cat. No. .......................48-59-1202
MLDIG48, MLDIG72
± 0.1° between 0° and 90°
4°F to 158°F
°F to 140°F
(4°C to 40°C)
(-20°C to 60°C)
5
6
9
7
8
10
8. Down Arrow
9. Power Button
10. PIN Button
11. Wall Plug
12. USB Cable
13. Wall Grip
14. USB Port
15. Battery Door
BATTERY
To reduce the risk of re, personal
a short circuit, never immerse your tool, battery
pack or charger in uid or allow a uid to ow
inside them. Corrosive or conductive uids, such
as seawater, certain industrial chemicals, and
bleach or bleach containing products, etc., can
cause a short circuit.
Do not expose your battery or cordless tools to water
or rain, or allow them to get wet. This could damage
the tool and battery. Do not use oil or solvents to
clean or lubricate your battery. The plastic casing
will become brittle and crack, causing a risk of injury.
Store batteries at room temperature away from mois-
ture. Do not store in damp locations where corrosion
of terminals may occur. As with other battery types,
permanent capacity loss can result if the pack is
stored for long periods of time at high temperatures
(over 120° F). MILWAUKEE Li-Ion batteries maintain
their charge during storage longer than other battery
types. After about a year of storage, charge the battery as normal
injury, and product damage due to
Maintenance and Storage
.
3
WARNING
To reduce the risk of injury or explo-
WARNING
WARNING
battery pack even if it is damaged, dead or completely discharged. When burned, toxic fumes and
materials are created.
Disposing of MILWAUKEE Li-Ion Battery
MILWAUKEE Li-Ion batteries are more environmentally friendly than some other types of power tool
batteries. Always dispose of your battery according
to federal, state and local regulations. Contact a
recycling agency in your area for recycling locations.
Even discharged batteries contain some energy.
Before disposing, use electrical tape to cover the
terminals to prevent the battery from shorting, which
could cause a re or explosion.
The RBRC™ Battery Recycling Seals (see "Symbology") on your batteries indicate that MILWAUKEE
has arranged for the recycling of that battery with
the Rechargeable Battery Recycling Corporation
(RBRC). At the end of your battery's useful life,
return the battery to a MILWAUKEE Branch Ofce/
Service Center or the participating retailer nearest
you. For more information, visit the RBRC web site
at www.rbrc.org.
sion, never burn or incinerate a
RBRC Battery Recycling Seals
LEVEL
Recharge only with the charger
cic charging instructions, read the operator’s
manual supplied with your charger and battery.
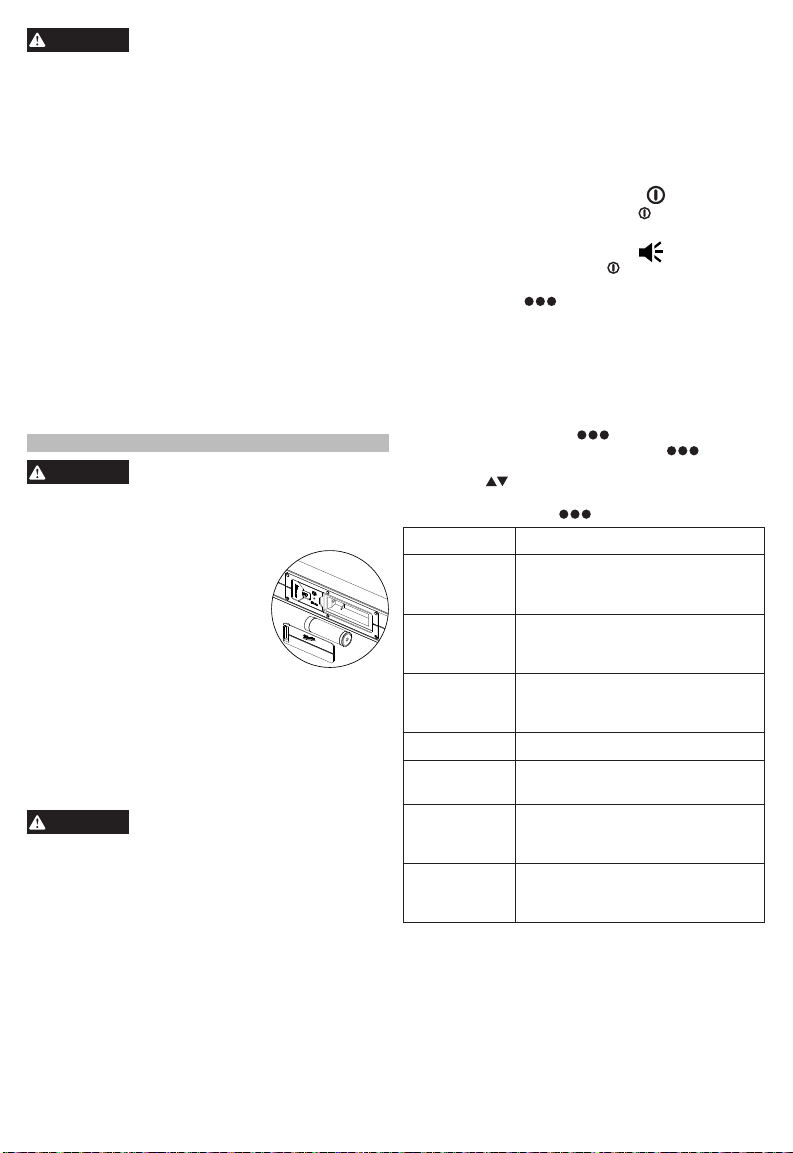
Removing/Inserting the Battery
To remove the battery, unlatch the
battery door. Turn the level over
and let the battery slide out from
the tool.
To insert the battery, slide the pack into the body of
the tool by aligning the white arrow on the battery
with the white arrow on the battery compartment.
Close the battery door.
NOTE: The battery, once removed, may be charged
in the REDLITHIUM® USB Charger, model 48-59-
2002. Alternatively, see "Charging the Battery",
below, for charging without removing from the level.
may be hazardous.
1. Plug your USB cable into a power source such as
an AC wall adaptor, computer or car port. Charge
rates may vary depending on the power source’s
maximum output.
2. Lift the rubber cover to expose the micro USB port.
Insert the micro USB plug into the micro USB port.
3. The indicator light will display the charging status:
Red Solid: Charging, 0-79% charged
Green Flashing: Charging, 80-99% charged
Green Solid: 100% Charged
Red/Green Flashing: Damaged or Faulty Battery
specied for the battery. For spe-
Only use accessories specically
recommended for this tool. Others
Charging the Battery
If the light indicator ashes red and green, check
that the battery is fully seated into the bay. Remove
the battery and reinsert. If the light continues
to ash red and green, the battery may be extremely hot or cold, or wet. Allow the battery to
cool down, warm up, or dry out and then reinsert.
If the problem persists, contact a MILWAUKEE
service facility.
NOTE: The level will not be able to be used while
the battery is charging.
Press and hold the power button to turn the level
on and off. The level will beep to indicate it is ready.
Double tap the power button to turn the sound on
or off. This feature can also be accessed by pressing
the menu button and cycling to Sound.
When on, the level will sound when it is within 10°
of the target. The beats per minute will change once
you are within 5°. If the target is crossed, the pitch
will also change, indicating a passed target.
When a target is reached within the tolerance range
set by the user, the on target tone will play.
Press the menu button to access the menu.
Once open, press the menu button again to
cycle through the menu screens and the up and down
arrow keys to modify settings.
To exit, select exit on the menu screen or press and
hold the menu button .
Description Function
Mode Changes the level's measurement
Sensitivity Changes the precision of the
Tolerance Adjusts the start of color
Sound Turns sound on or off
Settings Expands to more menus and
Power Mode Changes the display between
Language Changes the language settings
Turning ON/OFF
Audio Leveling
Menu Guide
type between angle, percent,
in/ft, and mm/m
mode selected between whole,
tenth, and hundredth
activation as the level approaches
the desired target
offers and exit to working mode
High Contrast, Auto and Power
Save
between English, French, and
Spanish
4
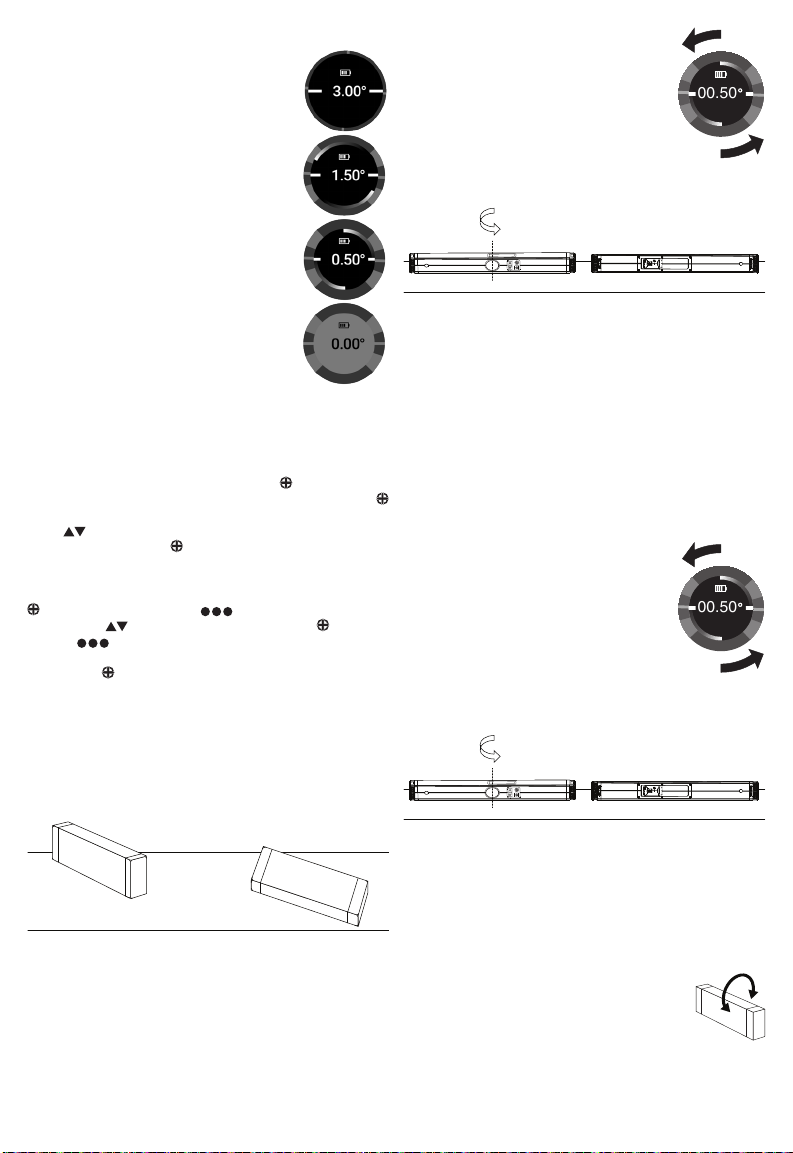
Approaching 0°, 90°, or PIN Measurement
00.50
180°
00.50
180°
30°
1. When the level is within 3° of the
target measurement, directional indicators will appear and move in the
direction needed to achieve the tar-
get.
2. If the sound is on, the beats per min-
ute will change once you are within
5°. If the target is crossed, the pitch
will also change, indicating a passed
target.
3. When the target is achieved within
the tolerance range set by the user,
the background will turn green (if 0°
or 90°) or blue (if PIN). If the sound is
on, the on target tone will also play.
A pin can be set to provide a custom target measure-
ment other than 0° and 90°.
To set the PIN, place the level at the desired mea-
surement and press the PIN button .
To adjust the PIN, press and hold the PIN button
again to set a new PIN. Use the up and down arrow
keys to adjust to the exact measurement desired.
Press the PIN button once more to set the new PIN.
A PIN list stores commonly used measurements and
recent PINS.
To enter the PIN list, press and hold the PIN button
, then the menu button . Use the up and down
arrow keys to select a PIN and the PIN or menu
button to set the PIN.
To turn off the PIN and return to 0° and 90° as targets,
press PIN again while in working mode.
The level will go to sleep after 3 minutes of inactivity.
The level can be turned back on again by moving the
level or pressing any button. The level will turn off
after an additional 10 minutes of inactivity.
NOTE: The level will go to sleep immediately if it
is not upright, and turn off after an additional 10
minutes of unuse.
Setting & Adjusting PIN
Inactivity Shutdown
3. Record the measurement displayed
as well as the direction of the rota-
tion.
NOTE: The direction of the rotation is
determined by the direction of the rotat-
ing indicators on the display. Clockwise
rotation equals +, while counterclockwise equals -.
4. Rotate the level 180°. Reference the
line marked in step 2 to ensure the level is placed
in the exact same location.
5. Record a second measurement, again noting the
direction of the rotation.
6. Subtract the rst measurement from the second
measurement. Then, divide by two to determine
the true surface measurement.
In-Field Level Check Best Practice
To verify the level is within factory specications,
follow the below instructions:
1. Set the level to the following.
Mode = Angle
Sensitivity = Hundredths
Tolerance = 0.00
2. Place the level on a known at, even surface with
the main display facing forward. Mark a line on the
surface to note the exact location.
3. Record the measurement displayed
as well as the direction of the rota-
tion.
NOTE: The direction of the rotation is
determined by the direction of the rotat-
ing indicators on the display. Clockwise
rotation equals +, while counterclockwise equals -.
4. Rotate the level 180°. Reference the line marked
in step 2 to ensure the level is placed in the exact
same location.
Upright Not upright
Precision Measuring Best Practice
All levels read slightly different from one end to the
other. As a result, you may see variance in some
readings. In order to provide the most precise measurement, follow the below instructions:
1. Adjust the level settings to the mode and sensitivity
desired.
2. Place the level on the surface to be measured with
the main display facing forward. Mark a line on the
surface to note the exact location.
5. Record a second measurement, again noting the
direction of the rotation.
6. Add the rst measurement to the second measurement. Then, divide by two to determine the level's
variance.
NOTE: If the difference is between 0.00 and 0.05,
the level is within the accurate range. If not, please
contact a MILWAUKEE service facility.
"TILT" will be displayed if the level is tilted
beyond 30° front or back.
If the level is tilted for 30 seconds, it will go
to sleep. After 10 additional minutes, the level will
turn off.
5
Tilt

Power Save & Depleted Battery
WARNING
WARNING
WARNING
The level has various power saving modes to con-
serve battery life when it is low.
When the battery is below a 9% charge, the
level will notify the user and suggest entering
power save mode. If accepted, the main display will
turn off and only the top read display can be used.
To exit this mode, press any button and select exit.
Power save can also be activated using the menu.
Depleted mode will be automatically activated when
the battery is below a 3% charge. In this mode,
only the top read display can be used. If a button
is pressed, the notication will briey display before
the screen turns off again. When the battery is fully
depleted, the level will turn off.
To reduce the risk of injury, always
unplug the charger and remove the
battery pack from the charger or tool before
performing any maintenance. Never disassemble
the tool, battery pack or charger. Contact a
MILWAUKEE service facility for ALL repairs.
Keep your tool, battery pack and charger in good
repair by adopting a regular maintenance program.
Inspect your tool for issues such as undue noise,
misalignment or binding of moving parts, breakage of
parts, or any other condition that may affect the tool
operation. Return the tool, battery pack, and charger
to a MILWAUKEE service facility for repair. After six
months to one year, depending on use, return the
tool, battery pack and charger to a MILWAUKEE
service facility for inspection.
If the tool does not start or operate at full power with
a fully charged battery pack, clean the contacts on
the battery pack. If the tool still does not work properly, return the tool, charger and battery pack, to a
MILWAUKEE service facility for repairs.
Maintaining Tool
To reduce the risk of personal injury and damage, never immerse
your tool, battery pack or charger in liquid or
allow a liquid to ow inside them.
Clean dust and debris from the USB port. Keep the
electronics, displays and handles clean, dry and free
of oil or grease. Use only mild soap and a damp cloth
to clean, since certain cleaning agents and solvents
are harmful to plastics and other insulated parts.
Some of these include gasoline, turpentine, lacquer
thinner, paint thinner, chlorinated cleaning solvents,
ammonia and household detergents containing am-
monia. Never use ammable or combustible solvents
around tools.
Cleaning
ACCESSORIES
Use only recommended accesso-
For a complete listing of accessories, go online to
www.milwaukeetool.com or contact a distributor.
ries. Others may be hazardous.
SERVICE - UNITED STATES
1-800-SAWDUST (1.800.729.3878)
Monday-Friday, 7:00 AM - 6:30 PM CST
or visit www.milwaukeetool.com
Contact Corporate After Sales Service Technical
Support with technical, service/repair, or warranty
questions.
Email: metproductsupport@milwaukeetool.com
Become a Heavy Duty Club Member at
www.milwaukeetool.com to receive important
notications regarding your tool purchases.
SERVICE - CANADA
Milwaukee Tool (Canada) Ltd
1.800.268.4015
Monday-Friday, 7:00 AM - 4:30 PM CST
or visit www.milwaukeetool.ca
MILWAUKEE REDSTICK levels are guaranteed to be accurate within
certain stated ranges on the product when the range is marked by the
term “GUARANTEED”. Subject to certain exceptions, MILWAUKEE
will replace or repair (i) any spirit level which, after examination, is
determined by MILWAUKEE to no longer be accurate during the lifetime
of the product, and (ii) any digital level which, after examination, is determined by MILWAUKEE to no longer be accurate for a period of three
(3) years after the date of purchase unless otherwise noted. Return
of the level to a MILWAUKEE factory Service Center location freight
prepaid and insured, is required. A copy of the proof of purchase should
be included with the returned product. This guarantee does not apply if
the inaccuracy is caused by damage that MILWAUKEE determines to
be from misuse, alterations, abuse, lack of maintenance or accidents.
ACCEPTANCE OF THE EXCLUSIVE REPAIR AND REPLACEMENT
REMEDIES DESCRIBED HEREIN IS A CONDITION OF THE CONTRACT FOR THE PURCHASE OF EVERY MILWAUKEE PRODUCT.
IF YOU DO NOT AGREE TO THIS CONDITION, YOU SHOULD NOT
PURCHASE THE PRODUCT. IN NO EVENT SHALL MILWAUKEE BE
LIABLE FOR ANY INCIDENTAL, SPECIAL, CONSEQUENTIAL OR
PUNITIVE DAMAGES, OR FOR ANY COSTS, ATTORNEY FEES,
EXPENSES, LOSSES OR DELAYS ALLEGED TO BE AS A CONSEQUENCE OF ANY DAMAGE TO, FAILURE OF, OR DEFECT IN
ANY PRODUCT INCLUDING, BUT NOT LIMITED TO, ANY CLAIMS
FOR LOSS OF PROFITS. SOME STATES DO NOT ALLOW THE EXCLUSION OR LIMITATION OF INCIDENTAL OR CONSEQUENTIAL
DAMAGES, SO THE ABOVE LIMITATION OR EXCLUSION MAY NOT
APPLY TO YOU. THIS WARRANTY IS EXCLUSIVE AND IN LIEU
OF ALL OTHER EXPRESS WARRANTIES, WRITTEN OR ORAL.
TO THE EXTENT PERMITTED BY LAW, MILWAUKEE DISCLAIMS
ANY IMPLIED WARRANTIES, INCLUDING WITHOUT LIMITATION
ANY IMPLIED WARRANTY OF MERCHANTABILITY OR FITNESS
FOR A PARTICULAR USE OR PURPOSE; TO THE EXTENT SUCH
DISCLAIMER IS NOT PERMITTED BY LAW, SUCH IMPLIED WARRANTIES ARE LIMITED TO THE DURATION OF THE APPLICABLE
EXPRESS WARRANTY AS DESCRIBED ABOVE. SOME STATES
DO NOT ALLOW LIMITATIONS ON HOW LONG AN IMPLIED WARRANTY LASTS, SO THE ABOVE LIMITATION MAY NOT APPLY TO
YOU, THIS WARRANTY GIVES YOU SPECIFIC LEGAL RIGHTS,
AND YOU MAY ALSO HAVE OTHER RIGHTS WHICH VARY FROM
STATE TO STATE.
This warranty applies to product sold in the U.S.A. and Canada only.
Please consult the Find a Service Center Search in the Parts &
Service section of MILWAUKEE’s website www.milwaukeetool.com
or call 1.800.SAWDUST (1.800.729.3878) to locate your nearest
MILWAUKEE factory Service Center location.
Every MILWAUKEE digital level is warranted to the original purchaser only
to be free from defects in material and workmanship. Subject to certain
exceptions, MILWAUKEE will repair or replace any part on a digital level
which, after examination, is determined by MILWAUKEE to be defective
in material or workmanship for a period of three (3) years* after the
date of purchase unless otherwise noted. Return of the digital level to
a MILWAUKEE factory Service Center, freight prepaid and insured, is
required. A copy of the proof of purchase should be included with the returned product. This warranty does not apply to damage that MILWAUKEE
determines to be from repairs made or attempted by anyone other than
MILWAUKEE authorized personnel, misuse, alterations, abuse, normal
wear and tear, lack of maintenance, or accidents.
*This warranty does not cover Cordless Battery Packs or Chargers.
There are separate and distinct warranties available for these products.
ACCEPTANCE OF THE EXCLUSIVE REPAIR AND REPLACEMENT
REMEDIES DESCRIBED HEREIN IS A CONDITION OF THE CONTRACT
FOR THE PURCHASE OF EVERY MILWAUKEE PRODUCT. IF YOU DO
NOT AGREE TO THIS CONDITION, YOU SHOULD NOT PURCHASE
THE PRODUCT. IN NO EVENT SHALL MILWAUKEE BE LIABLE FOR
ANY INCIDENTAL, SPECIAL, CONSEQUENTIAL OR PUNITIVE DAMAGES, OR FOR ANY COSTS, ATTORNEY FEES, EXPENSES, LOSSES
OR DELAYS ALLEGED TO BE AS A CONSEQUENCE OF ANY DAMAGE
TO, FAILURE OF, OR DEFECT IN ANY PRODUCT INCLUDING, BUT NOT
LIMITED TO, ANY CLAIMS FOR LOSS OF PROFITS. SOME STATES DO
NOT ALLOW THE EXCLUSION OR LIMITATION OF INCIDENTAL OR
CONSEQUENTIAL DAMAGES, SO THE ABOVE LIMITATION OR EXCLUSION MAY NOT APPLY TO YOU. THIS WARRANTY IS EXCLUSIVE
AND IN LIEU OF ALL OTHER WARRANTIES, WRITTEN OR ORAL. TO
6
ACCURACY GUARANTEE
LIMITED WARRANTY - USA & CANADA
 Loading...