

Milwaukee M18 RADIUS, 2147-20 Operator's Manual
Cat. No. / No de cat.
2147-20
M18™
ADIUS
™
LED COMPACT SITE LIGHT WITH ONE-KEY
™
(TWIST LOCK)
LAMPE DE CHANTIER À DEL COMPACTE M18™ AVEC ONE-KEY
™
ADIUS
™
(VERROU ROTATIF)
LUZ DE SITIO COMPACTA DE LED CON ONE-KEY™ M18™
ADIUS
™
(SEGURO DE GIRO)
OPERATOR'S MANUAL
MANUEL de L'UTILISATEUR
MANUAL del OPERADOR
WARNING To reduce the risk of injury, user must read and understand operator's manual.
AVERTISSEMENT An de réduire le risque de blessures, l'utilisateur doit lire et bien
comprendre le manuel.
ADVERTENCIA Para reducir el riesgo de lesiones, el usuario debe leer y entender el manual.
2
3
IMPORTANT SAFETY
INSTRUCTIONS
WARNING
Read all safety warnings and all instructions. Failure to follow
the warnings and instructions may result in electric
shock, re and/or serious injury. Save all warnings
and instructions for future reference.
WORK AREA SAFETY
• To reduce the risk of injury, close supervision is
necessary when an appliance is used near children.
• Store idle light out of reach of children. Warm
lights can become hazardous in the hands of chil-
dren.
ELECTRICAL SAFETY
• Power cord plugs must match the outlet. Never
modify the plug in any way. Do not use any
adapter plugs with earthed (grounded) power
tools. Unmodied plugs and matching outlets will
reduce risk of electric shock.
• Avoid body contact with earthed or grounded
surfaces, such as pipes, radiators, ranges and
refrigerators. There is an increased risk of electric
shock if your body is earthed or grounded.
• Suitable for rain and wet locations. Store indoors. Water and dust resistant.
• To reduce the risk of electric shock, do not put
light in water or other liquid. Do not place or store
appliance where it can fall or be pulled into a tub or
sink.
• Do not abuse the cord. Never use the cord for
carrying, pulling or unplugging the power tool.
Keep cord away from heat, oil, sharp edges
or moving parts. Damaged or entangled cords
increase the risk of electric shock.
• Arrange cords carefully to avoid hazardous
environments. Tripping or snagging on cords can
cause injury and product damage. Do not allow
cords to run through puddles or across wet ground.
• Do not unplug by pulling on the cord. To unplug,
grasp the plug, not the cord.
• Unplug the cord from outlet when not in use and
before servicing or cleaning.
• Always use a suitable extension cord to reduce
the risk of electric shock.
• If operating a light in a damp location is unavoid-
able, use a ground fault circuit interrupter (GFCI)
protected supply. Use of an GFCI reduces the risk
of electric shock.
PERSONAL SAFETY
• Do not overreach. Keep proper footing and bal-
ance at all times. This enables better control of the
light in unexpected situations.
• Do not use on a ladder or unstable support.
Stable footing on a solid surface enables better
control of the light in unexpected situations.
BATTERY TOOL USE AND CARE
• Recharge only with the charger specied by the
manufacturer. A charger that is suitable for one type
of battery pack may create a risk of re when used
with another battery pack.
• Use light only with specically designated bat-
tery packs. Use of any other battery packs may
create a risk of injury and re.
• When battery pack is not in use, keep it away
from other metal objects, like paper clips, coins,
keys, nails, screws or other small metal objects,
that can make a connection from one terminal
to another. Shorting the battery terminals together
may cause burns or a re.
• Under abusive conditions, liquid may be ejected
from the battery; avoid contact. If contact accidentally occurs, flush with water. If liquid
contacts eyes, additionally seek medical help.
Liquid ejected from the battery may cause irritation
or burns.
• Do not use a battery pack or tool that is damaged or modied. Damaged or modied batteries
may exhibit unpredictable behavior resulting in re,
explosion or risk of injury.
• Do not expose a battery pack or tool to re or
excessive temperature. Exposure to re or tem-
perature above 265°F (130°C) may cause explosion.
• Follow all charging instructions and do not
charge the battery pack or tool outside the
temperature range specied in the instructions.
Charging improperly or at temperatures outside
the specied range may damage the battery and
increase the risk of re.
SERVICE
• Have your light serviced by a qualied repair
person using only identical replacement parts.
This will ensure that the safety of the light is main-
tained.
• Never service damaged battery packs. Service
of battery packs should only be performed by the
manufacturer or authorized service providers.
SPECIFIC SAFETY RULES
•Chemical Burn Hazard. Keep batteries away
from children.
•This tool contains a lithium button/coin cell
battery. A new or used battery can cause severe
internal burns and lead to death in as little as 2
hours if swallowed or enters the body. Always
secure the battery cover with all screws. If it does
not close securely, stop using the tool, remove the
batteries, and keep it away from children. If you think
batteries may have been swallowed or entered the
body, seek immediate medical attention.
•Maintain labels and nameplates. These carry
important information. If unreadable or missing,
contact a MILWAUKEE service facility for a free
replacement.
SPECIFICATIONS
Cat. No. ..................................................... 2147-20
Ingress Protection............................................ IP54
Max Number of Lights in Sequence ....................12
Battery Type .................................................M18™
Charger Type ................................................M18™
Recommended Ambient
Operating Temperature ......................0°F to 125°F
DC Input Volts......................................................18
DC Input Amps ...................................................2.5
AC Input Volts ....................................................120
AC Input Amps.......................................................1
AC Output Volts .................................................120
AC Output Amps ................................................ 11 *
* Reduce AC Output Amps by 1A per additional
light added in sequence.
SYMBOLOGY
Volts
Direct Current
Alternating Current
C
US
UL Listing for Canada and U.S.
CAUTION
Bright Light -
Do Not Stare Into Light
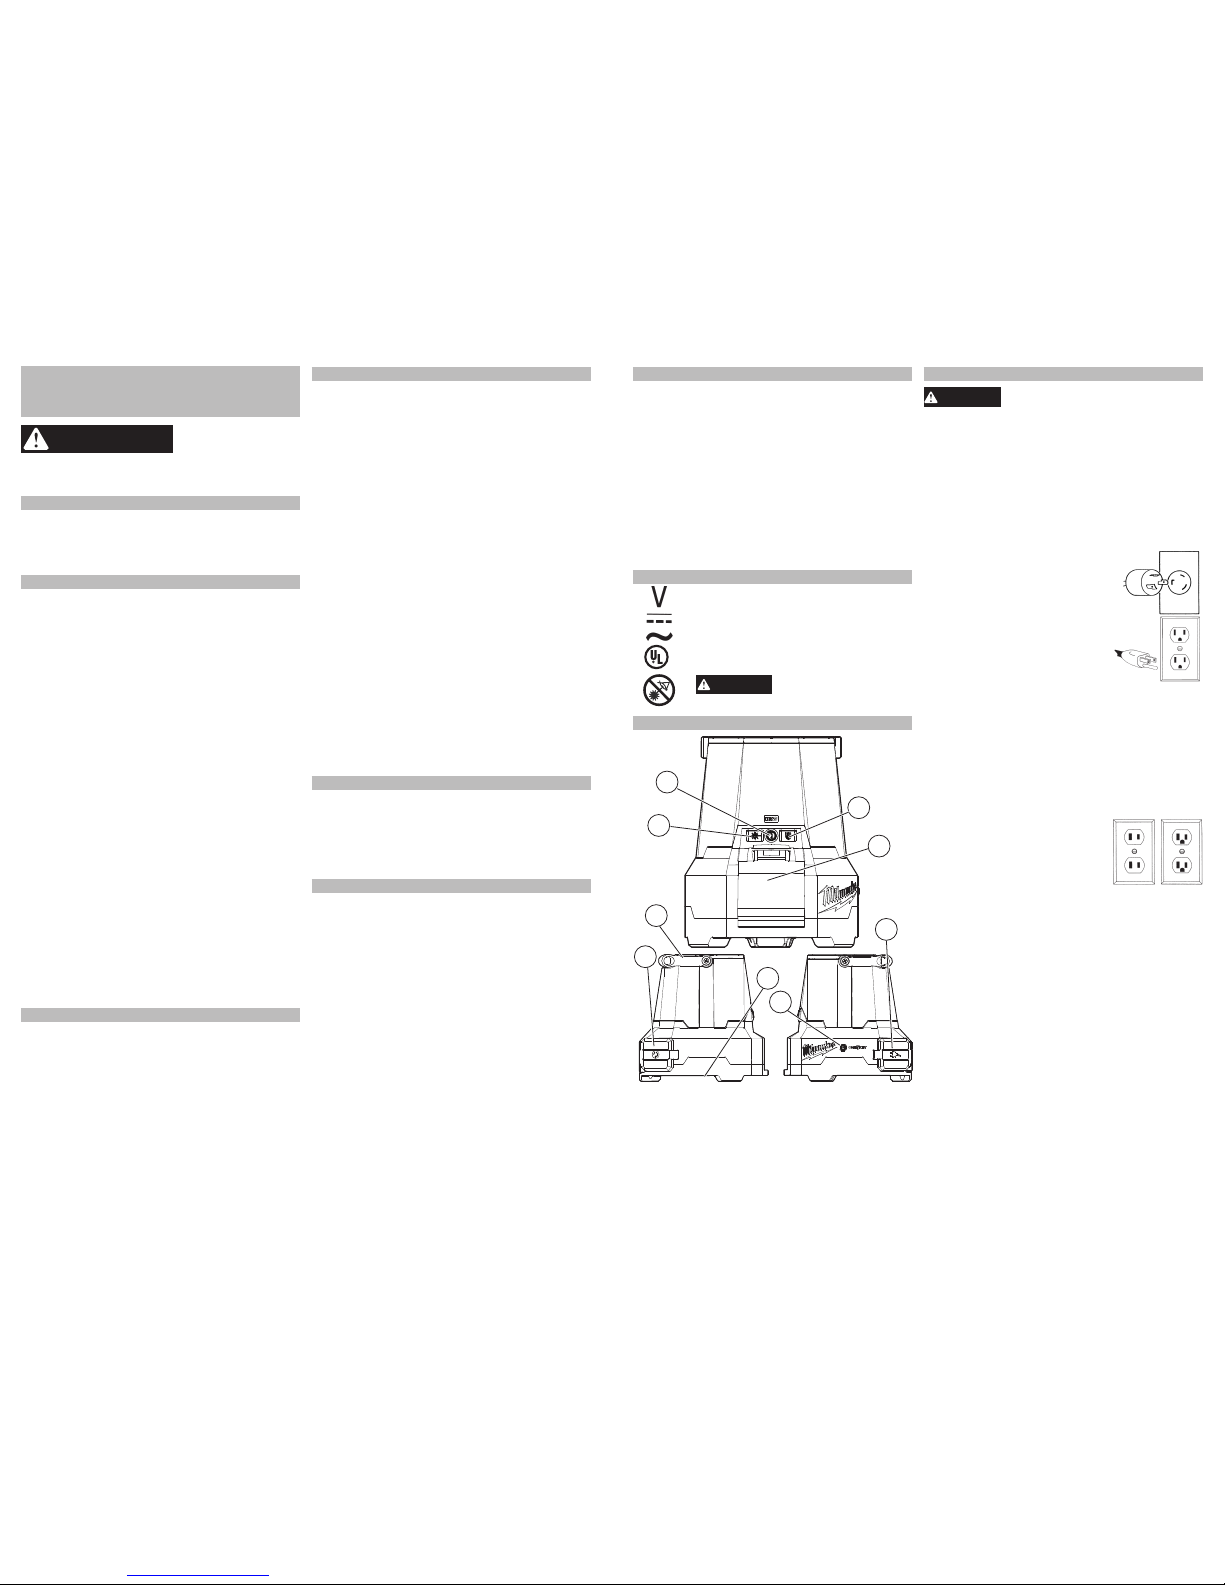
FUNCTIONAL DESCRIPTION
1
2
3
4
9
5
8
1. Area selector
2. Power
3. Brightness selector
4. Battery bay
5. AC input
6. ONE-KEY indicator
7. Rafter hook
8. AC output
9. Handle
10. Security cable (not shown)
7
6
GROUNDING
DANGER
Improperly connecting the grounding wire can result in the risk of
electric shock. Check with a qualied electrician
if you are in doubt as to whether the outlet is
properly grounded. Do not modify the plug provided with the tool. Never remove the grounding
prong from the plug. Do not use the tool if the
cord or plug is damaged. If damaged, have it
repaired by a MILWAUKEE service facility before
use. If the plug will not t the outlet, have a
proper outlet installed by a qualied electrician.
Grounded Tools (Three-Prong Plugs)
Tools marked “Grounding Required”
have a three wire cord and three
prong grounding plug. The plug
must be connected to a properly
grounded outlet (See Figures A and
B). If the tool should electrically malfunction or break down, grounding
provides a low resistance path to
carry electricity away from the user,
reducing the risk of electric shock.
The grounding prong in the plug is
connected through the green wire
inside the cord to the grounding
system in the tool. The green wire in the cord must
be the only wire connected to the tool's grounding
system and must never be attached to an electrically
“live” terminal.
Your tool must be plugged into an appropriate outlet,
properly installed and grounded in accordance with
all codes and ordinances. The plug and outlet should
look like those in Figures A and B.
Double Insulated Tools (Two-Prong Plugs)
Tools marked “Double Insulated”
do not require grounding. They
have a special double insulation
system which satises OSHA requirements and complies with the
applicable standards of Underwriters Laboratories, Inc., the Canadian Standard Association and the National Electrical
Code. Double Insulated tools may be used in either
of the 120 volt outlets shown in Figures C and D.
Fig. B
Fig. A
Fig. C
Fig. D
4
5
ASSEMBLY
WARNING
Recharge only with the charger
specied for the battery. For specic charging instructions, read the operator’s
manual supplied with your charger and battery.
Inserting/Removing the Battery
Insert the battery pack by sliding battery pack into
the body of the tool. Insert the battery pack until the
battery latches lock.
To remove the battery pack, press in both battery
latches and slide the battery pack off of the tool.
Inserting/Removing Extension Cords
When not using the AC option, make sure the AC
doors are closed completely.
To operate the light on AC Power, open the door
and plug in a suitable extension cord into the light.
When running the light on AC Power, an extension
cord can be run from the light. Open the door and
plug in a suitable extension cord.
NOTE: Do not exceed 11A of output. Reduce AC
Output Amps by 1A per additional light added in
sequence.
ONE-KEY™
To learn more about the ONE-KEY functionality for
this tool, please reference the Quick Start guide in-
cluded with this product or go to milwaukeetool.com/
One-Key. To download the ONE-KEY app, visit the
App Store or Google Play from your smart device.
OPERATION
WARNING
To reduce the risk of injury, do not
look directly into the light when the
light is on.
Using the Light
1. Insert battery pack or plug into AC power.
2. Press the Power button to turn on the light.
3. Press the Brightness button to cycle through
High (4400 lumens), Medium (2100 lumens), and
Low (1000 lumens). The light will default to the
selected brightness the next time it is turned on.
4. Press the Area Selector button to select front,
back, or full lighting. The light will default to the
selected area the next time it is turned on.
5. Press the Power button to turn the light off.
NOTE: On battery power, the light will ash to indicate the battery is reaching end-of-charge.
Orientation
The light can be oriented in multiple ways:
• Placing it on its base
• Hanging it upright by the handle
• Hanging it upside down by the rafter hook
MAINTENANCE
WARNING
To reduce the risk of injury, always
unplug the tool and charger and
remove the battery pack from the charger or tool
before performing any maintenance. Never disassemble the tool, battery pack or charger. Contact
a MILWAUKEE service facility for ALL repairs.
Maintain Light
Keep your light, battery pack and charger in good
repair by adopting a regular maintenance program.
If the light does not work properly, return the light to
a MILWAUKEE service facility for repairs.
Internal Battery
An internal battery is used to facilitate full ONE-KEY™
functionality.
To replace the battery:
1. Remove the battery pack and all extension cord
connections.
2. Turn the tool over and remove the ve screws
holding the lens onto the base, as indicated by the
screw symbols on the bottom of the tool. Do not
remove the other screws in the base.
3. Remove the lens.
4. Remove the two screws holding the coin cell bat-
tery cover in place.
5. Remove the old battery. WARNING! Always
keep batteries away from children and dispose of
properly; new and used batteries can cause injury.
6. Insert the new battery (Cat. No. 50-11-0025).
Always use MILWAUKEE replacement batteries;
others may not be rated for high temperatures.
7. Replace the battery cover and tighten screws
securely.
8. Replace the lens and tighten the screws securely.
WARNING
To reduce the risk of personal injury and damage, never immerse
your tool, battery pack or charger in liquid or
allow a liquid to ow inside them.
Cleaning
Clean dust and debris from vents. Keep handles
clean, dry and free of oil or grease. Use only mild
soap and a damp cloth to clean, since certain cleaning agents and solvents are harmful to plastics and
other insulated parts. Do not use sprays or solvents.
Some of these include gasoline, turpentine, lacquer
thinner, paint thinner, chlorinated cleaning solvents,
ammonia and household detergents containing am-
monia. Never use ammable or combustible solvents
around tools.
ACCESSORIES
WARNING
Use only recommended accesso-
ries. Others may be hazardous.
For a complete listing of accessories, go online to
www.milwaukeetool.com or contact a distributor.
EXTENSION CORDS
Grounded tools require a three wire extension
cord. Double insulated tools can use either a two
or three wire extension cord. As the distance from
the supply outlet increases, you must use a heavier
gauge extension cord. Using extension cords with
inadequately sized wire causes a serious drop in
voltage, resulting in loss of power and possible tool
damage. Refer to the table shown to determine the
required minimum wire size.
The smaller the gauge number of the wire, the greater
the capacity of the cord. For example, a 14 gauge
cord can carry a higher current than a 16 gauge cord.
When using more than one extension cord to make
up the total length, be sure each cord contains at
least the minimum wire size required. If you are using
one extension cord for more than one tool, add the
nameplate amperes and use the sum to determine
the required minimum wire size.
Guidelines for Using Extension Cords
• If you are using an extension cord outdoors, be sure
it is marked with the sufx “W” to indicate that it is
acceptable for outdoor use.
• Be sure your extension cord is properly wired and in
good electrical condition. Always replace a damaged
extension cord or have it repaired by a qualied
person before using it.
• Protect your extension cords from sharp objects,
excessive heat and damp or wet areas.
• When stringing lights together, consider the total
Amperes draw when selecting the extension cords.
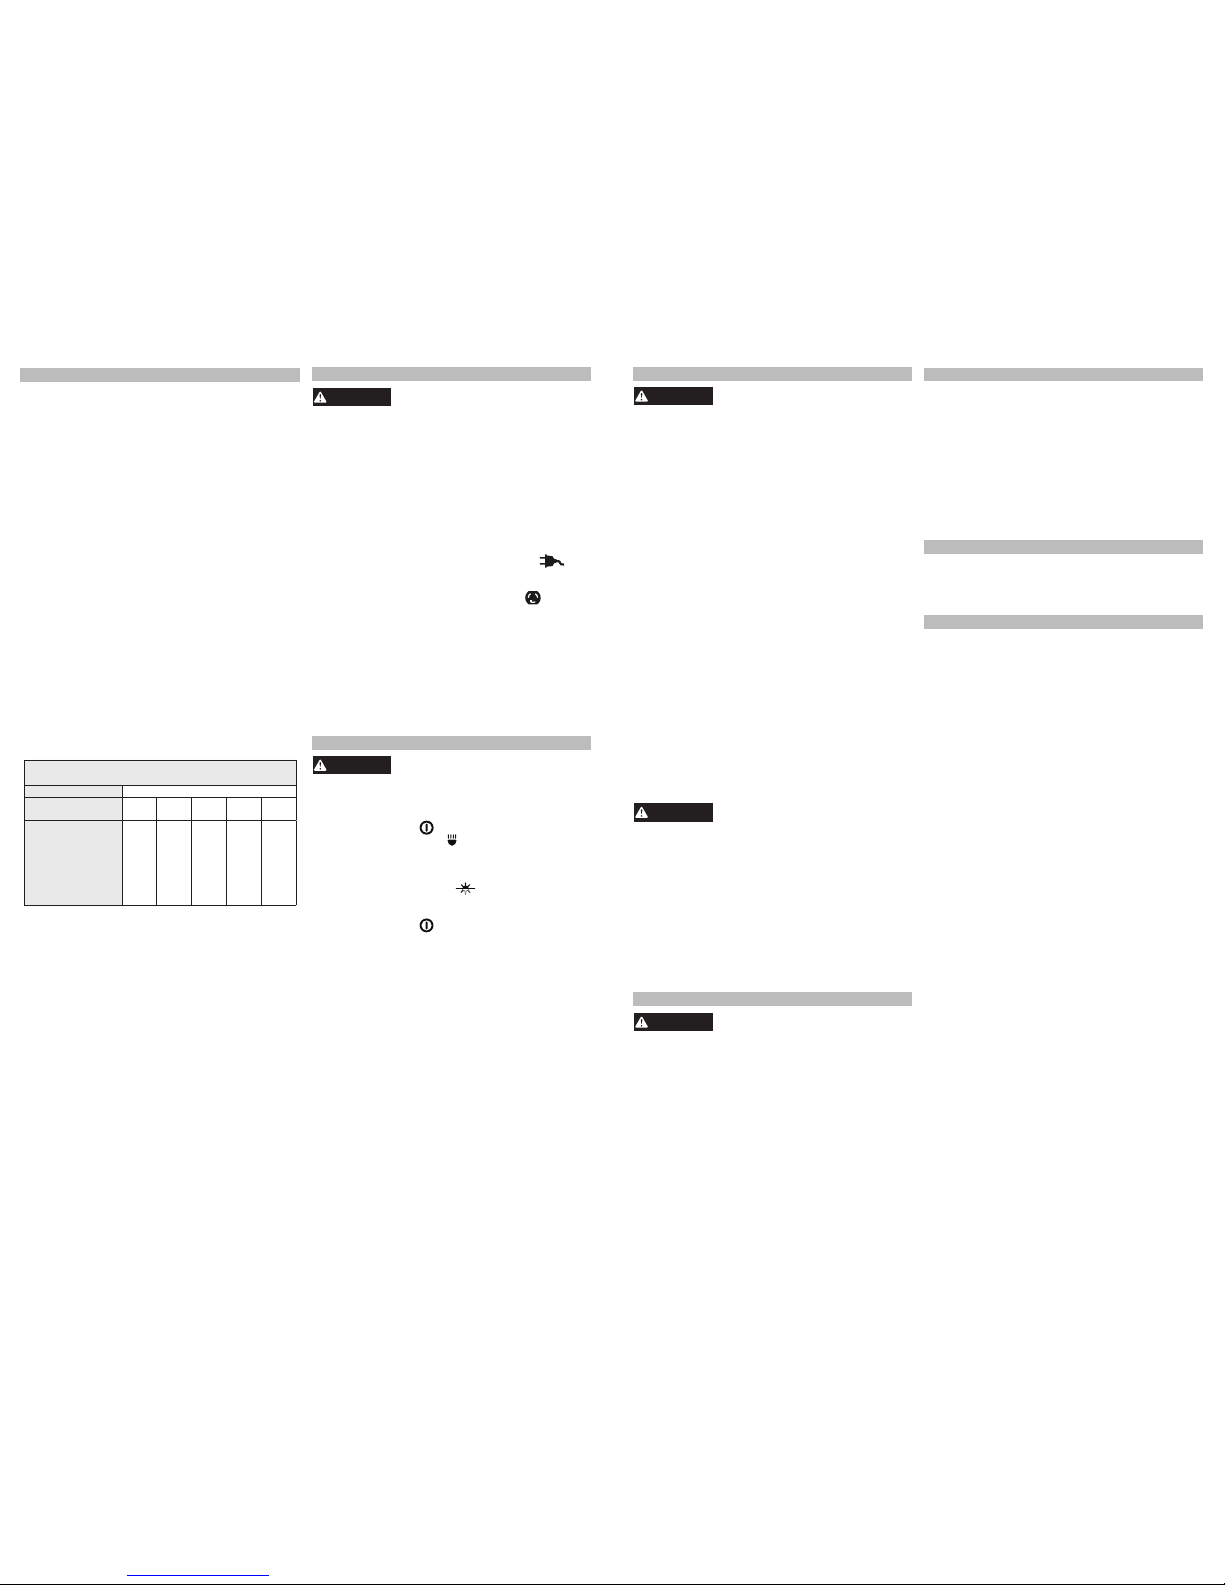
Recommended Minimum Wire Gauge
For Extension Cords*
Extension Cord Length
Nameplate
Amperes
25' 50' 75' 100' 150'
0 - 2.0
2.1 - 3.4
3.5 - 5.0
5.1 - 7.0
7.1 - 12.0
12.1 - 16.0
16.1 - 20.0
18
18
18
18
16
14
12
18
18
18
16
14
12
10
18
18
16
14
12
10
--
18
16
14
12
10
--
--
16
14
12
12
--
--
--
* Based on limiting the line voltage drop to ve volts at 150%
of the rated amperes.
READ AND SAVE ALL INSTRUCTIONS
FOR FUTURE USE.
SERVICE - UNITED STATES
1-800-SAWDUST (1.800.729.3878)
Monday-Friday, 7:00 AM - 6:30 PM CST
or visit www.milwaukeetool.com
Contact Corporate After Sales Service Technical
Support with technical, service/repair, or warranty
questions.
Email: metproductsupport@milwaukeetool.com
Become a Heavy Duty Club Member at
www.milwaukeetool.com to receive important
notications regarding your tool purchases.
SERVICE - CANADA
Milwaukee Tool (Canada) Ltd
1.800.268.4015
Monday-Friday, 7:00 AM - 4:30 PM CST
or visit www.milwaukeetool.ca
LIMITED WARRANTY USA & CANADA
Every MILWAUKEE power tool* (see exceptions below) is warranted
to the original purchaser only to be free from defects in material and
workmanship. Subject to certain exceptions, MILWAUKEE will repair
or replace any part on an electric power tool which, after examination,
is determined by MILWAUKEE to be defective in material or workman-
ship for a period of ve (5) years** after the date of purchase unless
otherwise noted. Return of the power tool to a MILWAUKEE factory
Service Center location or MILWAUKEE Authorized Service Station,
freight prepaid and insured, is required. A copy of the proof of purchase
should be included with the return product. This warranty does not
apply to damage that MILWAUKEE determines to be from repairs
made or attempted by anyone other than MILWAUKEE authorized
personnel, misuse, alterations, abuse, normal wear and tear, lack of
maintenance, or accidents.
Normal Wear: Many power tools need periodic parts replacement and
service to achieve best performance. This warranty does not cover
repair when normal use has exhausted the life of a part including,
but not limited to, chucks, brushes, cords, saw shoes, blade clamps,
o-rings, seals, bumpers, driver blades, pistons, strikers, lifters, and
bumper cover washers.
*This warranty does not cover Air Nailers & Staplers; Airless Paint
Sprayer; Cordless Battery Packs; Gasoline Driven Portable Power
Generators; Hand Tools; Hoist – Electric, Lever & Hand Chain; M12™
Heated Gear; Reconditioned Product; and Test & Measurement
Products. There are separate and distinct warranties available for
these products.
**The warranty period for Job Site Radios, M12™ Power Port, M18™
Power Source, Jobsite Fan and Trade Titan™ Industrial Work Carts
is one (1) year from the date of purchase. The warranty period for
the Drain Cleaning Cables is two (2) years from the date of purchase.
The warranty period for the LED in the LED Work Light and the LED
Upgrade Bulb for the Work Light is the lifetime of the product subject
to the limitations above. If during normal use the LED or LED Bulb
fails, the part will be replaced free of charge.
Warranty Registration is not necessary to obtain the applicable war-
ranty on a MILWAUKEE power tool product. The manufacturing date
of the product will be used to determine the warranty period if no proof
of purchase is provided at the time warranty service is requested.
ACCEPTANCE OF THE EXCLUSIVE REPAIR AND REPLACEMENT
REMEDIES DESCRIBED HEREIN IS A CONDITION OF THE CONTRACT FOR THE PURCHASE OF EVERY MILWAUKEE PRODUCT.
IF YOU DO NOT AGREE TO THIS CONDITION, YOU SHOULD NOT
PURCHASE THE PRODUCT. IN NO EVENT SHALL MILWAUKEE
BE LIABLE FOR ANY INCIDENTAL, SPECIAL, CONSEQUENTIAL
OR PUNITIVE DAMAGES, OR FOR ANY COSTS, ATTORNEY FEES,
EXPENSES, LOSSES OR DELAYS ALLEGED TO BE AS A CONSEQUENCE OF ANY DAMAGE TO, FAILURE OF, OR DEFECT IN ANY
PRODUCT INCLUDING, BUT NOT LIMITED TO, ANY CLAIMS FOR
LOSS OF PROFITS. SOME STATES DO NOT ALLOW THE EX-
CLUSION OR LIMITATION OF INCIDENTAL OR CONSEQUENTIAL
 Loading...