

Page 1
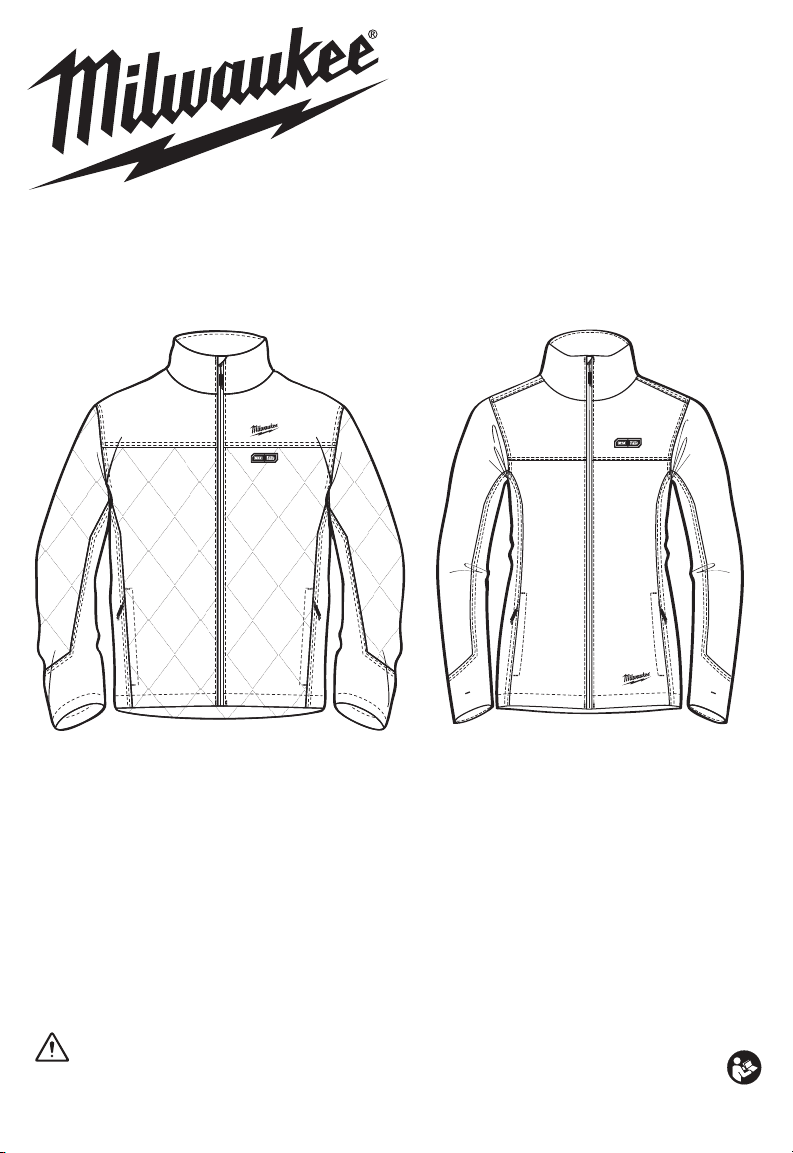
OPERATOR'S MANUAL
Cat. No.
M12 HJM BLACK9, M12 HJM BLACK9W M12 TC
M
12™ AXIS™ HEATED JACKET AND M12™ COMPACT
CHARGER AND POWER SOURCE
WARNING
To reduce the risk of injury, user must read and understand operator's manual.
Page 2
GENERAL PRODUCT SAFETY
WARNING
WARNINGS
Read all safety warnings and in-
warnings and instructions may result in electric
shock, re and/or serious injury. Save all warnings and instructions for future reference.
structions. Failure to follow the
WORK AREA SAFETY
• Keep work area clean and well lit. Cluttered or
dark areas invite accidents.
ELECTRICAL SAFETY
• Do not expose heated jacket to rain or wet conditions. Water will increase the risk of electric shock.
• Do not abuse the power cable. Never use the
cord for carrying, pulling or unplugging the
heated jacket. Keep cord away from heat, oil,
sharp edges or moving parts.
PERSONAL SAFETY
• Stay alert, watch what you are doing and use
common sense when using the heated jacket.
Do not use while you are tired or under the inuence of drugs, alcohol or medication. A moment
of inattention may result in serious personal injury.
PRODUCT USE AND CARE
• Do not use the heated jacket if the power button does not turn it on and o. Any heated jacket
that cannot be controlled with the power button is
dangerous and must be repaired.
• Disconnect the battery pack from the heated
jacket before storing. Such preventive safety
measures reduce the risk of starting the heated
jacket accidentally.
• Store out of the reach of children and do not allow persons unfamiliar with these instructions
to operate the heated jacket. Heated jacket can
be dangerous in the hands of untrained users.
• Maintain heated jacket. Check for breakage of
parts and any other condition that may aect
the heated jacket’s operation. If damaged, have
the heated jacket repaired before use.
• Use the heated jacket in accordance with these
instructions, taking into account the working
conditions and the work to be performed. Use
of the heated jacket for operations dierent from
those intended could result in a hazardous situation.
BATTERY TOOL USE AND CARE
• Recharge only with the charger specied by the
manufacturer. A charger that is suitable for one type
of battery pack may create a risk of re when used
with another battery pack.
• Use heated jacket only with specically designated battery packs. Use of any other battery
packs may create a risk of injury and re.
• When battery pack is not in use, keep it away
from other metal objects like paper clips, coins,
keys, nails, screws, or other small metal objects
that can make a connection from one terminal
to another. Shorting the battery terminals together
may cause burns or a re.
• Under abusive conditions, liquid may be ejected
from the battery; avoid contact. If contact accidentally occurs, flush with water. If liquid
contacts eyes, additionally seek medical help.
Liquid ejected from the battery may cause irritation
or burns.
• Have your heated jacket serviced by a qualied
repair person using only identical replacement
parts. This will ensure that the safety of the heated
jacket is maintained.
SPECIFIC SAFETY RULES FOR
HEATED JACKET
SERVICE
Read instructions carefully.
Use:
• Do not use this heated jacket with an infant, child,
a helpless person, or anyone insensitive to heat,
such as a person with poor blood circulation.
• If you have a medical condition making you sensitive to overheating, or you use any personal
medical devices, consult the device manufacturer
and/or your physician to determine if use of this
product is appropriate.
• Never use if inner liner is wet.
•Heating elements are not recommended to touch
bare skin.
• Shut off power immediately if discomfort occurs.
• Do not allow the cords to be pinched.
• If improper operation of this heated jacket is
observed, discontinue its use immediately and
contact a MILWAUKEE® service facility for repair.
•Do not use pins. They may damage the electric
wiring.
Care:
• Before washing, disconnect and remove battery
pack and battery controller from battery
controller pocket. Push the power cord
completely into the battery controller pocket
and fasten closed.
•Follow Care Instructions on jacket tags. Machine
wash, Gentle Cycle in warm water. Tumble Dry
Low Heat.
• Do not bleach.
•Do not iron.
•Do not wring or twist.
• Do not dry clean. Do not use dry-cleaning fluid on
this heated jacket. Do not bleach. Cleaning solvents
may have a deteriorating effect on the insulation of
the heating element.
•Maintain labels and nameplates. These carry
important information. If unreadable or missing,
contact a MILWAUKEE® service facility for a
replacement.
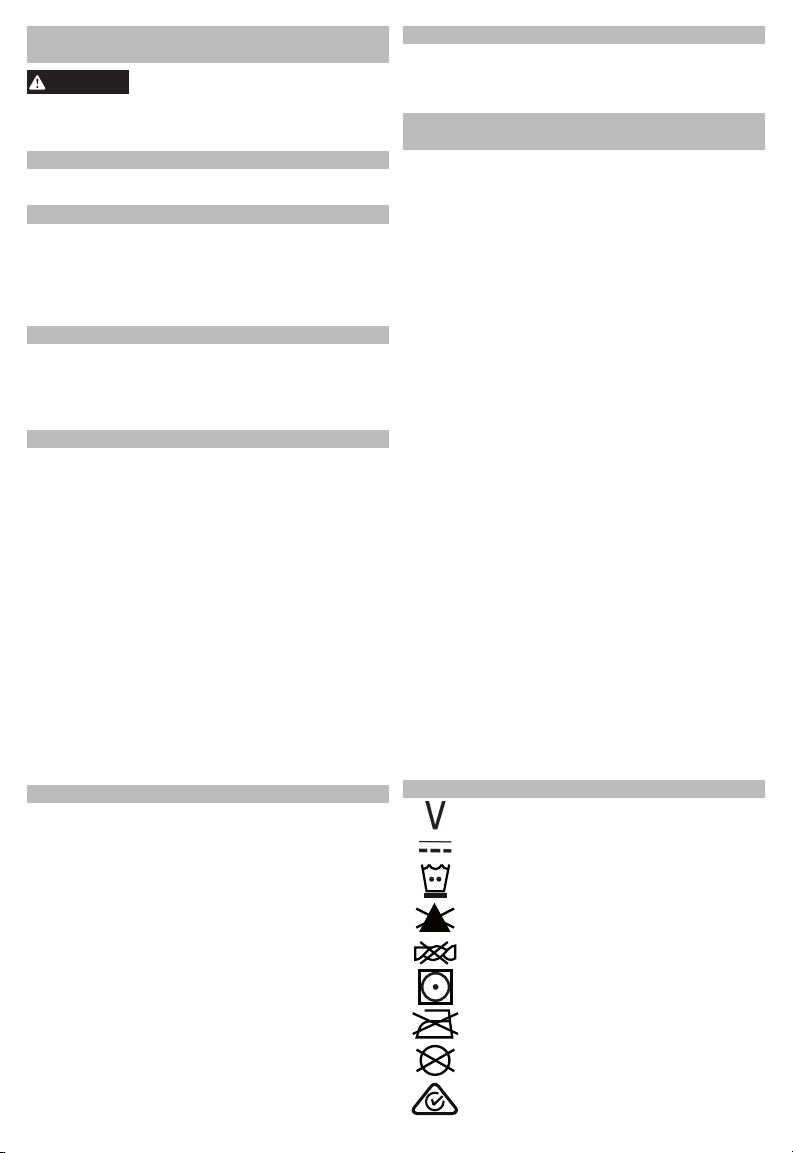
SYMBOLOGY
Volts
Direct Current
Machine wash, gentle cycle in warm water
Do not bleach
Do not wring or twist
Tumble dry, low heat
Do not iron
Do not dry-clean
Regulatory Compliance Mark (RCM).
This product meets applicable regulatory
requirements.
2
Page 3
Read Operator's Manual
This charger was only suitable for indoor
use. Never expose the charger to rain.
Class III appliance
T3.0A
Time-lag fuse 3.0A
ADDITIONAL BATTERY SAFETY RULES
WAR
NING
damage due to a short circuit, never immerse your tool,
battery pack or charger in fluid or allow a fluid to flow
inside them. Corrosive or conductive fluids, such as
seawater, certain industrial chemicals, and bleach or
bleach-containing products, etc., can cause a short
circuit.
T
o reduce the risk of fire,
personal injury
, and product
SPECIFICATIONS
Cat. No. .................................................................
Volts............................................................ 12V DC
Battery Type .................................................M12™
Charger Type................................................M12™
M12 HJM BLACK9, M12 HJM BLACK9W
M12 TC
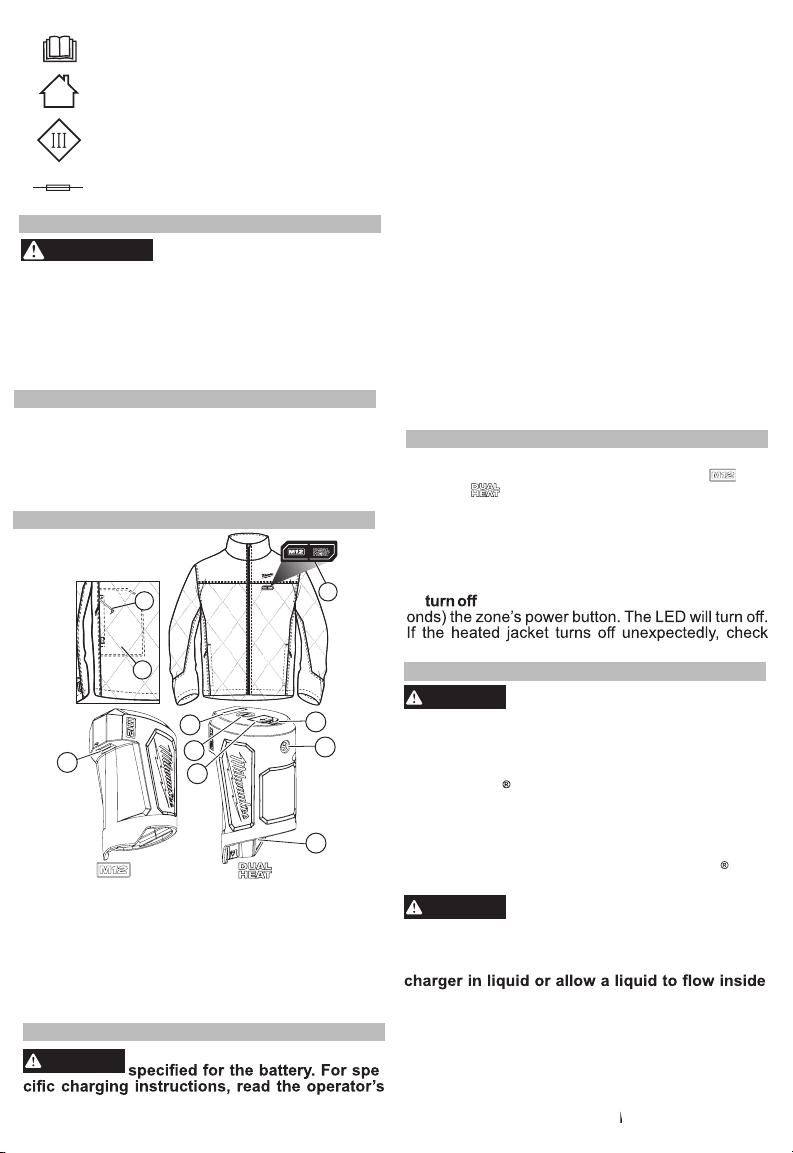
FUNCTIONAL DESCRIPTIONS
3
1
Inserting/Removing the Battery
To insert the battery, slide the pack into the body of
the battery controller. Make sure it latches securely
into place.
Insert the power cable (from inside the battery
controller pocket) into the power cable port on the
battery controller.
Place the battery controller into the pocket and zip
closed. If necessary, open the expansion zone
secured to accommodate larger battery packs.
To remove the battery, push in the release buttons
and pull the battery pack out of the controller.
The USB Out port can be used to charge a cell
phone, MP3 player, or other personal device that
uses less than 5V, 2.1A of DC electrical current.
To turn on the USB Out port, press the USB power
button on the controller. The USB port will remain
on for two hours before turning off automatically. It
is recommended that the battery controller USB
port not be used while in the jacket.
Press the USB power button to display the battery
pack’s remaining power on the fuel gauge LEDs.
Using the USB Out Port
Fuel Gauge
OPERATION
The zone power buttons are located on the upper left side of the jacket. Use the jacket
shoulder
To turn on, press and hold (1 to 2 seconds) the
zone’s power button. The zone will be turned to High
and the red LED will light.
Temperature setting can be adjusted at any time
by pressing the zone’s power button. Each press
will cycle through the zone’s temperature settings.
To
the heated jacket, press and hold (1 to 2 sec-
and
.senoz owt eht lortnoc ot snottub rewop
2
IN
OUT
4
5
6
7
8
DC OUT
9
10
1. Jacket Power Buttons and Shoulder
High: Red LED
Medium: White LED
Low: Blue LED
2. Battery contoller pocket
3. Power cable
4. USB out
5. Fuel Gauge LEDs
6. USB power button
7. Micro USB in
8.Charging LEDs
RED: Charging
Green: Charging
complete
9. DC out
10. Battery bay
ASSEMBLY
WARNING
manual supplied with your charger and battery.
Recharge only with the charger
connections and charge the battery pack.
CARE
WARNING
battery pack and battery controller from the
heated jacket before performing any maintenance. Never disassemble the heated
jacket, battery pack or charger. Contact a
MILWAUKEE
If the heated jacket does not start or operate properly
with a fully charged battery pack, clean the contacts
on the battery pack. If the heated jacket still does
not work properly, return the heated jacket,
charger and battery pack, to a MILWAUKEE
service facility for repairs.
WARNING
remove battery pack and battery controller from
battery controller pocket before washing. Never
immerse your battery controller, battery pack, or
them.
To clean the heated jacket:
1. Remove battery pack and battery controller.
2. Push the power cord completely into the battery
controller pocket and zip closed.
-
3. Machine wash, Gentle Cycle in warm water. Do not
use bleach. Do not dry clean. Do not wring or twist.
4. Tumble Dry on Low Heat. Do not iron.
3
To reduce the risk of injury, always
unplug the charger and remove the
service facility for ALL repairs.
To reduce the risk of personal injury and damage, disconnect and
Page 4
MILWAUKEE ® LI-ION
CHARGER
CHARGING THE BATTERY
WARNING
12V Li-Ion Chargers. Other types of batteries
may cause personal injury and damage.
Charge only
Li-on
batteries in
When to Charge the Battery Pack
with this MILWAUKEE
Remove the battery pack from the tool for charging
when convenient for you and your job. MILWAUKEE
batteries do not develop a "memory" when charged
after only a partial discharge. It is not necessary to run
down the battery pack before placing it on the charger.
• Use the Fuel Gauge to determine when to charge
your MILWAUKEE
•
You can "Top-Off" your battery pack's charge before
starting a big job or long day of use.
•
The only time it is necessary to charge the
MILWAUKEE
battery pack has reached the end of its charge. To
signal the end of charge, power to the tool will drop
quickly, allowing you just enough power to finish
making a cut, drilling a hole, or driving a fastener.
Charge the battery pack as needed.
®
Li-Ion battery pack.
®
Li-Ion battery pack is when the
Charging the Battery Pack
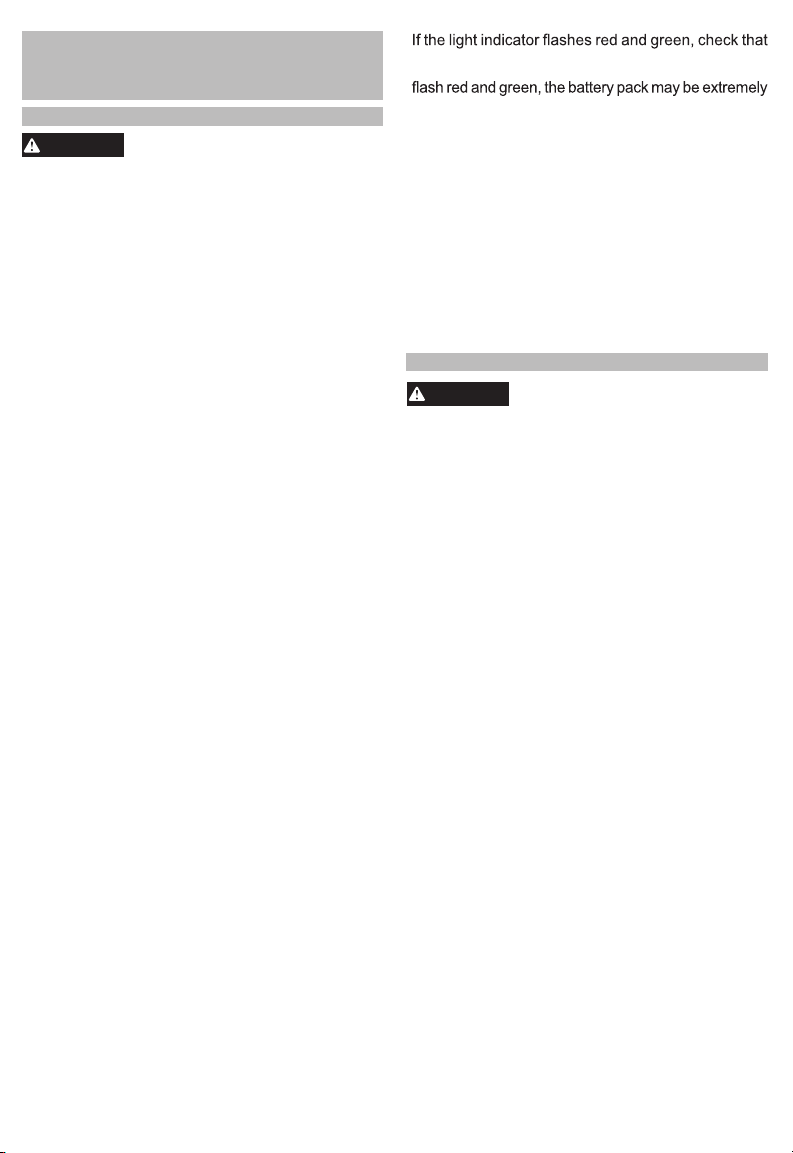
1. Plug your USB A end of the cable into a power
source such as an AC wall adaptor, computer or
car port.
2. Insert the Micro-USB end of the cable into t
Micro-USB port in the charger.
3. Insert the battery pack into charger. The indicator
light will display the charging status:
Red: Charging
Green: Charged
Red Flashing: Battery is too hot or too cold
Red/Green Flashing: Damaged or Faulty Battery
• During charging, press the power button to display
the current charge on the fuel gauge.
• USB A Port (for device charging) and DC out port
(for powering heated gear) is shut down when the
Micro-USB port is being used.
• A fully discharged battery pack with an internal
temperature in the normal range will charge in about
130 to 525 minutes, depending on the battery pack.
•• Heavily cycled batteries may take longer to charge
completely.
• After charging is complete, the continuous green
light will come on.
• The charger will keep the battery pack fully charged
if it is left on the charger.
The Red Flashing Indicator light on the charger
indicates that the battery pack temperature is outside the charging range. Once the battery pack is
within the acceptable range, normal charging will
take place and the red light will be continuous. Hot
or cold batteries may take longer to charge.
MILW
®
Charger
AUKEE
MIL
W ®AUKEE
12V
he
•
the battery pack is fully seated into the bay. Remove
the battery pack and reinsert. If the light continues to
hot or cold, or wet. Allow the battery pack to cool down,
warm up, or dry out and then reinsert. If the problem
persists, contact a
®
• If the light indicator does not come on, check that
the battery pack is fully seated into the bay. Remove
the battery pack and reinsert. If the light indicator
still does not come on, remove pack and unplug
charger for at least 2 minutes. After 2 minutes,
plug charger back in and insert pack. If after these
attempts the light indicator still does not come on,
®
contact a MILWAUKEE
Store your charger in a cool, dry place.
Unplug battery chargers and remove batteries when
not in use. Do not store battery packs in the M12™
Compact Charger and Power Source.
Maintenance and Storage
MILWAUKEE® service facility.
®
service facility.
ACCESSORIES
WARNING
For a complete listing of accessories, go online to
www.milwaukeetools.com.au/
www.milwaukeetools.co.nz or contact a distributor.
Use only recommended accesso-
ries. Others may be hazardous.
4
Page 5

Page 6

Page 7

Page 8

WARRANTY - AUSTRALIA and NEW ZEALAND
Please refer to Australian and New Zealand warranty supplied with tool. This warranty applies only to
product sold in Australia and New Zealand.
SERVICE - AUSTRALIA and NEW ZEALAND
MILWAUKEE®prides itself in producing a premium quality product that is Nothing But Heavy Duty®.
Your satisfaction with our products is very important to us! If you encounter any problems with the
operation of this tool, please contact your authorised MILWAUKEE® dealer.
For a list of MILWAUKEE® dealers, guarantee or service agents please contact MILWAUKEE
Customer Service or visit our website.
(Australia Toll Free Telephone Number 1300 645 928)
(New Zealand Toll Free Telephone Number 0800 279 624)
or visit www.milwaukeetools.com.au / www.milwaukeetools.co.nz.
Milwaukee Electric Tool Corporation
13135 West Lisbon Road, Brookfield, Wisconsin U.S.A. 53005
®
Milwaukee Tool (Australia)
21 Kelletts Road, Rowville, VIC 3178
Melbourne, Australia
Milwaukee Tool (New Zealand)
2 Landing Drive, Mangere
Auckland, 2022, New Zealand
Professionally Made in China for Milwaukee Tool (Australia) / Milwaukee Tool (New Zealand)
Designed by Milwaukee Electric Tool Corp.
Printed in China
 Loading...