


User manual
www.miltone.net
Air Synth
&
MIDI Controller
© Copyright 2014. m!lTone is a registered trademark of
Bahu Music LLC. All other trademarks included herein are
the property of their respective owners. (Design and
specifications are subject to change without notice).
Contact
Website
http://www.miltone.net
support@miltone.net
®
®
LLC
Designed and Assembled in Austin, TX
Monday, December 15, 2014

Preface
You have just opened a box to a device that truly allows one to create & explore
music, control video, lights, and more handsfree. The possibilities and endless as one
can connect many m!lTones together through MIDI.
Thank you for backing the m!lTone. We hope you enjoy it!
Please let us know what you think of the m!lTone. We want to grow a community of
developers and tinkerers to push and see what the limit are on this device. What will you
make it do? How will you use it?
The m!lTone is open source and over time new features will be added. We will also
be taking requests to add specific functionality on the m!lTone. If there is any
functionality you would like please email features@miltone.net
Monday, December 15, 2014
Index
3.2 Synthwave Buttons ......................................................................................... 14
3.3 Synthwave Knobs ........................................................................................... 15
3 Synthwave Mode ...................................................................................................... 13
3.4 Synthwave Knob Mapping ............................................................................ 16
5.1 Harmonizer Display ........................................................................................ 23
5 Harmonizer Mode .................................................................................................... 23
5.2 Harmonizer Buttons ....................................................................................... 24
1.1 Controls ............................................................................................................ 3
1.2 Connectivity & Power ...................................................................................... 4
1 Overview ................................................................................................................... 3
1.3 LCD Menu ........................................................................................................ 5
1.4 Knob Function Mapping ................................................................................ 6
5.3 Harmonizer Knobs .......................................................................................... 25
3.1 Synthwave Display ......................................................................................... 13
2.4 Air Min Distance ............................................................................................ 11
2 Air Controls ............................................................................................................. 7
2.1 Air Index Modes ............................................................................................... 7
2.2 Air Modes .......................................................................................................... 9
2.5 Air Max Distance ............................................................................................. 11
3.1 Synthwave Mode ............................................................................................ 13
3.5 Synthwave Air ................................................................................................. 17
4.1 Hulusi Display ................................................................................................... 19
4.2 Hulusi Buttons .................................................................................................. 20
4 Hulusi Mode ............................................................................................................ 19
4.3 Hulusi Knobs ..................................................................................................... 21
4.4 Hulusi Air .......................................................................................................... 22
Index
6.1 m!lTone Mode ............................................................................................... 33
6.2 Load Instrument Preset ............................................................................... 33
10 Settings .................................................................................................................. 33
6.3 Save Instrument Preset ................................................................................ 33
6.4 Splash Disable .............................................................................................. 34
6.5 Menu Display Time ..................................................................................... 34
6.6 Factory Reset ................................................................................................ 34
8 ADSR ...................................................................................................................... 29
9 Arpeggiator ............................................................................................................. 30
7 Tempo ...................................................................................................................... 28
6.7 Dump EEPROM .......................................................................................... 34
6 Scale/Key/TET ....................................................................................................... 27
1
2
2.8 Load Air Controls ............................................................................................. 12
2.6 Air Window Size ............................................................................................... 11
2.7 Air Bend Center ............................................................................................... 12
2.9 Save Air Controls .............................................................................................. 12
5.4 Harmonizer Air ............................................................................................... 26
7.1 BPM ............................................................................................................... 28
7.2 Tempo Multiplier .......................................................................................... 28
7.3 Tempo Chain .................................................................................................. 28
9.1 Arp Effect ........................................................................................................ 30
9.2 Chain Patterns ............................................................................................... 31
9.3 Arp Pattern .................................................................................................... 32
9.4 Sweep Direction ........................................................................................... 32
11 12/24 TET SCALES............................................................................................... 35
2.3 Air En/Disable ................................................................................................. 11
Monday, December 15, 2014
Connectivity & Power
Controls
The m!lTone can be powered with:
1.2 Connectivity & Power
9V battery
6V 2 Watt Solar Panel (minimum)
9 - 12 V center pin positive DC power supply with a 2.1mm jack
ON
IN
OUT
Audio
Out
0
10
9 - 12 V DC
11
Air Sensor I
Rotary
Encoder
Main
Button
Button 1 Button 2 Button 3 Button 4 Button 5
Knob 1, Knob 2, Knob 3, Knob 4
1.1 Controls
The m!lTone comes with three modes: Synthwave, Hulusi, and Harmonizer mode. The
buttons and knobs have different functionality depending on the mode selected. The
Up to 2 ultrasonic (Air) sensors
4 configurable knobs (pots)
6 buttons
1 rotary ecoder knob/button to access and modify menu and parameters
LCD
Air Sensor 2
m!lTone is equipped with the following:
The m!lTone is equipped with with:
1/4” stereo audio out
MIDI in
MIDI out/software thru
MIDI
In
MIDI
Out
Speaker
Volume
Power
Switch
DC
Jack
3
4
1/4 “ Audio
Out
Monday, December 15, 2014
-> Submenu
LCD
LCD Menu
Main Menu
1.3 LCD Menu
The main menu items will display
centered on the top line.
-> Submenu
The submenu will display left
justified following “->.”
- Selection
The selection will display left
justified following “-.”
1st
2nd 3rd 4th
1.4 Knobs Function Mapping
The bottom row of the LCD displays the functions of
each knob. The names in the figure on the right
correspond to the functionality of knobs 1, 2, 3, and 4,
respectively.
To access and modify the menu use the rotary encoder/button as shown above. Turn to scroll
between menu items and press to enter the submenu. Scroll to the value or submenu and
press to enter or apply changes. Hold the menu button for at least 1/3 of a second to return to
the previous menu or submenu. Hold the menu button for at least 1.5 seconds to return to
the main menu.
Rotary
Encoder/Button
2x16 LCD
Display
The functionality of each of the four knobs can be modified by holding the shift button
(button 5) and the button of the knob you would like to change. This only applies to
Synthwave and Hulusi modes. The table below shows the functions the knobs can perform.
Display
Knob Function Mapping
Nt1
Inst 1 Note or Air 1 Delta
Vl1
Inst 1 Volume
Wv1
Inst 1 Wavetype
Nt2
Inst 2 Note or Air 2 Delta
Vl2
Inst 2 Volume
Wv2
Inst 2 Wavetype
2Of
Inst 2 Note Offset
Nt3
Inst 3 Note
Vl3
Inst 3 Volume
Wv3
Inst 3 WaveType
3Of
Inst 3 Note Offset
Atk
Attack Time
Dec
Decay Time
Sus
Sustain Time
Rls
Release Time
TrS
Tremelo Speed
TrD
Tremelo Depth
Mod
Sweep & Random Arp Range
BPM
Beats Per Minute
5
6
Monday, December 15, 2014
Air Index Modes
Air Controls
2.1 Air Index Modes
Weighted Air Index Mode is a mix of Continuous and Discrete. In this index mode, the
value of the index will be a whole number for 75% of the index delta space and the
remaining 25% will be continuous to the next index value. This allows for a note in the
scale to be played, but pitch bent into the next or previous note in a scale. Use two
hands/objects to do a “divebomb” effect. This index mode also defaults the BPM to
Infinity “Inf” only for the instrument using the Air sensor.
2.1.3 Weighted Air Index Mode
Continuous Air Index Mode is similar the Theremin. This index mode defaults the BPM
to Infinity “Inf” only for the instrument using the Air sensor. The BPM of the other
instruments will be the BPM.
2.1.2 Continuous Air Index Mode
2.1.1 Discrete Air Index Mode
Discrete Air Index Mode breaks up the distance between the object/hand and sensor
into discrete values so that the index value is always a whole number. Only notes within
the selected scale can be played.
The index delta can be changed using a knob. When moving the knob, the value displayed
on the screen shows the index delta in millimeters. Moving the knob all the way to the left
automatically sets the index delta so that all notes can be played depending on the scale and
the Min and Max Air Distance settings. Moving the knob slightly more the right will
automatically set the index delta so that the index value goes all of the way from 0 to 127.
7
8
O
b
j
e
c
t
The m!lTone translates the distance to an object to something called an index. For
every index delta (∆) distance travelled, the index gets incremented by 1. There are
several Air Modes that determine how more precisely distance gets translated to an
index. These modes are described in section 2.2. The value of the index gets translated
as a note in a scale or can be outputted directly as a MIDI Controller message. There
are three Air Index Modes that change whether the index values are discrete or
continuous. Continuous index values allow for all of the notes in between two notes of
a scale to be played. These index modes are described in sections 2.1.1-2.1.3.
∆
To change between “Air Index Modes” navigate to menu “Air Controls->Air # Index Mode”
or hold button 1 or button 2 for at least half a second in either SynthWave or Hulusi mode
and select the desired Air index mode.
Monday, December 15, 2014
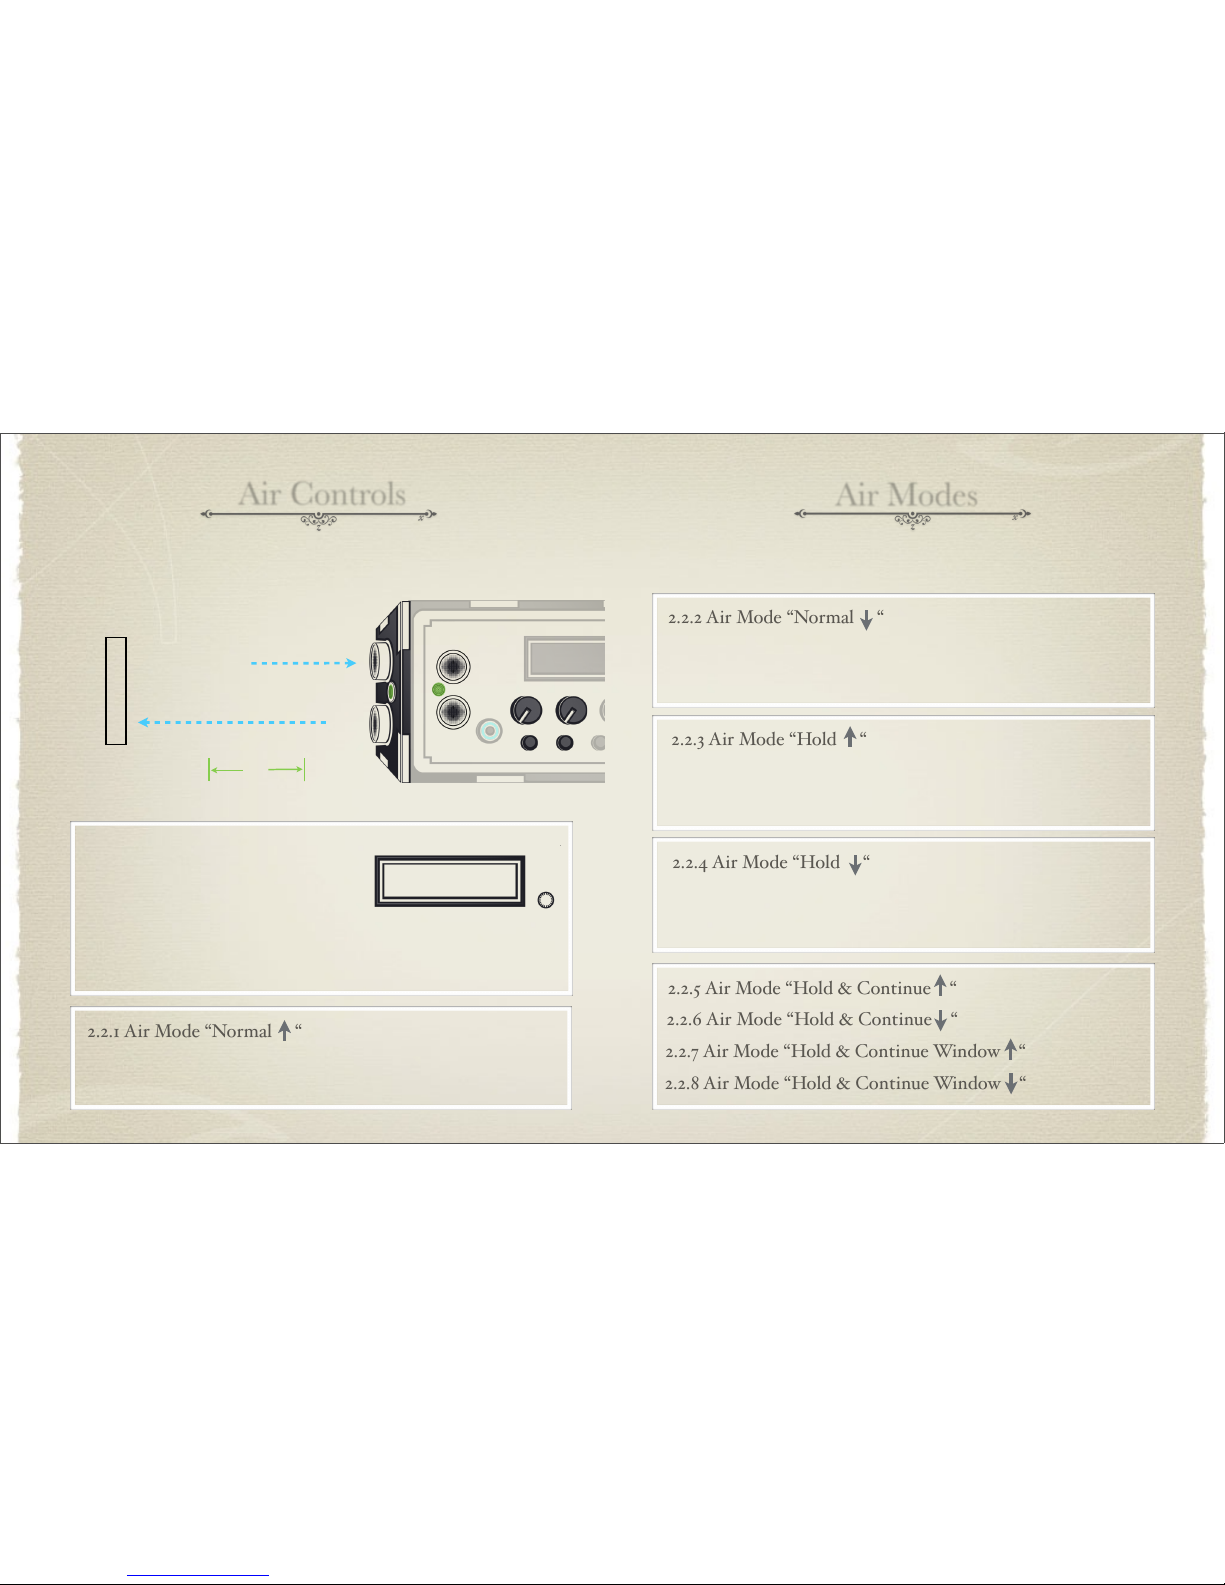
2.2.6 Air Mode “Hold & Continue “
2.2.7 Air Mode “Hold & Continue Window “
2.2.8 Air Mode “Hold & Continue Window “
2.2.5 Air Mode “Hold & Continue “
2.2.3 Air Mode “Hold “
2.2.1 Air Mode “Normal “
Air Modes
O
b
j
e
c
t
Air Controls
2.2 Air Modes
Normal Up will make the index increase as the object gets farther away from the sensor.
The lowest note will play when the hand/object is closest to the sensor. When there is
no object present, the index value will be 0 and no note will be played.
To change between “Air Modes” press the shift button and press button 1 or 2 to cycle
between the modes in the SynthWave or Hulusi modes. You can also navigate to menu
item “Air Controls->Air Mode” and select the desired mode.
Air Controls
Hold Up is the same as Normal Up except the index value does not revert to 0 whenever
the hand/object is removed, but will remain the same as it was when the object was
removed.
2.2.2 Air Mode “Normal “
Normal Down is the same as Normal Up except the index will increase and the object
gets closer to the sensor.
2.2.4 Air Mode “Hold “
Hold Down is the same as Hold Up except the index will increase and the object gets
closer to the sensor.
9
10
Air modes adjust how the movements of the
hand/object in front of the sensor determine
what the index value should be, and which note
gets played.
∆
Monday, December 15, 2014

Air Controls
Air Controls
2.3 Air En/Disable
The Air sensors can be enabled and disabled by pressing button 1 or button 2 in
SynthWave and Hulusi modes. You can also navigate to menu “Air Controls->Air En/
Disable” to toggle the sensors on and off. The LED next to the Air sensor{s} will flash
green when enabled.
2.5 Air Max Distance
Navigate to menu “Air Controls->Air Max Distance” to modify the furthest distance to
the Air sensor that registers. The distance can be changed from 2048 to 8092
2.6 Air Window Size
Air window size only applies to Air Mode “Hold and Continue Window.” Navigate to
menu “Air Controls->Air WindowSize” to set the window size in index delta’s that
allows a hand/object to modify the value. The value can be changed from 1 to 4.
2.7 Air Bend Center
There are eight user Air presets that can be loaded, modified, and saved. Navigate to
menu “Air Controls-> Load Air Ctrls” to load an Air preset. Different Air presets can be
assigned to Air 1 and Air 2 sensors.
2.9 Save Air Controls
2.8 Load Air Controls
11
12
2.4 Air Min Distance
Navigate to menu “Air Controls->Air Min Distance” to modify the closest distance to
the Air sensor registers. The distance can be changed from 128 to 2048.
Air Bend Center only applies to Air Mode “Bend.” Use the rotary encoder to navigate
to menu “Air Controls->Air Bend Center” to change the default index value for when
an object/hand in not in front of the Air sensor. This value should be 64 if you are
outputting pitch bend MIDI messages. Alternatively, this can be set to another index
value. For example, if a player would like the 15th note in a scale to be played
whenever they move their hand away from the sensor, then set this value to 15.
There are eight user Air presets that can be loaded, modified, and saved. Navigate to
menu “Air Controls-> Save Air Ctrls” to save an user Air preset. When saving a preset
the following is saved: Air Index Mode, Air Mode, Air Min Distance, Air Max
Distance, Air Window Size, and Air Bend Center.
If Air 1/2 is enabled when entering this submenu, one can hold their hand to the
distance they want to be the minimum and press the main button to set it.
If Air 1/2 is enabled when entering this submenu, one can hold their hand to the
distance they want to be the maximum and press the main button to set it.
Monday, December 15, 2014

xxx
Synthwave Mode
BPM
3. 1 Synthwave Display
Mod
Vl1
Vl1
Mod
BPM
Nt2
Vl1
Vl2
Nt2
Nt3
Vl3
2
3
Number of
Instruments = 1
Instruments = 2
Instruments = 3
4
The LCD display shows the functionality of the knobs
on the bottom row and the notes being played on top.
To change the number of instruments press button 4
Nt1
(Synthwave mode default display)
Synthwave mode allows the user to use the knobs and/or handsfree sensors to play
music and send MIDI messages. To play in “Synthwave” Mode navigate to
“Settings->m!lToneMode” in the menu. Select Synthwave mode and press the clear
button to set it. This mode supports 3 instrument polyphony and can output over
three separate MIDI channels. Each instrument’s wavetype, MIDI Channel, and
ADSR settings can be modified as well instrument 2 and 3’s Note Offset.
3 Synthwave Mode
Instrument Wavetypes
Instrument 2 & 3 Note Offset
-5 to 10
Sine, Square 1, Pulse, Saw, Tri Dist,
Triangle, Organ, Noise
Instrument MIDI Channel
1 to 16, Disable
Synthwave Buttons
Air 2
On/Off
Air 1
Mode Toggle
Change
Number of Notes
Octave
Up
[
]
[
]
[
]
[
]
Shift
][
Access menu
and
modify settings
Tap
Tempo
Knob 1
Map
Air 1
On/Off
Change
Arp Effect
Change
Key
Air 1
Mode Toggle
[ ]
Knob 2
Map
[ ]
Knob 3
Map
[ ]
Knob 4
Map
[ ]
3. 2 Synthwave Buttons
13
14
Number of Instruments
1 to 3
ADSR
Decay time - 10 to 520
Sustain level - 0 to 127
Release time - 10 to 520
Attack time - 10 to 520
change the mapping of the buttons. The buttons above in are the functionality of
[ ]
[ ]
The functionality of the buttons are shown above. Press the shift button (button 5) to
the buttons when shift is pressed. The buttons above in are the functionality of
the button when shift is held.
or navigate to menu “Synthwave->Num Instruments.” Although the functions of
the knobs are configurable, they will reset to the defaults in the table below every
time the number of instruments is changed.
Air 2
Map
[ ]
Monday, December 15, 2014

Synthwave Knobs
Synthwave Knobs
The functionality of each of the four knobs can be modified by holding the shift button
and the button of the knob you would like to change. The table below shows what each
knob can be assigned to in synthwave mode.
Knob 1
Options
Knob 2
Options
Knob 3
Options
Knob 4
Options
Inst 1 Note or Air 1
Delta
Inst 1 Volume
Inst 1 Volume
BPM
Inst 1 Volume
Inst 2 Note or Air 2
Delta
Inst 2Volume
Inst 2Volume
Inst 1 Wavetype
Inst 2Volume
Inst 3 Note
Inst 3Volume
Attack Time
Inst 2 Wavetype
Inst 3Volume
Release Time
Inst 2 Note Offset
Inst 3 Wavetype
Sweep & Random
Arp Range
Decay Time
Inst 3 Note Offset
Tremelo Speed
Susatin Level
Tremelo Speed
Tremelo Depth
Sweep & Random
Arp Range
3.4 Synthwave Knobs Mapping
3. 3 Synthwave Knobs
Knob 1
Knob 2 Knob 3
Instrument 1
Instrument 2 Instrument 3
Note
follow
Instrument 1
Off
Instrument 2
Off
Note
follow
Instrument 3
Off
Knob 4
Air 1
Note Delta
Air 2
Note Delta
* Air Mode Enabled
15
16
The LCD display shows the
functionality of the knobs on the
bottom row and the notes being
played on top. To change the number
of instruments press button 4 or
navigate to menu “Synthwave->Num
Instruments”. The knob functionality
is changed when changing the
number of instruments as shown in
the table of the previous page.
The default functionality of the knobs in Synthwave mode are shown below. Instrument
2 & 3 will play an interval offset from Instrument 1 when knobs 2 & 3 are set to “Note
Follow” position as shown below. The note offset can be changed in Synthwave menu.
BPM
Tap
Tap Tempo
Tempo
Follow
Knob 1
Knob 2
Monday, December 15, 2014

Synthwave Air
In Synthwave mode the user can use “Discrete Air”, “Continuous Air”, and “Weighted
Air” index modes. Press button 1 or 2 to enable and disable Air 1 and 2 respectively. You
can also navigate to “Air Controls->Air Enable” in the menu and toggle Air 1 and Air 2.
3. 5 Synthwave Air
O
b
j
e
c
t
Air 2
On/Off
Air 1
On/Off
The led will flash green to indicate that the handsfree sensor is on. Knobs 1 and 2 will
change to “Air delta” functionality. The m!lTone Air modes are explained on page 9.
Each sensor can be mapped to modify many of the functions that each knob can modify.
17
18
∆
Monday, December 15, 2014

x
To play in Hulusi mode navigate to “Settings->m!lTone Mode” in the menu. Select
“Hulusi” mode and press the rotary encoder button set it. Hulusi mode supports 3
instruments(note polyphony) and MIDI channels. You can modify each instrument’s
wave type, MIDI Channel, and ADSR settings in “Hulusi” menu.
Hulusi Mode
4. 1 Hulusi Display
4 Hulusi Mode
Instrument Wavetypes
Instrument MIDI Channel
1 to 16, Disable
Hulusi Buttons
Access menu
and
modify settings
4. 2 Hulusi Buttons
(Hulusi mode display)
The LCD display shows the functionality of the
knobs on the bottom row and the notes being played
on top. The number of instruments is always three
and cannot be changed in Hulusi mode.
Hulusi mode emulates the Chinese flute “Hulusi”. The word Hulusi translates to silk
gourd and is said to have a silky tone to the instrument. The Hulusi consists of three
pipes the first of which is able to play notes in the scale. The 2nd and 3rd pipes act as
resonators that play an interval of the key of the instrument. Two additional voices
(drones) will play relative to the key selected.
The m!lTone expands on the Hulusi by allowing the use of hundreds of different scales.
The Hulusi flute has sounds similar to square and sawtooth waves. One can modify the
wave type of each of the three notes and can closely match the real sound of the Hulusi
flute.
Ping 2
On/Off
Notes
Off (Hold)
[
]
Air
Delta
[
]
[
]
Ping 1
On/Off
Shift
[
Change
Key
Air
Delta
Change
Scale
]
Sine, Square 1, Pulse, Saw, Tri Dist, Triangle, Organ, Noise
19
20
BPM
Vl2
Vl1
x x
Nt1
The functionality of the buttons are shown above. The buttons do the same as
Synthwave mode. The arpeggiator effect will modulate on instrument 1 only. Holding
the main button will begin the release phase of the ADSR and mute all the sounds.
[
]
Change
Arp Effect
Change
Arp Effect
Monday, December 15, 2014

Hulusi Knobs
Hulusi Air
In Hulusi mode the knobs functionality cannot be changed. The table below and the
figure above show what the knobs can modify.
Knob 1
Mapping
Knob 2
Mapping
Knob 3
Mapping
Knob 4
Mapping
Instrument 1
/ Air 1 Delta
Instrument 2
Volume
Instrument 2
Volume
BPM
4.3 Hulusi Knobs
Instrument 3
Volume
Instrument 2
Volume
Instrument 1
/Air 1 Delta
BPM
4.4 Hulusi Air
O
b
j
e
c
t
Navigate to “Air Controls->Air 1 Enable” in the menu and enable or disable Air 1. The
LED will flash green to indicate that the handsfree sensor is on. Knobs 1 changes from
“Root Offset” to “Air delta” functionality. Turn back to page 9 to learn about the Air
delta and Air modes.
22
21
∆
Monday, December 15, 2014

Harmonizer Mode
5. 1 Harmonizer Display
5 Harmonizer Mode
Harmonizer Buttons
Access menu
and
modify settings
Harmonizer mode allows the user to play the buttons like a piano expect the buttons
only play the notes of the selected scale. Harmonizer mode supports 5 instruments
(note polyphony) and MIDI channels. You can modify each instrument’s wavetype,
MIDI Channel, Air Source, and ADSR settings. To play in “Harmonizer” mode
navigate to “Settings->m!lTone Mode” in the menu and select it.
Note 3 Note 4Note 2Note 1
Note 5
Sustain
Nt5
BPMTrDTrSRoo
s Nt1
Nt4
Nt3
Nt2
Harmonizer mode displays the notes of the buttons
being played on the bottom row of the LCD. When
the sustain button (main button) is pressed an “s” will
appear in the leftmost bottom corner.
23
24
5. 2 Harmonizer Buttons
The functionality of the buttons are shown above. There is no shift button in
Harmonizer mode. Each button plays the next note in the selected scale. The main
button will sustain the notes of the buttons that are held down. Each button can be
assigned to a different instrument preset if desired.
Instrument Wavetypes
Instrument MIDI Channels
1 - 16, Disable
Sine, Square 1, Pulse, Saw, Tri Dist, Triangle, Organ, Noise
The top row of the LCD always and only displays the following four values:
2 - value of of the tremelo speed
3 - value of of the tremelo depth
4 - BPM
1 - the note that the first button that will play
Monday, December 15, 2014

Harmonizer Knobs
Harmonizer Air
The knobs functionality cannot be changed in Harmonizer mode. The table below and
the figure above show what the knobs can modify.
Knob 1
Mapping
Knob 2
Mapping
Knob 3
Mapping
Knob 4
Mapping
Root Offset
/ Air Delta
Tremelo
Speed
Tremelo
Depth
BPM
5.3 Harmonizer Knobs
Tremelo DepthTremelo Speed
Root Note Offset
/Air Delta
BPM
Press button 1 or 2 to enable and disable Air 1 and 2 respectively. Navigate to “Air
Controls->Air 1 Enable” in the menu and enable or disable Air 1.
5. 4 Harmonizer Air
O
b
j
e
c
t
The LED will flash green to indicate the Air sensor is on. Knobs 1 changes from “Root
Offset” to “Air delta” functionality. Select between Air Source 1 or 2 in the Harmonizer
submenu and enable that sensor to use the handsfree sensor to change the root note.
Navigate to “Harmonizer->Air Source” to choose which of the two sensors will modify
the root note,.
25
26
∆
Monday, December 15, 2014

MIDI
IN
Scale/Key/TET
The m!lTone has over 200 scales from all over the world to choose from. The scale can be
modified in the “Scale” submenu and will change when selecting between scales. A quarter tone
is a pitch halfway between the usual notes of a chromatic scale. Imagine a piano with an extra
pitch in between every key. That changes it from 12 tones to 24 tones per octave.
Key
The key can be changed from the menu in “Scale/Key/TET->Key” or by pressing the shift
button followed by button 3.
Select between 12 Tone Equal Temperment (TET) and 24 TET to choose between half
tone and quarter tone scales. The scales displayed in the Scales submenu will change
based on the TET selected. To change between quarter tone and half tone scales change
“Scale TET” in Scale/Key/TET menu.
6 Scale
Scale TET
Tempo
BPM is the number of beats (notes) played in one minute. The beats per minute can be set
from 10 to 1022. Use the BPM knob to set the BPM modes like shown above.
Tempo Multiplier multiplies the value selected to the BPM. The tempo multiplier can be a
value from 1 to 9. Navigate to “Tempo->Tempo Mult” to change the value.
Enable “Tempo Chain” when daisy chaining multiple m!lTones via MIDI cables.
When the m!lTones down the chain are in tempo follow mode they will time sync
with the m!lTone at the top of the chain. Turn the BPM knob to the left until the
display shows “Fol” to be in tempo follow mode. There is a 1/3 rd millisecond delay
per m!lTone daisy chained.
7.1 BPM
7.3 Tempo Chain
MIDI
OUT
7.2 Tempo Multiplier
Top of the chain
(enable tempo chain)
28
27
There are over two hundred 12 TET (half tone) scales and over forty 24 TET
(quarter tone) scales.
BPM
Tap
Tap Tempo
Tempo
Follow
0
1022
Bottom of the chain
(set knob4 to “Fol”)
Monday, December 15, 2014

ADSR
Arpeggiator
(ADSR display)
SusDecAtk
x
Rls
x x x
9 Arpeggiator
8 ADSR
30
29
There are 4 arpeggiator effects that can be changed by pressing shift followed by button
4 or via the menu under “Arpeggiator->Arp Effects.” A knob must be assigned to “Mod”
to vary the number of notes for pattern for Random Arp and Sweep. The arpeggiator
affects instrument 1 when one note polyphony is selected. Only instrument 2 is affected
when two or three note polyphony are selected.
9.1 Arp Effect
Below is a breakdown of the arpeggiator effects available.
A “Mod” of value 1 has no effect on rand arp and sweep.
- No pattern is applied
None
Random Arpeggiator
Arpeggiator Chain
Sweep
1
Max step
size = 16
Envelope
Level
0
127
Time
Attack Decay Release
Sustain
Level
Knob 3
Mod
- Random arpeggiator will play a random note between the root note and within the
step size selected using knob “Mod”. Hold shift and button 3 or 4 to cycle to “Mod.”
- Arpeggiator chain is explained in detail on the following page.
Arpeggiator
- Arpeggiator is explained in detail on the following page.
- Sweep will continue to play the next note in the selected scale until the “Mod”
step size is reached. Hold shift and button 3 or 4 to cycle to “Mod.”
The “attack” and “decay” of a sound have a significant effect on the instrument’s sonic
character. Navigate to a m!lTone Mode menu item and scroll to “ADSR” to modify the
instruments ADSR envelope. The contour of an ADSR envelope is specified using four
parameters Attack, Decay, Sustain, and Release. A sustain value of 127 and long release
time is recommended when using the Air sensor(s).
Release time - the time taken for the level to decay from the sustain level to zero
Sustain level - the level during the sustain phase of a sound
Decay time - the time takes for a sound to reach the sustain level from peak level
Attack time - the time takes for a sound to reach its peak level
Monday, December 15, 2014

Arepeggiator
9.4 Sweep Direction
32
31
The direction of the sweep effect can be to changed to Up, Down, or Up-Down. Sweep
direction is Up by default and only affects the “Sweep” arp effect.
Arepeggiator
Example
9.2 Chain Pattern
There are a total of 90 arpeggiator chain patterns that can be selected. Change the
arp effect to “Arp Chain” to use the chain pattern selected. All patterns consist of the
indices to arpeggiator patterns. The example below explains chain pattern in detail.
Pattern
Description
1: 10 - 22 - 44
Plays arp pattern 10 followed by arp pattern 22
followed by 44 and repeats
2: 10 - 2 - 4
Plays arp pattern 10 followed by arp pattern 2
followed by 4 and repeats
etc.
C5
Major Pentatonic: C5 D5 E5 G5 A5 C6
Example
9.3 Arp Pattern
There are a total of 90 arpeggiator patterns that can be selected. Change the arp effect
to “Arpeggiator” to use the selected arp pattern. Only patterns 10 - 99 can be selected.
Patterns 0-9 are reserved for building arpeggiator chains. Patterns 10 - 99 consist of two
intervals. The example below explains arpeggiator pattern in detail.
Pattern
Description
10: 0 - 1
Plays C5 followed by D5 and repeats
11: 0 - 2
Plays C5 followed by E5 and repeats
12: 0 - 3
Plays C5 followed by G5 and repeats
23: 1 - 4
Plays D5 followed by A5 and repeats
etc.
C5
Major Pentatonic: C5 D5 E5 G5 A5 C6
Arp chain pattern 2 as shown above will play arp pattern 1: 0 - 1 followed by arp pattern
2: 2 followed by 4: 4. The entire chain pattern is thus:
0 - 1 - 2 - 4 => C5 D5 E5 A5 repeat
Monday, December 15, 2014

Settings
Factory Reset
Doing a factory reset will permanently overwrite any new settings and presets saved and
will not be able to retrieved. To restore the m!lTone with factory settings navigate to
“Settings->Factory Reset” and select “yes.”
m!lTone Mode
The m!lTone has three modes with different controls and ways of playing with the
handsfree sensor. The modes available are Synthwave, Hulusi, and Harmonizer. The
three modes are explained in detail in this guide. Refer to the index for the pages.
Settings
Load Instrument Preset
The m!lTone is equipped with 32 presets that can be loaded on each individual instrument
or on all instruments. Navigate to the “Settings->Load Inst Prst” to load the preset
instrument (sound) of your liking.
Save Instrument Preset
The m!lTone is equipped with 32 presets of which 16 can be saved. Saving an
instrument preset saves the instrument’s wavetype, MIDI channel, ADSR, tremelo
speed, tremelo depth, arpeggiator bank index, and arpeggiator chain index. The
preset last used will be reatined when powering the m!lTone off and on.
Splash Disable
When the m!lTone is powered on a splash screen showing “m!lTone Air Synth” is
displayed. Navigate to menu “Settings->Splash Disable” disable the splash screen.
Dump EEPROM
This settings is only useful if the m!lTone is attached to a computer via an FTDI to
USB programming cable. The contents of theEEPROM, which holds all saved
presets, will get dumped on a serial console.
Menu Display Time
Menu display time is the duration of time that the menu stays on the LCD. The
menu display time can be changed from 244 ms to 5044 ms. The display time can be
set in menu “Settings->Splash Disable” and will persist when powering off and on.
34
33
Monday, December 15, 2014

12 TET Scales
Adonai Malakh - Aeolian Flat - Aeolian Natural Minor Asavari A to G - Algerian - Altered Pentatonic - Alternating
TetraMirror - Augmented Chord - Augmented Messiaen Truncated Mode 3 Inverse - Balinese Pelog - Balinese Pentachord
- Blues Dorian Hexatonic - Blues Enneatonic - Blues Heptatonic - Blues Minor - Blues Minor Maj7 - Blues Modified -
Blues Octatonic - Blues PentaCluster - Blues Pentatonic Minor - Raga Malkauns - Blues Phrygian - Blues V - Blues with
Leading Tone - Center Cluster PentaMirror - Chaio - Chinese - Chromatic - Chromatic Bebop Chromatic DecaMirror -
Chromatic Diatonic Dorian - Chromatic Dorian - Chromatic Dorian Inverse - Chromatic HeptaMirror - Chromatic
HexaMirror - Chromatic Hypodorian - Chromatic Hypodorian Inverse - Chromatic Hypolydian Inverse Persian -
Chromatic Hypolydian Puravi - Chromatic Hypophrygian Inverse - Chromatic Lydian - Chromatic Lydian Inverse Todi
Chromatic Mixolydian - Chromatic Mixolydian Inverse - Chromatic NonaMirror - Chromatic OctaMirror Chromatic
PentaMirror - Chromatic Permuted Diatonic Dorian - Chromatic Phrygian - Chromatic Phrygian Inverse - Chromatic
TetraMirror - Chromatic TriMirror - Chromatic UndecaMirror - Diminished - Diminished 7th Chord 3 Semitones -
Diminished Chord Dominant Bebop - Dominant Pentatonic - Dorian Aeolian - Dorian Kafi - Dorian Pentatonic Kumoi
Japan - Dorian Tetrachord - Dorian b5 - Double Phrygian Hexatonic - Egyptian Suspended Pentatonic - Enigmatic Major
Verdi Enigmatic Ascending Enigmatic Minor - Eskimo Hexatonic 2 - Eskimo Tetratonic - Example Of Pelog - Example of
Slendro - Full Minor Genus Chromaticum - Genus Secundum - Gipsy Hexatonic Raga Kalakanti - Half Diminished
Symmetric Blues Dim - Han Kumo - Harmonic Major - Ethiopian Nat Bhairava - Harmonic Major 2 Ionian 5 -
Harmonic Minor - Harmonic Minor Inverse or Bhairav - Harmonic Minor Tetrachord - Harmonic Neapolitan Minor -
Hawaiian - Hindolita - Hirajoshi Japan - Honchoshi Plagal Form - Houseini Houzam - Hungarian Folk or Byzantine -
Hungarian Gypsy Damian Emmanuel - Hungarian Major Hungarian Minor Hungarian Minor b2 - Indian Phrygian dim
4th Ionian Major Bilaval - Ionian Pentatonic - Iwato Japan - JG Octatonic - Japanese Pentachord - Japanese Sakura
Pentatonic Soft Descend - Jazz Minor Inverse Javanese - Kiourdi - Kokin Joshi Soft Ascend Japan - Kung - Leading Whole
Tone - Locrian - Locrian Natural Maj 6 Pseudo Turkish - Locrian PentaMirror - Locrian bb7 - Lydian 2 - Lydian
Hexatonic Augmented - Lydian Diminished - Lydian Dominant Overtone Bartok - Lydian Hexatonic - Lydian Kalyan F to
E ascending naturals - Lydian Minor Stravinski - Lydian Mixolydian - Lydian Pentachord - Magen Abot - Major 7 Chord -
Major And Minor mixed - Major Bebop - Major Bebop Heptatonic - Major Blues - Major Locrian Major Lydian - Major
Pentachord - Major Pentatonic - Major Tetrachord - Major Triad eg Ab - Major Triad eg C - Major Triad eg F - Major
add 9 eg Ab add9 - Major add 9 eg Bb add9 - Major add 9 eg F add9 - Major b7 Chord eg Ab7 - Major b7 Chord eg C7 -
Major b7 Chord eg D7 - Major b7 Chord eg F7 - Maqam Hijaz - Maqam Shaddaraban - Marva or Marvi - Messiaen
Mode 3 - Messiaen Mode 3 Inverse - Messiaen Mode 4 Messiaen Mode 4 Inverse - Messiaen Mode 5 - Messiaen Mode 5
Inverse - Messiaen Mode 6 - Messiaen Mode 6 Inverse - Messiaen Mode 7 - Messiaen Mode 7 Inverse - Messiaen
Truncated Mode 2 - Messiaen Truncated Mode 3 Half Augmented - Messiaen Truncated Mode 5 Messiaen Truncated
Mode 5 Inverse - Messiaen Truncated Mode 6 - Minor 6th Added - Minor 7th Messiaen Truncated - Minor 7th eg Am7
C6 - Minor 7th eg Dm7 F6 - Minor Bebop Minor Bebop Heptatonic - Minor Locrian - Minor Melodic - Minor
Pentachord - Minor Pentatonic with Leading Tones - Minor Triad eg Am - Minor Triad eg Cm - Minor Triad eg Fm -
Mixolydian Augmented - Mixolydian Hexatonic - Mixolydian Khamaj G to F ascend - Mixolydian Pentatonic - Mixolydian
b5 - Moorish Phrygian - Name Of Scale Neapolitan Major - Neapolitan Minor - Neapolitan Minor Mode - Neveseri -
Blues Phrygian - Enigmatic Minor - Marva - Minor Bebop - Phrygian Locrian - Prokofiev - Prometheus - Raga
Madhuri - Rock - Two - Nohkan - Oriental - Oriental - Oriental 2 - Oriental Pentacluster - Phrygian Aeolian - Phrygian
Bhairavi - Phrygian Dominant Dorico Flamenco Avaha Raba Spanish Folk Jewish Major - Phrygian Hexatonic - Phrygian
Locrian - Phrygian Major Flamenco Spanish Phrygian - Phrygian Tetrachord - Prokofiev - Prometheus - Prometheus
Neapolitan - Pyramid Hexatonic - Raga Abhogi - Raga Bagesri - Raga Chandrakauns Kafi - Raga Desh - Raga
Gandharavam - Raga Harikauns - Raga Jayakauns - Raga Jyoti - Raga Khamaji Durga - Raga Latika Raga Madhuri -
Raga Malkauns - Raga Megh - Raga Mian Ki Malhar - Raga Nata - Raga Paraju - Raga Rukmangi Pelog 2 - Raga Shri
Kalyan - Raga Tilang - Raga Trimurti - Raga Vaijayanti - Raga Valaji - Raga Vasanta - Raga Vasantabhairavi - Raga
Vijayanagari - Raga Vijayasri - Raga Vijayavasanta - Raga Viyogavarali - Raga Vutari - Raga Yamuna Kalyani - Raga
Zilaf - Ritsu - Ritusen Japan Scottish Pentatonic - Rock n Roll - Romanian Bacovia - Romanian Gnossiennes - Romanian
Major Purvi - Sabach - Scottish Hexatonic - Scriabin Shostakovich - Spanish 8 Tones - Spanish Heptatonic - Spanish
Pentacluster - Superlocrian Diminished Whole Tone - Symmetrical Nonatonic Takemitsu Tree Line Mode - Takemitsu
Tree Line Mode 2 - Todi - Ultra Locrian - Utility Minor - Verdi Enigmatic - Verdi Enigmatic Descending - Warao - Whole
24 TET Scales
Maqam AtharKurd - Maqam Bastanikar - Maqam Bayati - Maqam Farahfaza - Maqam Hijaz - Maqam Hijaz2 - Maqam
HijazKar - Maqam HijazKarKurd - Maqam HijazKarKurd - Maqam Husseini - Maqam Huzam - Maqam Iraq -
Maqam Jiharkah - Maqam Karjighar - Maqam Kurd - Maqam Mahur - Maqam Mustaar - Maqam Nahawand - Maqam
Nahawand2 - Maqam Nairuz - Maqam NawaAthar - Maqam Nikriz - Maqam RahatElArwah - Maqam Rast - Maqam
Rast2 - Maqam Saba - Maqam Saba2 - Maqam SabaZamZam - Maqam ShaddAraban - Maqam Shehnaz - Maqam
Sikah - Maqam Sikah2 - Maqam SikahBaladi - Maqam SikahBaladi2 - Maqam Sunbulah - Maqam Suzidil - Maqam
Suznak - Maqam UshaqMasri - Maqam Yekah Maqam Yekah2 - Maqam Zanjaran
36
35
Monday, December 15, 2014

Appendix
A.1 Install 9V Battery
A.2 Mic Stand Hex Nut
1. Remove the screws on the bottom sides
2. Remove the bottom cover using the backpanel notch
3. Place the battery in the battery clip until it sits securely
4. Put the bottom back with the battery on the side with no wires
Follow the five steps below to remove and/or install a 9V battery. A phillips
screwdriver is needed to remove the screws.
1. Remove the screws on the bottom sides
2. Remove the bottom cover using the backpanel notch
3. Place the hex nut in the etched well and seat it until it is secure
4. Put the threaded part of the mic stand through the hole in the bottom cover
and make sure it secures tightly to the hex nut
The m!lTone can be secured on any standard mic stand using the hex nut provided.
The inside of the bottom cover has been etched to seat the hex nut in its place.
Follow the steps below to remove and/or install the hex nut. A phillips screwdriver is
needed to remove the screws.
5. Put the bottom back with the battery on the side with no wires
5. Put in the screws and tighten until snug
6. Put in the screws and tighten until snug
Monday, December 15, 2014
 Loading...