

Page 1
Instructions for the
PLATFORM BED - FULL
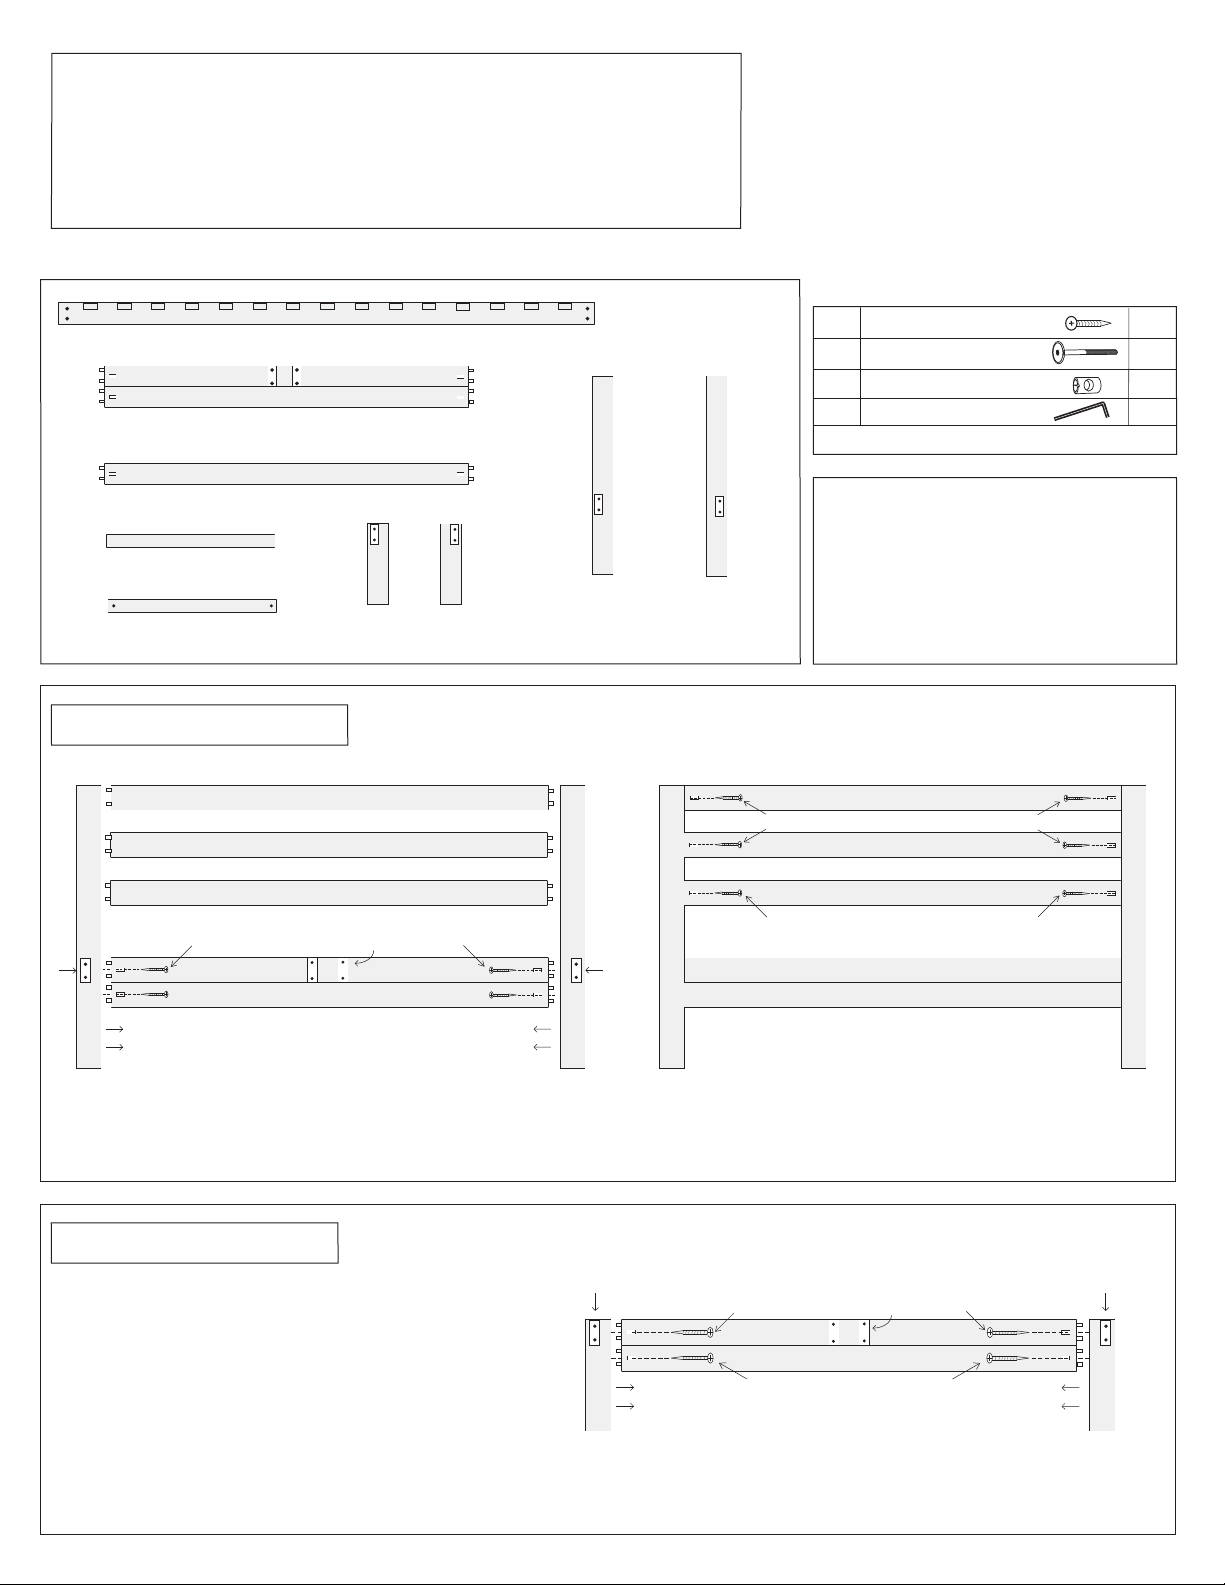
PARTS LIST
A-75-P bed rails (4) - 75”
A-48-F bed end (2) - 48”
HARDWARE LIST
H-20
1-1/2” WOOD SCREW
H-21
2 - 1/2” BOLT
CROSS DOWEL
H-3
H-10
HEX WRENCH
#2 PHILLIPS HEAD SCREW DRIVER REQUIRED
14
24
24
1
A-48-H headboard connectors (3) - 48”
A-24 regular slats (26) - 24”
A-24-C connector slats (4) - 24”
STEP 1: Assemble the headboard
A-48-H
A-48-H
A-40-HL
A-20 A-20
pocket
Insert dowels on ends of A-48-F and A-48-H into corresponding
holes in headboard legs A-40-HL and A-40-HR as pictured. Be
sure pockets on legs and A-48-F bed end are on the same side.
NOTE: Pockets on the (3) A-48-H headboard connectors should
face the other side. Use screwdriver to secure with A-20 wood screws.
A-48-H
A-48-F
A-15-L
left leg (1)
pockets
A-15-R
right leg (1)
A-40-HL
headboard
left leg (1)
A-40-HR
pocket
Tulip Poplar is a beautiful hardwood species that can have some
slight coloration in parts of the tree. We make every attaempt to
preserve the prettiest wood for the parts of our frames that show.
However, in an attempt not to waste perfectly good and sound
poplar, some pieces of the frame will reflect this coloration. We
A-40-HR
headboard
right leg (1)
A-20 A-20
use these pieces in parts of the frame that ultimately will be
hidden, such as bed slats. Any green tint in the wood will change
brown after several weeks or after exposure to direct sunlight for
about 30 minutes.
A-48-H
A-20 A-20
A-48-H
A-48-H
FLIP HEADBOARD AROUND TO OTHER SIDE and use
screwdriver to secure the (3) A-48-H headboard connectors
with (6) A-20 wood screws as pictured.
STEP 2: Assemble the footboard
Insert dowels on ends of A-48-F into corresponding holes in
legs A-15-L and A-15-R as pictured. Be sure pockets on legs
and A-48-F are on the same side. Use screwdriver to secure
with A-20 wood screws.
pocket pocket
A-20
A-20 A-20
pockets
A-48-F
A-20
A-15-L A-15-R
Page 2
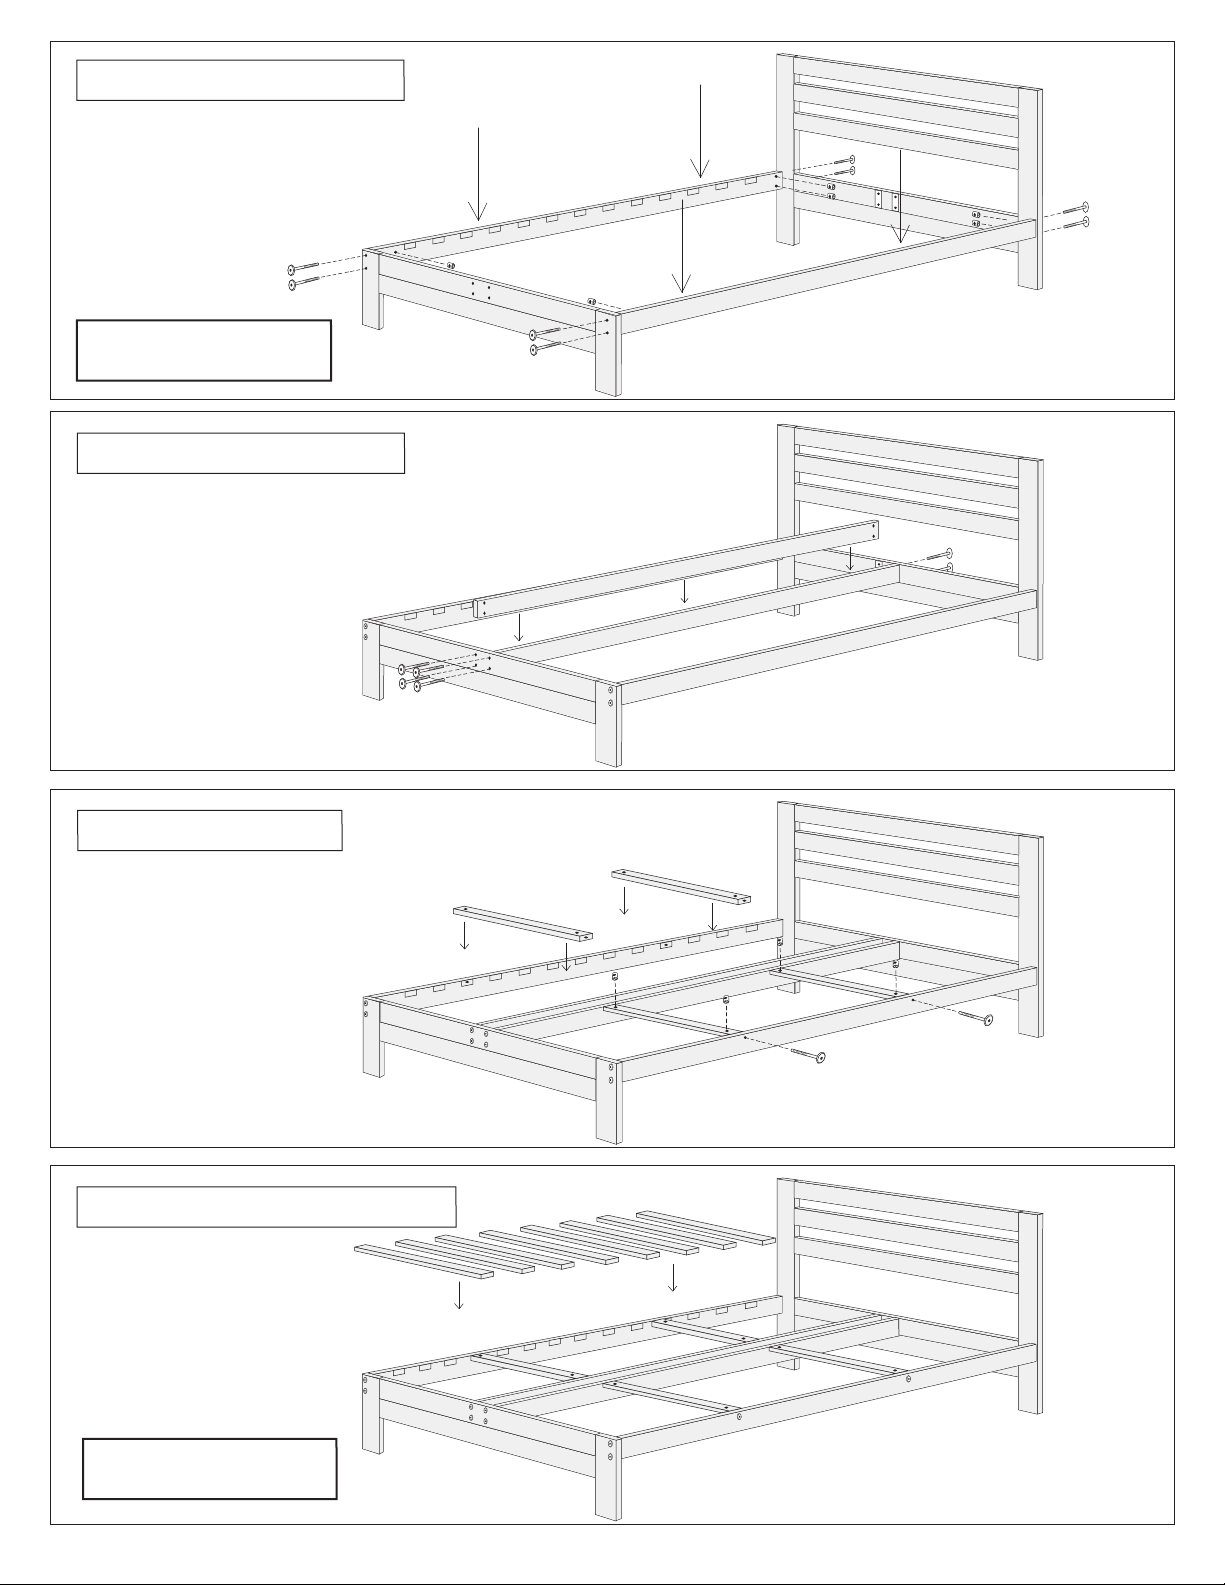
STEP 3: Insert and attach outside rails
Attach the (2) A-75-P outside rails using
the H-21 bolts and H-3 cross dowels as
pictured. Be sure the pockets on the
rails face toward the inside of the bed.
Tighten with H-10 hex wrench provided.
A-75-P
H-3
H-21
H-3
H-21
H-21
IMPORTANT: Select the 2 best
looking rails for the outside
STEP 4: Insert and attach center rails
Install the remaining (2) A-75-P rails using
the H-21 bolts and H-3 cross dowels as
pictured. Be sure the pockets on the
rails face toward the pockets of the
outside rails. Tighten with H-10
hex wrench provided.
STEP 5: Install connector slats
H-21
H-3
H-21
H-3
A-75-P
A-75-P
H-21
A-75-P
Install the (4) A-24-C connector slats in
the pockets with holes in them. Attach
using the H-21 bolts and H-3 cross
dowels as pictured. Hand tighten,
do not use H-10 hex wrench
at this time.
STEP 5: Install regular slats and tighten bolts
Install all of the A-24 regular slats and
tighten the (8) H-21 connector slat bolts
with H-10 hex wrench provided.
IMPORTANT: Please retighten
all H-21 bolts after 30 days!
H-21
H-21
 Loading...