

Page 1

Caution : You must read this before you proceed
Console Table
Label Picture Description QTY
A Table Top 1
B Leg 4
Page 1 OF
8
Page 2

Label Picture Description QTY
1
2
3
Bolt(M6*15MM) 17
Allen Wrench 1
Restraint Device Hardware
4
5
12MM Bracket Screw 2
Washer 17
Bracket 4
6
7
8
Before
Beginning
Assembly
:
30MM Plastic Anchor 2
30MM Screw 2
Restraint Strap 2
Page 2 OF
8
Page 3
Parts Introduction
Table Top(A)
Leg (B)
FRONT FACING
This Console Table has multiple parts and may require up to some
30 minutes to assemble. To give you an overview of the Console
Table parts, the above picture is to help you put the various parts
into perspective. Please read through the instructions herebelow to
familiarise the parts and steps before assembly.
Page 3 OF
8
Page 4

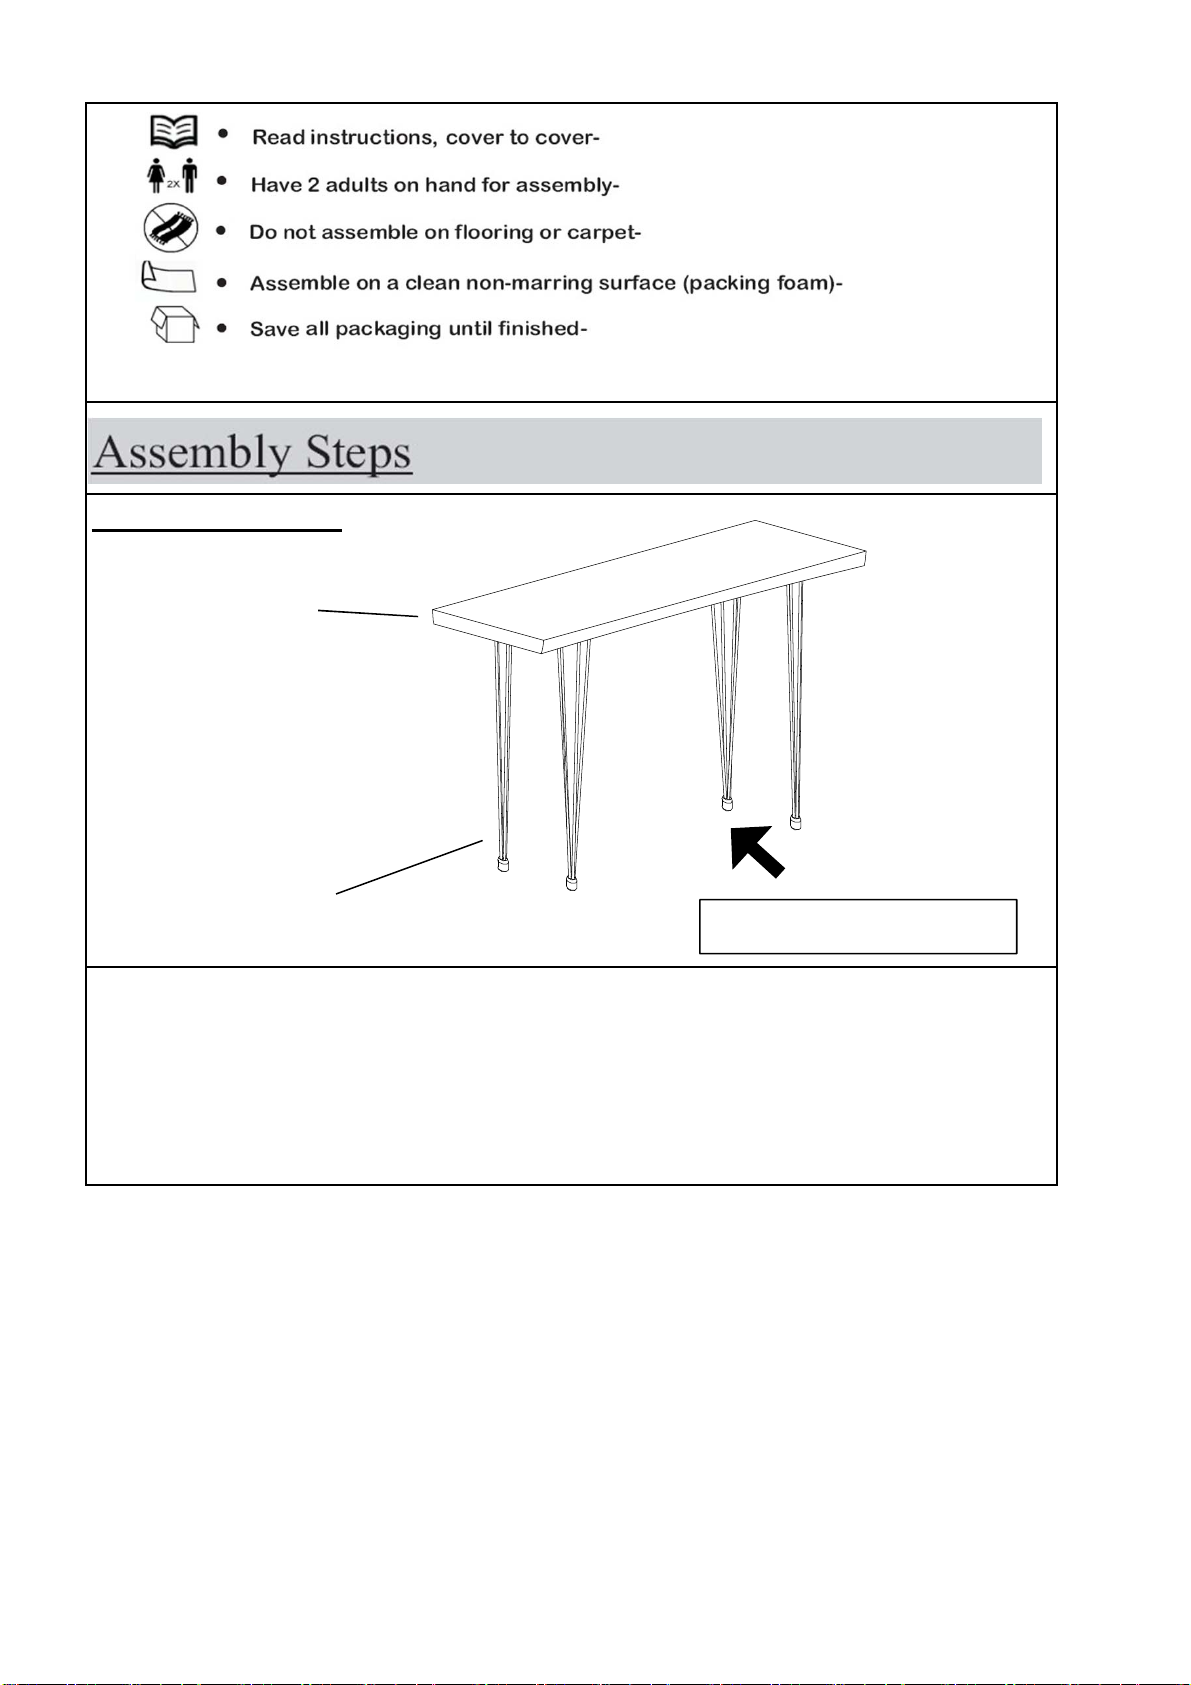
Step 1
Place the Table Top(A) facedown onto a clean, non-marring
surface.
Align the mounting positions on the Table Top(A) and the Leg(B).
Attach Leg(B) to Table Top(A) using Washer(1) and Bolts(2) , with
Allen Wrench(3) as shown.
Loosely tighten the Bolts.
Step 2
Repeat step 1, attaching the remaining 3 legs to the Table Top(A).
In a sequential manner, drive in and fully tighten all Bolts at all
joints.
Page 4 OF
8
Page 5

Step 3
Fix one Bracket(4) on Table Top(A) by the Bracket Screw(5) as
Shown.
Repeat this step to fix another Bracket on product.
Step 4
Turn the Table right side up close to wall.
Hammer Plastic Anchor(6) into wall,then attach Bracket (4) to
Plastic Anchor(6) with Screw (7).
Repeat this step to fix another bracket on wall, as shown.
Page 5 OF
8
Page 6

Step 5
Pull the Restraint Strap(8) through two Brackets(4) one by one, lock
tight the Restraint Strap(8), as shown.
Step 6
In a sequential manner,drive in and fully tighten all Bolts at all joints. Thereafter,turn the
Table right side up. Your Table is now ready to for use.
Adjust Pre-installed Levellers at the base of the Legs until the Table is level to the
ground.
Page 6 OF
8
Page 7

Step
7
Your Table is ready for use.
This Table can only be used on a flat,level surface.
Page 7 OF
8
Page 8

Questions & Answers about Proposition 65
• What is Proposition 65? Proposition 65 requires businesses to provide warnings to
Californians about significant exposures to chemicals that cause cancer, birth defects or
other reproductive harm. These chemicals can be in the products that Californians
purchase, in their homes or workplaces, or that are released into the environment. By
requiring that this information be provided, Proposition 65 enables Californians to make
informed decisions about their exposures to these chemicals.
Proposition 65 also prohibits California businesses from knowingly discharging significant
amounts of listed chemicals into sources of drinking water. Proposition 65 requires
California to publish a list of chemicals known to cause cancer, birth defects or other
reproductive harm. This list, which must be updated at least once a year, has grown to
include approximately 900 chemicals since it was first published in 1987.
• What types of chemicals are on the Proposition 65 list?
The list contains a wide range of naturally occurring and synthetic chemicals that include
additives or ingredients in pesticides, common household products, food, drugs, dyes, or
solvents. Listed chemicals may also be used in manufacturing and construction, or they
may be byproducts of chemical processes, such as motor vehicle exhaust.
• What does a warning mean?
If a warning is placed on a product label or posted or distributed at a workplace, a
business, or in rental housing, the business issuing the warning is aware or believes that
it is exposing individuals to one or more listed chemicals. By law, a warning must be
given for listed chemicals unless the exposure is low enough to pose no significant risk of
cancer or is significantly below levels observed to cause birth defects or other
reproductive harm.
• Where can I get more information on Proposition 65? If you have specific questions on
the administration or implementation of Proposition 65, you can contact OEHHA's
Proposition 65 program at P65.Questions@oehha.ca.gov, or by phone at (916)
445-6900.
Page 8 OF
8
 Loading...