Miller Electric HJ134589 User Manual

Specifications and Main Features

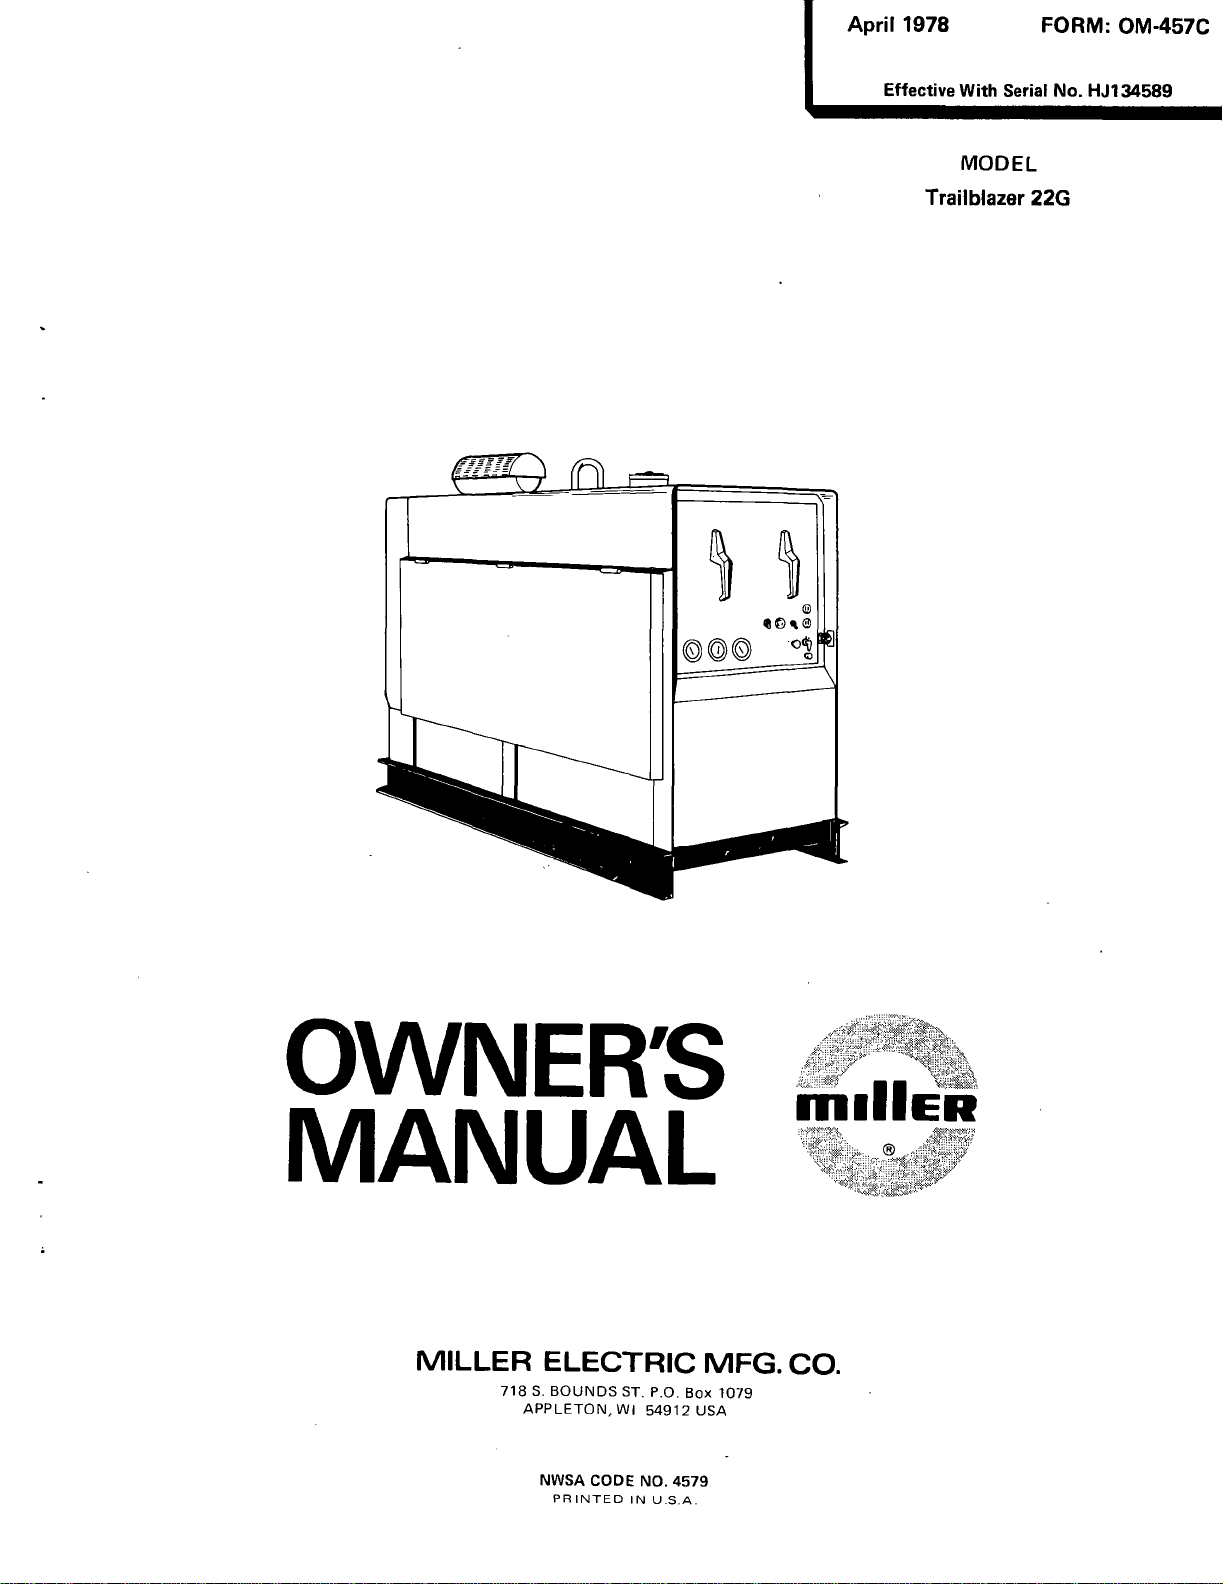
  • Mode Type: Trailblazer 22G
  • Input Measured Amperes Welding Engaged: 45-475 Amps
  • Volt Rating: 40 V open circuit
  • Frequency: 50/60 Hz
  • Duty Cycle: 100%
  • Dimensions: Net Measure 1520 Pounds, Shipping Measure 1560 Pounds
  • RPMED: 1800 RPM for welding purposes.
  • Tank Fuel Capacity: 17.5 gallons
  • Cooling mechanism: Provided with a 180-degree Fahrenheit thermostat
  • Cooling Mechanism Measure: 9 Quarts
  • Electrical systems: 120/240 V AC power terminals are provided.
  • Auxiliary Power Output: 7.5 kVA at 120/240 Volts

Frequently Asked Questions

Q: Why does the manufacturer recommend for this model to not go beyond 475 Amps welding?

A: The manufacturer recommends for this model to never go beyond 475 Amps welding as this is the highest welding amperage this specific model can take.

Q: Considering that this unit is powered by auxiliary power plant, is it advisable to earth ground it?

A: Yes, it is advisable to earth ground it as this unit is powered by an auxiliary power plant.

Q: Fuel tank capacity Please.

A: Fuel tank capacity is 17.5 gallons

Q: At what rpm is the engine rotating when Weld is off?

A: Weld RPM-Off at 1800RPM as stated in the specification guidelines.

Q: This unit Sdger states is working with a maximum of 180 F is it paired with a cooling mechanism?

A : Yes it has a cooling mechanism paired.

Q: Is it possible for the output voltage to change during an active operation?

A: Absolutely, the output voltage is expected to change depending on what kind of load is being used on the output receptacles.

Q: Which type of fuel is used by this engine?

A: It is important to note that this engine specifically needs gasoline that is 85 octane or higher to function.

Q: Is there any procedure I can follow to resolve fluctuations in the oil pressure gauge?

A: The most effective way to tackle this issue would be to stop the engine without attempting to work on it further until the problem is permanently fixed.

User Manual

Page 1
April
1978
FORM:
OM-457C
Effective
Trailblazer
With
MODEL
Serial
22G
No.
HJ134589
OWN
ERS
MILLER
718S.BOUNDS
APPLETON,
NWSA
ELECTRIC
ST.
WI
CODE
PRINTED
IN
54912
NO.
P.O.
U.S.A.
4579
Box
USA
MFG.
1079
ITIIIIER
CO.
Page 2
LIMITED
WARRANTY
$
LIMITED
Wisconsin
ton,
Equipment
workmanship
are
by
to
by
sold
engines,
delivery
respect
factured
items
manufacturers,
is
engines
for
MILLER
useful
normal
welder
tips,
that
In
and
defect
the
with
come
case
respect
therefor
parts nozzles
from
duty
remedies
replacement
appropriate replacement
payment
of
depreciation
Customers
at
Appleton.
defect
warranty
original
the
following
the
or
claim
As
matter
a
users
event
original
Wisconsin.
failure,
of
periods
user:
WARRANTYMiller
warrants
furnished
and
material
Miller.
No
trade
Such
others.
subject
if
any.
a
period
warranty
life
of
and
relay
in
contact
nozzle
insulators
in
workmanship
Millers
of
the
to
shall
where
or,
(3)
cases,
authorized
at
an
credit
or
based
upon
risk
and
Miller
procedures
of
general
warranty
failure
from
This
clusive
Customer
to
by
warranty
accessories
engines,
the
to
The
of
one
does
not
less
than
contactor
breach
quality
at
be,
authorized
the
the
for
actual
expense.
Upon
shall
to
policy
claims
resulting
date
the
warranty
with
Electric
is
Miller
of
as
is
trade
warranties
manufacturers
year.
apply
one
with
the
where
materiat.
or
of
of
Millers
reasonable
Miller
purchase
use)
upon
All
receipt
instruct
be
followed.
only,
warranted
on
from
of
delivery
EFFECTIVE:
supersedes
other
no
that
all
free
the
time
made
other
or
accessories
of
to
components
(1)
year,
points,
welding
failure
warranty
goods,
any
option,
in
writing
cost
service
price
return
transactions
of
notice
the
Miller
defect within
a
guarantees
Co..
Mfg.
new
and
from
defect
and
place
Miller
by
items
and
their
respective
warranty
such
MILLERMATIC
wire
including
does
not
or
any
the
exclusive
(1)
repair
Miller
by
of
repair
station
reasoi~able
(less
of
the
are
of
apparent
claimant
honor
may
Equipment
of
Equipment
all
Apple-
unused
with
manu-
other
having
as
spot
result
other
or
or
goods
FOB.
the
on
FEBRUARY
previous
or
in
of
on
(2)
in
or
(4)
an
in
the
to
MILLER
warranties
1.
Arc
2.
Original
All
3.
4.
All
provided
(30)
days
5.
Replacement
ANY
HEREIN
OR
REPRESENTATION
REMEDY
ANY BUT
IMPLICATION,
TRADE
IMPLIED
FITNESS
ANY
TO
MILLER
EXCEPT
WRITING,
ULTIMATE USERS
EXPERIENCED
AND
OF
WELDING
OR
CONSUMER
EXTEND EXTEND
CONSUMER.
1978
20,
warranties
expressed
welders,
welding
other
that
of
the
EXPRESS
AND ANY
FOR
OR
WARRANTY
FOR
AND
IS
EXCLUDED
MILLER
AND
TO,
main
guns
Millermatic
the
user
date
FOR
THIS
OPERATION
COURSE
PARTICULAR
AS
EXPRESSLY
PURCHASE
FOR
EQUIPMENT
USE.
AND
MILLERS
and
or
power
power
(Labor
and
notifies
so
such
of
or
repair
WARRANTY
IMPLIED
BREACH
PROVISION,
OF
OF
ALL
PRODUCTS
OPERATION
IN
MILLER
NO
is
ex
implied.
and
only)
year
Miller
in
exclusive
WARRANTY,
TO
PERFORMANCE,
OF
MIGHT
OF
PURPOSE,
DISCLAIMED
PROVIDED
ARE
BY
AND
USE
NOT,
WARRANTIES
IS
components.
CONTRACT
LAW,
PERSONS
sources,
rectifiers
1
feeder/guns
Feeders
failure.
parts
AS
DEALING,
MERCHANTABILITY
EQUIPMENT
AND
COMMERCIAL/INDUSTRIAL
BY
THE
AND
RESELLER
WARRANTIES
writing
of
NOT
CUSTOM
INCLUDING
WITH
FURNISHED
BY
INTENDED
MAINTENANCE
FOR
CONSUMERS
AUTHORIZED
.
within
labor
PROVIDED
GUARANTY
ARISE
RESPECT
MILLER.
BY
MILLER
TRAINED
DO
TO,
1
year
3
years
90
days
1
year
thirty
60
days
AND
WHICH,
ANY
OR
FOR
NOT
ANY
a
BY
OF
OF
BY
IN
TO
Page 3
After
this
manual.
this
AMENDMENT
manual
was
TO
printed,
SECTION
refinements
INSTALLATION
3
ERRATA
in
equipment
design
SHEET
occurred.
This
sheet
ex.cenXioi~s.tadata
lists
aooearina
later
in
Amend
Normally
plant
quire
For
Code.
needed,
Section
engine-driven
capability;
machine
detailed
If
additional
consult
quirements
Amend
Figure
3-3.
therefore,
grounding.
grounding
information
a
qualified
to
apply
3-3.
Power
EQUIPMENT
welding
grounding
For
instructions
particular
your
Plant
GROUNDING
generators
of
these
reasons
consult
regarding
electrician
situation,
Connections
the
or
your
your
TERMINAL
do
not
frame
a
your,
require
and
convenient
local
particular
dealer.
follow
case
or
state
operating
After
them
grounding.
recommended.
is
grounding
terminal
codes
circumstances
determining
explicitly.
However,
the
and
the
this
Also,
is
provided
latest
and/or
extent
machine
unusual
circumstances
all
on
issueofthe
grounding
which
to
has
auxiliary
weld/power
National
requirements
grounding
any
power
re
may
units.
Electrical
is
re
Circuit
Jumper
IShipped
AMENDMENT
Amend
Add
CAUTION:
_______
connected
Sections
the
chboard,
and
grounding
electric cedures. clantoavoid
-
AMENDMENT
Delete
AMENDMENT
Amend
utility,
Section
Section
Groundingl
Lead
Ungrounded)
TO
SECTION
5-1
and
following
accessory
panelboard,
CAUTION
The
auxiliary
equipment
or
procedure
and
local
Since
hazardous
or
injury
SECTION
TO
6-7.
ELECTRICAL
SECTION
TO
POWER
7-2.
5-9
power
other
is
state
voltages
damage
FUNCTION
5-
blockatthe
capability
(lights,
equipment
employed
codes,
are
caused
6-
FUNCTION
TACHOMETER
SEQUENCE
7-
PLANT
Figure
beginning
of
drills,
normally
Section
(see
the
and
present,
improper
by
OPERATION
3-3.
Power
OF
GENERATOR
of
this
welding
grinders,
supplied
3-3
issueofthe
latest
is
recommended
it
or
OF
ENGINE
(OPTIONAL)
OF
OPERATION
Plant
the
section
generator
etc.).
by
for
unit
faulty
Connections
CONTROLS
is
Do
other
primarily
connect
not
electrical
grounding
National
that the
installation.
CONTROLS
/
intended
this
power
unless
information).
Electrical
Code
installation
unit
be
for
to
a
ALWAYS
for
made
use
any
proper
proper
by
with
portable
service
transfer
consult
installation
licensed
a
TC-000
box,
switch
the
electri
OM-457C
680-B
cord-
swit
local
pro
Page
A
Page 4
Add
CAUTION
CAUTION.:
we/ding
cables
block
The
when
at
weld
not
beginning
output
we/ding
terminals
and
of
Section
are
do
not
/
electrically
touch
the
energized
output
when
terminals
when
the
engine
the
is
running.
engineisrunning.
Disconnect
-
the~
AMENDMENT
Amend
Weld
speed
Amend
Carburetor
I~1t~
be
must
This
engine
To
ensure
machined
minus
or
plus
a
Delete
Amend
Amend
To
long
obtain
nose
Figure
Section
of
Section
Change
Do
not
centered
is
correct
surface
pliers
Section
Figure
proper
TO
SECTION
GOVERNOR
9-3.
this
engine
9-4.
CARBURETOR
Effective
bend,
between
equipped
fuel
of
throttle
.020
inch.
and
9-2.
Carburetor
IDLE
9-9.
9-7.
IDLE
engine
9-
SERVICE
is
1850
rpm.
With
Serial
or
twist,
with
level
To
bend
apply
and
at
right
a
Teledyne
in
the
(no
body
increaseordecrease
float
the
Float
CONTROL/GOVERNOR
CONTROL/GOVERNOR
idle
and/or
ENGINE
FLOAT
No.
pressure
angles
Walbro
float
chamber,
gasket)
lever
Setting
weld
speed,
MAINTENANCE
SETTING
HJ185451
on
to
carburetor.
with
distance
at
a
point
perform~
the
float
the
machined
check throttle
closetothe
LINKAGE
LINKAGE
body.
distance
body
from
ADJUSTMENT
the
The
surface,
(dimension
inverted.
top
float
of
the
ADJUSTMENT
following
float
body,
and
must
A,
This
dimension
the
float
body
body.
(Figure
procedures:
when
move
Figure
to
9-7)
viewed
freely
9-1)
should
the
machined
on
from
from
be
the
top
1-1/16
free
the
float
axle.
of
float
inches
surface,
end,
to
use
0M-457C
Page
TCO8O
511
9-7.
Idle
Figure
B
Control/Governor
Linkage
Adjustment
Page 5
1.
Loosen Rotate
rotation rotationofthe
be &
IMPORTANT
______________
due
the
the
to
sockets
(6&8).
CAUTION
engine.
2.
Recheck
engine
pushed
the
thelinkage
of
necessary
lock
to
8)
linkage
(5
and
fully
linkage
the
linkage
linkage
to
adjust
the
position
Check
socket
&
9)
slightly
Ensure
all
that
-------
adjustments
it
allow
in
at
nuts
socket
the
nuts
body
reach
to
this
&
(6
(9)
socket
socket
the
linkage
of
linkage
&
(5
until
unrestricted
limbs
--------~
made
normal
time.
8)
until
(9)
(9)
the
9)
and
remove
the
will
will
lengthen
itself
linkage
for
(7J
being
clear
are
----
far.
thus
operating
throttle
shorten
obtain
to
sockets
freedom
out
movement
of
-
Place
hardware
the
stop
the
governor
the
governor
the
(5&9).
of
movement
of
proper
fan
the
the
temperature
(10)
(2)
plate
inch
1/32
alignment,
of
the
linkage
and
the
-
CONTROL
IDLE
(about
securing
about
is
linkage
linkage
(7)
(7)
required.)
gap
throughout
loosen
is
(7)
-:~-~
switch
five
motor
minutes).
vacuum
the
linkage
inch
1/32
reduce
and
widen
and
its
entire
the
linkage
restored.
unit
in
from
the
the
Tighten
travel.Ifthe
socket
Tighten
before
-
the
LOCK
Ensure
socket
the
stop
gap;
(In
gap.
the
linkage
nuts
the
starting
OUT
that
the
the
to
(9)
counterclockwise
a
some
(1).
governor.
clockwise
A
cases
socket
is
linkage
&
(6
linkage
or
working
position.
CHOKE
-
and
8)
socket
binding
Start
control
it
nuts
rotate
nuts
on
may
the
the
(6
~.
is
3.
Pull butt
A.
B.
IMPORTANT
BEFORE
AUTOMA
pivoting
Place
4.
when
will
the
delay
after
vacuum
5.
When
I~EIi11~
the
arm
(3)
against
Rotate
whereas
Rotate
rotate
restricts
more
the
TIC
the
the
the
remain
arc
is
about
Do
the
the
counterclockwise
the
the
the
fuel,
Ensure
throttle
IDLE
vacuum
IDLE
IDLE
idle
at
is
broken,
controlledbythe
ten
line
fitting
the
engine
not
readjust
idle
screw
mixture
the
screw
(20)
flow,
the
that
plate
toward
idle
idle
screw
fuel
making
stop
position.
motor
arm
CONTROL CONTROL
until
an
time
a
seconds,
going
has
gone
the
front
of
(4)
throughout
obtain
to
(4)
rotationofthe
adjustment
clockwise
making
air-fuel
the
vacuum
butts
(2)
obtain
To
until
(17)
switchinthe
switch
is
arc
established,
will
delay setting
adjust
into
idle
of
the
the
idle
to
rpm
the
welding
550
screw
until
the
air-fuel
mixture
motor
against
this
condition
screw
AUTOMATIC
isinthe
exist
before
the
time-delay
AUTOMATIC
time-delay
intake
manifoldofthe
adjust
rpm,
(4)
screw
generator
the
following
rpm.
screw
(20)
the
engine
mixture
richer.
idle
screw
the
idle
(16)
which
at
the
screw
screw
when
the
to
adjustments:
Clockwise
(4)
counterclockwise
screw
it
may
butts
time
engine
screw
(A)
rotation
will
decrease
operates
leaner.
butts
(16)
(4)
be
necessary
against
IDLE
position.
IDLE
the
begins
A
for
the
Rotating
priortop/acing
position. engine
in
engine.~
until
(16)
adjusting
the
idle
position.
of
until
smoothly.
against
the
mounting
Operation
immediately
to
return
Figure
desired
1200
rpm
vacuum
the
engine
the
the
screw
the
to
adjust
When
If
9-7.
time
is
motor
Maintain
screw
(4)
rpm.
engine
Rotating
(20)
vacuum
the
IDLE
screw
plate.
of
the
the
engine
comes
idle
to
rpm.
the
engine
This
delay.
obtained.
idle
pressure
will
begins
the
on
increase
falter
to
screw
counterclockwise
unit
motor
mounting
CONTROL
Check
(16).
deviceisautomatic
idling
is
running,
weld
to
up
The
length
does
not
is
screw
-
rpm.
the
arm
engine
or
clockwise
(20)
switch
by
engine
rpm.
of
to
go
located
to
(3)
rpm,
then
roll;
admits
plate
in
the
manually
rpm
When
this
time
idle
rpm
the
on
IMPORTANT
______________
due
to
then
be
Is~..tU.I
6.
Place
ing
the
Check
7.
ment
A.
B.
C.
the
linkage
necessary
~
~
I
nut
Ensure
the
(11).
securing
the
is
deemed
IF
REGULATION
sitivity
IF
REGULATION
sitivity
IF
ENGINE
sitivity
Check
socket
to
readjust
that
CONTROL
IDLE
Adjust
nut
(11)
governor
necessary,
adjustment
adjustment
SURGES
adjustment
the
(18)
body
linkage
being
the
limbs
(19)
outof
vacuum
switch
the.governor
maintain
to
RANGE
screw
RANGE
screw
(HUNTS)
screw
regulation
loosen
IS
(14)
IS
(14)
(14)
engine
for
proper
clear
are
the
in
speed
the
one
TOO
inward.
TOO
outward.
UNDER
outward.
freedom
alignment
idle
motor
of
the
LOCK
adjustment
governor
by
applying
of
the
two
BROAD
NARROW
LOAD
-~
of
screw
fan
OUT
speed
-
Decrease
-
movement
and
with
(16)
and
the
position.
screw
setting.
removing
locking
Increase
Increase
throughout
the
fixed
and
vacuum
Loosen
until
(12)
the
nuts
(13)
the
governor
the
governor
the
governor
end,
repeat
the
a
engine
and
its
adjust
Steps
motor
governor
high
proceed
spring
spring
spring
entire
unit
idle
load.
4
rpm
with
(15)
travel.
the
and
before
speed
of
If
a
(15)
(15)
-
If
tength
5.
working
adjusting
1850
governor
the
following
tension
tension
tension
the
linkageisbinding
of
the
linkage.
the
on
screw
is
obtained.
sensitivity
instructions:
by
sliding
by
sliding
by
the
the
the
sliding
It
will-
engine.
secur
Tighten
adjust
sen
sen
sen
Page 6
8.
Tighten
by
repeating
the
two
Step
locking
7.
nuts
(13)
to
maintain
the
desired
governor
sensitivity.
Readjust
the
governor
sensitivity
)
Whenever
Amend
The
ft.).
ment
Loosen
main
screw
Rotating
Whenever
1~
the
Section
Teledyne
Minor
adjustment
is
deemed
the
main
adjustment
counterclockwise
(21)
the
screw
counterclockwise
nut
(22).
IMPORTANT
Delete
Figure
AMENDMENT
Amend
Figure
the
governor
9-10.
HIGH
Walbro
carburetor
will
necessary,
adjustment
screw
(21)
admits
Restricting
9-8.
High-Altitude
TO
SECTION
Circuit
10-1.
governor
(Step
speed
ALTITUDE
be
necessary
see
screw
clockwise
(21)
until
clockwise
more
fuel,
the
Diagram
sensitivity
is
61
CARBURETOR
be
can
equipped
for
Figure
9-7
locking
until
the
engine
restricts
making
fuel
flowtothe
Carburetor
-
10
TROUBLESHOOTING
7)
(Step
adjusted,
with
proper
and
nut
the
operation
proceed
(22).
Apply
engine
operates
the
fuel
the
flow,
air-fuel
point
Adjustment
is
adjusted,
the
governor
MODIFICATION
an
adjustable
follows:
as
near-full
a
begins
smoothly;
making
mixture
where
the
governor
sensitivfty
main
at
a
particular
engine
falter
to
then
continue
air-fuel
the
richer.
the
mixture
(Step
(Optional)
for
jet
altitude.
loadtothe
lose
and
counterclockwise
mixture
Remove
is
too
EOWE3
AC
(Step
speed
MAY
71
(Figure
high-altitude
Whenever
welding
RPM.
Rotate
leaner.
the
engine
lean
,,_-_~___
load.
will-cause
5EU~A4~.
~
S~3ED
MUST
6)
need
readjustment.
9-7)
operation
carburetor
a
generator.
main
the
rotation
Rotating
Tighten
valve
GRCcu~UIC
be
readjusted.
(above
adjust
Rotate
adjustment
of
1/4
the
screw
the
locking
burning.
4000
the
turn.
(21)
*.OTE
33
72
r.._77
No.
REAR
B-081
127
24
VIEW
~
23
-~
J,~2
EOW
027
;scfi
~
CAUTION
I
-~<
I
~7
I
~OLr
acE
o~a
C
(Q~T
C%AL)
Effective
CA~.GE-3VER
UETEA
-
With
If
/
No.
Serial
Circuit
HJ211479
Diagram
For
I
I
c0)
I
NCI.~C:p~V
I
Models
~
~
E~E1r
~
SIAAA
~
AWE
A1.DWELE!R
AE
jESUS
Figure
10-1.
Circuit
Diagram
OM-457C
PageD
Page 7
)tem
No.
-
Page Page
33
53
77
80
97
100
146
6
4
5
Dia.
Mkgs.
Zi
VS1
TAC
HM
S2,5
Part
In
No.
Parts
010318
053724
017421
036259 025932
032
936
032
936
039
269
OlO
493
053
359
Listed
List
Replaced
Part
015
602 966
053
049685 036
377
024
017
Deleted
032
936
080
487
601158
079
486
010 014
891
010 030
170
011
609
No.
With
VALVE,
GUARD,
CATCH,
REACTOR
shut-off
fan
door
SUPPRESSOR,
HK311202)
METER FUSE
BLANK, COVER, CLAMP,
S/N
BLANK,
(dia.
BOX
snap
junction
HJ21
snap
steel
1479)
BUSHING,snapin3/4IDx1
SWITCH,
toggle
mkg.
(Eff
-
w/strainer
0.75
changed)
with
-
in
7/8
box
-
cushion
in1inch
SPDT
Description
-
65
uf
S/N
HJ211479)
with
(Eff
with
(Eff
dia
3/4
dia
(Eff
15
amp
fuel
volts
S/N
S/N
x
with
125
ac
HJ21
HJ21
13/64
S/N
volts
with
(Eff
1479)
1479)
hole
(Eff
HJ211479)
Quantity
1
2
2
1
S/N
1
1 1
2
1
with
1
1 1
2
BE
SURE
TO
PROVIDE
MODEL
AND
SERIAL
NUMBERS
WHEN
ORDERING
REPLACEMENT
PARTS.
OM-457C
Page
E
Page 8
p.
Page 9
6677
OF
CONTENTS
Page
No.
Section
TABLE
No.
SECTION
SECTION
SECTION
SECTION
1
SAFETY
1
-1.
Introduction
-
2.
General
1
-
1
Arc
3.
1-4.
2-1.
2-2. 2-3.
2-4.
3-1. 3-2.
-
3 3-4. 3-
4-1.
-
4
-
4
-
4
4-5.
Welding
Standards
2
INTRODUCTION
General
Receiving-Handling
Description
Safety
INSTALLATION
3
Location
Weld
Output
3.
Equipment
Remote
5.
120/240
4
ENGINE
Lubrication
2.
Coolant
3.
Preparing
Cleaner
Air
4. Fuel
RULES
Precautions
Booklet
Connections
Grounding
Amperage
Volts
AC
PREPARATION
System
New
Battery
OPERATION
FOR
Index
Terminal
Control
Terminals..
For
Connections
Service
OF
ARC
WELDING
POWER
SOURCE
1
3
4
5
5
5
5
7
8
8 8 9 9
SECTION
SECTION
SECTION
5-1.
-
5 5-3.
5-4.
5-5.
-
5
5-7.
5-8. 5-9.
6-1. 6-2. 6-3.
6-4.
6-5.
6-6.
6-7.
-
6
7-
-
7
-
7
-
7
2.
6.
8.
1.
2.
3.
4.
FUNCTION
5
Volts
120
Switch
Range
Fine
Amperage
Remote
Volt-Ampere
Cycle
Duty Polarity
Meters 240
Volts
6
FUNCTION
Choke
Push
Start
Idle
Control
Engine
Temperature
Pressure
Oil
Electrical
Hour
Total
SEQUENCE
7
Sheilded
Power
Starting
Engine
AC
Amperage
Switch
AC
Control
Button
Switch
Ammeter
Gauge
Tachometer
Meter
Metal-Arc
Plant
Operation
The
Down
Shut
OF
GENERATOR
Receptacle
Control
Control
Curves
Duplex
OF
ENGINE
And
Gauge
OF
OPERATION
(SMAW)
Engine
Receptacle
CONTROLS
Switch
Welding
CONTROLS
10
10 10
10
10
11
11 11 11
12 12 12 12 12
12
12 12
13 13
13 13
Page 10
Section
SECTION
8-1.
-
8
8-
No.
8
General
Collector
2.
3.
Welding
GENERATOR
Cables
Ring
MAINTENANCE
Brushes
Page
No.
14
14 14
SECTION
SECTION
PARTS
9
9-1.
Lubrication
9~
2.
Coolant
9-3.
Governor
9.
4.
Carburetor
9-
5.
Vacuum
9.6.Idle 9-
7.
Carburetor
9-8.Air 9-
Idle
9.
9.10.
High
9.11.
Key
9-12.
Spark
10
LIST
ENGINE
MAINTENANCE
System
Service
Float
Circuit
Control
Cleaner
Control/Governor
Type
TROUBLESHOOTING
Altitude
Ignition
Arrestor
Time
Air
Temperature
Service
Carburetor
Setting
Filter
Air
Delay
Switch
Adjustment
Selector
Linkage
Modification
Lubrication
Adjustment
14
14
15
15
15
15 15 16
17
18 18
18
Page 11
SECTION
1-SAFETY
RULES
FOR
OPERATION
OF
ARC
WELDING
POWER
SOURCE
1-1.
1-2.
A.
B.
INTRODUCTION
We
learn
experience, wasteful,
Safe
ing
opment,
and
dents
tained.
given.
technical
Read
to
these
used
for
Failure
jury
can
These
General
2
Reference
available
those
Index
The
Health
spection
stallation,
and
practices
and
cutting
and
safe
installation,
occur
The
Some
and
install,
procedures
and
the
safety
to
death.
or
used
be
safe
Precautions,
-
Arc
Welding
for
given
in
this
National
Administration,
requirements
by
volumes
understand
their
use,
GENERAL
Prevention
Burn
Wear
protective
hat,
gloves,
pocket
flaps,
and
sparks
Wear
helmet
underneath,
clear
cover
1-3A.2.
metal
flash
plugs
Z49.1
oxygen.
-,
similar
Oily
be
medical
from
with
to
Replace
ha,dled
first
first
burnsofthe
should
space.
to
Fume
ventilation.
that
cadmium
chipping)
metal.
See
Avoid
Hot
never
Medical
qualified
unless
of
Ear
confined
overhead.
Flammable
intending
Toxic
Adequate
result
depletion
them
dard with
Lead
and
experience.
like
child
a
unwise.
Let
developed
are
field
when
reason
based
are
operate,
instruction
others.
of
observe
When
with
practices
(and
standards:
additional
in
this
manual.
from
described
experience
operation,
equipmentisimproperly
for
the
on
to
explain.
these
service
or
as
applicable
these
safe
safety
confidence.
are
common
Cutting)
Published
and
manual.
ANSI
Electrical
local
also
and
service.
PRECAUTIONS
clothing
and
and
high
wear
safety-toe
cuffless
slag.
with
safety
This
the
clothing.
electrode
as
without
and
person
eves
be
worn
hard
or
cut.
is
glass
eye
are
hat
filter
a
eyes
and
appropriate
glass).
protect
cover
or
greasy
such
aid
aid
facilities
A
hair
preparations
weld
Prevention
fumes,
adequate
listed
materials,
Severe
vapors,
welding
(or
ventilationasdescribed
1
in
Standards
zinc
-.
-.
when
Learning
touching
the
safe
common
manuals,
divided
Z49.1
Code,
provide
-
gogglesorglasses
MUST
when
experience
experience
in
this
have
evolved
and
practices
is
It
safe
practices
the
to
practices
becomes
to
arc
(only).
Standards
more
are
They
is
industrial
leather
shoes.
trousers
lenses
for
from
broken,
A
spark
stubs
safety
hot
a
of
manual.
servicing
may
sense,
wiser
to
equipment.
the
particular
for
personal
may
a
habit,
into
welding
complete
listedinthe
the
most
Occupational
codes,
basis
a
(or
Button
or
plates
weldingorcutting,
radiant
pitted,
may
and
gloves.
be
for
by
skin
burns.
working
be
should
discomfort,
or
heat,
cutting)
index.
-,
welded
First
available
immediate
on
worn
be
not
illness
oxygen
may
and
(Or
treatment.
should
close
when
should
mercury
through
is
stove
others
teach
in
the
use
Research,
reliable
equipment
practices.
used
not
others
may
follow
before
attempting
Comply
equipment
safety
serious
cause
the
equipment
Sections:
two
and
cutting;
on
safety
procedures
complete.
Safety
and
for
equipment
asbestos)
shirt
avoid
to
with
side
(protected
energy
or
them.
ignite
workpieces
aid
facilities
for
each
overhead
when
others
used
by
or
enrichment
produce.
in
ANSI Stan
NEVER
beryllium
cut)
may
personal
harmful,
you.
of
weld
devel
Acci
main
or
be
always
require
the
rules.
with
and
in
1
and
also
are
than
Standards
and
in
local
in
gauntlet
collar
and
entry
shields
by
(and
and
flying
spattered.
should
and
shift
treatment
in
or
work
persons
death
can
Prevent
ventilate
-
bearing
produce
harmful exhaust
as
For
Metals
fumes
the
wears
Work
and,
Gas
in
ously.
Leaving
prevent
stream
Check
Vapors
heat gas,
-
violet
chloroethylene
gene.
drawn
radiant
minute
Fire
C.
Causesoffire
arc,
of
BE
through
through
operator.
To
of
Keep
(in
circuits.
If
work
paint
work
away
ignition
shields.
Walls welded
should
a
a
or
Fire
tinguishing ing
a.
b.
c.
d.
Hot
ensure
been
After
embers,
An
duce welded
described
concentrations
ventilation
well
the
as
beryllium,
coated
should
work
surface,
an
air-suppied
in
a
if
necessary,
in
leaks
quantities
large
Do
not
confined
possible
valves
be
to
from
of
the
arc
and
other
(radiant)
DO
NOT
into
energy
amounts
and
Explosion
flame,
compressed
AWARE
cracks,
wall
Sparks
fires
prevent
equipment
electrical
combustibles
if
practicable,
spray
cannot
of
Out
with
touching
on
be
protected
watcher
equipment
or
cutting
appreciable
tion)
are
appreciable
be
ignited
openings
feet
may
combustibles
partitions
work
permit
supervisors
taken.
work
is
and
container
empty
flammable
or
on
in
must
operator both
must
with
or
be
heated
not
the
area
respirator.
confined
a
the
space
while
confined
can
bring
gas
space,
accumulation
have
been
that
sure
chlorinated
(or
flame)
and
lung
energy
and
perchloroethylene
WELD
welding
can
penetrate
of
trichloroethylene
Prevention
and
explosion sparks,
flying
and
gases
THAT
flying
pipes,
along
floor
or
parts)
rooms,
be
reach
suitable
(or
must
if:
within35feet
openings,
and
slag
and
explosion:
clean
of
metallic
in
are
to
dip
moved,
of
and
combustibles
cut).
Walls,
by
be
combustibles
combustibles
by
sparks
(concealed
combustibles
expose
adjacent
be
can
ignited
should
approval
check
done,
flames.
that
toxic
or
unless
cut,
AWS
Standard
of
toxic
be
used,
must
wear
be
used.
containing
unless
is
well
while
only
an
wearing
should
space
change
oxygen
shut
accidently
space
solvents
to
form
eye
irritating
the
cut
or
cutting
to
are:
hot
slag
intoaconfined
OFF
of
gases
is
PI-IOSGENE,
arc
where
atmospheres
combustibles
cylinders
the
of
or
cylinders;
sparks
through
Out
35
can
fly
and
operable,
particles
do
area,
an
tanks,
sparks
heat-resistant
during
NOT
free
area
storage
combustibles
move
and
snug-fitting,
on
opposite
ceilings,
and
by
standing
(including
further
are
visible)
to
walls,
radiant
by
be
obtained
that
that
area
held
combustibles,
when
container
A6.O,
in
to
adequate
listed3in
or
-
vapors
fumes.
each
or
person
an
air-supplied
materials
ventilated,
coating
it
is
is
air-supplied
be
avoided.
concentration
supply
gas
in
the
opened
safe
before
be
can
decomposed
products.
can
also
vapors
solvent
atmosphere
or
perchloroethylene.
heated
or
and
short
circuits.
or
falling
windows
of
sight
feet.
free
of
that
weld
or
of
combustibles.
ventilators.
areas,
or
heat;
fire-resistant
sides
and
floor
covers
or
with
some
suitable
time
for
building
than
floors
or
sparks
ceilings,
conducted
or
before
precautions
is
free
of
heated,
has
first
been
Standards
Adequate
in
respirator.
that
emit
removed
the
or
ventilated
being
respirator.
Leaked
space.
at
source
space
left
or
re-entering
a
highly
The
decompose
form
to
vapors
where
or
containing
reached
material;
can
slag
or
doors,
of
the
oil,
grease,
can
cause
Move
cut.
least35feet
at
protect
covers
should
near
shields.
after
construc
35
feet
walls
within
or
roofs,
heat.
operation
sparks,
that
or
can
must
never
cleaned
local
the
area
toxic
from
operator
gas
danger
if
down
open.
the
by
toxic
ultra
tn
phos
can
the
even
the
by
misuse
pass
and
goggled
and
short
the
Avoid
the
If
against
or
be
not
work
fire
ex
weld
but
can
35
metal
to
have
glowing
pro
be
as
index.
to
it.
be
OM-457
Page
1
Page 12
Page
paragraph
Hollow
or
Explosive
contain
line).
D.
Compressed
Standard
manual,
TIONS ~N
Regulator
tor
downstream
more
Never
than
Remove
(first
a
Leaks Excessive
downstream
Faulty
when
release.
Repair.
repair
special
2.
Cylinders damage
Avoid
rails,
short
1-3C,)
ICCorDOT
assurance
Identifying
marked
tent.
name,
and
Empties:
keep
Prohibited
than
Locate
Passageways
where
Transporting
such
ground
no
Do
flame,
exceed
exists.
2
This
includes:
solvent
or
solubility)
carbon
mended substitute
A
container
to
determine
cutting.
followed
dioxide,
in
for
above).
castings
They
atmospheres.
flammable
precautions.
and
FOR
CYLINDERS,
1.
Pressure
relief
from
overpressure;
relief
devices.
connect
that
for
faulty
close
faulty
cylinder
regulator:
-
if
gas
Creep
Gauge
pressurized,
Do
manufacturers
to
techniques
Cylinders
must
their
to
electrical
electrical
circuit
of
on
Notify
number,
hazardous.
Keep
them
separate
use.
intended
its
or
secure
they
may
as
a
platform
their
by
ts.
NOT
expose
that
etc.
130F.
a
thorough
water
washing,
by
and
A6.0.
Waterfilling
inerting.
with
unknown
Do
if
it
is
safe
containers
or
can
explode.
dust,
Gas
Equipment
those
detailedinCGA
SAFE
HANDLING
listed
Regulators
valve
equipment.
a
regulator
which
the
regulator
valve).
leaks
externally,
-
if
valve
closed.
-
if
gauge
nor
NOT
attempt
and
be
handled
walls,
Circuit
wires,
that
arcs
marking
when
safety
content.
gas
do
them;
supplier
other
or
valves
from
Never
use,
cylinderssothey
and
work
struck.
be
cylinders.
or
valves
cylinders
may
Cool
steam
depending
and
purging
protective
using
NOT
to
Never
gas,
contents
depend
weld
just
must
weld
or
or
liquid
Comply
OF
in
6
Standards
is
designed
is
it
not
Provide
such
to
a
cylinder
from
service
The
pressure
pointer
returns
repair.
designated
are
carefully
welding
lead
be
the
cylinder
only
rely
was
following
does
to
used
with
circuits.
to
on
on
regulator
delivery
tools
valves,orsafety
contact
or
may
must
Use
not
if
unmarked.
markings
closed,
replace
FULLS
and
use
a
cylinder
NEVER
cause
with
areas.
With
cradle.
or
caps,
to
water
as
~a
Keep
a
crane,
Do
or
excessive
rupture.
spray
caustic
or
on
inerting
equipment
below
should
on
sense
cut.
be
vented
cut
or
vapors
with
precautions
Standard
COMPRESSED
index.
to
protect
intended
protection
containing
designed.
immediately
continues
not
stop
Send
faulty
repair
trained
by
to
devices:
cylinders
serious
a
each
is
properly
cylinders
color
to
NEVER
a
on
cylinder.
caps
return
its
or
support
cannot
cylinders
useasecure
NOT
lift
chains,
by
heat,
Do
not
where
cleaning
the
combustibles
with
working
be
of
smell
before
where
(such
P-i,
only
to
symptoms
move
after
pin
regulators
center,
personnel.
prevent
including
can
They
accident.
cylinder.
handled.
with
identify
DEFACE
securely;
promptly.
contents
roller.
or
knocked
be
clear
cylinders
slings,
sparks,
allow
such
nitrogen
as
level
cleaned
or
welding
the
air
as
in
PRECAU
GASES
the
protect
with
gas
for
indicate
rise
to
off
stop
pressure
leaks
produce
It
name
gas
or
is
It
mark
for
of
support
off
or
slag,
contents
exposure
(or
or
recom
may
(see
sight
may
gaso
this
regula
any
one
or
other
repair
with
pin
for
where
and
third
(See
is
an
of
gas
con
alter
illegal
MT;
other
over.
areas
the
mag
and
to
a
Protect
cylinders
and
valve.
valve
weather.
Do
that
objects,
cylinders.
Stuck
cylinder
Supplier.
gases.
refill
or
Never
any
fittings
use.
gas.
green
or
other
cylinder.
should
Never
for
clamps
substitute)
Mixing
Never
Cylinder
3.
Hose
Prohibited
the
specified
fuel
gas,
ferrules
Use
wire
fittings.
No
splice
Avoid
ground
wise
Coil
Protect
slag,
Examine
tions.
leaks.
Repair
(1-2D3).
4.
Clean
orifices for
from
less
Match
the
regulator
NECT
cylindercontaining
Tighten
clean
tion
fitting
Adapters.
between
wrenches
HAND
Regulator
right
grooved
5.
Drain
opening
screw
heat ization.
tubing
copper
hose.
runs
long
to
keep
damaged.
hose
excess
hose
open
hose
Immerse
or
leaky
NOT
Do
Connections
cylinder
and
damage
and
regulator
inlet
a
regulator
connections.
smooth
disassemble,
wrench.
Use
cylinder
to
threads.
outlet
threads
hex
on
from
label
and
Proper
hydrogen,
people
cl
0th.
regulator
and
leaks,
hand
Pressurizing
regulator
cylinder
in
(clockwise).
at
pressure
high
Leave
to
it
to
flame.
regularly
pressured
worn
valve
crack
to
and
CGA
a
tighten
nut
Steps:
of
adjusting
particularly
Replace
NOT
use
not
can
mix
to
try
never
hose
use
A
general
designed
splices.
prevent
from
being
prevent
and
as
Use
kinks
oxygen,
damage
for
hose
use
tape.
outlet
before
seals
valve
momentarily,
of
sources
cylinder.
and
cylinder
cylinder
designed
other
any
When
where
seats
clean,
adapter
and
regulator,
adapter
connections
hose)
(Or
for
oxygen
shank)
or
residual
(or
manifold
Draining
seat
by
screw
valves
caps
hammer
a
be
opened
any
gases
modified
be
other
hose
identification
black
for
a
binding
only
and
run
over,
kinks
and
by
sharp
leaks,
in
hose
by
cutting
of
impurities
connecting
ignition.
Before
marking
outlet
for
a
particular
gas.
assembling
necessary.
and
(available
if
marked
and
fuel
for
through
gas
valve)
prevents
allowing
engaged
from
bumps,
securely
wrench
or
hand.
by
in
a
cylinder.
or
that
than
for
inert
the
hose
to
connect
standard
abuse.
Suspend
stepped
tangles.
edges,
and
wear,
bubbles
water;
Out
area
regulator.
pointing
with
Wipe
connecting,
agree,
match.
gasorgases
threaded
Tighten.
retighten
-
from
is
one
required.
RIGHT
may
left
hand
gas.
suitable
by
turning
excessive
to
seat
open
slightly
falls,
when
moving
to
open
Notify
exchanged.
designed
is:
rule
gases.
(not
ordinary
hoses
brass
fittings
hose
or
on,
and
sparks,
by
loose
connec
indicate
and
splicing
that
may
Except
outlet
clean
a
check
that
and
NEVER
connections,
If
connec
properly
using
supplier)
your
Use
and
be
identified
threads
vent
adjusting
compression
on
pressur
on
single-stage
falling
your
for
for
red
off
other
clog
away
lint-
that
the
CON
to
two
LEFT
by
(with
before
a
to
to
a
regulators.
cylinder
slowly.
maximum)
leak.
quick
of
regulator
valve
When
leave
inert
and
For
emergency
gauge
fuel
while
slowly
is
cylinder
gases,
gas,
shutoff.
opening
that
so
pressurized
open
open
valve
.in
fully
to
cylinder
regulator
(gauge
following
seal
to
than
less
valve.
pressure
reaches
position:
stem
one
in
regu
against
turn
to
Standtoside
Open
creases
lator
For
oxygen,
possible
permit
Page 13
E.
Use
pressure
and
efficient,
Check
for
after.
Brush
equivalent
off
User
Remove
iately
ment
per
water
soapy
Responsibilities
leaky
for
repair.
manual.
charts
recommended
leaks
with
gallon
after
or
(available
first
on
soap
test;
defective
See
Use!
pressure
pressurization
solution
of
water).
dried
equipment
Responsibility
from
(capful
Bubbles
soap
your
settings
and
of
indicate
is
combustible.
from
statement
supplier)
on
regulators.
regularly
Liquid
Ivory
leak.
service
for safe
there
Clean
immed
in
equip
with
the
weld.
low-reflective,
free
for
Provide
at
directly
in
area.
operation
Allow
panels.
level.
or
Viewing
will
be
Others
looking
working
air
circulation,
face
the
weld.
See
that
non.cornbustible
particularly
for
shields
all
persons
all
are
screens
persons
wearing
or
floor
as
who
flash
goggles.
Before
doors
starting
closed.
are
weld;
make
to
sure
that
screen
flaps
or
bay
F.
G.
1~3.
A.
Leaving
Close
Rope
Rope ting
ARC
Comply
Welding,
tor
significant
fumes
ments
operator others
standards
Burn
Comply
The
damage light-colored
resemble
more
WITH
1.
Wear addition
additional
sleeves,
Equipment
supply
gas
Staging-Support
staging-support
operation;
WELDING
with
properly
invites
voltages.
rise,
are
hot,
avoids
from
referenced
Protection
with
welding
eyes,
acute
severe
PRECAUTIONS.
Protective
long-sleeve
to
flame-proof
outergarments
skin
Bare
collar
vent
2.
Protect
tric
Welding
12
before
Protect
Cracked
radiation
Cracked,
MEDIATELY.
or
Flash
helmet
not
at
high
may
3.
Enclosed
room
protection.
to
protect
of
entry
and
Eye
eyes
without
arc
helmet
denser
or
striking
filter
or
can
broken,
spattered.
goggles
to
give
be
lowered
an
arc
momentarily
intensity
leave
a
Protection
welding
enclosed
or
at
source
rope
precautions
done,
trouble.
The
ultraviolet
and
compressed
unnecessary
accidents.
precautions
is
intense
arc
penetrate
surfaces,
sunburn,
and
painful.
Clothing
clothing
gloves,
protective
of
untreated
chest
sparks.
Head
Protection
from
exposure
protection.
shield
or
must
arc.
withaclear
plate
broken
through
pass
or
Replace
with
some
over
gas-shielded
permanent
of
Nearby
area.
bay
Unattended
and
should
burn.
may
in
is
safe
a
The
equipment
is
arc
and
Precautions
in
index.
in
1-2.
and
lightweight
burn
and
those
DONT
(particularly
and
hat,
clothing
and
apron,
cotton.
Wear
dark,
neck
and
containing
be
used
helmet
to
filter
loose
clear
side
shields
protection
face
the
with
arc)
dark
Personnel
For
is
best.
drain
gas.
used
be
not
1-2,
1-1,
process,
carries
bright
very
infrared
gases
and
risks
are
visibly
the
skin
from
GET
shoes
(1-2A).
such fire-resistant
may
bright
substantial
and
NEVER
to
arc.
when
welding.
cover
plate.
shield
or
burns.
cause
plates
cover
plate
MUST
the
to
before
an
unprotected
cause
can
in
the
area
production
In
open
for
welding
this
and
but
careless
a
high
and
hot.
radiates,
energy
be
used.
protects
described
Its
clothing,
for
as
radiation
and
eyes.
gas-shielded
BURNED;
gas-shielded
As
necessary,
leather
leggings.
clothing.
button
pockets
look
filter
a
plate
Place
NOT
should
be
must
when
broken,
be
worn
should
eyes
is
struck.
arc
(particularly
eyes
retinal
a
fieldofvision.
welding,
surround
areas,
or
section.
opera
currents
Sparks
The
himself
and
here
reflect
Skin
arcs
COMPLY
arc)
jacket
Avoid
Button
to
at
an
shade
over
be
replaced
pitted,
under
the
helmet
Looking
burn
a
separate
cut
weld
wise
and
from
burns
pre
elec
face
worn;
that
Arc
at
fly,
can
are
use
or
no.
IM
the
the
B.
Toxic
Fume
Prevention
with
Comply
Generator
Carbon
C.
Fire
Comply
Equipments equipment.
Loose fire.
in
Never
creates
to
D.
Compressed
such
Comply
E.
Shock
Exposed
circuit,
fatally
NOT
face
when
To
in
a
protect
Keep
out
adequate
dry
duckboard,
be
not
and
an
the
body
possibly
1.
Grounding
When
welding
to
tor
carry
HOT GROUND
or
gas
Three-phase
ment
connect
3-phase
the
third
cally
fatally.
Before
tors
are
tions.
If
line
a
ment
the
to
connection
must
comes
receptacle.
use
a
plug
precautions
engine
monoxide
and
Explosion
with
precautions
It
cable
connections
strike
an
brittle
a
a
rupture
with
precautions
Prevention
hot
conductors
in
or
shock
a
STAND,
welding,
against
and
body
avoided.
electrically
surface
lethal
installing,
power
the
building
ground
by
stray
so
flammable
a
connection.
before
installing.
single-phase
line.
Do
(live)
-
HOT
a
welding,
touching
with
cord
for
connection
grounded
to
be
connected
with
a
three-prong
Never
with
rated may
arc
area
Gas
ungrounded,
person
SIT,
clothing
insulation
or
Sweat,
electrical
currents
the
connect
source,
currents
current
electrical
NOT
wire,
dangerous
check
switchbox.
a
grounded
broken
a
exhaust
kill.
can
Prevention
capacity.
overheat
on
a
cylinder
that
later
under
Equipment
whose
LIE,
without
shock:
dry.
against
rubber
sea
HOT
to
Equipment
control,
ground.
safely.
may
conduit,
such
liquid
Check
If
equipment
connect
the
or
ground
bare
metal
a
ground
to
a
switchbox,
the
to
plug,
remove
off
in
1-2B.
be
must
in
may
can
in
or
LEAN
mat
part
flow
the
condition
mating
ground
the
ventedtothe
1-2C.
Do
not
cables
and
overheatorflash
other
or
cause
a
rough
handling.
1-2D.
other
bare
electrically-HOT
becomes
body
OR
ON,
suitable
protection.
Never
work
electrical
when
dampness
moisture
or
water,
-
or
grounded
resistance,
Conductors
shock,
only
lead
If
ground
through
frames
i&ork
Equipment
possibly
or
oil
as
or
phase
3-phase
to
the
equipment
equipment
for
continuity.
of
equipment
is
provided
a
three-prong
receptacle,
prong
connect
ground
prong.
enabling
table,
to
only
that
connect
overload
fire.
cause
a
pressure
violent
rupture
metalinthe
equipment
conductor.
a
TOUCH
in
damp
shock.
between
metal-reduces
dangerous
the
body.
of
each
and
water
be
must
made
fatally.
a
pipe
carrying
fuel.
requirement
power
two
ground
will
become
can
shock,
Be
frames
with
the
plug
the
If
only.
to
a
grounded
from
prong
outside
arc
welding
and
cause
vessel.
or
welding
wet
a
with
area
Stay
or
sweat
body
unit
such
circula
adequate
electrically
NOT
Do
ANY
of
equip
is
available,
wires
of
lead
electri-.
possibly
conduc
sure
at
connec
the
equip
ground
is
added
ground
the
line
cord
mating
a
plug,
lead
can
DO
sur
on
can
and
the
lead
for
lead
air.
a
It
a
as
to
to
or
Trademark
of
Proctor
&
Gamble.
OM-457
Page
3
Page 14
2.
Electrode
insulated
Fully
holders
use
3.
Connectors
insulated
Fully
welding
4.
Cables
Frequently
IMMEDIATELY
damaged
bared
cable.
resistance
cable
Keep
hot
metal
5.
Terminals
Terminals have
insulating
6.
Electrode
Electrode
switch
of
trigger
gun
other
HOT
7.
Safety
devices
Safety
not
be
disconnected
Before
installation,
OFF
all
switches)
all
nect
volts
line-cord
Holders
with
cable
lengths.
inspect
insulation
Cables
equivalent
dry,
and
sparks.
And
and
covers
Wire
wire
metal-arc
gas
is
pressed.
parts.
Devices
such
power
to
prevent
cables
plu~.
electrode
protruding
lock-type
cables
REPLACE
to
with
to
free
of
Other
other
exposed
secured
becomes
Keep
es or
inspection,
and
remove
accidental
from
welding
holders
screws.
connectors
for
those
avoid
possibly
damaged
original
oil
and
Exposed
parts
before
electrically
welding
equipment
hands
interlocks
shunted
or
line
turning
power
should
wear,
with
areas
cable.
grease,
Parts
of
and
and
out.
service,
fuses
be
used.
should
be
cracks
excessively
-
lethal
be
may
and
protected
electrical
operation.
HOT
when
is
ON
clear
body
circuit
breakers
of
equipment,
lock
(or
ON
of
power.
and
source,
used
and
shock
taped
units
the
and
of
pull
Do
to
damage.
worn
to
should
power
welding
wire
should
or
red-t~
Discon.
all
NOT
join
from
give
from
and
shut
115
Do
not
open
in
an
If,
shock
Leaving
connect
Power
power
1-4.
STANDARDS
For
or
their
1.
2.
burns,
equipment
all
disconnect
source.
more
latest
ANSI
CUTTING
Society,
ANSI
TION
AND
TION,
emergency,
power
information,
revisions
Standard
2501
Standard
obtainable
Institute,
3.
American
AND
CUTTING
COMBUSTIBLES,
4.
NFPA
Standard
FOR
WELDING
National
5.
Avenue,
NFPA
Boston,
Standard
CESSES,
6.
CGA
Pamphlet
PRESSED
Compressed
N.
York,
7.
OSHA
Standard
CUTTING
ING,
power
flash
or
to
switch
BOOKLET
obtainable
NW
EDUCATIONAL
1430
Broadway.
Welding
Fire
obtainable
GASES
Gas
Y.
10036.
circuit
it
must
switch
from
unattended.
equipment.
must
refer
and
comply
Z49.1,
7th
St.
SAFE
Z87.i,
from
Society
CONTAINERS
obtainable
OXYGEN-FUEL
51,
AND
CUTTING,
Protection
02210.
Mass.
CUTTING
51B,
same
P-i.
IN
CYLINDERS,
Association,
29
CFR,
AND
BRAZING.
or
change
be
disconnected,
arcing.
Always
be
INDEX
the
to
es
SAFETY
from
Miami;
PRACTICE
EYE
American
New
Standard
same
Association,
item
as
SAFE
Part
polarity
available
following
applicable:
the
Fla.
AND
York,
WHICH
AND
4.
HANDLING
500
1910,
while
shut
OFF
near
IN
WELDING
American
33125.
FOR
FACE
National
N.Y.
10018.
A6.0.
HAVE
1.
item
as
GAS
obtainable
470
WELDING
obtainablefrom
Fifth
Avenue,
Subpart
welding.
guard
and
the
standards
OCCUPA PROTEC
Standards
WELDING
SYSTEMS
from
AtlantIc
OF
Q,
against
dis
welding
AND
Welding
HELD
the
PRO.
COM
the
New
WELD.
or
Page
4
Page 15
SECTION
2-
INTRODUCTION
Rated
Amperes
Output
350
@
100%
Duty
40V
Cycle
Welding
Current
Range
45
475
To
Amps
Welding
Coarse
45-
65-140
100-220
130
220
Current
In
Amperes
Ranges
85
.
300
-475
Ranges
Fine
From
To
Max.
Each
Range
Figure
Range
Mm.
Coarse
Open-Circuit
Voltage
Range
Of
55 DC
2-1.
Specifications
To
Volts
Weight
Power
3kva Volts
7.5
Power
AC
Hz.
Welding
kva
Volts
Hz.
Plant
120
50/60
90
While
120/240
50/60
As
Dimensions
(Inches)
-
43-1/2
Height
Width
-25
-
Depth
AC
63
(Pounds)
?~i~E
1520
1560
~.
GENERAL
2-1.
This
izing
tenance, tion
assure
RECEIVING-HANDLING
2-2.
Prior
from
that
or
damage
the
purchaser
and
freight
occasiontofile
When essential Serial
2-3.
DESCRIPTION
This Unit
(SMAW)
output generator.
ac
output
etc.,
manual
personnel
and
presented
optimum
to
installing
around
have
may
that
bill
requesting
that
(or
Style)
welding
will
produce
Welding
of
7.5
A
of
while
welding.
has
been
prepared
the
with
troubleshooting
herein
performance
the
occurred
may
with
willbefurnishedbythe
claim
Model
Numbers
generator
kva
duplex
up
design,
should
this
equipment,
unit
and
during
have
the
carrier.
arises.
information
Description
dc
a
when
used
120/240
at
receptacle
3
kva
to
be
of
carefully
occurred
concerning
of
the
is
driven
output
as
120
at
of
given
shipment.
on
Figure
in
equipment.
careful
equipment.
clean
all
inspect
in
transit
of
copy
carrier
this
and/or
for
Any
the
Stock
especially
installation,
this
this
A
equipmentbesupplied.
a
by
gasoline
for
Shielded
a
welding
the
when
front
to
generator,
panel
power
volts
volts
familiar
use
operation,
All
informa
consideration
material
packing
for
any
claims
must
be
of
bill
on
request
equipment,
Number
engine.
Metal
used
as
a
provides
toolt,
2-2.
main
damage
for
loss
filed
lading
it
and
The
or
an
power
lights,
to
by
if
is
Arc
ac
an
Functional
2-4.
Diagram
This
provide
if
the
preparation installed)
instructions,
duplex
duplex
SAFETY
Before
tion
at
This
will
welding
The
following
NOTE
and
Under
tenance
not
sonnel.
welding
generator
240
volts
optional
and
be
and
desired,
receptacle
receptacle.
the
equipment
the
help
applications.
carefully
front
avoid
definitions
blocks
this
heading,
procedures
of
found
followed
m
has
ac
auxiliary
receptacle
installation
see
delete
and
is
put
this
manual
possible
apply
throughout
CAUTION
installation,
or
practices
reconnectable
power
kit
is
information
(or
Section
all
referenceto120
into
should
to
with
operation,
due
CAUTION.
this
replace
injury
oper~g,
will
create
may
at
ordered.
5-9
be
misuse
to
manual:
be
a
capability
the
front
if
for
complete
240
the
read
or
IMPORTANT.
and
found
hazard
TB.007
956
to
panel
Should
factory
volts
ac
volts
dc
sec
safety
completely.
improper
main
that
if
to
per
OM-457
Page
5
Page 16
IMPORTANT
I
Under
this
tenance
not
merit.
I
procedures
carefully
heading,
followed
installation,
or
practices
result
nay
operating,
will
in
be
damage
and
found
to
SECTION
main
that
equip-
U
if
U
INSTALLATION
3
-
Under
this
that
found
efficientoperation
NOTE
heading,
need
special
explanatory
of
the
I
statements
emphasis
equipmrrnt.
to
obtain
the
will
be
most
3-1.
LOCATION
A
proper
generator
remain
(Figure
installation
if
the
relatively
3-1)
site
unit
is
maintenance
shouldbeselected
to
provide
dependable
free.
for
F~O~TANT
I
this
II
(optional),
toward
proper
torque
vehicle
fitting
welding
the
I
I
this
If
located
engine
comply bodily
unit
welding
the
weight
weight
weight.
canvas
generator
from
unit
in
a
can
with
injury
generator
enture
front
of
cover
the
is
to
place
vented
be
proper
lossoflife.
or
that
(hitch
distribution.
the
It is
when
environment.
CAUTION
L
be
where
be
mounted
is
to
the
engine
of
the
Also
be
in
operation
indoors,
exhaust
the
may
trailer
ensure
placed
building.
result
end)
traileris5to10%
recommended
(optional)
not
operated
the
of
out
venting
on
endismounted
to
of
that
a
to
it
fumes
;~=ANT;
The
has
was
spark
is
mandatory
operated
Grasslands,
4442
areas,
I
A
proper
into
and
the
unit
minimum maintained
and
panels
welding
structions.
removal
U
Do
passages
the
internal
subsequent
filtering
I
Holes
are
3-1
gives
layout.
exhaust
engine
been
not
specifically
arrestor,
inaNational
brush,
of
California
check
your
installation
the
out
of
to
dust,
18
of
between
the
nearest
generator
The
of
the
outer
not
place
of
the
volume
of
components
failure.
deviceisused.
provided
overall
system
equipped
ordered
maintained
if
this
forest
or
Public
state
site
welding
moisture,
dirt,
inches
the
obstruction.
muss
installation
enclosure
filtering
any
welding
intake
to
Warranty
in
the
dimensions
and
welding
be
base
on
with
a
as
an
in
welding
Forest,
covered
Resources
local
permits
generator,
of
unrestricted
kept
site
for
device
generator
air
and
an
overheating
for
and
this
spark
optional
effective
generator
laws.
freedom
and
and
generator
Also,
completely
should
maintenance
over
this
as
thereby
is
void
mounting
the
welding
arrestor
accessory.
working
on
or
land
(see
Code).
of
air
also
corrosive
space
front
the
undersideofthe
also
the
would
subject
condition
if
any
purposes.
base
mounting
the
welding
service,
trailer
a
maintain
that
the
gross
properly
over
protect
should
from
Failure
in
stjrious
generator
unless
order,
is
to
California
Section
other
For
movement
least
subjects
vapors.
must
and
free
permit
functions.
intake
restrict
and
type
and
the
the
be
the
to
it
A
be
rear
of
ob
easy
air
the
of
Figure
hole
On
most
welding
the
moving
the
lifting
extend
completely
opposite
ents
to
the
trate
I
unit.
unit,
of
side
damage
bottom
generators
However,
be
sure
under
lift
of
f
the
should
of
the
that
base.
base
if
the
unit.
a
lifting
a
the
short
will
tips
fork lift
expose
of
forks
device
lift
xte
e
internal
the
is
vehicle
are
long
nd
lift
forks
provided
ut
o
compon
is
used
enough
of
pene
the
for
for
to
U
TA-004
285
Dimensional
3-1.
Figure
full
in
any
welding
that
weld
any
the
access
3-2)
CONNECTIONS
rated
maintain
and
of
performance.
the
unit
output
NEGATIVE
and
lower
portion
door.
of
pieces
and
connect
the
lower
output
these
is
Route
angle
3-2.
U
WELD
To
to to
obtain
select,
comply
OUTPUT
the
install,
satisfactory
A
be
Ensure
~iaking
Location
A.
POSITIVE
The
located
on
front
lower
horizontal
I
two
(see
Figure
terminals.
Secure
Drawing
from
proper
areas
completely
connections.
weld
the
of
the
iron
cablestothe
the
door.
access
(Figure
this
welding
may
~own
output
front
weld
the
on
unit,
result
panel.
cables
front
3-2)
isis
necessary
cables.
in
before
terminals
Open
between
of
weld
less
the
Failure
than
the the
base
output
1
are
NOTE
POLAR
weld
WORK.
with
output
a
terminals
1
the
If
welding
SWITCH
ITY
labeled
are
i
generator
(Optional),
ELECTRODE
is
equipped
the
and
Page
6
Page 17
The
connections
this
figure
polarity.
B.
for
are
Figure
welding
should
It
is
recommended
short
adequate
welding
which
resistance
the
maximum
Proper
of
welding
condition
holder
Use
Table
the
anticipated
used.
Table
the
electrode
holder
select
long,
feet
at
Do
not
Follow
for
installing
Use
correct
clamp
terminals.
according
Cables
Welding
If
listed
performance:
1.
2.
3.
4.
5.
shown
in
dc
Straight
3-2.
Weld
cables
were
followed
carrying
and
to
result
current
is
cables
of
be
used
as
a
guide
maximum
3-1
shows
and
size
electrode
the
electrode
on
lugs
connect
to
Section
not
the
to
and
adequate
to
work
feet
or
the
be
as
possible,beplaced
current
cables
is
added
may
operation
and
must
3-1
cableis75
the
the
maximum
use
damaged
the
and
Install
to
Output
ordered
to
that
the
capacity.
connections
voltage
in
overloading
output
a
great
connections
ensure
for
selecting
total
cable.
long
cable
that
weld
current
frayed
holder
holder
the
weld
the
cables
3-2A.
Connections
with
ensure
welding
close
causes
of
the
capability
extent
An
size.
the
operators
weld
current
cable
length,
Example:
and
the
is
recommended
that
cables.
manufacturers
onto
cable
cables
the
to
TB-004
this
unit,
the
best
cables
together,
The
resistanceofthe
a
voltage
Excessive
arc.
well
as
of
dependent
that
are
insulated
safety.
cable
correct
which
which
If
the
work
cable
is
be
to
the
electrode
connect
to
the
to
output
the
welding
be
kept
and
as
reducing
this
the
on
in
electrode
size will
includes electrode is
25
for
used.
instructions
the
weld
output
terminals
282-A
steps
be
drop
cable
unit.
use
good
for
feet
100
cable.
work
3-
3.
EQUIPMENT
Normally,
grounding.
capability,
A
grounding
for
this instructions issueofthe
3-4.
REMOTE
(Figure
The
REMOTE
the
on
junction
the
amperage
To
Connect
AMPERAGE
from
plug
the
plug
fully
rotated,
will
not
3-5.
120/240
as
of
be
120/240
is
operating,
the
120/240
licensed
injury
make
while
The
120/240
connecting
50/60
volts.
obtainedatthese service
120/240
GROUNDING
engine-driven
However,
grounding
terminal
purpose
consult
National
AMPERAGE
5-1)
AMPERAGE
front
panel
for
point
control
Remote
the
CONTROL
the
remote
far
as
as
the
under
Out
pull
VOLTS
the
h
voltsacterminals
it
volts
electrician
due
to
connections
the
engine
volts
accessory
Hertz
to
rural,
volts3wire
since
of
has
(see
Figure
your
Electrical
of
connecting
Circuitry
control
it
will
willbelockedinthe
plug
stress.
AC
TERMINALS
igh
pote
is
recommended
ac
to
faulty
to
is
operating.
terminals
ac
equipment
power
terminals
residential,
connection.
TERMINAL
Welding
this
unit
frame
the
been
provided
3-2).
local
or
Code.
CONTROL
CONTROL
the
welding
Remote
a
in
the
Amperage
receptacle,
into
in
turn
ial
nt
while
terminals
avert
any
installation.
the
120/240
act
plant.
be
may
or
generators
has
auxiliary
and
case
For
state
generator
Amperage
unit.
Control
insert
the
receptacle
clockwise
(Figure
is
t
hat
the
welding
that
be
chance
Never
volts
as
a
the
to
The
used
other
(Figure
do
power
be
may
the
on
detailed
codes
or
CONNECTIONS
receptacle,
the
to
the
direction.
receptacle
3-3)
nt at
rese
p
generator
connections
made
only
of
personal
attempt
terminals
ac
junction
7.5
kva,
that
power
to
provide
buildings
3-2)
not
require
plant
required,
front
panel
grounding
the
latest
located
REMOTE
rotate
Once
and
t
he
to
a
by
to
for
point
120/240
can
standby
requiring
a
to
be
provides
Control
three-prong
and
WELDING
AMPERES
NOTE.
400 500
100
150
200
250 300 350
200
2
1
1/0 2/0
3/0
4/0 4/0
2-2/0
BASED
AND
AMP.
PER
INSULATION
WELDING
WELDING
VOLTAGE
HAVE
clean
are
Cable
ICOPPE
250
1/0 2/0 3/0 4/0 4/0
4/0
2-2/0
2~3/0
ON
EITHER
DENSITY
THE
GENERATORS
HIGHER
2
DIRECT
and
Size
IN
RI
300
1
2/0
3/0
4/0
2~2/O
2-3/0
2-3/0
A
OF
WITH
OPEN-CIRCUIT
GENERATOR
GENERATORS
OF
tight.
WELD
350
1/0
3/0
4/0
4/0
2-2/0 2-3/0 3-2/0 24/0
A-002
CURRENT
4
VOLTS
NOT
A
LESS
OF
OPEN-CIRCUIT
CIA
OR
OVER
VOLTAGE
MUST
THAN
SPECIAL
CUlT
400
1/0
3/0
4/0
2-2/0 2-3/0
2-3/0 2-4/0
3-3/0
702-A
VOLT
HAVE
lDCl,
LESS
300
BE
100
I
I
Figure
Do
not
engine
NEC
if
neutral
cord
per
and
nectors
is
conductor,
connect
securely.
3-3.
change
running.
local
or
grip
to
box
Power
fuses
Install
electrical
Insert
connector.
proper
Plant
CAUTION
Connect
or
Circuit
load
Connections
code
load
lead
Strip
terminals
leed
any
grounding
requires
wires
1/2
and
wires
jumper
through
inch
tighten
while
lead
grounded
pro
insulation
con
OM-457
I
.
Page
7
6.
Ensure
that
all
connections
3-1.
Table
TOTAL
50
100
4
2
1
1/0
1/0
2/0
2/0
3/0
3/0
3/0
3/0
4/0
4/0
A,
5OFEETOR
CABLE
B.
100% DROP
CIRCULAR
WELD
C.
RATING
AGE
USED.
AN
VOLTS.
DESIGN VOLTAGE.
LENGTI-IOF
4
2 2
1
1/0
2/0 3/0 3/0 4/0
SIZE
DUTY
A
OR
CABLE
TO
(CCV)
WHILE
OPEN-CIRCUIT
SOME
MAY
Welding
CABLE
150
2
1
LESS.
IS
CYCLE
CURRENT
MILS
WITHSTAND
OF
THE
MOST
WELDING
Page 18
I
The
100
120/240
I
The
the be
determined
FINE
(full
voltage
120/240
m
AMPERAGE
counterclockwise)
volts
will
volts
from
power
in
vary
terminals.
Figure
plant
accordance
control
is
The
3-4.
must
position
being
with
voltage
be
rotated
whenever
utilized.
the
various
at
load
the
to
the
applied
loads
may
260
U,
I
I
to
Figure
250
240
230
220
~
210
200
0
3-4.
~
20
10
AC
Power
30
Curve
7.7SKVA
40 50
~
POWER
For
I.SKVA
70
60
.MPERES
120/240
KVA
14.3
16.1
KVA
120
110
90
80
100
8-005
185
AC
Terminals
Volts
4-1.
See
the
for
complete
LUBRICATION
This
engine
with
filled
otherwise
the
operate
bayonet
levelislow.
9.
type
Engine
was
the
correct
ordered.
engine.
indicator.
See
1
Manufacturers
care.
engine
shippAd
amount
Check
should
It
the
oil
selection
Crankcase
Keep
This
At
Never
With
Oil
from
the
Add
Operate
Below
the
and
oil
be
a
quality
Level
SECTION
manual
factory
type
level
to
up
chart,
Oil
Engine
This
Level
of
before
the
brand
Table
63
(F-i
with break-in
FULL
of
9-1,
TA-900
ENGINE
4
-
Fl
Engine)
crankcase
its
unless
oil
attempting
mark
on
oil
if
the
in
Section
033-3.1
the
F
oil
PREPARATION
~i~RTANTI
I
to
I
I
The
the
ment
U
The
cap
that
. .
If
this
peratures
have
will
liquid engine
coolant
thermostat
of
is
Do
not
without
and
develop
will
become
dirt.
radiator
which
the
replacement
welding
which
to
the
in
overheat.
to
system
equal
run
one.
for
is
rated
generator
below
are
added
be
system
is
equipped
should-become
temperature
the
engine
is
If
this
carbon
excess
contaminated
this
engineisequipped
7
at
psi.
has
cap
be
is
to
additional
0F,
coolant
the
to
freeze
will
with
defective,
rating.
withadefective
the
done,
If
accumulation
with
this
cap
a
rating
engine
excessive
of
operated
and
180F
a
is
ever
7
psi.
anti-freeze
system
thus
be
sure
thermostat
will
and
sludge
with
replaced,
-
in
cause
thermostat.
the
run
a
pressurized
the
tem
or
cold
1
the the
replace
or
oil
and
ensure
I
If
I
Page
4-2.
8
I
New
moving
the
hours
several
period.
time
After
and
change
in
9-1,
the
break-in
COOLANT
The
liquid
generator
from
the
freeze
0F.
to
engines
engine
before
about
Section
factory
to
permit
4-1.
Figure
Oil
L–~RTANT~
have
very
itisrecommended
Thus,
parts.
of
operation.
times This
50
the
oil
SYSTEM
capacity
is
9
be
kept
each
engine
it
will
hours
oil
filter.
9
for
is
drained.
quarts
with
operation
to
Be
day
requires
be
fully
of
running
correct
of
the
(U.S.
the
Level
close
minimum
a
sure
during
about50hours
broken
See
the
oil
type
coolant
Measure).
proper
of
the
Indicator
clearance
during
check
to
the
in.
drain
time,
selection
oil
and
system
This
amount
unit
at
I
between
that
loading
the
oil
the
engine
of
the
chart,
to
grade
this
in
unit
of
water
temperatures
their
first
level
break-in
running
break-in
use
welding
is
shipped
and
of
50
Table
after
anti
down
oil
~on
moving
an
vision
sure
before
I
4-3.
A.
neck.
a
from
PREPARING
Wet
The
wet
tion
added
due
to
weak
specific
If
this
battery
hou
a
the
has
been
within
completely
When
or
possible
radiator
full
the
removing
rag
almost
glove
NEW
Charged
and
Battery
charged
and
normally
periods
long
thus
require
reading
gravity
is
level
not
instructedinSection
as
Id
beaxercisedatall
pressure
position,
open
made
to
removing
the
used
permit
Allow
cap,
to
protect
to
extremely
radiator.
be
exposure
BATTERY
is
battery
present
shipped
in
of
idleness,
charging.
1.260
of
when
an
4-3A,
times
The
cap.
at
which
veuiting
the
pressure
the
from
cap
is
it
recommended
the
operators
hot
FOR
SERVICE
with
The
(at
it
the
is
battery
battery
80F)
to
step
the
be
4.
operational
wi~en
will
cap
point
built
to
the
coolant.
electrolyte
status.
may
should
before
used,
re
turn
to
a
pro
pres
up
escape
radiator
that
hand
solu
However,
become
have
operation.
charge
-
a
the
IMPORTANT
Do
not
battery
the
battery
attempt
connected.
while
the
to
operate
Also,
engine
do
is
the
engine
not
attempt
running.
without
to
the
remove
Page 19
B.
If
ing,
operation
to
Charged
Dry
This
battery
battery
lyte,
proceed
I
Put
ing
1.
Remove work
2.
Fill
3.
Place
check
hydrometer.
4.
The
gravity
tions structions
the
battery
the
the
negative
for
on
protective
the
electrolyte
table
the
battery
a
battery
the
battery
reading
are
does
only
step
is
to
connect
()
Battery
is
shipped
operation,
follows:
as
the
battery
other
or
cells
thermometer
specific
temperature
1.260
not
met,
below:
NOTE
not
require
required
the
terminalonthe
in
a
dry
be
will
it
and
cover
eye
solution.
from
the
suitable
area.
the
to
required
gravity
must
to
prior
the
charge
any
to
place
negative
battery.
state.
necessary
clothing
unit
and
level
of
in
one
each
of
80F
be
installation.
battery
additional
the
battery
()
battery
To
prepare
obtain
to
prior
place
with
the
center
with
cell
and
If
following
charg
into
cable
.
the
new
electro
to
pour
it
level
on
a
electrolyte.
and
calls
a
battery
the
specific
both
condi
in
the
4-4.
4-5.
11.35
9.46
8.52
7.57
6.62
5.67
4.73
3.78
2.84
IC
-J
10.4
1.98
.95
AIR
The
air
type
quires
FUEL
Figure
conditions.
load
another.
to
condition
the
fect
_j
2.5
2.29
2.08
1.87
1.7
1.46
1.25
1.04
0.83
0.62
0.4
0.21
CLEANER
cleaner
with
initial
no
4-2
of
fuel
~
0
U
3.0
2.75
2.5
2.25
2.0
1.75
1.5
1.25
1.0
0.75
0.5
0.25
this
a
replaceable
service.
illustrates
Fuel
Different
the
engine,
consumption
50
D.C.
WELD
1.0
POWER
engine
filter
typical
consumption
brands
and
of
100
AMPERES
2.5
KVA
is
equipped
fuel
many
this
150
4.0
AT
100%
(I!
AVAILAILI)
element.
consumption
will
of
fuel,
other
engine.
200
AT
100
6.0
DUTY
is
with,
The
air
from
vary
operating
conditions
250
300
DUTY
CYCLE
9.0
12.0
CYCLE
element
a
dry
cleaner
under
specific
one
conditions,
350
WELD
6-005
engine
will
606
re
af
400
removed.
the
charged.
a.
b.
c.
5.
Re-install
negative negative
to
cha
rging
Failure
battery
Use
automotive
an
should
be
correct
electrolyte
rates
can
correct
electrolyte
When
the
charger
necessary.
Rinse
before
metals,
and
discarding.
tery with solution.
and
the
discarding.
do
mutilate
work
or
clear
Use
clothing.
the
()
()
battery
t
he
to
exploding
charged
be
used;
battery
re.check
Install
the
empty
not
pour
the
If
acid
area
water
and
the
battery
terminal
cable.
remove
should
battery
type
about
at
conditions
however,
conditions
is
charged,
the
the
the
batte:
battery
electrolyte
Since
battery
into
a
empty
electrolyte
has
accidentally
during
fillingorcharging,
neutralize
same
procedure
in
the
of
the
battery
baft
ery
could
caps
the
battery
charger.
3.5
a
ampere
met.
are
the
time
will
be
disconnect
electrolyte
caps.
containers
acid
metal
sinkordrain.
spilled
with
if
unit
making
is
caps
This
Lower
to
longer.
level.
is
corrosive
container
soda
is
add
sure
connected
m!st
result
be
over
battery
rate
charging
obtain
it
from
Add
with
the
on
flush
ammonia
or
spilled
that
be
in
until
the
water
Rinse
before
bat
to
the
off
on
the the
Figure
4-2.
Fuel
Consumption
Chart
1IIC~UiR.
Do
not
attempt
Do
running.
fuel
will
in
a
warm
full
it
Never
ponents.
if
to
The the
trap
is
dirt
fuel
tank,
holds
located
from
not
expand
climate
overflow
will
fuel
allow
is
tank
equipped
therefore;
water
the
on
tankifit
the
and
left,
to
when
to
the
fill
or
dirt
the
exposed
to
causing
drain
tank
bottom
should
the
fuel
engine
on
with
will
back
become
of
the
a
from
fuel
fill
IMPORTANT
I
I
Use
a
85
at
ratings
result the
fuel
good
octane,
may
in
damage
tankis17.5
grade
for
cause
of
regular
this
engine.
detonations
the
to
gallons
engine.
(U.S.
tank
tank
completely
outside
to
If
heat,
a
potential
engine
area
trap
not
completely
go
the
the
tank
necessary.
gasoline,
Fuels
(knocking)
The
Measure).
with
the
temperature
the
thnk
fire
other
or
in
the
engine.
drain
to
ratedatleast
of
lower
which
fuel
capacity
engine
as
is
hazard.
com
bottom
dry.
drain
A
water
octane
cold
too
could
This
plug
of
of
and
I
I
OM-457
Pa~
9
Page 20
SECTION
5-FUNCTION
OF
GENERATOR
CONTROLS
5.1.120
Optional
Up
this universal
being
The
the
280
260
>
240
220
~
200
Figure
5-2.
RANGE
The
age range
to
duplex
load
140
130
120
110
100
0
0
5-2.
ranges.
ac
Range
Fi~jre
VOLTS
240
3
kvaof120
receptacle
power
operated
power
applied
AC
Power
Volts
SWITCH
switch
Each
indicated
5-1.
AC
Volts
volts
tools
weld
at
output
to
power
AC
5
AC
Curve
AC
Receptacle
(Figure
permits
of
the
the
on
Generator
RECEPTACLE
AC
Receptacle,
50/60
ac
for
operating
when
etc.,
rpm.
will
voltage
connections.
20
POWER
AMPERES
10
POWER
AMPERES
For
5-1)
selection
five
switch
scale
above
Controls
Hertz
120
the
decrease
120
(And
of
positions
the
(Figure
See
power
volts
welding
in
accordance
30
AT
120V.
15
AT
240V.
Optional
five
different
has
Range
TB-004
5-1)
Section
is
available
ac or
generator
B-005
its
switch
284
(For
120
volts
40
20
192-A
240)
amper
amperage
handle.
5-9)
at
with
The
contacts
the
continuous
scale
surrounding
from
percentage
is
not
FINE
(full
the
panel.
Remote
from
receptacle
remote
REMOTE
the
REMOTE
is
FINE
the
the
is
functioning
AMPERAGE
For
example:
generator
Control
amperage
output
switch.
the
mustbeset
to
using
is
actual
an
AMPERAGE
counterclockwise)
volts
120
AMPERAGE
Amperage
the
control
not
position.
amperage.
FINE
possible
welding
i
The calibrated
this
operator the
operator
and
use
I
The
100
120/240
AMPERAGE
using
front
5-4.
is
REMOTE
If
a
tions
TROL
When
that
in
the
Control
STANDARD
only
control
WhenaRemote control
FINE
tor.
welding Amperage
fine generator
Range
desired,
generator
5-5.
VOLT-AMPERE
FINE
of
the
contact
fine
adjust
0
selecting
the
100
to
percent
calibration,
this
scaletoselect
a
amperage
plantisbeing
power
control
controltothe
VOLTS
instructed
as
of
may
Control
the
AMPERAGE
position.
be
to
utilized,
When
AMPERAGE
Amperage
as
a
control
the
If
FINE
is
set
at
will
provide
adjustment
the
for
If
full
adjustment
AMPERAGE
100%
at
CURVES
AMPERAGE
type,
the
amperage
FINE
in
increments
should
it
percentage
value.
control
must
position
in
be
AC
duplex
CONTROL
is
to
REMOTE
in
Section
amperage
CONTROL
Likewise,
the
the
in
control
Control
fine
amperage
on
setting
AMPERAGE
50%
the
(from
of
one
selected
range
(max.
(Figur~5-3)
control
thereby
output
AMPERAGE
noted
be
fine
a
amperage
of
the
be
rotated
whenever
utilized.
position
any
receptacle
(Figure
be
used,
AMPERAGE
3-4.
is
desired,
ifaRemote
switch
STANDARD
the
on
is
used,
being
adjustment
the
WELDING
position,
mm.
to
half
by
of
the
range
control
position).
making
of
coarse
The
make
switch
must
front
control
max.
of
means
on
are
while
control
Due
ten.
that
setting,
range
the
to
the
FINE
when
the
on
5-1)
connec
is
essential
it
be
placed
Amperage
in
be
position
panel
the
remote
of
genera
on
the
Remote
positions)
the
welding
of
selected
the
welding
of
it
is
to
if
the
in
I
U
CON
the
will
the
the
the
is
Page
5-
10
I
U
3.
FINE
The
select
adjustment
maximum
Range
Do
not
welding
contacts
become
to
AMPERAGE
FINE
an
switch.
change
under
or
of
pitted
AMPERAGE
exact
of
of
the
the
the
tMPORTANT
the
position
load,
switch.
and
CONTROL
welding
welding
coarse
of
this
as
This
arcing
eventually
control
amperage.
amperage
amperage
the
Range
causes
arcing
causes
inoperative.
(Figure
permits
This
from
range
switch
across
the
5-1)
the
control
minimum
selected
while
contacts
operator
the
allows
by
the
100
5-3.
curves
generator
maximum
control,
maximum
With
determine
voltage.
200 300
DC
Volt-Ampere
the
what
U
0
Figure
The
I
to
to
volt-ampere
of
the
welding
minimum
AMPERAGE
minimum shown.
Load
characteristics.
possible particular
to
and
voltageispredetermined
to
arc
AMPIIIS
show
the
available
of
each
controls
curves
of
use
the
Remember,
400
to
the
output
the
of
a
weld
300 600
Curves
voltage
at
any
coarse
output
each
coarse
large
volt-ampere
current
the
volt-ampere
point
range.
extent
B-005
and
from
The
between
range
by
curves
will
current
FINE
that
the
be
curves
130
the
the
is
arc
it
is
at
a
Page 21
-
5
show
range.
volt-ampere
maximum
DUTY
6.
The
ten
operated
100
generator
If
the
the
to
various
the
When
CYCLE
duty
minute
percent
welding
duty
determine
duty
minimum
curves
cycle
at
a
can
cycle
the
curve
of
of
period
given
duty
be
safely
amperes
will
the
cycles.
and
FINE
AMPERAGE
will
the
particular
(Figure
a
welding
that
a
output.
cycle.
operated
are
decrease.
safe
output
IMPORTANT
maximum
fall
54)
generator
welding
This
This
increased
between
coarse
welding
at
Figure
of
curves
control
generator
means
rated
beyond
5-4
the
the
range
is
the
generator
that
load
enables
welding
each
of
is
minimum
percentage
coarse
adjusted,
in
use.
can
safely
is
rated
the
welding
continuously.
rated
output,
the
operator
generator
and
of
the
5-
240
9.
VOLTS
(Figure
This
welding
terminal
capbility
120
a
be
at
A.
or
purchased
Power
Receptacle
to
Up
the
at
when
duplex
the
Curve
3
5-1)
strip
240
kva
for
welding
AC
generator
TEl
240
volts
if
240
volts
For
(See
240
of
receptacle
DUPLEX
is
and
proper
volts
ac.
is
ac
is
Optional
Figure
volts
for
generator
RECEPTALCE
equipped
stator
Although
present,
desiredatthe
240
5-2).
50/60
ac
operating
is
being
with
to
provide
the
an
optional
front
VOLTS
Hertz
power
operated
a
voltage
reconnection
capability
panel.
AC
is
power
tools,
weld
at
(Optional)
changeover
for
either
kit
must
be
Duplex
available
lights,
at
etc.,
rpm.
I
Exceeding
the
to
U
500
450
~
400
4
350
0
z
300
250
30
5-7.POLARITY
POLARITY
The either
changing
I
Do SWITCH
arcing
causes
inoperative.
I
DC
not
internal
Figure
STRAIGHT
cable
while
across
the
indicated
the
components
40
5-4.
SWITCH
SWITCH
connections.
change
welding
the
contacts
duty
-~
50
DUTY
%
Duty
(Optional)
provides
DC
or
the
position
or
contacts
to
become
cycle
of
the
60
CYCLE
Cycle
REVERSE
under
of
the
will
welding
RATED
;;;
Chart
a
of
load,
switch.
pitted
cause
-
~bq~
70
means
the
and
damage
generator.
OUTPUTi
-
80
B-053
of
polarity
POLARITY
this
as
This
eventually
-
-
~%
100
90
306
selecting
without
causes
arcing
U
The
the may
Installation
B.
I
I
FINE
The
position
receptacle
voltage
VOLTS
240
determined
be
Ensure
that
attempting
onornear
ponents
when
on
will
Of
AMPERAGE
the
vary
AC
240
the
engine
any
the
using
front
panel.
in
accordance
receptacle.
from
Figure
VOLTS
is
connections
terminal
control
240
with
The
5-2.
AC
Duplex
completely
examination
or
TEl.
strip
may
VOLTS AC
the
at
voltage
Receptacle
shut
down
be
load
in
duplex
applied
various
before
of
any
I.~
to
loads
I
com
I
TA~
are
this
in
the
with
procedure
familiarize
Trouble
respect
front
panel.
for
1
to
with
Before
yourself
shooting
proceeding
with
the
of
Section
circuit
this
this
manual.
installation,
diagram
NOTE
left
All
directions,
the
U
operator
such
facing
as
the
or
welding
right,
generator
NOTE
all
Retain
installation.
i
hardware
removed
during
U
If
ITY
are
To
ensure
with
SWITCH,
TRODE
5-8.METERS
This
meters
indication
an
internally
minals.
output
(due
current
the
welding
SWITCH
labeled
that
the
connect
terminal
welding
are
connected
The
terminals,
cable
to
output
generator
(Optional),
ELECTRODE
the
weld
and
the
of
the
labeling
(Optional)
generator
for
monitoring
of
the
voltmeter
to
not
resistance).
of
the
welding
current
the
electrode
work
can
the
welding
the
will
indicate
the
actual
The
is
equipped
the
weld
and
WORK.
output
position
holder
cabletothe
be
equipped
welding
process.
welding
voltage
ammeter
generator.
with
output
will
on
cable
operation
generator
the
voltage
POLAR
a
terminals
beinaccordance
POLARITY
the
the
to
WORK
terminal.
with
meters.
and
These
meters
output
at
the
at
welding
will
indicate
the
serve
ELEC
The
ter
weld
are
arc
the
the
down
panel.
center
remove
TEl.
Location
the
and
welding
bolt
retain
Of
generator
from
insulation
insulation
Reconnectable
Shut
1.
I
side
2.
Remove
5-5),
Terminal
Duplex
as
Figure
Strip
Receptacle
5-5.
raise
and
board
board.
TA-059
Components
OM-457
(see
tar
right
Figure
Bolt
485
Page
11
Page 22
3.
4.
5.
6.
7.
8.
9.
Remove
located
and
allow
Connect
duplex
tacle).
Install
RC2
Affix
supplied
VOLTS
nameplate.
Remove
TEl
(see
Move
lead
terminal
5-6.
Figure
Position
5-6).
120
VOLTS
front
on
to
hang
leads
removed
receptacle
in
front
240
AC
designation
and
retain
5-6).
Figure
3
No.
B
to
terminal
jumper
panel
free.
(only
links
RC2
panel.
VOLTS
jumper
on
AC
(see
from
(one
lead
A
TEl
duplex
Figure
RC1
AC
for
links
on
(same
for
on
label
duplex
from
jumper
240
receptacle
5-5).
to
the
each
over
side
volts
Remove
240
side
of
existing
receptacle
terminal
link
side)
of
TEl).
(see
RC1
leads
volts
recep
strip
from
Figure
120
See
10.
11.
ac
Lead
No.
3
on
120
VOLTS
5-6.
Figure
Install
Lower
resume
Ac
Jumper
Volts
insulation
right
operation.
(STANDARD)
Link
AC
board
side
panel
B
C
0
Arrangement
over
Lead
240
TEl
of
VOLTS
welding
No.
and
3
For
secure
generator
AC
120
with
TA-059
(OPTIONAL)
And
and
A
B
C
D
243
240
bolt.
Temperatuu
Gauge
Engine
Ammeter
Pressure
Oil
Gauge
6-1.
out,
carburetor
engine
When
-
CHOKE
A
CHOKE
engine,
power
very
position
control
for
ready
Figure
CONTROL
control
is
provided
generator.
little
thereby
is
required
warms
inward
CHOKE
the
operation.
When
air
it
up
slowly
SECTION
6-1.
Engine
(Figure
for
varying
the
on
the
will
be
supplying
if
the
engine
will
be
until
control
6-1)
front
CHOKE
admitted
a
necessary
it
is
is
fully
6-FUNCTION
Controls
the
fuel-air
control
control
the
to
richer
mixtureoffuel.
is
cold
when
to
in
pushed
the
in,
panel
engine
push
as
engine
mixture
of
the
is
pulled
started.
the
farasit
should
thru
CHOKE
will
to
weld!
fully
This
As
the
the
the
go.
OF
ENGINE
The would
Welding
rpm.
not
being
from
terminals,
OUT
IDLE
This
the
position.
CONTROL
usually
(SMAW)
only
used.
120
place
CONTROLS
switch
used
when
be
this
as
If
accessory
the
true
IDLE
process
AC
holds
VOLTS
AUTOMATIC
performing
does
if
120
the
power
receptacle,
CONTROL
Shielded
not
require
VOLTS
tools
are
120/240
or
switchinthe
IDLE
AC
receptacle
to
be
position
Metal
constant
a
operated
volts
LOCK
Arc
is
ac
IMPORTANT
the
the
AC
full
cause
the
by
is
going
receptacle
equipment
rpm.
idle.
to
is
idling,
lower
engine
damage
6-1)
charging
the
charging
the
to
system
120
If
volts
from
ac
terminals,
engine
when
operated
the
power
equipment.
AMMETER
supplied
used
by
charging.
the
is
returning
while
(resulting
receptacle
ammeter
to
a
discharge
the
ted volts
the
true
are
frequency
at
volts
ENGINE
6-4.
ENGINE
The
being
also
be
being
is
not
registers
ac
power
VOLTS
120
be
operating
the
the
from
registers
the
battery
engine
equipment
sure
at
engine
engine
may
(Figure
equivalent
electrical
The
low
amount
when
to
or
off
is
same
If
power
voltage
idling
to
current
be
opera
120/240
until
holds
tools
and
rpm)
120
the
which
generator.
of
current
the
generator
is
It
Page
6-2.
6-3.
12
START
START
A
the
on
Rotating
and
RUN,
starter
started,
rotate
clockwise
CONTROL
IDLE
This
engine
standard
ployed,
is
not
loaded,
An
IDLE
trol
panel,
device.
idling
MATIC
tion
allows
LOCK
necessary
(1800).
rpm
120
volts
receptacle
PUSH
push
front
the
key
pressing
motor
release
the
key
the
to
is
equipment.
the
engine
CONTROL
allows
IDLE
the
OUT
position
desirable
or
The
ac
when
or
BUTTON
button
panel
operated
and
the
operated
OFF
equipped
will
thus
saving
control
The
IDLE
-
LOCK
engine
LOCK
power
and
for
START
the
start
START
position.
SWITCH
When
remain
switch,
OUT.
of
to
is
required
7.5
the
AND
key
starting
Ignition
the
push
Ignition
with
the
fuel.
over
CONTROL
idle
to
the
operate
OUT
kva
SWITCH
operated
and
switch
push
engine.
button.
(Figure
automatic
an
idle
idle
at
located
the
operation
The
AUTOMATIC
until
switch
the
position
from
power
stopping
button
Once
switch
6-1)
control
rpm
on
switch
an
is
engine
the
plant
when
used
must
switch
fully
To
the
arc
(Figure
will
the
stop
fully
idling
is
the
generator
of
the
labeled
is
is
whenever
at
constant
be
120
is
being
is
provided
the
engine.
clockwise
engage
engine
the
engine,
counter
device
being
generator
automatic
AUTO
IDLE
struck.
used
VOLTS
utilized.
6-1)
con
posi
The
it
weld
when
the
em
AC
has
6-5.
TEMPERATURE
The
Temperature
and
will
PRESSURE
OIL
rpm.
and
remedied.
ELECTRICAL
indicate
to
TOTAL
the
engine.
indicate
PRESSURE
in
pounds
by
do
HOUR
This
to
6.6.
OIL
The
pressure
indicated
6-7.
engine
engine
been
ELECTRICAL
as
The
used
6-8.
is
TOTAL
The
operation.
on
GAUGE
indicates
gauge
when
overheated
an
GAUGE
gauge
square
per
the
Should
not
gauge
the
operate
should
pressure
the
TACHOMETER
tachometer
engine
rpm.
METER
HOUR
meter
informationisuseful
registers
(Figure
(Figure
indicates
(OPTIONAL)
the
inch.
remain
fluctuate
engine
(OPTIONAL)
is
a
the
6-1)
coolant
condition
6-1)
the
lubricating
Normally,
constant
again
0-4000
total
for
routine
or
until
rpm
temperature
occurs.
the
for
drop,
trouble
tachometer
hours
maintenance
system
pressure
a
given
stop
of
engine
the
has
Page 23
I
Never
generator
open
personnel,
ponents
is
voidifthe
portion
under
or
of
with
removed.
weather
of
the
the
any
CAUTION
circumstances,
portion
any
In
addition
protection
unit
will
welding
outer
be
generator
enclosure
EAr1
SECTION
ope~he
of
the
to
being
the
to
reduced.
greatly
is
operated
or
open
outer
a
internal
removed.
SEQUENCE
7-
welding
enclosure
hazard
com
Warranty
with
any
OF
OPERATION
1.
Ensure
that
the
the
in
in
Section
Section
FINE
engine
instructed
2.
Make
connections
instructed
to
3.
Rotate
counterclockwise)
4.
5.
the
Start
Place
position
the
engine
IDLE
and
as
CONTROL
commence
been
has
4.
the
to
3-5.
AMPERAGE
prepared
120/240
controltothe
setting.
instructedinSection
switch
operation.
volts
in
7-3.
the
for
ac
operation
terminals
100
LOCK
as
as
(full
OUT
7-1.
7-2.
Make
120
minal
The
low This
SHIELDED
Prior
clothing
(glasses
comply
damage.
1.
Ensure
Section
2.
Make
quired.
3.
Place
4.
Rotate
setting.
5.
If the
STANDARD
to
switch
6.
Start
7.
Place
and
8.
The
control
POWER
VOLTS
engine,
voltage
could
to
the
Remote
a
REMOTE
be
used,
the
the
commence
FINE
PLANT
all
sure
is
strip
when
at
result
METAL-ARC
welding,
(welding
and/or
may
that
the
4.
Connections
Ignition
the
FINE
place
in
REMOTE
the
engine
IDLE
AMPERAGE
if
used)
electrical
AC
turned
the
welding
result
engine
receptacle
off
starting,
output
in
damage
it
is
imperative
and
coat
in
-
has
the
to
switch
equipment
helmet)
serious
in
AMPERAGE
the
Control
If
REMOTE
Amperage
AMPERAGE
position.
position.
instructedinSection
as
CONTROL
welding.
be
adjusted
may
OPERATION
and
before
has
low
receptacle
electrical
to
(SMAW)
that
gloves)
_________________________
been
weld
OFF
the
CONTROL
Remote
a
switch
control
connected
starting
rpm
of
the
volts
which
120/240
equipment.
WELDING
proper
and
eye
be
on.
put
or
permanent
prepared
output
as
terminals
position.
controltothe
is
not
to
Amperage
AMPERAGE
7-3.
the
desired
in
(or
remote
while
welding.
the
to
ac
ter
the
engine.
causes
generator.
protective
protection
Failure
bodily
instructed
desired
be
used, place
in
switch
Control
CONTROL
position
amperage
7-3.
STARTING
THE
ENGINE
IMPORTANT
I
Check
the
Make
sure
Make
the
before
attempting
with
fresh
I
1.
to
in
as
re
2.
3.
4.
5.
all
Make
generator.
Place
the
IDLE
position.
engine
Choke
Rotate
the
Press
welding
to
warm
the
the
START
engine
loose
no
ne~ssary
gasoline.
and
CONTROL
IDLE
This
up
as
engine
Ignition
push
oil
level
and
etc.
parts
connections
the
to
start
electrical
be
should
idle
at
rpm.
necessary.
switchtothe
button.
radiator
are
laying
to
Fill
unit.
connections
switchinthe
in
order
done
RUN
position.
coolant
in
the
the
level.
the
unit.
generator
fuel
tank
the
to
welding
AUTOMATIC
to
permit
the
IMPORTANT
button.
in.
a
longer
at
engine
I
full
the
I
Always
h~e
stopped
otherwise
motor,
is
7.4.
6.
When
As
ENGINE
1.
Remove
2.
Allow
length
load.
the
the
engine
the
This
temperature
ensure
SHUT
all
of
rotating
engine
warms
weld
engine
time
idling
has
that
DOWN
if
time
a
the
Starts,
up,
and
idle
to
the
chance
the
ring
is
starter
before
or
release
slowly
power
for
engine
to
ensure
to
re-engaging
pinion
the
push
loads
few
a
has
equalize.
pinion
may
START
the
from
minutes,
been
that
and
the
be
damaged.
push
CHOKE
the
allow
operating
the
intemal
flywheel
starter
generator.
IMPORTANT
~
I
Make
120
minal
The low This
sure
VOLTS
strip
engine,
voltage
could
all
AC
is
when
at
result
electrical
receptacle
turned
starting,
the
output
in
damage
equipment
off
before
has
receptacle
to
and
low
electrical
connected
120/240
starting
rpm
of
volts
ac
the
engine.
which
the
generator.
equipment.
to
causes
the
ter
3.
Do 120
during
Place
not
VOLTS
the
operate
the
Ignition
accessory
AC
receptacle
shutdown-idling
engine
switchinthe
IMPORTANT
power
or
equipment
120/240
period.
OFF
volts
position.
from
terminals
OM-457
the
Page
13
Page 24
8-1.
1
If
work
any
the
remove
vent
engine
catching
and
casting
connect
GENERAL
Economical
power
generator
reasonable
Ottasional
pressed
periodically,
amount
attention.
air
of
ckist
is
to
spark
compression
the
repairpersons
the
the
negative
operation
are
blowing
recommended.
is
depending
and
dirtinthe
SECTION
-
8
GENERATOR
CAUTION__.!
be
doneonthe
from
plugs
stationary
I-)
battery
trouble-free
and
based
of
out
upon
from
hand
adapter
upon
the
This
the
atmosphere.
o~enerator,
rotor
the
turning
cable
unit
locationofthe
engine.
between
casting.
from
service
regular
with
should
This
the
the
the
inspections
clean
be
will
rotor
rotor
Also
battery.
this
of
dry
performed
unit
and
pre
and
dis
fan
weld/
and
com
the
MAINTENANCE
COLLECTOR
8-2.
The
proper
conditions.
extremely
brushes
made
dark
a
rings,
Never
into
8-3.
WELDING
Check
should
flon
cables
brushes
function.
for
weekly.
brown.
use
a
use
the
rings
connections
be
should
replaced.
emery
inspected
BRUSHES
RING
should
be
inspected
The
the
Under
If
or
it
finer
cloth
in
should
brush
generator
of
movement
normal
sandpaper
as
turn
If
dustyordirty
freedom
3/0
and
CABLES
periodically
be
frequently
repaired
with
life
location,
use
become
part
destroy
electrical
periodically
is
very
been
has
a
and
the
slip
necessary
followed
of
the
emery
the
carbon
for
tightness.
and
all
insulating
to
under
good
operating
check
close
cleanliness
will
rings
to
a
by
will
brushes.
brealc
in
ensure
discolor
clean
crocus
embed
The
the
tape
normal
should
the
their
in
of
cloth.
itself
cables
insula
or
an
the
be
to
slip
the
SECTION
9-1.
LUBRICATION
This become
engine
checked
be
some
about50hours
oil
and factured used mended
during
The
quarts,
make
to
engine
fully
should
engines
change
by
as
a
replacement
grades
break-in
capacity
without
sure
will
a
any
oil
require
broken
be
number
will
of
the
and
and
of
a
level
kept
use
running
oil
one
types
to
the
filter
at
in.
as
of
oil
filter.
of
oil.
use
engine
change.
is
up
least
During
as
light
times
during
time
Premium
the
major
Table
of
oil
after
withafilter
the
to
50
hours
this
period,
possible.
during
the
break-in
the
on
oil
9-1
to
use
break-in
the
4
quarts.
required
an
break-in
heavy
companies,
gives
~mixd4erenandso!ls.GeneraIly,motor
oils
fall
into
two
sulphonate
the
produce
chemical
cating
~cause
In
normal
hours
of
oil
should
normal ticle
suspension
drained. crankcase
removal
base.
sulphonates
good
reaction
properties
extensive
operation,
operation
be
drained
operating
in
Foreign
when
thus
and
categories:
The
phosphate
alkaline.
are
oils,
mixing
which
of
either
to
damage
should
oil
with
filter
a
after
oil
oil
and
tend
is
the
allowed
temperature,
the
particles
the
contaminating
the
greatly
oil.
The
the
engine.
be
change
engine
thus
thereby
to
the
phosphate
base
Although
two
reduces
mixing
changed
has
promoting
removal
settle
to
cool,
new
bases
every
at
oil
of
running
the
The
oil
operating
period.
duty
list
a
to
keep
oil
change
Check
operating
base,
oils
are
both
produces
the
of
oils
after
150
been
warmed
when
the
bottom
thereby
added.
9
-
time
loadonthe
level
should
day,
drain
oil,
manu
oil,
should
of
recom
oil
level
is
drained. is
the
dip
level.
and
acidic;
bases
lubri
could
about
hours.
up
foreign
the
of
avoiding
ENGINE
to
as
After
the
be
up
4-1/2
stick
a
1
50
The
to
par
oil
is
the
MAINTENANCE
9-2.
COOLANT
Caution
ing
almost
has within before
neck.
a
glove
from
N
If
the
make added
often
lU.S.
During
est
dangersisover-heating.
of
over-heating,
engine
At
the
make
Temperature
static
head.
determined
170F
the
valve
the
system
SYSTEM
should
radiator
the
full
made
been
the
completely
When
or
possible
engine
sure
a
the
to
as
necessary.
Measure).
the
break-in
lubrication
first
sign
a
thorough
of
valve
locatedinthe
This
unit
tem~erature
180
and
opens
begins.
be
exercised
pressure
position,
open
to
permit
radiator.
removing
removing
be
used
rag
exposure
is
to
be
operated
good
gradeofethylene
coolant
system.
The
period
but
the
and
coolant
of
over-heating,
check
to
the
engine
retards
F.
When
and
free
CAUTION
at
all
The
cap.
at
which
venting
Allow
the
the
cap
is
the
coolant
is
the
it
cap,
to
protect
to
extremely
in
a
temperature
Change
system
of
a
new
engine,
There
basic
determine
the
circulationofthe
are
items
circulation.
shut
coolant
outlet
at
flowoLcoolant
reached,
desired
the
is
the
usually
temperature
times
will
cap
point
built
pressure
from
recommended
the
operators
hot
coolant.
glycol
the
coolant
capacity
several
for
consideration
the
engine
cause.
regulated
frontofthe
when
turn
a
provision
up
to
the
anti-freeze
one
possible
by
varying
coolant
remov
to
pressure
escape
radiator
that
hand
below
solution
is
9
of
the
down
thermo
a
cylinder
until
between
is
achieved,
through
an
0F,
quarts
great
causes
a
U
I
is
as
are
and
pre
Page
Above
Not
low
As
above
Aslowas
Lower
below
lower
slow
Table
90
degrees
than
10
as
zero
lOdegrees
zero
than
zero
9-1.
32
degrees
Fahrenheit
Fahrenheit
10
degrees
Fahrenheit
Selection
Oil
Fahrenheit
degrees
Guide
SAE3O
.
SAE
1OW-30or1OW-20
SAE
1OW-30
SAE
1OW-30or1OW-20
SAE
20
20W
lOW
SW
or
or
or
or
10W-30 20W
1OW-20
5W-20
1
th~
Ensure
rating.
the
thermostat
heat.
without
run
a
result,
become
The
engine
mal
wear
periodically.
50
hours
placed.
tliermostal
that
the
Do
not
run
If
the
thermostat
a
thermostat,
excess
contaiminated
flTAr~
fan
and
should
Check
of
operation,
uiuud
replacement
the
engine
remains
remains
will
carbon
with
and
alternator
be
and
readjust
fail,
has
without
closed,
the
accumulate
sludge.
belts
checked
and
whenever
replace
an
the
open,
engine
are
for
tension
it
immediately.
equal
thermostat.
a
engine
or
will
and
subject
proper
after
belts
temperature
will
over
the
engine
cold.
run
oil
the
to
tension
the
are
will
nor
first
re
I
If
is
As
14
Page 25
9-3.
GOVERNOR
The
governor
obtain
to
set
load
ing
factory
less
absolutely
speed
Correct
conditions.
locked
SERVICE
setting
weld
with
a
necessary.
The
lead
and
rpm
governor
seal.
NOTE
sensitivity
and
engine
speed
Do
not
setting
response
control
remove
are
this
factory
to
chang
setting
seal
9-5.
VACUUM
In
order
fitting
is
un
idle
This
gasoline engine
to
type
control
brass
or
operation.
CIRCUIT
provide
air
valve.
fitting
suitable
a
cleaner
See
will
clean
solvent
AIR
air
is
provided
Figure
have
FILTER
for
the
vacuum
on
9-3
for
location
be
removed
to
periodicelly
(Figure
circuit,
the
underside
on
and
to
ensure
9-3)
the
cleaned
brass
a
of
the
engine.
in
proper
9-4.
A.
The
governor,
does
,d~cribed
The
engine
1800
and tion
concerning
Manual,
CARBURETOR
Zenith
Carburetor
Do
not
bodies.
endofthe
right
freely
To
ensure
(dimension
tance
machined
inverted.
body
minus
or
the
top
nose
long
float
the
not
rpm
Page
The
angles
on
correct
surface
1/32
of
pliers
body.
haveaNo
in
the
is
factory
when
governor
41,
paragraph
bend,
float
bodies
to
float axle.
the
This
inch.
the
float
and
in
used
as
Engine
set
to
it
comes
FLOAT
or
twist,
bodies
must
machined
the
fuel
levelinthe
A,
Figure
of
throttle
dimension
To
increaseordecrease
bodies
bend
conjunction
Load
Surge
Manual.
operate
weld
to
up
adjustment,
entitled
Pierce
SETTING
NOTE
apply
pressure
when
viewed
be
centered
surface
float
9-1)
(no
body
should
to
the
the
float
with
1200
at
speed.
refer
between
chamber,
from
gasket)
be
machined
lever
this
adjustment
rpm
For
the
to
Governor.
the
on
from
the
and
must
of
top
with
1-5/32
distance
surface,
at
a
point
engine,
idle
speed
infornia
Engine
float
free
and
move
check
floats
throttle
inches
close
as
at
from
use
dis
plus
Fitting
device
weld
this
Figure
going
the
Located
Idle
Of
Valve.
Air
Filter
DELAY
is
automatic
AUTOMATIC
engine
rpm
which
at
rpm.
the
engine
time
delay
This
9-4.
into
the
adjustment
TA-900
Location
ADJUSTMENT
when
IDLE
will
time
When
the
begins
is
controlledbythe
screw
intake
manifoldofthe
this
of
remain
arc
to
is
screw.
955-bA
the
position.
at
the
engine
is
broken,
return
located
IDLE
idle
to
on
Brass
Underside
On
Control
9-3.
rpm.
vacuum
CONTROL
9-4)
the
an
delay
The
of
Figure
Vacuum
of
switch
engine
arc
Screw
line
9-6.
Figure
IDLE
(Figure
Operation
CONTROL
When
until
immediately
time
a
idle
setting
the
to
a
to
engine.
comes
will
the
9-4
is
length
fitting
Circuit
TIME
idling
isinthe
is
started,
established,
to
up
before
exist
of
A
in
shows
Marvel-Schebler
B.
To
ensure
distance
gasket
should of
the
bend
and
The
edge
Figure
correct
(dimension
face
be
1/4.
float
the
of
Figure
with
bodies
float
the
9-2.
9-1.
Carburetor
fuel
B,
throttle
To
increase
to
lever
float
should
Carburetor
Carburetor
level
Figure
body
decrease
or
the
gasket
at
a
point
be
in
9-2)
kept
Float
the
inverted.
face,
Float
Setting
float
from
top
distance
use
a
closetothe
parallel
Setting
TA-900
chamber,
of
This
dimension
from
nose
long
float
with
the
TA-008
check
floats
the
body.
gasket.
955-7
to
top
pliers
835
9-7.
Manifoid
Adjust
Turn
crease
9-4.
Figure
CARBURETOR
Air
Air
Stove
Figure
9-5)
Cleaner
Inlet
9-5.
(Figure
In
Engine
Screw
Clockwise
AtATime
Idle
Time
L..
Idle
Carburetor
A
1/8
To
Delay.
Control
AIR
Compartment
In-
~
Time
TEMPERATURE
Air
Temperature
__j
Delay
d
TA-gOD
Adjustment
(Shown
Weather
SELECTOR
Selector
In
Position)
TA-900
Selector
OM-457
955-3A
Coid
955-4
Page
15
Page 26
9-8.
A.
The
air
tube
which
rounding
around prevent
Figure
operating
remain
For
warm
slide
it
AIR
CLEANER
Daily
1.
Open
er.
2.
Make
dirt
intaketothe
allows
engine
the
exhaust
carburetor
9-5
shows
position.
1
about
/2S
weather
all
the
way
Service
the
engine
certain
and
foreign
air
the
air
compartment
manifold
in
icing
the
When
away
operation,
down
SERVICE
compartment
that
the
material.
cleaner
to
cold
selector
the
from
against
screen
is
equipped
be
drawn
air
or
of
the
weather.
tube
is
tube
the
air
cleaner
loosen
the
manifold
(Figure
door
the
on
either
heated
engine.
in
in
this
the
9-6)
nearest
weather
with
from
drawn
air,
Heated
the
cold
position,
inlet.
selector
and
the
cap
selector
a
the
sur
from
air
will
weather
it
must
tube
and
re-tighten.
air
clean
is
free
of
B.
Weekly
Service
tions
accomplished
1.
2.
3.
U
I
Service
element
paper
when
or
in
missing.
is
field,
is
It
recommended
hand
filter
the
gasket
insideofair
Out
Do
recommended
ten
washings
first.
follow
for
distributor.
your
Remove
Inspect Wipe
element.
or
It
after
comes
Whenitbecomes the
on
from
once
loss
of
power
the
following
element
on
the
not
use
that
at
or
necessary
the
procedure
that
replacement.
every
is
noted.
manner:
lock
assembly
end
the
of
cleaner
elementifthe
the
element
the
endofthe
NOTE
service
to
element
a
spare
New
week
the
housing
outlined
elements
under
normal
Servicing
and
element
should
the
element
seal.
for
before
air
in
are
be
whichever
cleaner
Figure
be
available
installing
gasketisdemaged
season,
always
condi
damage.
replaced
in
9-6.
kept
is
I
U
For
a
in
the
be
.can
the
side
fully
the
hand.
CAUTION:
ment
The
element
by
doing
5.
Shake
element
CAUTION:
excess
temporary
field,
cleaned
the
or
against
Do
out
water
so.
and
may
excess
Do
by
a
allow
not
against
expedient
the
element
by
tapping
end
the
palm
not
tap
hard
be
damaged
water
to
attempt
using
compressed
care
ele
surface.
from
air
of
dry.
to
remove
Compressed
ceed
100
clean
can
sert
nozzle
ment
and
Clean
dust
side
of
holding
6
ment.
the
air.
the
inches
air,
lbs. the
inside
blow
from
the
element
nozzle
from
6.
An
through
light
indicates
clean.
dicates
aged
further
not
of
pressure
element.
the
out
the
at
the
even
is
held
Any
that
and,
use.
to
ex
In
ele
dust.
out
by
least
ele
fine
pattern
the
element,
inside
that
the
large
spot
the
element
therefore,
Replace
If
compressed
available,
or
vapor, ent
which
moved
then
the
washed.
in
warm
a
non-sudsing
CAUTION:
solvents
gasoline.
of
when
element,
of
light
is
is
unfit
element.
than
light
dam
hotter
stand;
or
the
element
the
or
any
cannot
by
compressed
element
Agitate
water
not
Do
the
or
a
is
in
for
air
is
if
soot,
oily
is
dirt
pres
be
air,
is
to
element
containing
detergent.
water
use
hand
can
fuel
oil;
To
by
it
cleaned
similar
not
re
be
oil,
minimize
waiting
is
suggested
Reverse
water
all
loosened
terial
down
for
filter
standby
flush
to
thoroughly
from
time,
the
element
that
be
replaced
unit.
with
foreign
the
filter.
the
TA-900
clean
created
to
dry,
newly
by
716-7
rinse
ma
a
Page
9.6.
Air
Figure
16
Cleaner
Service
Page 27
A
See
Figure
9-4
(2
1
10
9-9.
'
226
~
9-7.
Idle
weld
linkage
plate
the
linkage
and
linkage
gap.
will
the
of
the
directions
socket(s)
)1)
being
position
Control/Governor
ADJUST
is
not
rpm
calibrate
to
(item
1,
is
(2)
about
(1),
the
remove
(4)
the
to
socket(s)
Clockwise
shorten
the
Con
gap.
linkage
)1)
linkage
until
the
with
socket
nuts
(4).
is
bind
cocked
the
arm
conditions
Linkage
engine,
of
the
I
4.
5.
Adjustment
A.
Position
etor
throttle travel.
B.
Position travels
imaginary
the
rti~7
sta
ensure
vacuum
CONTROL
the
to
minutes).
in
fully
the
arm
the
to
butt
to
Rotate
Clockwise
crease
the
Tighten
justments
Recheck IDLE
Start
engine
five
ed
Pull
ator
(8)
throughout
A.
linkage
center
alignment
made
he
t
that
motor
all
connections
welding
reach
this
at
(8)
idle
the
the
the
arm
stop
the
arm
an
equal
center
of
the
in
Steps
e
ngine
body
unit.
switchinthe
generator
normal
Ensure
time.
toward
position.
idle
following
the
idle
rotation
engine
(8)
laterally
socket
(4)
(2)
plate
throttle
screw
limbs
that
the
screw
throughout
(8)
radially
distancetoeither
line
drawn
shaft
(7)
1
and
2.
and
while
clear
are
made
engine
operating
the
CHOKE
frontofthe
Maintain
(10)
adjustments:
(10)
screw
the
of
whereas
rpm
does
thus
LOCK
Figure
IDLE
CONTROL/GOVERNOR
MENT
(Figure
in
the
event
being
attained,
the
engine
1.
Adjust
Figure
1/32
loosen
hardware
governor
(4)
rotationofthe
governor
versely,
socket)s)
and
2.
Rotate
sockets
respect
(5)
to
9-7)
that
proper
perform
for
proper
the
length
9-7)
so
from
the
the
linkage
(6)
and
accordingly
linkage
counterclockwise
(4)
thus
increase
the
linkage
(4)
are
each
to
the
lock
engine
the
idle
and
of
that
the
stop
securing
securing
carburetor.
obtain
to
linkage
(1)
will
lengthen
the
gap.
socket(s)
parallel
other.
position
following
idle
weld
the
throttle
(3).
the
linkage
Rotate
socket(s)
and
but
Secure
of
the
LINKAGE
and/or
procedures
rpm:
governor
To
adjust
nuts
the
thus
rotation
the
in
opposite
the
linkage
stop
(5)
socket(s)
the
1/32
)4(
reduce
governor
)4)
slightly
linkage
~thelinkage~edomofmovement
throughout
due
ing
relativetoeach
3.
Loosen
(8)
radially
are
simultaneously
to
its
the
entire
the
and
linkage
other,
alignment
laterally
travel.
repeat
met:
If
the
socket(s)
Step
(7)
screw
the
until
linkage
(4)
2.
and
following
TC-003
that
so
not
that
so
perpendicular
(9).
and
recheck
ki
r
wo
ng
of
the
far.
OUT
and
temperature
control
welding
pressure
the
against
obtain
to
(10)
screw
counterclockwise
OM-457
the
touch
its
the
arm
side
on
fan
and
Place
position.
allow
is
the
on
stop
400
will
carbur
entire
of
the
t
he
(about
push
gener
arm
rpm.
Page
the
ad
the
the
(8)
an
to
(3)
in
I
17
Page 28
6.
7.
B.
Connect
vacuum
Manually
screw
mounting
screw
screw Screw
motor
butts
against
rotationofthe
rpm.
idle
the
Rotate
clockwise
roll,
wise
Rotating
air
Rotating
mits
leaner.
motor
(16)
(10)
(16)
(16)
uni~
then
flow,
more
the
pivot
butts
plate.
butting
butting
so
mounting
stop
until
rotate
until
the
making
the
vacuum
unittothe
the
If
that
screw
(3).
IMPORTANT
Screw
mixture
the
the
screw
screw
air,
making
motor
vacuum
against
this
is
against
against
plate
(10)
engine
the
screw
engine
(11)
the
air-fuel
(11)
carburetor.
the
not
possible
the
the
(16)
butts
before
will
decrease
adjustment
begins
(11)
counterclock
operates
clockwise
mixture
counterclockwise
the
air-fuel
(12)
linkage
motor
arm
vacuum
due
(3)
stop
mounting
against
idle
Screw
falter
to
Smoothly.
restricts
mixture
from
(14)
motor
the
to
before
plate,
the
vacuum
screw
engine
(11)
the
richer.
ad
the
until
unit
idle
the
adjust
(10)
(23)
(23)
UNDER
(22)
ten
screw
governor
by
by
the
IF
A.
or
12.
B.
C.
Tighten
desired
sensitivity
REGULATION
Decrease
sliding
inward.
IF
REGULATION
Increase
sliding
outward.
IF
ENGINE
LOAD
sion
by
(23)
outward.
the
two
governor
by
repeating
the
the
sensitivity
the
the
sensitivity
Increase
sliding
locking
sensitivity.
governor
governor
SURGES
the
the
Step
RANGE
RANGE
sensitivity
nuts
11.
IS
spring
adjustment
IS
spring
adjustment
(HUNTS)
governor
adjustment
(21)
Readjust
TOO
(22)
TOO
(22)
spring
to
BROAD
tension
screw
NARROW
tension
screw
maintain
the
NOTE
Whenever
ed,
Whenever
governor
the
governor
the
governor
speed
the
governor
sensitivity
sensitivity
(Step
speed
(Step
11)
10)
(Step
may
11)
(Step
be
must
readjusted.
is
10)
adjusted,
need
readjustment.
is
adjust
the
that
Ensure
before
plate
(3)
priortoplacing
AUTOMATIC
8.
Place
MATIC
is
automatic
AUTOMATIC
the
started,
established,
comes
delay
idle
rpm.
the
setting
the
If
seconds,
desired
vacuum
the
engine.
screw.
9.
When
(16)
-
U
Do
not
the
vacuum
ing
I
I.
the
Check
throughout
duetothe
ing
the
tive
to
the
linkage
the
the
the
IDLE
engine
to
up
will
exist
The
engine
adjust
time
line
the
engine
1050
until
readjust
linkage
its
linkage
and
screw
idle
IDLE
IDLE
position.
when
at
weld
length
of
the
does
delay.
fitting
Figure
the
motor
entire
linkage
repeat
(16)
screw
IDLE
the
position.
CONTROL
the
IDLE
will
rpm
which
rpm.
before
of
time-delay
not
the
going
9-4
has
is
rpm
NOTE
idle
idle
(12)
travel;
socket
fixed
(12)
Steps7.8,
butts
against
(10)
butts
CONTROL
Operation
IDLE
CONTROL
position.
remain
time
the
When
the
the
engine
this
time
screw
idle
to
go
time-delay
This
screw
into
shows
the
to
gone
obtained.
screw
rpm
rpm.
freedom
for
If
the
(14)
end
&
against
s~it~h
of
Once idle
at
engine
arc
begins
delay
A
rpm
screw
is
intake
the
adjustment
Idle
rpm,
(10)
linkage
)eing
adjust
9.
the
switch
in
the
is
broken,
is
after
located
when
of
(12)
cocked
the
until
mounting
the
to
controlled
in
adjust
movement
the
stop
the
in
AUTO
the
device
idling
is
switch
engine
arc
an
immediately
time
a
return,
9-4.
Figure
about
for
on
ten
the
the
this
of
screw
(A)
manifold
adjust~
is
bind
rela
of
length
equipped
(above
for
proper
carburetor
9-8
and
locking
until
the
main
engine
rotation
Tighten
point
burning.
MODIFICATION
with
an
4000
operation
adjustment
proceed
nut
generator.
the
engine
adjustment
operates
for
1/4
fuel
the
the
screw
the
where
flow,
air-fuel
locking
the
LUBRICATION
adjustable
Minor
ft).
follows:
as
(1).
Apply
Rotate
begins
screw
smoothly,
turn.
making
counter
(2)
mixture
nut
the
mix
at
the
Ro
(1).
(If
a
is
a
9-10.
HIGH
ALTITUDE
(Optional)
The main
adjustment
particular
in
is
is
to
by
of
deemed
Loosen
near
main
falter
to
(2)
then
tating
the
air-fuel
clockwise richer.
(Figure
carburetor
Zenith
for
jet
will
altitude.
necessary,
main
the
full
engine
adjustment
and
counterclockwise
continue
the
screw
mixture
admits
Remove
~icting
is
too
tUre
KEY
9-11.
TYPE
CARBURETOR
9-8)
may
altitude
high
be
necessary
Whenever
refer
adjustment
load
to
(2)
screw
lose
rpm.
until
counterclockwise
clockwise
(2)
leaner.
more
the
engine
the
fuel
lean
will
cause
IGNITION
be
operation
to
figure
screw
the
clockwise
Rotate
the
Rotating
fuel,
load.
valve
SWITCH
a
welding
restricts
making
Applicable)
and
is
noticed,
switch
key
product
the
by
slot.
that
and
9-12.
Periodically,
amount
remove
spraying Wipe
lubriplate
is be
SPARK
also
u~ed.
of
the
a
generous
excess
chain
anti-oxidant
an
ARRESTOR
depending
moisture
key
offof
and
on
in
the
and
lubricate
amount
the
nameplate.
cablefluid
and
(Optional)
the
location
or
air,
the
of
lubricant
which
penetrating
of
the
binding
Ignition
into
the
is
non-gumming
similar
a
or
unit
when
Itisrecommended
oil
Page
the
While
this
first.
1000
in
fire
exhaust
no
device
most
weekly
The
operating
a
highly
hazard.
practical
will
solid
or
entire
Glowing
retain
can
minimize
particles
every
hours
com
spark
50
spark
or
10.
Place
the
IDLE
CONTROL
the
position.
securing
ment
tained.
governor
11.
Check
removing adjustment
locking
instructions:
18
nut
screw
Tighten
speed
the
nuts
Loosen
(19).
(20)
governor
the
is
deemed
Adjust
until
the
setting.
engine
(21)
and
governor
a
high
securing
engine
load.
necessary,
proceed
the
in
switch
speed
governor
idle
rpm
(19)
nut
regulation
If
a
governor
loosen
with
the
LOCK
adjusting
speed
of
1800
maintain
to
by
applying
sensitivity
of
one
the
following
OUT
screw
adjust
is
the
and
two
ob the
Internal
bustible
carbon sufficient
arresting
fire
hazards
provided
The
carbon
operating
arrestor
three
times
combustion environment
particles
heat
to
device
by
it
that
trap
hours,
should
season:
per
blown
ignite
will
stop
removing
is
properly
should
whichever
be
inspected
engines
a
are
out
materials.
all
and
maintained.
be
operating
common
with
sparks,
trapping
serviced
occurs
every
Page 29
tMPORTANT
Replace
failure.
the
spark
arrestor
if
inspection
reveals
any
signs
of
I
A.
Inspection
1.
2.
3.
The
engine
has
been
not
was
specifically
spark
arrestor,
is
mandatory
of
check
the
and
an
in
brush,
California
examine
metal
or
engine
tube with
the
The
the
important
the
is
securely
operated grasslands,
4442
areas,
Visually
cracks,
With
outlet examine failure.
tube
is
efficiency).
Check
arrestor
exhaust
equipped
ordered
maintained
if
this
National
a
or
state
your
the
corrosion.
stopped,
a
flashlight
and
vanes
vanes
outlet
factor
mounting
mounted.
system
with
as
in
welding
forest
Public
Resources
and
local
outsideofthe
look
the
outlet
must
be
tube
must
in
clamp
this
on
a
spark
an
optional
effective
generator
Forest,
covered
laws.
inside
other
or
tube
attached
firmly
be
completely
maintaining
to
ensure
welding
arrestor
accessory.
working
or
on
land
Code).
device
the
source.
light
for
generator
unless
is
California
Section
(see
For
spark
metal
to
intact
spark
that
it
A
order,
be
to
other
for
holes,
arrestor
Visually
weld
or
inlet
the
(this
arresting
the
spark
I
B.
Servicing
I
Service
from
I
I
1.
2.
Stop
Remove
arrestor
hole,
3.
Start
particles
discharge,
stack.
4.
Stop
The
the
device
sparks
flying
the
engine
the
cleanout
withawrench.
break
it
the
engine
out
momentarily
the
engine.
Carbon
and
loose
and
the
Replace
Trap
in
an
hot
or
allow
plug
with
run
cleanout
where
area
carbon
the
from
If
a
screwdriver
a
it
at
hole.
cover
and
secure
particles.
exhaust
the
crust
idle
rpm
If
the
there
is
system
bottom
has
formed similar
or
to
particles
end
of
the
cleanout
no
blow
of
to
the
are
danger
cool.
the
spark
over
tool.
collected
slow
exhaust
plug.
I
the
to
Hazardous
cuitry running.
inspection
Troubleshooting
formed
The
following
remedies
welding
for
generator.
of
Shut
by
some
voltages
the
welding
down
work
or
qualified
chart
of
CAUTION
are
the
of
internal
personnel
is
the
present
generator
engine
the
on
designed
troubles
9-8.
Figure
SECTION
t~ternalcir
on
while
inside
diagnose
that
the
attempting
of
should
develop
may
before
circuitry
only.
to
High-Altitude
10-
TROUBLESHOOTING
is
engine
any
the
unit.
be
per
and
provide
in
this
Vacuum
Motor
Unit
Carburetor
It
according
generator
developed.
Use
performing
remedied
Factory
all recommendations
Adjustment
is
assumed
Section
to
has
this
chart
troubleshooting
after
Authorized
of
cases
that
3
been
functioning
in
conjunction
performing
Service
equipment
should
proper
of
this
procedures.
malfunction,
be
strictly
installation
manual,
properly
with
these
Station
and
until
circuit
the
If
the
procedures,
should
the
followed.
TC-003
has
been
that
the
this
diagram
trouble
the
be contacted.
manufacturers
OM-457
226
made,
welding
trouble
while
is
not
nearest
Page
In
ig
Page 30
No
weld
output
terminals.
receptacle
~
No
output
terminals.
well
as
VOLTS
.
No
output
receptacle
well
as
output
No
weld
Erratic
Engine
when
CONTROL
AUTOMATIC
-
Engine
when
CONTROL
AUTOMATIC
output
from
AC
120/240
is
normal.
.
or
weld
speed
arc
will
arc
TROUBLE
120/240
120
RC1
Output
from
Weld
Output
as
output
receptacle
from
Rd.
volts
ac
power
current.
-
remains
is
struck
switch
IDLE
return
not
broken
is
Switch
IDLE
or
120/240
volts
volts
VOLTS
normal,
~S
120/240.voltsac
is
normal
from
RC1.
120
VOLTS
Weld
output
plant
power
output,
-
-.
-
-
at
idle
rpm
and
IDLE
S2
is
position.
-
idle
to
rpm
and
IDLE
S2
is
position.
-
AC
120
AC
ac
as
in
in
~
~
-Defective
-
-
Shorted
PROBABLE
R
EM
0
CONTROL REMOTE
remote
connected
Remote
n
AMPERAGE
receptacle
Loose
volts
Defective
Loose
AC
Defective
Defective
Damp
Loose
Check
RANGE
Magnetic
switch
Coilofidle
GS1
Filter
Idle
Idle
Leak
S2.
t
o
Fuse
Fl
ac
receptacle
burned
on
control
control
in
amperage
secure
connections
terminals.
connection
or-defective
or
dirty
.leads
Switch-S3.
CR1.
solenoid
vacuum
IDLE
T
E
position
a
mpe
to
RC2.
and/or
power
120
brushes.
rotor.
and
field
-
control
out.
valve
-
valve
CAUSE
AM
P
switch
rage
welding
control
i
A
n
CONTROL
F2
is
open.
at
winding.
120
at
Rd.
volts
ac
winding.
electrodes.
connections.
Contacts
not
closing
solenoid
plugged.
GS1
closed.
GS1
plugged.
line.
CONTROL
EAAG
is
S5
with
control
generator.
plug
EMOTE
120/240
VOLTS
of
the
reed
-
-
valve-
switch
-
E
in
no
is
Place
the
REMOTE
STANDARD
the
controltothe
RC2.
Insert
remote
and
RC2
Check
Secure
Have
Secure
Have
station.
Replace
Have
Use
Check
and
connections.
power
all
120
brushes.
rotor
dry
new,
Connections
rotate-as
replace
connections
generator.
Discoloring
loose
by
Replace
Apply
connection.
CR1.
-
12
vdc
operation.
filter.
Clean
valve
Open
Remove
Check
Check
-
and
line.
switchS2with
-
REMOTE
amperage
winding
volts
replaced
electrodes.
of
brass
to
-
See
GS1
clean
-
position
far
fuses
replaced
ac
winding
at
contacts
solenoid
Section
by
turning
GS1.
-
-
AEMEDY
AMPERAGE
AMPERAGE
control
as
possible
FlorF2
120
to
authorized
both
Replace
9-8
ohmmeter.
-
or
connect
plug
in
a
as
at
authorized
VOLTS
replaced
service
inside
and
could
contact
-
coil
GS1
for
cleaning
in
counterclockwise
a
-
-
CONTROL
a
CONTROL
fully
clockwise
required.
AC
receptacle
authorized
at
station.
outside
indicate
switch
or
and
-
procedure.
-
-
-
-
remote
into
service
heating
check
-
switch
amperage
receptacle
receptacle
direction.
station.
PCi.
-
-
of
welding
plate
for
-
direction.
-
S5
service
caused
53.
of
proper
in
-
Page
1f it
20
becomes
necessary
to
replace
any
fuseinthe
welding
generator,
ensure
that
proper
sizeisused.
the
fuse
of
a
-
Page 31
NOTE
GROUND
INSTALLED
ERAME
NEUTRAL
POWER
AC
r~<CI
lh-<
EIT
GAS
CAUTION
OWNERS
TO
REFER
p
I
I
I
I
AlT
TIME
ATTEMPTING
AND
METER
UOLTDGE
1-
EQUIPMENT
GROUND
STRAP
RETWEEN
AND
WELDER
RE
MUST
ENGINE
FRAME
I
I
I
INCLUDING
I
C0)
OPTIONDL
RECEPTACLE
P4RU.
LP TOTAL
2ADVOLT
GROUNDING
IF
DESIRED
I3~ft45
~
j3,
JR~~
PIC.R
~
~t50~
23
REAR
127
DIEW
ThERR4
30t~
2D
5333
~
LOW
Figure
1O~1.
Circuit
Diagram
Circuit
Diagram
No.
CB-901
775-itt
OM-457
Page
21
Page 32
Page 33
April
1978
FORM:
OM-457C
Effective
With
Serial
No.
HJ134589
PARTS
LIST
Page 34
54 55
56
57
58
OM-457
Page
A
Figure
1
Main
Assembly
Page 35
CD
11
w
~
~
a1_
a
0
0
-I
0
9
(11
0
CD
03
C~
0
Page 36
Item
No.
Dia.
Mkgs.
Factory
Part
No.
Description
Quantity
Page
A
Figure
1
2
3
4
017
010434
006698
018
602
5
6
7
8
9 10 11 12
13
14
15
.
16 17
010870
010
006 014
007
010
017
031
018
018
008698
010 433
*017
018
000
18
19
20
21
22
23
24
25
26 27
28 29
30 31 32
33
34
35 36
37
38 39
40
010
018 023
022 899
010515
005612
008766
035
027 010
*028262
015
010
073
027564
053724
017 028
605 008 006015 006 005
41 42 43
44
45 46
47
48
018
017
020 025 025
025 605 026
49
50
51
605
025181 005108 010
52
53
54
Batt
55
5~
3
57
Figure
017421
017
*015
023 017
Main
Assembly
430
858
938
STRAP,
mounting
STRIP,rubber
TANK,fuel
tank-fuel
CAP,
.
FITTING,
pipe
-
fuel
2x
1/2x
(consisting
-
of)
galvanized
FITTING,pipe-brassnipplehexl/8NPT
318
829 289 479
868
765
859
VALVE,
FITTING,
fuel
LINE,
FITTING,
SEAL,
BRACKET,
AIR
CLEANER,
CAP,
.
shut-off
weather
cleaner
air
-
-
brass
flared
(usedwith
-
brass
flared
-
lift
mounting
intake
-
w/strainer
Marvel
eye
-
intake
.BAFFLE,dust-cap
-
7/16-20
309
861
272
861 365 626
NUT,
.
ELEMENT,
.
BODY,
.
CLAMP,
.
CLAMP,
HOSE,
CABLE,
DOOR,
BOLT,J
wing
air
air
hose
intake
battery
access
5/16-18
steel
air
cleaner
cleaner
cleaner
1-1/16-2
-
air
-
-
battery
clamp
insulated
DOOR,side
COVER,top
968 529 875
WASHER,
cotter
PIN, CLAMP,
neoprene
1/4x3-1/2
muffler2inch
5-7/8
MUFFLER,exhaust
700
955
355
BRACKET
WASHER,
.
SPR
.
ING,
compression
ASSEMBLY,
-
flat
steel
13/32
.SPACER,anti-noise
GUARD,fan
363
404
982
777
i~adiator
HOSE,
RADIATOR
radiator7lb
CAP,
.
ENCLOSURE,
-
upper
(consisting
pressure
radiator
FITTING,pipe-brassdraincockl/4NPT
037
112
757
594
365
453 884
182
429 837 430
radiator-lower
HOSE,
ENGINE,
BLADE,
.
CONTROL,
.
CLAMP,
.
STOVE,
.
SENDER,
.
SENDER,
.
BRACKET,
.
ALTERNATOR,
.
INSULATOR,
.
PULLEY,
.
-
electric
gas
fan
(included
weld/idle
-
stove
manifold
temperature
pressure
mounting
terminal
single
start
manifold
-
oil
35
amp
belt
vacuum
.TUBING,steel5/BODxl2gawallxl/2
.PIPE,blackl-1/2x
089
B
FITTING,
.
GENERATOR
CATCH,door
477
ROD,
709
BATTERY,
641
CABLE,
431
HOLDER,
pipe
holddown
12
battery
battery
-
brass
ASSEMBLY
-
battery
53
volts
-
uninsulated
15
tank
2
plug
inverted
-
Schebler
inverted
air
cleaner
-
carburetor
dia
3-5/8
x
dia
mounting
ID
of)
(consisting
with
engine
-
alternator
volts
12
-
nylon
coupling
(See
amp
elbow
connector
dry
x
1/16
-
muffler
2
OD
x
-
see
(See
Fig.
negative
(engine
NPT
1/8
Page
male
1/4
carburetor)
male
type
(consisting
(consisting
1/8
x
of)
engine
D
Page
ground
alternator)
6)
1/8
x
1/4
parts
10)
NPT
TBG
list)
of)
of)
2 2
1
1
1 1 1
2
1
NPT
1/8
x
1
1 1
1 1 1 1 1
1
1
5
1 1
1
4
2
1 1
6
1 1 1
2
1
2
2
1
1 1 1 1 1 1 1 1 1
1
1
1
1
1
1
1
1
1
1
1
2
2
1
1
1
Page 37
Item
No.
Dia.
Mkgs.
Factory
Part
No.
Description
Quantity
Figure
58
59
60 61 62 63
64 65 66 67
68
69 70
71
72 73
74
75
76
77
78
78
79
80
81 82
83
A
R2,3
TEl
VR1
SR1,2
Zi
VS1
Z2
030
060
023892
007
894
010266 017420 004 444
000 553
144
010
107
603
621
038
967
053
038
620 372
052
035860
038493
035
704
031
926
008
780
004
291
036259 025138
025
139
025
140
004
556
031
318
Figure
932
025
218
028
031
220
603
125
004 426
Main
Assembly
RESISTOR,
(Contd.)
WW
adj
CABLE,ground MOUNT,
engine
SPRING,extension
LATCH,door
-
base
stud
7/16
-
rectifier
.
terminal
-
mtg.
ASSEMBLY
center
UPRIGHT,
MOUNT,
CLAMP,
HOSE,
BLOCK,
dual
nylon
neoprene
terminal
INSULATION,
LINK,
jumper
BRACKET,
RECTIFIER
.VARISTOR,3joule390volts
.RECTIFIER,
HEAT
UPRIGHT,
BASE
REACTOR
integrated
rectifier
SINK,
base
(consisting
-
front
.COIL,lefthand
center
COIL,
.
COIL,
.
DOOR,
PANEL,
C
PANEL,
SUPPRESSOR, FRAME,
STABILIZER
STRIP,
KIT,
label
hand
right
access
hinged
front
mounting
cotton
(includes
-
front
-
lower
-
upper
0.75uf10
1/8
375
-
generator
dia
slit
5/32
30
amp
terminal
of)
lower
with
-
reactor
4(4ft
x
all
labels)
20
watt
ID
x
4
pole
block
strip
(consisting
6amp
or
(used
right
components
ohm
w/leads
&
stabilizer
reqd
ohm
11/32
600
when
-
order
OD
of)
volts
unit
(See
by
(order
has
Page
ft)
by
TAC)
8)
foot)
2
1
1 2 2
1
2
1
1
ft.
1
1 2
1
1
1
2
1
1
1
1
1
1
1
1
1
1
1
1 4
ft.
1
A2
RC2
S4
Shunt
TAC
025
103
103
604
234
025
031
317
027 847
311
038
011
281
010
082
010805
011
948
019
603
024694
769
038
103633 103634
318
604 039 046 039 044
039
045
032
053
601
976
880
601 601
879
027
851
030
084
032936
Parts
for
Optional
METER,
amp
RECEPTACLE,
CAP,
straight.grounded
TUBING,
HANDLE,
GUIDE,
KNOB,
BEARING
CONTACT
&
ball
SWITCH
BRACKET,
.
INSULATOR,
.
SWITCH,
.
. .
..
.
.
..
..
.
.
Equipment
dc
5OMV
straight
TERMINAL,
mounting
switch
polarity
steel
5/8
switch
contact-switch
BOARD
..BUSBAR
MOUNTING
..
NUT,
.
.
.TERMINAL
BUS
..
TERMINAL
. .
CLIP,
..
SCREW,
.
.
NUT,
..
NUT,
..
COVER, SHUNT,
BAR
BOARD
-
steel
self.tocking
BOARD,
BOARD,
.
spring
steel-hex steel-hex
meter
bus
-
steel
cap
switch&terminal
5OMV
TACHOMETER,electric
0-600
.
duplex
2P3W
polarity
.
switch
.
polarity
(consisting
OD
5/32
x
ASSEMBLY,
hex
power
black
bar
hex
hd
1/2-13
jam
full
1/2-13
board
600
amp
12
volts
scale
grounded
(used
&
&
of)
wall
1/4-20
output
1/2-13
4000
with
power
terminal
1/2
x
movable
-
black
1-1/2
x
rpm
2P3W
15
RC2)
output
(consisting
board
Ig
(consisting
amp
of)
250
volts
of)
1
1
1
..
1 1
1
1
2
1
2
1
1
1
2
1
1
2
1
1
1
1
1
1
1
1
1
OM-457
Page
4
Page 38
Item
No.
Figure
Dia.
Mkgs.
A
Factory
Part
No.
Main
Assembly
(Contd.)
Description
-
~
Quantity
*Re~mmended
BE
SURE
TO
Spare
PROVIDE
TT
V
Parts.
STOCK.
97
017 020
032
025
027 010
010 031
MODEL,
98
390
374
936
638
561 429
875 466
99
BRACKET, BRACKET,
METER, METER,
MUFFLER,
JET,
CLAMP,
PIPE,
AND
100
mtg.
mtg.
hour
volts
exhaust
carburetor
muffler
black
1-1/2
SERIAL
-
-
4-40
dc
0-100
-
high
2
NUMBERS
x
tachometer
tachometer
volts
scale
-
low
noise
altitude
inch
dia
4-3/4
WHEN
to
engine
ORDERING
REPLACEMENT
2
PARTS.
Page
TO-006
562
BGenerator
Figure
5
Assembly
Page 39
Item
No.
Dia.
Mkgs.
Factory
Part
No.
Description
Quantity
Figure
91
92 93 94 95 96 97 98
99
100 101
102
103 104
105
106 107
108
109
110
111
112
113
114 115
116
117
B
SR3
F1,2
SR3
025271 025517 025305 037 025 306 026 039 269
*012625
039169 010493 059017 039207
032311
**003
024617
053390 035917 035776
025525
010021 018614
018665
600270
*020034
025321 025516
025305
037956
957
203
632
Generator
ENDBELL DIODE
ASSEMBLY,
.INSULATOR
DIODE,
INSULATOR
CHANNE.L,
fuse-holder
BOX, FUSE,
cartridge
HOLDER,
BUSHING,
STATOR
BAFFLE,
GUARD,
ROTOR,
RING,
generator
retaining-external
BEARING,
rotor
FAN,
steel
KEY,
threaded
ROD,
CLAMP,
BRUSH
CAP,
steel
SET
brush
.BRUSHHOLDER
BRUSH,
BRACKET,
DIODE
ASSEMBLY,
.INSULATOR
DIODE,
Assembly
275
amp
neoprene
45
fuse
cartridge
5/8ID7/8
snap
air
generator
ball
3/8x3/8
end
cushion
(consisting
holder
contact
mounting
275
amp
Fig.
volts
inch
250
60
A
polarity
reverse
volts
amp
(See
reverse
250
1/4
amp
mounting
(consisting
2
x
dia
9/16
of)
-
brush
holder
volts
polarity
straight
straight
250
Page
x
of)
x
11-1/2
250
11/32
3
Item
52)
(consisting
polarity
long
volts
hole
hole
(consisting
polarity
of)
of)
1
1
2 3
5
1 1
2
1
1
1
1
1
1 1
1 1 1
6
2
1 1
1
1
1
1
2
3
*Recommended **Rotor
BE
is
SURE TO
available
Spare
PROVIDE
on
Parts.
an
exchange
STOCK,
basis.
MODEL,
Contact
AND
Factory
SERIAL
Service
NUMBERS
Department
WHEN
for
details.
ORDERING
REPLACEMENT
PARTS.
OM-457
Page
6
Page 40
Figure
Cl
146
Page
164
071-A
TC-006
C
Figure
7
Panel,
Front
-
Upper
With
Components
Page 41
Item
No.
Dia.
Mkgs.
Factory
Part
No.
Description
Quantity
Figure
131 132
133
134
135
136
137 138
139
140 141 142 143
144
145
146 147
148
149 150
151
152
153
154
155 156
157
158
159 160
161
162 163 164
C
S3
Ri
S2,5
RC3
RC1 Si P81
CR1
Oil
A
Temp
019 010
039 601
039044
601 039
039
601
010 059
059262 011
*605
053 032
604 005 011
034876
039 601 039043 039049
601
039044
601 031 019 602 019 039
039 039
-
754
836
046
879
Front
Panel,
HANDLE,
PIN,
spring
NAMEPLATE
TERMINAL,
NUT,
.
Upper
switch
-
compression
power
steel-hex
(order
.BUSBAR
880
045
043
976
528
343
413
960
359
897
176 372 767
SWITCH,
S~NITCH,
SWITCH,
steel.hex
NUT,
.
TERMINAL
.
CLIP,
.
SCREW,
.
TUBING, BRACKET, BRACKET,
SWITCH,
RHEOSTAT,
spring
cap
steel
mounting mounting
range
BOARD,
-
-
WW
toggle
RECEPTACLE,
RECEPTACLE,straight-duplex
ignition
push
RELAY,reed
047 976
TERMINAL,
SCREW,
.
cap
power
-
.CLlP,sprir~g-busbar
.TERMINALBOARD,red
880
879 858
755
178
790
241
237 239
NUT,
.
.BUS
NUT,
.
PANEL,
HANDLE,
SCREW,
CONTROL,
GAUGE,
METER,
GAUGE,
-
steel
BAR
steel-hex
front
rheostat
set-steel
push
pressure
amp
temperature
hex
-
dc
With
-
range
output
full
jam
bar
bus
hex
steel
OD
1/2
(See
300
SPST
twistlock
-
key
button
output
steel
hex
jam
full
upper
1/4.20
-
pull
-
oil
60-0-60
by
1/2-13
1/2-13
black
x
.
meter
-
meter
Fig.
watt
20
type
-
starter
1/2-13
1/2-13
stock,
hd
11
Cl
amp
-
hd
x
Components
model,
-
black
(consisting
1/2-13
x
wall
x
ga
9)
Page
34
ohm
volts
125
grounded
grounded
start
w/o
-
red
(consisting
1/2-13x1-1/2
3/8
(used
(See
and
1-1/2
1-1/4
2P3W
with
Fig.
serial
of)
2P3W
of)
handle)
A
Page
numbers)
15
amp
4
Item
79)
1 1 1 1
1
1
1
1 1
1
1 1
1
1
2
125
volts
1
1
1
1
1 1
1 1
1
1
1
*Recommended
BE
SURE
TO
Spare
PROVIDE
Parts
STOCK,
MODEL,
AND
SERIAL
NUMBERS
WHEN
ORDERING
REPLACEMENT
PARTS.
OM-457
Page
8
Page 42
Item
No.
171
172 173 174 175 176
177
178 179 180 181
182
183
184
185
186 187
188 189
190 191 192
Figure
Cl
Factory
Part
No.
011
413
011
322
010
671
017
428
011
412
011
490
011
025
011
010
011
009
200
010
010
202
010
201
011
007
011
018
011
489
011
018
010
200
010
202
010
201
011
095
011
019
011
012
011
013
Switch,
BRACKET,
SPRING
LOCATOR,
CONTACT
CONTACT
SPRING,
CONTACT,
CONTACT,
.
SPACER,
SPACER,
SPACER,
.
SPRING,
.
CONTACT,
CONTACT
CONTACT, SPACER,
SPACER,
SPACER,
.
CONTACT
CONTACT
SHIM, GUIDE,
Range
BOARD
guide
contact
(See
mounting
quadrant
ASSEMBLY,
pressure
switch switch
contact contact contact
pressure
stationary
ASSEMBLY,
stationary
contact
contact contact
BOARD,
BOARD,
.
contact
board
C
Page
Fig.
-
swit~h
ASSEMBLY
movable
-
copper
-
bronze
.024
thick
thick
1/8 1/16
thick
stationary
.024
thick
1/8
thick
thick
1/16
stationary
movable
board
-
stationary
Description
8
Item
144)
(consisting
(consisting
(consisting
(consisting
of)
of)
of)
of)
Quantity
1
1
3
1
2
2
1
9 6 2
1
2
2 3 3
Page
TB-Oil
BE
9
SURE
273
TO
PROVIDE
STOCK,
MODEL,
AND
Figure
SERIAL
Cl
NUMBERS
Switch,
Range
WHEN
ORDERING
REPLACEMENT
PARTS.
TB-Oil
412
Page 43
Item
No.
Figure
Dia.
Mkgs.
D
Factory
No.
Part
757
018
Control,
Weld/Idle
Vacuum
Description
(See
Fig.
A
Page
Quantity
3
42)
Item
201
202
203
204 205
206
207
208
209
210 211
212
213 214
215
216
217
218 219 220 221
SR4
GS1
417
017
393
604
392
604
931
603
470
603
869
010
020 963 018
097
020
962
010
561
252
031
964
020
304
003
030
023
603
802 544
017
713
015 018
160
799
024
098
018
334
010
206
LINKAGE
NUT,
speed
RIVET,
steel-round
RECEPTACLE,
VALVE,
shut-oft-needle
BUSHING,
TUBING,
CHAMBER, HOSE,
neoprene
brass
TEE,
RECTIFIER,
TUBING,
VALVE,
12
BREATHER,
RIVET,
steel
BRACKET, GROMMET,
LINKAGE
BALL
JOINT,
hook
BOLT,
clevis-rod
CLIP,
ASSEMBLY,
inch
3/16
screw
-
brass
3/16
copper
vacuum
7/64
1/8
1/8
x
selenium
copper
voltsdc2
brass
-
round
mounting
rubber
ASSEMBLY,
1/4-28
1/4-28
pipe
1/4
end
-
pipe
-5/16
vacuum
head
3/16
1/4
dia
reducer
OD
x
4
ID
x
OD
.030
x
1/4
way
vent
head
1/4
-
chamber
ID
vacuum
thread
1/2x3-3/4
x
.030
x
x
-
actuator
3/4
x
MPT
1/4
waIl
waIlx1
IPS
port
2
vacuum
hole 3/16
1/2
to
carburetor
13-1/2
x
1/8
1/8
FPT
orifice
groove
(consisting
of)
2
1
1
1
202.
201.
.207
205
208
209
211
757-C
TA-018
WHEN
Vacuum
ORDERING
REPLACEMENT
PARTS.
OM-457
Page
10
D
Figure
BE
SURE
TO
PROVIDE
STOCK,
MODEL,
AND
Control,
SERIAL
Weld/Idle
NUMBERS
Page 44
Loading...