

Page 1
OM-610 029 820S
July 2002
Processes
Description
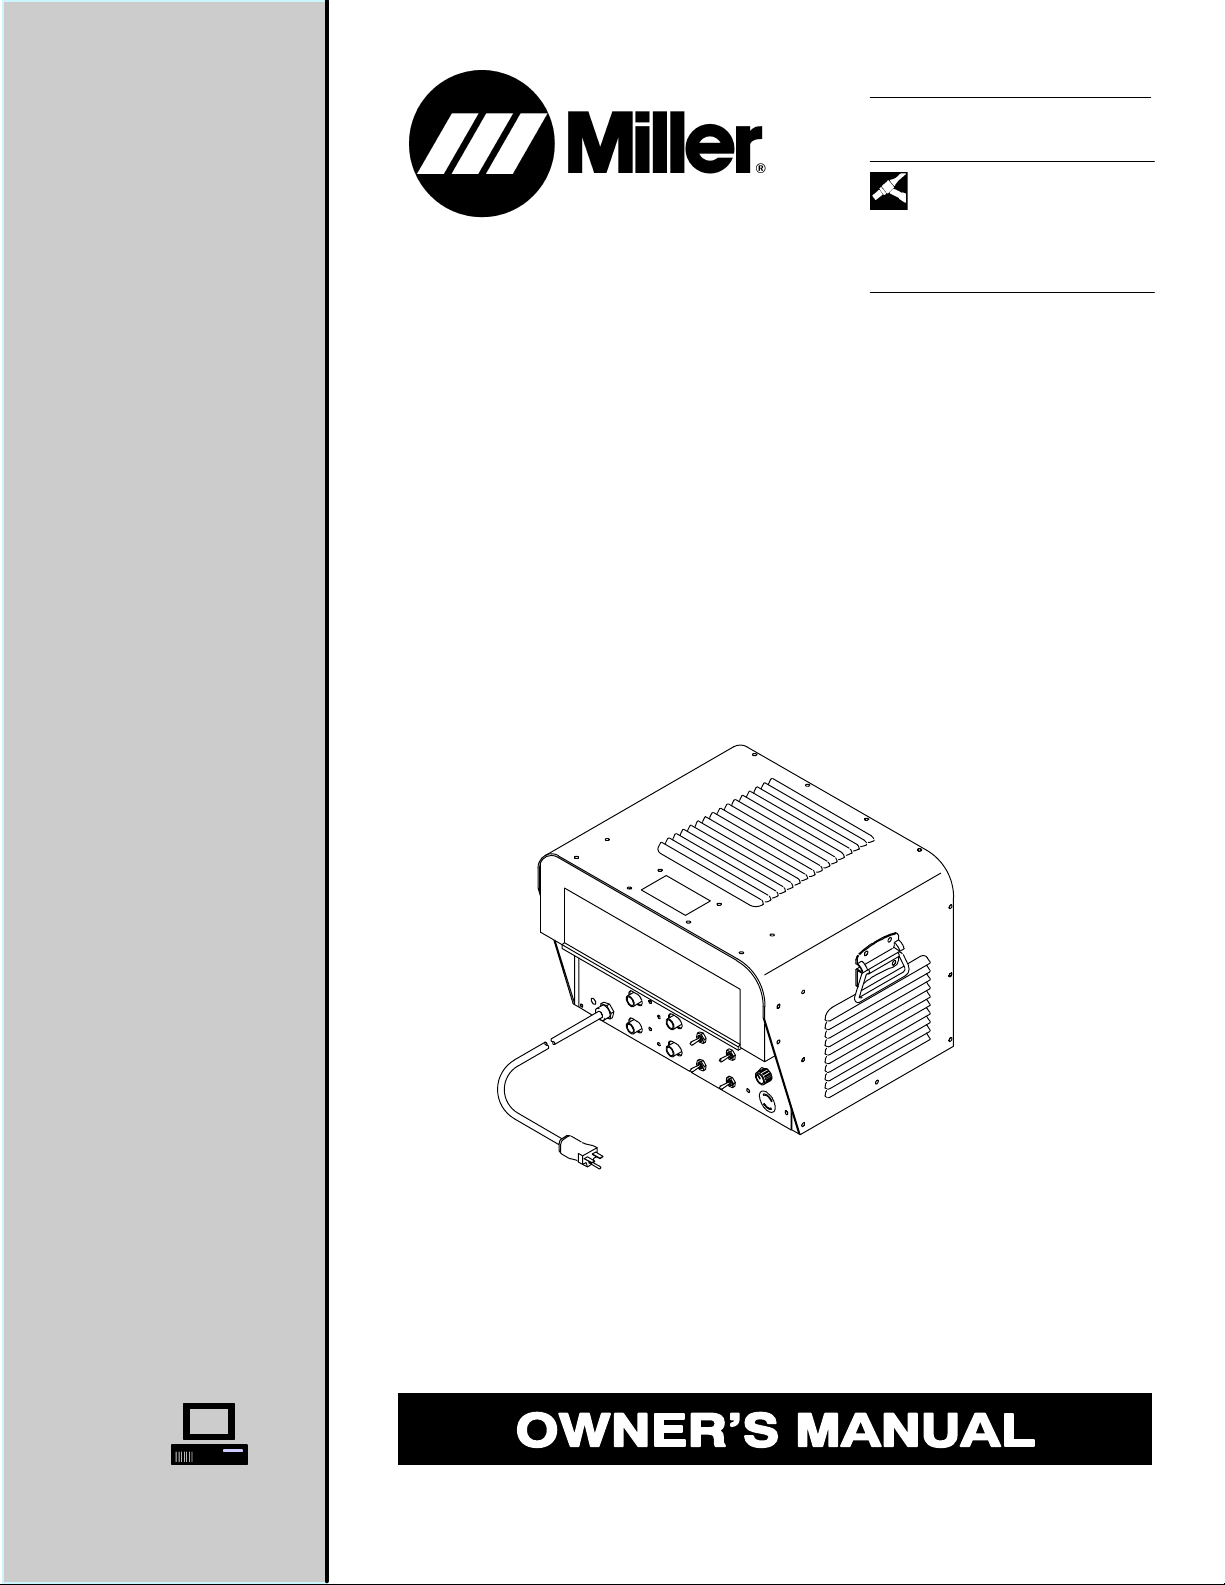
High Frequency Arc Starter
HF-20-1WG
TIG (GTAW) Welding
Visit our website at
www.MillerWelds.com
Page 2
From Miller to You
Thank you and congratulations on choosing Miller. Now you can get
the job done and get it done right. We know you don’t have time to do
it any other way.
That’s why when Niels Miller first started building arc welders in 1929,
he made sure his products offered long-lasting value and superior
quality. Like you, his customers couldn’t afford anything less. Miller
products had to be more than the best they could be. They had to be the
best you could buy.
Today, the people that build and sell Miller products continue the
tradition. They’re just as committed to providing equipment and service
that meets the high standards of quality and value established in 1929.
This Owner’s Manual is designed to help you get the most out of your
Miller products. Please take time to read the Safety precautions. They
will help you protect yourself against potential hazards on the worksite.
We’ve made installation and operation quick
and easy. With Miller you can count on years
of reliable service with proper maintenance.
And if for some reason the unit needs repair,
there’s a Troubleshooting section that will
help you figure out what the problem is. The
Miller is the first welding
equipment manufacturer in
the U.S.A. to be registered to
the ISO 9001 Quality System
Standard.
parts list will then help you to decide the
exact part you may need to fix the problem.
Warranty and service information for your
particular model are also provided.
Working as hard as you do
– every power source from
Miller is backed by the most
hassle-free warranty in the
business.
Miller Electric manufactures a full line
of welders and welding related equipment.
For information on other quality Miller
products, contact your local Miller distributor to receive the latest full
line catalog orindividual catalog sheets. To locate your nearest
distributor or service agency call 1-800-4-A-Miller, or visit us at
www.MillerWelds.com on the web.
Miller offers a Technical
Manual which provides
more detailed service and
parts information for your
unit. T o obtain a Technical
Manual, contact your local
distributor. Y our distributor
can also supply you with
Welding Process Manuals
such as SMAW, GTAW,
GMAW, and GMA W-P.
Page 3

CERTIFICATE
NAME OF EQUIPMENT: MODEL NO.
SERIAL NO. DATE:
This equipment has been type-tested under standardized field test conditions as recommended
by the Joint Industry Committee on High-Frequency Stabilized Arc Welding Machines found to radiate
less than 10 microvolts per meter at a distance of one mile, the maximum allowable limit established
by the Federal Communications Commission for equipment of this type.
Installations using this equipment on the basis of these tests, may reasonably be expected to
meet the radiation limitations established by the Federal Communications Commission, only when
installed, operated and maintained as specified in the instruction book provided.
USER’S CERTIFICATION
The welding equipment identified above has been installed in accordance with the specific
instructions applicable to this model as outlined in the instruction book furnished. It is being used only
for the purpose for which it was intended and is being maintained and operated in accordance with the
manufacturer’s instructions
Date Installed Signed
Page 4

Page 5

WARNING
This product, when used
for welding or cutting,
produces fumes or
gases which contain
chemicals known to the
State of California to
cause birth defects and,
in some cases, cancer.
(California Health &
Safety Code Section
25249.5 et seq.)
TABLE OF CONTENTS
SECTION 1 – SAFETY RULES FOR OPERATION OF ARC WELDING POWER SOURCE
1-1. Introduction 1. . . . . . . . . . . . . . . . . . . . . . . . . . . . . . . . . . . . . . . . . . . . . . . . . . . . . . . . . . . . . . . . . .
1-2. General Precautions 1. . . . . . . . . . . . . . . . . . . . . . . . . . . . . . . . . . . . . . . . . . . . . . . . . . . . . . . . . . .
1-3. Arc Welding 7. . . . . . . . . . . . . . . . . . . . . . . . . . . . . . . . . . . . . . . . . . . . . . . . . . . . . . . . . . . . . . . . . .
1-4. Standards Booklet Index 11. . . . . . . . . . . . . . . . . . . . . . . . . . . . . . . . . . . . . . . . . . . . . . . . . . . . . . .
SECTION 2 – SAFETY PRECAUTIONS AND SIGNAL WORDS
2-1. General Information And Safety 12. . . . . . . . . . . . . . . . . . . . . . . . . . . . . . . . . . . . . . . . . . . . . . . . .
2-2. Safety Alert Symbol And Signal Words 12. . . . . . . . . . . . . . . . . . . . . . . . . . . . . . . . . . . . . . . . . . .
SECTION 3 – SPECIFICATIONS
3-1. Description 13. . . . . . . . . . . . . . . . . . . . . . . . . . . . . . . . . . . . . . . . . . . . . . . . . . . . . . . . . . . . . . . . . .
SECTION 4 – INSTALLATION OR RELOCATION
4-1. Location 13. . . . . . . . . . . . . . . . . . . . . . . . . . . . . . . . . . . . . . . . . . . . . . . . . . . . . . . . . . . . . . . . . . . . .
4-2. Coolant Connections 13. . . . . . . . . . . . . . . . . . . . . . . . . . . . . . . . . . . . . . . . . . . . . . . . . . . . . . . . . .
4-3. Gas Connections 14. . . . . . . . . . . . . . . . . . . . . . . . . . . . . . . . . . . . . . . . . . . . . . . . . . . . . . . . . . . . .
4-4. Remote Hand Switch And Receptacle Connection 14. . . . . . . . . . . . . . . . . . . . . . . . . . . . . . . . . .
4-5. Weld Input/Output Connections 14. . . . . . . . . . . . . . . . . . . . . . . . . . . . . . . . . . . . . . . . . . . . . . . . .
4-6. Electrical Input Connections 15. . . . . . . . . . . . . . . . . . . . . . . . . . . . . . . . . . . . . . . . . . . . . . . . . . . .
SECTION 5 – OPERATOR CONTROLS
5-1. Process Selector Switch 15. . . . . . . . . . . . . . . . . . . . . . . . . . . . . . . . . . . . . . . . . . . . . . . . . . . . . . .
5-2. Power Switch 15. . . . . . . . . . . . . . . . . . . . . . . . . . . . . . . . . . . . . . . . . . . . . . . . . . . . . . . . . . . . . . . .
5-3. High Frequency Intensity Control 16. . . . . . . . . . . . . . . . . . . . . . . . . . . . . . . . . . . . . . . . . . . . . . . .
5-4. Valve Control Switch 16. . . . . . . . . . . . . . . . . . . . . . . . . . . . . . . . . . . . . . . . . . . . . . . . . . . . . . . . . .
5-5. Start Selector Switch 16. . . . . . . . . . . . . . . . . . . . . . . . . . . . . . . . . . . . . . . . . . . . . . . . . . . . . . . . . .
5-6. Postflow Timer 17. . . . . . . . . . . . . . . . . . . . . . . . . . . . . . . . . . . . . . . . . . . . . . . . . . . . . . . . . . . . . . .
SECTION 6 – SEQUENCE OF OPERATION
6-1. Gas Tungsten Arc Welding (GTAW) 17. . . . . . . . . . . . . . . . . . . . . . . . . . . . . . . . . . . . . . . . . . . . . .
6-2. Shutting Down 17. . . . . . . . . . . . . . . . . . . . . . . . . . . . . . . . . . . . . . . . . . . . . . . . . . . . . . . . . . . . . . . .
SECTION 7 – MAINTENANCE & TROUBLESHOOTING
7-1. Internal Cleaning 18. . . . . . . . . . . . . . . . . . . . . . . . . . . . . . . . . . . . . . . . . . . . . . . . . . . . . . . . . . . . . .
7-2. Interconnecting Cords 18. . . . . . . . . . . . . . . . . . . . . . . . . . . . . . . . . . . . . . . . . . . . . . . . . . . . . . . . .
7-3. Spark Gaps 18. . . . . . . . . . . . . . . . . . . . . . . . . . . . . . . . . . . . . . . . . . . . . . . . . . . . . . . . . . . . . . . . . .
7-4. Tungsten Electrode 18. . . . . . . . . . . . . . . . . . . . . . . . . . . . . . . . . . . . . . . . . . . . . . . . . . . . . . . . . . . .
7-5. Troubleshooting 20. . . . . . . . . . . . . . . . . . . . . . . . . . . . . . . . . . . . . . . . . . . . . . . . . . . . . . . . . . . . . .
SECTION 8 – ELECTRICAL DIAGRAMS
Diagram 8-1. Circuit Diagram For 115 Volts Models With Gas & Water Controls 22. . . . . . . . . . . . . . .
Diagram 8-2. Circuit Diagram For 230 Volts Models With Gas & W ater Controls 22. . . . . . . . . . . . . .
SECTION 9 – CERTIFICATION FOR HIGH FREQUENCY ARC WELDING EQUIPMENT
9-1. General 23. . . . . . . . . . . . . . . . . . . . . . . . . . . . . . . . . . . . . . . . . . . . . . . . . . . . . . . . . . . . . . . . . . . . .
9-2. Definitions 23. . . . . . . . . . . . . . . . . . . . . . . . . . . . . . . . . . . . . . . . . . . . . . . . . . . . . . . . . . . . . . . . . . .
9-3. High-Frequency Radiation 24. . . . . . . . . . . . . . . . . . . . . . . . . . . . . . . . . . . . . . . . . . . . . . . . . . . . . .
9-4. Location 24. . . . . . . . . . . . . . . . . . . . . . . . . . . . . . . . . . . . . . . . . . . . . . . . . . . . . . . . . . . . . . . . . . . . .
9-5. General Installation Procedures 24. . . . . . . . . . . . . . . . . . . . . . . . . . . . . . . . . . . . . . . . . . . . . . . . .
9-6. Guidelines For Installation Of High-Frequency Assisted Arc Welding Power Sources 26. . . . .
9-7. Installation Guidelines Checklist 26. . . . . . . . . . . . . . . . . . . . . . . . . . . . . . . . . . . . . . . . . . . . . . . . .
SECTION 10 – PARTS LIST
Figure 10-1. Main Assembly (HF-20-WG Illustrated) 28. . . . . . . . . . . . . . . . . . . . . . . . . . . . . . . . . . . . . .
Figure 10-2. HF Panel (HF-20-2WG Illustrated) 30. . . . . . . . . . . . . . . . . . . . . . . . . . . . . . . . . . . . . . . . . .
Figure 10-3. Remote Hand Switch 31. . . . . . . . . . . . . . . . . . . . . . . . . . . . . . . . . . . . . . . . . . . . . . . . . . . . .
LIST OF CHARTS AND TABLES
Table 3-1. Specifications 13. . . . . . . . . . . . . . . . . . . . . . . . . . . . . . . . . . . . . . . . . . . . . . . . . . . . . . . . . . . . .
Table 7-1. Tungsten Size 19. . . . . . . . . . . . . . . . . . . . . . . . . . . . . . . . . . . . . . . . . . . . . . . . . . . . . . . . . . . .
Table 7-2. Troubleshooting 21. . . . . . . . . . . . . . . . . . . . . . . . . . . . . . . . . . . . . . . . . . . . . . . . . . . . . . . . . . .
WARRANTY
The following terms are
used interchangeably
throughout this manual:
TIG = GTA W
Stick = SMAW
Page 6

Page 7

OM-610 Page 1
Page 8
OM-610 Page 2
Page 9
OM-610 Page 3
Page 10
OM-610 Page 4
Page 11
OM-610 Page 5
Page 12
OM-610 Page 6
Page 13

OM-610 Page 7
Page 14

OM-610 Page 8
Page 15

OM-610 Page 9
Page 16

OM-610 Page 10
Page 17

OM-610 Page 11
Page 18

SECTION 2 – SAFETY PRECAUTIONS AND SIGNAL WORDS
2-1. GENERAL INFORMATION AND SAFETY
A. General
Information presented in this manual and on various labels, tags, and plates on the unit pertains to equipment
design, installation, operation, maintenance, and
troubleshooting which should be read, understood, and
followed for the safe and ef fective use of this equipment.
The nameplate of this unit uses international symbols
for labeling the front panel controls. The symbols also
appear at the appropriate section in the text.
B. Safety
The installation, operation, maintenance, and troubleshooting of arc welding equipment requires practices
and procedures which ensure personal safety and the
safety of others. Therefore, this equipment is to be installed, operated, and maintained only by qualified persons in accordance with this manual and all applicable
codes such as, but not limited to, those listed at the end
of Section 1 – Safety Rules For Operation Of Arc Welding Power Source.
2-2. SAFETY ALERT SYMBOL AND SIGNAL
WORDS
The following safety alert symbol and signal words are
used throughout this manual to call attention to and
identify different levels of hazard and special instructions.
This safety alert symbol is used with the signal
words WARNING and CAUTION to call attention to the safety statements.
WARNING statements identify procedures or
practices which must be followed to avoid serious personal injury or loss of life.
CAUTION statements identify procedures or
practices which must be followed to avoid minor
personal injury or damage to this equipment.
IMPORTANT statements identify special instructions
necessary for the most efficient operation of this equipment.
OM-610 Page 12
Page 19

SECTION 3 – SPECIFICATIONS
Table 3-1. Specifications
Model
HF-20-1WG
3-1. DESCRIPTION
This unit is a high-frequency arc stabilizer which superimposes high-frequency energy on either ac or dc power
supply weld outputs. It is designed primarily for use with
the Gas Tungsten Arc Welding (GTAW) process. However it can also be used for other processes requiring
arc initiation and stabilization such as Submerged Arc
Welding (SAW) and Plasma Arc Cutting (PAC) processes.
Input
V olts AC
115
Rated Welding
Amps. 60%
Duty Cycle
1000
SECTION 4 – INSTALLATION OR RELOCATION
Dimensions
Width Length Depth
20-1/4 in.
( 514 mm )
13-1/2 in.
( 343 mm )
CAUTION: HIGH-FREQUENCY ENERGY
can damage equipment.
( 381 mm )
15 in.
Net Weight
92 lbs. ( 41 kg )
• Check with manufacturer of equipment to be
used with this unit to ensure that damage will
not occur.
Units are equipped with gas and water (coolant) valves
and a postflow timer. These units do not function properly on welding power sources equipped with a primary
contactor, if the primary contactor provides on/off control of the welding arc. The welding power source must
be energized at all times for units to function properly.
4-1. LOCATION
IMPORTANT: Read entire Section 9 regarding high-
frequency equipment location and installation requirements before beginning installation.
Locate the high-frequency unit close to the work station.
This will allow the electrode and work cables to be kept
as short as possible, thereby minimizing high-frequency
radiation and losses.
4-2. COOLANT CONNECTIONS (Figure 4-1)
COOLANT
IN
WARNING: ELECTRIC SHOCK can kill.
COOLANT
OUT
• Do not touch live electrical parts.
• Shut down unit and welding power source
(stop and disable engine on engine driven
equipment).
• Disconnect input power employing lockout/
tagging procedures before making coolant
connections.
Lockout/tagging procedures consist of removing plug from receptacle, padlocking line disconnect switch in open position, removing fuses
from fuse box, or shutting off and red-tagging
circuit breaker or other disconnecting device.
CAUTION: OVERHEATING GAS TUNGSTEN
ARC WELDING (GTAW) T ORCH can damage
unit.
• Do not connect coolant hoses to the high fre-
quency unit if a recirculating coolant system is
used. Make connections from the torch
directly to the coolant system.
1. Connect a hose of suitable length and construction from coolant source to the COOLANT IN
connector on the front panel.
2. Connect the torch coolant hose to the COOLANT
OUT connector.
Both coolant connectors have 5/8-18 in. left-hand
threads.
OM-610 Page 13
Page 20

Welding
Power
Source
Electrode (+)
Work (–)
Electrode
Work
Torch
AC Input Power Cord Gas In Coolant In
Figure 4-1. Interconnection Diagram
4-3. GAS CONNECTIONS (Figure 4-1)
GAS
IN
WARNING: ELECTRIC SHOCK can kill.
GAS
OUT
• Do not touch live electrical parts.
• Shut down unit and welding power source
(stop and disable engine on engine driven
equipment).
• Disconnect input power employing lockout/
tagging procedures before making gas connections.
Lockout/tagging procedures consist of removing plug from receptacle, padlocking line disconnect switch in open position, removing fuses
from fuse box, or shutting off and red-tagging
circuit breaker or other disconnecting device.
1. Connect a hose of suitable length and construction from shielding gas supply to the GAS IN connector on the front panel. The gas must be controlled with the aid of a regulator and flowmeter.
2. Connect the torch shielding gas hose to the GAS
OUT connector.
Both gas connectors have 5/8-18 in. right-hand threads.
4-4. REMOTE HAND SWITCH AND RECEPT ACLE
CONNECTION (Figure 4-1)
REMOTE
A normally-closed Remote Hand Switch (with leads and
plug) is supplied to provide on/off control of high
frequency , gas, and coolant. The Remote Hand Switch
must be connected to the REMOTE receptacle on the
OM-610 Page 14
Remote
Receptacle
front panel for unit to function whenever the ST ART SELECTOR switch is in HIGH FREQUENCY position.
To connect switch to REMOTE receptacle, fully insert
switch plug (attached to leads) into receptacle, and
rotate plug fully clockwise until secure. A hose clamp
(attached to switch) is supplied to secure the switch to
the torch. Install and secure switch onto torch handle in
desired location.
4-5. WELD INPUT/OUTPUT CONNECTIONS (Fig-
ure 4-1)
Work
ST-070 989-B
ELECTRODE WORK
WARNING: ELECTRIC SHOCK can kill.
• Do not touch live electrical parts.
• Shut down unit and welding power source
(stop and disable engine on engine driven
equipment).
• Disconnect input power employing lockout/
tagging procedures before making connections.
Lockout/tagging procedures consist of removing plug from receptacle, padlocking line disconnect switch in open position, removing fuses
from fuse box, or shutting off and red-tagging
circuit breaker or other disconnecting device.
IMPORTANT: Refer to the welding power source Owner’s Manual for proper secondary cable sizes.
Four terminals are provided on the front panel for weld
input/output connections. To make connections, proceed as follows:
1. Connect welding cables from the welding power
source to the ELECTRODE and WORK termi-
Page 21

nals located on the left side of the front panel (see
Figure 4-1).
2. Connect torch cable to the ELECTRODE terminal and the work cable to the WORK terminal on
the right side of the front panel (see Figure 4-1).
4-6. ELECTRICAL INPUT CONNECTIONS (Fig-
ures 4-1 And 4-2)
INPUT
IMPORTANT: Read and comply with entire Section 9
regarding high-frequency equipment location and installation requirements before making electrical input
connections.
WARNING: ELECTRIC SHOCK can kill.
• Do not touch live electrical parts.
• Do not cut off ground terminal from plug.
• Ground in accordance with the National Elec-
trical Code, state, and local codes.
CAUTION: DIRECT CURRENT (DC) will
damage the unit.
• Connect unit only to alternating current (AC)
supply.
The 115 volts ac models are equipped with a 3-prong
parallel plug. Connect the plug to a matching, grounded
receptacle (see Figure 4-2).
Parallel Plug On
115 Volts AC Models
803 103
Figure 4-2. Electrical Input Connection Plugs
SECTION 5 – OPERATOR CONTROLS
5-1. PROCESS SELECTOR SWITCH (Figure 5-1)
DC AC
The PROCESS SELECTOR switch establishes the
proper circuitry for alternating current (ac) or direct
current (dc) welding. The switch must be placed in the
AC position when the unit is connected to an ac welding
power source or DC when connected to a dc power
source.
When the PROCESS SELECTOR switch is in the AC
position, high frequency will be present from the time an
arc is initiated until the arc is broken and the postflow
timer times out.
When the PROCESS SELECTOR switch is in the DC
position, high frequency will be present only until an arc
is initiated. Once an arc is established, the high frequency will shut off and remain off until a restart is attempted.
5-2. POWER SWITCH (Figure 5-1)
POWER
ON
V
OFF
WARNING: USING HIGH FREQUENCY WITH
THE SHIELDED METAL ARC WELDING
(SMAW) PROCESS can result in serious
personal injury.
• Place the POWER switch in the OFF position
before doing Shielded Metal Arc Welding
(SMAW).
The attempted use of high frequency to establish an arc with a stick electrode could cause an
arc to form between the electrode holder and
operator.
Placing the POWER switch in the ON position electrically energizes the unit and places it in a ready-to-weld
status. Placing the POWER switch in the OFF position
shuts the unit down.
OM-610 Page 15
Page 22

Welding Power Source
Work Connection
Work
Connection
Welding Power Source
Electrode Connection
Gas Connections
AC Input
Power Cord
Coolant
Connections
Power
Switch
Valve
Control
Switch
Process
Selector Switch
Figure 5-1. Front Panel View
Remote Receptacle
Start Selector Switch
Torch
Connection
High Frequency
Intensity Control
ST-143 763
5-3. HIGH FREQUENCY INTENSITY CONTROL
(Figure 5-1)
HF
The HIGH FREQUENCY INTENSITY control provides
a means of adjusting the intensity of high-frequency energy available to initiate and/or maintain an arc. The
scale surrounding the control reads from 0 to 100 and
should be used for reference only. Rotating the control
clockwise increases the intensity of the high-frequency
energy. Normally , the control needs to be adjusted only
initially.
IMPORTANT: As high-frequency intensity is increased,
the possibility of causing interference with local radio
and television receivers also increases. Set the HIGHFREQUENCY INTENSITY control for the lowest practical setting to initiate and maintain a reliable arc and
satisfactory welding operation.
OM-610 Page 16
5-4. VALVE CONTROL SWITCH (Figure 5-1)
ON OFF
The VALVE CONTROL switch determines whether or
not gas and water (coolant) will be permitted to flow.
When the switch is in the ON position, the gas and water
(coolant) valves will function normally . When the switch
is in the OFF position, the valves will remain closed.
5-5. START SELECTOR SWITCH (Figure 5-1)
A two-position switch, labeled START SELECTOR, is
provided on the front panel for selecting either TOUCH
start or HIGH FREQUENCY arc initiation.
A. TOUCH Position
When the switch is in the TOUCH position, the electrode
must be touched to the workpiece to initiate an arc.
B. HIGH FREQUENCY Position
When the switch is in the HIGH FREQUENCY position,
high frequency is available to initiate an arc without
touching the electrode to the workpiece.
IMPORTANT: When using the HIGH FREQUENCY
position of switch, the supplied normally-closed Remote
Hand Switch must be connected to the REMOTE receptacle on the front panel (see Section 4-4). High frequency is available when the Remote Hand Switch is closed.
Page 23

5-6. POSTFLOW TIMER
WARNING: ELECTRIC SHOCK can kill.
• Do not touch live electrical parts.
• Shut down unit and welding power source
(stop and disable engine on engine driven
equipment).
• Disconnect input power employing lockout/
tagging procedures before adjusting postflow
time.
Lockout/tagging procedures consist of removing plug from receptacle, padlocking line disconnect switch in open position, removing fuses
from fuse box, or shutting off and red-tagging
circuit breaker or other disconnecting device.
An adjustable 0 to 80 second Postflow Timer, located
behind the hinged access door on the rear panel, controls the period of time shielding gas and water (coolant)
will be allowed to flow after the arc is extinguished.
To select the desired portion of the maximum 80-second
postflow period available, rotate the knob to the
appropriate setting.
SECTION 6 – SEQUENCE OF OPERATION
WARNING: ELECTRIC SHOCK can kill;
MOVING PARTS can cause serious injury;
IMPROPER AIRFLOW AND EXPOSURE TO
ENVIRONMENT can damage internal parts.
• Do not touch live electrical parts.
• Keep all covers and panels in place while
operating.
Warranty is void if the unit is operated with any
portion of the outer enclosure removed.
ARC RAYS, SPARKS, AND HOT SURFACES
can burn eyes and skin; NOISE can damage
hearing.
• Wear correct eye, ear, and body protection.
FUMES AND GASES can seriously harm
your health.
• Keep your head out of the fumes.
• Ventilate to keep from breathing fumes and
gases.
• If ventilation is inadequate, use approved
breathing device.
HOT METAL, SPATTER, AND SLAG can
cause fire and burns.
• Watch for fire.
• Keep a fire extinguisher nearby, and know
how to use it.
• Do not use near flammable material.
• Allow work and equipment to cool before
handling.
MAGNETIC FIELDS FROM HIGH CURRENTS can affect pacemaker operation.
• Wearers should consult their doctor before
going near arc welding, gouging, or spot
welding operations.
See Section 1 - Safety Rules For Operation Of
Arc Welding Power Source for basic welding
safety information.
6-1. GAS TUNGSTEN ARC WELDING (GTAW)
1. Install and connect unit according to Section 4.
2. Select proper tungsten electrode (see Table 7-1).
3. Prepare tungsten electrode according to Section
7-4, and insert into torch.
4. Wear dry insulating gloves and clothing.
5. Connect work clamp to clean, bare metal at
workpiece.
6. Turn on shielding gas and water (coolant) supply
at the source.
7. Energize the welding power source.
8. Place the PROCESS SELECTOR switch in the
desired position (see Section 5-1).
9. Rotate the HIGH FREQUENCY INTENSITY
control to the desired position (see Section 5-3).
10. Place the VALVE CONTROL switch in the
desired position (see Section 5-4).
11. Place the START SELECTOR switch in the
desired position (see Section 5-5).
12. Rotate the Postflow Timer to the desired position
(see Section 5-6).
13. Wear welding helmet with proper filter lens
according to ANSI Z49.1.
14. Place unit POWER switch in the ON position.
15. Begin welding.
6-2. SHUTTING DOWN
1. Stop welding.
2. Shut down the welding power source, stop engine on welding generator and the high-frequency unit.
3. Turn off shielding gas and water (coolant) supply
at the source.
WARNING: HIGH CONCENTRATION OF
SHIELDING GAS can harm health or kill.
• Shut off gas supply when not in use.
OM-610 Page 17
Page 24

SECTION 7 – MAINTENANCE & TROUBLESHOOTING
IMPORTANT: Every six months inspect the labels on
this unit for legibility. All precautionary labels must be
maintained in a clearly readable state and replaced
when necessary. See Parts List for part number of
precautionary labels.
7-1. INTERNAL CLEANING
WARNING: ELECTRIC SHOCK can kill.
• Do not touch live electrical parts.
• Shut down unit and welding power source
(stop and disable engine on engine driven
equipment).
• Disconnect input power employing lockout/
tagging procedures before inspecting, maintaining, or servicing.
Lockout/tagging procedures consist of removing plug from receptacle, padlocking line disconnect switch in open position, removing fuses
from fuse box, or shutting off and red-tagging
circuit breaker or other disconnecting device.
Annually blow out or vacuum dust and dirt from around
high-frequency unit internal components. If dirty or
dusty conditions are present, clean unit monthly . If using
compressed air, be sure it is clean and dry.
7-2. INTERCONNECTING CORDS
WARNING: ELECTRIC SHOCK can kill.
• Do not touch live electrical parts.
• Shut down unit and welding power source
(stop and disable engine on engine driven
equipment).
• Disconnect input power employing lockout/
tagging procedures before inspecting, maintaining, or servicing.
Lockout/tagging procedures consist of removing plug from receptacle, padlocking line disconnect switch in open position, removing fuses
from fuse box, or shutting off and red-tagging
circuit breaker or other disconnecting device.
Every three months inspect all interconnecting cords for
damage to or breaks in the insulation jacket, particularly
at the plugs. Repair or replace the cord(s) as necessary .
7-3. SPARK GAPS (Figure 7-1)
It is necessary to readjust the spark gaps every three to
four months or when intermittent operation occurs. Normal spark gap setting is 0.008 in. (0.203 mm).
IMPORTANT: Spark gaps widen with normal operation.
At regular inspections, check and maintain the 0.008
inch (0.203 mm) spark air gap to ensure consistent
welding results and compliance with FCC radiation
regulations.
OM-610 Page 18
C
B
A
A
IMPORTANT: Do not clean or dress points since the
material at the tips is tungsten and impossible to file.
The entire point(s) (B) should be replaced when the
tungsten section has completely disappeared.
The spark gap assembly is located behind an access
door on the rear of the unit. To adjust spark gaps,
proceed as follows:
Figure 7-1. Spark Gap Adjustment
WARNING: ELECTRIC SHOCK can kill.
B
A
C
Ref. 802745
• Do not touch live electrical parts.
• Shut down unit and welding power source
(stop and disable engine on engine driven
equipment).
• Disconnect input power employing lockout/
tagging procedures before inspecting, maintaining, or servicing.
Lockout/tagging procedures consist of removing plug from receptacle, padlocking line disconnect switch in open position, removing fuses
from fuse box, or shutting off and red-tagging
circuit breaker or other disconnecting device.
To adjust spark gaps, proceed as follows:
1. Open rear panel access door.
2. Loosen screws (A) on both sides.
3. Place feeler gauge of proper thickness between
gaps (C).
4. Apply slight pressure a g ai n s t p o i n ts (B) so feeler
gauge is held firmly in gap.
5. Tighten screws (A) to 12 in/lbs torque (overtightening will deform plastic base).
6. Close and secure rear panel access door.
7-4. TUNGSTEN ELECTRODE (Table 7-1 And Fig-
ures 7-2 And 7-3)
Use Table 7-1 to select the correct size and type tungsten electrode. Prepare the tungsten electrode using
the following guidelines. A properly prepared tungsten
electrode is essential in obtaining a satisfactory weld.
Page 25

Table 7-1. Tungsten Size
Electrode Diameter
Pure Tungsten
(Green Band)
.010”
.020”
.040”
1/16”
3/32”
1/8”
5/32”
3/16”
1/4”
2% Thorium Alloyed
Tungsten
(Red Band)
.010”
.020”
.040”
1/16”
3/32”
1/8”
5/32”
3/16”
1/4”
DC-Argon Electrode
Negative/Straight Polarity
Up to 15
5-20
15-80
70-150
125-225
225-360
360-450
450-720
720-950
Up to 25
15-40
25-85
50-160
135-235
250-400
400-500
500-750
750-1000
Amperage Range - Polarity - Gas Type
DC-Argon Electrode
Positive/Reverse Polarity
*
*
*
10-20
15-30
25-40
40-55
55-80
80-125
*
*
*
10-20
15-30
25-40
40-55
55-80
80-125
AC-Argon Using
High Frequency
Up to 15
5-20
10-60
50-100
100-160
150-210
200-275
250-350
325-450
Up to 20
15-35
20-80
50-150
130-250
225-360
300-450
400-500
600-800
AC-Argon Balanced
Wave Using High Freq.
Up to 10
10-20
20-30
30-80
60-130
100-180
160-240
190-300
250-400
Up to 15
5-20
20-60
60-120
100-180
160-250
200-320
290-390
340-525
Zirconium Alloyed
Tungsten
(Brown Band)
.010”
.020”
.040”
1/16”
3/32”
1/8”
5/32”
3/16”
1/4”
*
*
*
*
*
*
*
*
*
*
*
*
*
*
*
*
*
*
Up to 20
15-35
20-80
50-150
130-250
225-360
300-450
400-550
600-800
Up to 15
5-20
20-60
60-120
100-180
160-250
200-320
290-390
340-525
*NOT RECOMMENDED
The figures listed are intended as a guide and are a composite of recommendations from American Welding
Society (AWS) and electrode manufacturers.
A. For AC or DC Electrode Positive Welding (Fig-
ure 7-2)
1-1/2 Times
Electrode
Diameter
2-1/2 Times
Electrode
Diameter
Ball the end of tungsten electrodes used for ac or dc
electrode positive welding before beginning the welding
operation. Weld amperage causes the tungsten electrode to form the balled end. The diameter of the end
should not exceed the diameter of the tungsten electrode by more than 1-1/2 times. For example, the end of
AC And DC
Electrode Positive
DC Electrode
Negative
a 1/8 in. (3.2 mm) diameter tungsten electrode should
not exceed a 3/16 in. (4.8 mm) diameter end.
Figure 7-2. Properly Prepared Tungsten
Electrodes
OM-610 Page 19
S-0009/8-88
S-0161
Page 26

B. For DC Electrode Negative Welding (Figures 7-2
And 7-3)
CAUTION: HOT FLYING METAL P ARTICLES
can injure personnel, start fires, and damage equipment; TUNGSTEN CONTAMINATION can lower weld quality.
• Grinding the tungsten electrode produces
dust and flying sparks which can cause injury
and start fires. Use local exhaust (forced ventilation) at the grinder or wear an approved
respirator. Read MSDS for safety information. Consider using tungsten containing ceria, lanthana, or yttria instead of thoria. Grinding dust from thoriated electrodes contains
low-level radioactive material. Properly dispose of grinder dust in an environmentally
safe way. Wear proper face, hand, and body
protection. Keep flammables away.
• Shape tungsten electrode only on grinder
with proper guards in a safe location wearing
proper face, hand, and body protection.
• Do not use same wheel for any other job, or
the tungsten will become contaminated.
• Shape tungsten electrodes on a fine grit, hard
abrasive wheel used only for tungsten shaping. Grind tungsten electrodes so that grinding marks run lengthwise with the electrode.
These procedures reduce the possibility of
the tungsten electrode transferring foreign
matter into the weld and help reduce arc wander and instability at lower currents.
Grind the end of the tungsten electrode to a taper for a
distance of 2 to 2-1/2 electrode diameters in length. For
example, the ground surface for a 1/8 in. (3.2 mm) diameter tungsten electrode should be 1/4 to 5/16 in. (6.4
to 8.0 mm) long.
For additional information, see your distributor for a
handbook on the Gas Tungsten Arc Welding (GTAW)
process.
7-5. TROUBLESHOOTING (Table 7-2)
WARNING: ELECTRIC SHOCK can kill.
• Do not touch live electrical parts.
• Shut down unit and welding power source
(stop and disable engine on engine driven
equipment).
• Disconnect input power employing lockout/
tagging procedures before inspecting, maintaining, or servicing.
Lockout/tagging procedures consist of removing plug from receptacle, padlocking line disconnect switch in open position, removing fuses
from fuse box, or shutting off and red-tagging
circuit breaker or other disconnecting device.
MOVING PARTS can cause serious injury.
• Keep away from moving parts.
Straight Ground
TUNGSTEN PREPARATION: WRONG
Arc Wander
Point
Figure 7-3. Tungsten Preparation
OM-610 Page 20
TUNGSTEN PREPARATION: IDEAL
Stable Arc
Flat
(The Dia. Of This
Flat Governs
Amperage Capacity)
Radial Ground
S-0162
HOT SURFACES can cause severe burns.
• Allow cooling period before servicing.
Troubleshooting to be performed only by
qualified persons.
It is assumed that the unit was properly installed according to Section 4 of this manual, the operator is familiar
with the function of controls, the high-frequency unit wa s
working properly, and that the trouble is not related to
the welding process.
The following table is designed to diagnose and provide
remedies for some of the troubles that may develop in
this high-frequency unit.
Use this table in conjunction with the circuit diagram
while performing troubleshooting procedures. If the
trouble is not remedied after performing these procedures, contact the nearest Factory Authorized Service
Station/Service Distributor. In all cases of equipment
malfunction, the manufacturer’s recommendations
should be strictly followed.
Page 27

Table 7-2. Troubleshooting
TROUBLE PROBABLE CAUSE REMEDY
Unit completely inoper- Input power cord plug not secure in Secure power cord plug in receptacle.
ative. receptacle.
Lack of high frequency; START SELECTOR switch in HIGH Place START SELECTOR switch in TOUCH
difficulty in establishing FREQUENCY position with no Remote position and touch electrode to workpiece, or
an arc. Hand Switch connected to REMOTE connect Remote Hand Switch to REMOTE
receptacle on front panel. receptacle (see Sections 4-4 and 5-5).
HIGH FREQUENCY INTENSITY Increase setting of HIGH FREQUENCY
control R3 setting too low or control INTENSITY Control (see Section 5-3).
inoperative. Replace R3 if necessary.
Dissipation of high frequency from Be sure that torch and work cables are
torch or work cable. not near any grounded metal.
Weld cable leakage. Check cables and torch for cracked or
deteriorated insulation or bad connections.
Repair or replace necessary parts.
Improper spark gap. Check spark gaps C and adjust if necessary
(see Section 7-3).
Use of tungsten larger than recom- Use proper size tungsten for welding
mended for welding amperage. amperage (see Table 7-1).
Wandering arc - poor Use of tungsten considerably larger Use proper size tungsten (see Table 7-1).
control of arc direction. than recommended.
Improperly prepared tungsten. Prepare tungsten as instructed in Section 7-4.
Gas flow rate too high. Reduce flow rate.
Tungsten electrode Water (coolant) in torch. Refer to torch parts list for part(s)
oxidizing and not re- requiring replacement, and
maining bright after repair torch as necessary.
conclusion of weld.
Loose gas fittings on regulator or Check and tighten all gas fittings.
gas line. This will draw air into the
weld zone.
Insufficient postflow time. Increase postflow time of Timer TD1
(see Section 5-6).
Drafts blowing gas shield away Shield weld zone from drafts.
from tungsten.
Insufficient high frequency. Increase setting of HIGH FREQUENCY
INTENSITY control R3 (see Section 5-3).
Dirty filler rod or material. Use clean filler rod or material.
OM-610 Page 21
Page 28

SECTION 8 – ELECTRICAL DIAGRAMS
Circuit Diagram No. SA-182 421-B
Diagram 8-1. Circuit Diagram For 115 Volts Models With Gas & Water Controls
OM-610 Page 22
Page 29

SECTION 9 – CERTIFICATION FOR HIGH FREQUENCY ARC WELDING EQUIPMENT
9-1. GENERAL
The following information is necessary to make a proper
installation of the high-frequency arc welding equipment
described in this instruction manual. In order to comply
with Part 18 of the Rules and Regulations of the Federal
Communications Commission (FCC), the certificate in
the front of this manual must be filled in completely and
signed after the unit has been correctly installed. The
certificate must be kept WITH THE EQUIPMENT AT
ALL TIMES to comply with the regulation. The manufacturer of the equipment covered herein has conducted
approved field tests and certifies that the radiation can
be expected to be within the legal limits if the correct installation procedures, as outlined, are followed. The importance of a correct installation cannot be overemphasized since case histories of interference due to highfrequency stabilized arc welding equipment have shown
that in most cases, an inadequate installation was at
fault. In the event that interference with authorized FCC
services occurs, the user is required to take suitable
steps to clear the situation. The Factory Service Department personnel will assist the user by supplying technical information.
Instead of complying with the installation requirements
and the certification of each individual installation, the
user may elect to certify the entire plant by having a
qualified engineer make a plant radiation survey. In such
cases, these instructions could serve as a guide in minimizing interference that might be caused by the highfrequency arc welding equipment.
Many processes and applications of processes require
open-circuit voltages sufficient to jump from the electrode to the work without making direct contact. The
maximum open-circuit voltage (OCV) of a welding
power source is not suf ficient for this. In the Submerged
Arc Welding (SAW) process, granules of flux often get
between the electrode and the workpiece making starting of the arc difficult at normal open-circuit voltages. A
higher voltage is also required to start and maintain a
stable arc in processes like the Gas T ungsten Arc W elding (GTAW) process. In these cases it will take several
thousand volts to cause an electrical spark to jump this
gap between the electrode and the work, creating an initial path of ionization that the arc current can follow
without the hazards that would be present at power frequency.
In order to provide these higher voltages, it is common
practice to superimpose a high open-circuit voltage on
the output of a welding power source by using high-frequency techniques. The high-frequency voltage can be
a source of interference and will be discussed in this
section.
9-2. DEFINITIONS
A. High-Frequency Assisted Arc Welding Power
Sources
In the arc welding process, high frequency may be used
for initiating an arc or stabilizing the arc once it is struck,
or for both functions.
The energy from the high-frequency source must flow to
the welding electrode via a good quality , low impedance,
and well insulated connecting cable.
B. Welding Circuit
The welding circuit consists of all attachments connected to the welding terminals.
C. Welding Terminals
Welding terminals are the terminals which provide welding power and high-frequency energy to the arc.
D. Electrode Terminal
The electrode terminal is the terminal to which the electrode cable or welding torch is connected.
E. Welding Torch
A device used in the Gas Tungsten Arc W elding (GTA W)
process to control the position of the electrode, to transfer current to the arc, and to direct the flow of shielding
gas.
F. Work Terminal
The work terminal is the terminal to which the welding
workpiece is connected.
G. Welding Zone
The welding zone is the space within 50 ft. (15 m) in all
directions from the midpoint between the power source
and the welding arc (see Figure 9-6).
H. Bonding
Bonding refers to connecting metallic objects together
to cause the objects to be at the same potential regardless of any current flow between them (see Figures 9-3
and 9-4).
I. Grounding (Earthing)
Depending on the practices within jurisdictions, one of
these terms is commonly used to indicate the connection, or bonding, of parts of the apparatus to the
earth.The terms may be used interchangeably.
J. Receiver
A receiver is any device normally used for receiving
electromagnetic energy and converting it to useful communications purposes.
K. Conduction
Conduction is the transmission of high-frequency energy via an electrical conductor or conducting medium.
OM-610 Page 23
Page 30

L. High Frequency
High frequency is radio frequency energy, either continuous or pulsed, used to start or stabilize a welding arc.
M. High-Frequency Assisted Arc Welding
High-frequency assisted arc welding refers to any of the
arc welding processes requiring high frequency.
N. Interference
Interference is the unwanted and problematic reception
of high-frequency energy.
O. Radiation
Radiation is the transmission of high-frequency energy
through space.
9-3. HIGH-FREQUENCY RADIATION
Installations using high frequency, either as an integral
part of the power source or as an accessory unit, will
produce some high-frequency radiation. Such radiation,
if the signal strength is sufficient at the receiving device,
can cause an inconvenience or disruption of communications or can cause malfunction in sensitive electronic
controls and systems. The four major causes of highfrequency radiation are as follows:
9-4. LOCATION
Locate the high-frequency power source as close to the
welding process as possible. Also consider the nearness of a suitable ground connection when selecting a
site for the installation of the power source. Ideally, the
high-frequency power source should be located in an
area where there is a limited amount of miscellaneous
wiring (lighting, power, telephone, communications, and
other unshielded conductors) located within the welding
zone. Ungrounded, metallic conductors in the welding
zone can act as antennas which will pick up, conduct, or
reradiate the high-frequency energy transmitted by the
welding circuit. All miscellaneous wiring in the welding
zone should be enclosed in grounded, rigid metallic conduit, copper braid, or some other material having an
equivalent shielding efficiency, and grounded at 50 ft.
(15 m) intervals (see Figure 9-1).
Shielded Wire
Electrode
Ground At 50ft.
(15 m) Intervals
50 ft.
(15 m)
Holder
A. Direct Radiation From The Power Source Or
High-Frequency Accessory Unit
Direct radiation is that radiation emanating directly from
the power source or accessory unit. Radiation from the
power line and welding power source accessories is not
considered to be direct radiation from the power source
or accessory unit.
B. Direct Radiation From The Welding Circuit
Any attachment to the output terminals of the high-frequency source is capable of acting as an antenna and
radiating high-frequency energy. Attachments include
weld cables, torches, worktables, etc. Since direct radiation from the welding circuit is the major source of radiation, it is important to keep attachments to a minimum.
C. Conduction And Radiation From The Power
Line
Most power lines are capable of conducting high-frequency energy which may cause interference directly or
by reradiation from these power lines. Normally such radiation is small when compared to that caused by radiation from the weld cables.
D. Reradiation
Radiation from the welding circuit can be picked up by
ungrounded metal objects or unshielded wiring in the
immediate vicinity, conducted some distance, and
reradiated. This can be a troublesome source of interference.
OM-610 Page 24
Work Clamp
High-Frequency
Welding
Power Source
Keep all unshielded and ungrounded
wires out of the welding zone.
Ground
S-0017
Figure 9-1. Requirements To Minimize Reradia-
tion Pickup In The Vicinity Of The Welding Zone
9-5. GENERAL INSTALLATION PROCEDURES
A. Weld Cables
Keep the weld cables as short as possible and do not
exceed 25 ft. (8 m) in length. Position the cables as
close together and as close to the floor or ground plane
as possible.
If the welding operation must be carried out at a point
farther than 25 ft. (8 m) from the welding power source,
use a portable high-frequency source and locate the
portable unit within 25 ft. (8 m) of the welding electrode.
B. High-Frequency Assisted Arc Welding Power
Sources
When the high-frequency assisted arc welding power
source is i n operation, all service doors and covers must
be closed, securely fastened, and adequately bonded to
ensure good contact around the entire perimeter of the
opening. Except for changes and adjustments allowed
by the manufacturer, the high-frequency assisted arc
welding power source should not be modified.
Page 31

High-Frequency
Welding Power Source
Electrical
Input
Supply
Ground
Place leads on floor or on boards
and keep 3/4 in. (19 mm)
to 1 in. (25 mm) apart.
Work Clamp
Figure 9-2. General Rules For Welding Leads
C. Grounding (Earthing) The Weld Cables
Electrode
Holder
S-0018
However, when the high-frequency power source is installed within a metal building, precautions must be
taken to be sure that the building is properly bonded an d
grounded (earthed). This can be accomplished by placing several good electrical ground rods around the periphery of the building. During the construction of a new
building of any type having metal in the structure, be
sure that all the reinforcing and structural steel is
bonded together (as by welding each piece of metal to
all other adjacent pieces). For metal buildings, adjacent
metal panels should be bolted or welded together at frequent intervals.All windows and doorways should be
covered with grounded copper screen or galvanized
hardware cloth of not more than 1/4 in. (6.4 mm) mesh.
E. Shielding Of Miscellaneous Wiring In The Weld-
ing Zone
Be sure that the enclosure of the high-frequency power
source is firmly grounded to the WORK terminal. If the
high-frequency power source is not labeled as being internally high-frequency grounded, then this ground
must be made by grounding the enclosure to the WORK
terminal with No. 12 AWG gauge or smaller wire. Connect the ground wire to a driven ground rod or to a water
pipe which enters the earth within 10 ft. (3 m) of the highfrequency power source.
D. Metal Buildings
Installation of a high-frequency power source within a
suitably bonded and grounded (earthed) metal building
can be an effective means of reducing high-frequency
radiation. Wherever possible, install high-frequency
power sources in such places.
Grounded
Copper Screens
Driven
Ground
Rod
Ungrounded, metallic conductors in the welding zone
can act as antennas which will pick up, conduct, and/or
reradiate the high-frequency energy transmitted by the
welding circuit located within or near the welding zone.
This means that all ungrounded water pipes must be
grounded, and that all lighting, power, telephone, communications, and other conductors within the welding
zone must be enclosed in grounded, rigid metallic conduit, copper braid, or some other material having an
equivalent shielding capability (spirally wound, flexible,
metallic conduit is not suitable). Shielding of the miscellaneous wiring in the welding zone must be grounded at
50 ft. (15 m) intervals. Excellent low resistance electrical
connections must be maintained between conduit sections (see Figure 9-4).
Copper Strap
S-0020
Grounding Wire
Bonding Of Metal Panels
Metal Panels
Metal Panels
Figure 9-3. Grounding And Bonding
Panels Of Metal Building
Metal Building
Panels
S-0019
Figure 9-4. Bonding Method For Poor Conductors
F. Power Service
The high-frequency power source should be connected
to the line input power supply as instructed in this manual. If the unit is equipped with a power cord, the supply
conductors serving the high-frequency power source
should be completely enclosed in solid metallic conduit,
or in equivalent shielding, up to the point of connection
with the power cord. The solid, metallic conduit, or
equivalent shielding, should extend the entire distance
from the power entrance location in the building to the
high-frequency power source. Shielding should be electrically continuous throughout its length and should be
connected so that good electrical contact is provided between the shield and the high-frequency power source.
OM-610 Page 25
Page 32

Line Input
Power Supply
50 ft. (15 m)
High-Frequency
Welding Power Source
a. Have all unshielded power, lighting, and com-
munication wires within the welding zone
placed in grounded shields or relocated outside
the welding zone.
Solid Metallic Conduit
Ground
Line Fuse And Switch Box
Or Receptacle
S-0021
Figure 9-5. Installation Of High-Frequency
Stabilized Arc Welding Power Source
9-6. GUIDELINES FOR INSTALLATION OF HIGH-
FREQUENCY ASSISTED ARC WELDING
POWER SOURCES
7. Locate the equipment so that the ground wire of
the high-frequency power source can be kept as
short as possible.
8. Shield the line input power leads up to the point of
connection with the enclosure of the high-frequency power source as specified by the manufacture’s requirements (see Section 9-5F).
9. Be sure that there is good electrical contact made
at the enclosure of the high-frequency welding
power source, through the conduit, and back to
the service box. Be sure that the conduit system
is continuous to a point at least 50 ft. (15 m) from
the equipment, and that the conduit system is
one complete run within the high-frequency zone.
If rigid, metallic conduit is not used, be sure that
the shielding used has equivalent shielding efficiency. Copper sleeving, lead covered cable, or
the equivalent, is satisfactory. Spirally wound,
flexible, metallic conduit is not suitable.
10. Keep WORK and ELECTRODE cables as short
and straight as possible.
11. Keep weld cables to a maximum length of 25 ft. (8
m).
12. Keep weld cables as close together and as close
to the ground plane as possible.
13. Adjust spark gap setting to the minimum setting
given in this manual.
14. Secure all service and access doors before operating.
15. Visualize the welding zone as a sphere with a 50
ft. (15 m) radius centered on a point between the
power source and the electrode holder (see Figure 9-6), and proceed as follows:
OM-610 Page 26
b. Ground all large metallic objects, long guy
wires, or support wires within the welding zone.
c. Be sure that there are no external power or tele-
phone wires, which may be off the immediate
premises, within the welding zone.
High-Frequency
Welding Power
Source
Electrode
Holder
S-0022Center Point
Figure 9-6. Welding Zone
16. Use driven ground rods which enter the ground
10 ft. (3 m) or less from the ground connection, or
cold water pipes, as the ground for the high-frequency welding power source.
17. Be sure that all ground connections are clean and
tight.
18. If the high-frequency welding power source is operated within a metal building, be sure that the
building is properly grounded.
9-7. INSTALLATION GUIDELINES CHECKLIST
All items may not be necessary or practical for each installation. Complete the necessary items to eliminate interference with authorized FCC services.
1. Is equipment properly located?
(See Sections 9-4, 9-5D, 9-5E, 9-6.1, and 9-6.9.)
2. Are ac input power connections properly made?
(See Sections 9-5B, 9-6.2, and 9-6.3.)
3. Are weld cables and equipment properly installed?
(See Sections 9-5A, 9-6.4, 9-6.5, and 9-6.6.)
4. Are ground connections properly made?
(See Sections 9-5C, 9-6.1, 9-6.6, 9-6.11, and
9-6.12.)
5. Is equipment properly set up and adjusted?
(See Sections 9-6.7 and 9-6.8.)
Page 33

Notes
OM-610 Page 27
Page 34

SECTION 10 – PARTS LIST
16
8
15
7
6
5
17
9
10
11
12
13 Fig 10–2
14
18
19
20
4
3
2
1
21
22
23
24
25
26
27
28
OM-610 Page 28
33
32
31
Figure 10-1. Main Assembly
30
29
SD-143 760-B
Page 35

Item
No.
Dia.
Mkgs.
Part
No.
Description
Figure 10-1. Main Assembly
1 139 749 TERMINAL BOARD, pwr input/output 1. . . . . . . . . . . . . . . . . . . . . . . . . . . . . . . . . . . . . . . . . . . . . . . . .
2 048 427 BUS BAR, output 2. . . . . . . . . . . . . . . . . . . . . . . . . . . . . . . . . . . . . . . . . . . . . . . . . . . . . . . . . . . . . . . . . . .
3 048 426 BUS BAR, secondary 1. . . . . . . . . . . . . . . . . . . . . . . . . . . . . . . . . . . . . . . . . . . . . . . . . . . . . . . . . . . . . . .
4 T2 186 623 COIL, coupling air HF 1. . . . . . . . . . . . . . . . . . . . . . . . . . . . . . . . . . . . . . . . . . . . . . . . . . . . . . . . . . .
5 131 515 LABEL, warning electric shock 1. . . . . . . . . . . . . . . . . . . . . . . . . . . . . . . . . . . . . . . . . . . . . . . . . . . . . . .
6 +048 431 WRAPPER 1. . . . . . . . . . . . . . . . . . . . . . . . . . . . . . . . . . . . . . . . . . . . . . . . . . . . . . . . . . . . . . . . . . . . . . .
7 602 261 HANDLE, chest 3-1/2 1. . . . . . . . . . . . . . . . . . . . . . . . . . . . . . . . . . . . . . . . . . . . . . . . . . . . . . . . . . . . . . .
8 601 795 BOLT, mach stl hexhd .250-20 x 4.500 2. . . . . . . . . . . . . . . . . . . . . . . . . . . . . . . . . . . . . . . . . . . . . . . .
9 010 853 FASTENER, screw sltd hd No. 2 2. . . . . . . . . . . . . . . . . . . . . . . . . . . . . . . . . . . . . . . . . . . . . . . . . . . . .
10 010 855 RETAINER, screw No. 2 2. . . . . . . . . . . . . . . . . . . . . . . . . . . . . . . . . . . . . . . . . . . . . . . . . . . . . . . . . . . .
11 010 854 NUT, speed No. 2 clip-on type 2. . . . . . . . . . . . . . . . . . . . . . . . . . . . . . . . . . . . . . . . . . . . . . . . . . . . . . . .
12 142 795 CASE SECTION, base/front/rear 1. . . . . . . . . . . . . . . . . . . . . . . . . . . . . . . . . . . . . . . . . . . . . . . . . . . .
13 141 736 HF PANEL, (Fig 10-2) 1. . . . . . . . . . . . . . . . . . . . . . . . . . . . . . . . . . . . . . . . . . . . . . . . . . . . . . . . . . . . . .
14 010 006 TUBING, stl .625 OD x 12ga wall x 3.250 2. . . . . . . . . . . . . . . . . . . . . . . . . . . . . . . . . . . . . . . . . . . . .
15 178 862 PANEL, mtg door 1. . . . . . . . . . . . . . . . . . . . . . . . . . . . . . . . . . . . . . . . . . . . . . . . . . . . . . . . . . . . . . . . . .
16 160 929 COVER, stud output 1. . . . . . . . . . . . . . . . . . . . . . . . . . . . . . . . . . . . . . . . . . . . . . . . . . . . . . . . . . . . . . .
17 605 787 WASHER, lock stl intl tooth .500 2. . . . . . . . . . . . . . . . . . . . . . . . . . . . . . . . . . . . . . . . . . . . . . . . . . . . .
18 601 879 NUT, stl hex full fnsh .500-13 2. . . . . . . . . . . . . . . . . . . . . . . . . . . . . . . . . . . . . . . . . . . . . . . . . . . . . . . .
19 601 976 SCREW, cap stl hexhd .500-13 x 1.500 2. . . . . . . . . . . . . . . . . . . . . . . . . . . . . . . . . . . . . . . . . . . . . . .
20 C1 141 204 CAPACITOR 1. . . . . . . . . . . . . . . . . . . . . . . . . . . . . . . . . . . . . . . . . . . . . . . . . . . . . . . . . . . . . . . . . .
21 S1,3 011 611 SWITCH, tgl DPDT 15A 125V 2. . . . . . . . . . . . . . . . . . . . . . . . . . . . . . . . . . . . . . . . . . . . . . . . . .
22 S2,4 011 609 SWITCH, tgl SPDT 15A 125VAC 2. . . . . . . . . . . . . . . . . . . . . . . . . . . . . . . . . . . . . . . . . . . . . .
23 R3 198 547 RHEOSTAT, WW 25W 1.5 ohm 1. . . . . . . . . . . . . . . . . . . . . . . . . . . . . . . . . . . . . . . . . . . . . . . . .
24 602 221 WASHER, lock stl intl tooth .375 1. . . . . . . . . . . . . . . . . . . . . . . . . . . . . . . . . . . . . . . . . . . . . . . . . . . . .
25 RC1 201 467 RECEPTACLE, twlk 2P2W 20A 250V 1. . . . . . . . . . . . . . . . . . . . . . . . . . . . . . . . . . . . . . . . . .
039 618 PLUG, twlk 2P2W 20A 250V Arrow Hart 9102N. . . . . . . . . . . . . . . . . . .
26 NAMEPLATE, (order by model and style number) 1. . . . . . . . . . . . . . . . . . . . . . . . . . . . . . . . . . . . . . . . . . . . . . .
27 097 922 KNOB, pointer 1. . . . . . . . . . . . . . . . . . . . . . . . . . . . . . . . . . . . . . . . . . . . . . . . . . . . . . . . . . . . . . . . . . . .
28 605 321 NUT, stl hex .468-32 8. . . . . . . . . . . . . . . . . . . . . . . . . . . . . . . . . . . . . . . . . . . . . . . . . . . . . . . . . . . . . . .
29 PLG1 192 457 CORD SET, pwr 115V 16ga 3/c 11ft 5 in 1. . . . . . . . . . . . . . . . . . . . . . . . . . . . . . . . . . . . . . . .
30 139 042 BUSHING, strain relief .270/.480 ID x .804mtg hole, P/O cordset 1. . . . . . . . . . . . . . . . . . . . . . . .
31 GS1,WS1 003 538 VALVE, 115VAC 2way 1/4 IPS port 1/8 orf out 2. . . . . . . . . . . . . . . . . . . . . . . . . . . . . . .
32 010 295 FITTING, pipe brs elb M 1/4NPT x .625-18LH 2. . . . . . . . . . . . . . . . . . . . . . . . . . . . . . . . . . . . . . . . .
33 010 296 FITTING, pipe brs elb M 1/4NPT x .625-18RH 2. . . . . . . . . . . . . . . . . . . . . . . . . . . . . . . . . . . . . . . . .
Fig 10-3 REMOTE HAND SWITCH 1. . . . . . . . . . . . . . . . . . . . . . . . . . . . . . . . . . . . . . . . . . . . . . . . . . . . . . . . . . . . . .
Quantity
+When ordering a component originally displaying a precautionary label, the label should also be ordered.
BE SURE TO PROVIDE MODEL AND STYLE NUMBER WHEN ORDERING REPLACEMENT PARTS.
OM-610 Page 29
Page 36

Item
No.
Dia.
Mkgs.
Part
No.
Description
Quantity
Figure 10-2. HF Panel (Fig 10-1 Item 13)
1 G 204 480 SPARK GAP ASSEMBLY (consisting of) 1. . . . . . . . . . . . . . . . . . . . . . . . . . . . . . . . . . . . . . . . . . .
199 855 BASE, spark gap 1. . . . . . . . . . . . . . . . . . . . . . . . . . . . . . . . . . . . . . . . . . . . . . . . . . . . . . . . . . . . . . . . . . . . . .
199 856 HOLDER, points 4. . . . . . . . . . . . . . . . . . . . . . . . . . . . . . . . . . . . . . . . . . . . . . . . . . . . . . . . . . . . . . . . . . . . . .
196 455 POINTS, spark gap 4. . . . . . . . . . . . . . . . . . . . . . . . . . . . . . . . . . . . . . . . . . . . . . . . . . . . . . . . . . . . . . . . . . . .
2 141 735 MOUNTING BOARD, component HF 1. . . . . . . . . . . . . . . . . . . . . . . . . . . . . . . . . . . . . . . . . . . . . . . . .
3 T3 098 337 TRANSFORMER (Part of discontinued HF-20-2WG model). . . . . . . . . . . . . .
4 T1 208 045 TRANSFORMER, high voltage 115V Pri 3600V Sec mA w/term 1. . . . . . . . . . . . . . . . . . . . . .
5 C3 191 944 CAPACITOR, polyp film 10uf 250VAC 1. . . . . . . . . . . . . . . . . . . . . . . . . . . . . . . . . . . . . . . . . . . . .
6 R2 030 603 RESISTOR, WW fxd 10W 10K ohm 1. . . . . . . . . . . . . . . . . . . . . . . . . . . . . . . . . . . . . . . . . . . . . .
7 TD1 114 494 TIMER, delay 1. . . . . . . . . . . . . . . . . . . . . . . . . . . . . . . . . . . . . . . . . . . . . . . . . . . . . . . . . . . . . . . . .
8 R5 030 686 POTENTIOMETER, cp std 1/T 2W 1. . . . . . . . . . . . . . . . . . . . . . . . . . . . . . . . . . . . . . . . . . . . . . .
9 182 294 BRACKET, mtg pot 1. . . . . . . . . . . . . . . . . . . . . . . . . . . . . . . . . . . . . . . . . . . . . . . . . . . . . . . . . . . . . . . . .
10 097 922 KNOB 1. . . . . . . . . . . . . . . . . . . . . . . . . . . . . . . . . . . . . . . . . . . . . . . . . . . . . . . . . . . . . . . . . . . . . . . . . . . .
11 R4 030 601 RESISTOR, WW adj 25W 1K ohm 1. . . . . . . . . . . . . . . . . . . . . . . . . . . . . . . . . . . . . . . . . . . . . . . .
12 R1 083 784 RESISTOR, WW fxd 100W 10 ohm 1. . . . . . . . . . . . . . . . . . . . . . . . . . . . . . . . . . . . . . . . . . . . . . .
13 C2 096 761 CAPACITOR, mica .002uf 10000V 1. . . . . . . . . . . . . . . . . . . . . . . . . . . . . . . . . . . . . . . . . . . . . . . .
14 C5 031 630 CAPACITOR, elctlt 22uf 50VDC 1. . . . . . . . . . . . . . . . . . . . . . . . . . . . . . . . . . . . . . . . . . . . . . . . . .
15 C6 046 140 CAPACITOR 1. . . . . . . . . . . . . . . . . . . . . . . . . . . . . . . . . . . . . . . . . . . . . . . . . . . . . . . . . . . . . . . . . . .
16 SR1 035 704 RECTIFIER, integ 40A 800V 1. . . . . . . . . . . . . . . . . . . . . . . . . . . . . . . . . . . . . . . . . . . . . . . . . . .
17 CR2 059 266 RELAY, encl 120VAC DPDT 1. . . . . . . . . . . . . . . . . . . . . . . . . . . . . . . . . . . . . . . . . . . . . . . . . . .
18 CR1 059 267 RELAY, encl 12VDC DPDT 1. . . . . . . . . . . . . . . . . . . . . . . . . . . . . . . . . . . . . . . . . . . . . . . . . . . .
*206 502 SERVICE KIT, spark gap assembly 1. . . . . . . . . . . . . . . . . . . . . . . . . . . . . . . . . . . . . . . . . . . . . . . . . . . . . .
13
14
15
16
17
12
18
1
2
3
4
5
6
11
10
9
8
7
Figure 10-2. HF Panel
*Recommended Spare Parts.
BE SURE TO PROVIDE MODEL AND STYLE NUMBER WHEN ORDERING REPLACEMENT PARTS.
OM-610 Page 30
ST-143 761-D
Page 37

Item
No.
Dia.
Mkgs.
Part
No.
Description Quantity
Figure 10-3. Remote Hand Switch
1 039 618 PLUG, twlk 2P2W 20A 250V 1. . . . . . . . . . . . . . . . . . . . . . . . . . . . . . . . . . . . . . . . . . . . . . . . . . . . . . . .
2 600 340 CABLE, port No. 16 2/c (order by ft) 20ft. . . . . . . . . . . . . . . . . . . . . . . . . . . . . . . . . . . . . . . . . . . . . . . .
3 070 585 TUBING, gl acrylic .162-.178 ID (order by ft) 1ft. . . . . . . . . . . . . . . . . . . . . . . . . . . . . . . . . . . . . . . . . .
4 RHS-11A 011 752 SWITCH, slide NC (consisting of) 1. . . . . . . . . . . . . . . . . . . . . . . . . . . . . . . . . . . . . . . . . . .
5 010 860 CLAMP, hose .812-1.750clp dia 1. . . . . . . . . . . . . . . . . . . . . . . . . . . . . . . . . . . . . . . . . . . . . . . . . . . . .
5
3
2
1
4
Figure 10-3. Remote Hand Switch
BE SURE TO PROVIDE MODEL AND SERIAL NUMBER WHEN ORDERING REPLACEMENT PARTS.
SA-143 762
OM-610 Page 31
Page 38

Notes
Page 39

Warranty Questions?
Call
1-800-4-A-MILLER
for your local
Miller distributor.
Y our distributor also gives
you ...
Service
Y ou always get the fast,
reliable response you
need. Most replacement
parts can be in your
hands in 24 hours.
Support
Need fast answers to the
tough welding questions?
Contact your distributor.
The expertise of the
distributor and Miller is
there to help you, every
step of the way.
Effective January 1, 2002
(Equipment with a serial number preface of “LC” or newer)
This limited warranty supersedes all previous Miller warranties and is exclusive with no other
LIMITED WARRANTY – Subject to the terms and conditions
below, Miller Electric Mfg. Co., Appleton, Wisconsin, warrants
to its original retail purchaser that new Miller equipment sold
after the effective date of this limited warranty is free of defects
in material and workmanship at the time it is shipped by Miller.
THIS WARRANTY IS EXPRESSLY IN LIEU OF ALL OTHER
WARRANTIES, EXPRESS OR IMPLIED, INCLUDING THE
WARRANTIES OF MERCHANTABILITY AND FITNESS.
Within the warranty periods listed below, Miller will repair or
replace any warranted parts or components that fail due to
such defects in material or workmanship. Miller must be
notified in writing within thirty (30) days of such defect or
failure, at which time Miller will provide instructions on the
warranty claim procedures to be followed.
Miller shall honor warranty claims on warranted equipment
listed below in the event of such a failure within the warranty
time periods. All warranty time periods start on the date that
the equipment was delivered to the original retail purchaser, or
one year after the equipment is sent to a North American
distributor or eighteen months after the equipment is sent to an
International distributor.
1. 5 Years Parts — 3 Years Labor
* Original main power rectifiers
* Inverters (input and output rectifiers only)
2. 3 Years — Parts and Labor
* Transformer/Rectifier Power Sources
* Plasma Arc Cutting Power Sources
* Semi-Automatic and Automatic Wire Feeders
* Inverter Power Supplies
* Intellitig
* Engine Driven Welding Generators
(NOTE: Engines are warranted separately by
the engine manufacturer .)
3. 1 Y ear — Parts and Labor Unless Specified
* DS-2 Wire Feeder
* Motor Driven Guns (w/exception of Spoolmate
Spoolguns)
* Process Controllers
* Positioners and Controllers
* Automatic Motion Devices
* RFCS Foot Controls
* Induction Heating Power Sources
* Water Coolant Systems
* Flowgauge and Flowmeter Regulators (No Labor)
* HF Units
* Grids
* Maxstar 85, 140
* Spot Welders
* Load Banks
* Racks
* Running Gear/Trailers
* Plasma Cutting Torches (except APT & SAF
Models)
* Field Options
(NOTE: Field options are covered under True
Blue for the remaining warranty period of the
product they are installed in, or for a minimum of
one year — whichever is greater.)
4. 6 Months — Batteries
5. 90 Days — Parts
* MIG Guns/TIG Torches
* Induction Heating Coils and Blankets
guarantees or warranties expressed or implied.
* APT, ZIPCUT & PLAZCUT Model Plasma Cutting
Torches
* Remote Controls
* Accessory Kits
* Replacement Parts (No labor)
* Spoolmate Spoolguns
* Canvas Covers
Miller’s True Blue Limited Warranty shall not apply to:
1. Consumable components; such as contact tips,
cutting nozzles, contactors, brushes, slip rings,
relays or parts that fail due to normal wear.
(Exception: brushes, slip rings, and relays are
covered on B o b cat, Trailblazer, and Legend models.)
2. Items furnished by Miller, but manufactured by others,
such as engines or trade accessories. These items are
covered by the manufacturer’s warranty, if any.
3. Equipment that has been modified by any party other
than Miller, or equipment that has been improperly
installed, improperly operated or misused based upon
industry standards, or equipment which has not had
reasonable and necessary maintenance, or equipment
which has been used for operation outside of the
specifications for the equipment.
MILLER PRODUCTS ARE INTENDED FOR PURCHASE
AND USE BY COMMERCIAL/INDUSTRIAL USERS AND
PERSONS TRAINED AND EXPERIENCED IN THE USE
AND MAINTENANCE OF WELDING EQUIPMENT.
In the event of a warranty claim covered by this warranty, the
exclusive remedies shall be, at Miller’s option: (1) repair; or (2)
replacement; or, where authorized in writing by Miller in
appropriate cases, (3) the reasonable cost of repair or
replacement at an authorized Miller service station; or (4)
payment of or credit for the purchase price (less reasonable
depreciation bas e d u p o n a c tual use) upon return of the goods
at customer’s risk and expense. Miller’s option of repair or
replacement will be F.O.B., Factory at Appleton, Wisconsin, or
F.O.B. at a Miller authorized service facility as determined by
Miller. Therefore no compensation or reimbursement for
transportation costs of any kind will be allowed.
TO THE EXTENT PERMITTED BY LAW, THE REMEDIES
PROVIDED HEREIN ARE THE SOLE AND EXCLUSIVE
REMEDIES. I N N O EVENT SHALL MILLER BE LIABLE FOR
DIRECT, INDIRECT, SPECIAL, INCIDENTAL OR
CONSEQUENTIAL DAMAGES (INCLUDING LOSS OF
PROFIT), WHETHER BASED ON CONTRACT, TORT OR
ANY OTHER LEGAL THEORY.
ANY EXPRESS WARRANTY NOT PROVIDED HEREIN
AND ANY IMPLIED WARRANTY, GUARANTY OR
REPRESENTATION AS TO PERFORMANCE, AND ANY
REMEDY FOR BREACH OF CONTRACT TORT OR ANY
OTHER LEGAL THEORY WHICH, BUT FOR THIS
PROVISION, MIGHT ARISE BY IMPLICATION,
OPERATION OF LAW, CUSTOM OF TRADE OR COURSE
OF DEALING, INCLUDING ANY IMPLIED WARRANTY OF
MERCHANTABILITY OR FITNESS FOR PARTICULAR
PURPOSE, WITH RESPECT TO ANY AND ALL
EQUIPMENT FURNISHED BY MILLER IS EXCLUDED AND
DISCLAIMED BY MILLER.
Some states in the U.S.A. do not allow limitations of how long
an implied warranty lasts, or the exclusion of incidental,
indirect, special or consequential damages, so the above
limitation or exclusion may not apply to you. This warranty
provides specific legal rights, and other rights may be
available, but may vary from state to state.
In Canada, legislation in some provinces provides for certain
additional warranties or remedies other than as stated herein,
and to the extent that they may not be waived, the limitations
and exclusions set out above may not apply. This Limited
Warranty provides specific legal rights, and other rights may
be available, but may vary from province to province.
miller_warr 6/02
Page 40

Owner’s Record
Please complete and retain with your personal records.
Model Name Serial/Style Number
Purchase Date (Date which equipment was delivered to original customer.)
Distributor
Address
City
State Zip
For Service
Call 1-800-4-A-Miller or see our website at www.MillerWelds.com
to locate a DISTRIBUTOR or SERVICE AGENCY near you.
Always provide Model Name and Serial/Style Number.
Contact your Distributor for:
Welding Supplies and Consumables
Options and Accessories
Personal Safety Equipment
Service and Repair
Replacement Parts
Training (Schools, Videos, Books)
Technical Manuals (Servicing Information
and Parts)
Circuit Diagrams
Welding Process Handbooks
Miller Electric Mfg. Co.
An Ill inoi s Tool Works Company
1635 West Spencer Street
Appleton, WI 54914 USA
International Headquarters–USA
USA Phone: 920-735-4505 Auto-A t t ended
USA & Canada FAX: 920-735-4134
International FAX: 920-735-4125
European Headquarters –
United Kingdom
Phone: 44 (0) 1204-593493
FAX: 44 (0) 1204-598066
www.MillerWelds.com
Contact the Delivering Carrier for:
For assistance in filing or settling claims,
contact your distributor and/or equipment
manufacturer’s Transportation Department.
PRINTED IN USA 2002 Miller Electric Mfg. Co. 5/02
File a claim for loss or damage during
shipment.
 Loading...