

Page 1
Milkotester Ltd.
49, Hristo Botev St., 4470 Belovo, BULGARIA, Phone: +359 889 259 646
MILKOTESTER
Milk analyzing device
Model: MASTER Touch
Fat, Solids-Non-Fat (SNF), Protein, Lactose, Water content, Temperature
(°C), Freezing point, Salts, Density, pH
THE INFORMATION CONTAINED IN THIS MANUAL IS A SUBJECT TO CHANGE
WITHOUT NOTICE. FOR UPDATES, PLEASE CONTACT THE MANUFACTURER
OR USE THE FOLLOWING WEB ADDRESS:
http://www.milkotester.com
Page 2

ULTRASONIC PORTABLE MILK ANALYZER www.milkotester.com
CAUTION!
This device operates on 100-250V. In order to avoid electrical
shock or to prevent the unit from damage DO NOT REMOVE the
cover!
Please follow the instructions in this manual !
Safety recommendations :
• Read carefully and make sure you understand all the
instructions.
• After initially turning on the device do recommend 3-4
cycles of "Clean"
• Place the device on a leveled and stable surface. If it falls
or is severely shocked its functional systems may be
damaged.
• When plugging the device into the electrical outlet, put away
the power cord so it does not stay in the way when
accessing the device and cannot be stepped on.
• Do not disassemble the device in order to avoid possible
electrical shock. In case of malfunction contact your local
dealer.
• Handle the liquids the device works with carefully, following
all the instructions for their preparation.
-2-
Operating Instructions Master Pro
Page 3

ULTRASONIC PORTABLE MILK ANALYZER www.milkotester.com
Table of contents
1. General description ....................................................................... 4
2. Close-up view ............................................................................... 5
3.1 Front panel ......................................................................... 5
3.2 Display ............................................................................... 6
3.3 Rear panel ......................................................................... 7
3. Samples preparation ..................................................................... 8
4. Working description ...................................................................... 10
4.1 Preparing the device .......................................................... 10
4.2 Measuring samples ............................................................ 11
4.3 Making corrections and calibration ..................................... 13
4.3.1 Correction .............................................................. 14
4.3.2 Calibration.............................................................. 16
4.4 Settings and options .......................................................... 19
4.5 Measurement of pH ........................................................... 22
4.6 Measurement of Conductivity ............................................. 25
4.7 Automatic weighting the milk with scales ........................... 26
4.7.1 Control options when working with scales ....................... 26
4.7.2 Preparation for work and checking the scales ................. 26
4.7.3 Weighting delivered milk ................................................. 27
5. Cleaning and maintenance ........................................................... 28
5.1 Routine cleaning ................................................................ 28
5.2 Complete flushing .............................................................. 29
5.3 Weekly cleaning ................................................................. 29
5.4 Peristaltic pump service ..................................................... 29
6. Troubleshooting ............................................................................ 30
7. Technical specifications ................................................................ 31
Appendix Freezing point determination ............................................. 33
Appendix Conductivity measuring .................................................... 36
Connecting to printer ......................................................................... 37
PC connection .................................................................................. 38
Guarantee card ................................................................................. 41
Accumulator………………………………………………………….........43
-3-
Operating Instructions Master Pro
Page 4

ULTRASONIC PORTABLE MILK ANALYZER www.milkotester.com
CHAPTER ONE
General description
MILKOTESTER MASTER is designed for percentage analysis of Fat,
Solids-Non-Fat (SNF), Protein, and Lactose, Water content,
Temperature (°C), Freezing point, Salts, Density an d pH. Тhose
components can all be measured at the same time. The device
measures cow milk, goat milk, sheep milk, buffalo milk, camel milk,
lama milk, restored milk, UHT, cream, whey and buttermilk.
The factory preset is for cow milk, sheep milk and UHT. Upon user’s
request the device can be calibrated for any of the above mentioned
types of milk.
The device has a compact design with a robust structure and a userfriendly interface. Most importantly, the one-button operation is
extremely simple – you press only once to start measuring, you press
only once for cleaning. MILKOTESTER MASTER can analyze three
types of milk defined by user. The measurement speed is 50 samples
per hour with cleaning included. The samples are precisely dosed and
small quantities are required – the sample volume is 25 cm³. No
thermal or mechanical treatment of the samples before analysis is
necessary. No use of chemical reagents is required. The working
conditions are as follows – temperatures from 5° to 35 °C, HR from
30% to 80%.
With regard to the “moisture problem” which remains of much
significance the front panel of the device is designed to operate when
with wet hands. In addition to this MILKOTESTER MASTER provides a
one year’s full warranty.
-4-
Operating Instructions Master Pro
Page 5
ULTRASONIC PORTABLE MILK ANALYZER www.milkotester.com
IN THIS CHAPTER
CHAPTER TWO
Close-up view
Front panel
Display
Rear panel
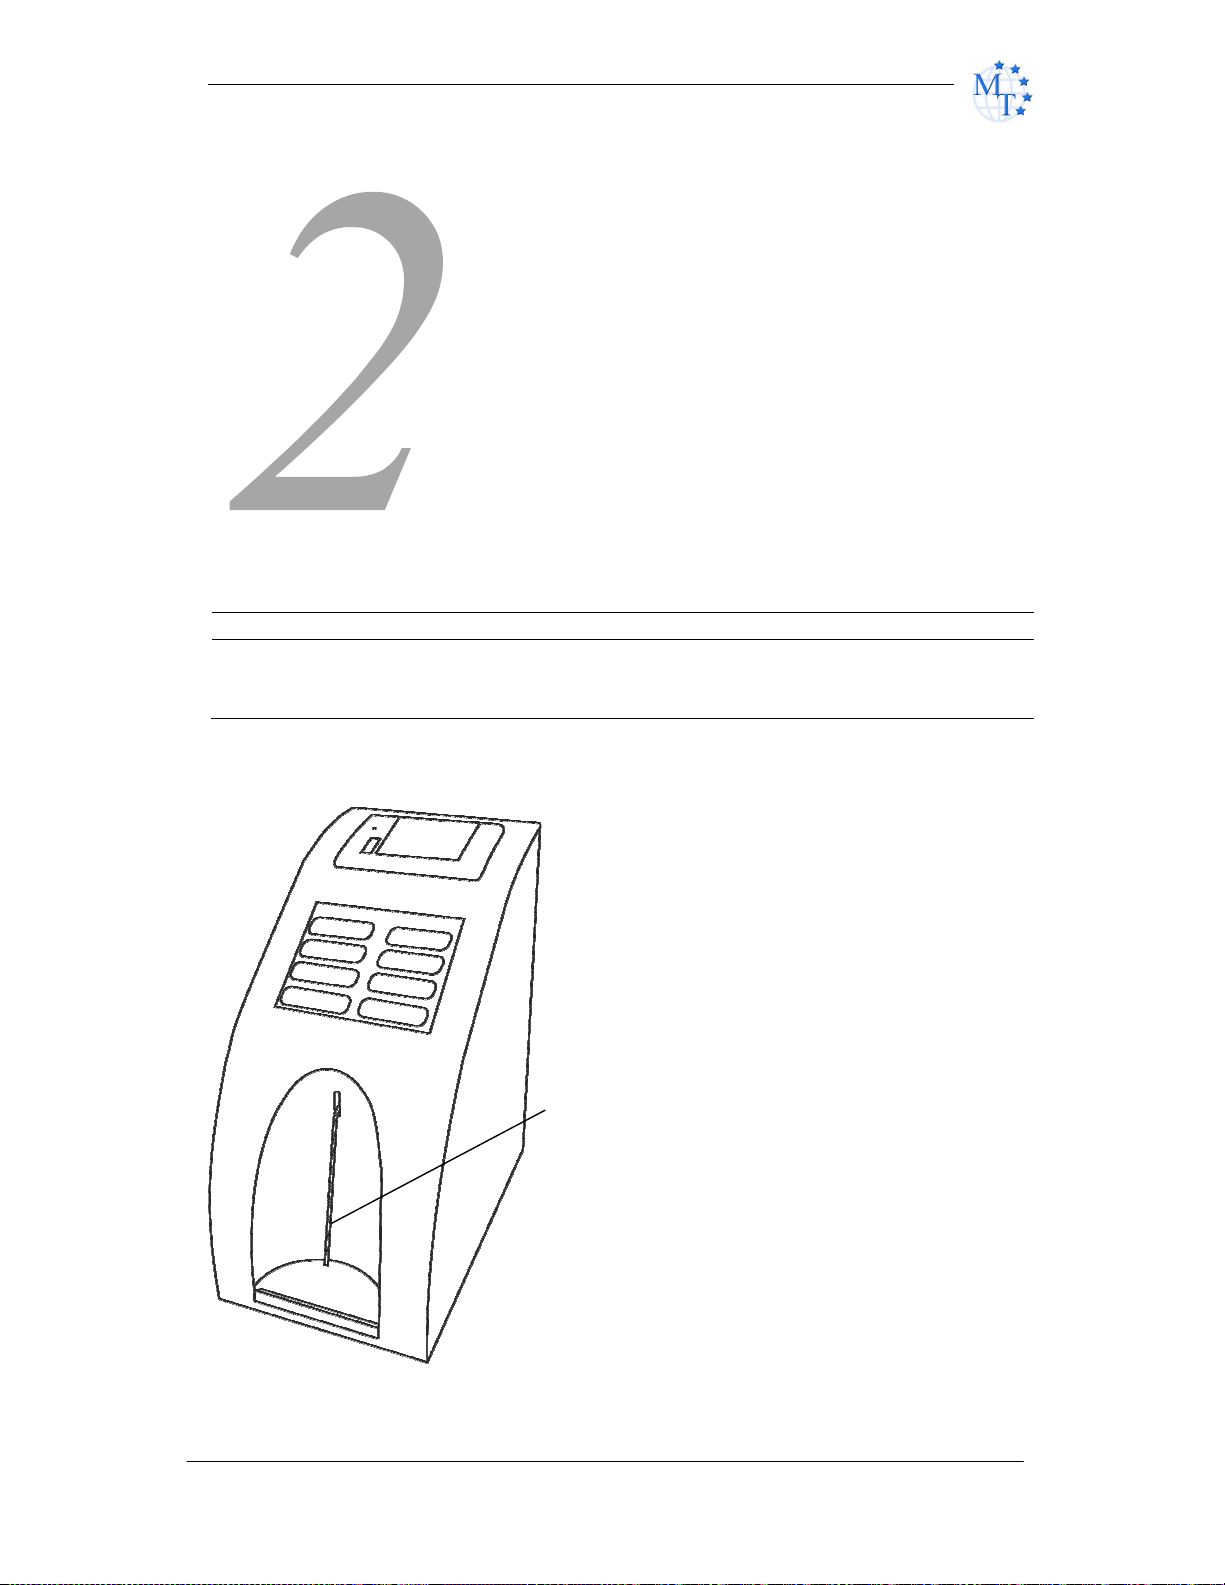
2.1 Front panel
1 – Intake pipette
-5-
Operating Instructions Master Pro
Page 6
ULTRASONIC PORTABLE MILK ANALYZER www.milkotester.com
TABLE
CAL2
CAL1
CAL3
Ph MEASURE
Close-up view
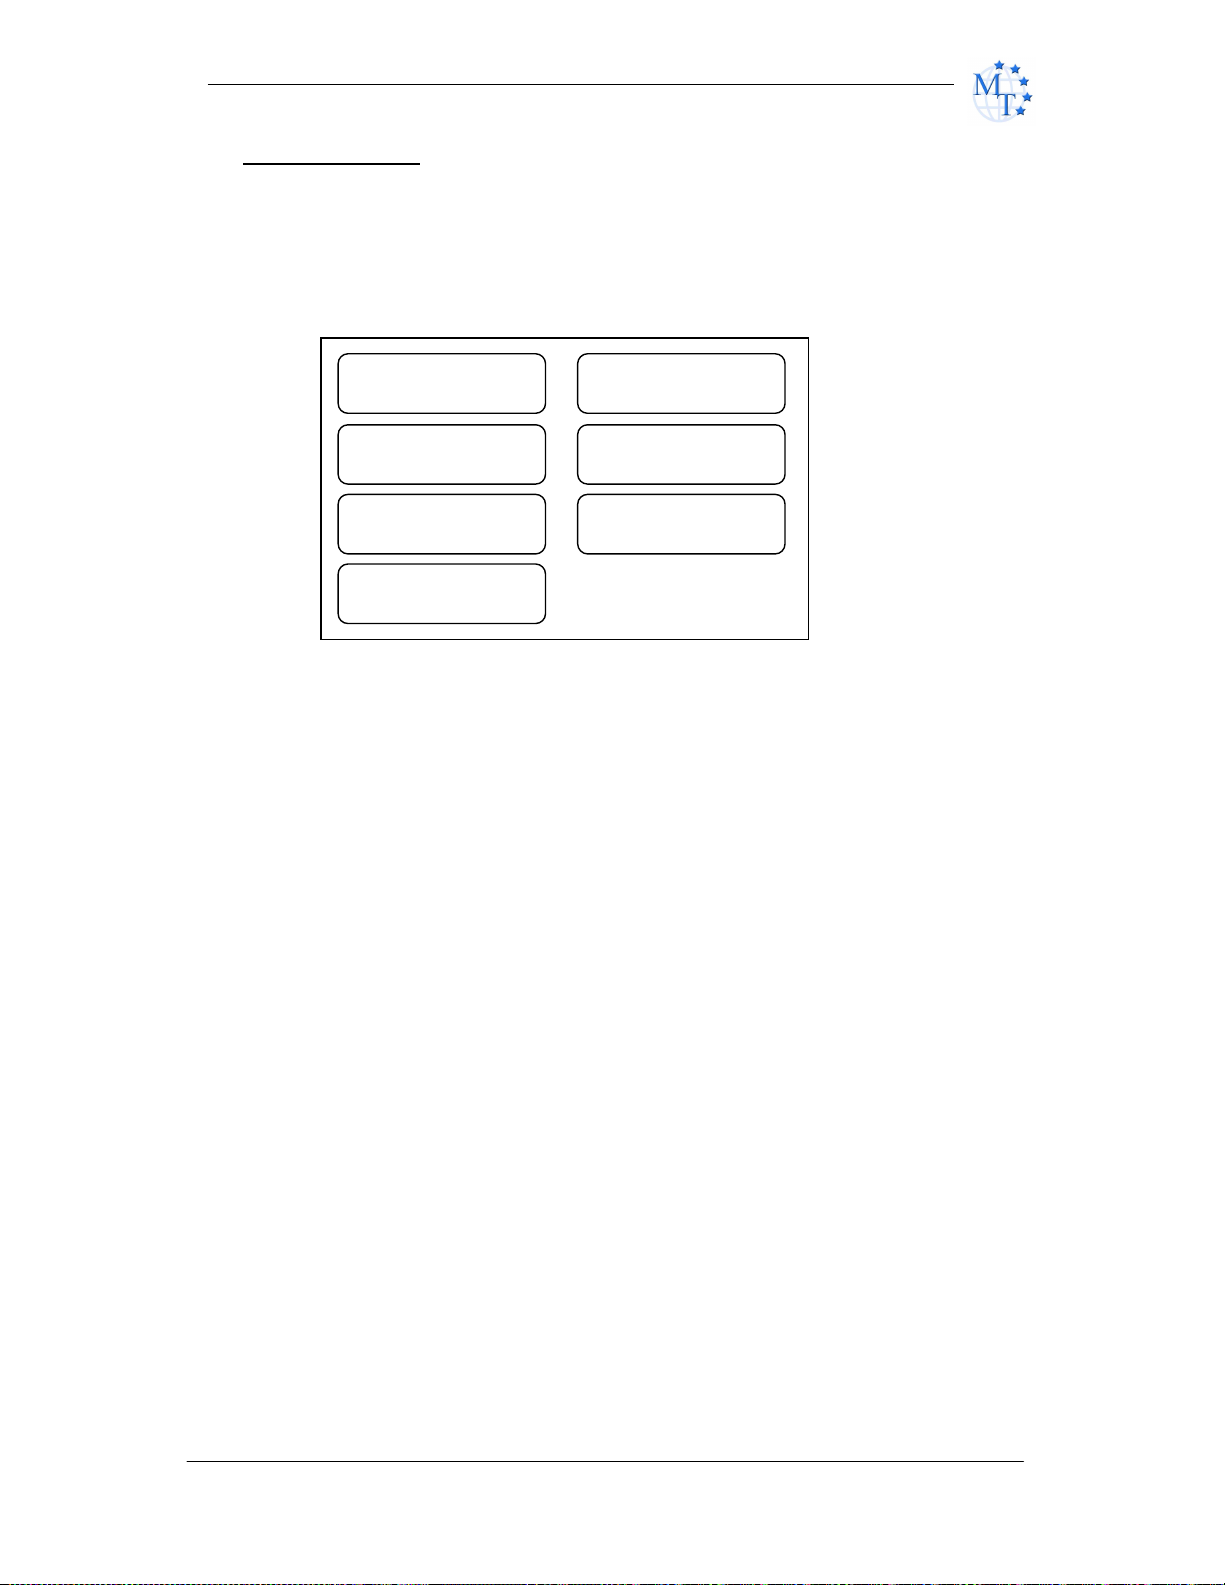
2.2 Display
COW MILK
SHEEP MILK
UHT MILK
CLEAN
MENU
-6-
Operating Instructions Master Pro
Page 7
ULTRASONIC PORTABLE MILK ANALYZER www.milkotester.com
4
3
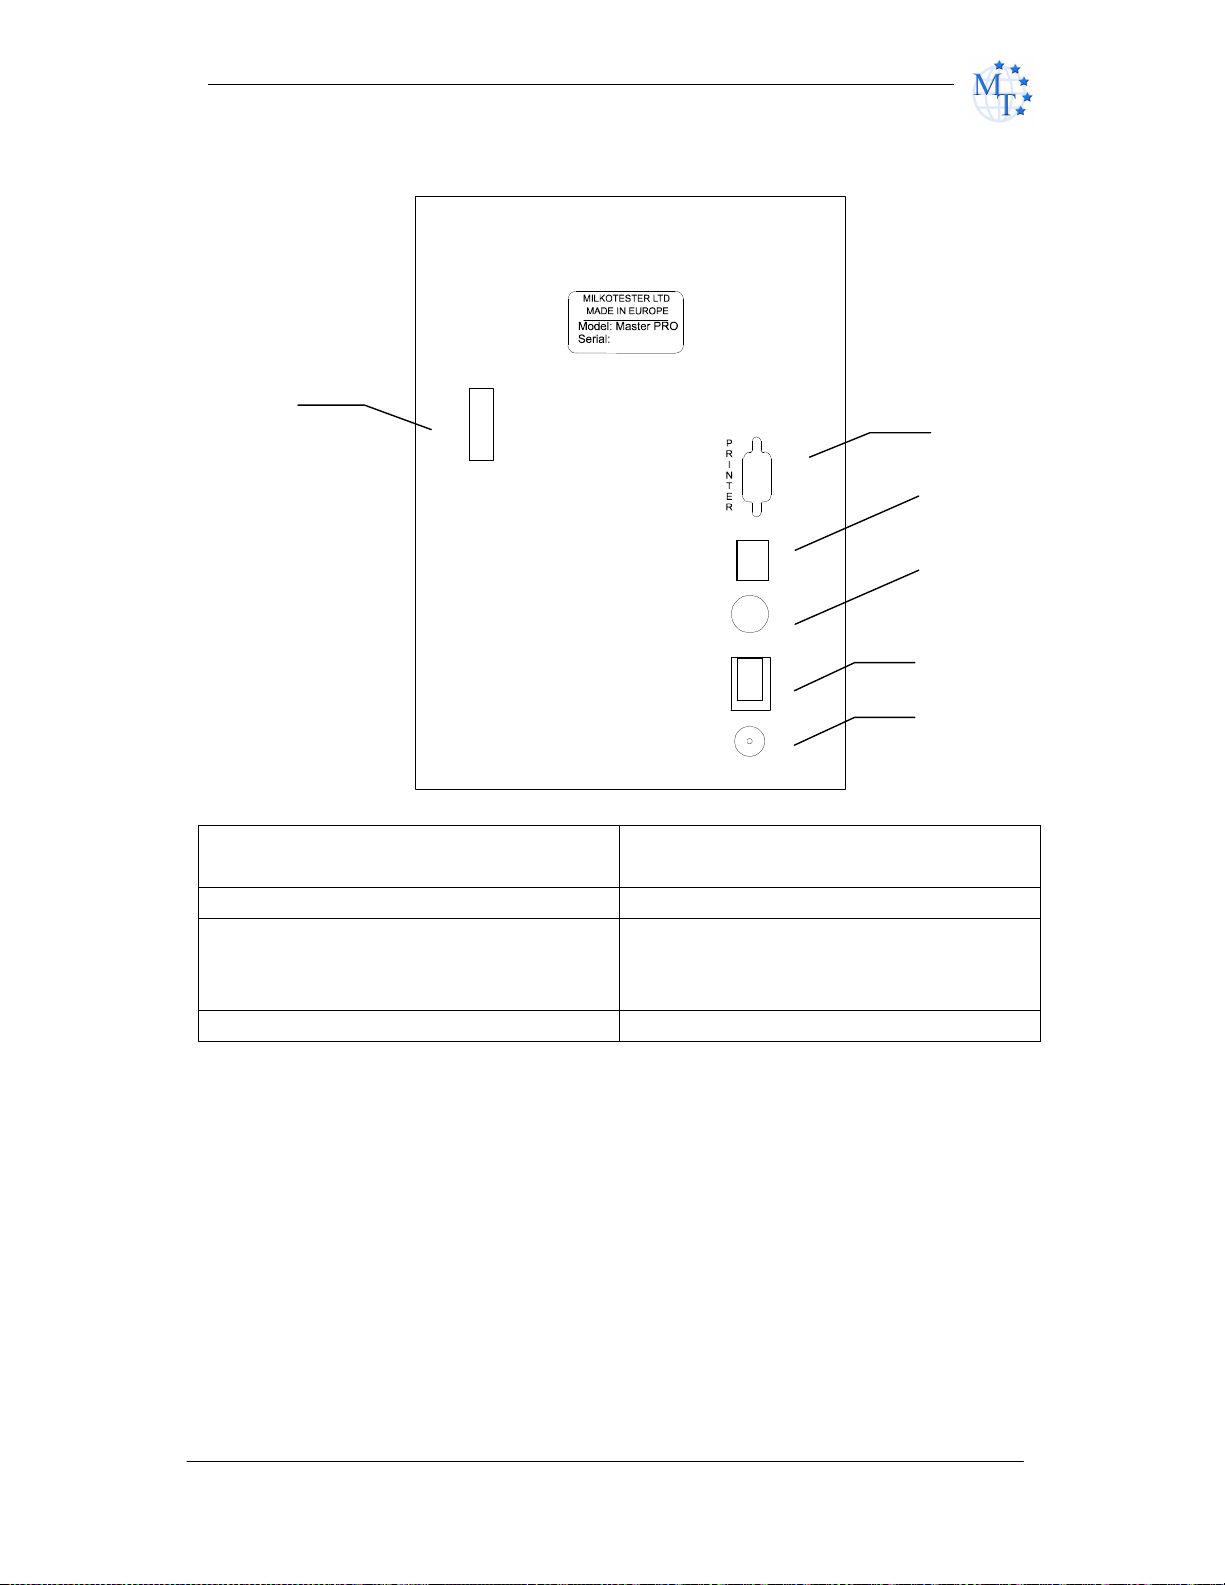
2.3 Rear panel
6
6
5
..
1 – Serial port to printer 5 – pH connector (active only on
request)
2 – USB (PC connection)
3 – Power in socket 12V DC (1415V DC for model with
6 – USB Flash Drive
(active only on request)
Accumulator)
4 – Power switch
-7-
Operating Instructions Master Pro
Page 8

ULTRASONIC PORTABLE MILK ANALYZER www.milkotester.com
CHAPTER THREE
Samples preparation
In order that most accurate results are obtained it is important that the
milk be kept for 2 hours after milking and stirred well before being used
for sample material. A good way to stir up the milk is to pour it several
times out of one vessel into another and back. Before analysis the
samples have to be filtered in order to be free from foreign fragments.
Milk samples should be 5-35 °C. Full cream samples containing fat
over 10% should be heated up to 42-43 °C and then cooled to 25-30
°C. If the sample temperature is over 36 °C the mes sage “Sample
overheated” will appear on the display. Use milk samples only once
and do not return it to the vessel. Samples can be kept for a maximum
of 2 days if they are stored at a temperature not exceeding 5 °С.
Milk stirring
It is a very important condition for receiving exact results. Before
taking samples from big vessels, the milk (fresh or thermally treated,
whole-milk or whipped) has to be well stirred for no less than 5 min., by
vertical and circular slow movements. Mixing spoon with long handle is
used, allowing the lowest layers of the liquid to be reached. The milk in
the milk-cans is stirred 5 to 8 times from the surface to the bottom and
reverse with slow circular movements.
Sample preservation
The vessels where the samples will be put have to be clean, dry,
glass, metal or from other suitable material, to be tightly closed with
rubber or other stopples. The stopples not to absorb water and fat and
not to influence the analyses sample content.
-8-
Operating Instructions Master Pro
Page 9

ULTRASONIC PORTABLE MILK ANALYZER www.milkotester.com
In summer the sample fills up to the top the vessel, but in winter
– at least 3/4 from the vessel’s volume. Each sample for analyses has
to be labeled and described in a way not allowing to be mixed up.
The samples are stored in conditions, assuring temperature,
corresponding to the requirements for storing such kind of product
(advisable – 1 °С).
If there is a need of longer sample storing they have to be
preserved; the most commonly used preservative is potassium
dichromate (K2Cr2O7) - 1 g for 1 000 ml. The samples have to be
stored in a cold and dark place after the preservation. Have in mind
that during the analyses the results for SNF% will be increased with
0,1 %. After adding the preservative the sample has to be well stirred.
Preparing the samples for analyses
Milk – raw and thermally treated
When examining samples taken immediately before analyses
and shortly stored, the milk is poured several times from vessel to
vessel in order to distribute the fat content uniformly. To avoid foam
formation or separation of milk fat, the samples have to be carefully
poured using the walls of the vessels, as they are tilted slightly. For a
better mixing the sample it has to be poured at least 3 times. When
needed the same is tempered to the temperature within the measuring
range.
If there is fat stuck on the walls of the vessel and the stopple
(when the samples were stored for a long time), the milk has to be
slowly heated up to 35-40 °С. At the same time it has to be slowly
shaken. The cream, stuck to the walls of the vessel is removed. The
sample is poured several times and is cooled down (advisable up to
20°С).
If there is separated liquefied fat or white particles with irregular form
on the vessel’s walls reliable results could not be expected.
Do not make analyses if the acidity of the milk is more than 17oT.
-9-
Operating Instructions Master Pro
Page 10

ULTRASONIC PORTABLE MILK ANALYZER www.milkotester.com
IN THIS CHA
PTER
CHAPTER FOUR
Preparing the device
Measuring samples
Corrections
Calibration
Working description
4.1 PREPARING THE DEVICE
1. Place the device on a horizontal and stable surface.
Caution: Any sources of hot or cold air can influence the
accuracy of the measurements.
2. Connect the power cord 12V DC to the power socket on the
rear panel of the unit and plug it into the electrical outlet (the
outlet has to be grounded, see “Important Safety
Instructions”).
3. Turn on the POWER switch and MILKOTESTER MASTER will
be ready for use. Before proceeding with using the unit,
please read and follow the rest of the instructions in this
chapter!
Powering by an external 12V DC power source
Milk analyzer MASTER can be used in places where no regular
electrical supply is available MILKOTESTER MASTER can be
powered by your car battery or other 12V DC external power sources.
Milk analyzer MASTER has provided a cable suitable for this purpose.
To use this option, follow the procedure described below:
-10-
Operating Instructions Master Pro
Page 11
ULTRASONIC PORTABLE MILK ANALYZER www.milkotester.com
Master Pro Touch
CAL2
CAL1
CAL3
Ph MEASURE
1. Unplug the 12V DC power cable from the socket on the rear
panel of the unit and then from the electrical outlet.
2. Connect the supplied power cord 12V DC to the Power-in
socket 12V DC socket on the rear panel of the unit and plug
the other end of the cable into the electrical lighter socket
inside your vehicle.
3. The device will be turned on immediately. After starting the
unit goes into system check mode and will be ready for
analyses in about 5 minutes.
NOTE:
If the unit does not start up after it is connected to the power source,
check the fuse inside the connector plugged into the electrical lighter
socket.
4.2 MEASURING SAMPLES
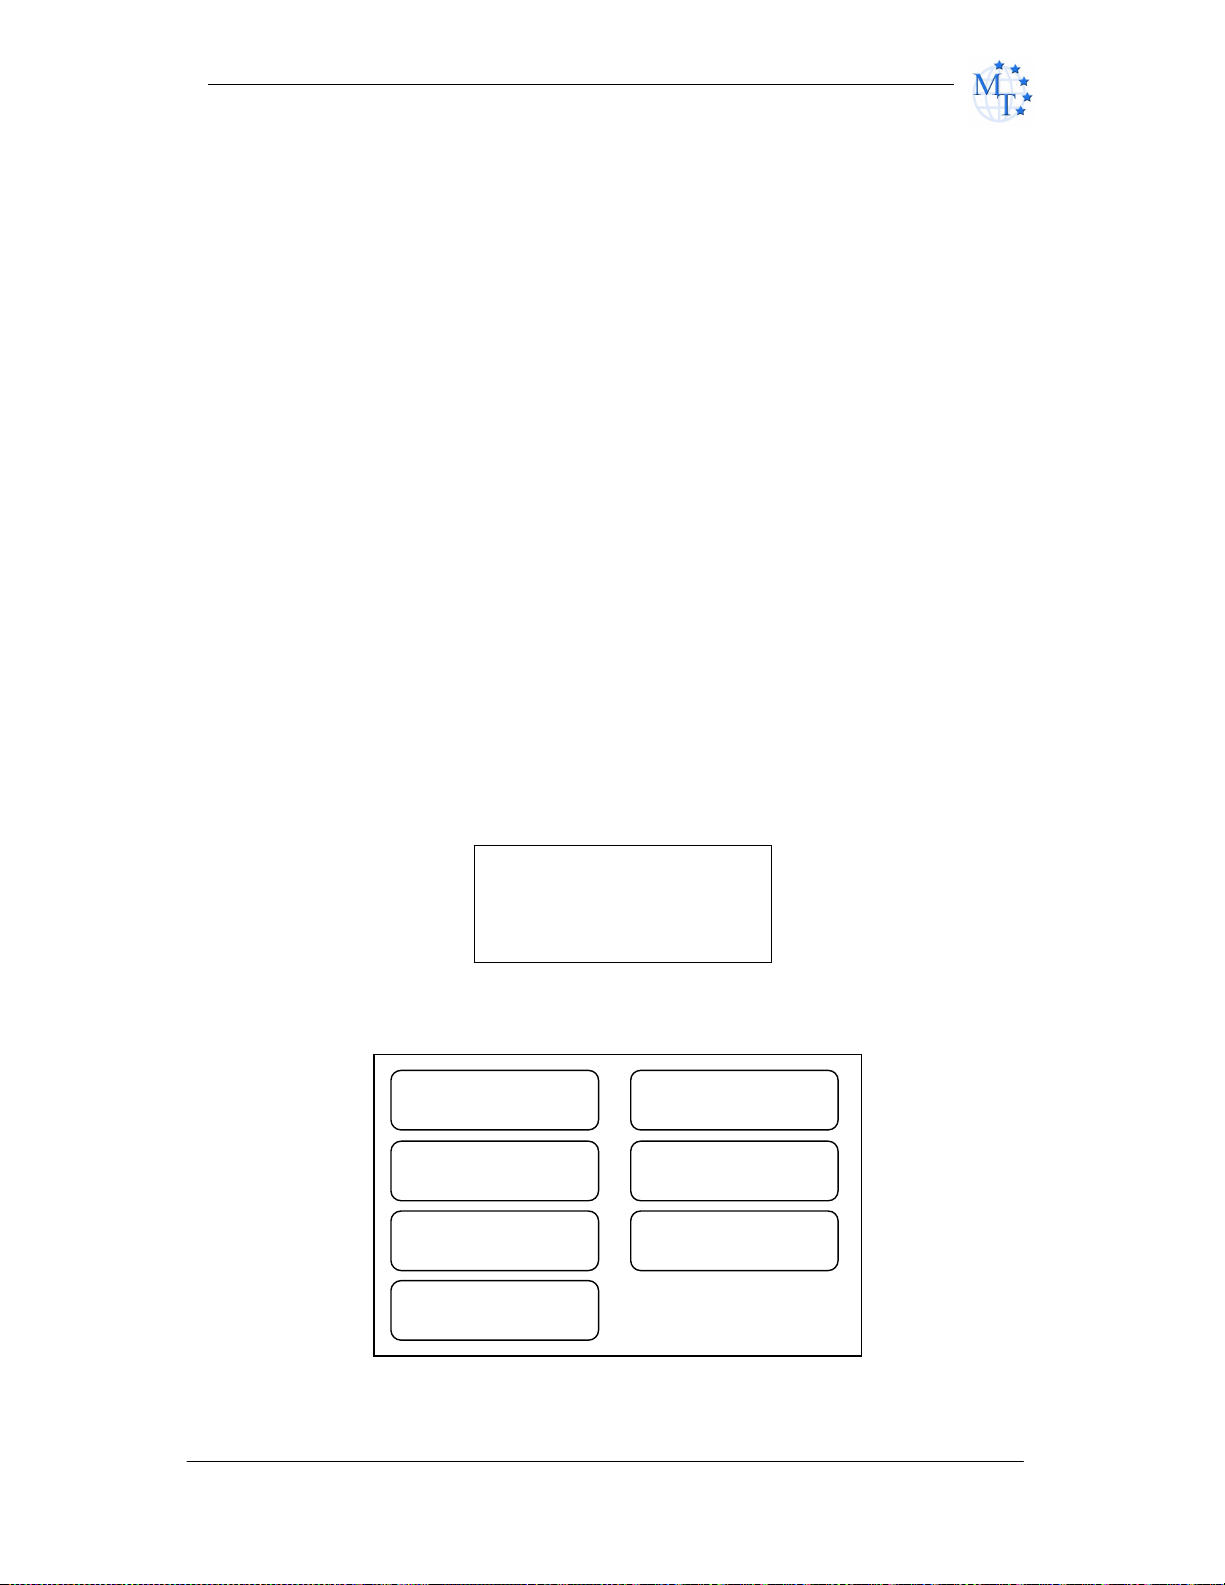
After MILKOTESTER MASTER is turned on from the POWER switch,
the display reads first:
Followed by:
COW MILK
MENU
TABLE SHEEP MILK
UHT MILK
CLEAN
-11-
Operating Instructions Master Pro
Page 12

ULTRASONIC PORTABLE MILK ANALYZER www.milkotester.com
MEA
SURING
Please Wait
CUSTOMER
LITERS
SAVE
PRINT
START AGAIN
BACK
You can choose among three types of milk at a time, (upon user’s
request the device can be calibrated for any of the other types of
milk).
Place the cup with the milk sample
Place a second milk sample under the pH probe (the automatic mode
for pH measurement must be turned on).
When you choose the desired type you use the ↑↓ (UP and DOWN)
arrow buttons, and then press ENTER to activate analyzing.
The following text will appear:
In about 60-90 sec. the results of analyzing
X MILK
CAL X
will appear on the display as follows:
Customer:
Liters:
FAT: X.X
SNF: X.XX
DENSITY: X.X
PROTEIN: X.X
LACTOSE: X.X
SALTS: X.X
WATER: XX.X
Fr.POINT: -X.XXX
TEMP: XX.X
pH XX.X
Co: XX.X
-12-
Operating Instructions Master Pro
Page 13

ULTRASONIC PORTABLE MILK ANALYZER www.milkotester.com
The results will be printed immediately after they are ready if the
printer is in automatic mode. If the printer is in manual mode, pressing
the UP will cause printing results.
Changing modes is done by Menu ->Settings->Printer En/Dis
Page2
Menu
By choosing the ENTER button you can
start measuring anew.
By choosing the EXIT button you can start
from the very beginning and choose to
analyze another type of milk.
When finished analyzing the instrument issues a beep sound, returns
the analyzed sample material back into the cup, and the values of all
measured components appear on the display. If the unit is connected
to the printer all results will be automatically printed out.
At this point the sample cup can be removed from under the pipette.
The instrument will continue to show the measured values until a new
analysis is initiated.
WARNING!
Make sure that the instrument is at rest during analysis. Any shaking of
the device will cause inaccurate results.
NOTE:
Due to the possible presence of water inside the flow system left from
the last flushing procedure, we recommend that you do not take into
account the first analysis after flushing if they appear inaccurate. To
prevent or reduce this inaccuracy due to water in the system, please
refer to chapter “Cleaning and Maintenance”, section “Thorough
Cleaning”.
To access the menu, press the MENU button. The range of functions
is grouped into submenus. Scroll through the menu to select the one
that you need and then select the settings you need to make. Press
ENTER to activate them. Press EXIT to keep the previous settings.
4.3 MAKING CORRECTIONS AND CALIBRATION
In the process of work with the analyzer there is a possibility the
results to start differing between the data for some of the measuring
parameters when measured with the milk analyzer and the
-13-
Operating Instructions Master Pro
Page 14

ULTRASONIC PORTABLE MILK ANALYZER www.milkotester.com
corresponding reference method of analyses (Gerber for fat, Kjeldahl
for proteins etc). In order to establish the possible discrepancy and to
correct the readings of the milk analyzer do the following:
Taking samples and preparation of samples for checking the accuracy
of the milk analyzer, making corrections and recalibration
This is a basic moment for the correct checking the accuracy of the
analyzer and for making correct and precise correction and calibration.
It is accomplished according Appendix Taking and preparation of
samples for checking correctness of the milk analyzer, making
corrections and recalibration.
Determination the type of the discrepancy:
Making measurements
Make measurements with different samples (not less than 3) with
known values of a separate parameter (for example fat content),
determined by the known reference methods of analyses (for example
Gerber's method for determination of fat content). For more accuracy it
is recommended among these samples to be also such with values,
close to the lowest and highest bounds for the measured parameters.
Make 5-time measurement for each of the samples. Calculate the
average value for each sample parameter, without taking into
consideration the first measurement for each sample.
Analyzing the measurement results
Make comparison between the values of the parameter from the
reference sample and measured with the analyzer. Make analyses of
the difference received.
If the received differences are relatively constant value for samples
with different content of the analyzed parameter, it is necessary to
make correction.
For example
М% of the reference samples: 2,20 3,00 3,80 4,60 5,20
М% average when measuring
with the analyzer: 2,38 3,17 4,01 4,79 5,42
Difference: 0,18 0,17 0,21 0,19 0,22
-14-
Operating Instructions Master Pro
Page 15
ULTRASONIC PORTABLE MILK ANALYZER www.milkotester.com
CAL2
Mode
CAL1
CAL3
Memory
Back
Back up Calibr.
Sensor Reset
Conclusion: the difference is relatively constant value and correction is
possible to be done with – 0,2 %
If the differences are not a constant value it is necessary recalibration
to be done.
For example.
М% of the reference samples: 2,20 3,00 3,80 4,60 5,20
М% when measured with the
analyzer: 2,02 2,93 3,76 4,75 5,44
Difference: -0,18 -0,07 -0,04 0,15 0,24
Conclusion: It is obvious that the difference is variable value and recalibration have to be
done.
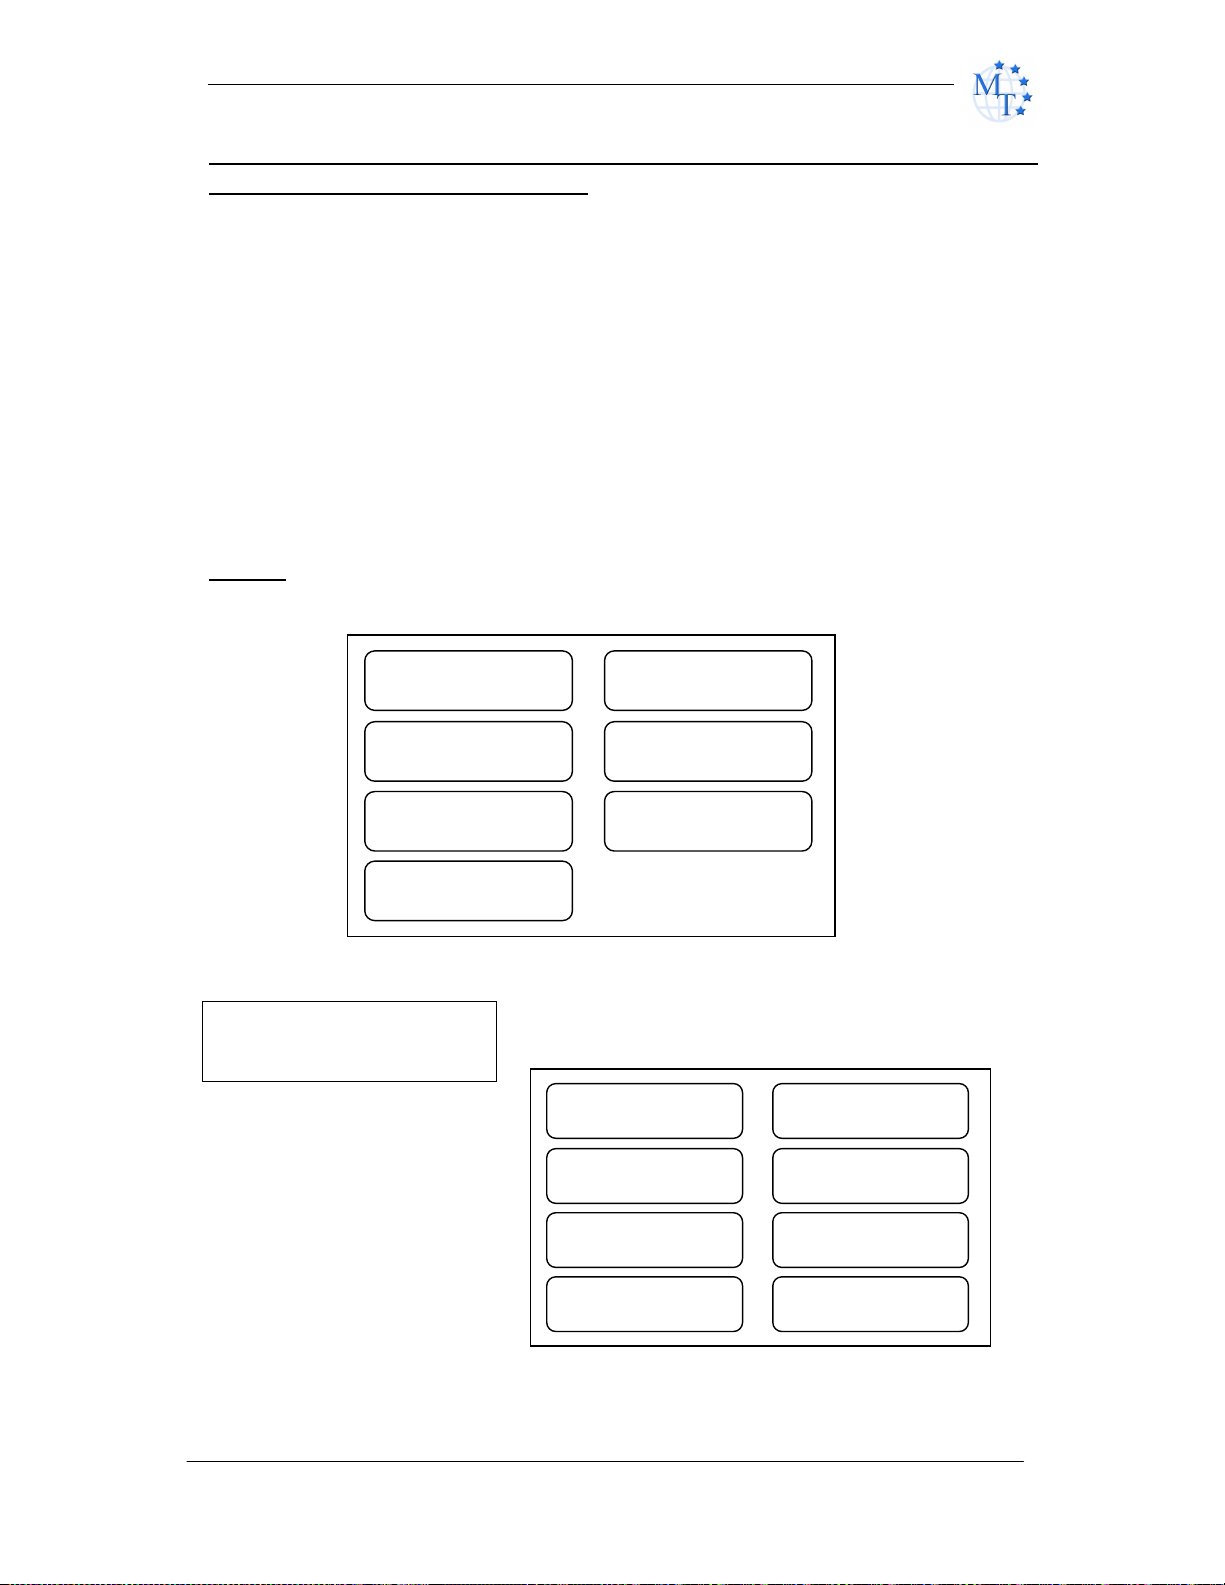
MENUTo select Mode, Options or Settings use the ↑↓ (up and down)
arrows and press ENTER.
Factory Options
Settings
MENU > Mode
Enter password
00000
Default password is 00000.
Correction
Security
Result D.Point Calibration
Restore Calibr.
Back
4.3.1 Correction
-15-
Operating Instructions Master Pro
Page 16
ULTRASONIC PORTABLE MILK ANALYZER www.milkotester.com
DENSITY
WATER
Example:
MENU > Mode > Correction > Cow milk > Fat.
In Submenu Mode select (press to select) Correction, Calibration,
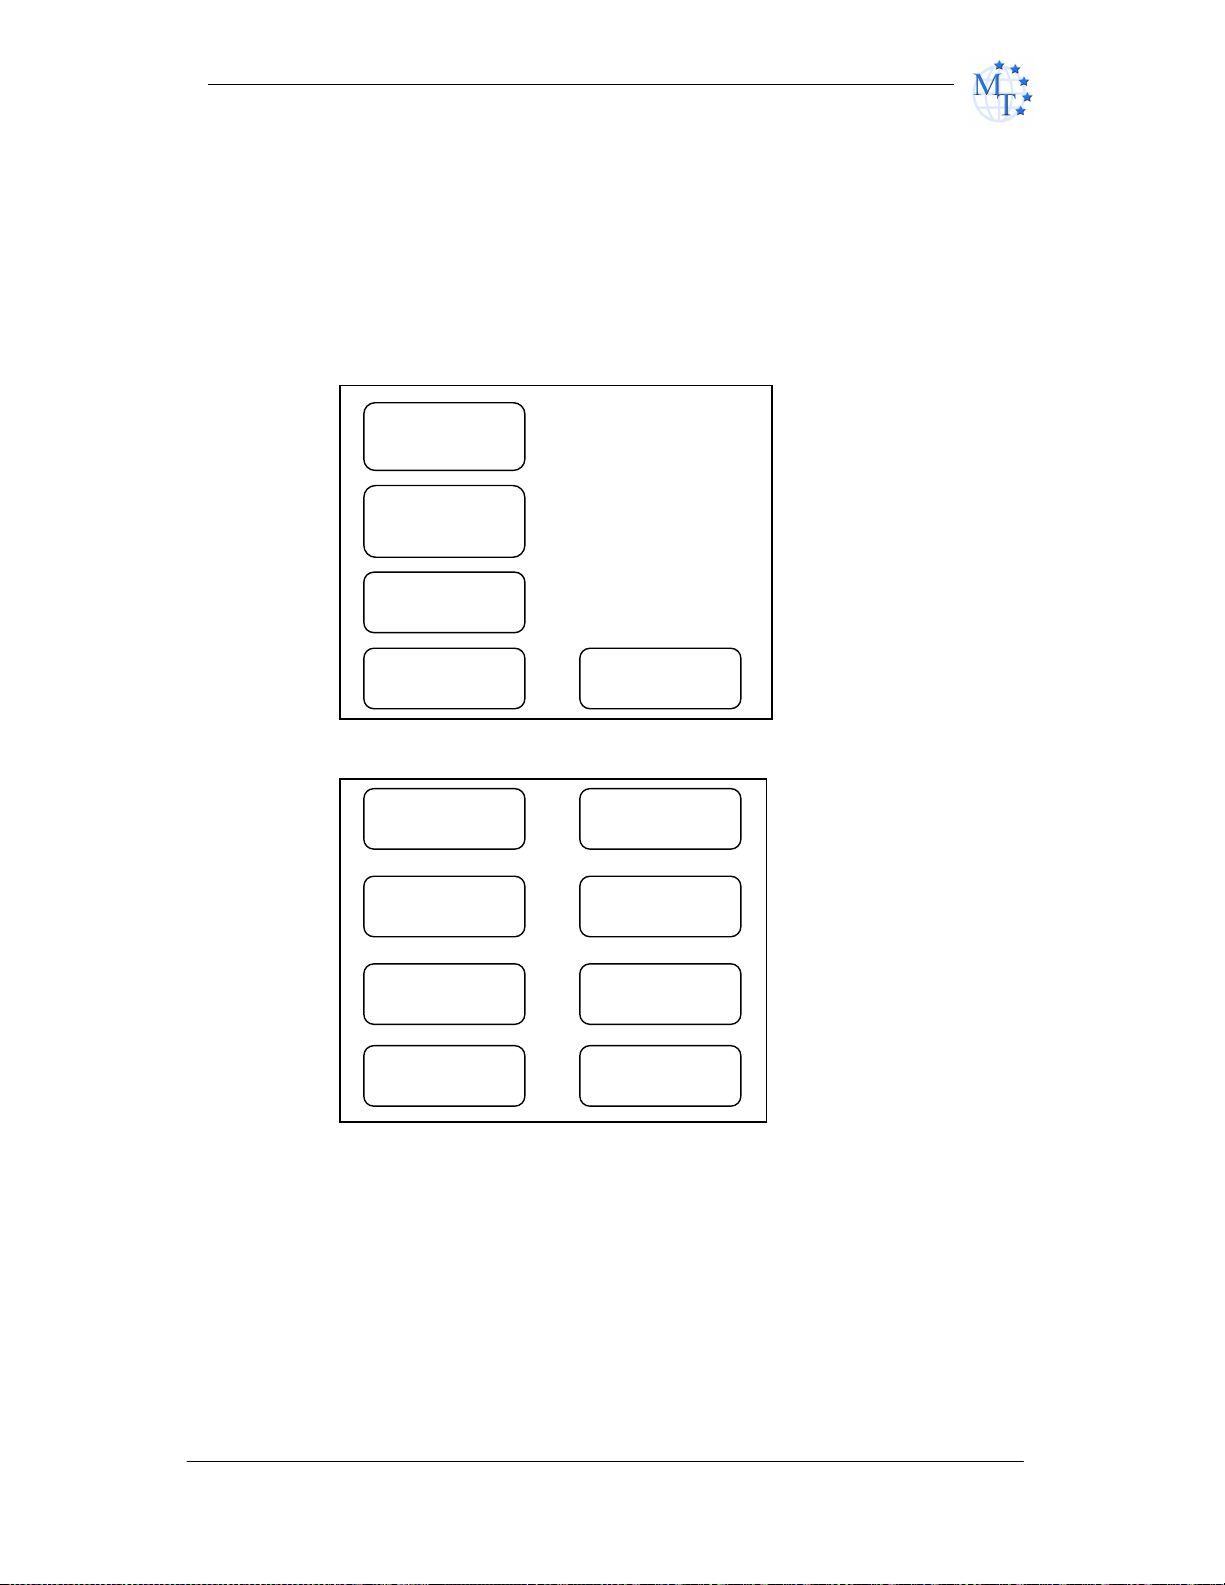
Back up or Restore.
If you choose correction and press ENTER, then use the ↑↓ (up and
down) arrows and press ENTER to select the type of milk.
COW MILK
CAL 1
SHEEP MILK
CAL 2
UHT MILK
THERMOMETER BACK
After choosing the type of milk, press the component for correction
FAT
LACTOSE
SNF
SALTS
PROTEIN
BACK
Press ENTER to validate the correction or BACK to keep the previous
value.
4.3.2 Calibration:
MENU > Mode > Calibration.
-16-
Operating Instructions Master Pro
Page 17
ULTRASONIC PORTABLE MILK ANALYZER www.milkotester.com
CAL 2
CAL 3
BACK
BACK
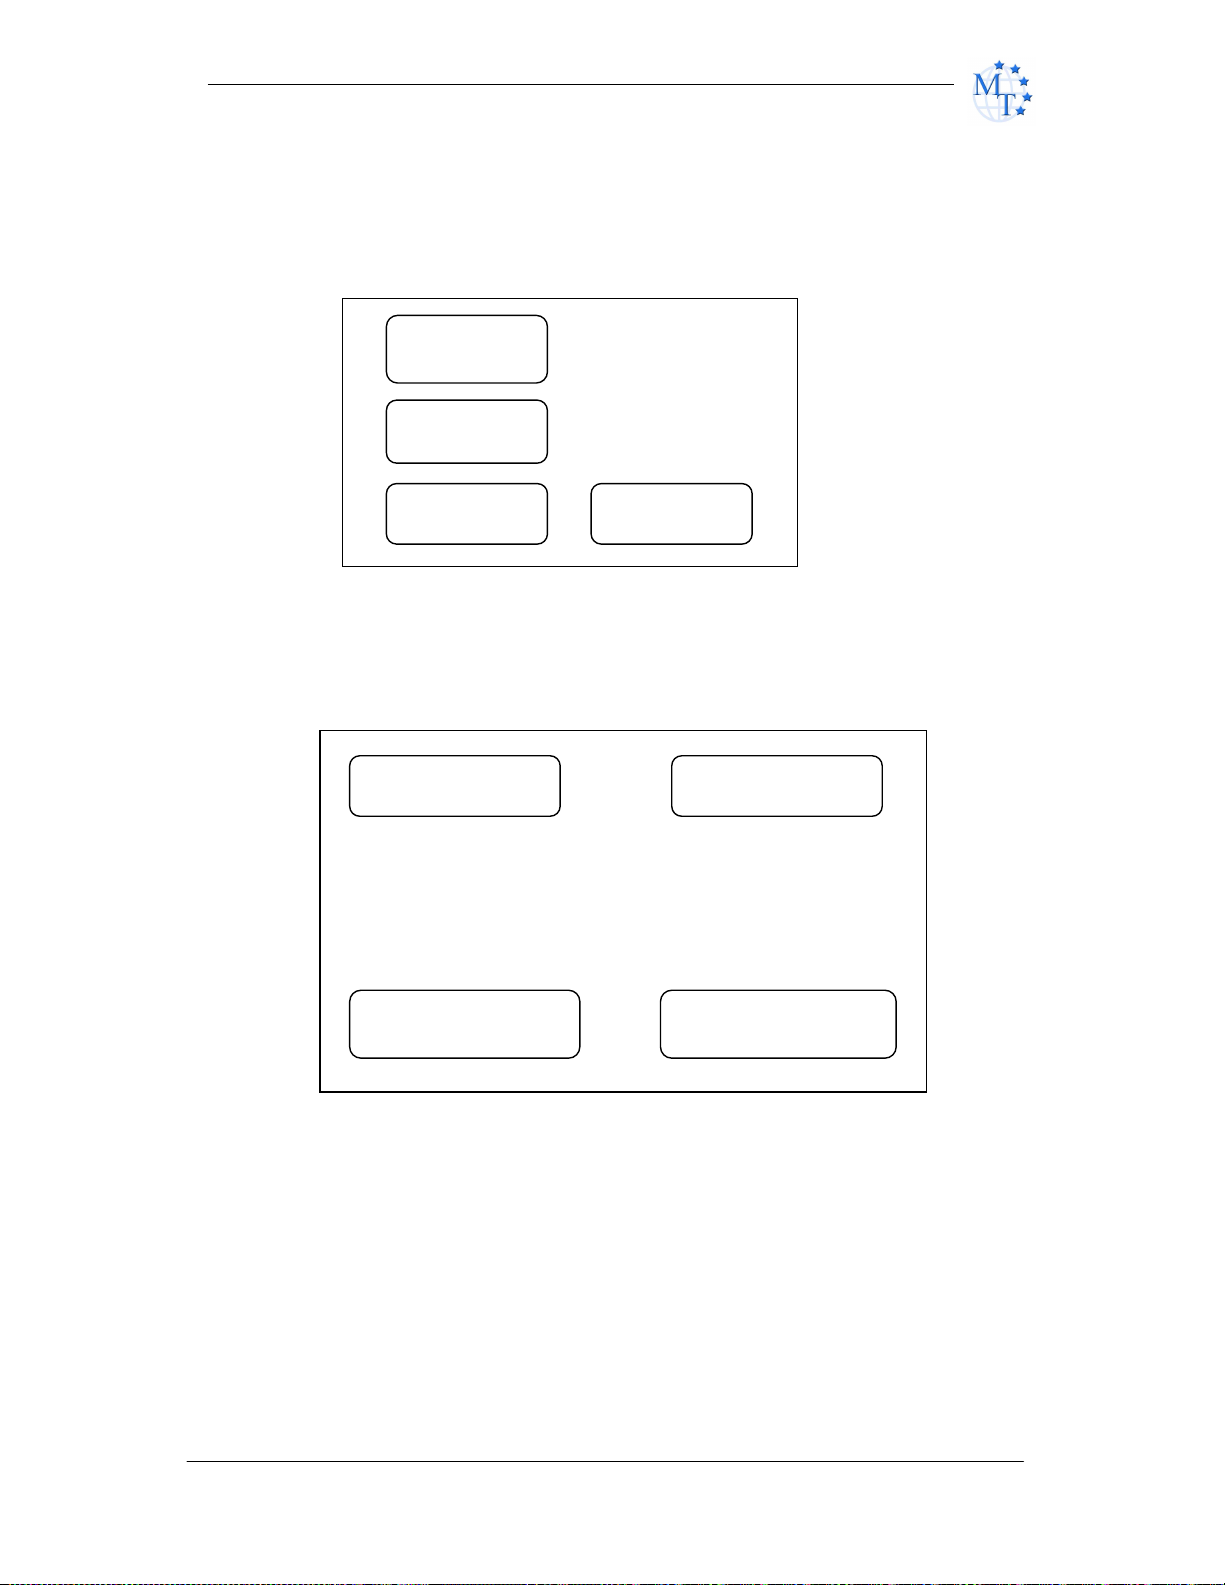
In order to perform calibration of the device for a certain type of milk
/for example – cow milk/. You need two samples of milk with known
values of their parameters – one with comparatively high percentage of
Fat and one with comparatively low percentage of Fat.
After pressing CALIBRATION on the display appears:
COW MILK
CAL 1
SHEEP MILK
UHT MILK
Select (press to select) the type of milk.
The following text will appear on the display:
HIGH FAT VALUE
LOW FAT VALUE
FAT: X.X FAT: X.X
SNF: X.XX SNF: X.XX
DENSITY: X.XX DENSITY: X.XX
PROTEIN: X.X PROTEIN: X.X
LACTOSE: X.X LACTOSE: X.X
SALTS: X.X SALTS: X.X
START
MEASUREMENTS
Select HIGH or LOW Fat Value and select a parameter . Then input
value ENTER to confirm.
By performing the procedure described above enter the known values
of the parameters of the milk with low percentage of Fat.
After confirming the last figure of the last parameter by pressing
START MEASUREMENTS the following text appears on the display:
-17-
Operating Instructions Master Pro
Page 18

ULTRASONIC PORTABLE MILK ANALYZER www.milkotester.com
Put Sample
Put sample
High Milk
1/5 times
and Press ENTER
The sample of milk with high Fat must be measured 5 consecutive
times. Put the first cup with the sample and press ENTER. After
measurement the following text appears on the display:
High Milk
2/5 times
and Press ENTER
Follow the procedure until the 5th measurement. After performing the
last measurement the following text appears on the display:
Put Sample
Low Milk
1/5 times
and Press ENTER
The sample of milk with low Fat must be measured 5 consecutive
times. Put the first cup with the sample and press ENTER. After
measurement the following text appears on the display:
Follow the procedure until the 5th
Put Sample
Low Milk
2/5 times
and Press ENTER
measurement. After performing the last measurement the following
text appears on the display:
Put Sample
Water
1/5 times
and Press ENTER
-18-
Operating Instructions Master Pro
Page 19
ULTRASONIC PORTABLE MILK ANALYZER www.milkotester.com
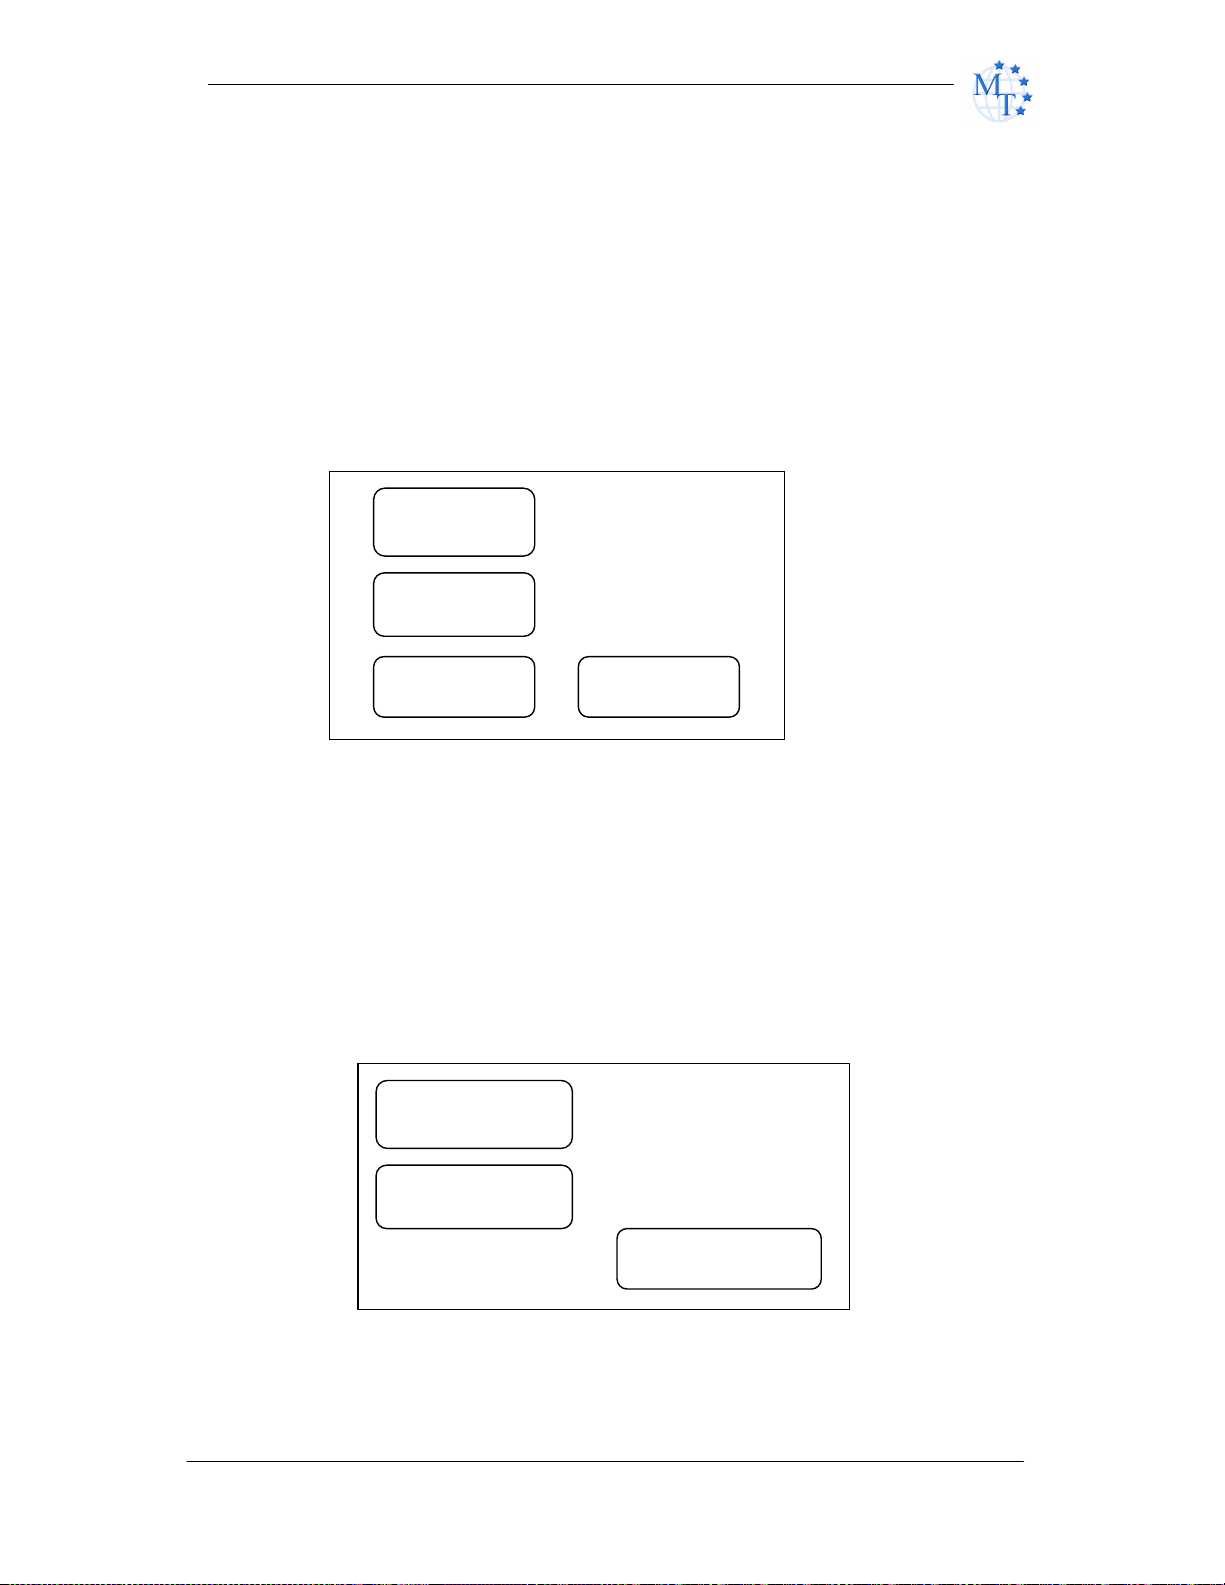
CAL 2
CHANGE PASSWORD
ON/OFF PASSWORD
Follow the described above procedure. After the end of the 5th
measurement the calibration procedure is complete.
Please note:
Before each sample measurement stir the milk by pouring it from one
vessel to another.
The temperature of the samples should be in the range of 15 to 25
degrees.
Before starting calibration it is recommendable to back up the
parameters of the existing calibration.
MENU > Mode > Back up
COW MILK
CAL 1
SHEEP MILK
UHT MILK
BACK
Choose the type of milk calibration for back up and press it.
In case of unsuccessful calibration / electricity cut, temperature range,
etc / choose Restore from the MENU to validate the last backed up
calibration and press Enter.
MENU > Mode > Restore
MENU > Mode > Security
BACK
-19-
Operating Instructions Master Pro
Page 20
ULTRASONIC PORTABLE MILK ANALYZER www.milkotester.com
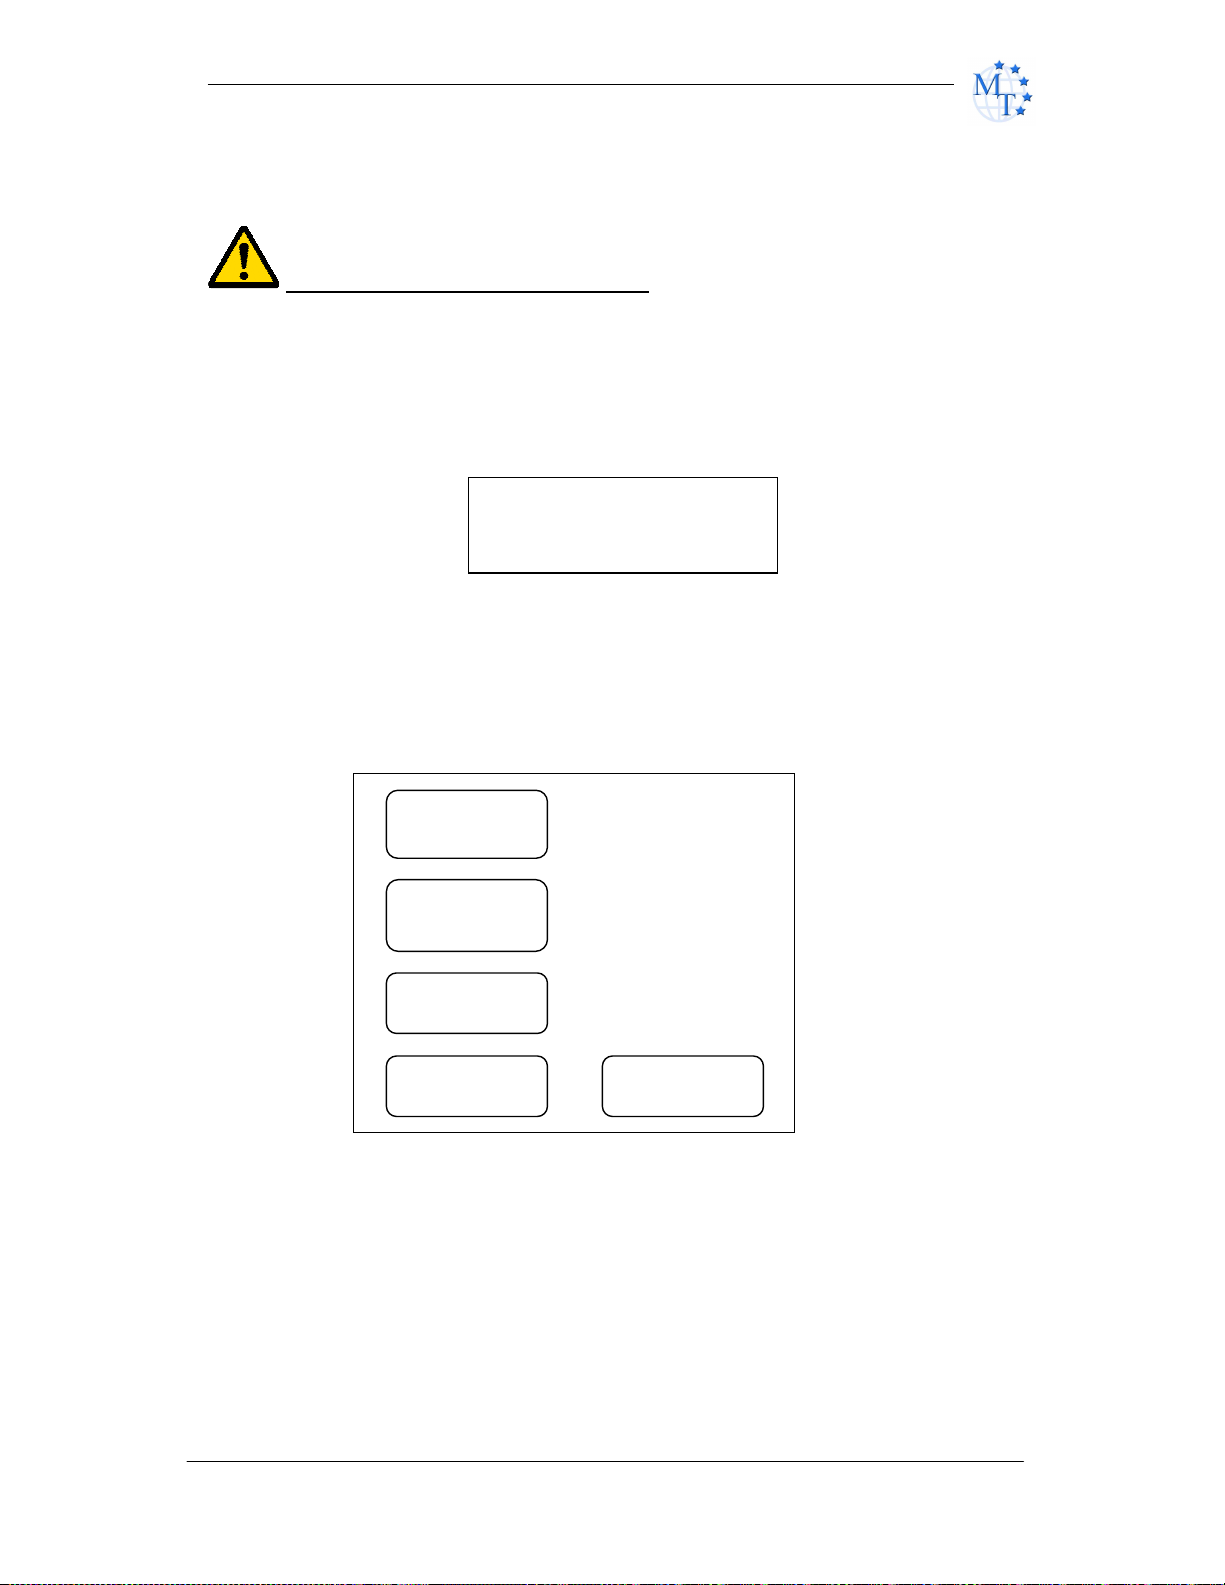
MENU > Mode > Security>Sensor reset
Use only if the sensor is changed
If you use this option, you will need a sample with water
*Read the manual for change of the sensor
MENU > Mode >Res d point
xx.x
xx.xx
4.4 Settings and options
MENU > Options
SYSTEM INFO
LANGUAGE
TIME AND DATE
PC
BACK
Choose Options and press ENTER.
MENU > Options > System info.
Choose System info, Language or Time and Date, and press ENTER.
-20-
Operating Instructions Master Pro
Page 21

ULTRASONIC PORTABLE MILK ANALYZER www.milkotester.com
English
Set time
MILKOTESTER
Model: MASTER LM2
Ver: x.xx
SN: XXXXXX
MENU > Options > Language.
Language:
Spanish
MENU > Options > Time and Date
Time and date:
Set date
MENU > Options >PC connection
It is used for factory settings
MENU > Options >Printer En/Dis
Printer On
Printer Off
It is used to turn the printer on and off
MENU > Options >Fast start
Enable
Disable
It starts the measurement irrespective of the ambient temperature
(used in hot weather)
-21-
Operating Instructions Master Pro
Page 22
ULTRASONIC PORTABLE MILK ANALYZER www.milkotester.com
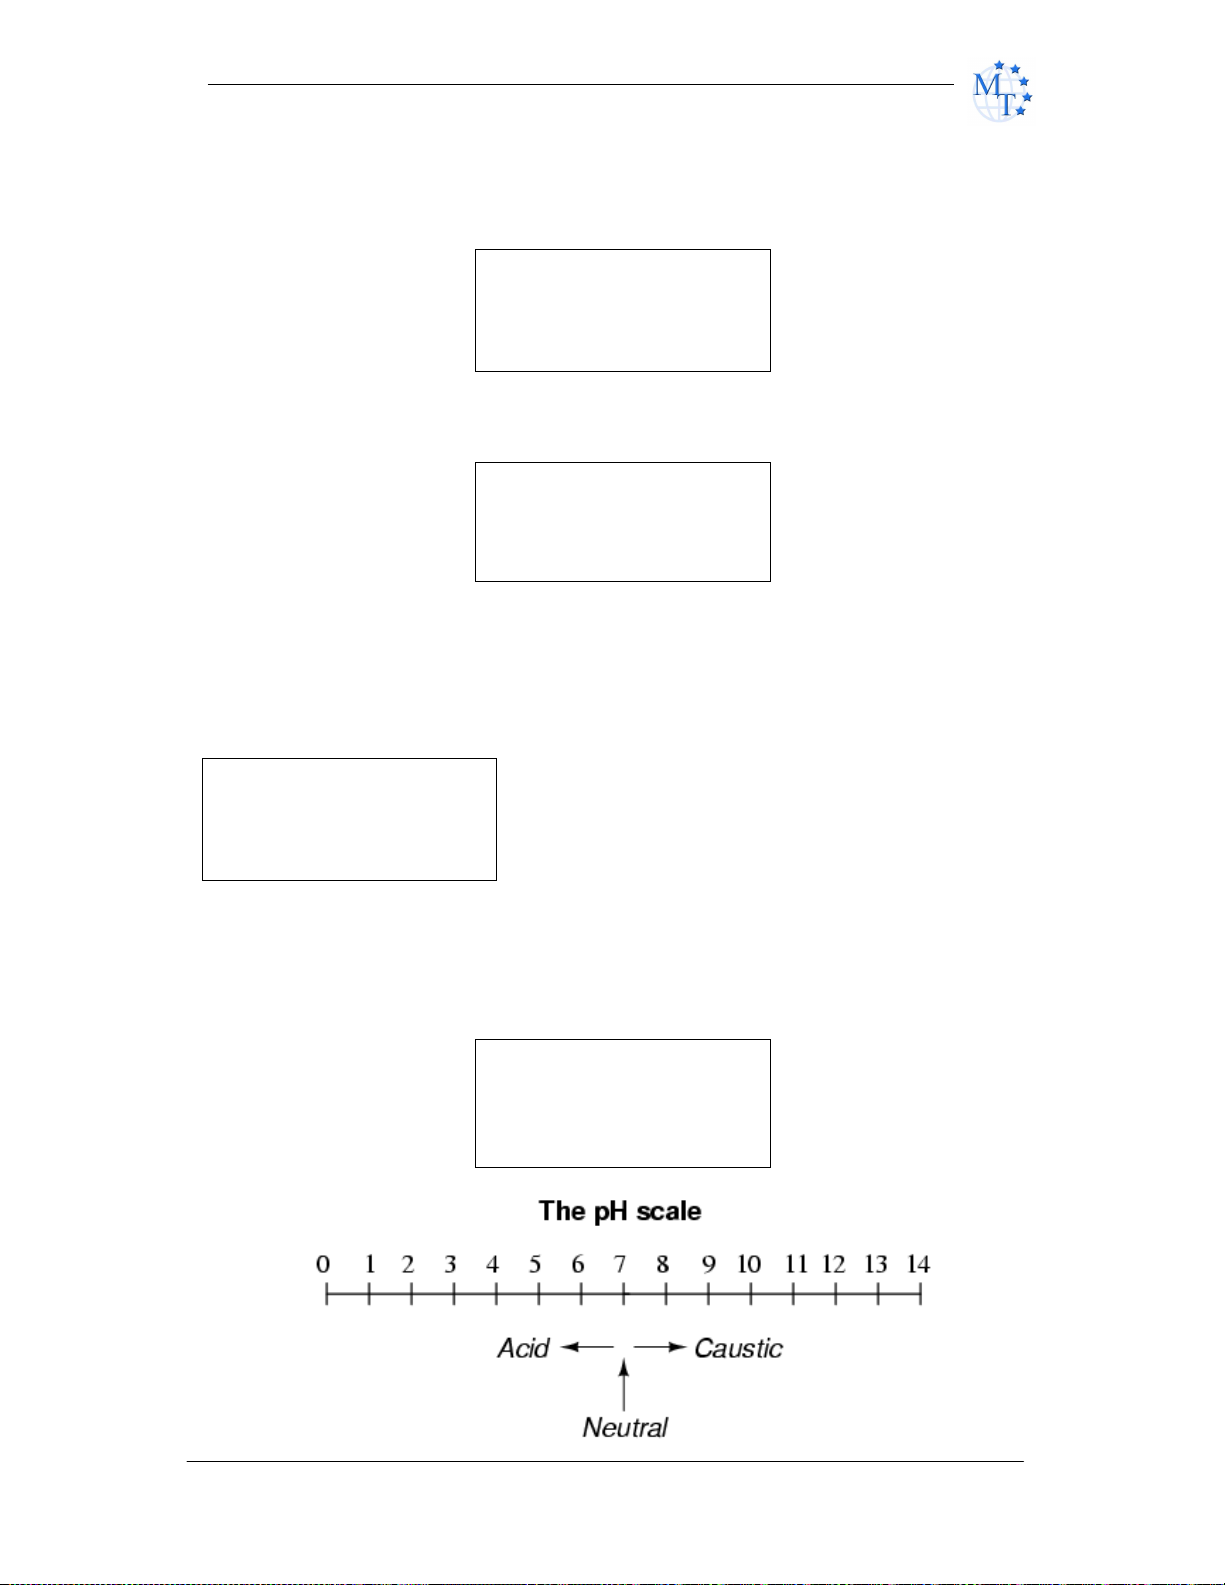
Set Fr. Point
Set f. Point Cal.1
pH calibration
MENU > Settings
Choose Settings and press ENTER.
Set pH
Set thermometer
Conductivity
MENU > Settings > Set Fr. Point.
Set f. Point Cal.2
Set f. Point Cal.3
Choose Set Fr. point and press ENTER.
Use ↑↓ (Up and Down) arrows to choose a type of milk and press
ENTER. The following text appears on the display:
Use ↑↓ (Up and Down) arrows to enter the
Set Fr. Point
- 0,540
Press ENTER
To Set
new value and Press Enter to confirm. After
dialing the last symbol press ENTER to
confirm the new value.
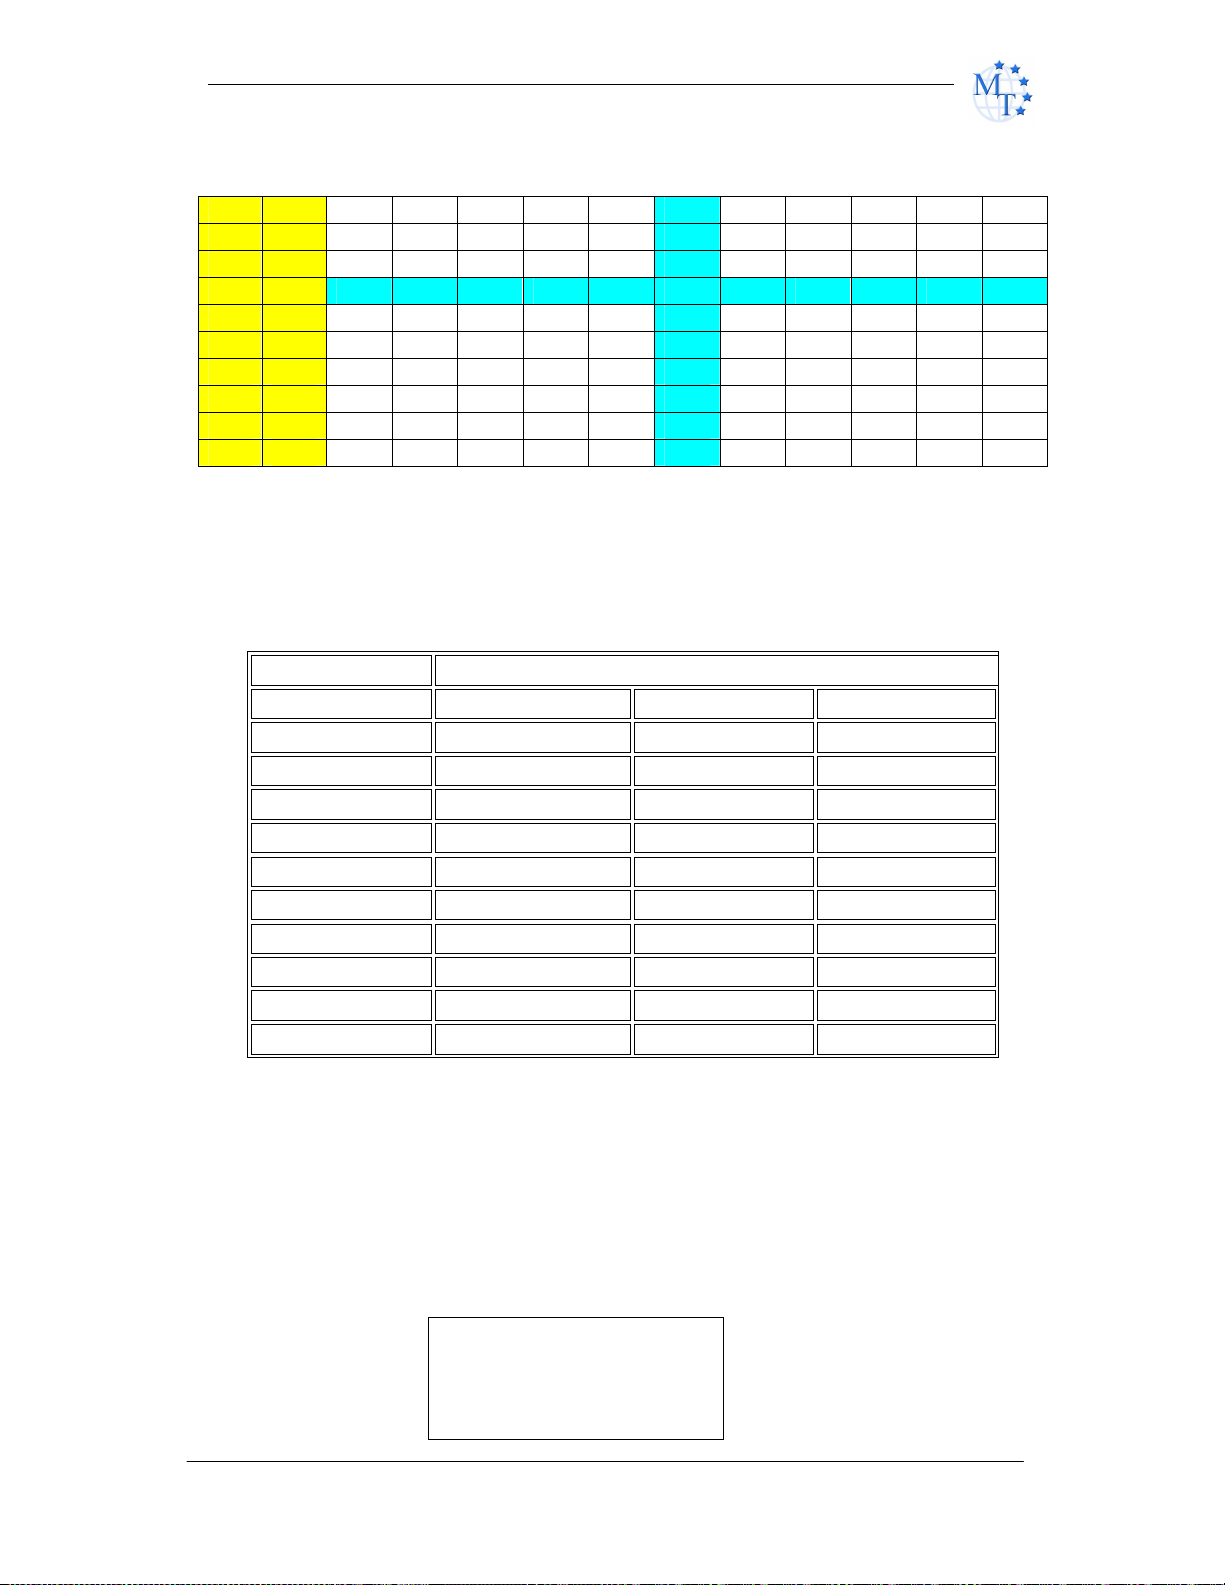
4.5 Measurement of pH
MENU > Settings > Set pH
(active only on request)
Set pH:
pH mode
-22-
Operating Instructions Master Pro
Page 23
ULTRASONIC PORTABLE MILK ANALYZER www.milkotester.com
75 167 0,75 0,60 0,45 0,30 0,15 0 0,15 0,30 0,45 0,60 0,75
85 185 0,90 0,72 0,54 0,36 0,18 0 0,18 0,36 0,54 0,72 0,90
0 4.01
7.12
9.52
Temperature effects on the value of pH buffers
Table of errors of pH measurement according to ambient temperature:
ºC ºF 2 3 4 5 6 pH7 8 9 10 11 12
5 41 0,30 0,24 0,18 0,12 0,06 0 0,06 0,12 0,18 0,24 0,30
15 59 0,15 0,12 0,09 0,06 0,03 0 0,03 0,06 0,09 0,12 0,15
25 77 0 0 0 0 0 0 0 0 0 0 0
35 95 0,15 0,12 0,09 0,06 0,03 0 0,03 0,06 0,09 0,12 0,15
45 113 0,30 0,24 0,18 0,12 0,06 0 0,06 0,12 0,18 0,24 0,30
55 131 0,45 0,36 0,27 0,18 0,09 0 0,09 0,18 0,27 0,36 0,45
65 149 0,60 0,48 0,36 0,24 0,12 0 0,12 0,24 0,36 0,48 0,60
T (ºC) pH
10 4.00 7.06 9.38
20 4.00 7.02 9.26
25
30 4.01 6.99 9.16
40 4.03 6.97 9.06
50 4.06 6.97 8.99
60 4.10 6.98 8.93
70 4.16 7.00 8.88
80 4.22 7.04 8.83
90 4.30 7.09 8.79
4.01
7.00
9.21
MENU > Settings > Set pH > pH Calibration
In order to calibrate the device you will need two buffer solutions with
known values, for example – one with value of pH 3 /low value/ and
the other – pH 7 /high value/.
After choosing Set pH the following text will appear on the display:
pH low buffer:
x.xx
Set
-23-
Operating Instructions Master Pro
Page 24

ULTRASONIC PORTABLE MILK ANALYZER www.milkotester.com
Setting
Remove the protective cup of the electrode.
Dip the electrode into the low value buffer solution and make sure that
the junction zone of the electrode is at least at 30 mm below the
surface of the buffer solution and leave it at rest. Now you have to
enter the known value of the “low” buffer solution. Use ↑↓ (Up and
Down) arrows to enter the new value and Press Enter to confirm. After
dialing the last symbol press ENTER to confirm the new value.
The following text will appear on the display:
Ref. Value: xxxxx
Wait until the electrode and the buffer stabilize /the reference value
should change the least possible/. Press Enter to set the value.
The following text will appear on the display:
pH high buffer:
Set
x.xx
Dip the electrode into the high value buffer solution and make sure that
the junction zone of the electrode is at least at 30 mm below the
surface of the buffer solution and leave it at rest. Now you have to
enter the known value of the “high” buffer solution. Use ↑↓ (Up and
Down) arrows to enter the new value and Press Enter to confirm. After
dialing the last symbol press ENTER to confirm the new value.
The following text will appear on the display:
Setting
Ref. Value: xxxxx
Wait until the electrode and the buffer stabilize /the reference value
should change the least possible/. Press Enter to set the value
Please note:
-24-
Operating Instructions Master Pro
Page 25

ULTRASONIC PORTABLE MILK ANALYZER www.milkotester.com
Auto pH meas.
The pH electrode must be calibrated on a regular base in order to
obtain high accuracy results of the measurement.
For calibration use buffer solutions with values as close as possible to
the pH values of the milk samples.
After each measurement of pH rinse the tip of the electrode with deionized water.
After each measurement or calibration put on the protective cup of the
electrode.
The pH electrode is fragile and must be handled with care.
MENU > Settings > Set pH > pH Mode
pH calibration
pH mode
The milk analyzer has two modes of work – manual and automatic.
They are selected from MENU > Settings > set pH > pH mode
Choose pH mode and press ENTER.
Manual pH meas.
Under the manual mode, the milk sample is put under the pH probe,
then you press the pH button and the measurement will last without
interruption (until the pH button is pressed again). In order to measure
pH the device must be in a working condition.
Measurement of pH is not possible when the device is in the following
mode:
MEASURING…
Please Wait
In this mode the device is measuring all the other components.
To start measurement of pH press pH button. The milk analyzer now is
operating as a pH meter. The following text will appear on the display:
-25-
Operating Instructions Master Pro
Page 26

ULTRASONIC PORTABLE MILK ANALYZER www.milkotester.com
pH result:
X.XX
Press the EXIT button to stop measurement of pH and enter the mode:
Cow Milk
Sheep Milk
UHT Milk
Now you can start measuring the other components of milk.
MENU > Settings > Set Thermometer
Press Enter and the following text will appear on the display:
Put probe 15° C
and press ENTER
Put a sampe of water with temperature 15°°°° and press ENTER
The following text will appear on the display:
Put probe 25° C
and press ENTER
Repeat the procedure with a sample of 25°°°° C
4.6 Measurement of Conductivity
MENU > Settings > Conductivity
(active only on request)
Calibr.Co Meter
ON/OFF Co Meter
-26-
Operating Instructions Master Pro
Page 27
ULTRASONIC PORTABLE MILK ANALYZER www.milkotester.com
ON Co Meter
And press Enter
Method of determination.
Conductivity (or Electrolytic Conductivity) is defined as the ability of a
substance to conduct electrical current. It is the reciprocal of the resistance.
In a healthy animal*, the mean value of electric conductivity is:
Milk type Conductivity values
Cow milk between 4 to 6,5 mS/cm (25°C);
Sheep milk between 3 to 5,5 mS/cm (25°C);
Buffalo between 2,5 to 5,5 mS/cm (25°C);
*These values depend on the geographical region, the breed and on other
factors.
Milk conductivity changes on the concentration of ions in the milk:
Conductivity calibration
Menu > Settings > Conductivity > Calibration Co meter
Following message is displayed:
Put sample 5.0mS/cm
1/5 times
Serves for conductivity measuring system calibration. Clean the analyzer
before starting conductivity measurement. You need a standard buffer with
conductivity 5.0[mS/cm], with temperature 25oС.
Menu > Settings > Conductivity > ON/OFF Co Meter
OFF Co Meter
-27-
Operating Instructions Master Pro
Page 28

ULTRASONIC PORTABLE MILK ANALYZER www.milkotester.com
MENU > Settings > Weighing scale
Calibration
Measure
Scale ON/OFF
MENU > Settings > Printer En/Dis
Printer auto En - Automatic printing of results after each measurement.
Printer auto Dis - Hand printing the results by pressing "up" after
measuring.
Printer auto En
Printer auto Dis
4.7 Automatic weighting the milk with scales
( active only on request)
Scales could be connected towards the milk analyzer, which to be
used for weighting the delivered milk before measuring its parameters.
For using the scale the operator has to follow up the two procedures:
- Preparation for work and checking the scales
- Weighting delivered milk
-28-
Operating Instructions Master Pro
Page 29

ULTRASONIC PORTABLE MILK ANALYZER www.milkotester.com
Put Heavy Weight
4.7.1 Control options when working with scales
Menu ->Settings-> Weighing scale
Calibration – serves for scales calibration (if there is deviation noticed).
For the purpose you have to have 2 standards of weight, for example
10 and 50 kg. After starting the following is displayed:
Put Light Weight
10 kg
Set and press
ENTER
Using the buttons Up, Down, Enter (as it is done
when calibrating the rest of the milk analyzer’s
options) enter the weight of the lighter standard
of weight, in our case 10.00kg.
The same procedure is repeated with the heavy
50 kg
Set and press
ENTER
standard weight, for example 50.000kg.
Measure – Off Line measuring mode, i.e. the analyzer is used as
universal scales. In this mode periodically control of the accuracy of
the scales with standards of weight is needed.
Scale ON/OFF – allows / forbids On Line weight scales work
(automatically transferring the kilograms measured milk from the
scales to the analyzer, after setting the deliverer’s number). If option
Enable is chosen, follow the way of work described above. If not, then
the operator has the possibility to enter manually liters and number of
the every deliverer.
4.7.2 Preparation for work and checking the scales
Put the scales on round and solid surface and level it, using its helical
legs.
Checking the scales is done by using 2 standards of weight – light and
heavy, for example 10 and 50 kg, in mode:
Menu ->Settings->Weighing scale->Calibration
In case there is discrepancy noticed, you need to make scales
calibration, as is described below.
4.7.3 Weighting delivered milk
The procedure is analogous to work when entering data for the
deliverer using additional keypad. The difference is that weight of milk
is automatically send from the scales.
Consequence of work is as follows: switch on the analyzer for
normal work. Place the vessel where the milk from different deliverers
will be collected. When the analyzer is ready for work, the operator has
to press “1,2,3,…” on the digital keyboard. Display shows the following:
-29-
Operating Instructions Master Pro
Page 30

ULTRASONIC PORTABLE MILK ANALYZER www.milkotester.com
Data:
Net: xx.xx
Client: 1234
Tare: xx.xx
Totl: xx.xx
0-Tare
Net – weight of the poured milk of the current deliverer.
Tare – tare's weight (weight of the milk collecting vessel collected from
the previous deliverers, if there is such in the vessel
Total – sum of Net + Tare
After the first measurement, across Net will be shown the weight of the
milk collecting vessel, and Tare will show 0. Now press the button
Tare, and now the scale is ready to weight the milk of the deliverer, i.e.
Net shows 0. Fill the glass for sample measuring and the rest of the
milk pour in the milk-collecting vessel, placed on the weighting scales.
Now the value on the display across Net is changing. The operator has
to wait the scales to be set at rest and press the button “Enter”.
The operator has to place the sample holder filled with milk sample in
the milk analyzer and to start the measurement. The milk analyzer
measures the sample and shows the results as in a normal mode. On
the print out 2 new lines appear:
Liters………..33.25
Kilograms…..35.00
Please, have in mind the formula for calculating liters from weight
measured:
Liters = Kilograms / Density
where:
Density is measured by the analyzer density of the correspondent
sample.
-30-
Operating Instructions Master Pro
Page 31
ULTRASONIC PORTABLE MILK ANALYZER www.milkotester.com
IN THIS CHAPTER
Fast clean
Dail
y clean
BACK
CHAPTER FIVE
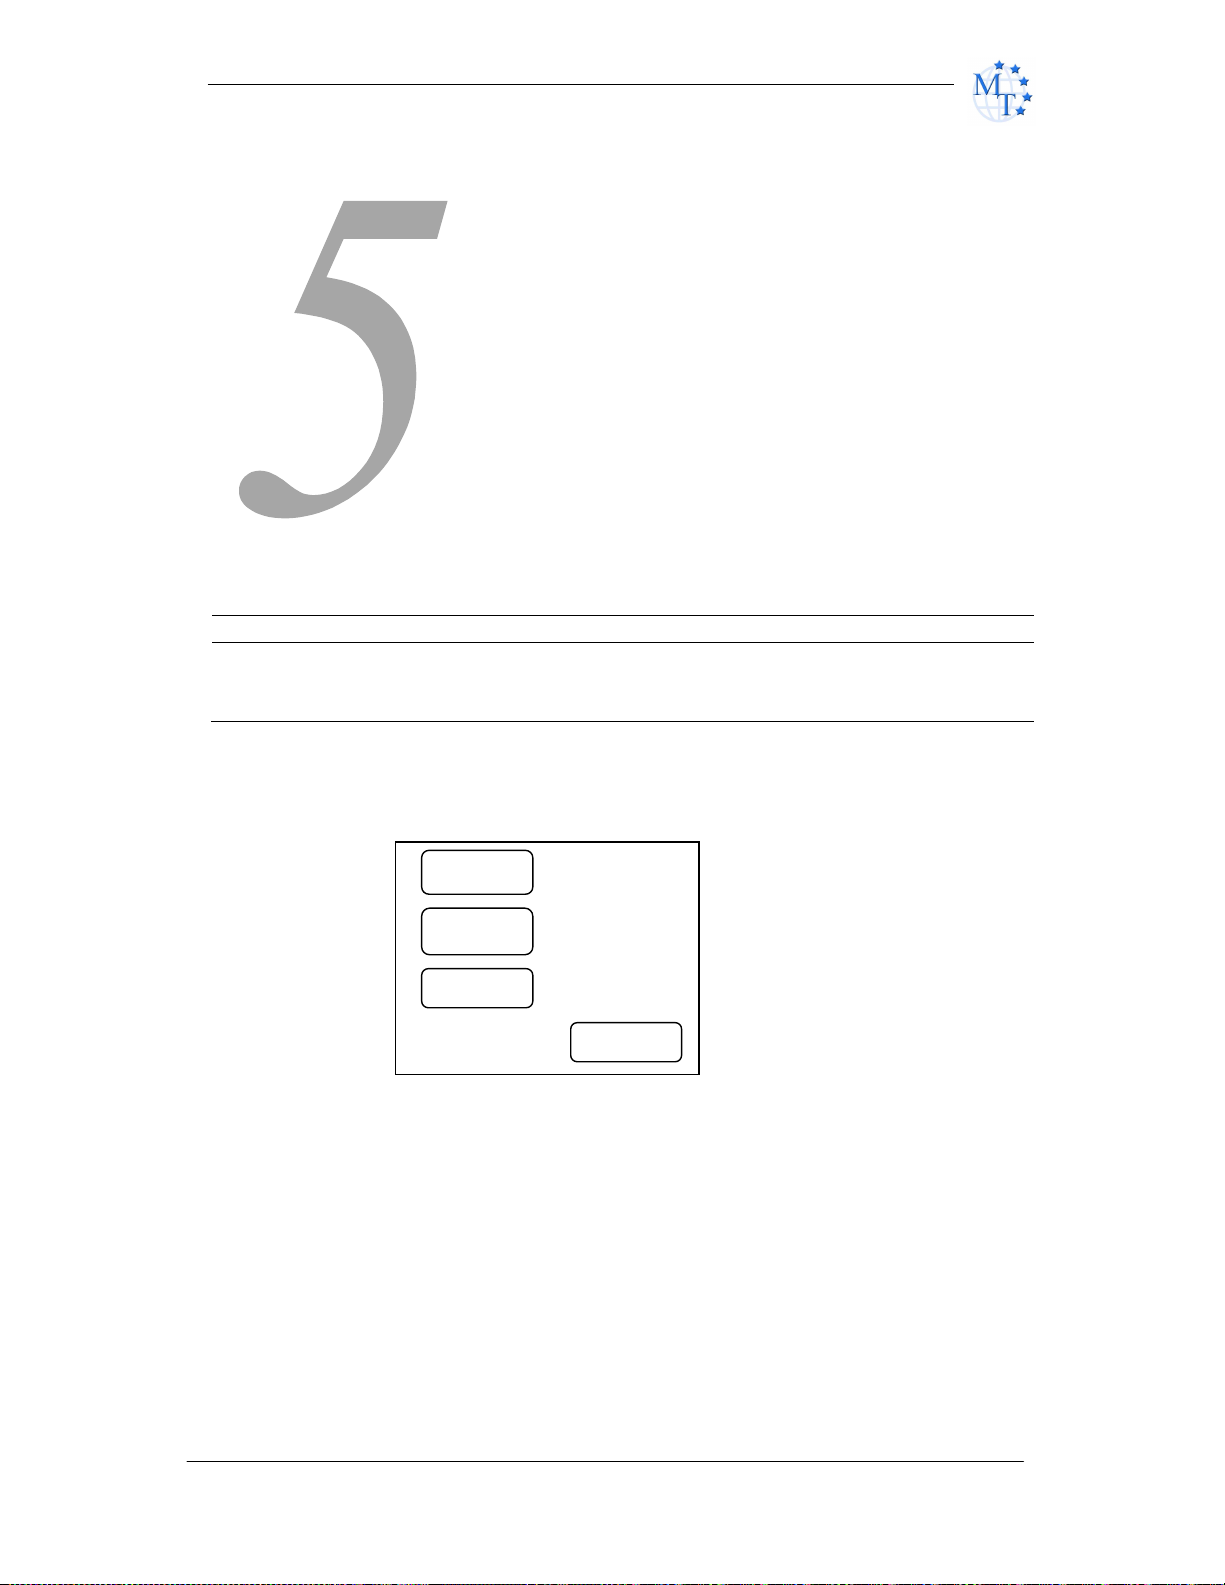
Cleaning and maintenance
Fast cleaning
Daily cleaning
Weekly cleaning
For high accuracy and reliability of the device, the following cleaning
procedures should be performed on due times.
Weekly
5.1. Fast cleaning
When the interval between 2 consecutive measurement analyses is
more than 30 minutes or a considerable number of measurements
have been performed the device begins to issue continuing beep
sounds. At the same time the message Cleaning needed appears on
the display. Please carry out the following procedure:
1. Fill up a sample cup with clean warm water (40°С) and place
it on the sample shelf under the pipette.
-31-
Operating Instructions Master Pro
Page 32
ULTRASONIC PORTABLE MILK ANALYZER www.milkotester.com
2. Press “clean” to initiate the flushing procedure. The device
automatically takes in the necessary amount of water and
then returns it back into the cup. This is repeated 5
consecutive times and after that the cup has to be removed
from the sample shelf.
After the end of the procedure the device is ready for measurement.
5.2. Daily cleaning
At the end of the working day the following procedure should be
performed:
The daily cleaning of the milk analyzer is done with water, heated to
40°C and cleaning solution “Master Daily”. Press th e button “Clean”,
select Daily cleaning and follow the instructions.
The procedure ’’Daily cleaning’’ could be also used during work
in interval of 2 hours.
5.3 Weekly cleaning
We recommend that you carry out the following procedure at the end
of every week.
The daily cleaning of the milk analyzer is done with water, heated to
40°C and cleaning solution “Master Weekly”. Press th e button “Clean”,
select Weekly cleaning and follow the instructions.
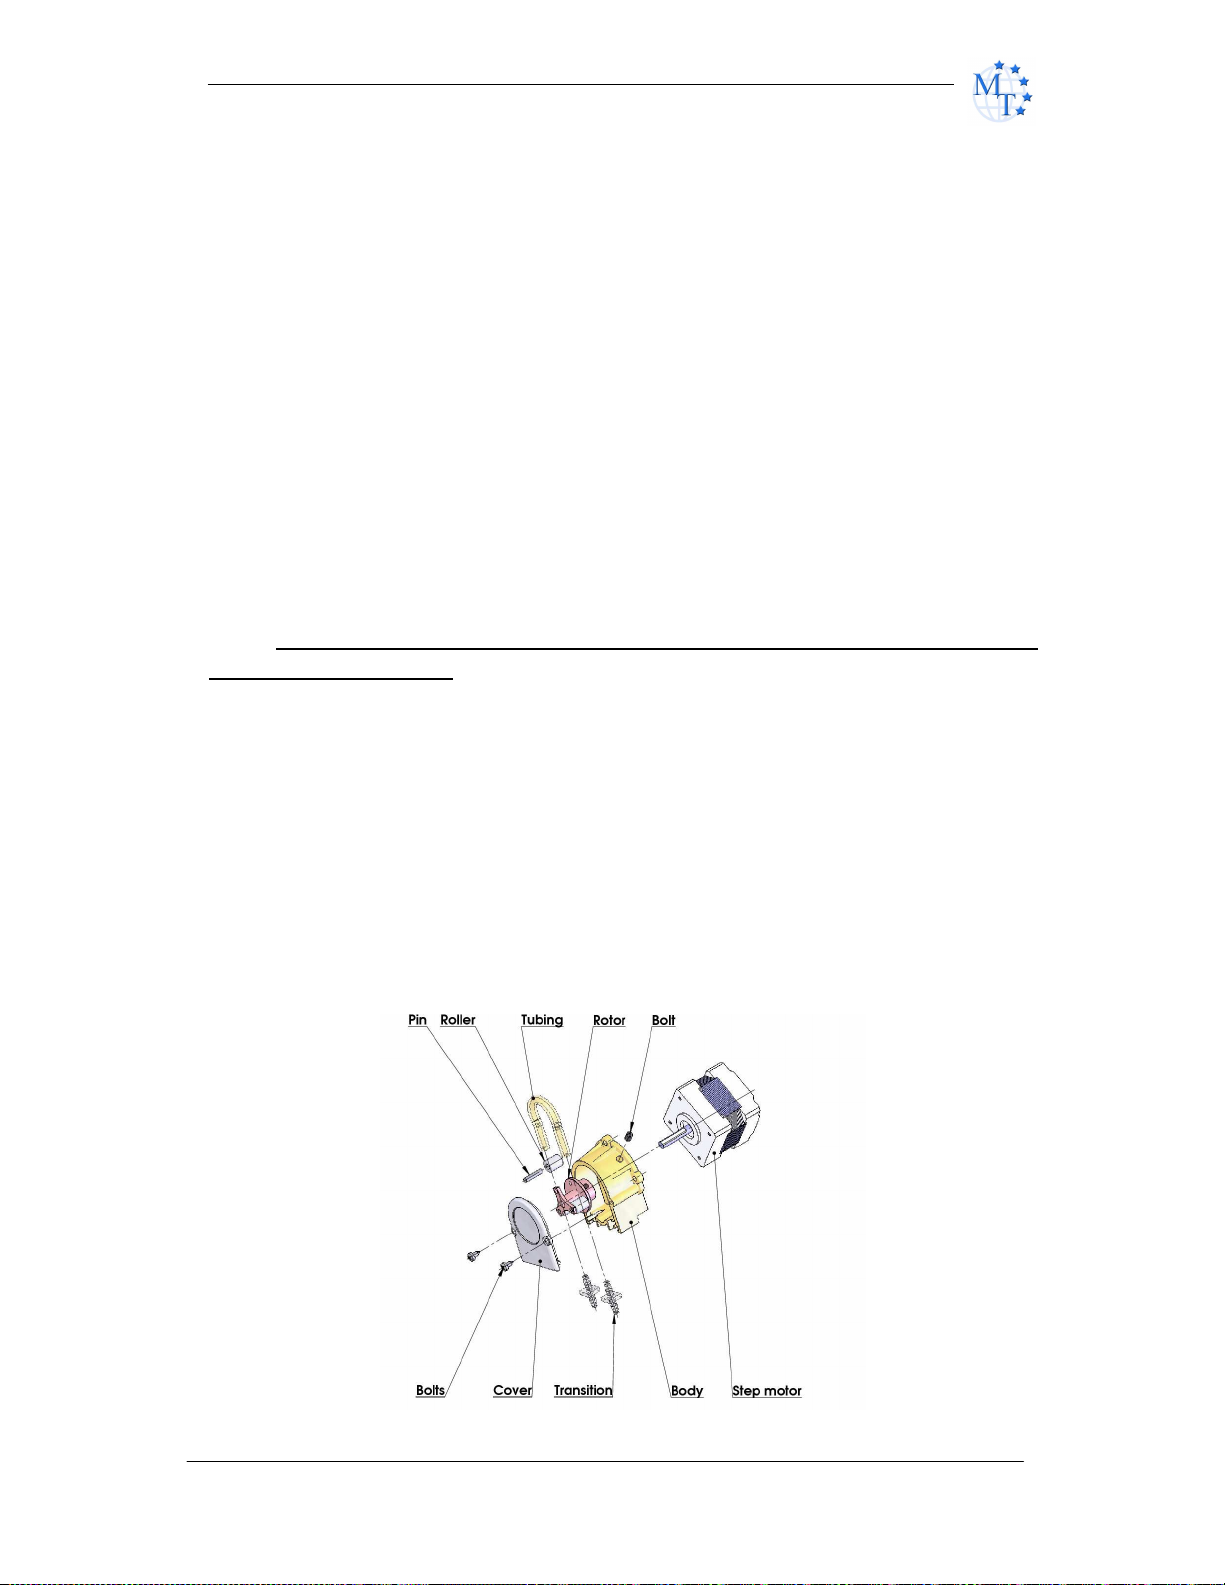
5.4 Peristaltic pump service
-32-
Operating Instructions Master Pro
Page 33

ULTRASONIC PORTABLE MILK ANALYZER www.milkotester.com
the sample.
CHAPTER SIX
Troubleshooting
Error message Possible problem
/cause
Insufficient quantity
Error 10
Empty Sensor
The sample
temperature is
high.
The temperature
of box is high
Error 11 Fault in sensor
of the milk sample
sucked in the
system or air in the
sample
Sucked overheated
sample
Analyzer
temperature has
exceeded
acceptable at work.
Repair/remedy
- Check that there are no air
bubbles in
- Check if after starting
measurement, milk sample in
the sample holder
decreases. In other case –
there is damage in the
suction system.
- The sample temperature
exceeds the maximum
permissible sample’s
temperature.
- Recommended ambient
temperature to 35 degrees
Celsius.
- Needs replacement of the
sensor. Contact Milkotester
Ltd for advice and
assistance.
-33-
Operating Instructions Master Pro
Page 34

ULTRASONIC PORTABLE MILK ANALYZER www.milkotester.com
CHAPTER SEVEN
Technical specification
1. Measured components:
• Fat
• Solids-Non-Fat (SNF)
• Protein
• Lactose
• Water content
• Temperature (°C)
• Freezing point
• Salts
• Density
2. Ranges of measurement:
Fat 0.00% ÷ 25%
SNF 3% ÷ 15%
Density * 1015 ÷ 10 40 kg/m3
Proteins 2% to 7%
Lactose 0.01 % ÷ 6 %
Added water 0 % ÷ 70 %
Sample temperature 1 °С ÷ 40 °С
Freezing point – 0,3 ÷ – 0,7 °С
Salts
Conductivity
0,4 ÷ 1,5%
2 ÷ 10 [mS/cm]
-34-
Operating Instructions Master Pro
Page 35

ULTRASONIC PORTABLE MILK ANALYZER www.milkotester.com
* To determine the milk density, add 1000 to the result from the
display.
Example: Result = 22; density = 22+1000 =1022.
3. Accuracy:
Fat ± 0.08%
SNF ± 0.1%
Density ± 0.3 kg/m3
Proteins
Lactose
± 0.1%
± 0.1%
ADDED Water ± 3.0%
Sample Temperature ± 1oC
Freezing point ± 0.005oC
Salts ± 0.05%
Air temperature from 10˚C to 40˚C
Relative humidity
from 30% to 80%
Electrical parameters:
AC Power supply 95÷250V
DC Power supply 12V
(active only on request)
pH
± 0.05
Conductivity ± 0.1
3. Dimensions:
W/D/H 110/260/205 mm
5. Weight – 3.1 kg
1. Milk sample volume per 1 measurement: 25 cm
3
(=25 ml)
-35-
Operating Instructions Master Pro
Page 36

ULTRASONIC PORTABLE MILK ANALYZER www.milkotester.com
Appendix Freezing point determination
1. Methods for determination.
The milk analyzer determines the freezing point of each sample and
the quantity of added water. The milk analyser does not measure the
freezing point, but calculates it from the components it depends on.
The basic components in the milk are water, Salts, lactose, FAT,
proteins, minerals (salts) and acids. The freezing point depends only
on the diluted in the milk components and quantity of the solvent (in
the milk it is water). The ultrasonic technology allows direct
measurement of FAT, proteins, lactose + salts (the soluble
components, only influencing the freezing point), and the quantity of
the solvent in % is determined by 100 % – total solids %, total solids =
lactose % + FAT % + proteins % + salts % + acids %.
Without understanding the meaning of the freezing point – determined
or shown from the milk analyzer added water result easily may lead to
a mistake for the value of this parameter.
2. The basic freezing point.
Milk freezes at lower temperature than water. The average freezing
point of the raw milk in the most regions is at about -0,540°С. The
average reading for your region is called “basic” freezing point.
The freezing point of milk is a “physiological constant”. This does not
mean that it will not vary. In fact feed, breed, season, time of lactation,
climate, whether the sample is taken at the beginning, middle or end of
lactation – all these factors will have an effect on the freezing point of
the individual sample. This means that there is an average value of all
these numbers. The more samples used in obtaining this average, the
more reliable it is as a base. Or the basic freezing point is an average
of freezing points of milk, taken from many cows. When a laboratory
checks a producer, it is only comparing the average of the producer’s
cows against a larger area average.
The Health authorities establish the basic freezing point or agriculture
departments in some regions, sometimes by universities, separate
dairy producers, or their associations. Frequently, tolerances have
been established on top of a basic freezing point to allow some
variations in the milk as well as device or operator variations.
Without mentioning the basic freezing point, the Association of Official
Analytical Chemists now recommends an upper limit freezing point at 0,525°C (2,326 standard deviations above the most recently
-36-
Operating Instructions Master Pro
Page 37

ULTRASONIC PORTABLE MILK ANALYZER www.milkotester.com
determined North American average of –0,5404°C), below which there
will be at 95%
confidence that will show 99% of all freezing point determinations on
unwatered milk:
“if the freezing point is –0,525°C or below, milk may be presumed to be
free of water or may be confirmed as water free by tests, specified
below. If the freezing point is above –0,525°C, milk will be designated
as “presumptive added water” and will be confirmed as added water or
added water free by tests specified below. Evaluate extreme daily
fluctuations in the freezing point of herd, pooled herd, or processed
milk for presence of added water”.
“Presumed added water”, as described above, must be “confirmed” by
means of tests on authentic milk samples obtained as specified in the
АОАС METHODS.
After determination the freezing point of your sample via the milk
analyzer, the added water is calculated using the following formula:
intint∗−
AddedWater
=
FrPo
int
FrPoFrPo
Base
CalcBase
[%]100
Where:
FrPointBase is the basic freezing point
FrPointCalc is measured freezing point
Sample:
First variant
If you’ve entered for milk analyzer basic freezing point -0.520°C
(according article 5.9 of the EU Milk Hygiene Directive 92/46/ЕЕС),
measured freezing point –0.540°C, using the above pointed formula
you’ll receive –3,8%. Because it is not possible the added water to be
negative value, the milk analyzer indicates 0% added water. The
reason for this is the tolerance in the basic freezing point, reasons for
which are described below.
If in the same milk we add 3,8% water, and the basic freezing point is
the same, the milk analyzer will measure freezing point –0.520°C, and
will indicate again 0% added water.
Second variant
-37-
Operating Instructions Master Pro
Page 38

ULTRASONIC PORTABLE MILK ANALYZER www.milkotester.com
If you’ve entered for the device basic freezing point –0.540°C,
measured freezing point –0.540°C, the milk analyzer will indicate 0%.
When you add 3,8% water, the device will indicate 3,8%-added water.
From the above mentioned follows that it is very important to enter
correct basic freezing point in the device.
The device’s results for added water may give information about doubt
of added water in the milk and the exact value of this added water may
be determined after a “cowshed sample” is taken and the result for the
freezing point, measured by the milk analyzer of the “cowshed sample”
is entered as basic freezing point in the formula for calculation of
added water.
Then the result from this formula will give us the absolute value of the
added water for the corresponding milk supplier.
-38-
Operating Instructions Master Pro
Page 39
ULTRASONIC PORTABLE MILK ANALYZER www.milkotester.com
Printing method
Thermal line dot printing
Printing density:
8dot/mm, 384dot/line
Printing speed:
50mm/s or 20line/s
Printing width:
48mm
Feeding speed:
50mm/s or 20line/
s
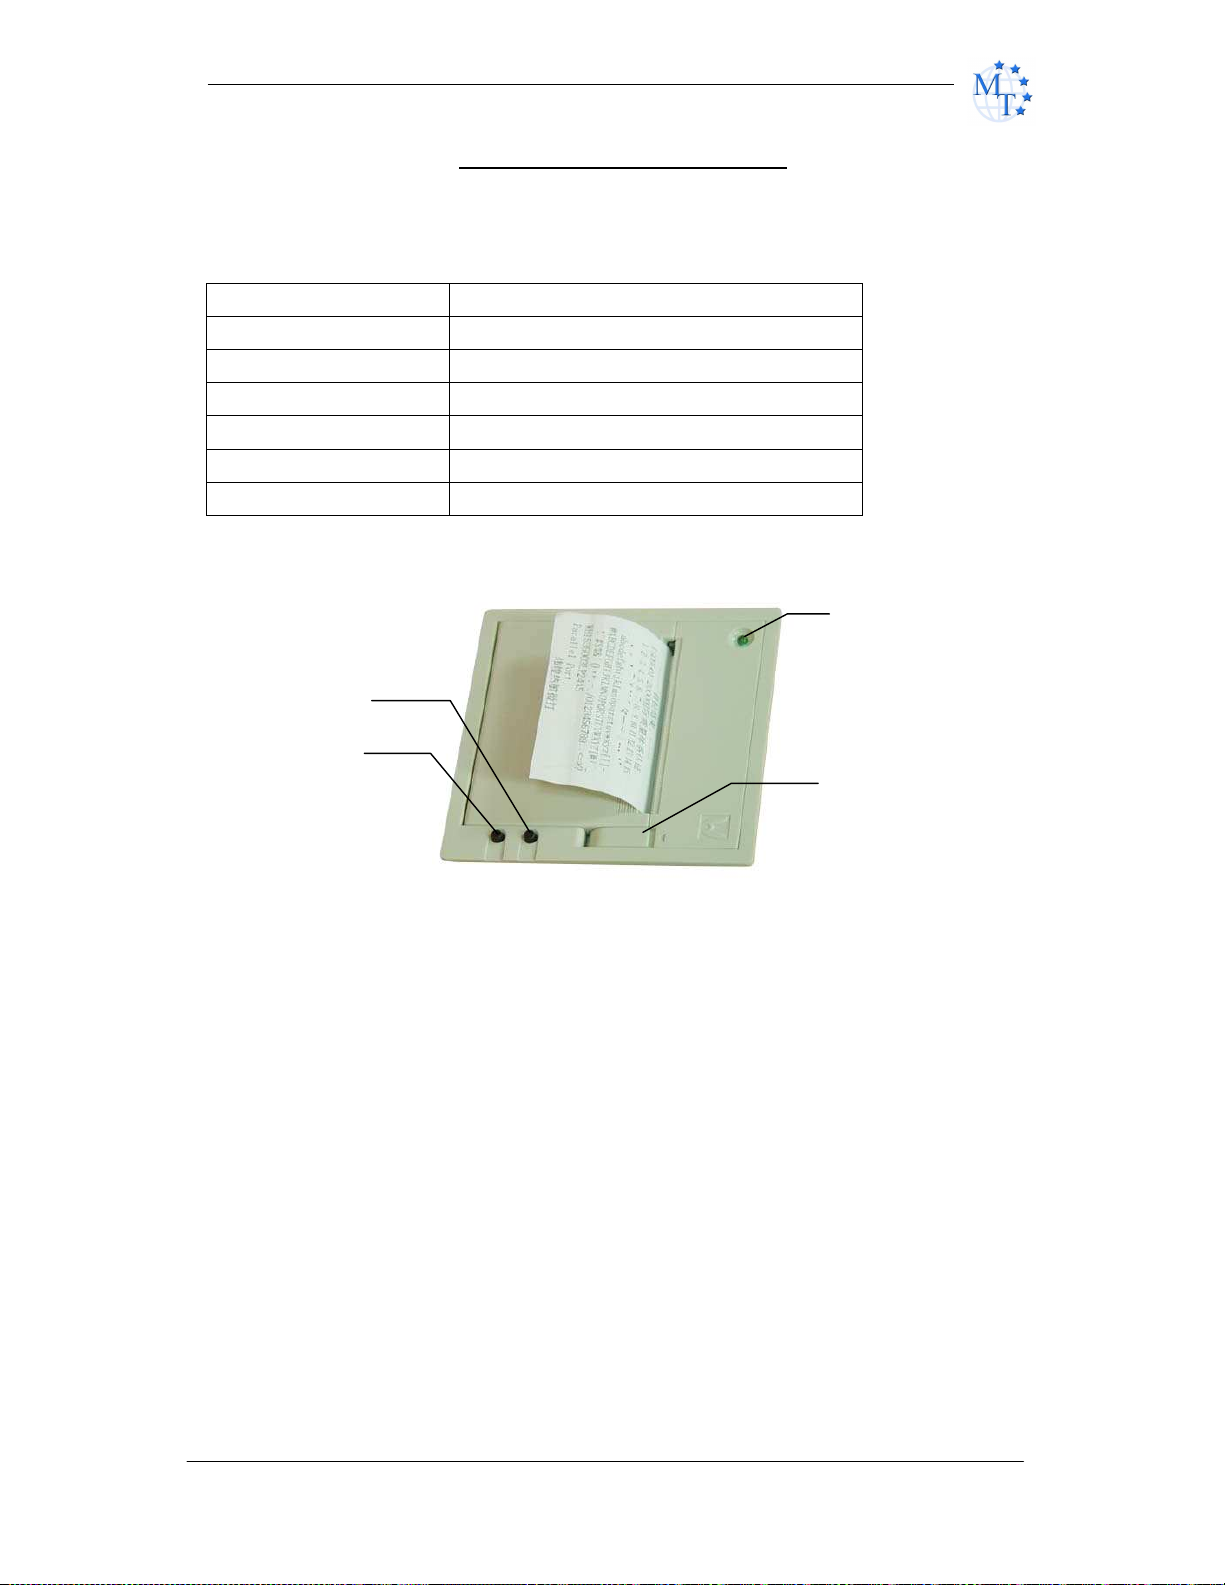
Appendix Internal printer
(active only on request)
Printer mechanism, easy loading type.
Paper width: 57,5±0,5mm
Power: DC 5V , 3A
3
1
2
1. On/Off
2. FEED Button
3. Power LED
4. Cover opening
4
-39-
Operating Instructions Master Pro
Page 40

ULTRASONIC PORTABLE MILK ANALYZER www.milkotester.com
CONNECTING TO EXTERNAL PRINTER
MILKOTESTER MASTER can be connected to an optional serial
printer for printing out the results. MILKOTESTER MASTER is set to
work only with printers supplied by Milkotester Ltd. We warn you that
the unit is not set to work with other types of printers.
To connect MILKOTESTER MASTER to the serial printer, follow the
steps below:
1. Connect the provided power-out 12V DC cable to the POWER
OUT 12 V (for printer) socket on the rear panel of
MILKOTESTER MASTER.
2. Plug the jack on the other end of the cable into the matching
socket on the back of the printer.
3. Connect the provided serial cable to printer to the Serial port
to printer on the rear panel of MILKOTESTER MASTER.
4. Connect the other end of the cable to the serial connector RS
232 on the back of the printer.
5. Turn on the POWER switch on the right panel of the printer.
The printer is now ready for printing. From this moment on all
measured results will be automatically printed out.
-40-
Operating Instructions Master Pro
Page 41
ULTRASONIC PORTABLE MILK ANALYZER www.milkotester.com
User guide for PC connection of the milk
analyzers from Master Series
Milkotester milk analyzers usually operate with two type communication port –
RS232 COM and USB 2.0 connecto
It is recommended always to connect the RS connector to the analyzer before to
switching on the device.
Usually computers contain one COM PORT, so the connection with the analyzer is
trough COM1.
Port is used to connect with the program MASTER DATA BANK, which is included
in each CD supplied with the ordered set.
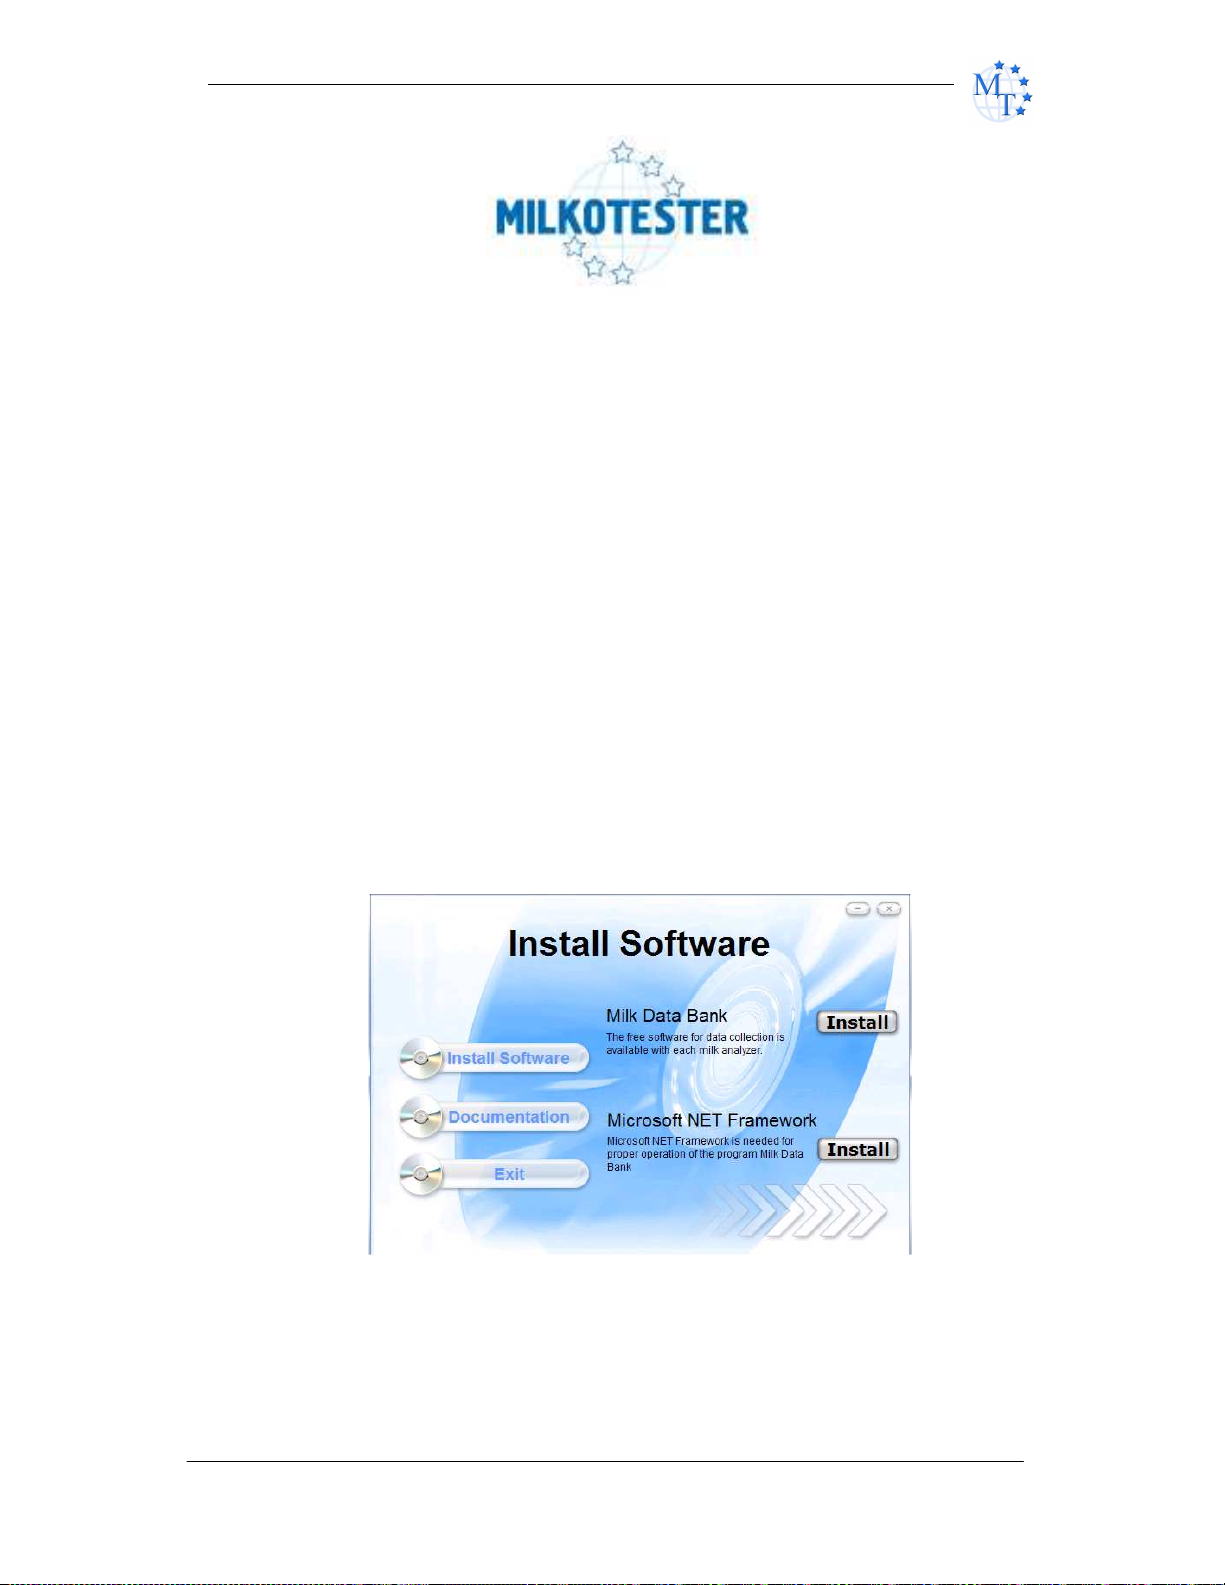
First step is to use the CD that comes with any
device. When started, the CD appears in picture and you
have to click ‘INSTALL’ on the Microsoft NET Framework,
and after that ‘INSTALL’ on the Milk data bank program.
When installed correctly, the program will make it’s own shortcut on the desktop:
MILK DATA BANK.
-41-
Operating Instructions Master Pro
Page 42
ULTRASONIC PORTABLE MILK ANALYZER www.milkotester.com
After successful installation, connect the milk
analyzer with USB cable and turn it ON.
The program works as below described way:
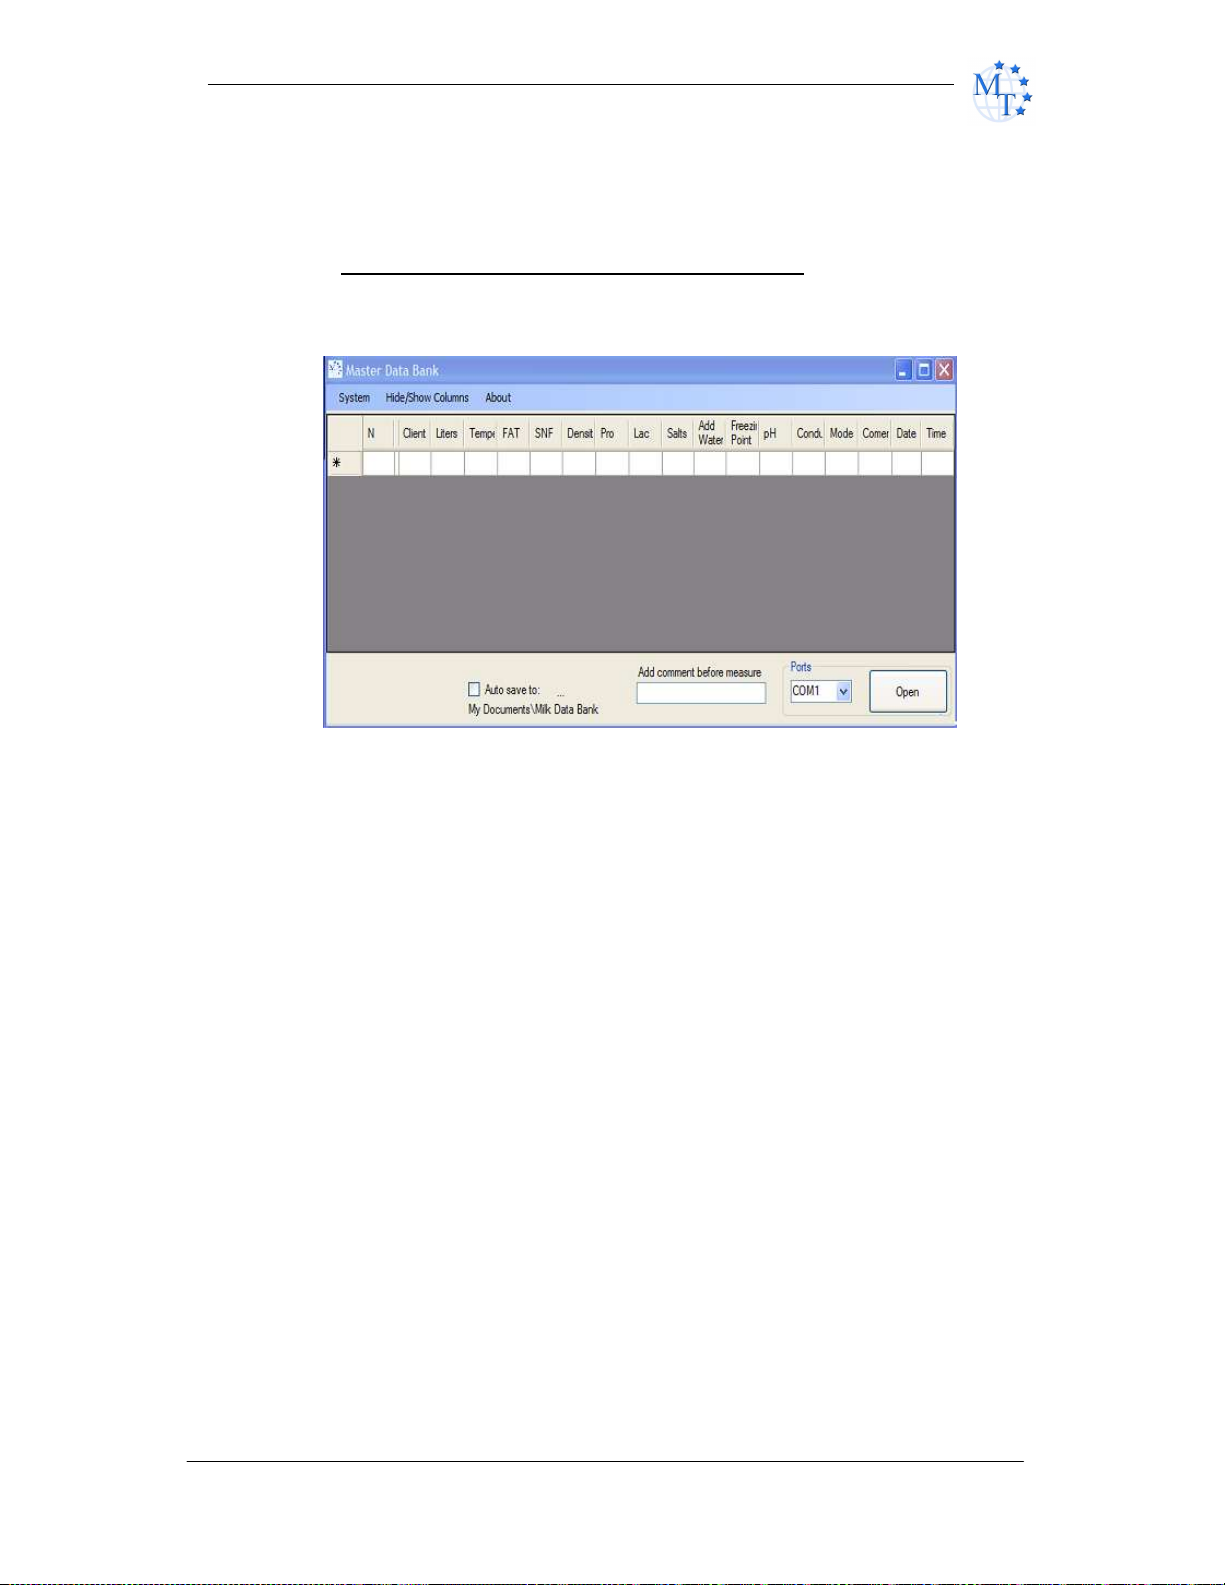
Starting the software, the following window will appear:
In the down right corner of the window you can see the COM PORT that is
connected milk analyzer. Choosing button OPEN, both devices connect each other and every
measurement mad from the analyzer will be ordered in the table.
In checking (filling) the box AUTO SAVE, the program keeps the data automatically as Microsoft
Excel file in new computer directory in “My documents”.
Hint: If the document in Excel is not in correct values you have to change the system separator
from ( , ) to ( . ) (from comma to full stop sign). This you can change form Excel options menu:
EXCEL OPTIONS > ADVANCED > SYSTEM SEPARATOR where the decimal separator must be full
stop sign.
2.USB 2.0
After successful installation, connect the milk analyzer
with USB cable and turn it ON. If it’s on USB the device
will find new COM PORT on your computer. Open Milk
data bank and open the com port in the bottom right
corner.
-42-
Operating Instructions Master Pro
Page 43
ULTRASONIC PORTABLE MILK ANALYZER www.milkotester.com
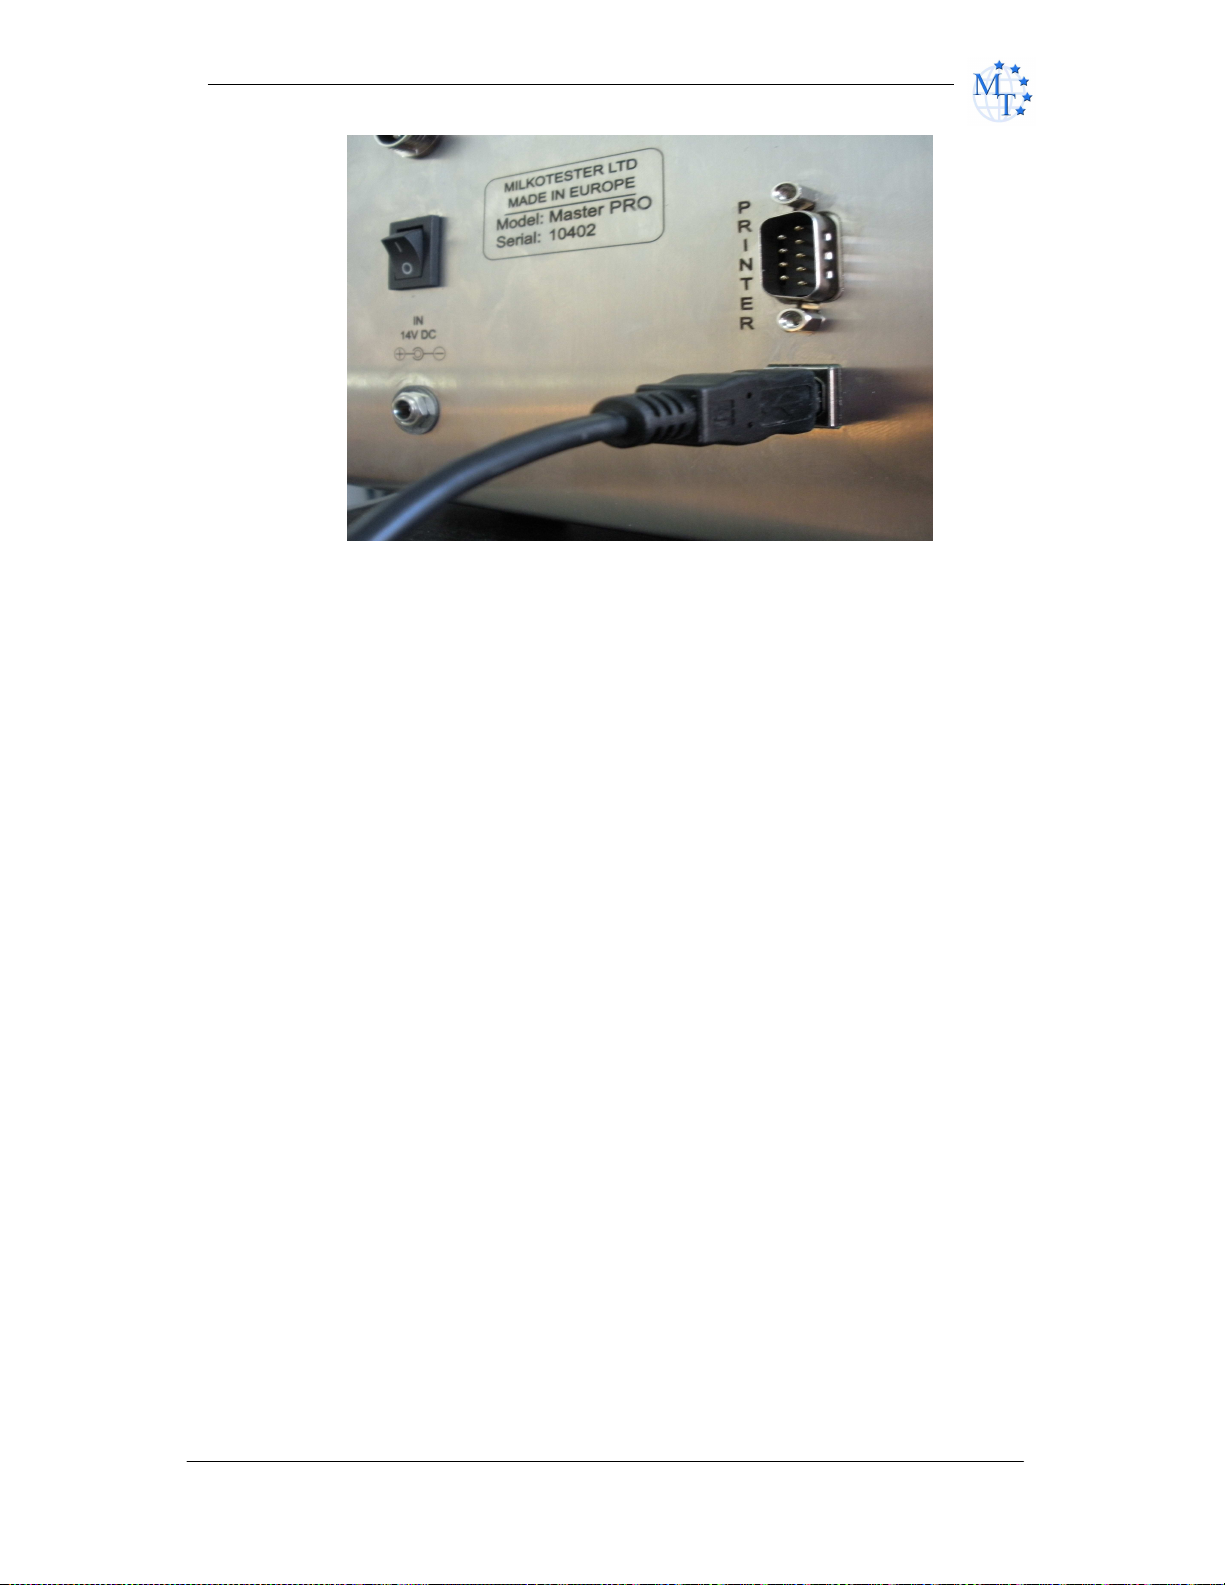
USB usage is the most popular way for PC connection for now. MASTER PRO milk
analyzers are with embedded USB port. It operates at the same way as RS connector, but the
difference is that the USB has to be installed from the CD (supplied with each analyzer) and it
forms own COM PORT. For example, if your computer has not got RS port, the USB will form
COM 1. If there is RS on your computer, the USB will form COM 2, if your computer have 10
communication ports, then the USB connector will create COM 11 and etc..
Accumulator
The device from Master Pro and Master Touch series can
work with accumulator on customer’s request. Those devices
have special 15 V power supply and need to be charged 12-13
hours.
-43-
Operating Instructions Master Pro
Page 44

ULTRASONIC PORTABLE MILK ANALYZER www.milkotester.com
Distributor:
......................
Serial
No:
Signature:
......................
Date of purchase:
.........................
Stamp:
....
..................
Milkotester Ltd.
49, Hristo Botev St. 4470 Belovo, BULGARIA
MILKOTESTER MASTER
Guarantee period is 1 (one) year after purchasing date.
Improper handling, transport and storage will invalidate the guarantee.
Guarantee is void if warranty labels are removed.
-44-
Operating Instructions Master Pro
.......................
 Loading...