

Page 1

Milestone Systems
XProtect® Matrix Monitor 2.3
User's Manual
Page 2

Milestone XProtect® Matrix Monitor 2.3
User's Manual
www.milestonesys.com
Contents
Contents
INTRODUCTION................................................................................ 6
INSTALLATION ................................................................................. 7
UP-TO-DATE VIDEO DEVICE DRIVERS .................................................................... 8
Remove old device pack ..................................................................................................... 8
Install new device pack ....................................................................................................... 8
CONFIGURATION ............................................................................. 9
FIRST TIME CONFIGURATION ................................................................................ 9
CONFIGURE A RUNNING MATRIX MONITOR .......................................................... 12
DAY-TO-DAY USE .......................................................................... 13
OPEN THE MATRIX MONITOR WINDOW ................................................................ 13
1×1 AND 2×2 VIEW ........................................................................................... 13
CAMERA INFORMATION...................................................................................... 14
IMAGE ASPECT RATIOS ...................................................................................... 14
Page 3

Milestone XProtect® Matrix Monitor 2.3
User's Manual
www.milestonesys.com
Contents
TOGGLE REGULAR AND FULL SCREEN VIEW......................................................... 14
ACCEPT RECEIVED COMMANDS .......................................................................... 14
ALERTS UPON EXECUTED COMMANDS ................................................................ 14
SHORTCUT MENUS ............................................................................................ 15
Matrix Monitor window shortcut menu ............................................................................ 15
Notification Area shortcut menu ...................................................................................... 15
SHUT DOWN ..................................................................................................... 16
INDEX .............................................................................................. 17
Page 4

Milestone XProtect® Matrix Monitor 2.3
User's Manual
www.milestonesys.com
Contents
Copyright, trademarks and disclaimer
Copyright
© 2012 Milestone Systems A/S.
Trademarks
XProtect is a registered trademark of Milestone Systems A/S.
Microsoft and Windows are registered trademarks of Microsoft Corporation. App Store is a service mark of Apple
Inc. Android is a trademark of Google Inc.
All other trademarks mentioned in this document are trademarks of their respective owners.
Disclaimer
This text is intended for general information purposes only, and due care has been taken in its preparation.
Any risk arising from the use of this information rests with the recipient, and nothing herein should be construed
as constituting any kind of warranty.
Milestone Systems A/S reserve the right to make adjustments without prior notification.
All names of people and organizations used in the examples in this text are fictitious. Any resemblance to any
actual organization or person, living or dead, is purely coincidental and unintended.
This product may make use of third party software for which specific terms and conditions may apply. When that
is the case, you can find more information in the file 3rd_party_software_terms_and_conditions.txt located in
your Milestone surveillance system installation folder.
MXM23-um-1-280812
Page 5

Milestone XProtect® Matrix Monitor 2.3
User's Manual
www.milestonesys.com
Contents
Page 6

Milestone XProtect® Matrix Monitor 2.3
User's Manual
www.milestonesys.com
6
Introduction
Introduction
Milestone XProtect Matrix is an integrated product allowing distributed viewing of video from any camera on any
monitor on a network operating with selected Milestone XProtect surveillance systems.
A computer on which Matrix-triggered images can be shown is known as a Matrix recipient. Being able to view
Matrix-triggered images requires that either an XProtect Smart Client (see separate manual available for
download (http://www.milestonesys.com/downloads)) or the Matrix Monitor application is installed on the Matrix
recipient. This manual covers the Matrix Monitor application.
Example: Viewing images in
the Matrix Monitor application
There are two ways in which Matrix-triggered images can appear on a Matrix recipient:
Another user wants to share important images, and sends them to the required Matrix recipient
The images are sent to the required Matrix recipient automatically when a predefined event occurs; for
example when a door sensor detects that a door is opened, or when the surveillance system detects
motion in the images from a camera
As part of the image exchange between computers on the Matrix-enabled surveillance system, other computers
are able to send commands to Matrix recipients. The commands typically tell the Matrix recipients to connect to,
or disconnect, image feeds from a particular cameras. Exactly which computers are allowed to send commands to
your Matrix recipient is defined as part of the configuration of your Matrix Monitor application.
Page 7
Milestone XProtect® Matrix Monitor 2.3
User's Manual
www.milestonesys.com
7
Installation
Installation
Note: Read the License Terms on the Product License Sheet (enclosed with the software DVD) before installing
the Matrix Monitor application.
To install the Matrix Monitor application, do the following:
1. Insert the surveillance system software DVD, wait for a short while, select required language (if
applicable), then click the Install Milestone Matrix Monitor link.
Alternatively, if you are installing a version downloaded from the internet, run the file
MilestoneXProtectMatrixMonitor.exe from the location you have saved it to.
Tip: Depending on your security settings, you may receive one or more security warnings (typically Do
you want to run or save this file?, Do you want to run this software? or similar). When this is the case,
click Run.
2. When the installation wizard starts, click Next.
3. Read and accept the License Agreement.
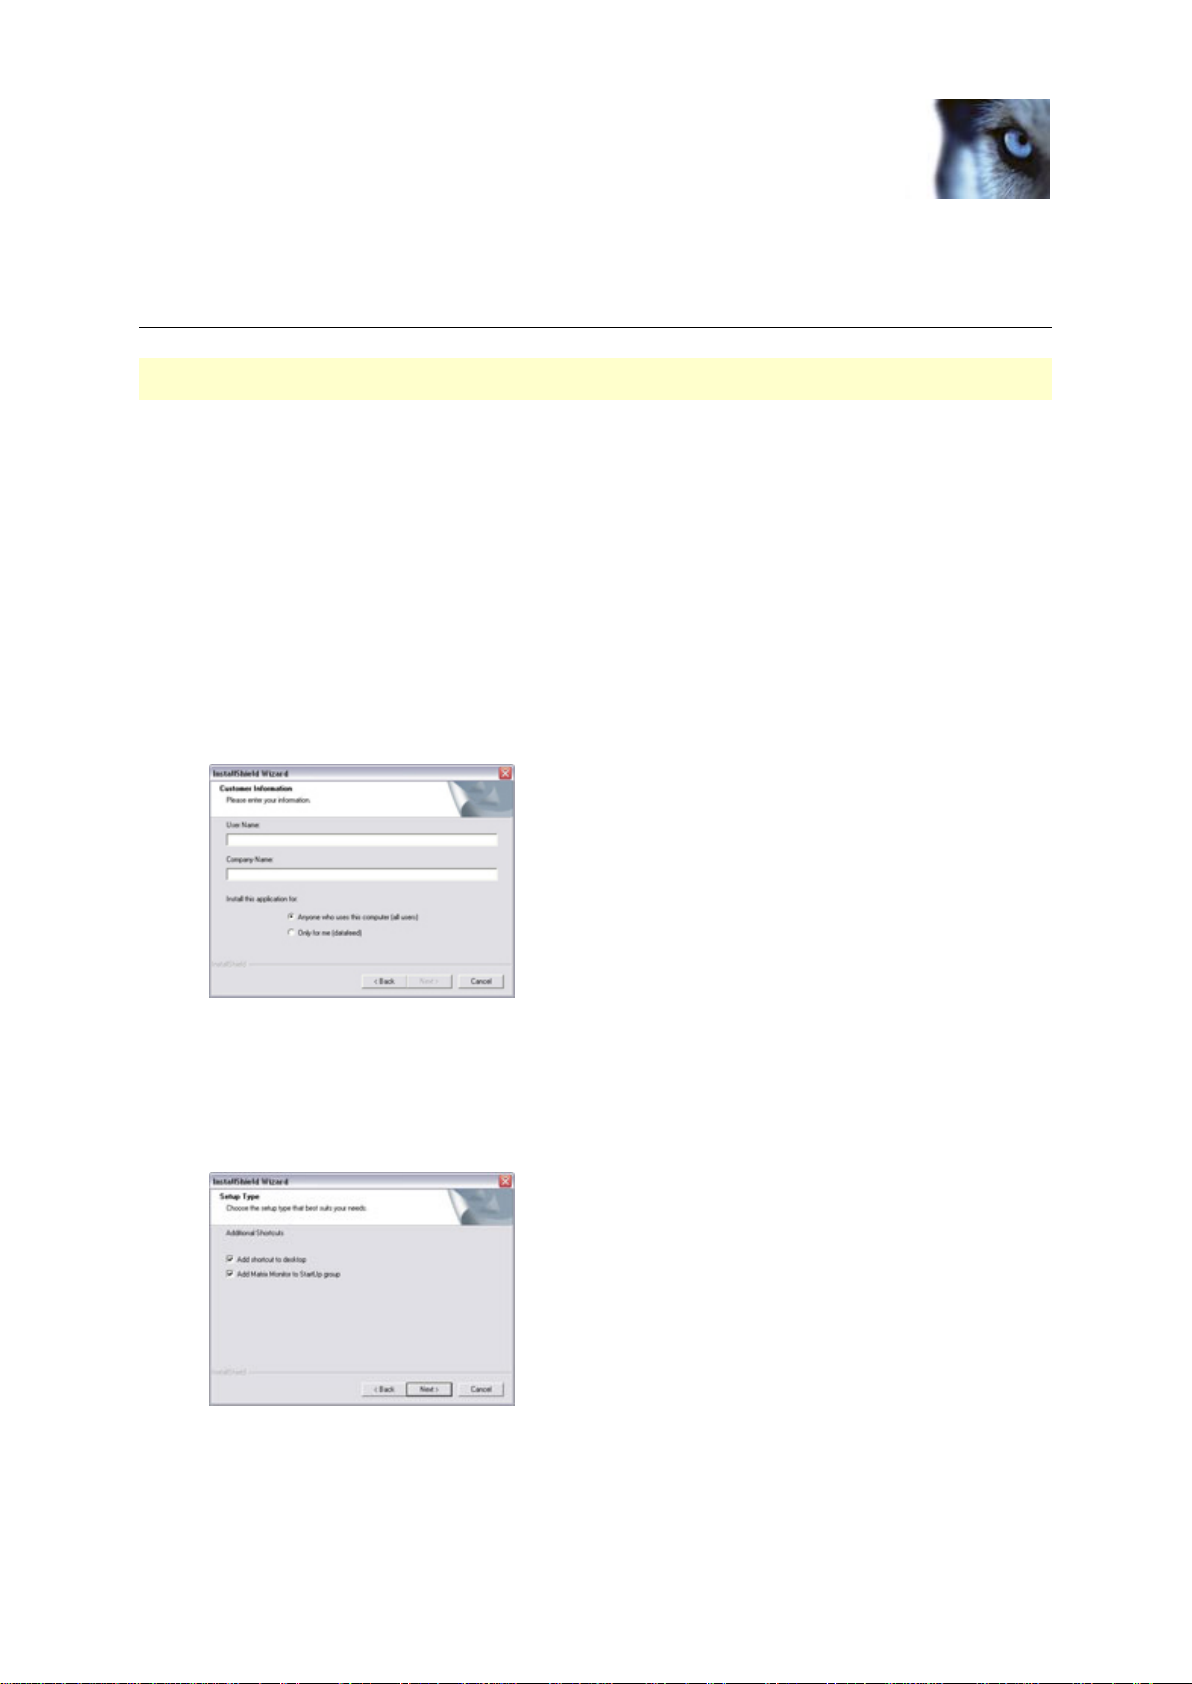
4. Specify your User Name and Company Name:
You furthermore have the option of selecting whether the Matrix Monitor application should be available
just for you, or for anyone using the computer. If in doubt, select Anyone...
When ready, click Next.
5. Follow the next few simple steps in the installation wizard until you are asked to select the setup type that
best suits your needs:
o If you want a shortcut to the Matrix Monitor application placed on your desktop automatically, keep
Add shortcut to desktop selected.
Page 8

Milestone XProtect® Matrix Monitor 2.3
User's Manual
www.milestonesys.com
8
Installation
o If you want the Matrix Monitor application to run automatically each time the computer loads
Windows, keep Add Matrix Monitor to Startup group selected.
When ready, click Next twice.
6. Click Finish.
Up-to-date video device drivers
Video device drivers are small programs used by Matrix Monitor for communicating with cameras. Video device
drivers are installed automatically during the initial installation of your Matrix Monitor.
However, new versions of video device drivers, so-called Device Packs, are released and made available for
download (http://www.milestonesys.com/downloads) for free, from time to time. It is highly recommended
that you regularly check if new Device Packs are available, and if so, that you download and install them on the
computer running Matrix Monitor.
Remove old device pack
IMPORTANT: When you remove your video device drivers, your Matrix Monitor will not be able to communicate
with cameras until you have installed the new version of the video device drivers. It is therefore highly
recommended that you perform the update at a time when you do not expect important incidents to take place.
1. Open Windows' Control Panel, and select Add or Remove Programs. This will open the Add or
Remove Programs window.
2. In the Add or Remove Programs window, select the Video Device Pack Vx.x entry (where x.x
indicates the relevant version number), and click Remove.
3. You will be asked to confirm that you want to remove the XProtect Video Device Drivers. Click OK to do
so.
Install new device pack
1. Double-click the downloaded XProtect Video Device Driver file DeviceInstaller.exe to begin installation.
Depending on your security settings, one or more Windows security warnings may appear. If such
security warnings appear, accept security warnings by clicking Run or similar (exact button text depends
on your browser version).
2. Select required language, and click OK. This will open the Video Device Driver Setup Wizard, which
will guide you through the installation.
3. On the wizard's first step, click Next.
4. On the wizard's second step, an installation path is automatically suggested. Click Next.
5. On the wizard's third step, select Device drivers... and click Next.
6. The wizard is now ready to install the video device drivers. Click Install to complete the installation of the
video device drivers.
Page 9

Milestone XProtect® Matrix Monitor 2.3
User's Manual
www.milestonesys.com
9
Configuration
Configuration
The way you access the configuration window for the Matrix Monitor application differs depending on whether you
configure the Matrix Monitor application for the first time or you want to make changes to the configuration of a
running Matrix Monitor application.
First time configuration
To configure the Matrix Monitor application for the first time, do the following:
1. Double-click the Matrix Monitor shortcut on your desktop:
Alternatively, use Windows’ Start menu, selecting All Programs > Milestone XProtect Matrix
Monitor > Milestone Matrix Monitor.
This will open the Matrix Monitor Configuration window:
2. In the Password and Retype Password fields, specify the
password required for communicating with your Matrix Monitor
application.
The password must match the password that has been specified
for your Matrix recipient on the surveillance system server;
consult your surveillance system administrator if in doubt.
Tip: Memorize the password; you will need it if you want to
change your Matrix Monitor application’s configuration at a later
stage.
3. Specify the port number on which your Matrix Monitor application
will listen for commands (e.g. about connecting to a camera).
By default, port 12345 is used. The port number must match the
port number that has been specified for your Matrix recipient on
the surveillance system server; consult your surveillance system
administrator if in doubt.
4. Specify which hosts (other computers) are allowed to send
commands to your Matrix Monitor application.
If commands from any host should be accepted, simply select Allow All Hosts.
If only commands from particular hosts should be accepted, leave the Allow All Hosts box cleared, and
do the following to add each required host:
a. Specify the IP address of the host in the field below the large Allowed Hosts box in the right side of
the window:
Tip: To jump to the next IP address segment in the field, press SPACE on your keyboard.
b. Click Add to add the host to the list of Allowed Hosts.
c. Repeat for each required host.
Tip: If you later want to remove a host from the list, simply select the unwanted host in the list, then
click Delete.
Page 10

Milestone XProtect® Matrix Monitor 2.3
User's Manual
www.milestonesys.com
10
Configuration
5. Now you are able to customize the behavior of your Matrix Monitor application; you do this by adjusting
settings in the window’s Run Mode section.
Tip: The Matrix Monitor application is pre-configured with typically required behavior (settings marked by
(default) in the following list). You do not need to adjust the settings listed in this step unless you want to
customize the way your Matrix Monitor application should behave; consult your surveillance system
administrator if in doubt.
o Always On Top: If selected (default), this setting forces the Matrix Monitor window on top of other
windows. This setting can subsequently be changed from a menu accessible by right-clicking inside
the Matrix Monitor window.
o Auto Accept All Commands: If selected (default), this setting will make your Matrix Monitor
application automatically accept all commands received from allowed hosts (provided the commands
are accompanied by the correct password). If this setting is not used, a dialog in the Matrix Monitor
window will prompt you to accept each received command.
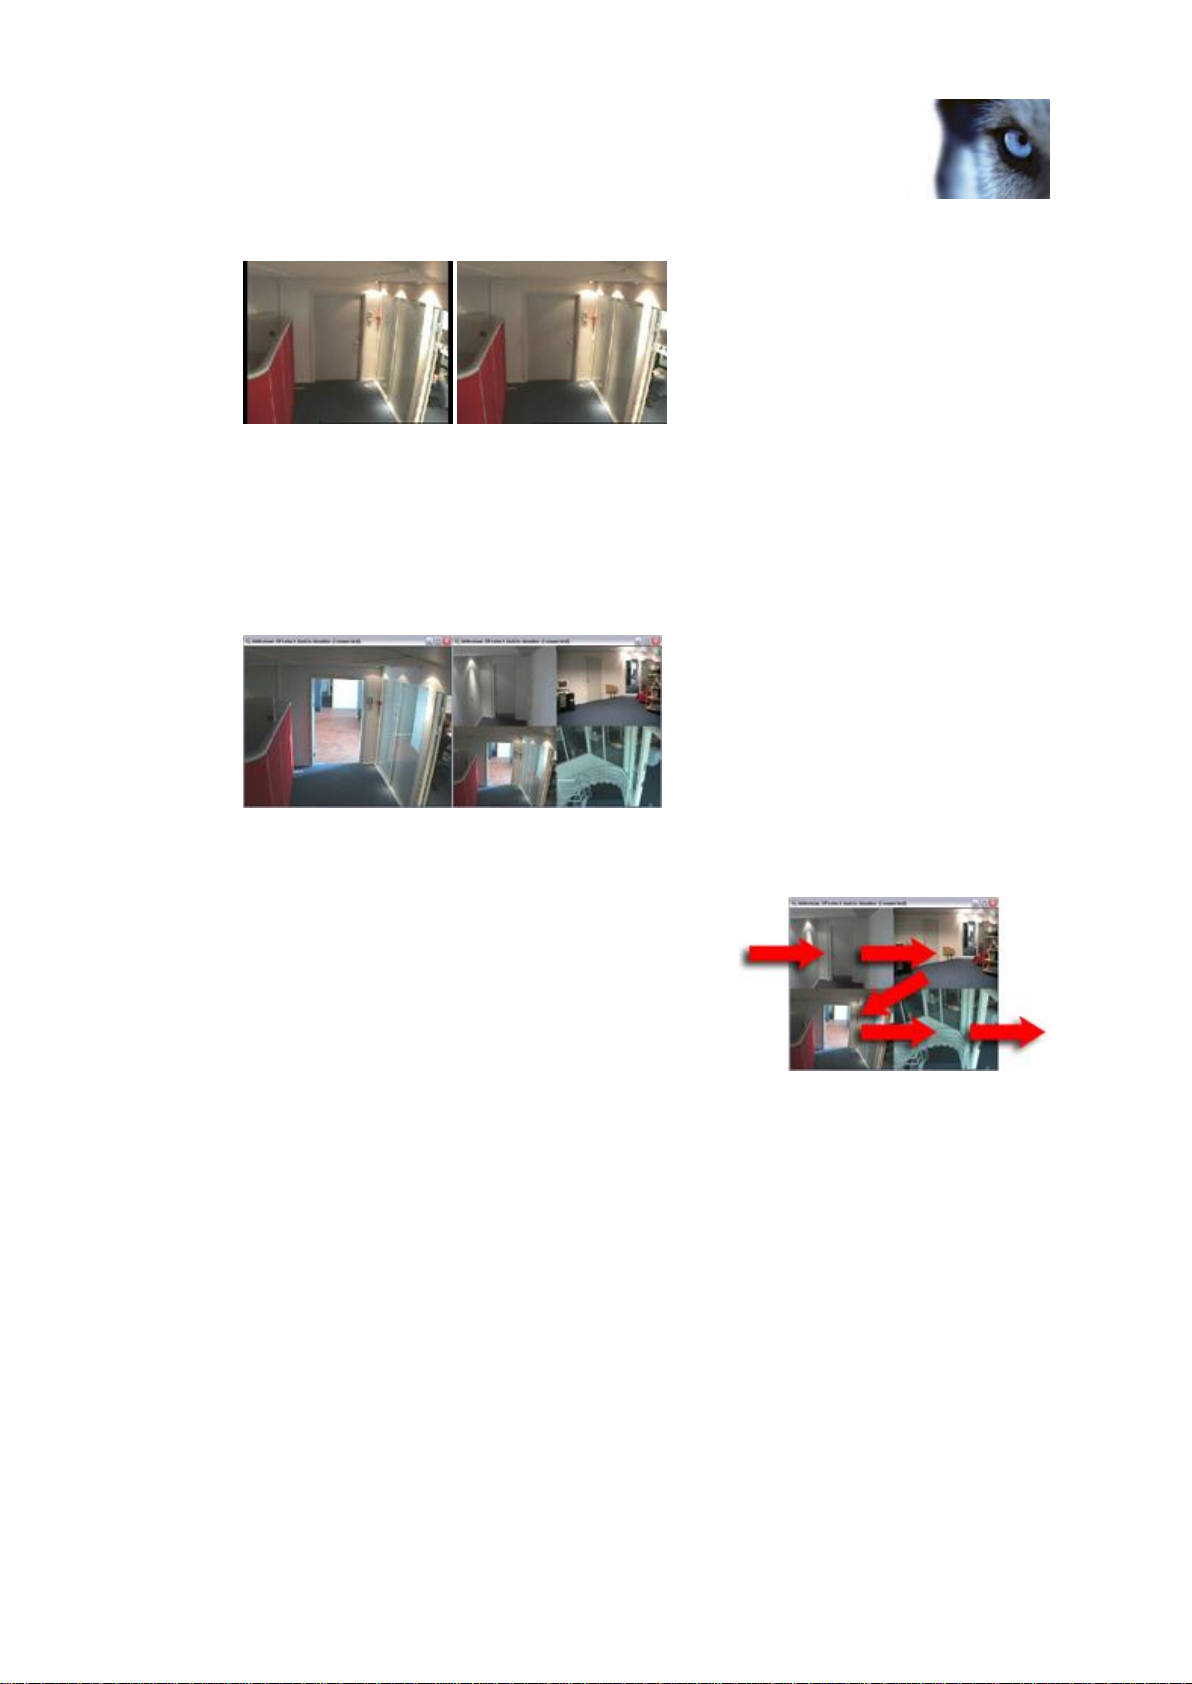
o Display Camera Info: If selected (default), this setting will show camera information in the Matrix
Monitor window. This allows camera names or camera IP addresses to be displayed, even if the
Matrix Monitor window is running in full screen mode.
The same image with and without camera information
o Keep Video Aspect Ratio: If selected (default), this setting will keep the original aspect ratio of
images when the Matrix Monitor window is resized. If this setting is not used, images will be
stretched to fill the available space.
Page 11
Milestone XProtect® Matrix Monitor 2.3
User's Manual
www.milestonesys.com
11
Configuration
The same image with (left) and without (right) original aspect ratio. Note how keeping the original aspect ratio
often leads to black bars around the images.
o Reconnect On Startup: If selected (default), the Matrix Monitor will automatically attempt to connect
to the last connected camera when starting. If this setting is not used, no camera connection will be
attempted at startup.
o Camera Layout: Lets you select whether the Matrix Monitor window should run in 1×1 or 2×2
mode:
In 1×1 mode, the Matrix Monitor window is capable of displaying image feeds from a single
camera at a time.
In 2×2 mode (default), the Matrix Monitor window is
capable of showing image feeds from up to four
cameras at a time. If using 2×2 mode, the image feeds
will be inserted in top-left-to-bottom-right order,
according to a first-in-first-out principle: Image feeds
will remain in the position in which they were loaded;
when all four positions are used, any new image feeds
will replace the oldest image feeds. If you select Insert
Camera On Top, new image feeds will always be
displayed in the top left position while any previously received image feeds will be shifted one
position forward and eventually be "pushed out:"
o Startup Mode: Lets you select how the Matrix Monitor window should open when starting.
With Full Screen, the Matrix Monitor window will open in full screen mode, i.e. completely
maximized, without any title bar, etc.
With Window, the Matrix Monitor window will open in regular mode, i.e. as a scalable window
with a title bar, etc.
With Hidden, the Matrix Monitor window will load in hidden mode, in which you will not see the
window until there are images to display. You will, however, still be able to access the window by
clicking the Milestone XProtect Matrix icon in Windows’ notification area (also known as the
system tray; typically located in the bottom right corner of your screen). Depending on your On
Connect settings (see next), a hidden Matrix Monitor window can automatically be restored to
previous size when a connect command is received:
Page 12

Milestone XProtect® Matrix Monitor 2.3
User's Manual
www.milestonesys.com
12
Configuration
o On Connect: Lets you determine how the Matrix Monitor window should react when a connect
command is received.
Show Alert: If selected, this setting will show a small alert box in the bottom right corner of your
screen when a connect command is received. The alert box will close automatically after 10
seconds.
Show Window: If selected, this setting will automatically restore a Matrix Monitor window in
hidden mode to previous size when a connect command is received.
o On Disconnect: Lets you determine how the Matrix Monitor window should react when a
disconnect command is received.
Show Alert: If selected, this setting will show a small alert box in the bottom right corner of your
screen when a disconnect command is received. The alert box will close automatically after 10
seconds.
Hide Window: If selected, this setting will automatically send the Matrix Monitor window to
hidden mode when a disconnect command is received. When the window is in hidden mode, you
still be able to access it by clicking the Milestone XProtect Matrix icon in Windows’ notification
area (also known as the system tray).
6. When ready, click OK.
Example only; your notification area may have different content
Configure a running Matrix Monitor
To change the configuration of a running Matrix Monitor application, do the following:
1. Open the Matrix Monitor window.
Right-click anywhere inside the Matrix Monitor window, and select Config from the
menu that appears:
2. Specify the password required for communicating with your Matrix Monitor:
3. Click OK.
This will open the Matrix Monitor Configuration window. Each of the window’s
settings is described in First time configuration (on page 9).
4. Make the required changes, and click OK when ready.
Page 13

Milestone XProtect® Matrix Monitor 2.3
User's Manual
www.milestonesys.com
13
Day-to-day use
Day-to-day use
Open the Matrix Monitor window
Depending on configuration (on page 9), the Matrix Monitor window may appear on your screen automatically.
If the Matrix Monitor application is not running, you can start it by double-clicking the Matrix Monitor shortcut on
your desktop:
Alternatively, use Windows’ Start menu, selecting All Programs > Milestone XProtect Matrix Monitor
> Milestone Matrix Monitor.
You may also find that the Matrix Monitor application is running, but in hidden mode. When the Matrix Monitor
application runs in hidden mode, you will not see the Matrix Monitor window until there are images to display.
You will, however, still be able to access the window by double-clicking the Matrix Monitor icon in Windows’
notification area (also known as the system tray; typically located in the bottom right corner of your screen):
Example only; your notification area may have different content
1×1 and 2×2 view
Depending on configuration (on page 9), your Matrix Monitor window will display either a 1×1 or a 2×2 view:
With 1×1, the Matrix Monitor window is capable of displaying image feeds from a single camera at a
time.
With 2×2, the Matrix Monitor window is capable of showing image feeds from up to four cameras at a
time.
If using 2×2, the image feeds will be inserted in top-left-to-bottom-right
order, according to a first-in-first-out principle: Image feeds will remain in
the position in which they were loaded; when all four positions are used,
any new image feeds will replace the oldest image feeds.
If you select Insert Camera On Top, new image feeds will be displayed in the top left position while any
previously received image feeds will be shifted one position forward and eventually be "pushed out:"
Page 14

Milestone XProtect® Matrix Monitor 2.3
User's Manual
www.milestonesys.com
14
Day-to-day use
Camera information
Depending on configuration (on page 9), your Matrix Monitor window may show
camera information immediately above images:
Image aspect ratios
Depending on configuration (on page 9), images in your Matrix Monitor window may either be displayed with
their original aspect ratio, or be stretched to fill the available space.
The same image with (left) and without (right) original
aspect ratio. Note how keeping the original aspect ratio
often leads to black bars around the images.
Toggle regular and full screen view
To quickly toggle between viewing the Matrix Monitor window in full screen or regular view, double-click
anywhere inside the Matrix Monitor window.
Accept received commands
As part of the image exchange between computers on the Matrix system, other computers (exactly which
computers are defined as part of your Matrix Monitor application’s configuration) are able to send commands to
your Matrix Monitor. The commands typically tell your Matrix Monitor to connect to, or disconnect from, an image
feed from a particular camera.
As part of the configuration (on page 9), your Matrix Monitor application may have been set up to automatically
accept all received commands, in which case new image feeds will automatically be displayed in your Matrix
Monitor window.
If your Matrix Monitor has not been set up to automatically accept all received commands, you will be prompted to
accept all received commands before they are executed. When a command is
received, a small dialog will be displayed in the bottom right corner of your screen.
The dialog will display the IP address or hostname of the sender as well as
information about the command itself.
To accept the command, click Accept. If you do not want to accept the command,
click Decline.
Alerts upon executed commands
As part of the configuration (on page 9), your Matrix Monitor application may have been set up to automatically
display alerts each time a command is executed.
Page 15

Milestone XProtect® Matrix Monitor 2.3
User's Manual
www.milestonesys.com
15
Day-to-day use
When this is the case, a small alert box will be displayed in the bottom right corner of your screen upon each
executed command. The alert box will inform you about the executed
command.
The alert box will close automatically after 10 seconds. If required, you can
close the alert box manually at any time.
Shortcut menus
Two shortcut menus are available when working with the Matrix Monitor application:
Matrix Monitor window shortcut menu
By right-clicking anywhere inside the Matrix Monitor window, you get access to a shortcut
menu:
The shortcut menu has the following options:
Full Screen: Lets you view the Matrix Monitor window in full screen mode, i.e. completely maximized,
without any title bar, etc. To return to regular view, simply select Full Screen again.
Tip: To quickly toggle between viewing the Matrix Monitor window in full screen or regular view, you can
also simply double-click anywhere inside the Matrix Monitor window.
Always On Top: Forces the Matrix Monitor window on top of other windows on your screen.
Config: Lets you access the Matrix Monitor Configuration window (see "Configuration" on page 9).
Note that before the Matrix Monitor Configuration window opens, you will be prompted to specify the
password required for communicating with your Matrix Monitor.
Hide Window: Sends the Matrix Monitor window to hidden mode, in which you will not see the window
until there are images to display.
You will, however, still be able to access the window by clicking the Milestone XProtect Matrix icon in
Windows’ notification area (also known as the system tray; typically located in the bottom right corner of
your screen):
Example only; your notification area may have different content
Notification Area shortcut menu
By right-clicking the Milestone XProtect Matrix icon in Windows’ notification area, you get
access to another shortcut menu:
The shortcut menu has the following options:
Show Window: Restores the Matrix Monitor window in either regular or full screen view, depending on
configuration.
Config: Lets you access the Matrix Monitor Configuration window. Note that before the Matrix
Monitor Configuration window opens, you will be prompted to specify the password required for
communicating with your Matrix Monitor.
Page 16

Milestone XProtect® Matrix Monitor 2.3
User's Manual
www.milestonesys.com
16
Day-to-day use
Exit: Shuts down (see "Shut down" on page 16) the Matrix Monitor application. Note that before the
application closes, you will be prompted to specify the password required for communicating with your
Matrix Monitor.
Shut down
Closing the Matrix Monitor window by clicking Close in the Matrix Monitor window’s title bar will not in itself shut
down Matrix Monitor application; it will merely send the window into hidden mode.
To shut down Matrix Monitor application, do the following:
1. Right-click the Matrix Monitor icon in Windows’ notification area (also known as the system tray; typically
located in the bottom right corner of your screen):
Example only; your notification area may have different content
Right-clicking the notification area’s Matrix Monitor icon lets you access a shortcut
menu:
2. From the menu, select Exit.
Note that before the application closes, you will be prompted to specify the password required for
communicating with your Matrix Monitor.
Page 17

Milestone XProtect® Matrix Monitor 2.3
User's Manual
www.milestonesys.com
17
Index
Index
1
1×1 and 2×2 view • 12
A
Accept received commands • 13
Alerts upon executed commands • 14
C
Camera information • 13
Configuration • 8, 12, 13, 14
Configure a running Matrix Monitor • 11
Copyright, trademarks and disclaimer • 4
D
Day-to-day use • 12
S
Shortcut menus • 14
Shut down • 15
T
Toggle regular and full screen view • 13
U
Up-to-date video device drivers • 7
Download new device pack • 7
F
First time configuration • 8, 11
I
Image aspect ratios • 13
Install new device pack • 7
Installation • 6
Introduction • 5
M
Matrix Monitor window shortcut menu • 14
N
Notification Area shortcut menu • 15
O
Open the Matrix Monitor window • 12
R
Remove old device pack • 7
Page 18

About Milestone Systems
Founded in 1998, Milestone Systems is the global
industry leader in open platform IP video
management software. The XProtect platform delivers
powerful surveillance that is easy to manage, reliable
and proven in thousands of customer installations
around the world. With support for the widest choice
in network hardware and integration with other
systems, XProtect provides best-in-class solutions to
video enable organizations – managing risks,
protecting people and assets, optimizing processes
and reducing costs. Milestone software is sold
through authorized and certified partners. For more
information, visit:
www.milestonesys.com.
 Loading...