

Miles Industries Ventana, BSK1200 Installation Instructions Manual
VENTANA
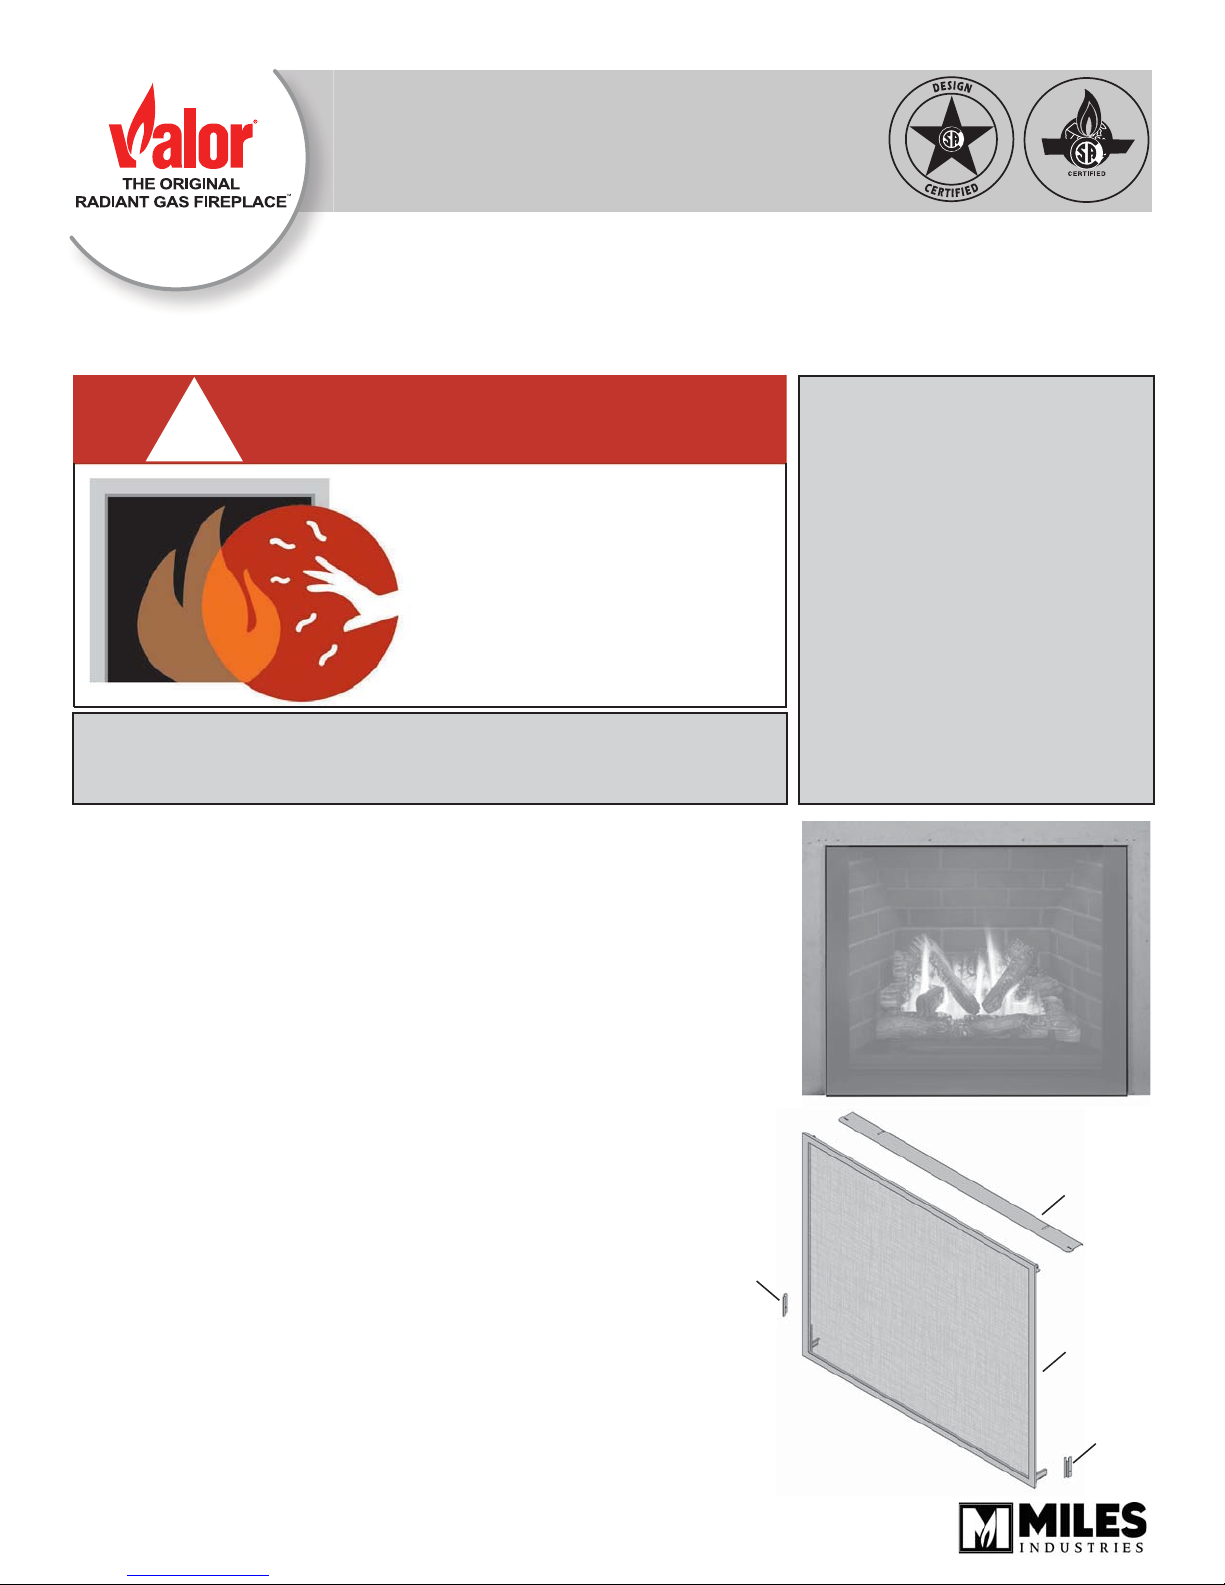
BSK1200 Barrier Screen Kit
CSA approved for use ONLY with Valor Ventana 1200
Installation Instructions
!
A barrier designed to reduce the risk of burns from the hot viewing
glass is provided with this appliance and shall be installed
for the protection of children and other at-risk individuals.
Barrier Screen
A Barrier Screen is provided to install with the Ventana 3-sided surrounds
1235 and 1240, the 4-sided surrounds 1237 and 1241 or on a Ventana
fi replace without a surround.
The barrier screen is designed specifi cally to prevent any contact with the
glass of the fi replace which becomes hot during operation and remains hot
when cooling.
WARNING
HOT GLASS WILL
CAUSE BURNS.
DO NOT TOUCH GLASS
UNTIL COOLED.
NEVER ALLOW CHILDREN
TO TOUCH GLASS.
INSTALLER
Leave this manual
with the appliance.
CONSUMER
Retain this manual
for future reference.
Kit content
The BSK1200 kit contains a barrier screen as well as 2 mounting brackets
and a convection baffl e to be fi tted directly to the Ventana heater 1200.
4003639-04
© Copyright Miles Industries Ltd., 2014.
Convection
baffl e
4004473AZ
LH hook
4003654AZ
Barrier
screen
assembly
4003365
RH hook
4003655AZ
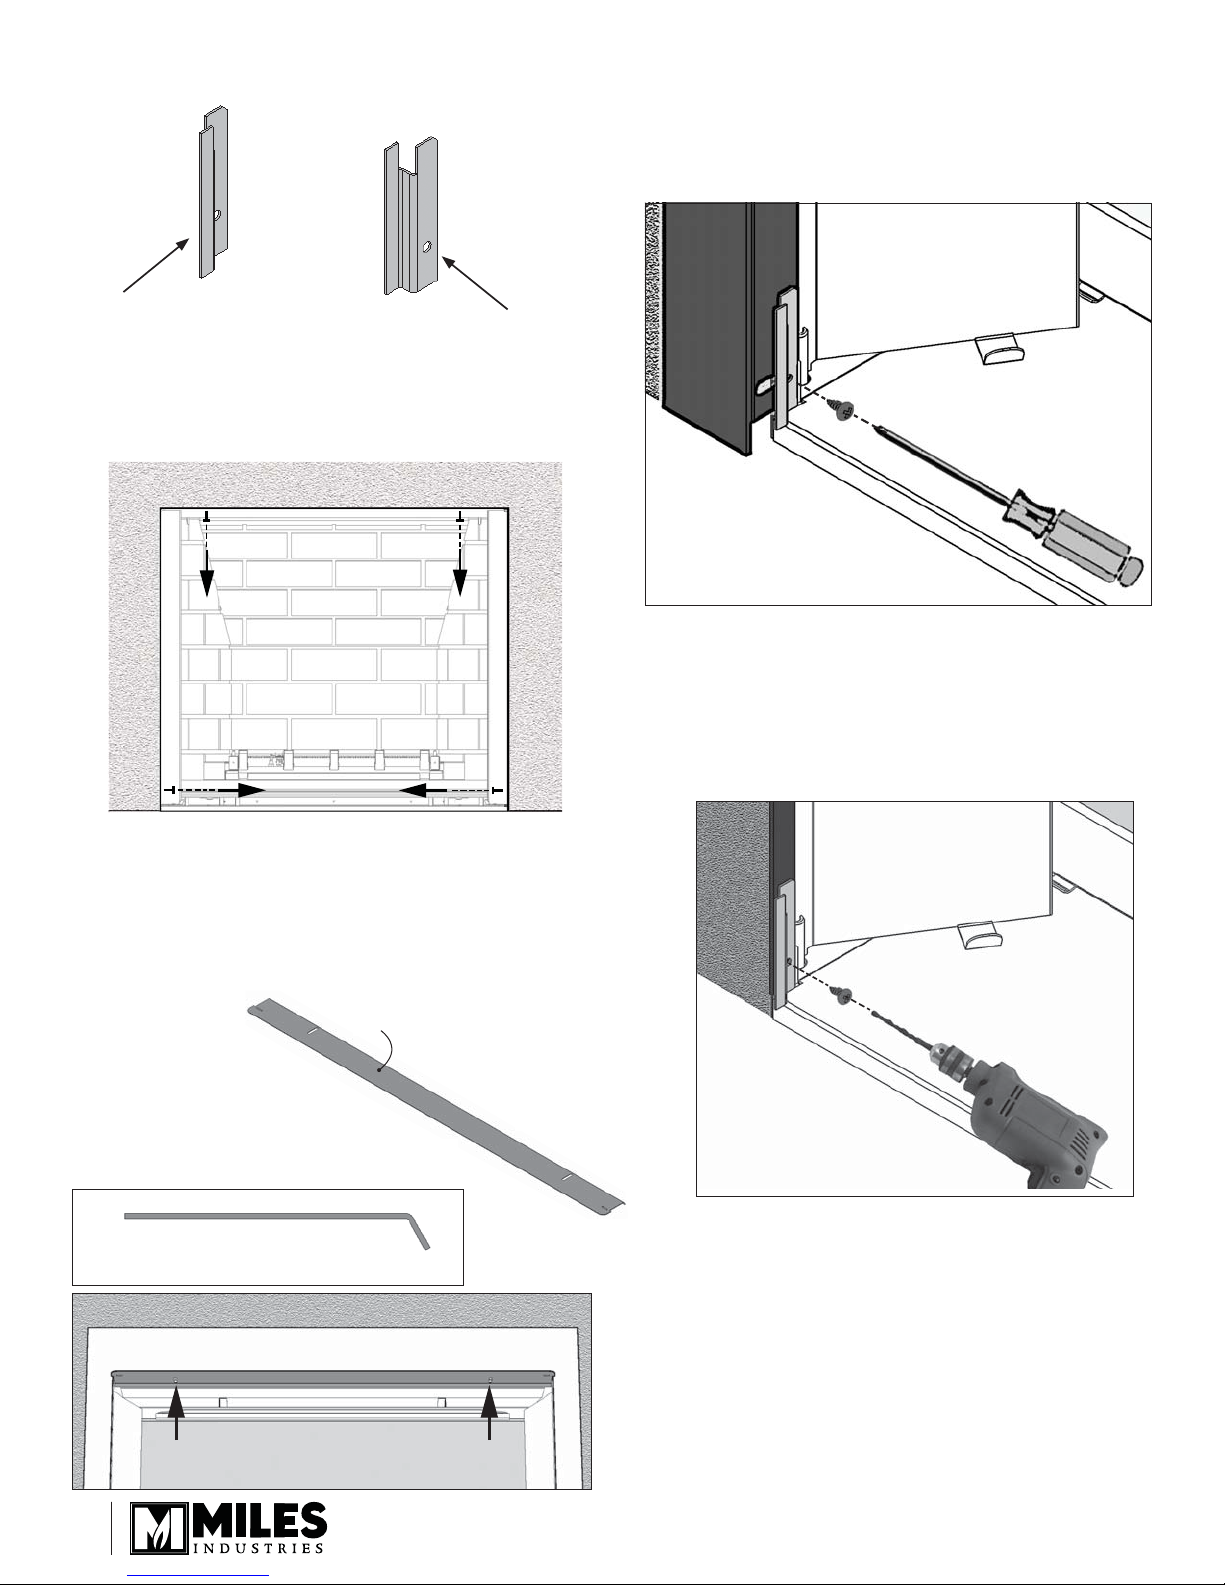
Identifi cation of the brackets
LH bottom bracket
RH bottom bracket
Installation of the brackets
1. Remove the two top screws and the two bottom
side screws of the surround trim or the surround
black strips.
4. Install the bottom brackets.
a. Bottom brackets to surround.
Place the bottom brackets as against the
surround bottom on each side and fi x it with the
screw removed in 1 as illustrated.
Bottom LH corner
b. Bottom brackets to black strip.
Place the bottom bracket against the black
strip at the bottom and drill a hole through the
black strip using a 1/8” (3.5 mm) drill bit. Fix the
bracket to the strip with the screw removed in 1
as illustrated.
2. Place the convection baffl e so its top side
is against the edge of the opening. Start the
screws using those removed in 1. in the baffl e
slots.
3. Push the baffl e as far in as possible and tighten
the screws.
Top
Rear
Front
Top
RearFront
Bottom
Convection baffl e orientation—right side view
Bottom LH corner
2
 Loading...