

Page 1

HANDHELD COMPUTER
DA04 SERIES
USER’S GUIDE
Page 2

Copyright © 2004
All rights reserved. No part of this publication may be reproduced, transmitted,
transcribed, stored in a retrieval system, or translated into any language, or computer
language, in any form, or by any means, electronic, mechanical, magnetic, optical,
chemical, or other, without the prior written permission of the manufacturer.
The manufacture reserves the right to revise this publication and to make changes
from time to time in the contents hereof without obligation to notify any person of
such revision or changes.
The manufacturer makes no representations or warranties, either expressed or
implied, with respect to the contents hereof and specifically disclaims any warranties
as to merchantability or fitness for any particular purpose. Any of the manufacturer's
software described in this manual is sold or licensed "as is". Should the programs
prove defective following their purchase, the buyer (and not the manufacturer, its
distributor, or its dealer), assumes the entire cost of all necessary servicing, repair
and any incidental or consequential damages resulting from any defect in the
software.
Trademark Acknowledgments
IBM, PC are registered trademarks of International Business Machines Corp.
Page 3

Microsoft, Windows CE, Pocket PC, and Windows Mobile are registered trademarks
of Microsoft Corp.
Intel, Xscale are the registered trademarks of Intel Corp.
All product and company names are trademarks or registered trademarks of their
respective holders.
Page 4

EMC and Safety Notice
FCC Regulations:
This mobile device complies with part 15 of th e FCC Rules. Operation is su bject to
z
the condition that this device does not cause harmful interference.
This mobile device complies with part 15 of th e FCC Rules. Operation is su bject to
z
the following two conditions: (1) This device may not cause harmful interference,
and (2) this device must accept any interference received, including interference that
may cause undesired operation.
This mobile device has been tested and found to comply with the limits for a Class
z
B digital device, pursuant to Part 15 of the FCC Rules. These limits are designed to
provide reasonable protection against harmful interference in a residential installation.
This equipment generates, uses and can radiated radio frequency energy and, if not
installed and used in accordance with the instructions, may cause harmful
interference to radio communications. However, there is no guarantee that
interference will not occur in a particular installation If this equipment does cause
Page 5

harmful interference to radio or television reception, which can be determined by
turning the equipment off and on, the user is encouraged to try to correct the
interference by one or more of the following measures:
-Reorient or relocate the receiving antenna.
-Increase the separation between the equipment and receiver.
-Connect the equipment into an outlet on a circuit different from that to which the
receiver is connected.
-Consult the dealer or an experienced radio/TV technician for help.
Changes or modifications not expressly approved by the party responsible for
compliance could void the user‘s authority to operate the equipment.
Page 6

RF Exposure Information (SAR) for GSM Function
4
This model device meets the government’s requirements for exposure to radio waves.
This device is designed and manufactured not to exceed the emission limits for
exposure to radio frequency (RF) energy set by the Federal Communications
Commission of the U.S. Government.
The exposure standard for wireless mobile devices employs a unit of measurement
known as the Specific Absorption Rate, or SAR. The SAR limit set by the FCC is
*
1.6W/kg.
Tests for SAR are conducted using standard operating positions accepted
by the FCC with the device transmitting at its highest certified power level in all
tested frequency bands. Although the SAR is determined at the highest certified
power level, the actual SAR level of the device while operating can be well below
the maximum value. This is because the device is designed to operate at multiple
power levels so as to use only the poser required to reach the network. In general,
the closer you are to a wireless base station antenna, the lower the power output.
The highest SAR value for the model device as reported to the FCC when tested for
use at the ear is 0.46 W/kg and when worn on the body, as described in this user
guide, is 0.092 W/kg for PCS Body SAR and 0.04 W/kg for WLAN Body SAR.
Page 7

(Body-worn measurements differ among device models, depending upon available
enhancements and FCC requirements.)
While there may be differences between the SAR levels of various devices and at
various positions, they all meet the government requirement.
The FCC has granted an Equipment Authorization for this model device with all
reported SAR levels evaluated as in compliance with the FCC RF exposure
guidelines. SAR information on this model device is on file with the FCC and can be
found under the Display Grant section of http://www.fcc.gov/oet/fccid
searching on FCC ID: IR5DA04IM.
For body worn operation, this device has been tested and meets the FCC RF exposure
guidelines for use with an accessory that contains no metal and the positions the
handset a minimum of 1.5 cm from the body. Use of other enhancements may not
ensure compliance with FCC RF exposure guidelines. If you do no t use a body-worn
accessory and are not holding the device at the ear, position the handset a minimum of
1.5 cm from your body when the device is switched on.
after
Page 8

Federal Communications Commission Radio Frequency Interference
Statement
This equipment generates, uses, and can radiate radio frequency energy and if not
installed and used in accordance with the instructions, may cause interference to
radio communications. This equipment has been tested and found to comply with
Class B digital devices, pursuant to Part 15 of the FCC rules which are designed to
provide reasonable protection against such interference when operated in a
commercial or residential environment.
Countermeasures if interference occurs
You are encouraged to do the following if interference occurs while you are
operating the device:
1. Turn OFF the unit and unplug the AC adapter from the outlet to see if the
interference disappears.
2. Connect the AC adapter to the outlet in another room and check if the
interference still exists.
3. Use an outlet that is far away from the interfered appliance.
4. Re-orient your computer in respect to the interfered appliance to see if there
is improvement.
If all of these failed, please call your dealer for help.
Page 9

CE
This equipment complies with the requirements set out in the Council Direction on the
Approximation of the laws of the Member States relating to Electromagnetic
Compatibility (89/336/EEC). For the evaluation regarding the electromagnetic
compatibility, the following standards were ap plied:
EN55022 +A2:2003 Class B EMI Conduction and Radiation
EN61000-3-2 Harmonics
EN61000-3-3 +A1:2001 Flicker (Voltage fluctuation)
EN55024 EMS
EN61000-4-2 +A2:2001 ESD
EN61000-4-3 +A1:2002 RS
EN61000-4-4 +A2:2001 EFT
EN61000-4-5 +A1:2001 Surge
EN61000-4-6 +A1:2001 CS
EN61000-4-8 Power-Frequency Magnetic Field
EN61000-4-11 +A1:2001 Voltage Dips and Voltage Interruptions
LVD EN60950 :2001
ETSI EN301 489-01 V1.4.1 EMC Standards for Radio Equipment
Page 10

ETSI EN 301 489-17 1.2.1 EMC Standards for 2.4GHz Wideband
Transmission Systems)
ETSI EN 300 328-2 V1.2.1 EMC Standards for Using Spread Spectrum
Modulation Techniques
UL, TÜV
AC Adapter (EN60950 LVD is included in TÜV)
E-Mark
Registered e13
Material Safety and Recycling Notice
All materials used in the construction of this unit are recyclable or environmentally
friendly. No mercury, cadmium, CFC or related materials were used in the
manufacturing process or inside the product.
Please recycle the packing materials, and at the end of the unit's life, all other
materials in accordance with the local regulations.
Please refer “
Materials and Recycling
” for the contents of the materials.
Page 11

CONTENTS
GETTING STARTED.............................................................................................. 1
U
NPACKING
Q
UICK CHECK
C
ONTROLS, INDICATORS, AND PORTS
O
PERATING ENVIRONMENT AND RUGGEDNESS
COMPONENTS AND FUNCTIONS.................................................................... 14
AC
B
O
BASIC OPERATION............................................................................................. 17
ADAPTER
ATTERY
PTIONAL DEVICES
............................................................................................................. 1
.......................................................................................................... 3
...................................................................... 4
...................................................... 13
......................................................................................................... 14
............................................................................................................... 14
............................................................................................... 15
S
TART PROGRAMS
C
ALIBRATE TOUCH SCREEN
S
ETTING POWER
A
DJUST VOLUME
C
HARGE BATTERY
S
WAP BATTERY
................................................................................................. 17
..................................................................................................... 17
................................................................................................... 18
................................................................................................. 18
..................................................................................................... 19
................................................................................... 17
Page 12

S
ET YOUR OWN BUTTON FUNCTIONS
.................................................................... 21
B
ACKUP DATA
D
ATA SYNC
C
RADLE (OPTIONAL
PCMCIA S
SD S
LOT
GPS (
D
IGITAL COMPASS (OPTIONAL
(P
OCKET
G
ET HELP
C
ALIBRATE TOUCH SCREEN
A
DJUST VOLUME
S
ET YOUR OWN BUTTON FUNCTIONS
T
ODAY SCREEN
................................................................................................................ 24
OPTIONAL
PC D
.............................................................................................................. 26
....................................................................................................... 21
........................................................................................................... 22
).............................................................................................. 23
LOT (MAY NOT BE AVAILABLE ON ALL MODELS
).................................................................................................... 25
).............................................................................. 25
EDICATED INSTRUCTIONS
................................................................................... 26
................................................................................................... 26
...................................................................................................... 27
).................................. 24
) ............................................................... 26
.................................................................... 26
F
IND
R
EMOVE PROGRAMS
M
I
NPUT
M
O
P
ASSWORD
A F
ANAGE CERTIFICATES
........................................................................................................... 27
ILE
..................................................................................................................... 28
ENUS
WNER INFORMATION
................................................................................................................... 28
............................................................................................................. 29
.............................................................................................. 27
......................................................................................... 28
........................................................................................... 28
Page 13

S
OUNDS
& N
OTIFICATIONS
.................................................................................... 29
C
LOCK
M
EMORY
P
OWER
SPECIFICATIONS................................................................................................. 31
CPU....................................................................................................................... 31
M
EMORY
D
ISPLAY
T
OUCH SCREEN
I/O
S
YSTEM UNIT DIMENSIONS AND WEIGHT
AC A
B
ATTERY
................................................................................................................... 29
................................................................................................................ 29
................................................................................................................... 30
................................................................................................................ 31
................................................................................................................. 31
...................................................................................................... 31
PORTS
DAPTER
.............................................................................................................. 32
.............................................................. 32
......................................................................................................... 33
............................................................................................................... 33
M
ATERIALS AND RECYCLING
E
NVIRONMENTAL RATINGS
MAINTENANCE / SERVICE............................................................................... 36
C
LEANING
T
ROUBLESHOOTING
RMA S
.............................................................................................................. 36
............................................................................................... 36
ERVICE
....................................................................................................... 37
................................................................................. 34
.................................................................................... 35
Page 14
Getting Started
GETTING STARTED
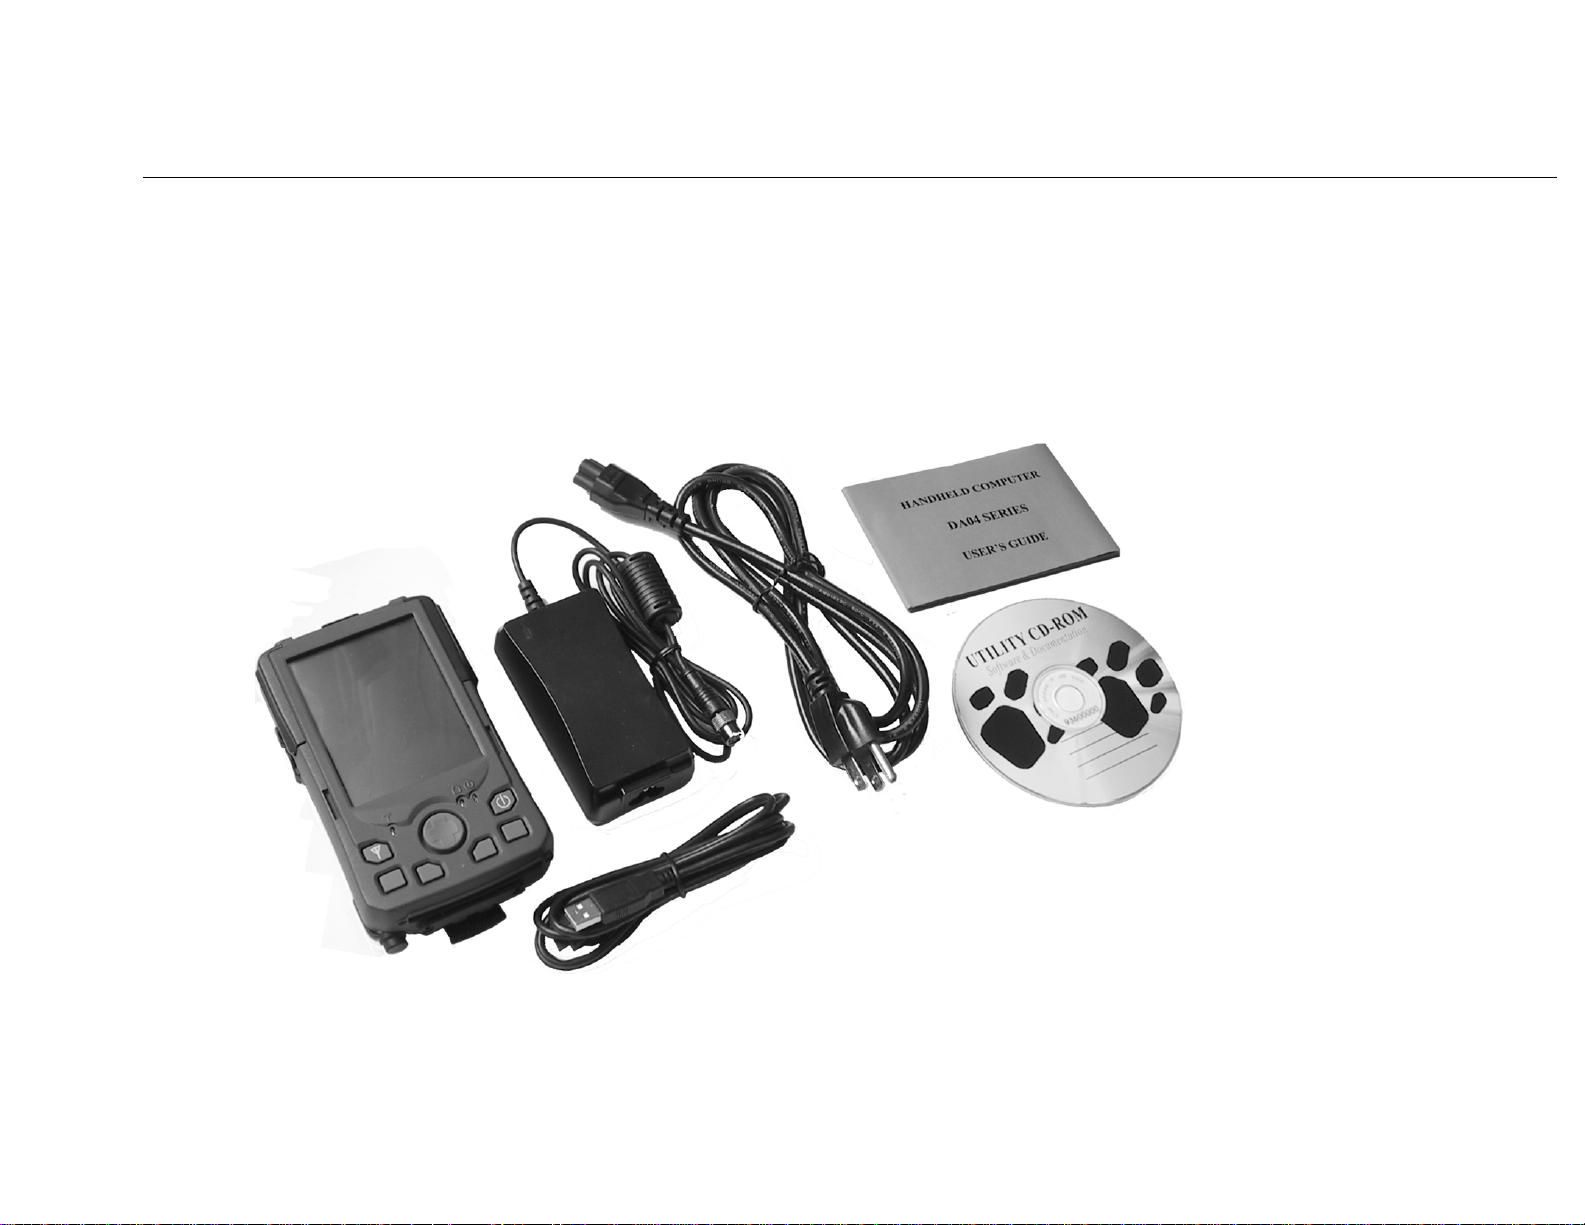
Unpacking
The following components come with your handheld computer.
If anything is missing or damaged please notify the dealer immediately.
•
Handheld computer unit
1
Page 15

Getting Started
•
•
•
•
•
•
AC adapter
AC power cord
Stylus
Data sync cable (USB)
User's guide
Utility CD
2
Page 16

Quick Check
Getting Started
•
•
•
•
•
•
Attach the AC adapter to AC outlet. The adapter LED indicates the power is
ready.
Plug the adapter to the handheld computer. The charge LED may light up
indicating battery charging if battery is not full.
Turn ON the computer by pressing the power button momentarily.
Test with stylus operations
Adjust backlight brightness:
Tap
Level
(
Adjust backlight timeout:
In the same window adjust the timeout period as desired.
Start Æ Settings Æ Control Panel ÆSystem Console Æ Backlight
, adjust the brightness level as desired.
Start)
=
•
•
Timeout is the idle time that the LCD backlight would turn OFF auto matically.
Press the power button for > 1 second to turn LCD backlight OFF or ON
Press power button momentarily to turn OFF computer.
3
Page 17

Controls, Indicators, and Ports
Front:
Getting Started
4
Page 18

Getting Started
1.
2.
3.
4.
5.
6.
7.
Wireless ON/OFF
(Flight button)
Turn ON/OFF the wireless device
(Wireless device WLAN, GPRS, Bluetooth, etc. are optional) Please turn it OFF
at locations with wireless control (hospital, onboard airplane, etc.)
Button 1 (User programmable)
Button 2 (User programmable)
Cursor Control
Left
[
Enter
[
Right
], [
] at the center
], [
Up
], [
Down
] 4 directions
Button 3 (User programmable)
Button 4 (User programmable)
Power Button
8.
Press momentarily turns the power ON or OFF.
Press > 1 second turns LCD backlight ON or OFF
(actually power OFF is “suspend” only, the battery is still backing up memory
data)
Power indicator
5
Page 19

Getting Started
9.
10.
Battery charge indicator
Wireless indicator
Note: You may change the functions of button 1~4. Refer “
Your Own Button Functions
” for details.
Basic Operations
” “
Set
6
Page 20

Rear:
Getting Started
7
Page 21

1. Speaker (under hand strap)
2. Master switch
Turns OFF all power including backup battery.
All data in RAM will be lost when turned OFF.
The switch is for troubleshooting or emergency only.
3. Stylus
4. Reset Button
Soft reset: Press the reset button to warm-boot. After reset the data remains
intact.
Hard reset: Press the reset button and power button simultaneously.
Getting Started
Hard reset clears all data, all settings, then cold-boot. After reset need to
calibrate touch screen, do set up, etc. again, but RAM data can not be recovered.
5. Battery knob
6. Battery
7. Microphone (optional)
8
Page 22

Left:
1. Antenna (optional)
Wireless device antenna
Getting Started
2. USB client port
For data sync with another computer
3. USB port
4. Kensington lock slot
9
Page 23

Right:
Getting Started
1. Microphone/Earphone jack
2. Infrared port (IR, optional)
3. SD card slot (Secured Digital card)
nd
4. 2
antenna (optional)
10
Page 24

Top:
1. Serial port
Bottom:
Getting Started
(serial port may be occupied by internal device)
11
Page 25

1. DC jack
2. PCMCIA slot (maybe not available on some models)
One PCMCIA type II slot
CF (Compact Flash card) connectivity is possible by PCMCIA-to-CF
adapter (optional)
3. Cradle docking connector
Connection to cradle
Getting Started
12
Page 26

Getting Started
Operating Environment and Ruggedness
A clean and moisture-free environment is preferred.
If it is necessary to work in a hostile environ ment, please make sure all ports are well
protected from dust, moisture, or water. Proper isolation from extreme hazardous
exposure is recommended.
The computer is designed with rugged features of vibration, shock, dust, and rain/water
protection. However, it is still necessary to provide appropriate protection while
exposing to harsh environments.
All connectors will decay or corrode if exposed to water or moisture. Corrosion is
accelerated if the power is ON. Please take proper water-resistant measures for cable
connections.
The DC jack is sealed type which may be operated with water splashing while DC power
cord attached. All other port caps should be in place when no cable is attached.
Regularly maintain the computer by cleaning dust, water, etc. will help keeping it in
optimal condition.
Warning: There is no isolated compartment in SD slot, PCMCIA slot, and docking.
These ports must be tightly sealed while working with dust/water.
13
Page 27

Components and Functions
COMPONENTS AND FUNCTIONS
AC adapter
When using the AC adapter:
Use a properly grounded AC outlet.
•
Use one AC outlet exclusively for the computer. Having other appliances on
•
the same line may cause interference.
Use a power strip with built-in surg e protection.
•
The AC adapter automatically detects the AC line voltage (110V or 220V) and
adjusts accordingly.
Battery
The computer will automatically switch to battery power when the ex ternal power
source (AC adapter) is disconnected.
Battery Power Saving Tips
•
•
Turn OFF the LCD backlight when it is visible with external light
Lower the intensity of the backlight
14
Page 28

Components and Functions
•
Battery Low
When the battery is nearly exhausted, the computer prompts a window warning it.
Once the Battery Low warning occurs, please do either or all of the following:
1. Save and close the files you are currently working on
2. Plug in the AC adapter to recharge the battery
3. Swap a charged battery
Shut down the computer when not to use for a longer time
Optional Devices
Note: Not all options are available on all models.
Cradle
For docking, port extension, battery-charging.
Spare Battery
Exactly the same as primary battery.
Wireless LAN
IEEE 802.11b wireless LAN card
(Local Area Network)
15
Page 29

Components and Functions
GPRS
(General Packet Radio Service)
Wireless voice and data communication
Bluetooth
Short-range wireless data communication
GPS
(Global Positioning System)
Positioning your location by GPS satellite signals
Digital Compass
Solid-state compass with digital readout and graphic display
16
Page 30

Basic Operation
BASIC OPERATION
(Pocket PC dedicated instructions are listed on later pages of this section)
Start Programs
(
Tap
Or tap
= Start
Start
Start Æ Windows Explorer
)
Programs Æ (desired programs)
Æ
(desired programs)
Æ
Calibrate Touch Screen
Tap
Use pen to touch the center of mark ”
moves. Tap the screen to confirm when finished.
Start
Settings Æ Control Panel
Æ
Stylus
Æ
” and repeat the action when the mark ”
+
Setting Power
Tap
computer to shut down automatically.
Start
Settings Æ Control Panel Æ Power
Æ
to calibrate.
+
, set the length of idle time for
”
17
Page 31

Setting LCD
Adjust backlight brightness:
Basic Operation
Tap on
adjust the brightness level as desire.
Setting backlight timeout:
In the same window adjust the timeout period as desired.
Timeout is the idle time that the LCD backlight would turn OFF automatically.
Start
Settings Æ Control Panel
Æ
System Console Æ Backlight Level
Æ
,
Adjust Volume
Tap
level as desired.
Start
Settings Æ Control Panel Æ Volume & Sounds
Æ
, adjust the volume
Charge Battery
Plug in AC adapter will charge the battery automatically. If the battery is already full,
the system will stop charge automatically.
Dock to optional cradle + adapter will charge battery, too. Cradle has a battery slot to
charge another battery externally.
18
Page 32

Swap Battery
To swap the battery:
Basic Operation
1.
2.
3.
4.
5.
6.
Turn power OFF
Turn the battery knob counterclockwise to loose the battery
Remove battery from compartment
Insert a new battery
Press the battery down and turn battery knob clockwise to lock it
Press power button to turn ON the computer
19
Page 33

Basic Operation
Note: During battery swap the memory data is sustained by a small backup battery.
Please swap battery within 1 minute to avoid data loss.
20
Page 34

Set Your Own Button Functions
The lower four buttons are user-programmable.
Basic Operation
Tap
Define the button functions from the selection list.
Other buttons are not user-programmable.
Start
Settings Æ Control Panel Æ System Console
Æ
Buttons
Æ
Backup Data
There are two types memory on the computer: Temporary memory RAM (Random
Access Memory) and permanent memory ROM (Read Only Memory). Optional
memory cards act like ROM.
Most data of ongoing program are stored in RAM. It would stay intact when power
turns OFF. (Actually pressing power button OFF/ON is “suspend/resume” only. Part
of the computer is still running, power supply to memory is always ON.)
However, data or program in RAM will be lost when hard ware reset or master switch
turns OFF. And if primary battery been removed for too long time (for example,
swap battery for >1 minutes), there are risks to lose RAM data as back up battery
may run exhausted. Long time storage will drain primary and backup battery to
exhaust thus unable to keep memory data.
21
Page 35

Basic Operation
To avoid data loss you may move data into ROM or memory card as follows:
Tap and hold the file to pop up the small menu. Tap
(ROM) or memory card folder. Tap and hold to pop up the small menu, tap
Flask Disk
Tap
Start
Æ
folder:
Programs Æ Windows Explorer
Æ
Copy
Flash Disk
then browse to
Flash Disk
Paste
.
Data Sync
You may transmit/receive data between this handheld computer and other computers
via data sync.
Install Microsoft ActiveSync utility o n host computer.
Connect handheld computer and host computer with the USB cable.
Follow the prompt to execute data sync.
Perform
Note: ActiveSync run on Windows CE prompts “Failed to Set Up Partnership”
Copy, Paste, Cut, Delete
, etc. same as PC.
because it’s designed for Pocket PC only. However, it still works despite the
message
22
Page 36

Basic Operation
Cradle (optional)
Cradle is the device for docking, port extension, and battery charging. AC adapter
may attach directly to cradle and charges the computer battery as well as spare
battery.
There is a battery slot on the back of cradle to mount spare battery.
Mount the cradle:
1. Computer may dock either power is ON or OFF (recommend OFF)
2. Open the rubber cap on the docking connector
3. Align the computer with cradle docking connector
4. Firmly push the computer down to engage the docking connector
5. Turn rotary latch to fix the computer
Remove from the cradle:
1. Turn loose the rotary latch to release computer
2. Pull away the computer either power is ON or OFF
23
Page 37

Basic Operation
f
Mount spare battery:
Perform the same procedure as mounting primary battery on computer. Cradle will
charge computer and spare battery simultaneously.
PCMCIA Slot
The computer accepts one type-II PCMCIA card. Insert the card firmly into the slot
and fix the rubber cover for water/dust protection.
To remove the card, push the eject button to pop out the card. The eject button can
hide into the compartment by pushing it in ward gently.
May need to load PCMCIA card driver to enable the function.
Note: If the computer is working with dust, moisture, or water, be sure to fix the
PCMCIA rubber cap tightly with screws.
(may not be available on all models)
(spare battery is optional)
SD Slot
The computer accepts one SD card (Secured Digital Card).
Insert the card firmly into the slot and fix the rubber cover for water/dust protection.
To remove the card, push the eject button to release it.
Note: I
the computer is working with dust, moisture, or water, be sure to fix the
24
Page 38

SD rubber cap tightly with screws.
GPS (optional)
Basic Operation
Tap
Start
Program Æ Windows Explorer Æ (map software)
Æ
to start GPS.
Digital Compass (optional)
Tap
compass
Calibration:
Tap
times, the compass will calibrate automatically.
Stay away from metal or magnetic field. The compass may be interfered by them.
Start
Calibration
Program Æ Windows Explorer Æ Digital Compass
Æ
on compass window, hold computer horizontally and turn 360º two
to start digital
25
Page 39

(Pocket PC Dedicated Instructions)
Get Help
Basic Operation
Tap
Select the help information needed.
Start
Æ
Help
Calibrate Touch Screen
Tap
Start
Settings Æ System
Æ
Screen Æ Align Screen
Æ
Adjust Volume
Tap
level as desired.
Start
Settings Æ Personal
Æ
Sounds & Notifications
Æ
Set Your Own Button Functions
Tap
Define the button functions from the selection list
Start
Settings Æ Personal
Æ
Buttons
Æ
to calibrate.
, adjust the volume
26
Page 40

Basic Operation
Today Screen
The today screen displays information of today’s appointments and status icons, etc.
Tap the information listed on today screen to execute the associated program. Tap
Start Æ Today
to enter Today screen.
Find A File
Tap
In
you have looked for this item before, tap the
list.
In
and subfolder are searched in the results list.
Start
Find
Type
, enter the file name, word, or other information you want to search for, If
, select a data type to help narrow your search. Tap
Find
Æ
Remove Programs
Tap
delete.
Start
Settings Æ System Æ Remove Programs
Æ
Find
arrow and select the item from the
Go
, My document folder
and follow the prompts to
27
Page 41

Manage Certificates
Basic Operation
Tap
Input your certificates. To delete a certificate, tap and hold it in the list, and then tap
Delete
Start
.
Settings Æ System Æ Certificates
Æ
Input
Tap
On the input method tab, select an input method and change the desired options.
Start
Settings Æ Personal
Æ
Input
Æ
Menus
Tap
appear on Start Menu.
Start
Settings Æ Personal
Æ
Menus
Æ
and select the items you want to
Owner Information
Tap
Start
Settings Æ Personal
Æ
Owner Information
Æ
and follow the
descriptions. On the identification tab, enter your personal information. Select “
information when device is turn on
ON.
” your information will be displayed at pow er
28
Show
Page 42

Password
Basic Operation
Tap
Start
Settings Æ Personal
Æ
Password
Æ
and follow the descriptions.
Sounds & Notifications
Tap
notifications.
Start
Settings Æ Personal
Æ
Sound & Notification
Æ
and set your favorite
Clock
Tap
Start
Settings Æ System Æ Clock
Æ
.
Memory
Tap
The main tab displays the amount of memory the system has allocated to file and data
storage versus the available memory.
The storage card tab displays how much memory is available on a storage card that is
Start
Settings Æ System Æ Memory
Æ
and follow the descriptions.
inserted in your device.
The running programs tab displays the list of the currently active programs. You can
stop a program by selecting it in the list and tapping stop.
29
Page 43

Power
Basic Operation
Tap
The Battery tab displays the amount of battery power remaining.
Start
Settings Æ System Æ Power
Æ
30
Page 44

SPECIFICATIONS
CPU
Intel XScale PXA255
CPU speed 400MHz
Memory
System RAM 128MB
System ROM 64MB
Display
Type: 4” Active TFT Transflective Color LCD
Specifications
Resolution: 480 x 640 pixels or 240 x 320
Mode: VGA or QVGA
Color: 256 for VGA or 64K for QVGA
Backlight: LED
Touch Screen
Type: Resistive
31
Page 45

Interface: Serial
Resolution: >480 x 640
I/O ports
USB port (USB 1.1 compatible)
USB client port
Serial port
Audio ports (Microphone/Earphone)
PCMCIA slot (type II x 1)
SD slot
Specifications
System Unit Dimensions and Weight
Width: 90mm (W 3.5”)
Depth: 150mm (H 5.9”)
Height: 33mm (D 1.3”)
Weight: 450g (15 oz.)
32
Page 46

Specifications
AC Adapter
Voltage: AC 90~240 V
Frequency: 50/60 Hz
Output Voltage: DC 10V 3.5A
Maximum Power: 35 Watts
Dimension: 108mm (4.2” W) x 56mm (2.2” D) x 34mm (1.3” H)
Weight: 270 g (9.5 oz.)
Battery
Type: Lithium Ion
Capacity: 7.4V 1800mAH
Dimension: 71mm (W 2.8”) x 64mm (D 2.5”) x 12.3mm (H 0.5”)
Weight: 108 g (3.8 oz.)
33
Page 47

Materials and Recycling
Materials of the computer are as follows:
Cabinet: Aluminum alloy ADC-12 or A380,
Magnesium alloy AZ91D,
UL grade PC+ABS GE C6200 or TN-3813BW
Bracket: Aluminum 5052
Steel with Nickel plating
Stainless Steel S304
Cushion pad: Nature rubber
PCB: FR-4, UL 94V0
Specifications
Battery: Rechargeable Lithium Ion
Packing: Carton: Unbleached paper
User's Guide: Recycled/Recyclable paper
Please recycle the parts according to local regulations.
34
Page 48

Specifications
Environmental Ratings
Temperature: DA04I:
0ºC ~ 45ºC (32ºF ~ 113ºF) operating
-20ºC ~ 60ºC (-4ºF ~ 140ºF) storage
DA04M:
-20ºC ~ 50ºC (-4ºF ~ 122ºF) operating
-40ºC ~ 70ºC (-40ºF ~ 158ºF) storage
Humidity: 5 ~ 95% Non-condensing operating
95% maximum storage
Altitude: 0 ~ 12,180 meters (0 ~ 40,000 feet) operating and storage
35
Page 49

Maintenance/Service
MAINTENANCE / SERVICE
Cleaning
Always turn OFF the power, unplug the power cord and remove the battery
before cleaning.
The exterior of the system and display may be wiped with a clean, soft, and lintfree cloth. If there is difficulty removing dirt, apply non-ammonia, non-alcohol
based glass cleaner to the cloth and wipe.
An air gun is recommended for cleaning water and dust. For salty water please
wipe with fresh water then blow-dry with an air gun. Close all caps tightly
before water cleaning.
Troubleshooting
Should the computer fail to function properly, you may try the following
troubleshooting steps: (Please backup your data before troubleshooting)
•
•
Check AC adapter, battery, and the power source.
Press hardware reset to re-boot the computer.
36
Page 50

Maintenance/Service
•
•
Turn OFF the master switch for a while then turn ON and re-boot.
Remove the software suspected.
RMA Service
If troubleshooting is unsuccessful, please consult your dealer for service
If it is necessary to send in the computer for repairs, please follow the dealer’s
instructions for RMA# procedure.
Shipping instructions:
1. Use the original shipping container and packing materials, if possible.
2. If the original packing materials are not available, wrap the equipment with
soft material (e.g., PU/ PE form) then put the wrapped equipment into a
hard cardboard shipping box.
3. Include a sheet with the follo wing information: (Note: please keep a copy
for your record)
Name
•
Address
•
37
Page 51

Maintenance/Service
Unit serial number
•
Place and date of purchase or the original invoice number
•
Date of failure
•
A DETAILED description of the problems you have encountered
•
A list of the hardware/software configuration, if applicable.
•
4. Clearly mark the outside of the shipping box with the RMA number. This
will facilitate faster processing and avoid faulty return.
5.
Unless prior arrangements have been made, the customer is responsible for
all shipping costs. Unauthorized use of the company’s shipping accounts is
not permitted.
38
Page 52

Recycled / Recycleable
Printed in Taiwan
 Loading...