

Page 1
R11e-LR8
R11e-LR8
R11e-LR8 - LR mPCIe Gateway module. It can be integrated into a RouterBOARD product with mPCIe slot. Requires LR package installation to configure
in RouterOS.
Specifications
Low power-consuming with mini PCIe interface, for long-distance data, transmit:
Interface – Mini-PCIe;
Temperature Operating -40 / +70;
Supports Class A and C;
Frequency - 863-870MHz (EU);
RF Output power - 862-870MHz (EU) @ 14dBm;
Receive max sensitivity - 137 dB @ SF12, Depends on the antenna used;
Maximum power consumption 2 W.
Installing the module in your device
R11e-LR8 for professional use. Each of the cards comes in ESD protective packaging. When handling electrical equipment please observe the following
safety precautions:
Use a wrist grounding strap when unpacking and working with electrical components to avoid electrical discharge (ESD) damage;
After unpacking please place the card on the anti-static mat;
When installing make sure there are no objects that can damage or touch the PCB plate;
The card can be installed in your desired device using the factory provided screw holes in a PCB plate;
Pictures added for illustration purposes, the device configuration, and the placement of the miniPCIe card may vary.
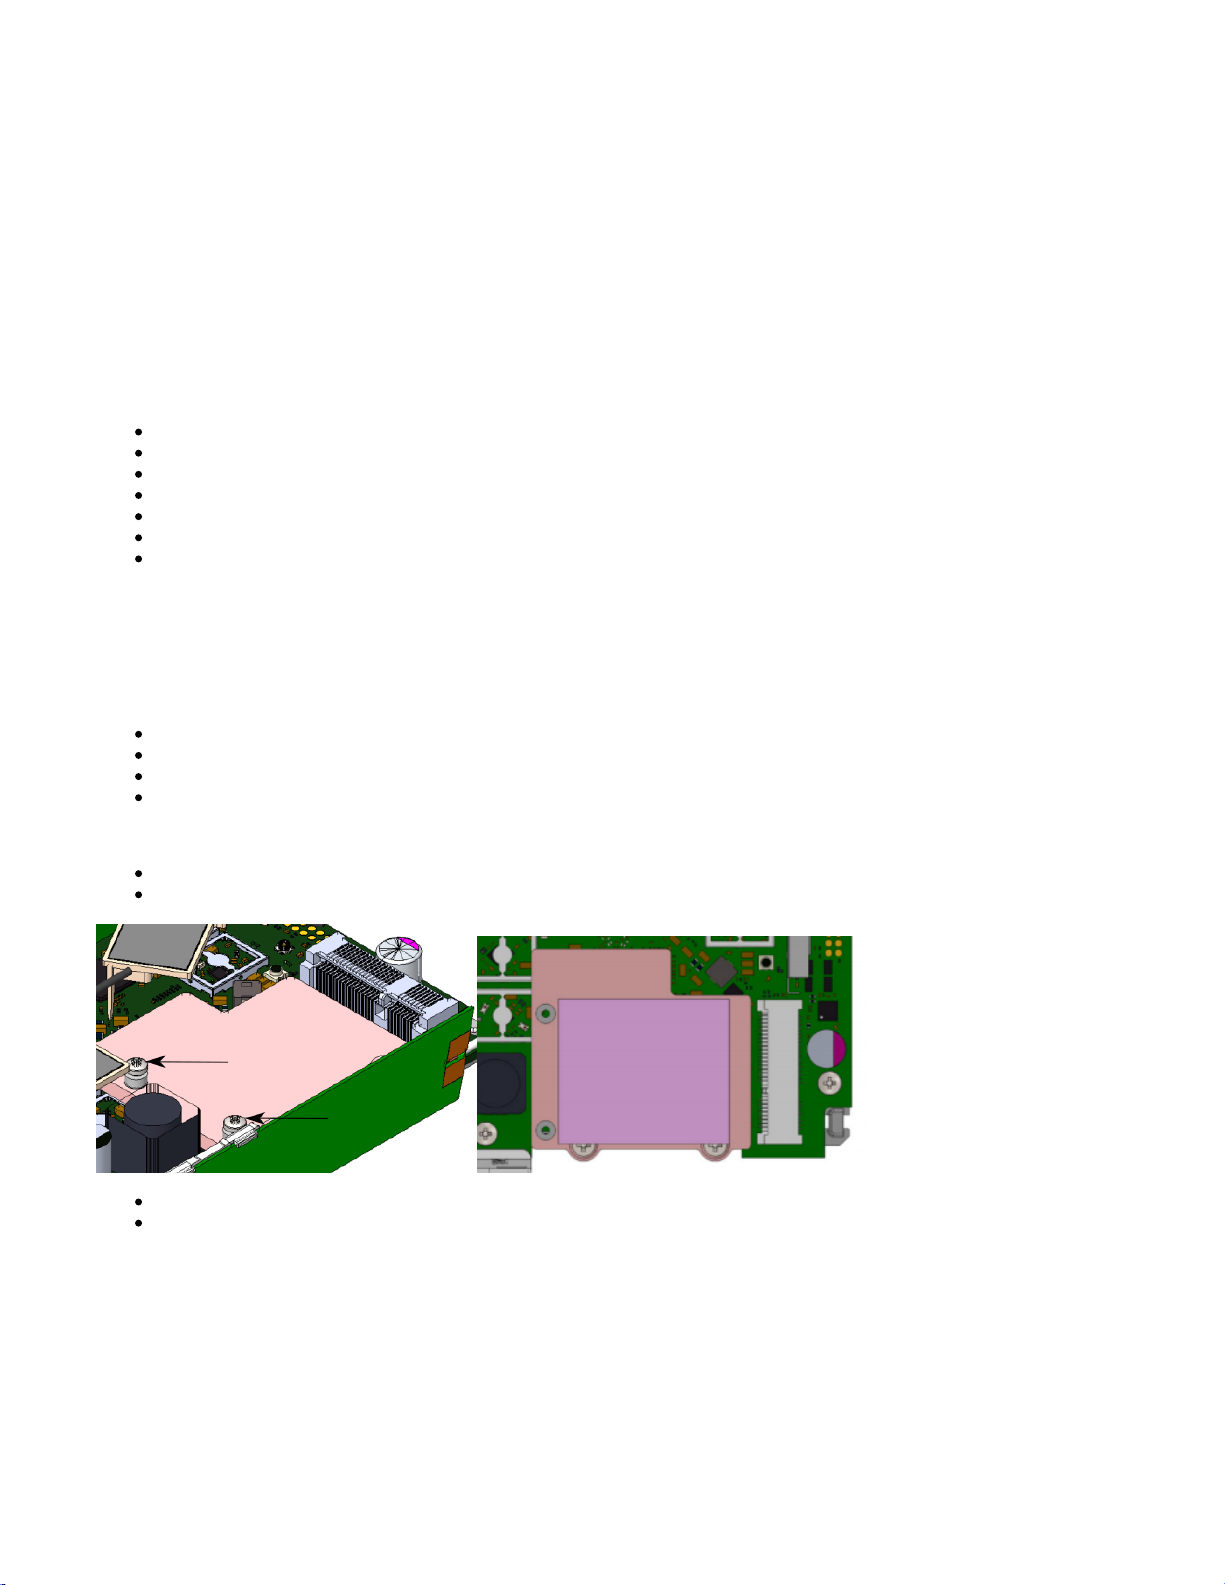
Locate miniPCIe slot on your device;
Unscrew two factory attached screws;
Optionally you can use the thermal pad by placing it under the card, the thermal pad is not included in the package;
Install the module to the miniPCIe slot and secure it with previously removed screws. Tightening torque 0,3 Nm.
Page 2
1.
2.
3.
4.
5.
1.
1.
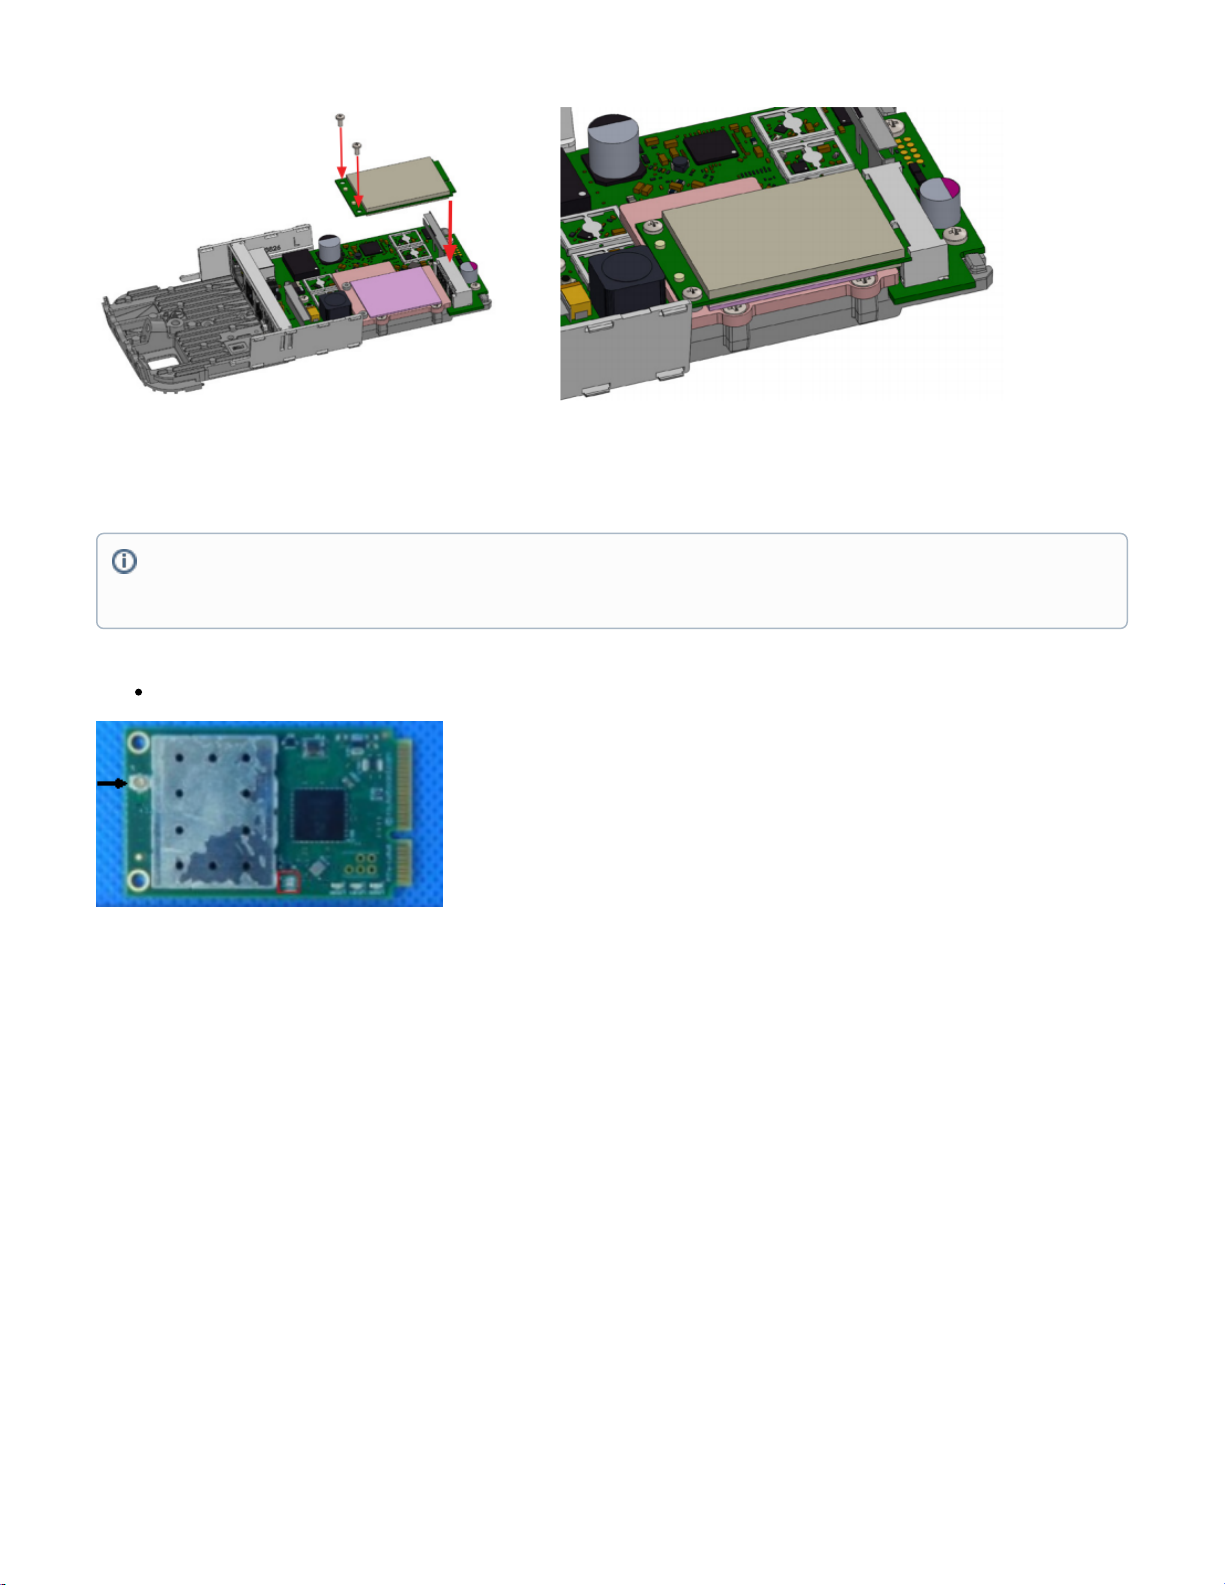
Connecting to the antenna
Attach antenna cable to the connector on the module:
When installing outdoors please ensure that the device case is waterproof and is designed for outdoor use. The IP rating scale for this device is IP0.
Mounting and configuration of this device should be done by a qualified person.
Configuration for RouterOS
To set the configuration for LR please connect to the device and log in with your web browser, Winbox, or mobile application. Two easy steps to follow:
First step:
Once logged in, Quick Set will be selected, please switch to WebFig on the right side of the screen. If the configuration is done through mobile
application then click on the gear symbol on the right side of the screen to open up an advanced menu.
On the left side menu please find and select the section "Lora".
On the newly opened window select the Servers tab.
Click + to add a new server configuration.
A new window will appear and you will have to enter:
Name: (Server name)
Address: (Server address)
Up port: (Usually it's 1700)
Down port: (Usually it's 1700)
Click OK to save.
Second step:
Select the Device tab on the previous window.
If your device does not have internal antennas, it is possible to connect to the external antennas by adding cable connectors, product code –
ACSMAUFL. https://mikrotik.com/product/acsmaufl
Please connect and disconnect the antenna, when the device is turned off!
Page 3

2.
3.
4.
5.
6.
Double-click or tap on the line to configure.
Choose the previously entered network on the drop-down menu.
Click on the button Enable to enable the gateway.
Click OK to save.
The configuration is done.
Specifications
The module can be installed on the miniPCIe to USB adapter and used in any of our devices with a USB slot and installed Lora package.
To use the module in other devices packet forwarder from Semtech is required. https://github.com/Lora-net/packet_forwarder
Operating system support
The module supports RouterOS software version v6. Other operating systems have not been tested.
CE Declaration of Conformity
Manufacturer: Mikrotikls SIA, Brivibas gatve 214i Riga, Latvia, LV1039.
BG
С настоящото Mikrotīkls SIA декларира, че този тип радиосъоръжение RouterBOARD е в съответствие с Директива 2014/53/ЕС. Цялостният
текст на ЕС декларацията за съответствие може да се намери на следния интернет адрес:
https://mikrotik.com/products
CS Tímto Mikrotīkls SIA prohlašuje, že typ rádiového zařízení RouterBOARD je v souladu se směrnicí 2014/53/EU. Úplné znění EU prohlášení o shodě
je k dispozici na této internetové adrese:
https://mikrotik.com/products
DA Hermed erklærer Mikrotīkls SIA , at radioudstyrstypen RouterBOARD er i overensstemmelse med direktiv 2014/53/EU. EU-
overensstemmelseserklæringens fulde tekst kan findes på følgende internetadresse:
https://mikrotik.com/products
DE Hiermit erklärt Mikrotīkls SIA , dass der Funkanlagentyp RouterBOARD der Richtlinie 2014/53/EU entspricht. Der vollständige Text der EU-
Konformitätserklärung ist unter der folgenden Internetadresse verfügbar:
https://mikrotik.com/products
EL Με την παρούσα ο/η Mikrotīkls SIA , δηλώνει ότι ο ραδιοεξοπλισμός RouterBOARD πληροί την οδηγία 2014/53/ΕΕ. Το πλήρες κείμενο της δήλωσης
συμμόρφωσης ΕΕ διατίθεται στην ακόλουθη ιστοσελίδα στο διαδίκτυο:
https://mikrotik.com/products
EN Hereby, Mikrotīkls SIA declares that the radio equipment type RouterBOARD is in compliance with Directive 2014/53/EU. The full text of the EU
declaration of conformity is available at the following internet address:
https://mikrotik.com/products
ES Por la presente, Mikrotīkls SIA declara que el tipo de equipo radioeléctrico RouterBOARD es conforme con la Directiva 2014/53/UE. El texto
completo de la declaración UE de conformidad está disponible en la dirección Internet siguiente:
https://mikrotik.com/products
ET Käesolevaga deklareerib Mikrotīkls SIA , et käesolev raadioseadme tüüp RouterBOARD vastab direktiivi 2014/53/EL nõuetele. ELi
vastavusdeklaratsiooni täielik tekst on kättesaadav järgmisel internetiaadressil:
https://mikrotik.com/products
Page 4

FI Mikrotīkls SIA vakuuttaa, että radiolaitetyyppi RouterBOARD on direktiivin 2014/53/EU mukainen. EU-vaatimustenmukaisuusvakuutuksen
täysimittainen teksti on saatavilla seuraavassa internetosoitteessa:
https://mikrotik.com/products
FR Le soussigné, Mikrotīkls SIA , déclare que l'équipement radioélectrique du type RouterBOARD est conforme à la directive 2014/53/UE. Le texte
complet de la déclaration UE de conformité est disponible à l'adresse internet suivante:
https://mikrotik.com/products
HR Mikrotīkls SIA ovime izjavljuje da je radijska oprema tipa RouterBOARD u skladu s Direktivom 2014/53/EU. Cjeloviti tekst EU izjave o sukladnosti
dostupan je na sljedećoj internetskoj adresi:
https://mikrotik.com/products
HU Mikrotīkls SIA igazolja, hogy a RouterBOARD típusú rádióberendezés megfelel a 2014/53/EU irányelvnek. Az EU-megfelelőségi nyilatkozat teljes
szövege elérhető a következő internetes címen:
https://mikrotik.com/products
IT Il fabbricante, Mikrotīkls SIA , dichiara che il tipo di apparecchiatura radio RouterBOARD è conforme alla direttiva 2014/53/UE. Il testo completo
della dichiarazione di conformità UE è disponibile al seguente indirizzo Internet:
https://mikrotik.com/products
IS Hér með lýsir Mikrotīkls SIA því yfir að RouterBOARD er í samræmi við grunnkröfur og aðrar kröfur, sem gerðar eru í tilskipun 2014/53/EU.
Fullur texti ESB samræmisyfirlýsingar er að finna á eftirfarandi veffangi:
https://mikrotik.com/products
LT Aš, Mikrotīkls SIA , patvirtinu, kad radijo įrenginių tipas RouterBOARD atitinka Direktyvą 2014/53/ES. Visas ES atitikties deklaracijos tekstas
prieinamas šiuo interneto adresu:
https://mikrotik.com/products
LV Ar šo Mikrotīkls SIA deklarē, ka radioiekārta RouterBOARD atbilst Direktīvai 2014/53/ES. Pilns ES atbilstības deklarācijas teksts ir pieejams šādā
interneta vietnē:
https://mikrotik.com/products
MT B'dan, Mikrotīkls SIA , niddikjara li dan it-tip ta' tagħmir tar-radju RouterBOARD huwa konformi mad-Direttiva 2014/53/UE. It-test kollu tad-
dikjarazzjoni ta' konformità tal-UE huwa disponibbli f'dan l-indirizz tal-Internet li ġej:
https://mikrotik.com/products
NL Hierbij verklaar ik, Mikrotīkls SIA , dat het type radioapparatuur RouterBOARD conform is met Richtlijn 2014/53/EU. De volledige tekst van de EU-
conformiteitsverklaring kan worden geraadpleegd op het volgende internetadres:
https://mikrotik.com/products
NO Mikrotīkls SIA erklærer herved at utstyret RouterBOARD er i samsvar med de grunnleggende krav og øvrige relevante krav i direktiv 2014/53/EU.
Den fulle teksten til EU-samsvarserklæringen er tilgjengelig på følgende internettadresse:
https://mikrotik.com/products
PL Mikrotīkls SIA niniejszym oświadcza, że typ urządzenia radiowego RouterBOARD jest zgodny z dyrektywą 2014/53/UE. Pełny tekst deklaracji
zgodności UE jest dostępny pod następującym adresem internetowym:
https://mikrotik.com/products
PT O(a) abaixo assinado(a) Mikrotīkls SIA declara que o presente tipo de equipamento de rádio RouterBOARD está em conformidade com a Diretiva
2014/53/UE. O texto integral da declaração de conformidade está disponível no seguinte endereço de Internet:
https://mikrotik.com/products
RO Prin prezenta, Mikrotīkls SIA declară că tipul de echipamente radio RouterBOARD este în conformitate cu Directiva 2014/53/UE. Textul integral al
declaraiei UE de conformitate este disponibil la următoarea adresă internet:
https://mikrotik.com/products
Page 5

SK Mikrotīkls SIA týmto vyhlasuje, že rádiové zariadenie typu RouterBOARD je v súlade so smernicou 2014/53/EÚ. Úplné EÚ vyhlásenie o zhode je k
dispozícii na tejto internetovej adrese:
https://mikrotik.com/products
SL Mikrotīkls SIA potrjuje, da je tip radijske opreme RouterBOARD skladen z Direktivo 2014/53/EU. Celotno besedilo izjave EU o skladnosti je na voljo
na naslednjem spletnem naslovu:
https://mikrotik.com/products
SV Härmed försäkrar Mikrotīkls SIA att denna typ av radioutrustning RouterBOARD överensstämmer med direktiv 2014/53/EU. Den fullständiga texten
till EU-försäkran om överensstämmelse finns på följande webbadress:
https://mikrotik.com/products
 Loading...