

Mighty Mac 824 RT Owner's Manual
MIGHTY MAC
·z
MODEL 824RT RE'AR-TINE TILLER
OWNERS
MANUAL
Phone: 215-495-7181
AMERIND-MacKISSIC
P,O, Box 111
Parkerford, Penna,
19457
Form 824-77
ASSEMBLY INSTRUCTIONS
Your MIGHTY MAC tiller has been shipped to you almost completely assembled, leaving only
the handles and control rods to install. Before beginning assembly, make sure all parts have been
received and are in good condition. If there are shortages or damage, notify the company from whom
you bought the machine, and the delivery agent at once.
(Note: In the following instructions, the "item" number refers to the number encircled for that part
in the illustrations).
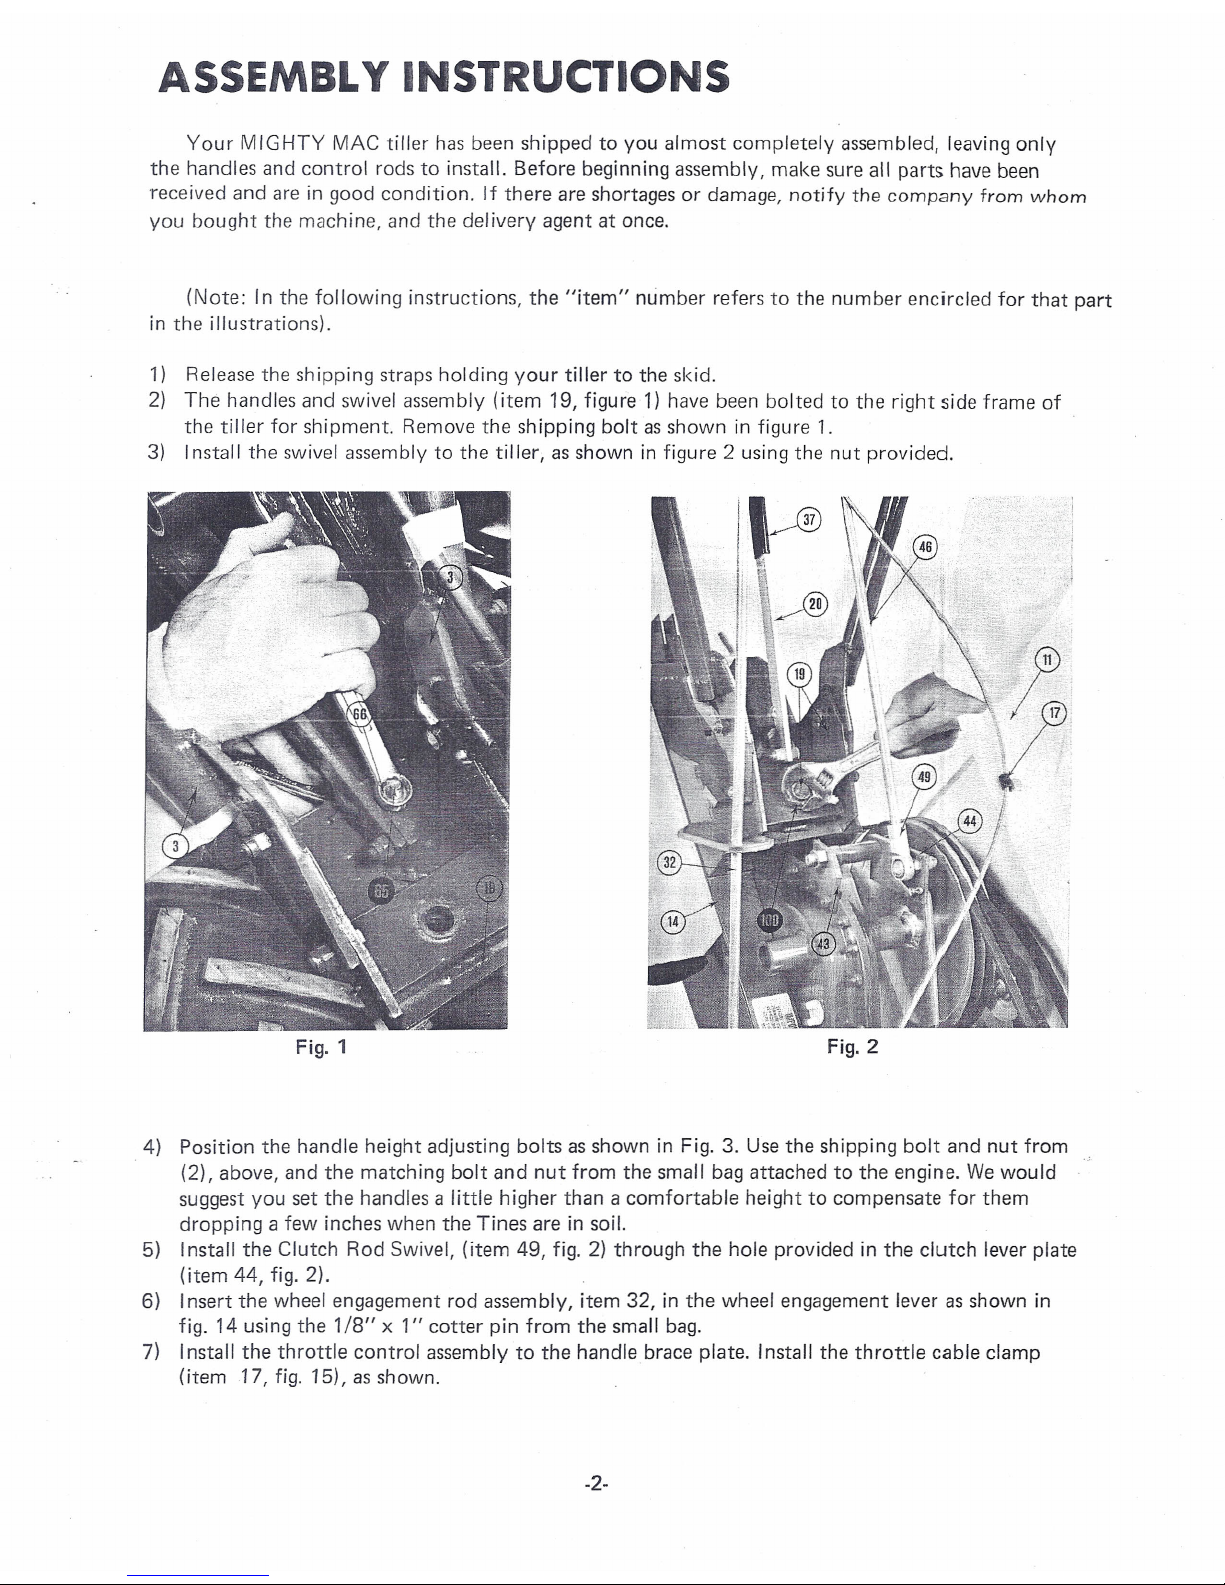
1) Release the shipping straps holding your tiller to the skid.
2) The handles and swivel assembly (item
19,
figure1)have been bolted to the right side frame of
the tiller for shipment. Remove the shipping bolt asshown in figure 1.
3) Install the swivel assembly to the tiller, asshown in figure 2 using the nut provided.
Fig. 1
Fig. 2
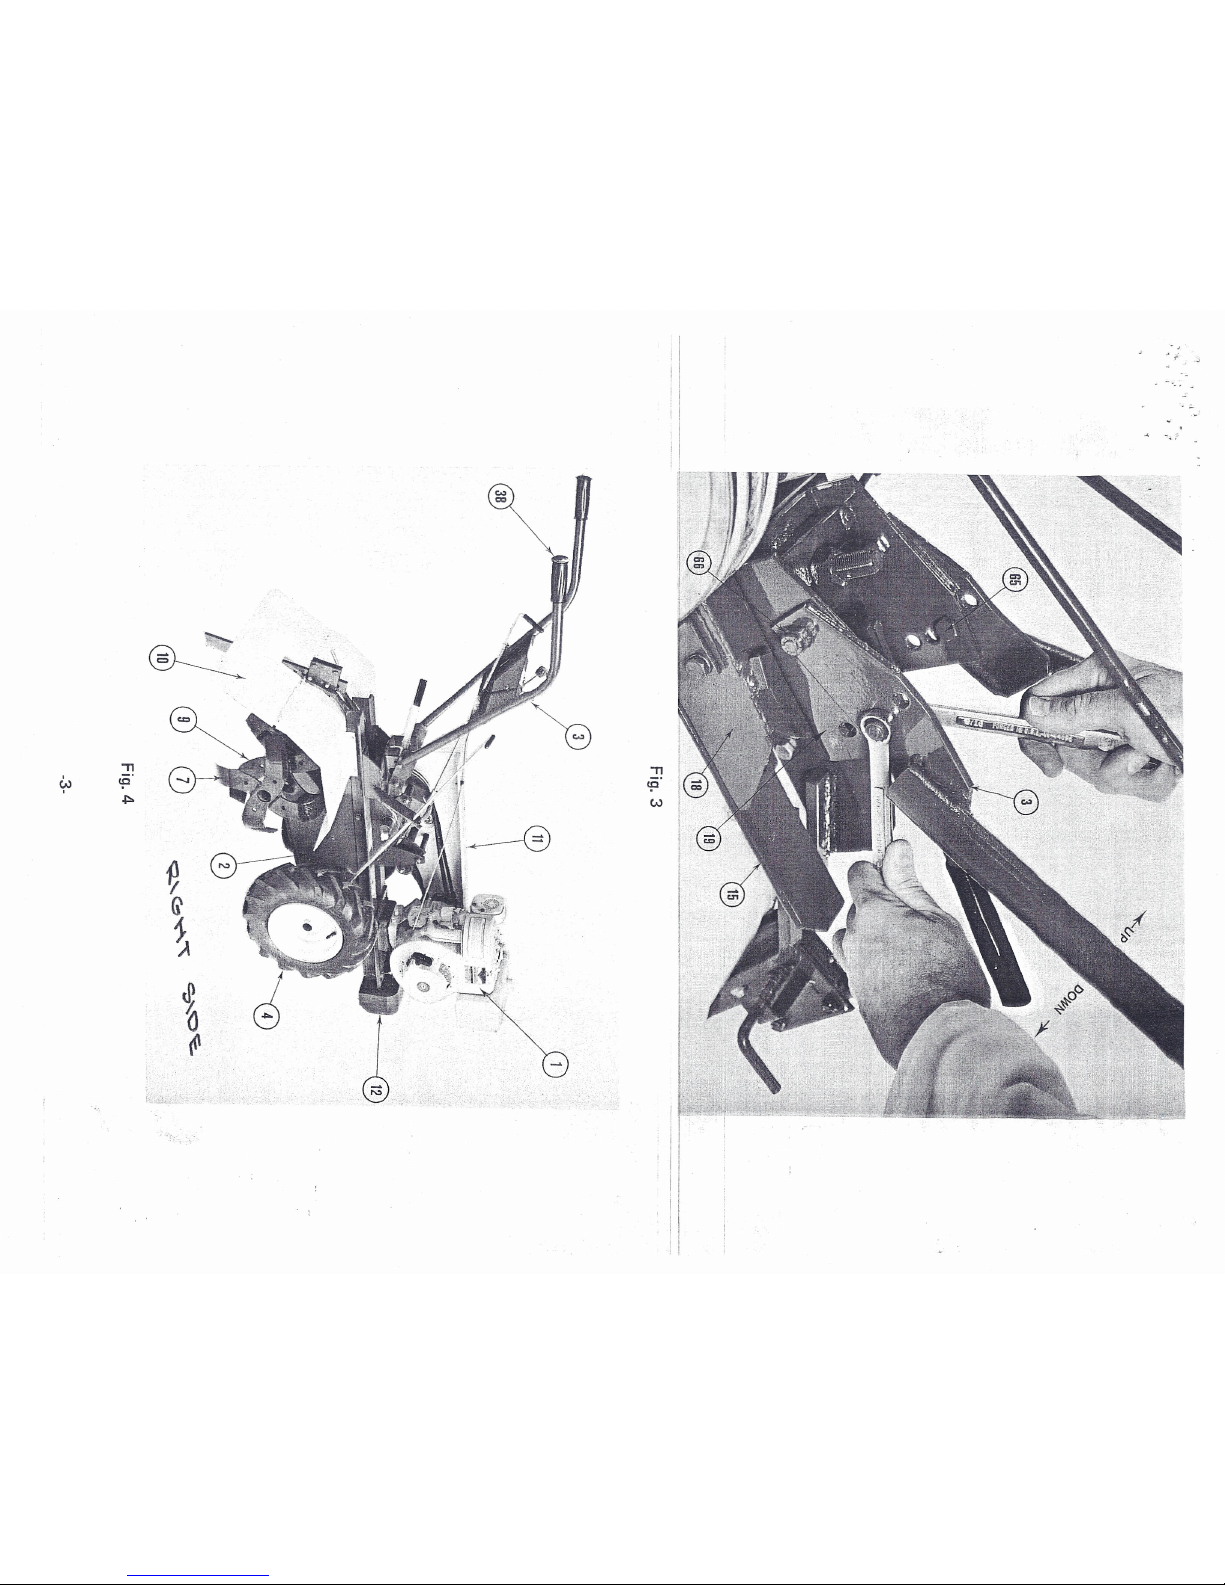
4) Position the handle height adjusting bolts asshown in Fig. 3. Use the shipping bolt and nut from
(2), above, and the matching bolt and nut from the small bag attached to the engine. We would
suggest you set the handles a little higher than a comfortable height to compensate for them
dropping a few inches when the Tines are in soil.
5) Install the Clutch Rod Swivel, (item 49, fig. 2) through the hole provided in the clutch lever plate
(item 44, fig. 2).
6) Insert the wheel engagement rod assembly, item 32, in the wheel engagement lever as shown in
fig. 14 using the
1/8/1x1/1
cotter pin from the small bag.
7) Install the throttle control assembly to the handle brace plate. Install the throttle cable clamp
(item 17, fig. 15), as shown.
-2-
-n
cpO
~
w
!
G'
~
I
I
~
f
()
I
t1'
f -
8) Remove the drag
bar
(item 13, fig. 6),
lift the hinged foot guard from it's
shipping position and re-install the foot
guard asshown in fig. 4.
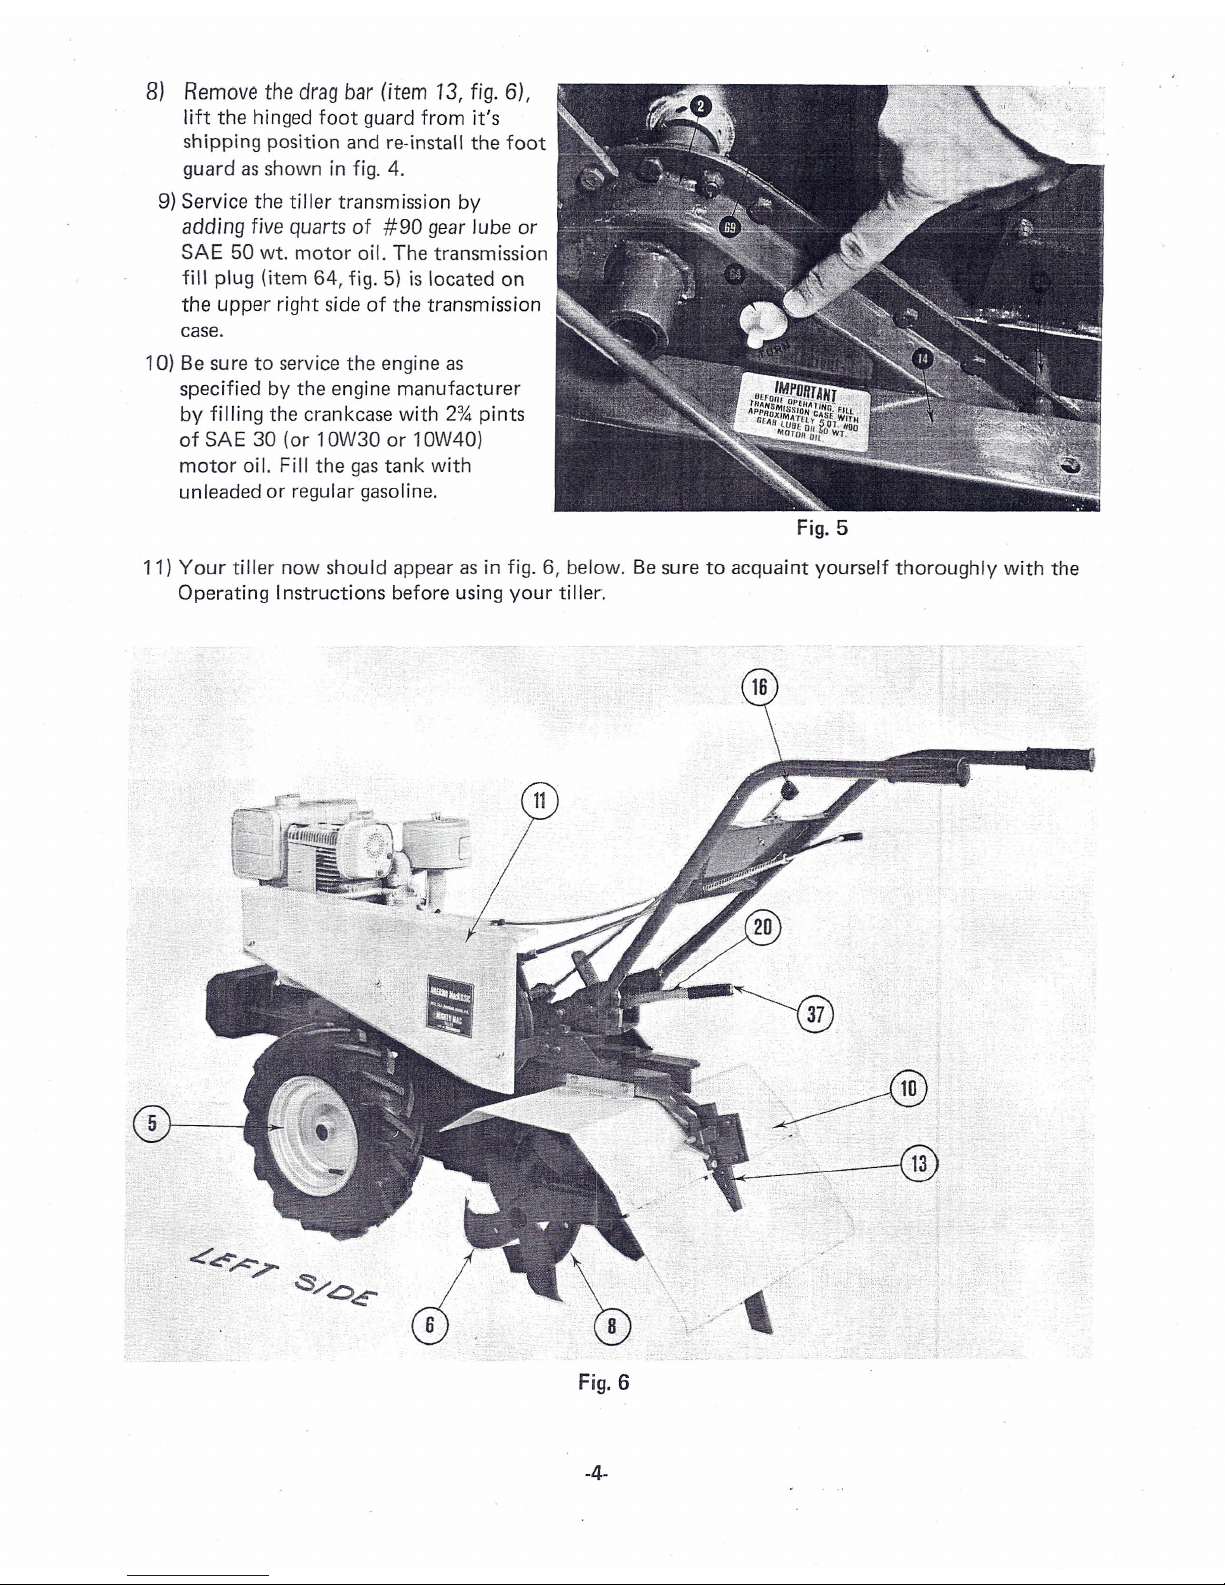
9) Service the tiller transmission by
adding five
quarts of #90 gear lube or
SAE 50 wt. motor oil. The transmission
fill plug (item 64, fig. 5) is located on
the upper right side of the transmission
case.
10) Be sure to service the engine as
specified by the engine manufacturer
by filling the crankcase with 2% pints
of SAE 30 (or 10W30 or 10W40)
motor oil. Fill the gastank with
unleaded or regular gasoline.
Fig. 5
11) Your tiller now should appear as in fig. 6, below. Be sure to acquaint yourself thoroughly with the
Operating Instructions before using your tiller.
'~-""'l'O
":-..'..'•..., . .' ':.:_.'.'.',,'; : >-
"""<' •.-"
,.",-
,',
-'
,
6
Fig. 6
-4-
'.
('"
,i' ,
.
,-
OPERATING INSTRUCTIONS
Your Mighty Mac 824 RT tiller has been designed to be the smoothest operating tiller possible. It is
very easily controlled but, as with any machine, requires that you
familiarize
yourself with its features
-and
follow a few important rules to get the most from it.
To operate your tiller SAFELY, there are several cardinal rules you must follow:
1) NEVER ATTEMPT
TO TILL WITH THE WHEELS DISENGAGED.
2) NEVER START
THE ENGINE WITH THE CLUTCH ROD (item
46, fig. 12)
ENGAGED IN
FORWARD OR REVERSE DRIVE.
3)
NEVER PUSH DOWN ON THE HANDLES HARD ENOUGH TO RAISE THE WHEELS
OFF THE GROUND.
To understand the importance of these rules, you should understand that the wheels are not intended
to pull the machine along; rather, they are there to hold back
against
the tines pushing the tiller forward.
For this reason, the wheels must be engaged and on the ground at all times; otherwise, the tines will
push it along too fast and the
tiller
will be out of control. Obviously, this creates a potentially
dangerous situation.
We have madeitpossible to
disengage
the wheels to make it easier to move the
tiller
about
with
the
engine "off". This is particularly useful in maneuvering the tiller in confined areas such as your garage
or tool shed or in moving it to and from your garden.
You may feel that the
tires
are installed backwards from the conventional way
tires
of this type
-are used. They are, however, correct as shown, because
oftheir function
of holdlngthe machTne -back:-
To start your
tiller
and get under way, first make sure the engine crankcase and tiller transmission
::=--=-_---==--=:case are:properl
v
f
lied with lubricant.Then:---- -----:------.--------- ------------------: _
1) Make sure the clutch rod is in neutral.
2) Make sure the sheels are engaged by pushing "in" on the wheel engagement rod assembly, item
32
(fig.8)and rolling the tiller ahead slightly until the wheels "lock". Ifitwill roll2inches, the
wheels are not yet engaged. Continue to pushinon the wheel engagement rod and roll the machine
forward until the wheels engage.
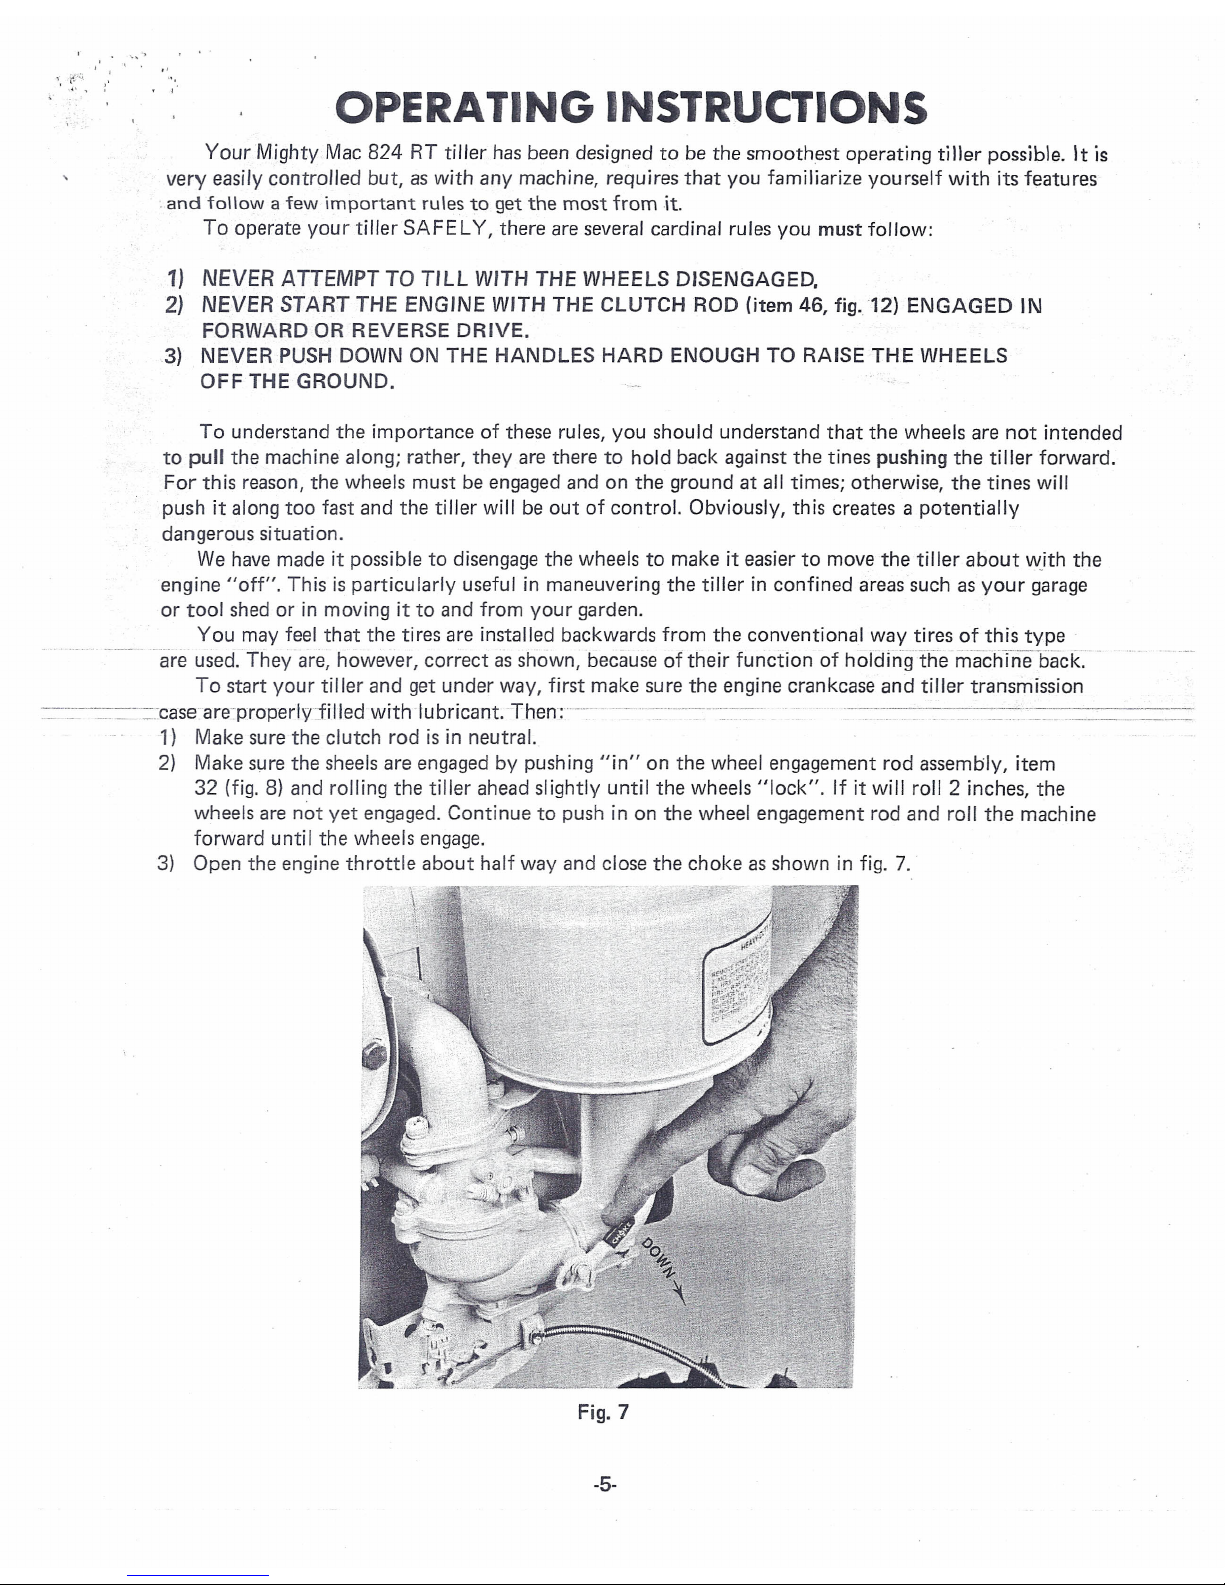
3)
Open the engine throttle about half way and close the choke as shown in fig.
7.
Fig. 7
-5-
 Loading...