

Page 1
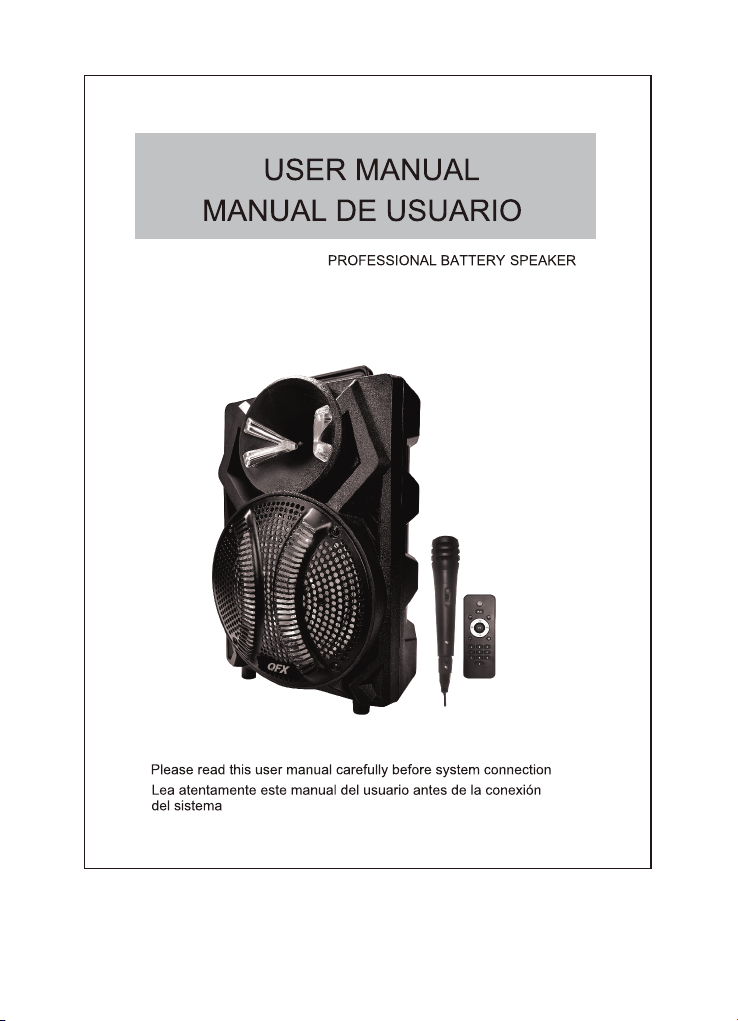
ALTAVOZ DE BATERÍA PROF ESIONAL
SIZE:100*140mm
材质:105g铜版纸黑白印刷
Page 2

THANK YOU F OR PURC HASING OU R SPEAK ER. PLEAS E
READ THE MA NUAL CA REFULLY BEF ORE OPERATING.
IM PO RTA NT S AF ETY MEASURE S
Before using this machine, please read all the safety and operating instructions. Please adhere to all the instructions herein,
and save this information in a safe place for future use.
1. Please ensure the power cord for this unit is out of the path
of foot t raffic. Do not place heavy objects on the power cord
as it wil l cause damage to the cord. Always firmly grasp the
plug an d pull the plug from the power supply, never yan k the
cable i n order to pull out the plug. Avoid the use of an exte n sion ca ble.
2. Ventilation: This unit shoul d be placed in a well ve ntilated sp ace whe re it has no less than 10cm ventilation space on eith er side o f it. Do not cover the u nit with a cloth or blanket. Do
not put i t on a bed, sofa, or car pet as this will sti fle the ventil ation o f the unit.
3. Casing Dismantling: DO NOT di smantle the casi ng . There
are no us able parts inside the unit. Make use of a service
cente r in order to have your unit repaired.
4. Should the unit emit any smell or smoke, immediately turn
off the power supply. Take the unit to the service center from
which y ou bought it for repairs.
厂
厂
Ι
Ι
1
1
Page 3

FE ATU RE S
●Bluetooth Function
Plays Mp3 files st ored in SD card USB drive external audio device
● / / .
●FM radio
●Microphone input
●
Aux input
●Remote control
●Built-in rechargeable battery
CO NNECTIN G
1. This set applies to AC 110V-240V , 50/60Hz
2. AC power: battery can be charged when connected to AC power.
Red light on battery is charging, it will change to green once bat tery co mplete charge.
3. Inte rnal battery will be charged even device switch off when plu-
gged in to AC power
. Adjust function keys to your personal audio preference.
4
BL UETO OTH INS TR UC TION
Change the mode into"BLUE", the bluetooth sign light twinkles,
and speaker will give an alarm. Ensure you enable the Bluetooth
function on your Bluetooth device. Search for Bluetooth connection
until you find device model and pair.
22
Page 4

BATTE RY & C HA RG ING
1. The units takes approximately 8 hours to fully charge. It will
automatically begin charging once the power cord is connected.
2. If the b attery power is low may caused sound distortion or stop
play, pls charging the battery ontime.
3. To maximize the battery's lifespan, please charging the battery
immediately. When the unit is not used for prolonged periods of
time,the battery will gradually lose its power. It is recommended
to full y charge the battery at least every 30days.
4. To saving battery, please power off once stop using .
RE MOTE CONT RO L
Sta ndby
USB /SD/L INE/B LUETO OTH (Audi o input )
Pre v/FM CH -
Pla y/pau se/FM t uner
Nex t/FM CH +
RPT
RPT
EQ
Rep eat
Sto p
Volu me up
Volu me down
Mut e
EQ
Equ alize r
Num ber
3
3
Page 5

11
PREV
⑨
⑩
⑧
⑦
⑥
⑤
④
①
②
③
PAN EL FU NC TI ON
① PO WER : POWER ON/O FF
② LE D LIG HT : LED LIGH T ON/OF F
③ MI C IN: WIRED MICRO PHONE I NPUT
④ DC 9V IN : DC 9V CHARGING INPU T
⑤ MI C VOL : MICROPHO NE VOLU ME ADJUST
⑥ TR EBL E: ECHO ADJUST
⑦ BA SS: MASTER VOLU ME ADJUS T
⑧ VO LUM E: MASTER VO LUME CO NTROL
⑨ AU X INPUT
⑩ US B/S D CARD INPUT
11 DIS PL AY PANE L FUNCTION:
REC : RECOR DING; I NSERT USB/S D CARD PR ESS THI S
BUT TON FOR R ECORDIN G, PRES S AGA IN TO STOP AN D
PLAY RECOR DING SO UND.
:PL AY/ PAUSE ; FM STATION AUTO SE ARCHING
:PR EVIOU S
:NE XT
MOD E: MODE S ELECT
4
Page 6

GRACIAS POR COMPRAR NUESTRO ALTAVOZ. POR FAVOR LEA
CUIDADOSAMENTE EL MANUAL ANTES DE OPERAR.MEDIDAS DE
SEGUR IDAD IMPORTANTES
Antes de usar esta máquina , por favor lea todas las inst rucciones de
funcionamiento y segur idad. Por favor, siga las ins trucciones en este
documento y guardar esta i nformación en un lugar seg uro par a uso futuro.
Asegúrese de que el cable de a limentación para esta un idad es tá fuera
de la ruta de tráfico de pie. No c oloque objetos pesados s obre el cable
de alimentación ya que est o haría daño a la médula. Suje te siem pre
firmemente el enchufe y la c lavija de la alimentació n, Nunc a tire del
cable para sacar el enchuf e. Evitar el uso de un cable de ex tensión.
Ventilación: Este apara to debe colocarse en un luga r bien ve ntilado
donde tiene no menos de espa cio de ventilación de 10cm a c ada lad o
de él. No cubra la unidad con un p año o manta. No lo ponga en una ca ma,
sofá o alfombra como esta se rá sofocar la ventilació n de la unidad.
Desmontaje de la cubiert a: Desmontar la carcasa. H ay no hay partes
utilizables dentro de la u nidad. Asegúrese de que un ce ntro de s ervicio
para tener su unidad repar ada.
Si la unidad emite cualqui er olor o humo, apague inmed iatam ente la
fuente de alimentación . Lleve la unidad al centro de s ervic io de que
rama usted para reparaci ones.
5
Page 7

CARACTERÍ STICAS
* Bluetooth
* Reproduce archivos MP3 a lmacenados en la unidad de S D card/ USB /
externo dispositivo de a udio.
* Radio del FM
* Entrada de micrófono
* Batería de litio 7V/1800 mAh incorporada
* Prioridad micrófono en cendido/apagado
CONEXIÓ N
1. Este sistema se ap lica a CA 110V-24 0V, 50 / 60Hz
2. Alimentación: baterí a se puede cargar cuando est á conectado a la
corriente alterna. Luz r oja de batería se está carga ndo, cambiará a
verde una vez la carga compl eta de batería.
3. Batería interna se carg ará incluso dispositiv o interruptor cuando est á
enchufado a la corriente a lterna.
4. Ajustar las teclas de func ión a sus preferencias per sonales de audio.
BLUETOOTH INSTRU CCIONES
Cambiar el modo de "Azul", e l signo de bluetooth luz twi nkles y altavoz
dará una alarma. Asegúres e de que activar la función Bl uetoo th en su
dispositivo Bluetoot h. Buscar conexión Bluet ooth hasta encontrar
pareja y modelo del dispos itivo.
6
Page 8

BATE RÍA Y CA RGA
1. Las unidades de toma apro ximadamente 8 horas en car garse
completamente. Se inic iará automáticamente u na vez conectado el
cable de alimentación de c arga.
2. Nivel de batería baja pue de resultar en sonido dist orsio nado, para
mejor rendimiento acús tico por favor vigile el niv el de carga de batería.
3. Para maximizar la vida út il de la batería, por favor, ca rgar la batería
inmediatamente. Cuan do la unidad no se utiliza por p eríod os
prolongados de tiempo, l a batería perderá gradua lmente su poder.
Se recomienda para carga r completamente la bater ía al menos cada
30 días.
4. Apagado de la unidad cuand o no esté en uso para ahorrar ba tería .
RE MOT E CO NT ROL
Sta ndby
USB /SD/L INE/B LUETO OTH (Audi o input )
Pre v/FM CH -
Pla y/pau se/FM t uner
Nex t/FM CH +
RPT
RPT
EQ
Rep eat
Sto p
Volu me up
Volu me down
Mut e
EQ
Equ alize r
Num ber
7
Page 9

PANE L DE CO NTR OL
11
⑩
PREV
⑨
⑧
⑦
⑥
⑤
④
①
PANE L DE FUNCIÓN
① POT ENC IA DE E NCE NDIDO/APAG ADO
② LUZ: LED LUZ DE ENCENDIDO/APAG ADO
③ MIC RÓF ONO : ENT RAD A DE MIC RÓF ONO C ON CA BLE
④ DC 9V EN: ENTRADA DE CARGA DE DC 9V
⑤ AJU STAR E L VOLU MEN D EL VOL:MICROPHONE MIC
⑥ AJU STE D E AGUD OS: E CHO
⑦
VOL UTA: V OLU MEN B AJO AJ UST E
⑧
VOL UME N DE LA VOLUTA: CON TRO L DE VOL UME N MAE STR O
⑨ ENTRADA DE AUX DE
FUNCIÓN DE PANEL DE PANTALLA 11:
REC: REG IST RO: I NTR ODU ZCA LA ME NOR Y DE USB/SD Y PRES ION E EST E
BOT ÓN PAR A INIC IAR L A GRAB ACI ÓN. P RES ION E EL BOT ÓN OT RA VEZ PA RA
DETENER GRA BAC IÓN
:
REPRODUCIR/PAUSA ; FM ES TACIÓN AUTO B ÚSQ UED A
:
ANTERIOR
:
SIG UIE NTE
MODO DE: SELECCIÓ N DEL MODO
.
②
③
8
Page 10

FCC Notice
This device complies with Part 15 of the FCC Rules. Operation is
subject to the following two conditions:
(1) This device may not cause harmful interference, and (2) this device must accept any
interference received, including interference that may cause undesired operation.
NOTE 1: This equipment has been tested and found to comply with the limits for a Class B digital
device, pursuant to part 15 of the FCC Rules. These limits are designed to provide reasonable
protection against harmful interference in a residential installation. This equipment generates, uses
and can radiate radio frequency energy and, if not installed and used in accordance with the
instructions, may cause harmful interference to radio communications. However, there is no
guarantee that interference will not occur in a particular installation. If this equipment does cause
harmful interference to radio or television reception, which can be determined by turning the
equipment off and on, the user is encouraged to try to correct the interference by one or more of
the following measures:
- Reorient or relocate the receiving antenna.
- Increase the separation between the equipment and receive r .
-Connect the equipment into an outlet on a circuit different from that to which the receiver is
connected.
-Consult the dealer or an experienced radio/TV technician for help.
NOTE 2: Any changes or modifications to this unit not expressly approved by the party
responsible for compliance could void the user's authority to operate the equipment.
 Loading...