

Miele 10114B70 User Manual
Operating and installation instructions
Oven
To avoid the risk of accidents or damage to the appliance it is essential
to read these instructions before it is installed and used for the first time.
M.-Nr. 10 114 870en-GB

Contents
Warning and Safety instructions .....................................7
Caring for the environment.........................................19
Oven overview ...................................................20
Oven controls....................................................21
On/Off sensor K ..................................................22
Sensor controls ...................................................22
Display ..........................................................23
Main menu ....................................................24
Symbols ......................................................24
Operating principles ...............................................26
Features ........................................................27
Model numbers ...................................................27
Data plate .......................................................27
Items supplied ....................................................27
Accessories supplied and available to order ............................27
Side runners ...................................................28
Baking tray, universal tray and rack with non-tip notches ................28
FlexiClip telescopic runners HFC72 .................................29
Fitting and removing FlexiClip telescopic runners .....................29
Oven controls.....................................................34
Safety features ....................................................34
System lock 0 for the oven........................................34
Safety switch-off ................................................34
Cooling fan ....................................................34
Vented oven door ...............................................34
Door lock - Pyrolytic cleaning ......................................34
PerfectClean treated surfaces ........................................35
Pyrolytic accessories ...............................................35
Before using for the first time.......................................36
Basic settings ....................................................36
Heating up the oven for the first time and rinsing the steam injection system ...38
Settings.........................................................40
Settings overview..................................................40
Opening the "Settings" menu .........................................42
To change and save settings ......................................42
Language J ......................................................42
Time ............................................................42
Display .......................................................42
2

Contents
Clock display ..................................................42
Clock format ...................................................43
Set...........................................................43
Date ............................................................43
Lighting .........................................................43
Start screen ......................................................43
Brightness .......................................................43
Volume ..........................................................44
Buzzer tones ...................................................44
Keypad tone ...................................................44
Welcome melody ...............................................44
Units............................................................44
Weight........................................................44
Temperature ...................................................44
Cooling fan run-on .................................................45
Pyrolytic cleaning..................................................45
Recommended temperatures ........................................45
Safety ...........................................................46
System lock 0..................................................46
Sensor lock ....................................................46
Catalyser ........................................................46
Showroom programme .............................................47
Demo mode ...................................................47
Factory default ....................................................47
MyMiele .........................................................48
To add an entry ...................................................48
To edit MyMiele ...................................................49
To delete entries ................................................49
To sort entries ..................................................49
Minute minder + Alarm ............................................50
Using the alarm .................................................50
Setting the alarm................................................50
Changing an alarm ..............................................51
Deleting an alarm ...............................................51
Using the minute minder N ..........................................52
To set the minute minder .........................................52
To change the time set for the minute minder .........................53
To cancel the time set for the minute minder ..........................53
3

Contents
Overview of functions .............................................54
Tips on saving energy .............................................56
Operation .......................................................59
Simple operation ..................................................59
Cooling fan.......................................................59
Using the oven - further functions ...................................60
Changing the temperature...........................................61
Rapid heat-up ....................................................62
Pre-heating the oven.............................................62
Using the Crisp function (steam reduction)..............................63
Changing the function ..............................................63
Setting the duration ................................................64
Switching off automatically ........................................65
Switching on and off automatically ..................................65
Sequence of a programme that switches on and off automatically .........66
Changing an entered cooking time .................................66
Cancelling cooking ..............................................66
Moisture plus d .................................................67
Moisture plus function d ...........................................68
Setting the temperature ..........................................69
Set the number of bursts of steam ..................................69
When to add the steam...........................................69
Preparing and starting the water intake process .......................70
Changing the type of heating ......................................71
Automatic burst of steam .........................................72
1, 2 or 3 bursts of steam ..........................................72
Residual water evaporation ..........................................73
To start residual water evaporation immediately .......................73
To skip residual moisture evaporation ...............................74
Automatic programmes............................................75
List of food types ..................................................75
To use an Automatic programme .....................................75
Notes on using these programmes .................................76
Search ..........................................................77
User programmes ................................................78
To create a User programme ........................................78
To start a User programme ..........................................79
4

Contents
To change User programmes ........................................80
Change cooking stages ..........................................80
Change name ..................................................81
To delete User programmes .........................................81
Baking ..........................................................82
Notes on the baking chart ...........................................83
Baking chart......................................................84
Roasting ........................................................88
Notes on the roasting chart ..........................................88
Food probe ......................................................90
How it works......................................................90
When to use it ....................................................91
Important notes about using the food probe .............................92
Using the food probe...............................................93
Time left display...................................................94
To display the core temperature....................................94
Using residual heat ................................................95
Roasting chart ....................................................96
Low temperature cooking ..........................................98
Using the "Low temperature cooking" special application ..................99
Low temperature cooking - setting the temperature manually ..............100
Grilling ........................................................101
Notes on the grilling chart ..........................................102
Grilling chart ....................................................104
Special applications .............................................105
Defrosting ......................................................106
Drying food .....................................................107
Reheat .........................................................108
Heat crockery ...................................................108
Proving yeast dough ..............................................109
Pizza ..........................................................109
Sabbath programme ..............................................110
Gentle bake .....................................................111
Frozen food / Ready meals .........................................112
Cleaning and care ...............................................113
Unsuitable cleaning agents .........................................113
Tips ...........................................................114
5

Contents
Normal soiling ...................................................114
Food probe ...................................................114
Stubborn soiling (does not apply to the FlexiClip runners) .................115
Pyrolytic cleaning ^ of the oven interior ..............................116
Setting up for the Pyrolytic cleaning programme ......................116
Starting Pyrolytic cleaning .......................................117
At the end of the Pyrolytic cleaning programme ......................118
If the Pyrolytic cleaning programme is cancelled .....................119
Removing the door ...............................................120
Dismantling the door............................................121
Refitting the door .................................................125
Removing the side runners .........................................126
Lowering the top heat/grill element ...................................127
Descaling the steam injection system F ...............................128
Sequence of a descaling cycle ...................................128
Preparation ...................................................129
Carrying out the descaling process ................................129
Problem solving guide ...........................................133
After Sales / Guarantee ...........................................140
Electrical connection.............................................141
Building-in diagrams .............................................142
Appliance and niche dimensions ....................................142
Front dimensions .................................................144
Installing the oven ...............................................145
Miele|home ....................................................146
Note for test institutes............................................148
Test food acc. to EN 60350 .........................................148
Energy efficiency class ............................................149
Product data sheets ............................................149
Copyright and licences ...........................................151
Addresses......................................................155
6

Warning and Safety instructions
This appliance complies with statutory safety requirements.
Inappropriate use can, however, lead to personal injury and
damage to property.
To avoid the risk of accidents and damage to the appliance,
please read these instructions carefully before using it for the first
time. They contain important notes on installation, safety, use and
maintenance.
Miele cannot be held liable for non-compliance with these
instructions.
Keep these instructions in a safe place and ensure that new users
are familiar with the contents. Pass them on to any future owner.
7

Warning and Safety instructions
Correct application
This oven is intended for use in domestic households and similar
~
working and residential environments.
The oven is not intended for outdoor use.
~
It is intended for domestic use only to cook food, and in particular
~
to bake, roast, grill, cook, defrost and dry food. Any other use is not
supported by the manufacturer and could be dangerous.
People with reduced physical, sensory or mental capabilities, or
~
lack of experience or knowledge who are not able to use the
appliance safely on their own must be supervised whilst using it.
They may only use it unsupervised if they have been shown how to
use it safely and recognise and understand the consequences of
incorrect operation.
8

Warning and Safety instructions
Safety with children
Children under 8 years of age must be kept away from the
~
appliance unless they are constantly supervised.
Children 8 years and older may only use the oven unsupervised if
~
they have been shown how to use it safely and recognise and
understand the consequences of incorrect operation.
Children must not be allowed to clean or maintain the appliance
~
unsupervised.
Please supervise children in the vicinity of the oven and do not let
~
them play with it.
Danger of suffocation. Packaging, e.g. plastic wrappings, must
~
be kept out of the reach of babies and children. Whilst playing,
children could become entangled in packaging or pull it over their
head and suffocate.
9

Warning and Safety instructions
Danger of burning.
~
Children's skin is far more sensitive to high temperatures than that of
adults. External parts of the oven such as the door glass, control
panel and the vents become quite hot during use. Do not let
children touch the oven whilst it is in use.
Danger of injury.
~
The oven door can support a maximum weight of 15 kg. Do not let
children sit on the door, lean against it or swing on it.
Danger of burning.
~
Children's skin is far more sensitive to high temperatures than that of
adults. The oven gets hotter during pyrolytic cleaning than it does in
normal use. Do not let children touch the oven whilst the Pyrolytic
cleaning programme is running.
10

Warning and Safety instructions
Technical safety
Unauthorised installation, maintenance and repairs can cause
~
considerable danger for the user. Installation, maintenance and
repairs must only be carried out by a Miele authorised technician.
Never use a damaged oven. It could be dangerous. Check it for
~
visible signs of damage before using it.
Reliable and safe operation of this oven can only be assured if it
~
has been connected to the mains electricity supply.
The electrical safety of this appliance can only be guaranteed
~
when correctly earthed. It is essential that this standard safety
requirement is met. If in any doubt please have the electrical
installation tested by a qualified electrician.
To avoid the risk of damage to the oven, make sure that the
~
connection data on the data plate (voltage and frequency) match
the mains electricity supply before connecting the oven to the
mains. Consult a qualified electrician if in doubt.
Do not connect the appliance to the mains electricity supply by a
~
multi-socket unit or an extension lead. These do not guarantee the
required safety of the appliance (fire hazard).
For safety reasons, this appliance may only be used after it has
~
been built in.
The oven must not be used in a non-stationary location (e.g. on a
~
ship).
11

Warning and Safety instructions
Tampering with electrical connections or components and
~
mechanical parts is highly dangerous to the user and can cause
operational faults.
Never open the casing of the appliance.
While the appliance is under guarantee, repairs should only be
~
undertaken by a Miele authorised service technician. Otherwise the
guarantee is invalidated.
Miele can only guarantee the safety of the appliance when
~
genuine original Miele replacement parts are used. Faulty
components must only be replaced by Miele spare parts.
If the connection cable is damaged or if the oven is supplied
~
without a cable, it must be replaced or fitted with a special
connection cable by a Miele authorised technician (see "Electrical
connection").
During installation, maintenance and repair work, the appliance
~
must be disconnected from the mains electricity supply, e.g. if the
oven lighting is faulty (see "Problem solving guide" and "Electrical
connection").
12

Warning and Safety instructions
In order to function correctly, the oven requires an adequate
~
supply of cool air. Ensure that the supply of cool air is not impaired
(e.g. by heat insulation strips in the housing unit). Please also ensure
that the cool air supply is not unduly heated by other heat sources
such as a solid fuel stove.
If the oven is installed behind a furniture panel (e.g. a door),
~
ensure that the door is never closed whilst the oven is in use. Heat
and moisture can build up behind a closed furniture panel and
cause subsequent damage to the oven, the housing unit and the
floor. Do not close the door until the oven has cooled down
completely.
13

Warning and Safety instructions
Correct use
Danger of burning.
,
The oven becomes hot when in use.
You could burn yourself on the heating elements, oven interior,
cooked food or oven accessories.
Wear oven gloves when placing food in the oven, turning or
removing it and when adjusting oven shelves etc. in a hot oven.
Due to the high temperatures radiated, objects left near the oven
~
when it is in use could catch fire.
Do not use the oven to heat up the room.
Oil and fat can ignite if overheated. Never leave the oven
~
unattended when cooking with oil and fat.
If it does ignite do not put the flames out with water. Switch the oven
off immediately and then suffocate the flames by keeping the oven
door closed.
Grilling food for an excessively long time can cause it to dry out
~
with the risk of catching fire.
Do not exceed recommended grilling times.
14

Warning and Safety instructions
Some types of food dry out quickly and can self-ignite if high grill
~
temperatures are used. Never use the grill to finish baking
part-cooked rolls or bread or to dry flowers or herbs. Use Fan
plus U or Conventional heat V for this type of procedure.
If using alcohol in your recipes, please be aware that high
~
temperatures can cause the alcohol to vaporise. The vapour can
catch fire on hot heating elements.
When using residual heat to keep food in the oven warm, the high
~
moisture content and amount of condensation in the oven can cause
corrosion damage. The control panel, the worktop or the housing
unit can also suffer damage.
When using residual heat do not switch the oven off. Instead set the
temperature to the lowest setting and leave the oven on the selected
function. The fan will then remain on automatically and dissipate the
moisture.
Food which is stored in the oven or left in it to be kept warm can
~
dry out and the moisture released can lead to corrosion damage in
the oven. Always cover food that is left in the oven to keep warm.
A build-up of heat can cause the enamel on the floor of the oven
~
to crack or shatter.
Do not line the floor of the oven with anything, e.g. aluminium foil. Do
not place roasting pans, pots or baking trays directly on the oven
floor.
The enamelling on the oven floor can become damaged by items
~
being pushed around on it. If using the oven to store pots and pans,
ensure that you avoid pushing them around on the oven floor.
15

Warning and Safety instructions
If cold liquid is poured onto a hot surface steam will occur, which
~
can cause scalding. The sudden change in temperature can also
damage enamel surfaces.
Do not pour cold liquid directly onto hot enamelled surfaces.
During cooking processes using moisture and during the residual
~
moisture evaporation process steam is produced which can cause
serious injury by scalding.
Do not open the door whilst a burst of steam is being released or
during the evaporation process.
It is important that the temperature in the food being cooked is
~
evenly distributed and sufficiently high. Stir and / or turn it to ensure
even heat distribution.
Plastic containers which are not suitable for use in an oven can
~
melt at high temperatures and can even damage the oven or catch
fire.
Only use plastic containers which are declared by the manufacturer
as being suitable for use in an oven. Follow the manufacturer's
instructions on use.
Do not heat up food in closed containers e.g. tins or sealed jars in
~
the oven, as pressure will build up in the container, causing it to
explode.
You could injure yourself on the open oven door or trip over it.
~
Avoid leaving the door open unnecessarily.
The door can support a maximum weight of 15 kg.
~
Do not sit on or lean against an open door, and do not place heavy
objects on it. Also make sure that nothing can get trapped between
the door and the oven cavity. The oven could get damaged.
16

Warning and Safety instructions
Cleaning and care
Do not use a steam cleaning appliance to clean this appliance.
~
The steam could reach electrical components and cause a short
circuit.
Scratches on the door glass can result in the glass breaking. Do
~
not use abrasive cleaners, hard sponges, brushes or sharp metal
tools to clean the door glass.
The side runners can be removed for cleaning purposes (see
~
"Cleaning and care"). Ensure that they are replaced correctly and do
not use the oven without them fitted.
Coarse soiling should be removed before running the Pyrolytic
~
cleaning programme. If not removed, coarse soiling can smoke and
cause the Pyrolytic cleaning programme to switch itself off.
17

Warning and Safety instructions
Accessories
Only use genuine original Miele accessories. Using accessories
~
from other manufacturers will invalidate the guarantee, and Miele
cannot accept liability.
If you have a Miele HUB 5000-M, HUB 5001-M or a HUB 5000-XL
~
oven dish, do not place it on Shelf level 1.
This would damage the floor of the oven. The very small gap
between the bottom of the dish and the oven floor would cause a
build-up of heat and could cause the enamel to crack or chip.
Never place a Miele oven dish on the top rail of Shelf level 1 as it will
not be held securely in this position by the anti-tip notches on the
runners.
In general it is best to use Shelf level 2.
The high temperatures used during pyrolytic cleaning will
~
damage accessories that are not designed for cleaning in the
Pyrolytic programme.
Please remove these accessories from the oven interior before
starting the Pyrolytic cleaning programme. This also applies to
non-pyrolytic accessories purchased separately to the oven (see
"Cleaning and care").
Only use the Miele food probe supplied with this oven. If it is
~
faulty, it must only be replaced with a suitable original Miele food
probe.
18
Caring for the environment
Disposal of the packing
material
The packaging is designed to protect
the appliance from damage during
transportation. The packaging materials
used are selected from materials which
are environmentally friendly for disposal
and should be recycled.
Recycling the packaging reduces the
use of raw materials in the
manufacturing process and also
reduces the amount of waste in landfill
sites.
Disposing of your old
appliance
Electrical and electronic appliances
often contain valuable materials. They
also contain materials which, if handled
or disposed of incorrectly, could be
potentially hazardous to human health
and to the environment. They are,
however, essential for the correct
functioning of your appliance. Please
do not therefore dispose of it with your
household waste.
Please dispose of it at your local
community waste collection / recycling
centre or contact your Dealer for
advice.
Ensure that it presents no danger to
children while being stored for
disposal.
19
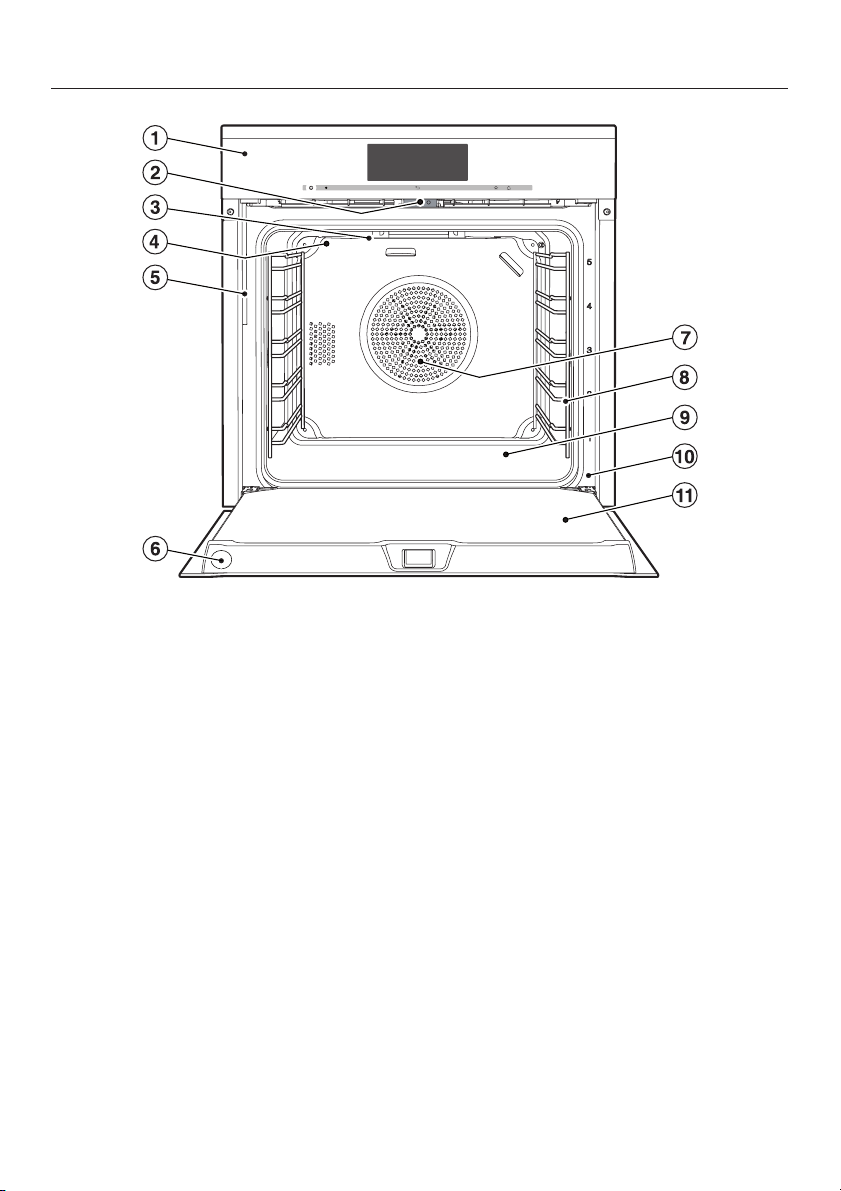
Oven overview
a Oven controls
b Door lock - Pyrolytic cleaning
c Top heat / grill element with wireless food probe antenna
d Steam inlet openings for Moisture plus
e Water intake pipe for the steam injection system
f Wireless food probe holder
g Air inlet for the fan with ring heating element behind it
h Side runners with 5 shelf levels
i Oven floor with bottom heat element underneath it
j Front frame with data plate
k Door
20
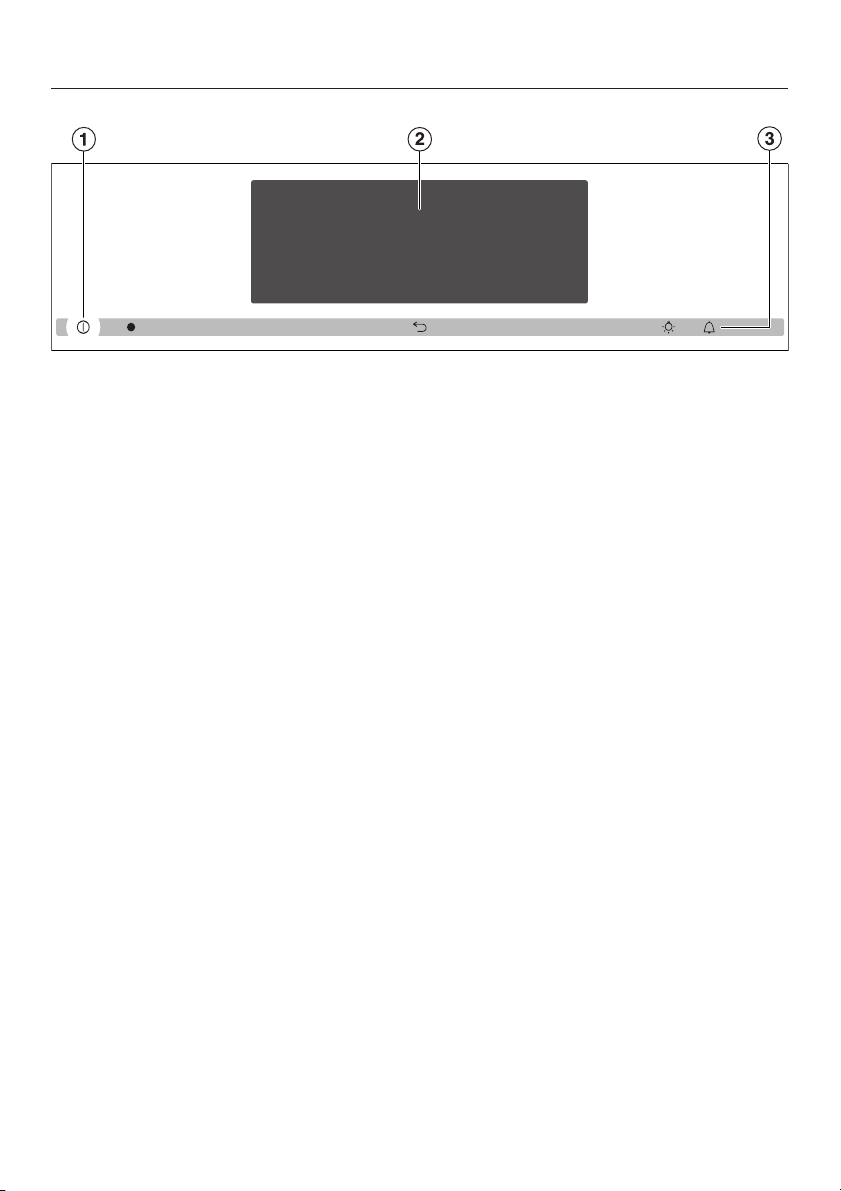
a On/Off sensor K
b Display
c #, I, N sensors
Oven controls
21
Oven controls
On/Off sensor K
The On/Off sensor K is recessed and reacts to touch.
It is used for switching the oven on and off.
Sensor controls
The sensors react to touch. Each touch is confirmed with a keypad tone. This
keypad tone can be switched off (see "Settings – Volume – Keypad tone").
Sensor Function Notes
# To go back a step
I For switching the
oven interior
lighting on and off
N For activating and
deactivating
minute minder /
alarm
If a list of options is showing in the display or if a
cooking process is running, touching I will switch
the oven interior lighting on or off.
If the display is dark, the I sensor will not react until
the oven is switched on.
The oven interior lighting switches off after
15 seconds during a cooking process or remains
constantly switched on, depending on the setting
selected.
If a list of options is showing in the display or if a
cooking process is running, you can enter a minute
minder duration (e.g. when boiling eggs on the hob)
or set an alarm, i.e. a specific time, at any point (see
"Alarm and minute minder").
If the display is dark, the N sensor will not react until
the oven is switched on.
22

Oven controls
Display
The display is operated by finger tip contact and in contrast to the sensors, there
is no audible tone when it is touched.
Do not use pointed or sharp objects e. g. pens to operate the Touch display as
they can damage the surface.
The Touch display will also not react to being tapped by such objects.
The display is split into three sections.
The menu path appears at the top left and shows you which menu or sub menu
you are in.
Options within a menu are separated by a vertical line. If there is not enough
space to show the whole path, additional options are indicated by ... N.
The time of day, Alarm und minute minder N are shown at the top right hand
side of the display.
The middle section shows the current menu and options. You can scroll to the
right or left by swiping your finger across the display.
The V and W arrow sensors at the bottom of the screen are used for scrolling to
the left or right. The number of small squares between the arrows indicates the
number of pages available and your position within the current menu.
23
Oven controls
Main menu
Oven functions
–
Automatic programmes c
–
Special applications
–
MyMiele
–
User programmes ~
–
Settings %
–
Maintenance y
–
Symbols
The following symbols may also appear in the display in addition to the text:
Symbol Explanation
P P P P G G GM Some settings, e. g. display brightness and buzzer volume
are selected using a bar chart.
: This symbol indicates that there is additional information and
advice about using the oven.
Select "OK" to access the information.
0 The system lock or sensor lock is switched on (see "Settings –
Safety"). The oven cannot be used.
Alarm
N Minute minder
... N This indicates that there are more options available, which are
not visible because there is not enough space in the display.
24
Oven controls
When a function is selected, the following symbols may appear in the display,
depending on setting:
Symbol Explanation
U Fan plus
V Conventional heat
d Moisture plus
O Intensive bake
[ Auto roast
X Bottom heat
W Top heat
Y Full grill
Z Economy grill
\ Fan grill
K Gentle bake
^ Pyrolytic cleaning
Q Core temperature when using the food probe
25

Oven controls
Operating principles
Each time you touch a possible option
the relevant field lights up orange.
To select or to open a menu
Touch the field you want once with
^
your finger.
Scrolling
You can scroll left or right.
Swipe the screen, i. e. place your
^
finger on the display and swipe in the
direction you want or touch the V or
W sensors to scroll to the left or the
right.
Exiting a menu
^ Touch # or touch an option in the
menu path at the top of the screen or
touch ...
Depending on which menu you are in,
this will take you back a level or back to
the main menu.
N.
Entering numbers
Numbers can be entered by swiping
and touching the roller or by using the
numerical keypad.
To enter numbers using the roller:
Swipe the roller up or down to select
^
the number you want.
To enter numbers using the numerical
keypad:
Touch z in the bottom right of the
^
input field.
The numerical keypad will appear.
^ Touch the numbers you want.
Once you have entered an accepted
value the "OK" sensor will light up
green. The last input figure can be
deleted using the arrow.
^ Touch "OK".
Entering letters
You can enter short names for your own
user programmes using a keyboard.
26
^
Touch the letters or characters you
want.
^
Touch "Save".

Features
Model numbers
A list of the ovens described in these
operating instructions can be found on
the back page.
Data plate
The data plate is located on the front
frame, visible when the door is open.
The data plate states the model number
of your oven, the serial number as well
as connection data (voltage, frequency
and maximum connected load).
Please have this information to hand,
should you need to contact Miele
regarding any questions or problems.
Items supplied
The oven is supplied with:
– the operating and installation
instructions for using the oven
functions,
Accessories supplied and
available to order
Accessories will vary depending on
model.
Your oven will be supplied with side
runners, a universal tray and a rack.
Depending on model, your oven may
also come supplied with some or
several of the accessories listed
here.
All the accessories listed as well as the
cleaning and care products are
designed for Miele appliances.
These can be ordered via the internet
at www.miele-shop.com, from Miele
(see end of manual for contact details)
or from your Miele dealer.
When ordering, please quote the model
number of your oven and the reference
number of the accessories required.
–
a recipe booklet for Moisture plus d
and the Automatic programmes,
–
screws for securing your oven in the
housing unit,
–
descaling tablets and a plastic tube
with clip for descaling,
–
various accessories.
27
Features
Side runners
Side runners for trays, racks and Miele
oven dishes are fitted on either side of
the oven cavity for shelf levels .
The numbers for the shelf levels are
marked on the front frame.
Each level consists of two rails, one
above the other.
The accessories (e.g. the rack) are
–
pushed into the oven between the
rails,
FlexiClip telescopic runners
–
(depending on model) are fitted on
the lower rail.
If necessary, the side runners can be
removed for cleaning (see "Cleaning
and care").
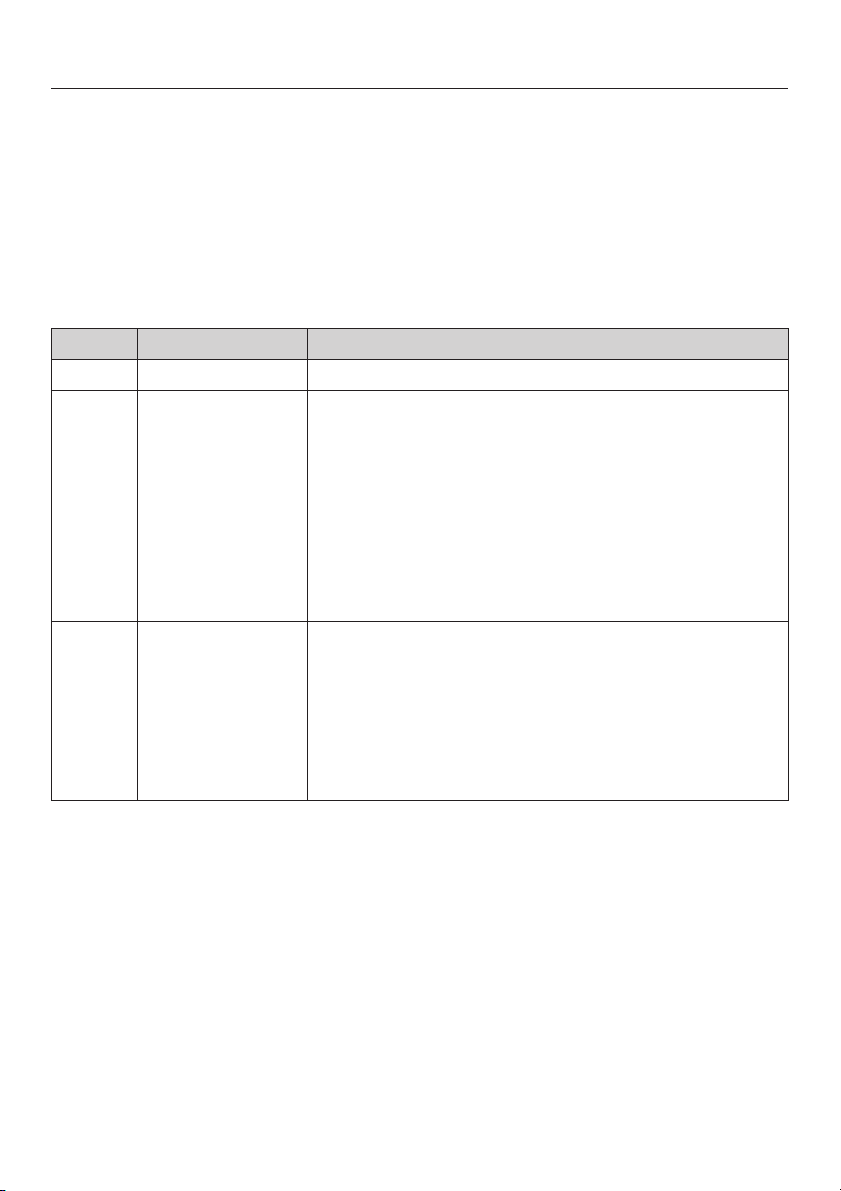
Baking tray, universal tray and rack
with non-tip notches
Baking tray HBB71:
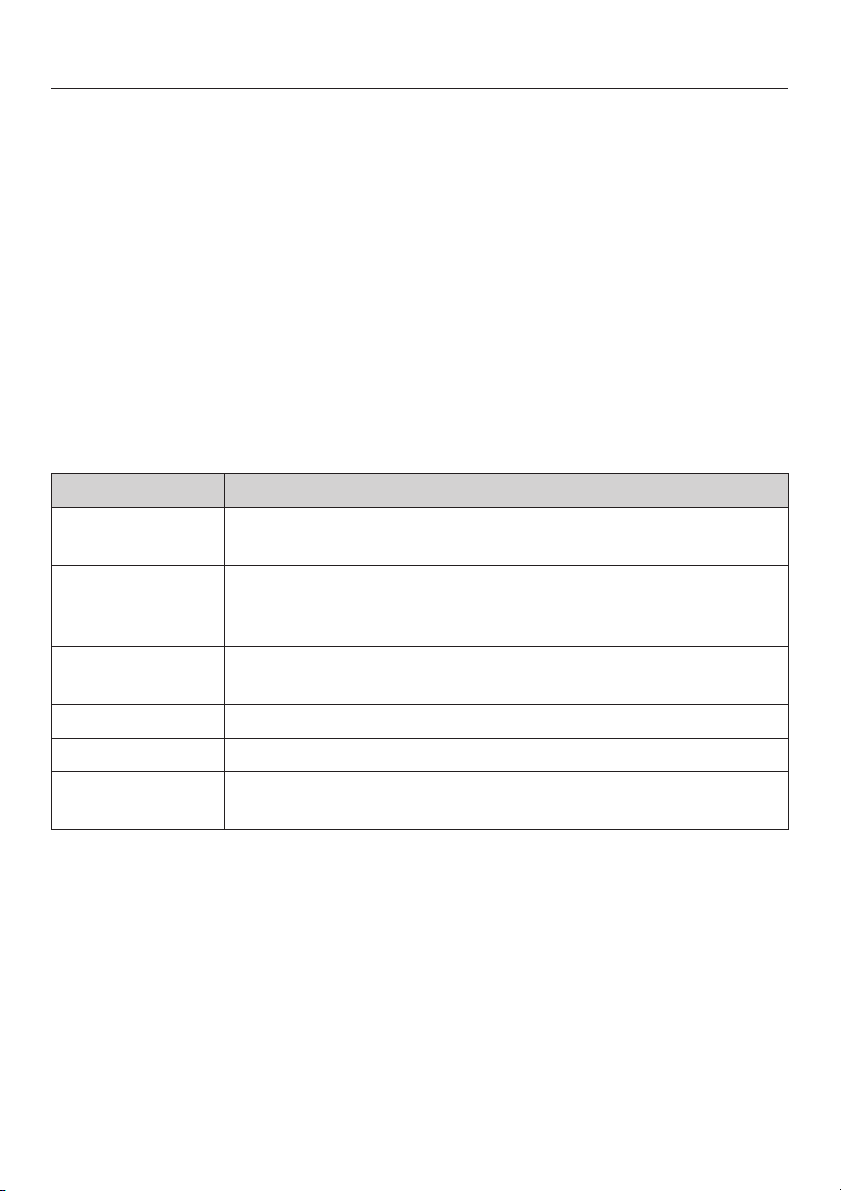
Universal tray HUBB71:
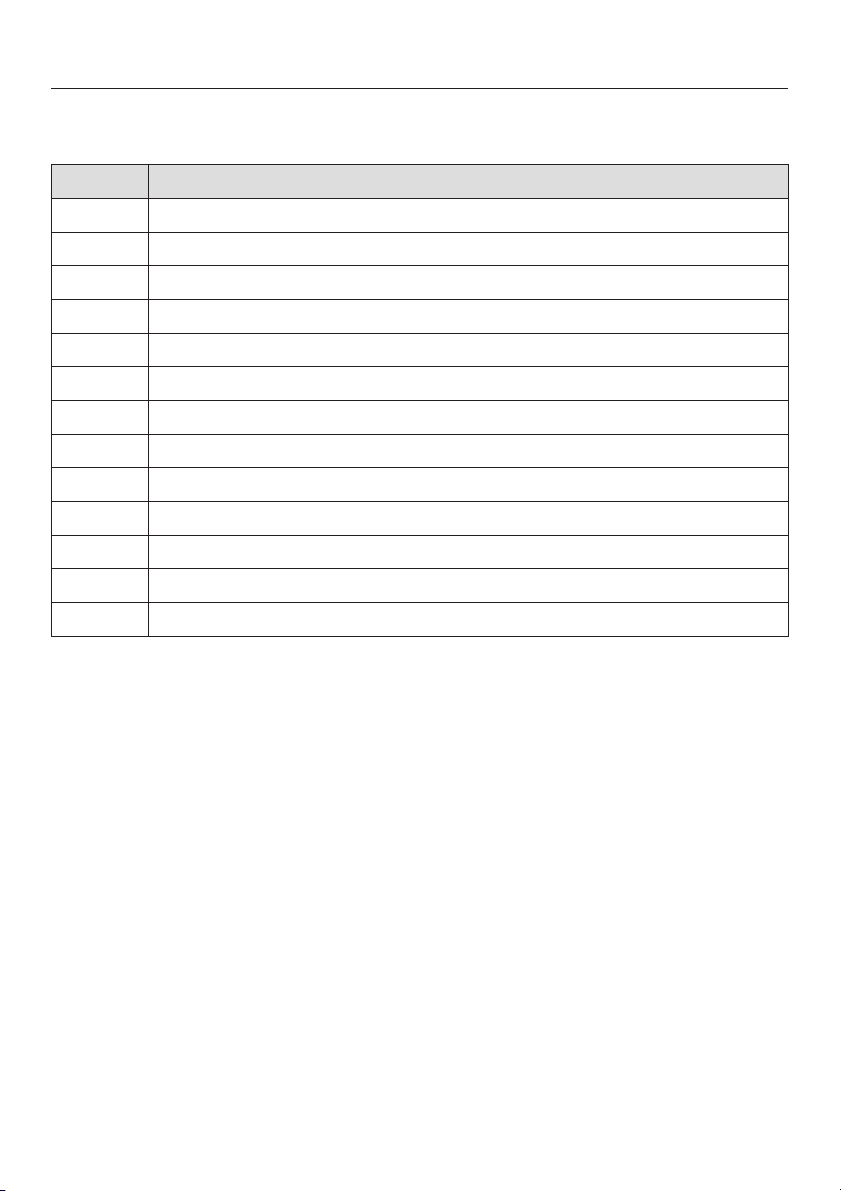
Rack HBBR72:
These accessories are inserted into the
oven between the two rails of a side
runner.
Always position the rack as illustrated
above.
The accessories have non-tip safety
notches half way along the short edges
which prevent them from being pulled
right out when they only need to be
pulled partially out.
28
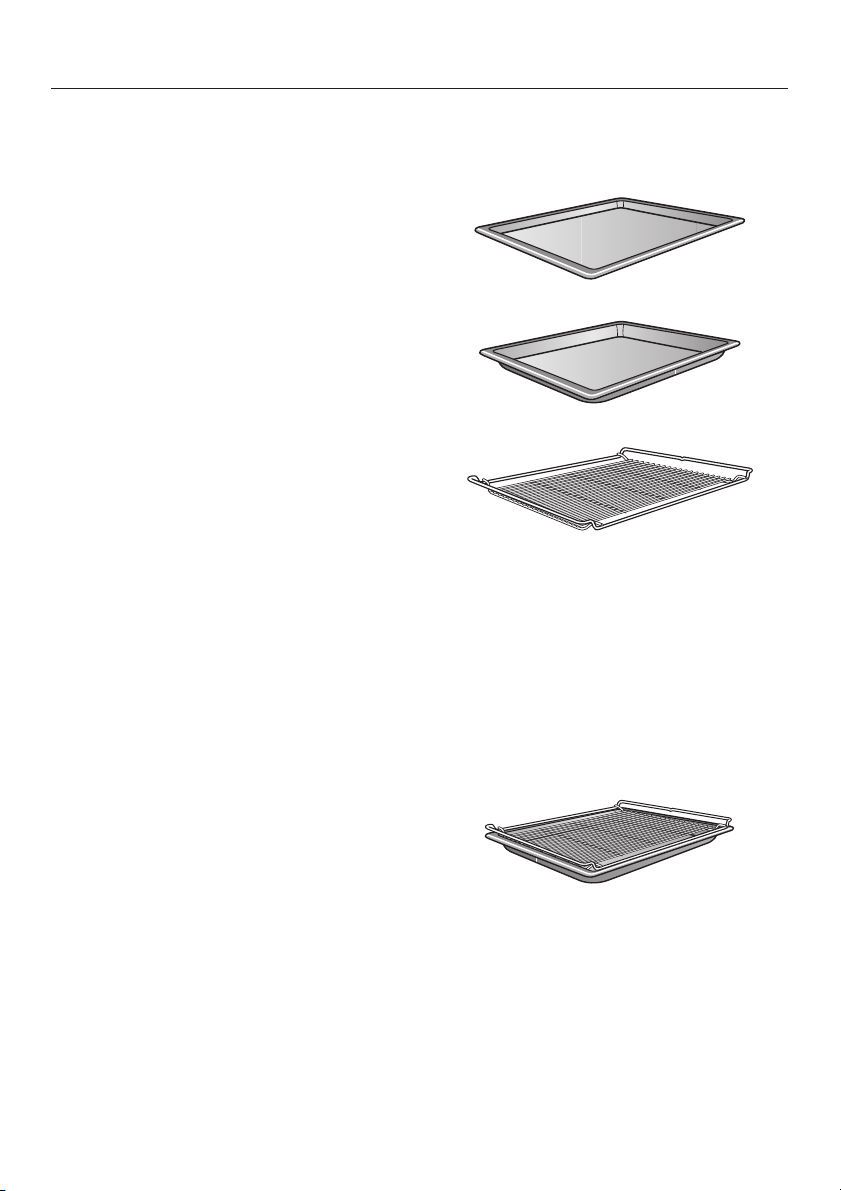
If you are using the universal tray with
the rack on top, insert the tray between
the rails of the side runners and the
rack will automatically slide in above
them.
Features
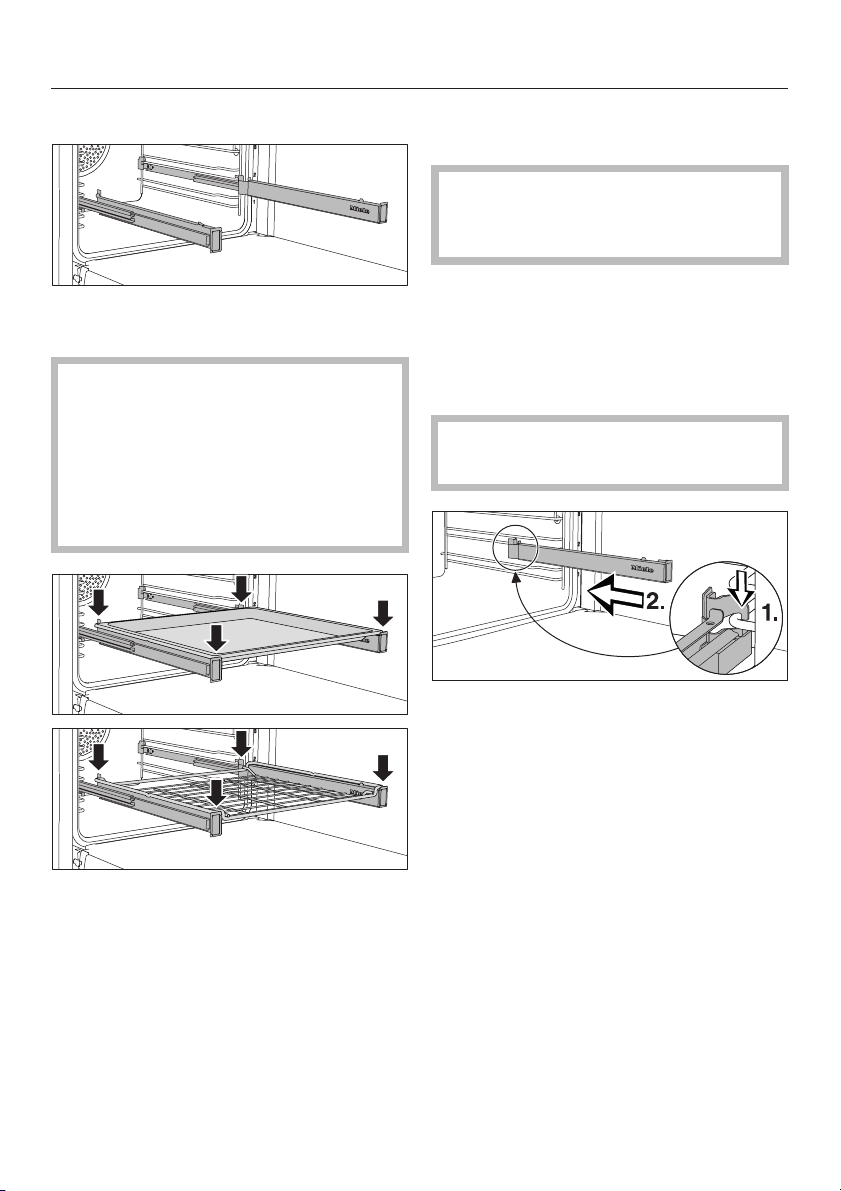
FlexiClip telescopic runners HFC72
The FlexiClip telescopic runners can be
used with any shelf level.
Push the FlexiClip telescopic
runners right into the oven before
placing accessories on them. The
accessories will then automatically
sit securely in between the stoppers
at either end of each runner and be
prevented from sliding off.
Fitting and removing FlexiClip
telescopic runners
Danger of burning.
,
Make sure the oven heating
elements are switched off and cool.
The FlexiClip runners are fitted in
between the two rails that make up a
shelf level.
The FlexiClip runner with the Miele logo
is fitted on the right.
When fitting the FlexiClip telescopic
runners do not extend them.
The FlexiClip runners can support a
maximum load of 15 kg.
^ Hook the FlexiClip runner onto the
front of the lower rail of a side rail (1.)
and then push it along the rail into the
oven compartment (2.).
29
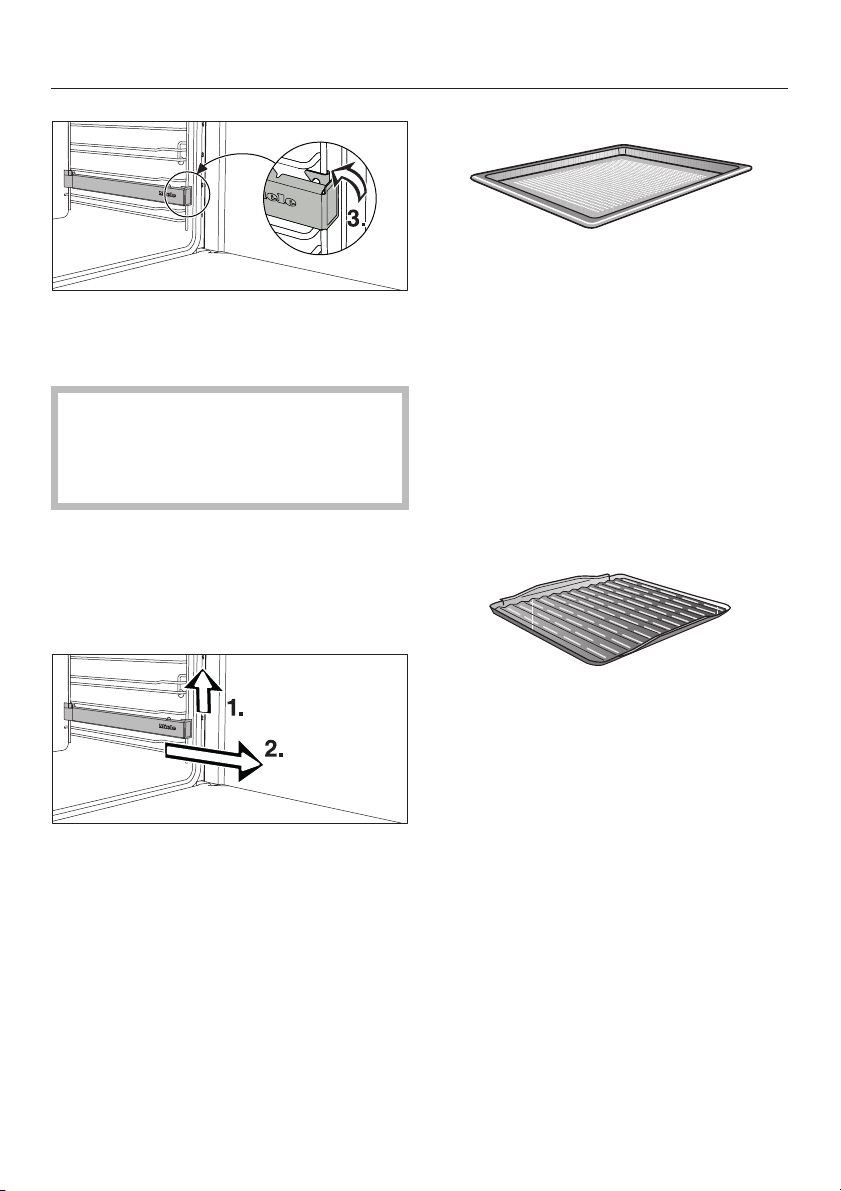
Features
Then secure the FlexiClip runner to
^
the bottom of the two rails as
illustrated (3).
If the FlexiClip runners are difficult to
pull out after fitting, you may need to
pull firmly on them once to release
them.
To remove a FlexiClip runner:
^ Push the FlexiClip runner in all the
way.
Perforated baking tray HBBL 71
The perforated baking tray has been
specially designed for baking fresh
yeast and quark dough items, bread
and rolls.
The fine perforations help to brown the
underside of food.
The tray can also be used for drying
fruit and vegetables.
The enamelled surface has been
treated with PerfectClean.
Anti-splash insert HGBB71
^
Remove the FlexiClip runner by
raising it at the front (1) then pulling it
forwards along the rail and out (2).
30
The anti-splash insert fits in the
universal tray.
The juices from the food being grilled or
roasted collect under the insert. This
prevents them from spitting and making
the oven dirty. The juices can then be
used for making gravy and sauces.
The enamelled surface has been
treated with PerfectClean.
 Loading...