

Midmuro genio premium, genio basic Installation Manual

My Own Orchest ra
Acoustic Piano MIDI Converter with Silent Mechanism
INSTALLATION GUIDE
Model : GENIO Premium / GENIO Basic
MIDMURO CO. LTD.
2013

Table of Contents
Chapter 1. System Connection Diagram
1.System Wiring Diagram (Upright Piano)
2.General View of Muting Assembly (Upright Piano)
Chapter 2. The Flow of Entire Installation
1. Mute Rail Installation
2. Sound Source Installation
3. Finishing
Chapter 3. Mute Rail Installation
1.Key Points for Installation
2.Mute Rail Working (STANDARD BAR)
3.Mute Rail Installation
4.Mute Rail Adjustment after Installation
5.Mute Lever Installation
Chapter 4. Sound Source Installation
1.Key Sensor Installation
2.Main Unit Installation·
3. Control Unit Installation
4.Pedal Sensor Installation
5.Let Off Adjustment

Chapter 1.System Connection Diagram
1. System Wiring Diagram
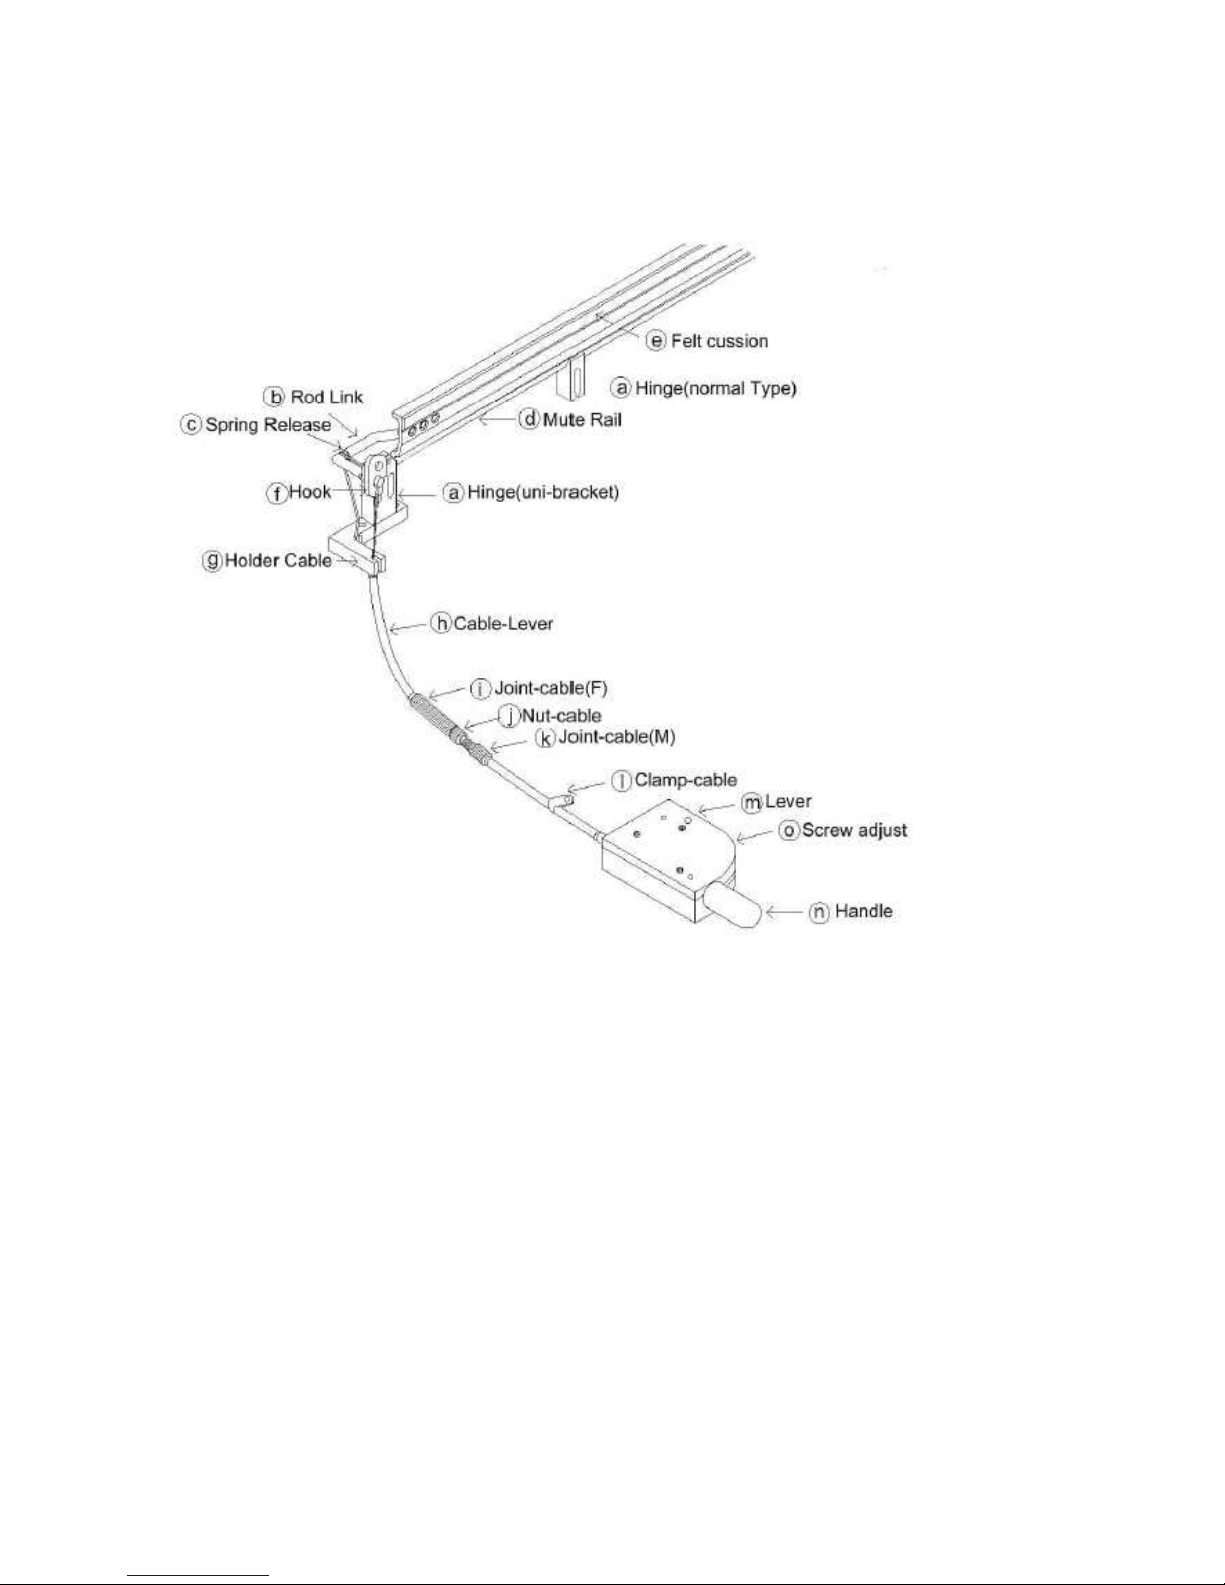
2.General View of Muting Assembly (Upright Piano)
Mute Rail, Uni-Bracket & Lever A’ssy

Chapter 2. The Flow of Entire Installation
1. Mute Rail Installation
① Separate the action from the piano and adjust mute rail length suitably for the action bracket
not to interfere the mute rail (Cutting the centre bracket’s part out)
② STANDARD type mute bar can be cut and adjusted according to the various action styles
③ Separate the piano damper rail
④ Install mute rail to the action
⑤ Install mute rail parallel with the strings without bend ※ Important
⑥ Install spring and E ring at uni bracket
⑦ Install mute lever, adjust mute on and off position
※ Important point : parallel mute rail with the strings -> same distance from every hammer
shanks, ensure the damper’s moving space when mute off
2. Sound Source Installation
① Separate the keys from the key bed, and put the sensor rail, and put several black keys
upon the key sensors for sensors, to adjust the springs height for correct sensor positioning.
② After setting the springs, install the sensor plate carefully.
③ Connect the main cable tightly to the connector in treble part of the sensor plate. Put the 5
black keys around the screws which shows the standard height of the sensor plate.
④ Adjust the height carefully by adjusting the distance between the bottom of black keys and
the top of the sensor rail
⑤ Install the Main Unit under the key bed inside, and connect the main cable.
⑥ Install the Control Unit under the key bed outside(front), and fix the headphones hanger.
⑦ Install pedal sensors.
⑧ Arrange the electric wires and sensor cables
※ Important point : Tidy arrangement of the main cables connected between key & pedal
sensors and main unit
3. Finishing
① Let-Off adjustment for muting position
② Calibration(Initializing) the system
③ Monitor the sounds, and adjust the sensitivity of each key if needed
④ After installation finished, check any noise happening.
※ Important point :
Let-Off : Adjust the hammer shanks take out before touching the mute rail
Check the dampers working properly during acoustic play (mute off).
Chapter 3 Mute Rail Installation
1. Key points for Installation
It is the most important to install the mute rail at the right position to stop the hammer shanks
just before touching the strings for mute play.
If the mute rail installation is not perfect, you can hear the real piano sound during mute on,
and the action working is not so harmonious during acoustic mute off play, and it disturbs the
basic piano performance.
Notably, securing the damper’s working space is very important for acoustic play.
Pay attention to Kawai new models, especially the damper’s free moving in middle-end section.
There are tailored mute rails for several popular models and you don’t need to cut the mute
rails. Just inform your piano model name when placing order.
Y121 (for Yamaha U1, U2, Old U2 should be cut a little shorter)
Y131 (for Yamaha U3)
K125 (for Kawai 124~127cm, Since BL)
K132 (for Kawai 132cm, BL61, 71 US50 etc, Since BL)
STANDARD BAR (No Cutting, Need aluminum rail cutting. Old Kawai KU need to be cut from
the standard type)
Kawai type middle-end part is already cut for the damper block screw to escape from the
interference with mute rail.
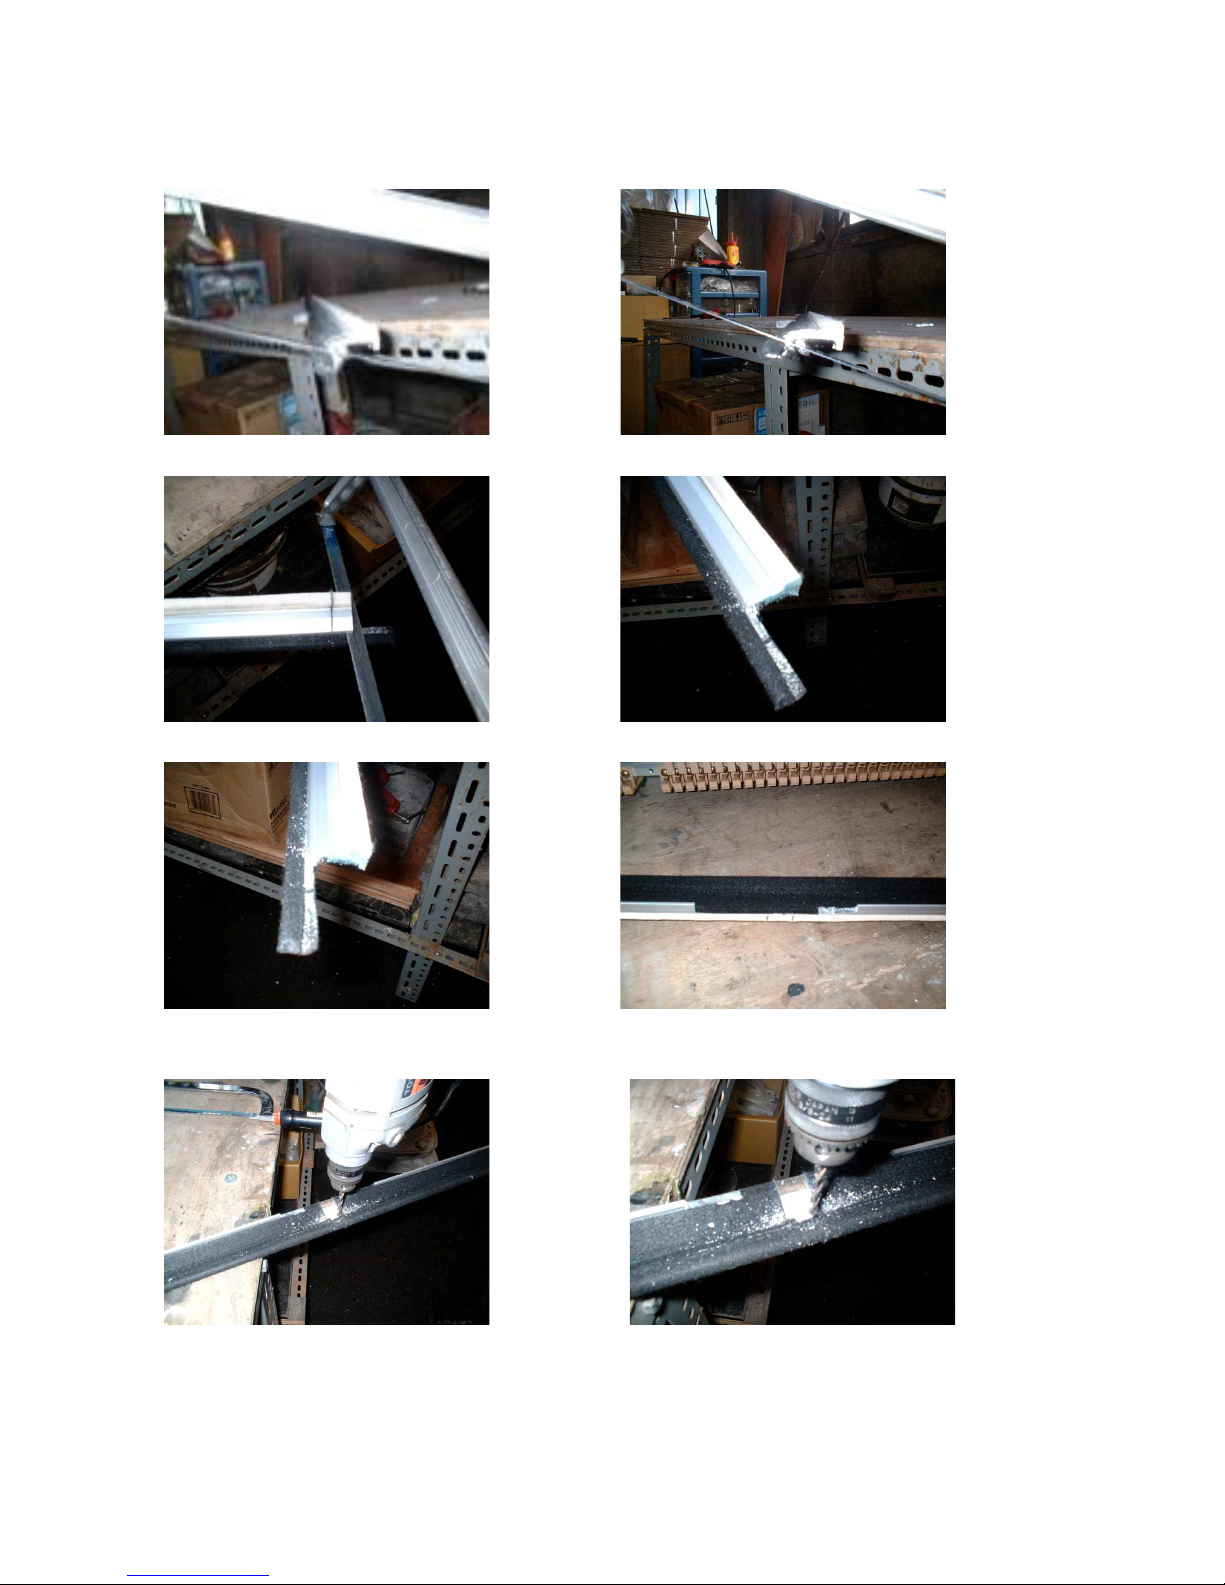
2. Mute Rail Working(STANDARD Type Mute Bar)
1) Cut the right edge with hacksaw 2) Keep cutting
3) 45° angle adjustable hacksaw is helpful. 4) Done.
5) Done. 6) Partial Cutting for centre bracket
7) After cutting, drill holes. 8) Drill holes
 Loading...