

Page 1
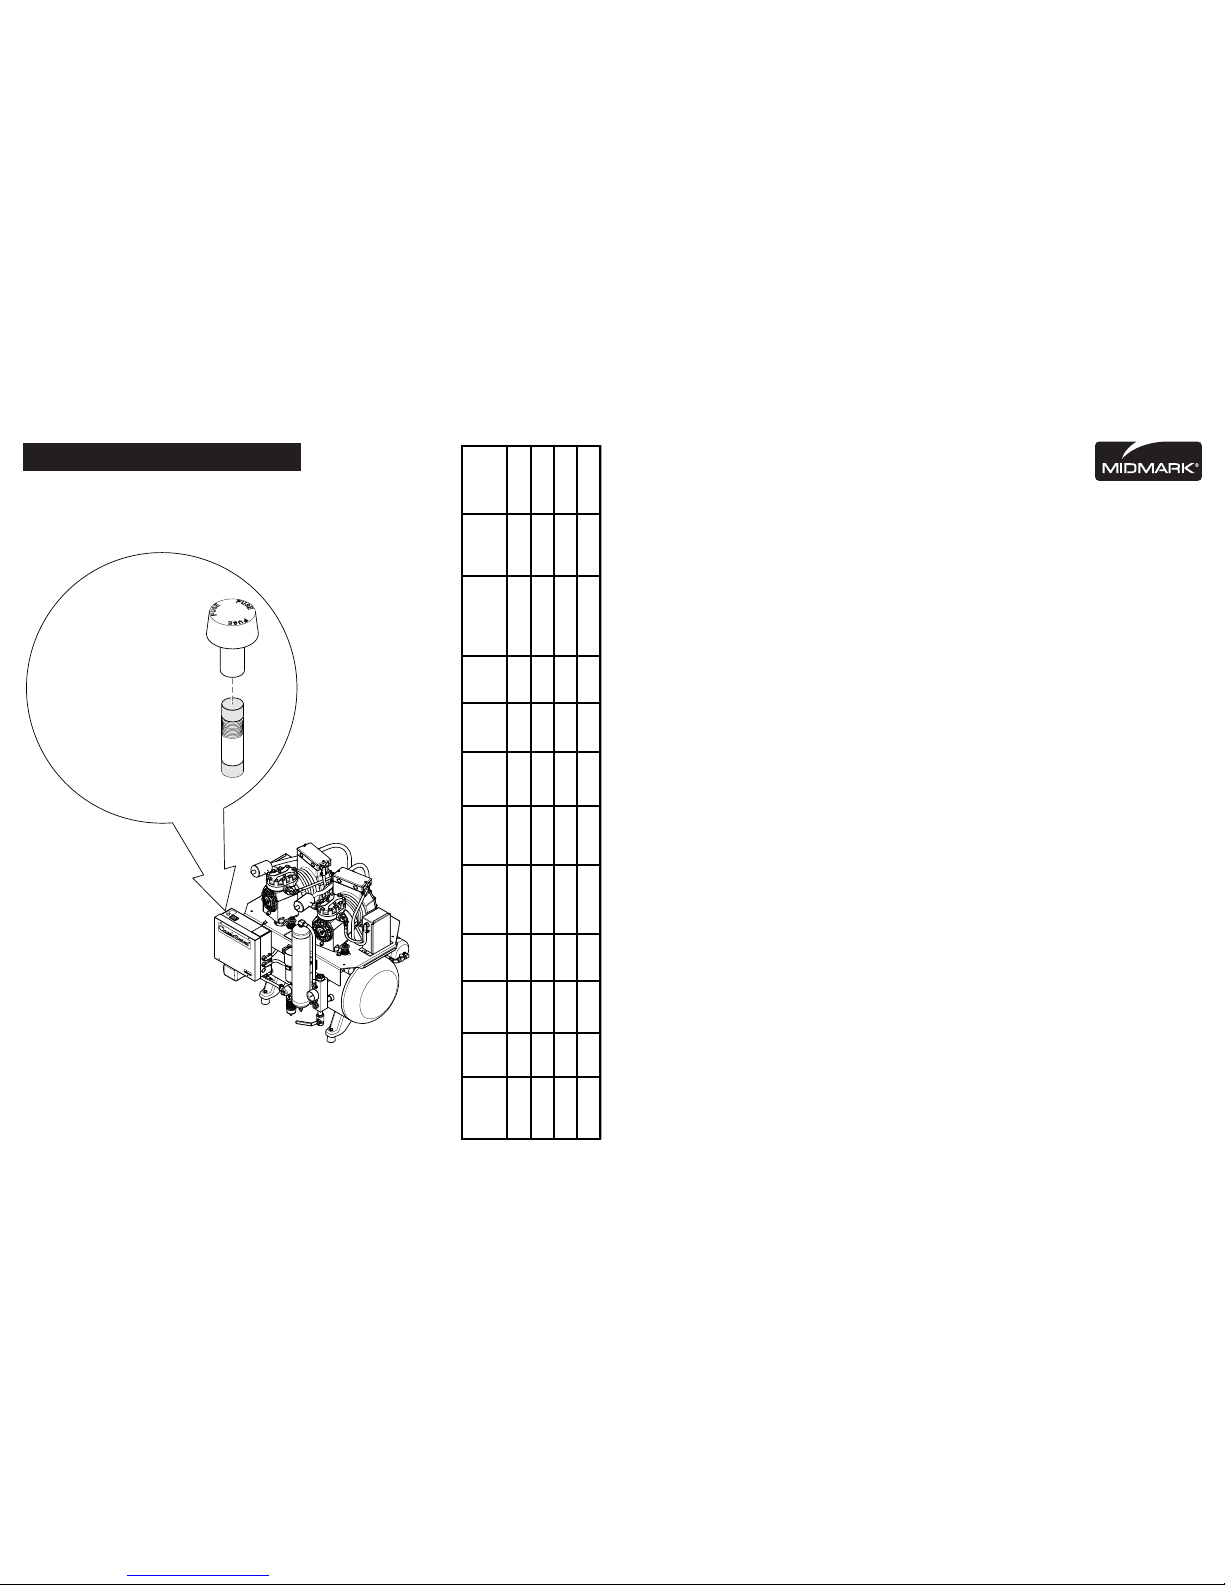
AA189400
Push in and turn
cap counter clockwise.
Pull fuse out of cap.
Visually check to
see if fuse is burnt
or broken.
Put fuse in cap.
Push in and turn cap
clockwise until it locks
in place.
Maintenance Guide
ClassicSeries™ Compressors
To ensure years of reliable service, follow the
maintenance schedule outlined in this guide.
If service is required, contact your authorized
Midmark dealer.
Dealer (name / phone):
__________________________________
__________________________________
__________________________________
Model Number:
__________________
Serial Number:
__________________
Date of Purchase:
_________________
Annual Maintenance Log
Date: Services Performed: Technician:
_____ _______________________ __________
_____ _______________________ __________
_____ _______________________ __________
_____ _______________________ __________
_____ _______________________ __________
_____ _______________________ __________
_____ _______________________ __________
_____ _______________________ __________
_____ _______________________ __________
_____ _______________________ __________
10540800 Rev. E
© Midmark Corporation 2006
Intended Use
To provide air pressure during general
examinations and procedures conducted by
qualified dental professionals.
LIMITED WARRANTY
SCOPE OF WARRANTY
Changing Fuse
Specifications
Classifications: Class 1, No Applied Part, Continuous Operation
Only replace fuse with 1/3 amp,
250 volt, Slo Blo, fuse.
Midmark Corporation (“Midmark”) warrants to the
original purchaser its new ClassicSeries™ and
PowerAir™ products and components (except for
components not warranted under “Exclusions”)
manufactured by Midmark to be free from defects in
material and workmanship under normal use and
service. Midmark’s obligation under this warranty is
limited to the repair or replacement, at Midmark’s
option, of the parts or the products the defects of which
are reported to Midmark within the applicable warranty
period and which, upon examination by Midmark,
prove to be defective.
APPLICABLE WARRANTY PERIOD
The applicable warranty period, measured from the
date of installation for the original user, shall be:
• ClassicSeries™Lubricated Compressors: Two (2)
years or 1,500 usage hours (whichever comes first)
• PowerAir™ Oil-less Compressors: Five (5) years or
3,500 usage hours (whichever comes first)
EXCLUSIONS
This warranty does not cover and Midmark shall not be
liable for the following: (1) repairs and replacements
because of misuse, abuse, negligence, alteration,
accident, freight damage, or tampering; (2) products
which are not installed, used, and properly cleaned as
required in the Midmark “Installation” manual and or
“maintenance” guide for this applicable product; (3)
products considered to be of a consumable nature; (4)
accessories or parts not manufactured by Midmark; (5)
charges by anyone for adjustments, repairs, replacement parts, installation, or other work performed upon
or in connection with such products which is not
expressly authorized in writing in advance by Midmark.
EXCLUSIVE REMEDY
Midmark’s only obligation under this warranty is the
repair or replacement of defective parts. Midmark shall
not be liable for any direct, special, indirect, incidental,
exemplary, or consequential damages or delay,
including, but not limited to, damages for loss of profits
or loss of use.
NO AUTHORIZATION
No person or firm is authorized to create for Midmark
any other obligation or liability in connection with the
products.
THIS WARRANTY IS MIDMARK’S ONLY WARRANTY AND
IS IN LIEU OF ALL OTHER WARRANTIES, EXPRESS OR
IMPLIED. MIDMARK MAKES NO IMPLIED WARRANTIES
OF ANY KIND INCLUDING ANY WARRANTIES OF
MERCHANTABILITY OR FITNESS FOR ANY PARTICULAR PURPOSE. THIS WARRANTY IS LIMITED TO THE
REPAIR OR REPLACEMENT OF DEFECTIVE PARTS.
Midmark Corporation
145 Mid County Drive
Orchard Park, New York 14127
Customer Service: 1-800-643-6275
Technical Service: 1-888-279-1260
Fax: 1-877-725-6495
www.midmark.com
Model
# of
Users
CFM @
80 PSI
Tot al
HP
Tan k
Capacity
Vol ta ge
Tot al
Amps
Breaker
Size
(Amps)
Sound
Level
(dbA)
Dimensions
H x W x D
(IN.)
Product
Weight
(lbs.)
Fresh Air
Intake Pipe
Size
CL21
1 - 3 5.3 1.0 10 115 12.4 20 68 29 x 26 x 24 202 2"
CL22
1 - 3 5.3 1.0 10 208- 230 6 20 68 29 x 26 x 24 202 2"
CL32
3 - 5 10.6 2.0 20 208-230 12 20 71 31 x 33 x 26 329 2"
CL52
5 - 7 15.9 3.0 32 208-230 18 30 75 32 x 41 x 27 460 2"
Page 2
AA182200
U
S
E
O
I
L
#
7
0
7
0
0
9
5
3
80
100
WET
DRY
To drain oil from
compressor...
A. Place a pan under the drain
plug, then remove drain plug.
B. Loosen front mounting nuts.
Remove rear mounting nuts.
C. Tip compressor forward to
drain all oil.
Drain
Plug
Air Intake
Filter
Ultra-Air
Filter
Element
O-ring
Maintenance Parts & Kits
Parts
Description Order Number
Oil (4 quarts) ............................ 77000953
Kits
Kits include: Ultra-Air Filter Element (qty. 1)
O-ring (qty. 2)
Compressor Oil (16 oz. / per compressor)
Air Intake Filter
Description Order Number
Single Compressor Kit ............. 77001633
Twin Compressor Kit ................ 77001634
Triple Compressor Kit .............. 77001635
A. Change Oil.
Change oil in each compressor.
example: Single model: one compressor
Twin models (shown): two compressors
Triple models: three compressors
B. Replace Air Intake Filter.
C. Replace Ultra-Air Filter Element
& O-ring
All models have only one Ultra-Air Filter.
Weekly
A. Check Oil Level.
Turn OFF for at least 5 minutes before checking.
If necessary, add oil until level reaches FULL line.
DO NOT OVERFILL! (see Adding Oil)
Adding Oil
WARNING
Never operate the equipment without complete
and proper grounding. The On/Off switch controls only the
secondary circuit power. The main power source must be turned
off to remove all power in the control box.
Duty cycle: when properly
sized the compressor should
run for 30-45 seconds and shut
off for 90 seconds.
AA184400
Check Valve
Access
Bi-Annually
A. Replace Exhaust Muffler.
Annually
AA182100
OIL
A. Check Pressurization Time.
Watch the Storage Air gauge as the
compressor runs. Record the time it takes
to go from 80 PSI to 100 PSI.
It should take approximately 15 to 45 seconds.
[Contact your dealer if significantly out of range]
B. Clean / Dust Compressor.
Wipe with a clean cloth to remove dust & debris.
Monthly
B. Check Moisture Indicator.
If indicator is BLUE, no action is required.
If indicator is PINK, marginal life or compressor
is overcycled.
If indicator is WHITE, dryer tank needs
replacing.
 Loading...