

Page 1
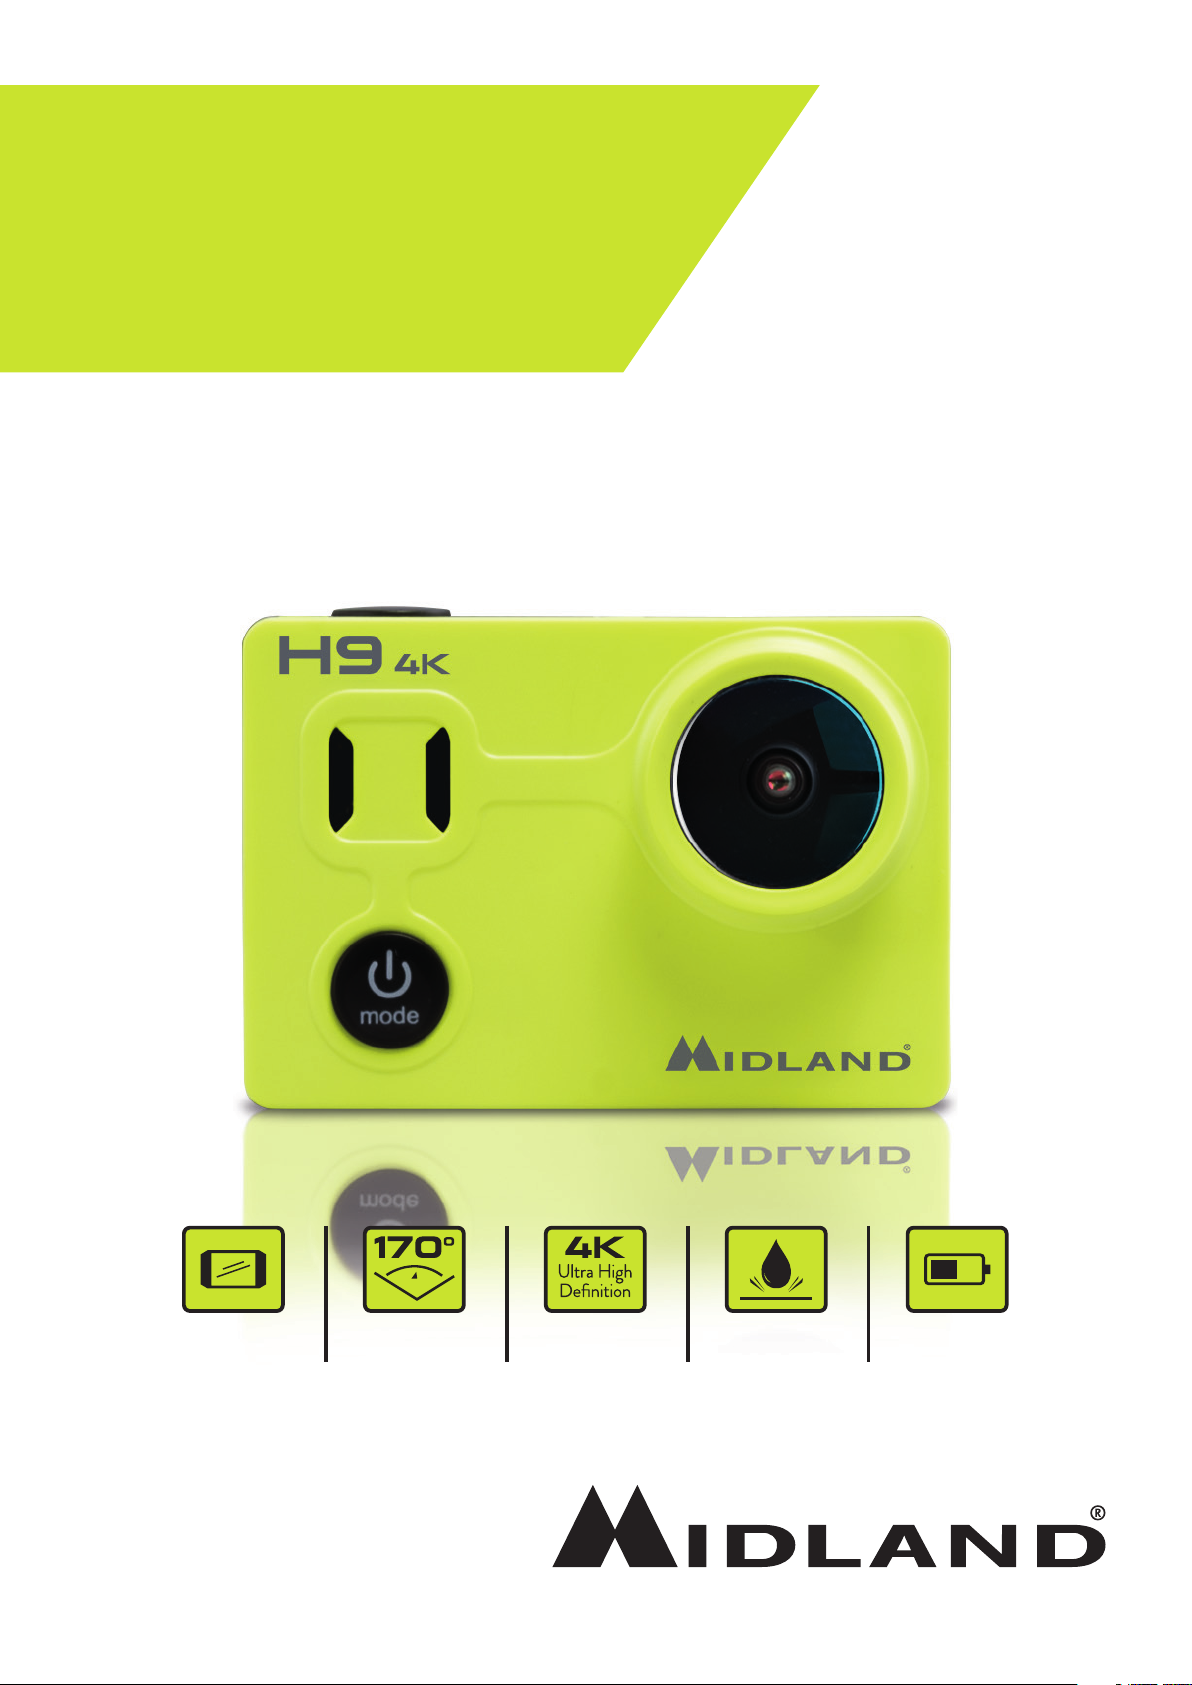
H9
4K ACTION CAM
MANUALE D’USO | USER MANUAL | MANUAL DE USUARIO
4K@30fps2-inch LCD Wide angle lens Waterproof
up to 30m
1.5 Hours
Page 2
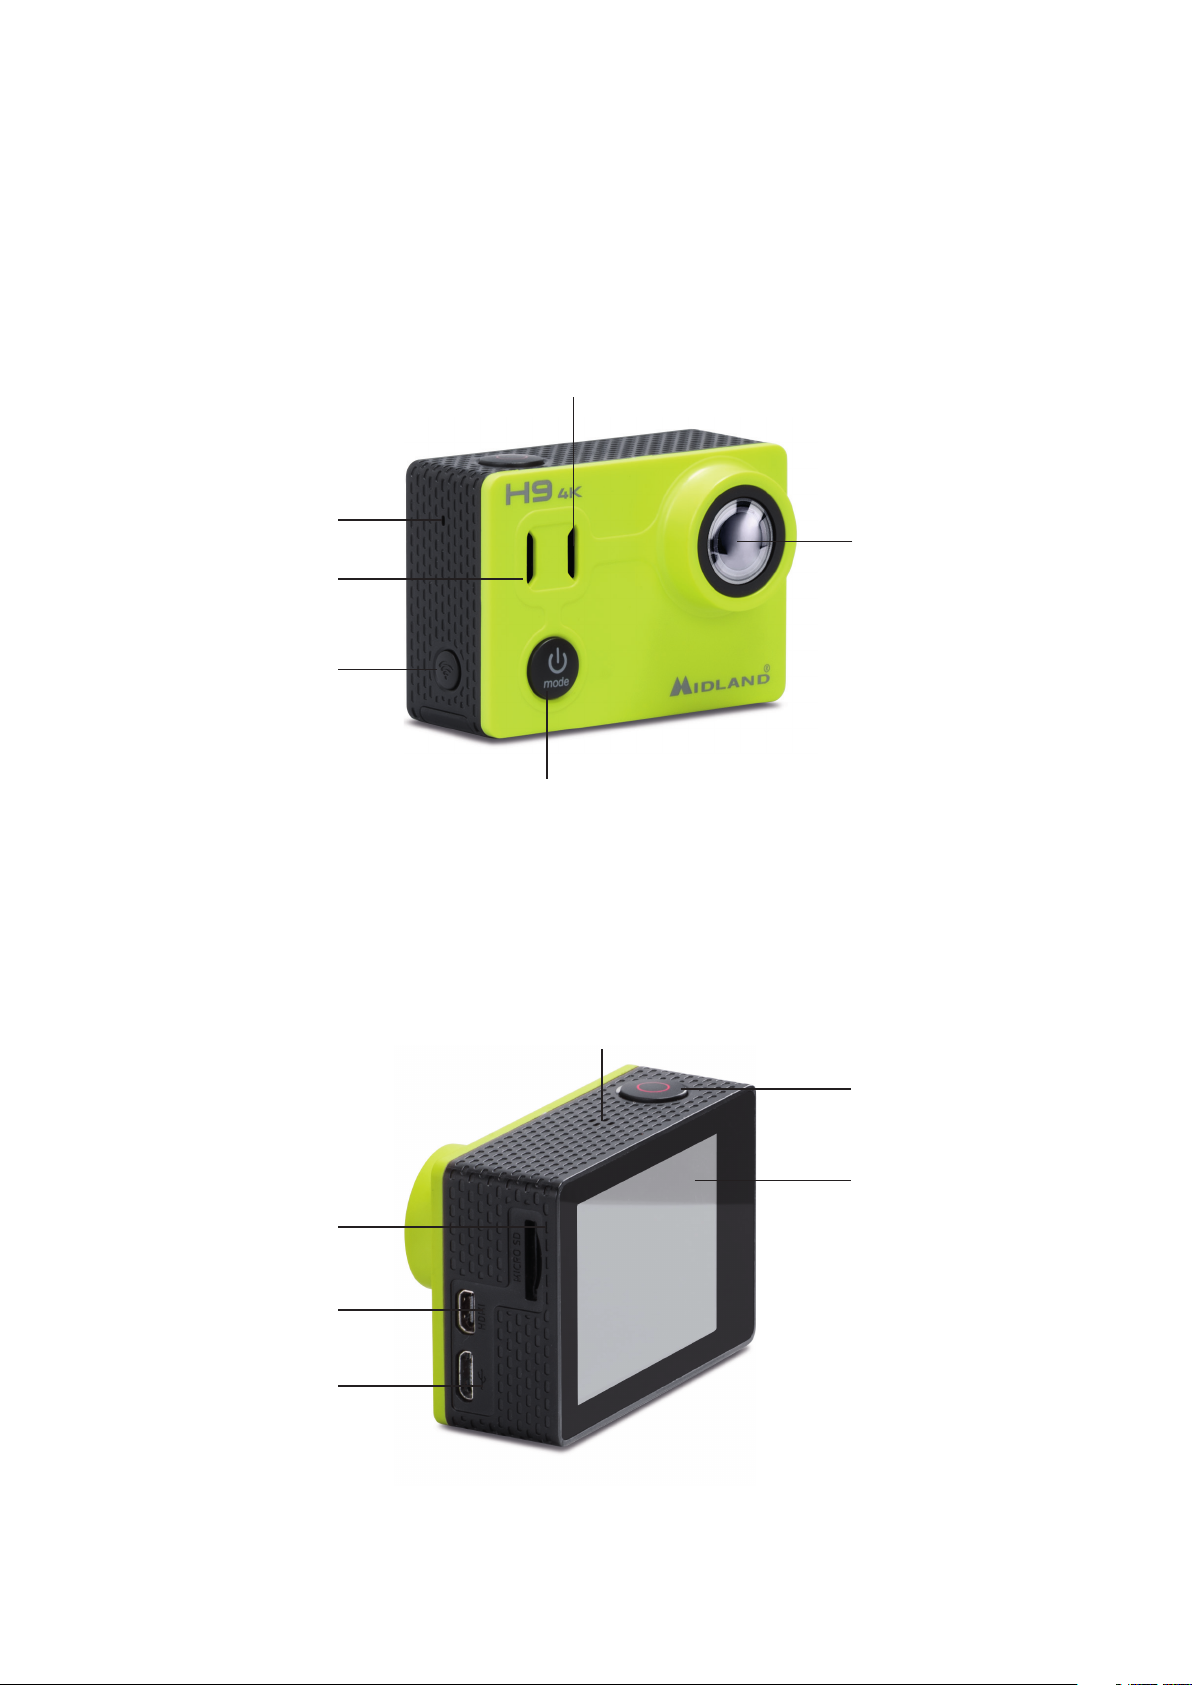
THE BASICS
Status Indicator Light
(right)
Microphone
Charging
status Light (left)
Wi-Fi button
Lens
Power/mode button
Speaker
Shutter/Select
button
Micro SD slot
Micro HDMI
Micro USB port
Screen
13
Page 3
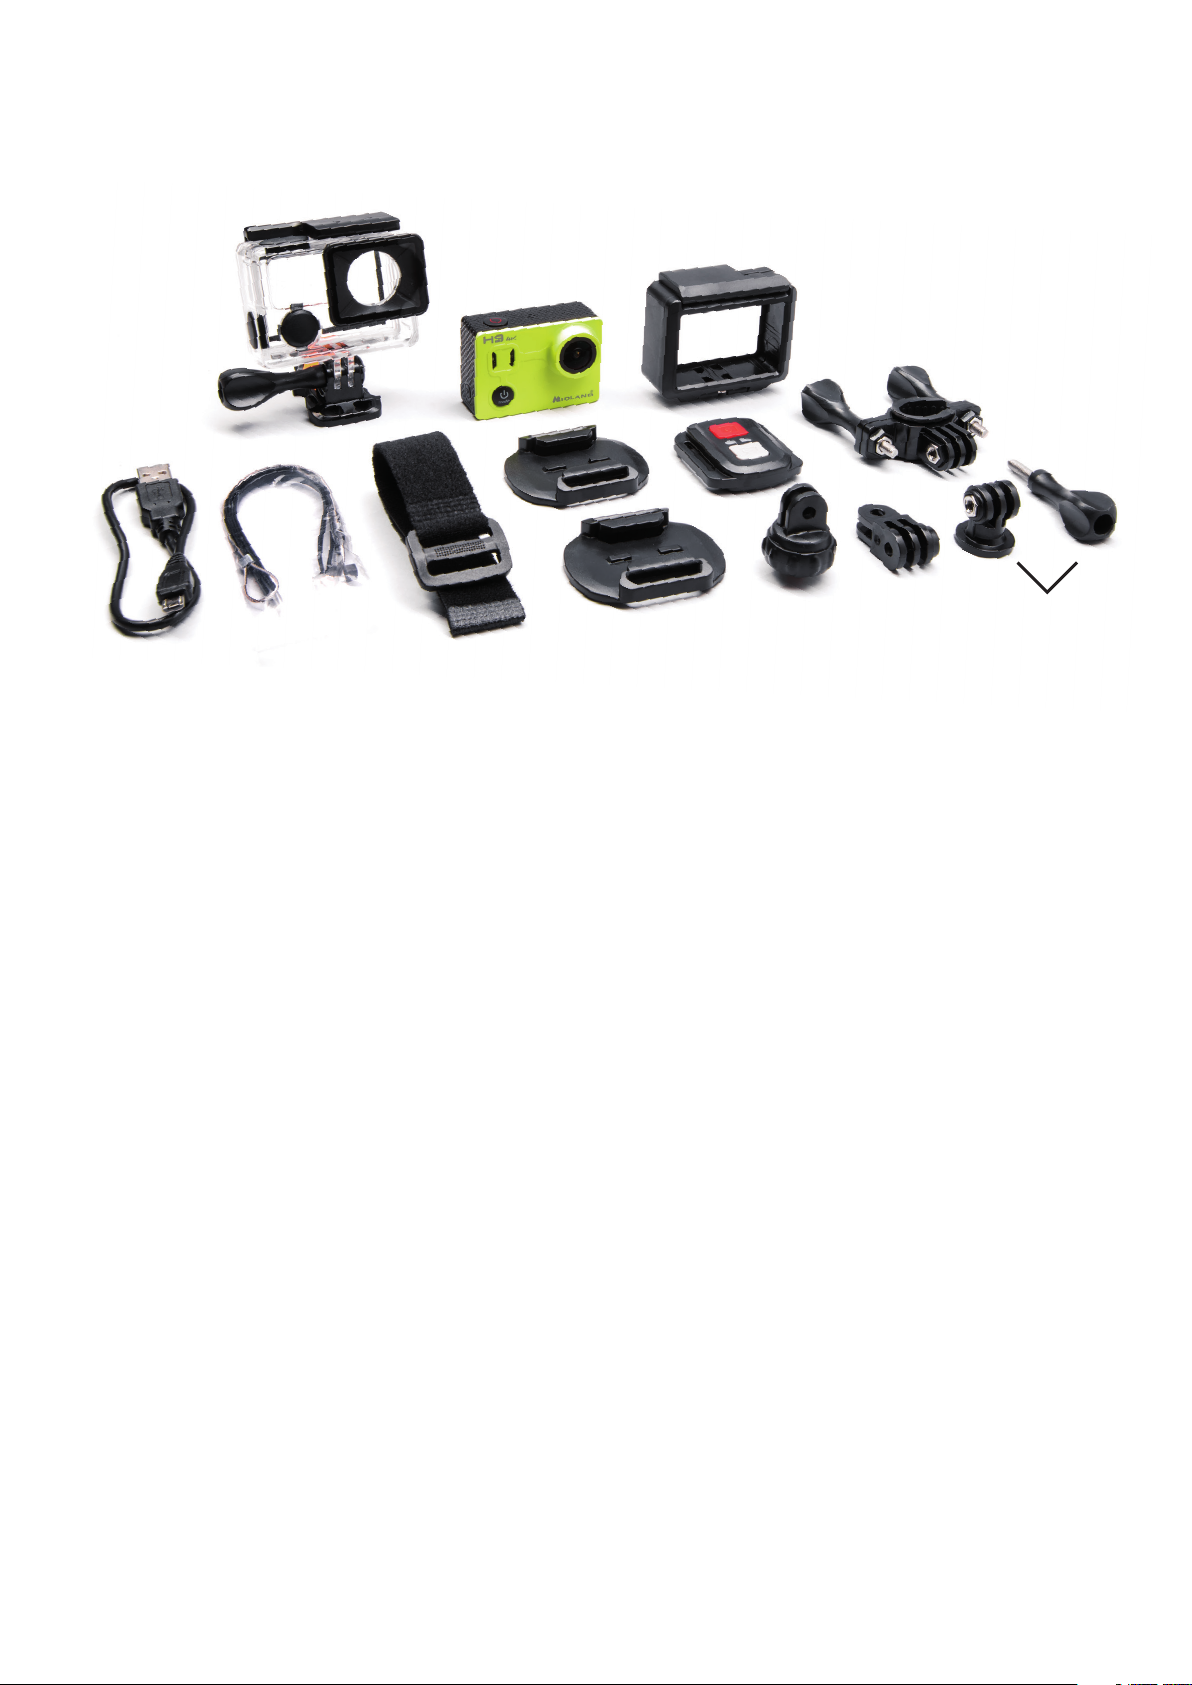
INCLUDED ACCESSORIES
1
12
9
1. Waterproof case 30m
2. Quick release mount (x2)
3. Standard photo mount
4. Curved mount
5. Flat mount
6. Tripod mount
7. 90° mount
8. Tethers
9. USB Cable
10. Handlebar mount
11. Wireless remote control
12. Frame
2
5
4 68 3
10
11
711
Attention: If you use the case in the water, wash it well and dry it after use. Do not use any
type of cleaning product.
14
Page 4

GETTING STARTED
To power ON: Press the Power/mode button.
To power OFF: Press and hold the Power/mode button.
OVERVIEW
Turn camera ON and repeatedly press the Power/mode button to cycle through camera mo-
des and settings. The modes will appear in following order:
Video Record video
Photo Capture a single photo
Burst Photo Capture photo bursts
Time Lapse Video Record Time Lapse video
Time Lapse Photo
Video playback Video playback
Photo playback Photo playback
Shoot a series of photos at set time inter-
vals
Settings
Adjust camera settings, resolution and
more
15
Page 5

SETTINGS
Repeatedly press the Power/Mode button to cycle through options and press the Shutter/Se-
lect button to select the desired option.
VIDEO RESOLUTION
4K@30fps, 2.7K@30fps, 1080p@30/60fps, 720@120fps
Micro SD card 4K 30 2.7K 30 1080p 60 1080p 30
32GB 80 min 120 min 60 min 120 min
64GB 160 min 240 min 120 min 240 min
› Photo resolution: 14M
› Video: 1min/5min
› Looping video: o/on.
› Time stamp: O / Date / Date and time
› Exposure: +-2.0/+-1.7/+-1.3/+-1.0/+-0.7/+-0.3/0
› Burst photo: 3 photos in 1 second / 7 photos in 2 seconds / 15 photos in 4 seconds
› Time Lapse Photo - interval: 3s/5s/10s/30s/60s
› Time Lapse Photo: on/o
› Time Lapse Video – resolution: 4K@30fps/2.7K@30fps
› Time Lapse Video – interval: 0.5s / 1s / 2s / 3s / 4s / 5s / 10s / 15s / 20s / 30s / 60s
› Power frequency: 50Hz / 60Hz / Auto
› Language: English / Italian / Spanish / Portoguese / German / Dutch / French / Czech /
Polish / Turkish / Russian / Japanese / Finnish / Danish / Swedish / Norwegian / Hungarian /
Slovak / Greek
› Remote control: on/o
› Date & Time (setting): MM/DD/YY, DD/MM/YY or YY/MM/DD
› Sound indicator: Shutter on/o, Start up on/o, Beep on/o, volume 0/1/2/3)
› Auto LCD OFF: o/1 min/3min/5min
› Power saver: o/1 min/3min/5min
› Format: Yes/No
› Reset: Yes/No
› Version
16
Page 6

DATE AND TIME SETTING
Date and time are automatically set when H9 is conncected to the APP MIDLAND H9 or it
is possible to set them manually through the Settings menu.
Should the battery be removed from the camera, date and time have to be set again.
VIDEO MODE
Video
To record video verify the camera is in Video mode. If the Video icon is not displayed on your
camera’s LCD screen, press the Power/mode button repeatedly until it appears.
To start recording:
Press the Shutter/Select button. The camera will emit one beep and its Status Light (Blue
Led) will flash while recording.
To stop recording:
Press the Shutter/Select button. The Camera Status Light will stop flashing and H9 will emit
one beep to indicate recording has stopped.
This camera automatically stops recording when the battery is out of power. Your videos will be
saved before the camera powers OFF.
PHOTO MODE
Photo
To capture a photo, verify the camera is in Photo mode. If the Photo icon is displayed on the
LCD screen, press the Power/mode button repeatedly until it appears.
To take a photo press the Shutter/Select button.
H9 will emit the shutter sound.
BURST PHOTO MODE
Burst
To capture a Burst Photo series, verify the camera is in Burst Photo mode. If the Burst Photo
icon is not shown on the camera LCD screen, press the Power/mode button repeatedly until it
appears.
To take a Burst Photo series:
press the Shutter/Select button. The camera will emit the camera shutter sound.
17
Page 7

TIME LAPSE PHOTO
TL (Time Lapse) Photo
To capture a Time Lapse photo series, verify the Time Lapse is ON and the camera is in Time
Lapse mode.
If the Time Lapse icon is not displayed on your camera’s LCD screen, press the Power/mode
button repeatedly until it appears.
In Time Lapse mode, H9 captures a series of photos at 3, 5, 10, 30 or 60 second intervals.
To take Time Lapse photos:
press the Shutter/Select control. The camera initiates countdown and emits the shutter
sound each time a Photo is taken.
TIME LAPSE VIDEO
TL (Time Lapse) Video
To record Time Lapse videos, verify that the camera is in TL Video mode.
If the TL Video icon does not appear on the camera’s LCD screen, press the Power/mode but-
ton repeatedly until it is shown.
H9 will issue videos with photos captured at 0.5/1/2/3/4/5/10/15/20/30/60 seconds.
To record a video press the Shutter/Select button. H9 will emit a beep and start recording.
PLAYBACK
Video Photo
1. Press the Power/Mode button to select Video or Photo.
2. Press the Shutter/Select button to enter the Playback menu.
3. Use the Power/Mode button to select the file you want to play.
4. Press the Shutter/Select button to playback or pause.
5. To return to the Playback menu, press Wi-Fi.
MICRO SD CARD
This camera is compatible with microSDHC and microSDXC memory cards with a capacity up
to 64GB.
You must use a microSD card with a Class 10 U3 speed rating.
We recommend using brand name memory cards for maximum reliability in high-vibration
activities.
BATTERY
To charge the battery:
1. Connect the camera to a computer or USB power supply.
2. The Charging Status Light (Red Led) remains ON while the battery is charging and will
turn OFF when the charge is full.
3. A complete charge takes 3-5 hours.
18
Page 8

2.4GHZ WIRELESS REMOTE CONTROL
Photo button
Video button
VIDEO MODE
Video
Verify that H9 is in Video mode.
To start recording press the grey (Video) button. H9 will emit 1 beep and the blue led of the
camera will flash while recording.
To stop recording press the grey button again. The led will stop blinking.
PHOTO MODE
Foto
To capture a photo, verify the camera is in Photo mode.
To take a photo press the red (Photo) button. H9 will emit a shutter sound.
BURST
Burst
To capture a Burst series, verify the camera is in Burst Photo mode.
To take a burst series, press the red button. H9 will emit shutter sounds.
TIME LAPSE VIDEO
TL (Time Lapse) Video
To record a Time Lapse video, the camera must be set in TL Video mode.
To start recording press the grey button. H9 will emit 1 beep and the blue led of the camera
will blink while recording.
To stop recording press the grey button again; the led will stop flashing.
19
Page 9

TIME LAPSE PHOTO
TL (Time Lapse) Photo
Make sure the camera is set in Time Lapse Photo mode.
To take Time Lapse photos press the red button.
CAMERA OFF
To turn o the camera by means of the remote control keep pressed both controls for 3 seconds.
CAMERA APP
“Midland H9” APP
The Midland H9 APP allows to control the camera remotely using a smartphone or tablet.
Features include the camera control, live preview, photo playback and sharing of photos and
contents.
1. Download the APP Midland H9 on your smartphone or tablet from Apple Store or Google
Play.
2. Press the Power/Mode button to turn on the camera.
3. Press the Wi-Fi button to turn on Wi-Fi. *
4. In your smartphone or tablet’s Wi-Fi settings, connect to the network “iCam-Midland H9”
followed by a series of numbers.
5. Open the Midland H9 APP on your smartphone or tablet.
* Keep it pressed to turn o the Wi-Fi.
The Midland H9 APP is compatible with the following smartphones and tablets.
Apple IOS:
› iPhone 6,6S,7(Plus) (iOS 10)
› iPad Air & Mini (iOS 10)
Android:
› Android 4X Quad-Core devices (Android 4.4 and higher).
COMPATIBILITY
Compatibility may vary by device.
Playback, sharing and access to the camera’s memory card might not be available on some
devices.
WARRANTY
For information about the warranty, please visit www.midlandeurope.com
20
Page 10

SPECIFICATIONS
› Video: 4K@30fps, 2.7K@30fps, 1080p@30/60fps, 720@120fps MOV format
› Photo: 14 MP jpg format
› Wide angle lens 170°
› Wi-Fi connection
› Water resistance: up to 30m of depth with waterproof case
› Display LCD: color 2”
› Built-in speaker and microphone
› Operational modes: Video/Photo/Time Lapse/Playback
› Multi-language menu: EN/IT/ES/PT/DE/DU/FR/RU/PL/TR/CZ/JP/FIN/DK/SW/NW/
HU/SL/GR
› Connections: USB 2.0 & micro HDMI
› Battery life up to 90min in 1080P with Wi-Fi OFF
› Memory: supports Micro SD card class 10 up to 64GB
› Battery: Li-Ion 1050mAh
› Dimensions: 598 x 29 x 40mm
› Weight: 65gr (w/out battery)
Specifications are subject to change without notice.
21
 Loading...