

Page 1
FULL HD
360°
Video&Photo
1.5h - 1500mAh
battery pack
H360
Virtual reality
ready
QUICK GUIDE
GUIDA RAPIDA
Page 2
2
H360
FULL HD
H360
FULL HD
14
2
3
5
8
7
6
9
9
10
11
14
13
12
Page 3

3
ENGLISH
Starting steps
• Make sure that the battery is full
• Format the Micro SD memory card.
Now you can proceed and set H360 upon your needs.
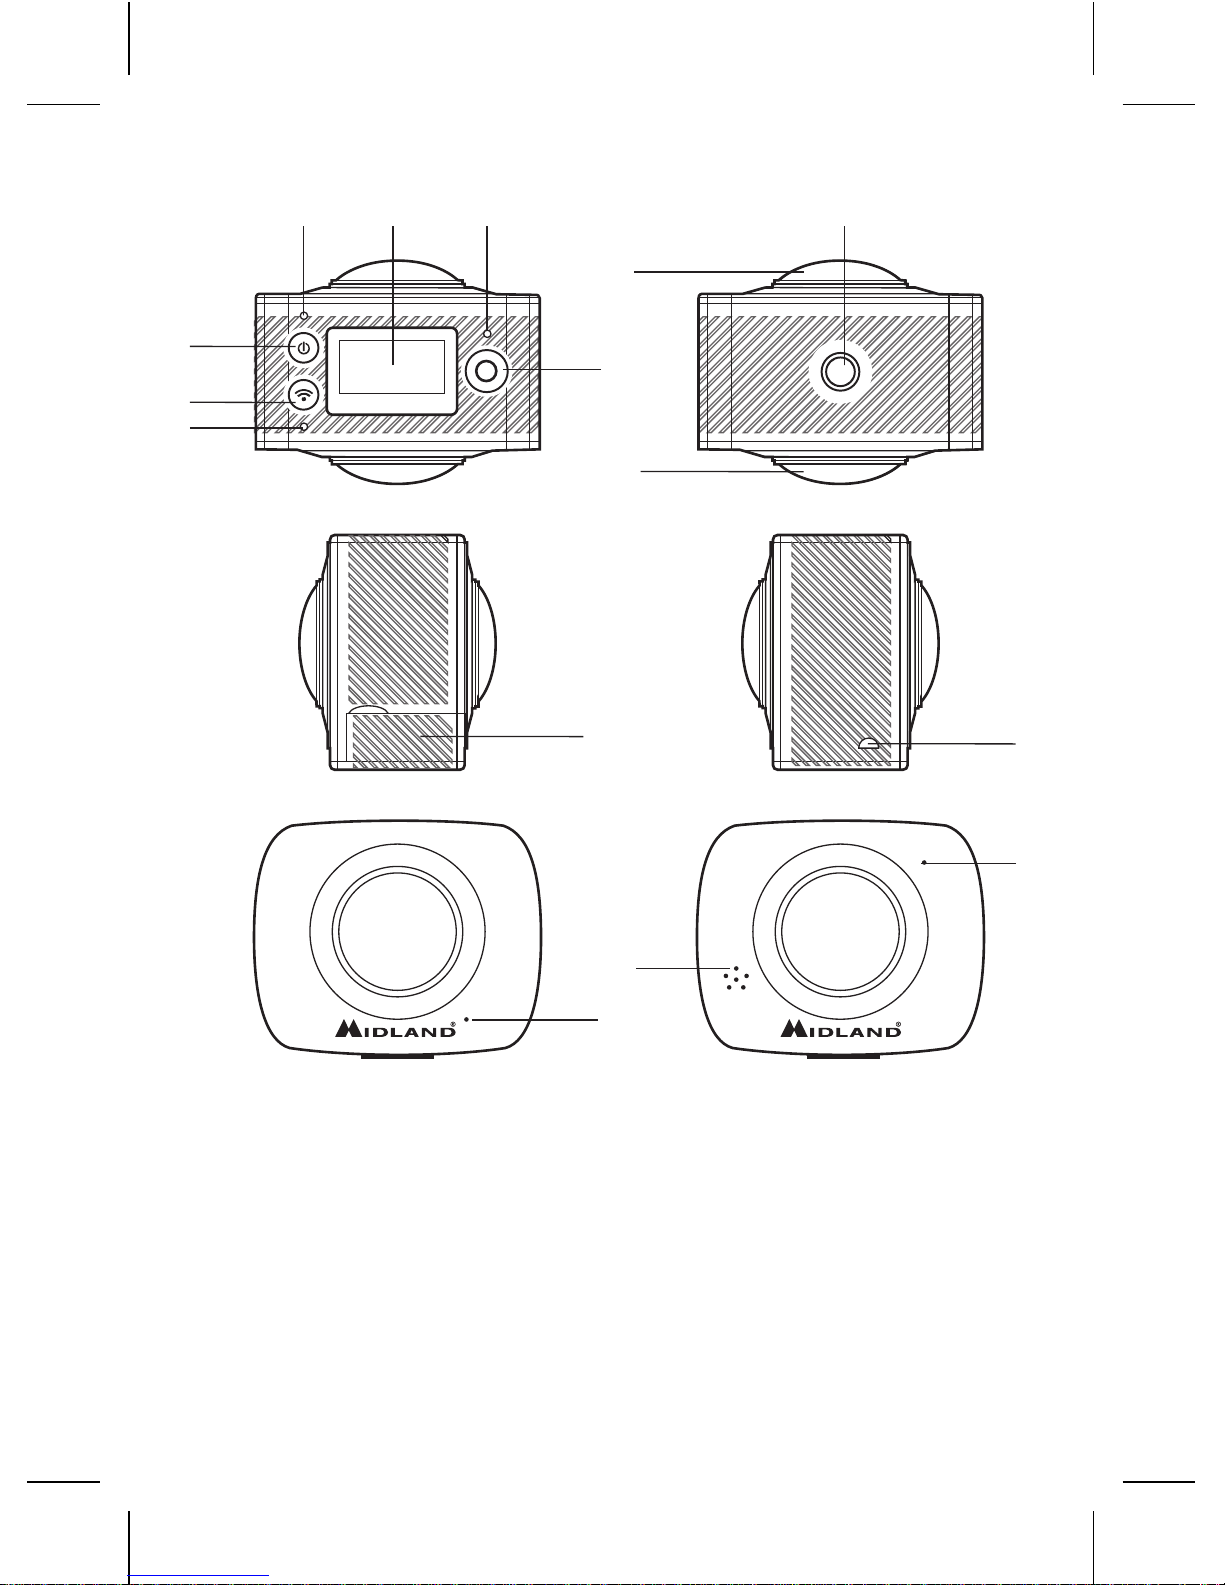
Appearance and buttons
1. LCD display screen
2. Power/Mode button
3. Wifi/Menu button
4. Power led (Red)/Charging led (Blue)
5. WIFI led (red)
6. REC led (red)
7. Start/Stop REC/Shutter button
8. Mount screw
9. Camera Lens x 2 (220°)
10. Connectors lid (USB, microSD)
11. Lanyard hole.
12. Microphone
13. Speaker
14. Reset Button
Turn-on &Turn-o.
• Turn-on: Press and hold the on/o button for about 2 seconds.
With a sound of “Beep” from the buzzer, LCD display screen will
be on.
• Turn-o: Press and hold the on/o
button for about 3 seconds.
“GOODBYE” will be displayed
Page 4
4
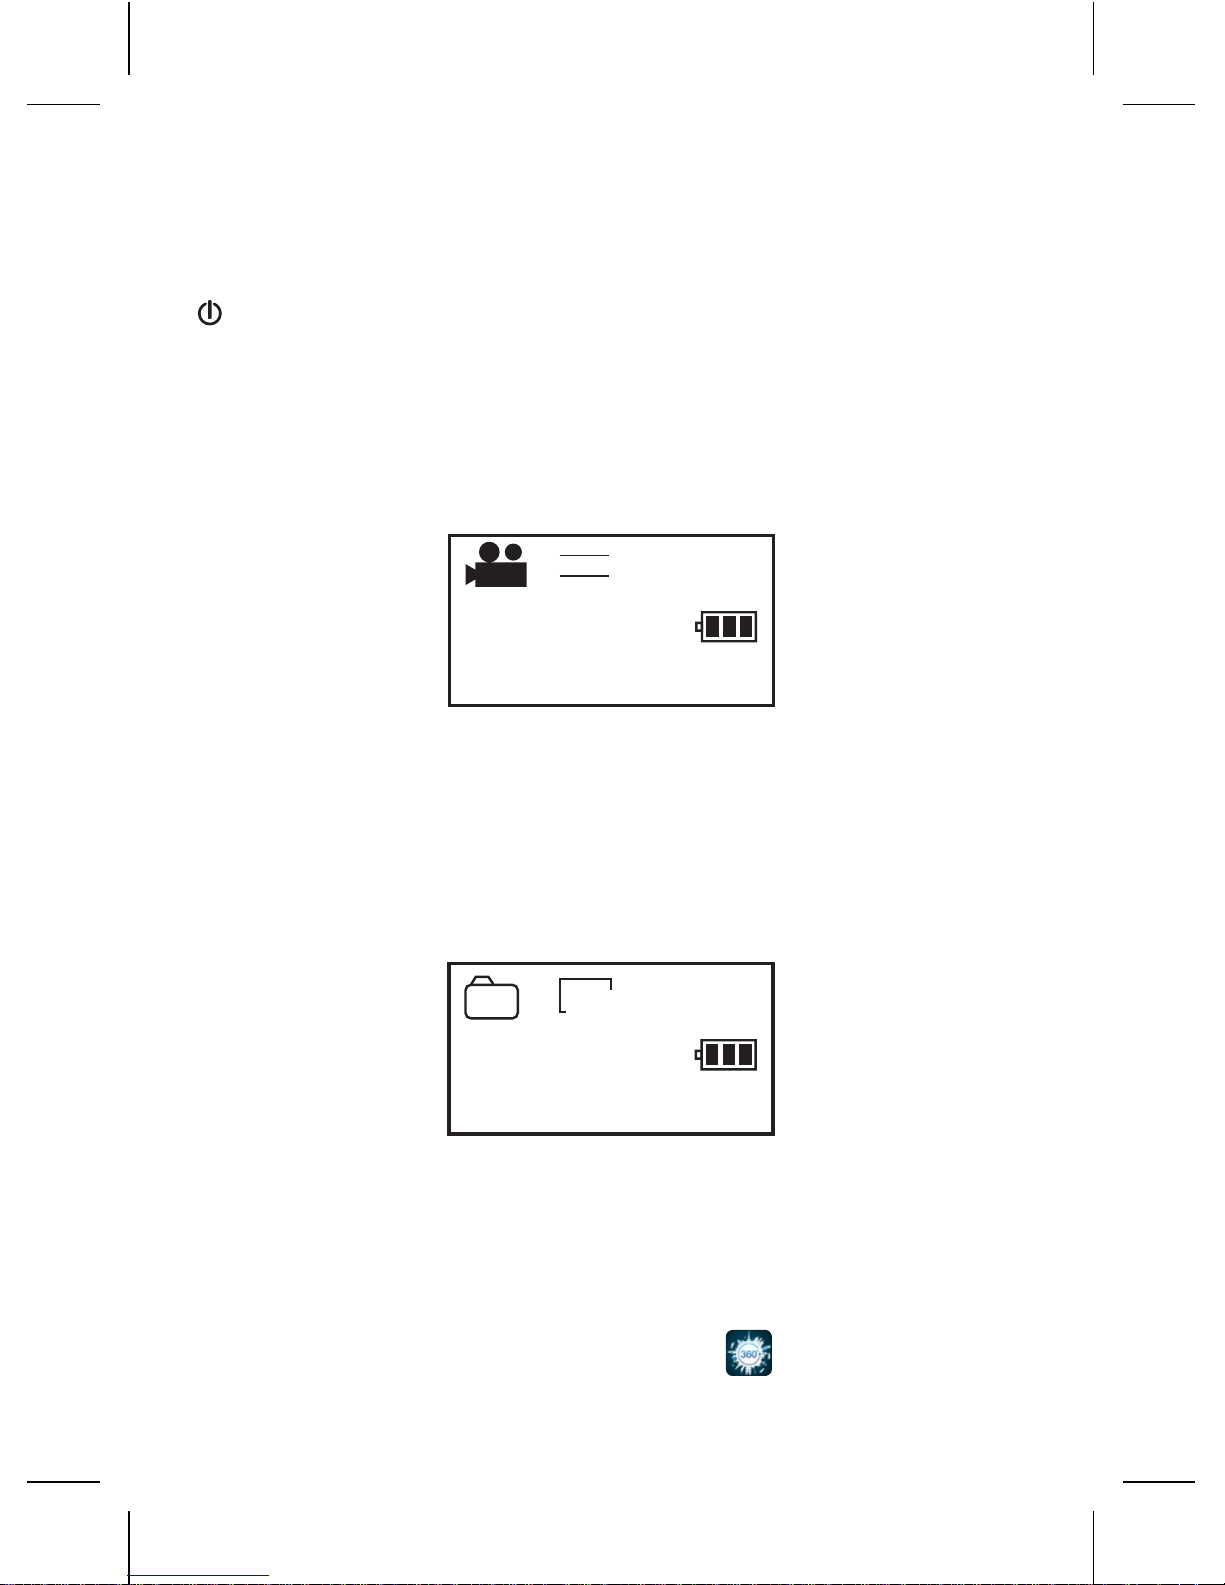
Working mode selection
The camera has two modes: video recording and photograph
shooting. They can be switched by pressing the Power/Mode button
or through APP.
• Video recording: the LCD displays the available REC time (as in
below example image). Press the start/stop REC button to start
recording. The REC led (red) will be twinkling during the video
recording process. LCD timer starts timing. Press the start/stop
REC button again to stop video recording.
• Photo shooting: The LCD displays the available number of pho-
tos (as in below example image). Short press the Shutter button
to shoot photographs after it is switched to the photo-shooting
mode. The buzzer will send out a “beep” sound. The counter will
countdown the remaining photos.
APP (for Android and iOS)
To view your videos you can download the APP “SYVR360”
available on Play Store (for Android users) or Apple Store (for iOS
users).
After installing “SYVR360” APP, the icon
will be shown on the
screen.
05:12:39
1080P
2015/01/01 01: 01
★★★★★★★★
★★★★★★★★
15298
2015/01/01 01: 01
P
5
m
2
3
5
05:12:39
1080P
2015/01/01 01: 01
★★★★★★★★
★★★★★★★★
2
Page 5

5
ITALIANO
Per iniziare
Prima di iniziare ad utilizzare H360:
• Assicuratevi che la batteria sia carica.
• Formattate la scheda di memoria microSD.
Ora potete iniziare ad impostare la videocamera.
Descrizione dei comandi
1. Display LCD
2. Tasto accensione/modalità
3. Tasto Wi-Fi/Menu
4. Led accensione (rosso )/Led di carica (blu)
5. Led modalità WI-FI (rosso)
6. Led registrazione in corso (rosso)
7. Tasto inizio/fine registrazione /scatto foto
8. Vite per aggancio supporti
9. Lenti grandangolo 220°
10. Copertura prese USB, microSD
11. Foro per laccetto da polso
12. Microfono
13. Altoparlante
14. Tasto Reset
Accensione/spegnimento
• Accensione: Premete per 2 secondi il tasto accensione/
spegnimento
; sentirete un “Beep” ed il display si accenderà.
• Spegnimento: Tenete premuto il tasto accensione/spegnimento
per 3 secondi. Sul display verrà visualizzato “GOODBYE”.
Page 6

6
Selezione modalità operative
H360 ha due modalità operative: registrazione video e scatto foto.
Possono essere selezionate premendo il tasto Accensione/Modalità
o tramite la APP dedicata.
• Registrazione video: in standby il display mostra il tempo di
registrazione residuo. Per iniziare la ripresa premete il tasto inizio
registrazione. Il led di registrazione lampeggerà rapidamente di
rosso per tutta la durata della registrazione. Il timer del display
indica la durata del video. Per interrompere la registrazione
premete di nuovo il tasto inizio/fine registrazione.
• Scatto foto: in standby il display indica gli scatti fotografici
disponibili. Premete brevemente il tasto scatto foto; sentirete un
beep. Sul display vedrete il numero di foto rimanenti.
APP (per Android e iOS)
Per poter visualizzare i vostri filmati è possible scaricare la APP
“SYVR360” gratuitamente su Play Store (per Android) o su Apple
Store (per iOS).
Dopo aver installato la APP “SYVR360”, l’icona
verrà
visualizzata sullo schermo.
05:12:39
1080P
2015/01/01 01: 01
★★★★★★★★
★★★★★★★★
15298
2015/01/01 01: 01
P
5
m
2
3
5
05:12:39
1080P
2015/01/01 01: 01
★★★★★★★★
★★★★★★★★
2
Page 7

7
INFORMAZIONE AGLI UTENTI: Ai sensi dell’art. 13 del decreto legislativo
25 luglio 2005, n.151 “Attuazione delle Direttive 2002/95/CE, 2002/96/CE
e 2003/108/CE, relative alla riduzione dell’uso di sostanze pericolose nelle apparecchiature elettriche ed elettroniche, nonché allo smaltimento dei rifiuti”. Il
simbolo del cassonetto barrato riportato sull’apparecchiatura indica che il prodotto alla fine della propria vita utile deve essere raccolto separatamente dagli
altri rifiuti. L’utente dovrà, pertanto, conferire l’apparecchiatura giunta a fine vita
agli idonei centri di raccolta dierenziata dei rifiuti elettronici ed elettrotecnici,
oppure riconsegnarla al rivenditore al momento dell’acquisto di una nuova apparecchiatura di tipo equivalente, in ragione di uno a uno. L’adeguata raccolta
dierenziata per l’avvio successivo dell’apparecchiatura dismessa al riciclaggio,
al trattamento e allo smaltimento ambientalmente compatibile contribuisce ad
evitare possibili eetti negativi sull’ambiente e sulla salute e favorisce il riciclo dei
materiali di cui è composta l’apparecchiatura. Lo smaltimento abusivo del prodotto da parte dell’utente comporta l’applicazione delle sanzioni amministrative di
cui al dlgs. n.22/1997 (articolo 50 e seguenti del dlgs. n.22/1997).
All articles displaying this symbol on the body, packaging or instruction manual of same, must not be thrown away into normal disposal bins but brought to
specialised waste disposal centres. Here, the various materials will be divided by
characteristics and recycles, thus making an important contribution to environmental protection.
L’APPARATO È DI LIBERO USO IN TUTTI I PAESI EUROPEI.
THE EQUIPMENT IS FREE USE IN ALL UE COUNTRIES.
Page 8

8
RED
IT / RSM
Cte International Srl dichiara che il prodotto è conforme ai requisiti essenziali
e alle disposizioni della Direttiva 2014/53/UE. La Dichiarazione di conformità
si può scaricare dal sito http://www.midlandeurope.com/it/pagina/10090-cer-
tifications
GB / CY / MT
Hereby Cte International Srl declares that this product is in compliance with the
essential requirements and other relevant provisions of Directive 2014/53/UE.
The declaration of conformity is available on the web site http://www.midland-
europe.com/it/pagina/10090-certifications
AT / DE / CH / LI
Hiermit erklärt Cte International Srl, dass das Produkt die grundlegenden Anforderungen und anderen relevanten Bestimmungen der Richtlinie 2014/53/
UE. Die Konformitätserklärung ist unter folgendem Link verfügbar: http://www.
midlandeurope.com/it/pagina/10090-certifications
ES
CTE International SRL. declara, bajo su responsabilidad, que este aparato cumple con lo dispuesto en la Directiva 2014/53/UE, del Parlamento Europe. La
Declaración de Conformidad está disponible en http://www.midlandeurope.
com/it/pagina/10090-certifications
FR / LU / CH
Par la présente Cte International Srl déclare que le modèle est conforme aux
exigences essentielles et autres dispositions pertinentes de la directive 2014/53/
UE. La déclaration de conformité est disponible sur le site internet http://www.
midlandeurope.com/it/pagina/10090-certifications
PT
A CTE INTERNATIONAL declara que este aparelho cumpre com o disposto na
Directiva 2014/53/UE do Parlamento Europeu. A Declaração de Conformidade
está disponível no sitio na Internet em http://www.midlandeurope.com/it/pagi-
na/10090-certifications
GR
Με το παρών, η Cte International Srl δηλώνει οτι το όνομα του μοντέλου
συμμορφώνεται ως προς τις βασικές απαιτήσεις και άλλες σχετικές
διατάξεις του Κανονισμού 2014/53/UE. Η δήλωση συμμόρφωσης
είναι διαθέσιμη στην ιστοσελίδα http://www.midlandeurope.com/it/pagi-
na/10090-certifications
NL
Hierbij verklaard CTE International Srl dat dit model voldoet aan de essentiële
eisen en andere relevante bepalingen van richtlijn 2014/53/UE. De verklaring
Page 9

9
van conformiteit is beschikbaar op de website http://www.midlandeurope.com/
it/pagina/10090-certifications
BE
CTE INTERNATIONAL Srl verklaart dat het product overeenstemt met de
voorschriften en andere bepalingen van de richtlijn 2014/53/UE. De conformiteitsverklaring is voorhanden op de website http://www.midlandeurope.com/it/
pagina/10090-certifications
PL
CTE International Srl deklaruje, że ten model jest zgodny z wymaganiami zasadniczymi i innymi istotnymi postanowieniami Dyrektywy 2014/53/UE. Deklaracja
Zgodności jest dostepna na stronie http://www.midlandeurope.com/it/pagi-
na/10090-certifications
RO
Cte International Srl declara ca acest model este in conformitate cu cerintele
esentiale si alte prevederi ale Directivei 2014/53/UE. Declaratia de confomitate este disponibila si pe site-ul http://www.midlandeurope.com/it/pagi-
na/10090-certifications.
BG
С настоящото CTE international Srl декларира, че продукта е в
съответствие с основните изисквания и съответните модификации на
Директива 2014/53/UE. Декларацията за съвместимост е налична на
сайта: http://www.midlandeurope.com/it/pagina/10090-certifications
NO
CTE INTERNATIONAL Srl erklærer at produktet er i overensstemmelse med
de viktigste kravene og andre relevante betingelser i Direktivet 2014/53/UE.
Samsvarserklæringen finnes tilgjengelig på nettstedet http://www.midland-
europe.com/it/pagina/10090-certifications
DK
Hermed erklærer Cte International Srl , at dette apperat er i overensstemmelse
med kravene og andre relevante bestemmelser i direktiv 2014/53/UE. Overensstemmelseserklæringen findes på webstedet http://www.midlandeurope.com/it/
pagina/10090-certifications
SE
CTE INTERNATIONAL Srl förkunnar att produkten överensstämmer med
de väsentliga kraven och övriga bestämmelser i direktiv 2014/53/EU. Denna
försäkran om överensstämmelse finns på webbplatsen http://www.midland-
europe.com/it/pagina/10090-certifications
FI
CTE INTERNATIONAL Srl vakuuttaa, että tuote täyttää direktiivin 2014/53/
UE. Vaatimuksenmukaisuusvakuutus on saatavilla http://www.midlandeurope.
Page 10

10
com/it/pagina/10090-certifications –verkkosivuilla.
HR
Cte International Srl ovime izjavljuje da je ime ovog modela u suglasnosti sa bitnim zahtjevima te ostalim relevantnim odredbama Propisa 2014/53/EU. Ova
Izjava o suglasnosti je dostupna na web stranici http://www.midlandeurope.com/
it/pagina/10090-certifications.
EE
Käesolevaga kinnitab Cte International Srl selle mudeli vastavust direktiivi
2014/53/UE. Vastavusdeklaratsioon on kättesaadav veebilehel http://www.
midlandeurope.com/it/pagina/10090-certifications
LT
CTE International patvirtina, kad šis modelis atitinka visus esminius Direktyvos
2014/53 / UE. Atitikties deklaracija yra pateikiama internetinėje svetainėje
http://www.midlandeurope.com/it/pagina/10090-certifications
LV
CTE INTERNATIONAL Srl deklarē, ka produkts atbilst pamatprasībām un citiem
ar to saistītajiem Direktīvas 2014/53 / UE. Atbilstības deklarācija ir pieejama
mājas lapā: http://www.midlandeurope.com/it/pagina/10090-certifications
SK
Týmto Cte International Srl prehlasuje, že tento názov model je v zhode so
základnými požiadavkami a ďalšími príslušnými ustanoveniami smernice 2014/53
/UE. Vyhlásenie o zhode je k dispozícii na webových stránkach http://www.
midlandeurope.com/it/pagina/10090-certifications
SI
Cte International Srl deklarira da je ta model skladen z bistvenimi zahtevami in
drugimi relevantnimi določili EU direktive 2014/53/UE. Deklaracija o skladnosti
je na voljo na spletni strani http://www.midlandeurope.com/it/pagina/10090-
certifications
CZ
CTE INTERNATIONAL SRL prohlašuje, že výrobek je v souladu s 2014/53/
UE. Prohlášení o shodě je k dispozici na webových stránkách http://www.
midlandeurope.com/it/pagina/10090-certifications
H
Mi, a CTE International Srl. saját felelősségre kijelentjük, hogy ezen elnevezésű
termék megfelel az 2014/53 /UE. A megfelelőségi nyilatkozat elérhető
weboldalunkon a http://www.midlandeurope.com/it/pagina/10090-
certifications címen.
Page 11

11
Page 12

FULL HD
360°
Video&Photo
1.5h - 1500mAh
battery pack
H360
Virtual reality
ready
Prodotto o importato da:
CTE INTERNATIONAL s.r.l.
Via. R.Sevardi 7- 42124 Reggio Emilia Italia
www.midlandeurope.com
Prima dell’uso leggere attentamente le istruzioni. Se il prodotto contiene
batterie: non gettare nel fuoco, non disperdere nell’ambiente dopo l’uso,
usare gli appositi contenitori per la raccolta.
Produced or imported by:
CTE INTERNATIONAL s.r.l.
Via. R.Sevardi 7 42124 Mancasale Reggio Emilia Italy
Per scaricare il manuale completo e per informazioni sulla garanzia visitate il
sito www.midlandeurope.com • To download the complete user manual and
for information about the warranty please visit www.midlandeurope.com
 Loading...