

Midea WQP8-B9252, WQP12-B9251 Maintance Manual
Shunde Midea Dishwasher Manufacturing Co.,Ltd.
Chapter InsⅠ tallation-------------------------------------------------------------1
1.1 Safety Instruction------------------------------------------------------- 1
1.2 Installation Instruction--------------------------------------------------- 2
Chapter Maintenance----------------------------------------------------------- 3
2.1 Foreword--------------------------------------------------------------3
2.2 Troubleshooting-------------------------------------------------------- 3
2.3 Note------------------------------------------------------------------6
2.4 Attached drawings-------------------------------------------------------6
Electric diagram-------------------------------------------------------- 7
Connection diagram----------------------------------------------------- 8
Ⅱ
After unpacking, the appliance should be checked to see if there is any damage to it.
The dishwasher is intended to wash dishes and platesby adults.
When using the dishwasher , some basic principals should be followed:
1) Extended power cord and adaptor should not be used.
2) The power cord should not be too long or knotted.
3) Switch off the power before making any repair of the dishwasher.
Children should be kept away from the detergent and the opened dishwasher.
Then dishwasher should not be installed in an unsheltered place or exposed to the rain or other
natural environment.
Never touch the heating element during or immediately after use.
The dishwasher should not be lean on or sit on when it is open, otherwise it will be overturned.
If the dishwasher malfunctions, turn off the water inlet and cut off the power before you read the
instruction of Chapter . If the problems cannot be solved by yourself, please contact the
professional technicians.
The dishwasher could not be repaired by unprofessional personnel with non-original spare parts.
It is recommended that if the dishwasher will not be used for a long time, it should be cut off the
water inlet, remove the plug and keep the door of dishwasher ajar.
1.1 Safety Instruction
Ⅱ
1
2
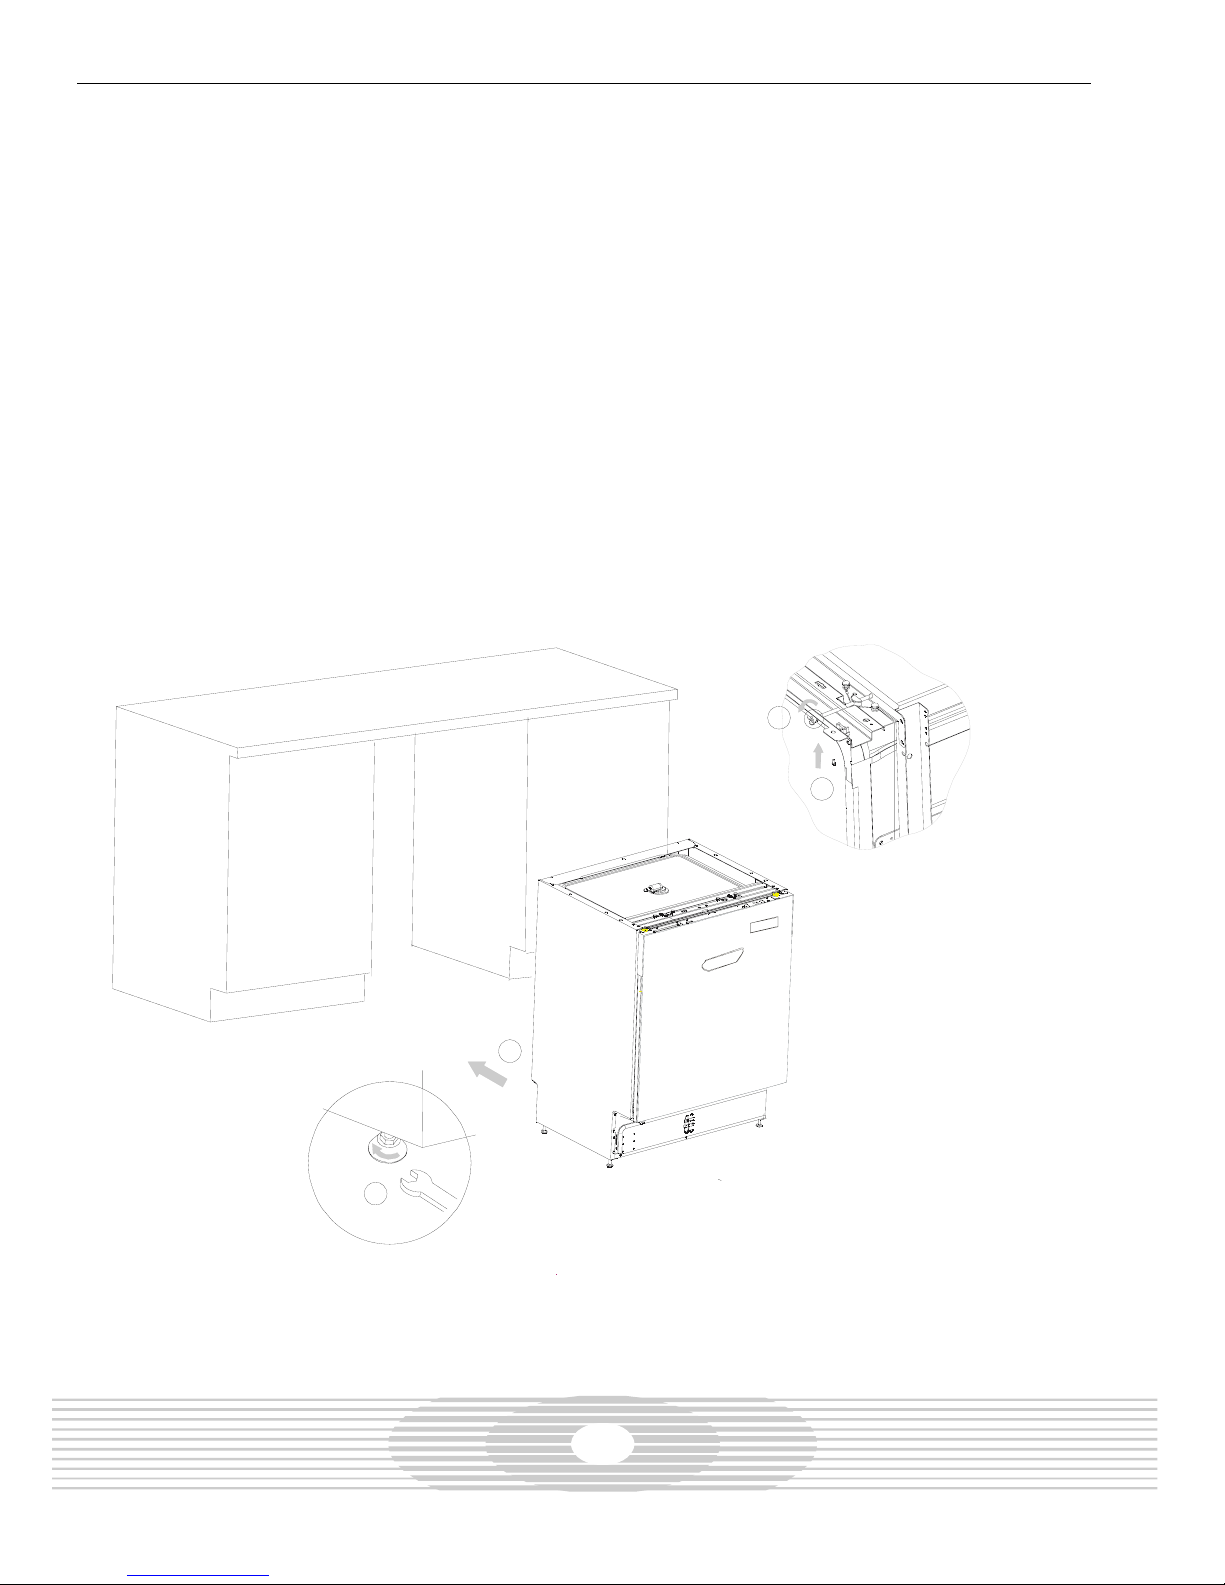
1.2 Installation Instruction
Unpacking
1) Removing the packing accessories, please pay attention that the plastic bag should be out of the
reach of children.
2) Open the door of the dishwasher to check the baskets are placed in the proper place
(manufactures may fix the baskets by some simple ways for the sake of safety).
Locate the dishwasher
1) The dishwasher should be kept away from heating resources and not be exposedtothesunto
prevent its coating from fading or falling off.
2) The back of the dishwasher should rest against the wall behind it and the sides, along the
adjacent cabinets or wall. The water supply and drain hose of the dishwasher could be positioned to
the right of the left to facilitate proper installation.
3) The dishwasher should be built in the cabinet and fixed it on the cabinet bytwoscrew.
Installa tion st eps
1)
2)
3)
4)
5)
6)
Install theaesthetic pannel on theouter door of the dishwasher.
Adjust the tension of door spring.
level the dishwahser and touch the cabinet by adjusting the four leveling legs individually.
Connect the inlet, and drain hoses, and power cord .
pushing the dishwasher into the cabinet.
fixing the dishwasher into the cabinet by two countersunk head screw.
5
3
Installation steps
2
6
When you want more particular content about installation, please to see the installation
manual we edited.
 Loading...