

Page 1

The design and specifications are subject to cha nge wit hout pr ior
notice for product improvement. Consult with t he sale s agenc y or
manufacturer for details.
AIR CONDITIONER
REMOTE CONTROLLER MANUAL
Thank you very much for purchasing our air conditi oner.
Please read this owner's manual carefully before usin g
your air conditioner. Make sure to save this manual f or
future reference.
[English]
Page 2
CONTENTS
Remote controller Specifications...................................................
Function buttons .................. .........................................................
Handling the remote controller ......................................................
Remote LCD screen indicators .....................................................
How to use the basic functions........................................................
How to use the advanced functions ...............................................
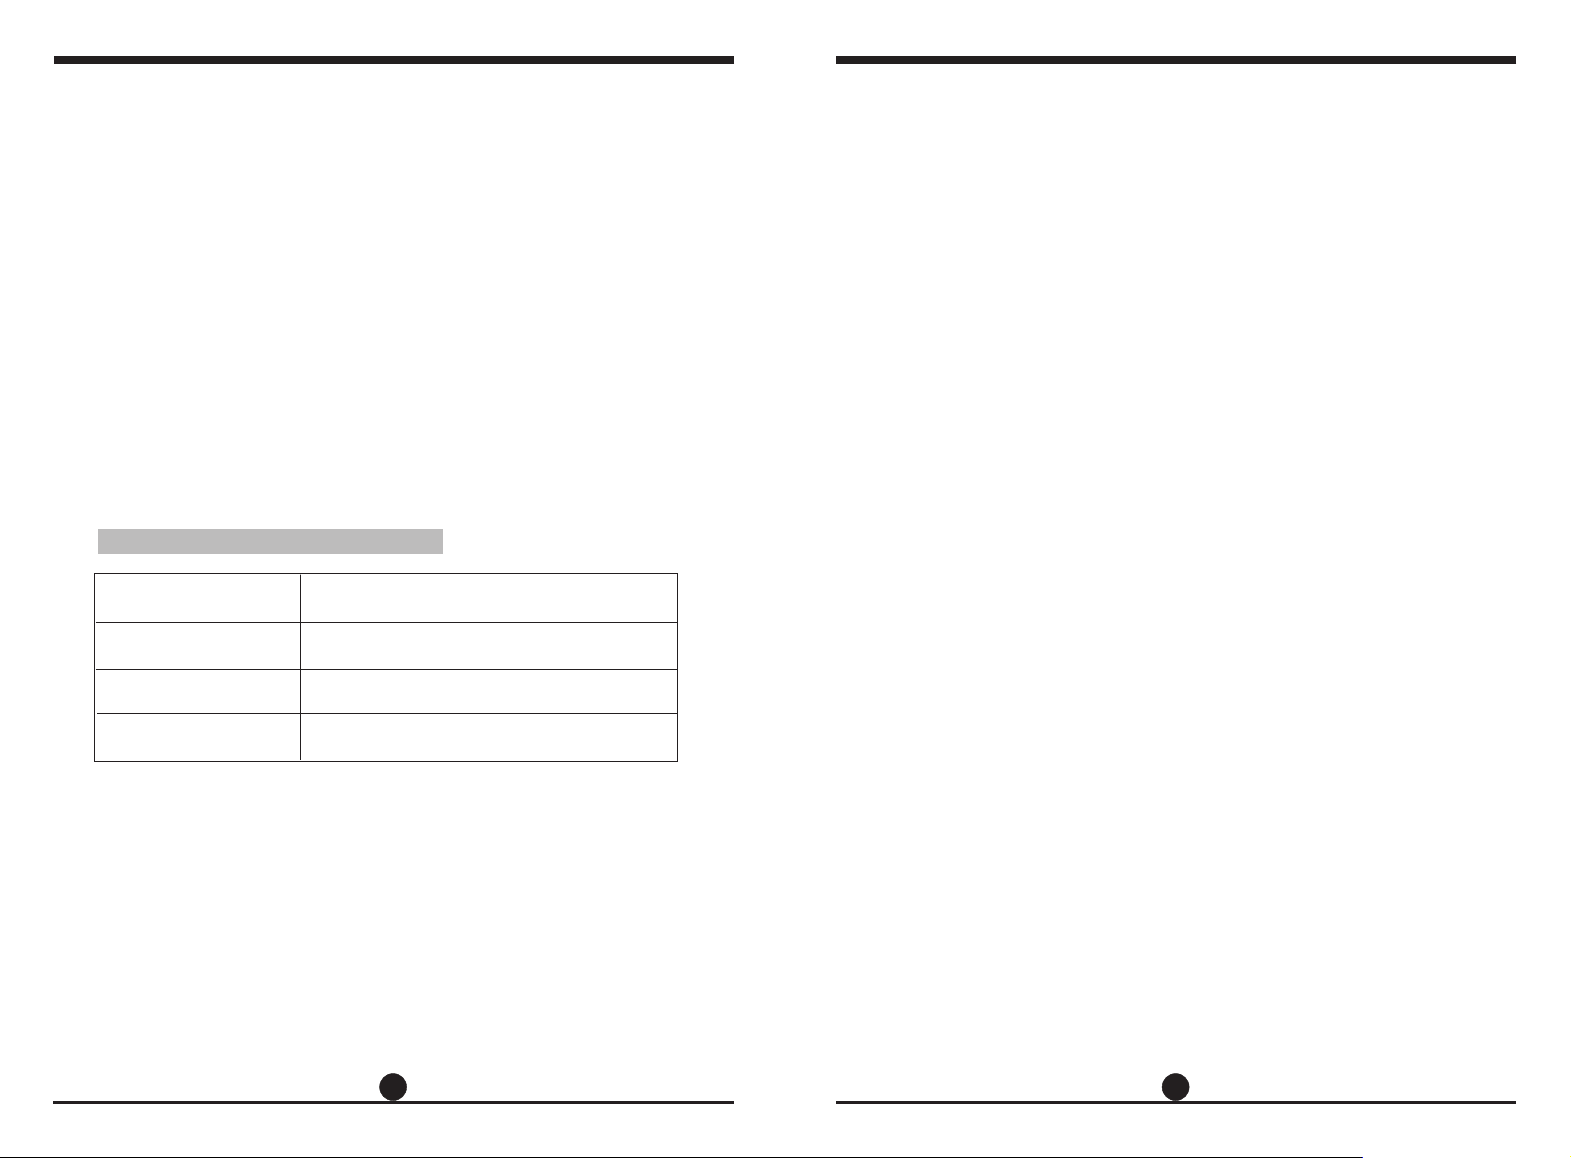
Remote Controller Specifications
Model
Rated Voltage
Signal Receiving Range
Environment
RG57A6(B)/BGEF
3.0V(Dry batteries R03/LR03×2)
8m
O O
-5 C~60 C
1
2
4
5
6
13
1
2
Page 3
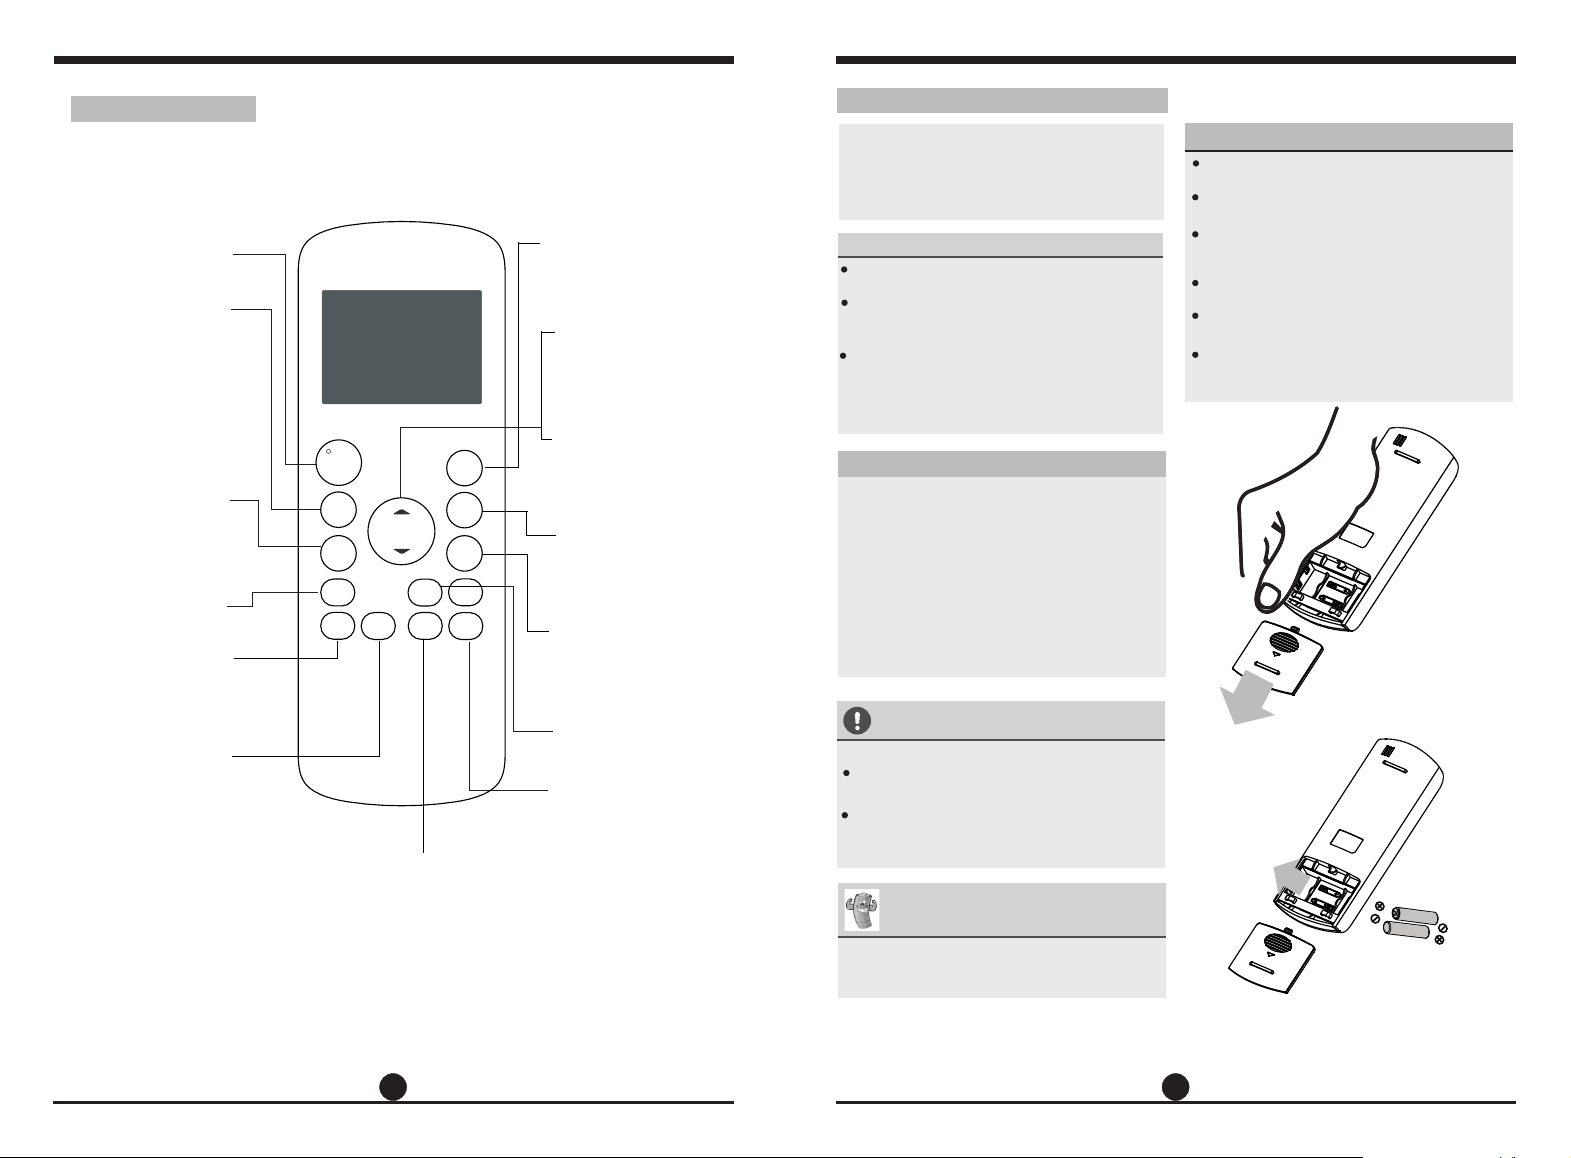
Function Buttons
Before you begin using your new air conditioner, make sure to familiarize yourself with its remote
control. The following is a brief introduction to the remote control itself. For instructions on how to
operate your air conditioner, refer to the How to Use Basic Functions section of this manual.
Turns the unit on or off
Scrolls through operation
AUTO g
NOTE:Plea se d o not select
HEAT mode if the mach in e you
purchas ed i s cooling onl y ty pe.
Heat mode i s no t supported
by the cool in g only applia nc e.
Selects fan speeds in
the following order:
AUTO g LOW g
Saves energy during
Enables unit to reach
preset temperature in
shortest possible time
SELF CLEAN
Starts and stops
self clean feature.
ON/OFF
MODE
modes as follows:
COOL g
HEAT g
FAN SPEED
MED g HIGH
sleeping hours
DRY g
FAN
SLEEP
TURBO
ON/ OFF
MOD E
FAN
SLE EP
TUR BO
CLE AN
TEM P
SWI NG
LED
SIL ENCE
FP
TIM ER
ON
TIM ER
OFF
DIR ECT
FOL LOW
LED
Turns indoor unit s LED display on and off.
,
SILENCE/FP
Used to activate silence
O
and 8 C heating feature.
TEMP
p
Increases temperate in
O
1 C increments.
Max. temperature is
O
30 C .
TEMPq
Decreases temperate in
O
1 C increments.
Min. temperature is
O
17 C .
TIMER ON
Sets timer to turn unit
on (see How to Use
Basic Functions for
instructions)
TIMER OFF
Sets timer to turn unit
off (see How to Use
Basic Functions for
instructions)
SWING
Starts and stops louver
movement
FOLLOW ME
Temperature sensing
and room temperature
display button.
If you are sensitive to light when you go to
sleep, you can press the LED button to turn
off the LED display on the indoor unit. Press
the button again to turn it back on.
MODEL:RG57A6(B)/BGEF
Handling The Remote Controller
NOT SURE WHAT A FUNCTION DOES?
Refer to the How to Use Basic Functions and
How to Use Advanced Functions sections
of this manual for a detailed description of
how to use your air conditioner.
SPECIAL NOTE
Button designs on your unit may differ
slightly from the example shown.
If the indoor unit does not have a particular
function, pressing that function s button
,
on the remote control will have no effect.
When there are wide differences between
,
,
Remote controller Illustration and
,
,
USER'S MANUAL on function description,
the description of USER'S MANUAL
shall prevail.
,
,
,
,
,
,
,
,
Inserting and Replacing Batteries
our air conditioning unit comes with two
Y
batteries. Put the batteries in the remote control
before use.
1. Slide the back cover from the remote
control downward, exposing the battery
compartment.
2. Insert the batteries, paying attention to match
up the (+) and (-) ends of the batteries with
the symbols inside the battery compartment.
3. Slide the battery cover back into place.
R03/LR03
BATTERY NOTES
For optimum product performance:
Do not mix old and new batteries, or
Batteries of different types.
Do not leave batteries in the remote control
if you don t plan on using the device for
,
more than 2 months.
BATTERY DISPOSAL
Do not dispose of batteries as unsorted
municipal waste. Refer to local laws for
proper disposal of batteries.
TIPS FOR USING REMOTE CONTROL
The remote control must be used within 8
meters of the unit.
The unit will beep when remote signal is
received.
Curtains, other materials and direct
sunlight can interfere with the infrared
signal receiver.
Remove batteries if the remote control
will not be used more than 2 months.
Prevent any liquid from falling into the
remote controller.
If other electrical appliances react to the
remote controller, either move these
appliances or consult your local dealer.
3 4
Page 4

Remote LCD Screen Indicators
Information are displayed when the remote controller is powered up.
Transmission Indicator
Lights up when remote sends
signal to indoor unit
ON/OFF display
MODE display
Displays the current
Appears when the unit is turned on,
and disappears when it is turned off
mode, including:
AUTO
COOL
DRY
TIMER ON display
Displays when TIMER
ON is set
TIMER OFF display
Displays when TIMER
OFF is set
HEAT
FAN
ECO display
Not available for
this unit
Battery display
Low battery
detection
SLEEP display
Displays when
SLEEP function
is activated
FOLLOW ME
display
Indicates that
the FOLLOW ME
function is on
FRESH display
Not available for
FAN SPEED display
Displays selected FAN SPEED:
HIGH, MED,
or LOW
This display is blank when
set to AUTO speed or DRY mode.
SILENT display
Displays when silence function
is activated.
Temperature/Timer display
Displays the set temperature by default, or timer setting
when using TIMER ON/OFF functions
Temperature range: 17-30 C
o
this unit
Timer setting range: 0-24 hours
This display is blank when operating in FAN mode.
Note:
All indicators shown in the figure are for the purpose of clear presentation. But during the actual
operation only the relative functional signs are shown on the display window.
How To Use The Basic Functions
3
1
ON/O FF
MODE
FAN
SLEE P
TURB O
CLEA N
COOL operation
1. Press the MODE butto n to s el ec t
COOL mode.
2. Set your desired tem pe ra tu re using
the Temp or Temp button.
3. Press the FAN button to s el ec t th e
fan speed: AUTO, L OW, M ED, or
HIGH.
4. Press the ON/OFF but to n to s ta rt the
unit.
TEMP
SWIN G
SILE NCE
FP
TIME R
ON
TIME R
OFF
DIRE CT
LED
FOLL OW
SETTING TEMPERATURE
The operating tempe ra tu re r ange for units is
O
17-30 C. You can in crease or decrease th e
set temperature in 1 C in crements.
O
AUTO operation
2
In AUTO mod e, t he u ni t will automatically
select the COOL, FAN, HE AT or DRY mode
based on the set temper at ur e.
1. Press the MODE butto n to s el ec t Auto mode.
2. Set your desired tem pe ra tu re using the
Temp or Tem p button.
3. Press the ON/OFFbu tt on t o st art the unit.
MODE
FAN
CLEA N
TEMP
,
SWIN G
SILE NCE
FP
TIME R
ON
TIME R
OFF
DIRE CT
LED
FOLL OW
2
NOTE: FAN SPEED can t be s et i n Auto mode.
4
ON/O FF
1
3
SLEE P
TURB O
5 6
Page 5

How To Use The Basic Functions
How To Use The Basic Functions
2
3
1
FAN operation
1. Press the MODE butto n to s el ec t FAN
mode.
2. Press FAN button to sel ec t th e fa n
speed: AUTO, L OW, M ED o r HIGH.
3. Press the ON/OFFbu tt on t o st art the
unit.
NOTE: You can t set temperature in FA N
mode. As a result, your re mo te c on trol s
LCD screen will not dis pl ay t em perature.
ON/O FF
MODE
FAN
SLEE P
TURB O
,
CLEA N
TEMP
SWIN G
LED
SILE NCE
FP
TIME R
ON
TIME R
OFF
DIRE CT
FOLL OW
,
DRY operation(dehumidifying)
1. Press the MODE butto n to s el ec t DRY
mode.
2. Set your desired tem pe ra tu re using the
Temp or Tem p button.
3. Press the ON/OFFbu tt on t o st art the unit.
NOTE: FAN SPEED can t be c ha nged in
,
DRY mod e.
3
1
2
ON/O FF
MODE
FAN
SLEE P
TURB O
CLEA N
TEMP
SWIN G
LED
SILE NCE
FP
TIME R
ON
TIME R
OFF
DIRE CT
FOLL OW
HEAT operation
1. Press the MODE butto n to s el ec t
HEAT mode.
2. Set your desired tem pe ra tu re using
the Temp or Temp button.
3. Press the FAN button to s el ec t th e
fan speed: AUTO, L OW, M ED, or HIGH.
4. Press the ON/OFF but to n to s tart the
2
4
1
3
ON/O FF
MODE
FAN
SLEE P
TURB O
CLEA N
TEMP
SWIN G
LED
SILE NCE
FP
TIME R
ON
TIME R
OFF
DIRE CT
FOLL OW
unit.
NOTE: As outdoor tempe ra tu re d rops, the
performance of your u ni t s HE AT fun ct io n
,
may be affe ct ed . In s uch instances, we
recommend using thi s ai r co nd itioner in
conjunction with ot he r he at ing appliance.
7
8
Page 6

Setting the TIMER function
Your a ir c on ditioning unit has two
timer-related fun ct io ns :
TIMER ON- sets the amou nt o f ti me r after
which the unit will aut om at ic ally turn on.
TIMER OFF- sets the a mo un t of t im e after
which the unit will aut om at ic ally turn off .
TIMER ON function
The TIMER ON function a ll ow s yo u to set
a period of time after wh ic h th e un it will
automatically tur n on, such as wh en y ou
come home fro m wo rk .
1.
Press the TIMER ON butt on . By
default, the last tim e pe ri od t hat you
set and an "h" (indicat in g ho ur s)will
appear on the display.
Note:
This number indicat es t he
amount of time after th e cu rrent time
that you want the unit to turn on.
For example, if you s et TIMER ON for
2.5 hours, will appear on the
" 2.5h "
screen, a nd t he u ni t wi ll t ur n on aft er
2.5 hours.
Press the TIMER ON butt on r ep ea tedly
2.
to set the time when you wa nt t he u ni t to
turn on.
3. Wa it 2 s ec onds, then the TI ME R ON
function will be acti va te d. The digital
display on your remot e co nt ro l will then
return to the tempera tu re d is play.
1
3
MODE
FAN
S
L
E
EP
Example
hours.
2
x5
TIM ER O N TIM ER O N
4
1sec
ON/OFF
SHORT
CUT
TEMP
TIMER ON
TIMER OF
F
: Setting unit to turn on after 2.5
2sec
TIMER OFF functio n
The TIMER OFF functio n al lo ws y ou to
set a period of time afte r wh ic h th e unit
will automaticall y tu rn off , such as when
you wake up.
Press the TIMER OFF but to n. B y
1.
default, the last tim e pe ri od t hat you
set and an "h" (indicat in g ho ur s)will
appear on the display.
Note:
This number indicat es t he
amount of time after th e cu rrent time
that you want the unit to turn off.
For example, if you s et TIMER OFF fo r
5 hours, will appear on the
" 5.0h "
screen, a nd t he u ni t wi ll t ur n off after
5 hours.
2. Press the TIMER OFF bu tt on r ep eatedly
to set the time when you wa nt t he u ni t to
turn off.
3. Wa it 2 s ec onds, then the TI ME R OF F
function will be acti va te d. The digital
display on your remot e co nt ro l will then
return to the tempera tu re d is play.
1
TIM ER O FF
2
TIM ER O FF
x10
NOTE:
When setting the TI MER ON or
TIMER OFF functions , up t o 10 h ou rs,
the time will incre ase in 30 minute
increme nt s wi th e ach pres s. Af ter 10
hours and up to 24, it will incre as e in 1
hour increm en ts . The timer wil l revert to
zero afte r 24 h ou rs .
You ca n tu rn off either function by
setting its timer to .
" 0.0h "
Timer on
TIME R
ON
TIME R
OFF
DIRE CT
FOLL OW
Continue to press
TIMER ON
or
TIMER OFF until
desired time is
reached.
ON/O FF
MODE
FAN
SLEE P
TURB O
CLEA N
TEMP
SWIN G
LED
SILE NCE
FP
1sec
4
2sec
3
ON/OFF
MODE
FAN
S
L
EEP
Example
SHORT
CUT
TEMP
TIMER ON
TIMER OF
F
: Setting unit to turn off after 5
hours.
9
10
Page 7

Setting both TIME R ON a nd T IM ER OFF at the same time
Keep in mind that the tim e pe ri od s you set for both functi on s re fe r to h ours after the
current time. For exa mp le , sa y that the curren t ti me i s 1:00 PM, and you want the u ni t
to tur n on a utomatically at 7:00 PM . You wa nt i t to o perate for 2 hours, the n au to ma -
tically turn off at 9:0 0 PM .
Do the following:
1
TIMER O N
2
TIMER O N
X12
3
4
sec
3
ON/OFF
MODE
SHORT
CUT
TEMP
TIMER ON
Example: Setting th e un it t o tu rn on after 6 hours, oper at e fo r 2 ho urs, then turn off
(see the figure below )
Your remot e di sp la y
Timer on
Timer is set To turn ON
6 hours from current time
Timer off
Timer is set to turn OFF
8 hours from current time
5
TIMER O FF
6
TIMER O FF
X16
11
7
8
sec
3
ON/OFF
MODE
SHORT
CUT
TEMP
TIMER ON
Timer starts
Current
time 1PM
2PM 3PM
6 hours later
8 hours later
4PM 5PM
6PM 7PM 8PM 9PM
Unit turns Unit turns
ON
OFF
12
Page 8

How To Use T he Advanced Functions How To Use T he Advanced Functions
TURBO function
The TURBO function makes the unit work
extra hard to reach your present temperature
in the shortest amount of time possible.
When you press the TURBO button in
COOL mode, the unit will blow cool air
with strongest wind setting to jump-start
the cooling process.
When you press the TURBO button in
HEAT mode, for units with Electric heat
elements, the Electric Heater will activate
and jump-start the heating process.
SELF CLEAN function
Airborne bacteria can grow in the moisture
that condenses around heat exchanger in the
unit. With regular use, most of this moisture
is evaporated from the unit. By pressing the
CLEAN button, your unit will clean itself
automatically. After cleaning, the unit will turn
off automatically. Pressing the CLEAN button
mid-cycle will cancel the operation and turn
off the unit.
You can use CLEAN as often as you like.
Note: You can only activate this function
in COOL or DRY mode.
FOLLOW ME function
The FOLLOW ME function enables the
remote control to measure the temper-
ature at its current location. When using
AUTO, COOL, or HEAT functions,
measuring ambient temperature from
the remote control (instead of from the
indoor unit itself) will enable the air
conditioner to optimize the temperature
around you and ensure maximum comfort.
1. Press FOLLOW ME button to activate
function. The remote control will send
temperature signal to the indoor unit
every three minutes.
2. Press FOLLOW ME button again to
turn off this function.
ON/O FF
MODE
FAN
SLEE P
TURB O
CLEA N
TEMP
SWI NG
LED
SILE NCE
FP
TIME R
ON
TIME R
OFF
DIR ECT
FOLL OW
MODEL:RG57A6(B)/BGEF
SILENCE/FP function
Active/Disable SILENCE function. If pushing
more than 2 seconds, the FP function will
,
,
be activated, pushing more than 2 seconds
again to disable.
When the Silence function is activated, the
compressor will operate at low frequency
and the indoor unit will bring faint breeze,
which will reduce the noise to the lowest
level and create a quiet and comfortable
room for you. Due to low frequency
operation of compressor, it may result in
insufficient cooling and heating capacity.
,
,
The FP function can only be activated
during the heating operation(only when the
setting mode is HEAT).
at a setting temperature of 8 C
The unit will operate
O
.
Indoor buzzer
will beep 0.7 and 0.3 seconds respectively for
entering or exiting 8°C heating mode.
Press the buttons of ON/OFF,
SLEEP, FP, MODE, FAN SPEED, UP or
DOWN while operating will cancel the
,
,
FP function.
SWING function
SWING Button
Used to stop or start horizontal louver auto
swing feature.
DIRECT Button
Used to change the louver movement and set
the desired up/down air flow direction.
The louver changes 6 in angle for each press.
O
ON/O FF
MODE
FAN
SLEE P
TURB O
CLEA N
MODEL:RG57A6(B)/BGE
TEMP
SWIN G
LED
SILE NCE
FP
TIME R
ON
TIME R
OFF
DIRE CT
FOLL OW
F
SLEEP Function
The SLEEP function is used to decrease
energy use while you sleep (and don t need
,
the same temperature settings to stay
comfortable). This function can only be
activated via remote control.
Note: The SLEEP function is not available
in FAN or DRY mode.
13
14
 Loading...