

Page 1

CR034-RG36F
202055091154
20130318
HEAT PU M P S & A I R C O N D I T I O N I N G
REMOTE CONTROL MANUA L
Than k yo u fo r pu rc ha sing MI DE A air c on di tioni ng . You ha ve m ad e the dec is io n
to use t he v er y be st p ro duct av ai la bl e. To en su re t ha t you ben ef it f ul ly f rom
this s ta te -o f- th e-art h ea t pu mp , PL EASE RE AD THIS OW NE R’ S MA NU AL
care fu ll y be fo re u sing th e pr od uc t.
The d esign a nd spec ifica tions a re subj ect to ch ange wi thout p rior no tice fo r produ ct
imp rovem ent. Pl ease co nsult y our sal es agen cy or man ufact urer fo r furth er deta ils.
Page 2
1
CONTENTS
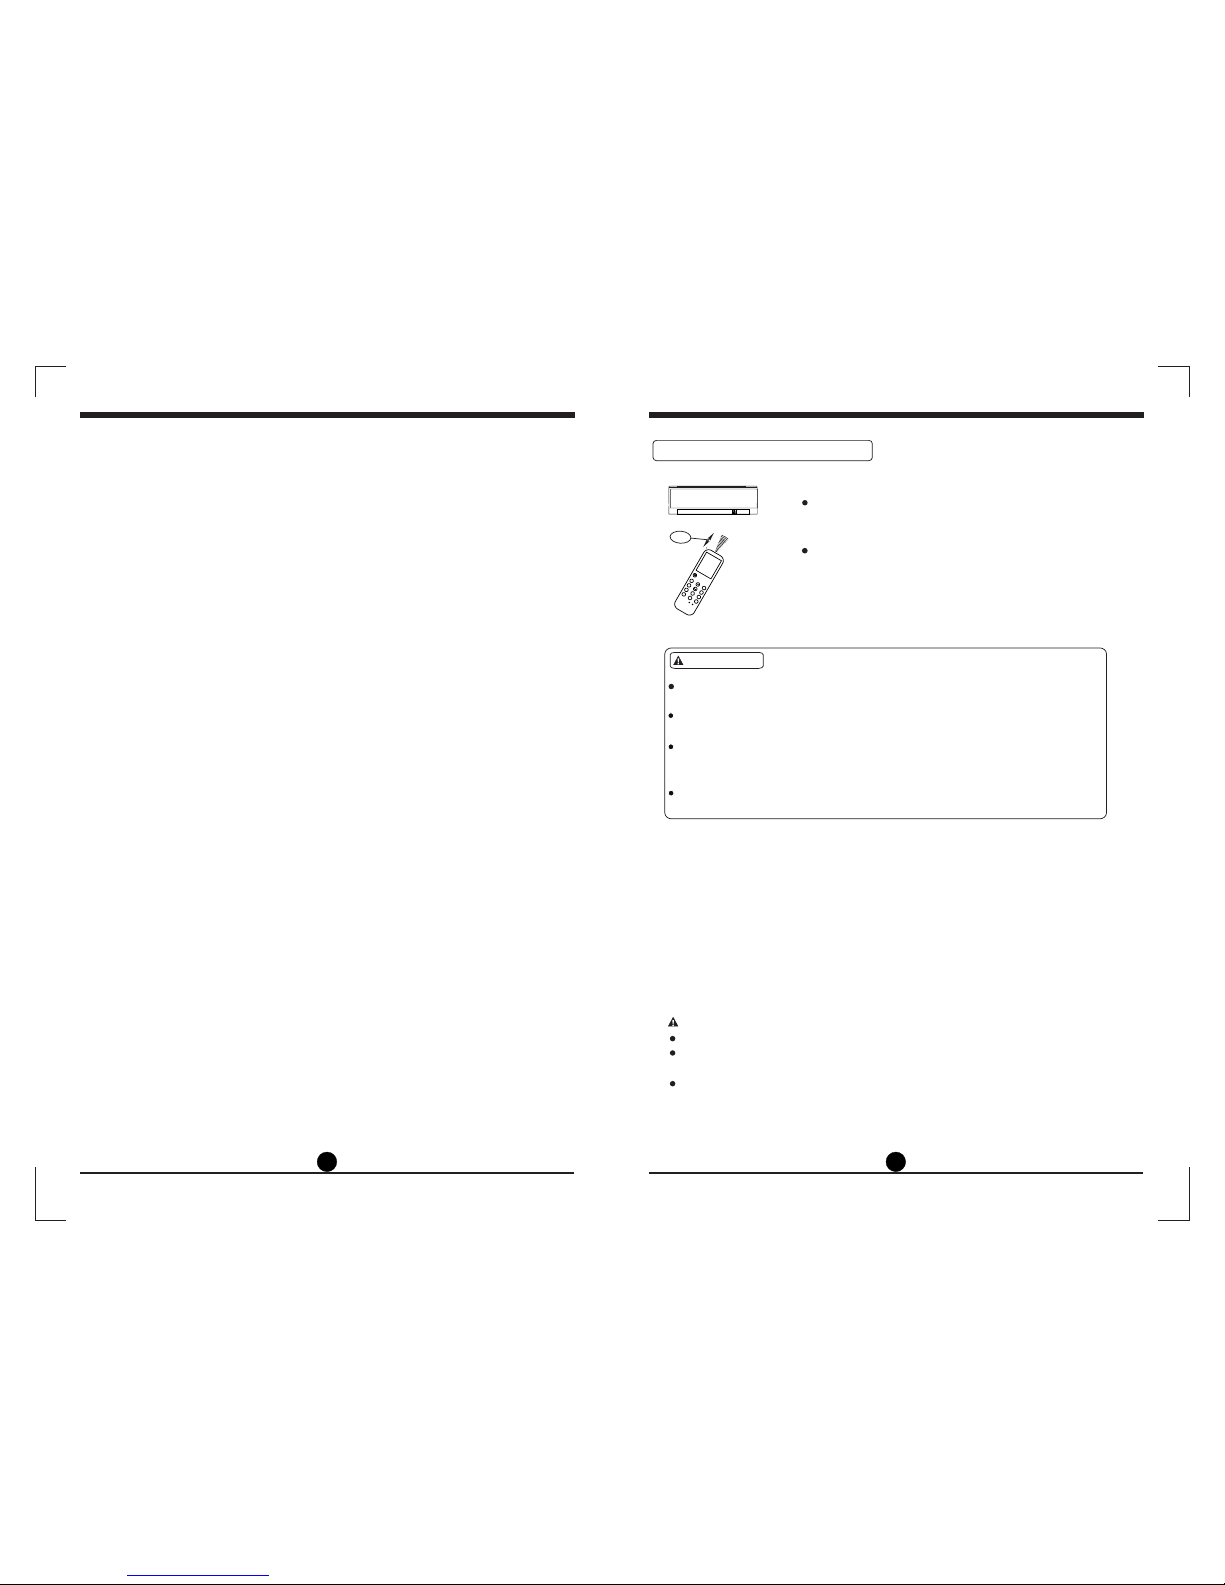
Use the remote control within a distance of 8
meters from the appliance, pointing it towards the
receiver. Reception is confirmed by a beep.
Keep the remote control where its signals can reach the
unit’s receiver. When you select the timer operation,
the remote control automatically transmits a signal to
the indoor unit at the specified time. If the remote control
is kept in a position that hinders proper signal
transmission, a time lag of up to 15 minutes may occur.
Location of the remote contr ol
8m
The remote control is powered by two dry batteries (R03/LR03X2) housed in the
rear section and protected by a cover.
(1) Remove the cover by pressing and sliding it off.
(2) Remove the old batteries and insert the new batteries, placing the (+) and (-)
ends correctly.
(3) Reattach the cover by sliding it back into position.
NOTE
When the batteries are removed, the remote control erases all settings.
After inserting new batteries, the remote control must be reprogrammed.
Replacing batteries
Handling of the r emote contr ol
CAUTION
The air conditioner will not operate if curtains, doors or other items
block the signals from the remote control to the indoor unit.
Prevent any liquid from falling onto the remote control. Do not expose
the remote control to direct sunlight or heat.
If the infrared signal receiver on the indoor unit is exposed to direct
sunlight, the air conditioner may not function properly. Use curtains to
prevent the sunlight from falling on the receiver.
If other electrical appliances react to the remote control, either move
these appliances or consult your local dealer.
2
CAUTION
Do not mix old and new batteries or batteries of different types.
Do not leave the batteries in the remote control if they are not going to be
used for 2 or 3 months.
Dispose of batteries responsibly. Do not dispose of batteries as unsorted
municipal waste. Separate collection of such waste separately for special
treatment is necessary.
MODE
SWING
TEMP
SHORTCUT
FAN
SPEED
TIMER
OFF
RESET
LOCK
LED
FOLLOW ME
TIMER
ON
TURBO
SELF CLEAN
DIRECT
SLEEP
FRESH
2
3
5
7
8
8
8
9
9
10
13
Handling the remote control .........................................................
Remote control specifications ......................................................
O
Function buttons, INTELLIGENT EYE, 8 C Heating ....................
Indicators on LCD ..........................................................................
How to use the buttons .................................................................
Auto operation ................................................................................
Cooling/Heating/Fan operation .....................................................
Dehumidifying operation ...............................................................
Adjusting airflow direction ............................................................
Timer operation (TIMER ON/TIMER OFF/DUAL TIMER)..............
SLEEP/FRESH (IONIZER/PLASMA) function ..............................
LED/FOLLOW ME function ........................................................... 14
TURBO/SELF CLEAN function ..................................................... 14
Page 3
Model
Rated Voltage
8m (when using 3.0 voltage, up to 11m)
3.0V (Dry batteries R03/LR03 X 2)
Remote Control Specifications
1. Operating Mode: AUTO, COOL, DRY, HEAT, and FAN.
2. Timer Setting Function within 24 hours.
O O
3. Indoor Setting Temperature Range: 17 C ~ 30 C
4. Full function of LCD (Liquid Crystal Display).
Environment
Signal Receiving
Range
Performance Feature
3 4
RG36F3/BG(C)EF
O O
-5 C ~ 60 C
NOTE
Func ti on b ut to n de signs i ll us tr at ed may di ffer sli gh tl y fr om t he mode l yo u
actu al ly p ur ch as ed, dep en di ng o n in divid ua l mo de ls .
All the f un ct io ns d es cribe d ar e ac co mp lishe d by t he i nd oo r unit, but i f yo ur
part ic ul ar u ni t do es not ha ve a p ar ti cu lar fea tu re , th er e wi ll be no
corr es po nd in g op erati on w he n re la tive bu tt on o n th e re mote cont ro l is
pres se d.
1
2
4
5
3
9
10
8
6
7
11
12
13
14
15
TURBO
SELF
CLEAN
SLEEP
FRESH
SILENCE
FP
TIMER
ON/OFF
INTELLIGENT
EYE
LOCK
RESET
LED
FOLLOW
ME
FAN
SPEED
SWING
MODE
TEMP
ON/OF F
SWING
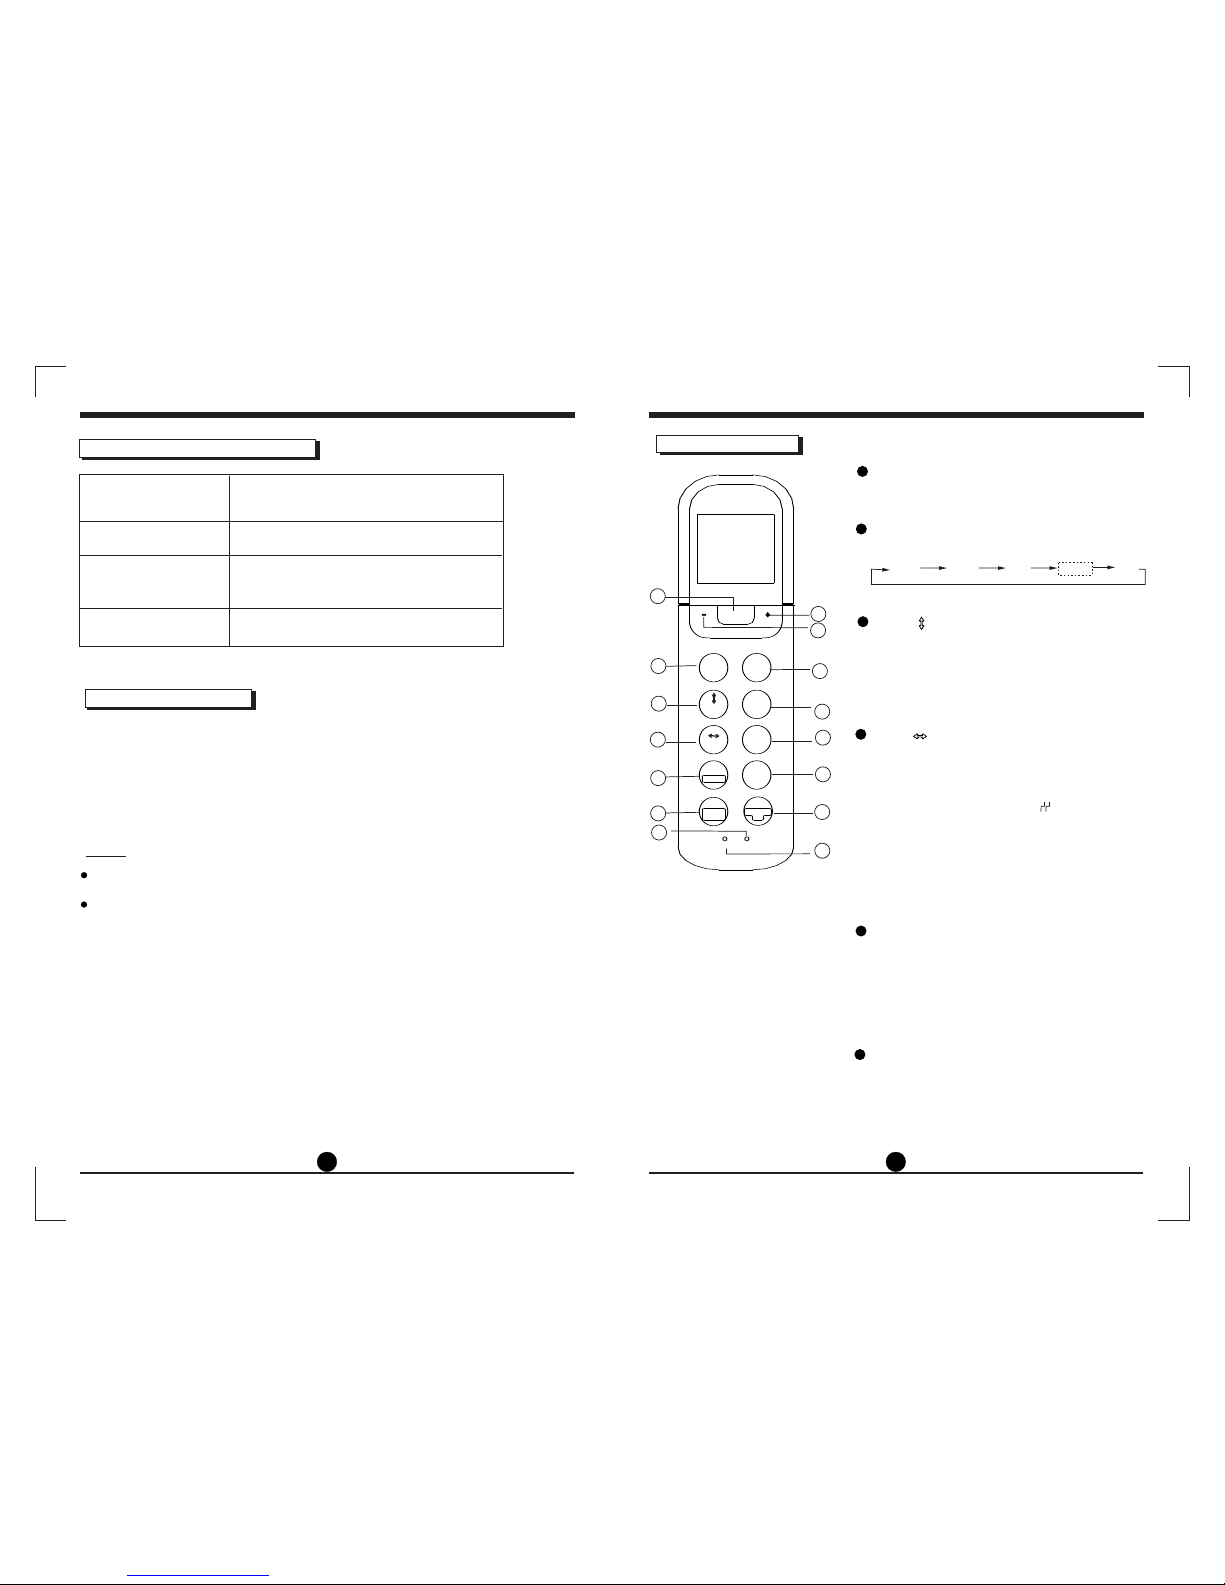
Function Buttons
1
2
Each time the button is pressed, the operation
mode is selected in a sequence of following:
3
MODE Button
4
5
ON/OFF Button
Operation starts when this button is pressed
and stops when this button is pressed again.
NOTE: Heat mode is for Cooling & Heating models only.
AUTO
COOL
DRY
HEAT FAN
NOTE: While the unit is running under SLEEP
mode, it would be cancelled if the MODE, FAN
SPEED or ON/OFF button is pressed.
6
Press to activate/disable SLEEP function. If
pressed for more than 2 seconds the FRESH
function will be activated. Pressing once
again for more than 2 seconds will disable
the FRESH function.
SLEEP/FRESH Button
Swing Button
Swing Button
Used to stop or start horizontal louver
movement or set the desired up/down air flow
direction. The louver changes 6 degrees in
angle with each press. If pressed for more
than 2 seconds, the louver will swing up and
down automatically.
Press to activate/disable TURBO function. If
pressed for more than 2 seconds, the SELF
CLEAN function will be activated. Pressing
again for more than 2 seconds will disable
the SELF CLEAN function.
TURBO/SELF CLEAN Button
Used to stop or start vertical louver movement
and set the desired left/right air flow direction.
The vertical louver changes 6 degrees in angle
with each press and the temperature display
area of indoor unit displays for one
second. If pressed for more than 2 seconds,
the vertical louver swing feature is activated
and the display area of indoor unit displays ‘IIII’
flashes four times, then the temperature
setting reverts back. If the vertical louver
swing feature is stopped, it displays ‘LC’ and
remains on for 3 seconds.
,
,
Page 4

5 6
Function Buttons
TIMER ON/OFF Button
INTELLIGENT EYE Button
8
Push this button to decrease temperature
setting or to decrease Hour for Timer setting.
UP Button ( )
Push this button to increase temperature
settings or to increase Hour for Timer setting.
DOWN Button ( )
9
-
+
12
13
10
11
Used to select the fan speed in four steps:
AUTO LOW MED HIGH
FAN SPEED Button
O
SILENCE/FP (8 C Heating) Button
Press this button to initiate the Auto-On /
Auto-Off time sequence. Each press will
increase the auto-timer setting by 30
minutes increments. When the setting
time displays 10H, each press will increase
the auto-timer setting by 60 minute
increments. To cancel the auto-timer
program, simply adjust the auto-on timer
to 0:0.
Press this button to initiate the INTELLIGENT
EYE Function. With the built-in infrared
sensor, the unit can detect the presence of
human in the room. If the unit detects no
human activity continuously for 30 minutes,
it will automatically enter standby (monitor)
status in order to save power consumption.
The unit will automatically start and resume
operation when human activity is sensed
again.
1
1
2
2
4
4
5
5
3
3
9
9
10
10
8
8
6
6
7
7
11
11
12
12
13
13
14
14
15
15
TURBO
SELF
CLEAN
SLEEP
FRESH
SILENCE
FP
TIMER
ON/OFF
INTELLIGENT
EYE
LOCK
RESET
LED
FOLLOW
ME
FAN
SPEED
SWING
MODE
TEMP
ON/OF F
ON/OF F
SWING
TURBO
SELF
CLEAN
SLEEP
FRESH
SILENCE
FP
TIMER
ON/OFF
INTELLIGENT
EYE
LOCK
RESET
LED
FOLLOW
ME
FAN
SPEED
SWING
MODE
TEMP
SWING
Press to activate/disable SILENCE function.
When the Silence function is activated, the
indoor unit will bring faint breeze, which
reduces noise to the lowest level and creates
a quiet and comfortable environment.
During heating operation (when the setting
mode is HEAT), by pressing this button for
O
more than 2 seconds, the FP (8 C Heating)
function is activated. The unit will operate at
O
a set temperature of 8 C. The LED display of
indoor unit will display ‘FP’. Pressing the
buttons ON/OFF, SLEEP, FP, MODE, FAN
SPEED, UP or DOWN while operating will
O
cancel the FP (8 C Heating) function.
14
15
LOCK Button
When you press the recessed LOCK button,
all current settings will be locked in and the
remote control will not accept any operation
except that of the LOCK. Press the recessed
LOCK button again to cancel the LOCK mode.
LED/FOLLOW ME Button
Press to disable/activate indoor LED display.
When button is pressed for more than 2
seconds, the ‘FOLLOW ME’ function will be
activated. Press again for more than 2
seconds again to disable the function.
7
When you press the recessed RESET button,
all current settings are cancelled and the
control will return to the initial settings.
RESET Button
Page 5

7 8
Indicators on LCD
Transmission Indicator
Temperature/Timer display
Fan speed display
Silence Display
Sleep Display
Mode display
ON/OFF display
This transmission indicator lights when remote
control transmits signals to the indoor unit.
Displays the current operation mode, including
AUTO ( ), COOL ( ), DRY ( ), HEAT ( )
(not applicable to cooling only models), FAN ( )
and back to AUTO ( ).
O O
Displays the temperature setting (17 C ~ 30 C).
When you set the operating mode to FAN, no
temperature setting is displayed. In the TIMER mode
the ON or OFF settings of the TIMER are displayed.
Displayed by pressing the ON/OFF button. Press
the ON/OFF button again to remove displayed icon.
Displays the selected fan speed, AUTO (no display)
and three fan speed levels " " (LOW) " " (MED)
" " (HIGH) can be indicated. The fan speed is
AUTO when the operating mode is AUTO or DRY.
Displayed when SILENCE function is activated.
Displayed under sleeping operation. Press the
SLEEP button again to remove displayed icon.
NOTE
All indicators shown in the figure are for the purpose
of clear presentation. But during the actual operation
only the relative functional signs are shown on the
display window.
Lock Display
Displayed when LOCK mode is activated.
FOLLOW ME Display
Displayed when FOLLOW ME function is activated.
F
auto cool dry heat fan
silen ce sle ep fol low me l ock run
SET TEMP. TIMER ONOFF
How to use the Buttons
Cooling/Heating/Fan Operation
Ensu re t he u ni t is p lu gged in a nd p ow er i s
avai la bl e.
1. Pre ss t he M OD E bu tt on to sel ec t CO OL ,
HEAT or FAN m od e.
2. Pre ss t he U P/ DO WN b utton s to s et t he
desi re d te mp er at ure. The temp er at ur e ca n
O O O
be set w it hi n a ra ng e of 1 7 C ~ 30 C in 1 C
incr em en ts .
3. Pre ss t he FA N SP EE D bu tton to s el ec t th e
fan sp ee d in f ou r st ep s: AUTO , LOW, MED ,
or HIG H.
4. Pre ss t he O N/ OF F bu tton to s ta rt t he a ir
cond it io ne r.
In FAN mode, the set temperature is not displayed
in the remote control and it is not possible to control
the room temperature. In this case, only steps 1, 3
and 4 may be performed.
NOTE
Auto Operation
Ensu re t he u ni t is p lu gged in a nd p ow er i s
avai la bl e. T he O PE RAT IO N in di ca tor on th e
disp la y pa ne l of t he i ndoor u ni t st ar ts f lashi ng .
1. Pre ss t he M OD E bu tt on to sel ec t AUT O.
2. Pre ss t he U P/ DO WN b utton t o se t th e
desi re d te mp er at ure. The temp er at ur e ca n
O O O
be set w it hi n a ra ng e of 1 7 C ~ 30 C in 1 C
incr em en ts .
3. Pre ss t he O N/ OF F bu tton to s ta rt t he a ir
cond it io ne r.
1. In the AUTO mode, the air conditioner can logically
choose the mode of Cooling, Fan, and Heating
by sensing the difference between the actual
ambient room temperature and the set temperature
on the remote control.
2. In the AUTO mode, you can not switch the fan
speed. It has already been automatically controlled.
3. If the AUTO mode is not comfortable for you, the
desired mode can be selected manually.
NOTE
3
1
2
4
1
2
3
2
2
TURBO
SELF
CLEAN
SLEEP
FRESH
SILENCE
FP
TIMER
ON/OFF
INTELLIGENT
EYE
LOCK
RESET
LED
FOLLOW
ME
FAN
SPEED
SWING
MODE
TEMP
ON/OFF
ON/OFF
SWING
TURBO
SELF
CLEAN
SLEEP
FRESH
SILENCE
FP
TIMER
ON/OFF
INTELLIGENT
EYE
LOCK
RESET
LED
FOLLOW
ME
FAN
SPEED
SWING
MODE
TEMP
SWING
F
Page 6

9 10
Dehumidifying Operation
Ensu re t he u ni t is p lu gged in a nd p ow er i s
avai la bl e. T he O PE RAT IO N in di ca tor on th e
disp la y pa ne l of t he i ndoor u ni t st ar ts f lashi ng .
1. Pre ss t he M OD E bu tt on to sel ec t DR Y mode.
2. Pre ss t he U P/ DO WN b utton s to s et t he
desi re d te mp er at ure. The temp er at ur e
O O
can be s et w it hi n a ra ng e of 17 C ~ 30 C
O
in 1 C incr em en ts .
3. Pre ss t he O N/ OF F bu tton to s ta rt t he a ir
cond it io ne r.
In the Dehumidifying mode, you can not switch the fan
speed. It has already been automatically controlled.
NOTE
Adjusting Airflow Direction
3
1
2
2
TURBO
SELF
CLEAN
SLEEP
FRESH
SILENCE
FP
TIMER
ON/OFF
INTELLIGENT
EYE
LOCK
RESET
LED
FOLLOW
ME
FAN
SPEED
SWING
MODE
TEMP
SWING
TURBO
SELF
CLEAN
SLEEP
FRESH
SILENCE
FP
TIMER
ON/OFF
INTELLIGENT
EYE
LOCK
RESET
LED
FOLLOW
ME
FAN
SPEED
SWING
MODE
TEMP
SWING
Use the SWING and SWING buttons to adjust
the desired airflow direction.
1. When the SWING button is pressed, the
horizontal louver changes 6 degrees in angle for
each press. If pressed for more than 2 seconds,
the louver will automatically swing up and down.
2. When the SWING button is pressed, the
vertical louver changes 6 degrees in angle for
each press. If pressed for more than 2 seconds,
the louver will automatically swing left and right.
NOTE
When the horizontal/vertical louver swings or moves
to a position which would affect the cooling or
heating effect of the air conditioner, it would
automatically change the swing/moving direction.
Timer Operation
Press the TIMER ON button to set the Auto-On
time of the unit. Press the TIMER OFF button
to set the Auto-Off time of the unit.
1. Press the TIMER ON/OFF button to show
‘TIMER ON’ on the display. The last Auto-On
setting time and the signal ‘H’ will be shown on
the LCD display area. Now it is ready to reset
the Auto-On time to START the operation.
2. Push the +/- buttons to set desired Auto-On
time. Each time you press the button, the time
increases by half an hour between 0 and 10
hours and by one hour between 10 and 24 hours.
3. After setting the TIMER ON, there will be a one
second delay before the remote control
transmits the signal to the air conditioner. Then,
after approximately another 2 seconds, the
signal ‘H’ and time will disappear and ‘TIMER
ON’ indicator will remain on the LCD display
window. The set temperature will re-appear on
the LCD display window.
To set the Auto-On time
To set the Auto-Off time
1. Press the TIMER ON/OFF button to show
‘TIMER OFF’ on the display. The last Auto-Off
setting time and the signal ‘H’ will be shown on
the LCD display area. Now it is ready to reset
the Auto-off time to STOP the operation.
2. Push the +/- buttons to set desired Auto-Off
time. Each time you press the button, the time
increases by half an hour between 0 and 10
hours and by one hour between 10 and 24 hours.
3. After setting the TIMER OFF, there will be a
one second delay before the remote control
transmits the signal to the air conditioner. Then,
after approximately another 2 seconds, the
signal ‘H’ will disappear and ‘TIMER OFF’
indicator will remain on the LCD display window.
The set temperature will re-appear on the LCD
display window.
1
2
ON/OFF
ON/OFF
2
Page 7

11
12
When you select the Timer Operation, the remote control automatically transmits
the timer signal to the indoor unit for the specified time. Therefore, the remote
control must be kept in a location where it can transmit the signal to the indoor
unit properly.
The effective operation time set by the remote control for the Timer Function is
limited to the following settings: 0.5, 1.0, 1.5, 2.0, 2.5, 3.0, 3.5, 4.0, 4.5, 5.0, 5.5,
6.0, 6.5, 7.0, 7.5, 8.0, 8.5, 9.0, 9.5, 10, in half hour increments, then 11, 12, 13,
14, 15, 16, 17, 18, 19, 20, 21, 22, 23 and 24 in one hour increments.
CAUTION
!
Example of timer setti ng
Start
Off
6 hours later
(Auto-On Operation)
The TIMER ON feature is useful when you want
the unit to turn on automatically before you
return home. The air conditioner will
automatically start operating at the set time.
To start the air conditioner in 6 hours.
1. Press the TIMER ON/OFF button to show
‘TIMER ON’. The last setting of starting
operation time and the signal ‘H’ will show
on the display area.
2. Press the +/- buttons to display ‘6:0H’ on the
TIMER ON display of the remote control.
3. Wait for 3 seconds and the digital display
area will show the temperature again. The
‘TIMER ON’ indicator remains on and this
function is activated.
TIMER ON
Example:
Set
TIMER ON
Stop
On
Set 10 hours later
(Auto-Off Operation)
The TIMER OFF feature is useful when you want the
unit to turn off automatically after you go to bed. The
air conditioner will stop automatically at the set time.
To stop the air conditioner in 10 hours.
1. Press the TIMER ON/OFF button to show
‘TIMER OFF’. The last setting of stopping
operation time and the signal ‘H’ will show
on the display area.
2. Press the +/- buttons to display ‘10H’ on the
TIMER OFF display of the remote control.
3. Wait for 3 seconds and the digital display area
will show the temperature again. The ‘TIMER
OFF’ indicator remains on and this function is
activated.
TIMER OFF
Example:
On
Stop
2 hours later
after setting
Set
To stop the air conditioner 2 hours after setting and
start it again 10 hours after setting.
1. Press the TIMER ON/OFF button to display
‘TIMER OFF’.
2. Press the +/- button to display 2.0H on the
TIMER OFF display.
3. Press the TIMER ON/OFF button to display
TIMER ON.
4. Press the +/- button to display 10H on the
TIMER ON display .
5. Wait for 3 seconds and the digital display area
will show the temperature again. The ‘TIMER
ON OFF’ indicator remains on and this function
is activated.
TIMER OFF TIMER ON
(On Stop Start operation)
This feature is useful when you want to stop the air
conditioner after you go to bed, and start it again in
the morning when you wake up or when you return
home.
Example:
DUAL TIMER
(Setting both ON and OFF timers simultaneously)
Start
10 hours later
after setting
TIMER OF F
TIMER ON O FF
Page 8

13
14
Example:
TIMER ON TIMER OFF
(Off Start Stop operation)
This feature is useful when you want to start
the air conditioner before you wake up and
stop it after you leave the house.
To start the air conditioner 2 hours after setting,
and stop it 5 hours after setting.
1. Press the TIMER ON/OFF button to display
‘TIMER ON’.
2. Press the +/- button to display 2.0H on the
TIMER ON display.
3. Press the TIMER ON/OFF button to display
‘TIMER OFF’.
4. Press the +/- button to display 5.0H on the
TIMER OFF display .
5. Wait for 3 seconds and the digital display area
will show the temperature again. The ‘TIMER
ON OFF’ indicator remains on and this function
is activated.
Off
Stop
Start
2 hours later
after setting
5 hours later
after setting
Set
NOTE
The TIMER ON or TIMER OFF that occurs in the
sequence directly after the set time will be activated
first. If the unit is off, it will first turn on. If the unit
is on, it will first turn off.
TIMER ON OFF
Pressing this button for less than 2 seconds will
initiate SLEEP function. If pressed for more
than 2 seconds, the FRESH function is initiated.
The sleep function enables the unit to
automatically increase (in cooling mode) or
O
decrease (in heating mode) 1 C per hour for
the first two hours, then hold the temperature
for the next 5 hours, after that the unit will stop
operation. This maintains the most comfortable
temperature and saves energy.
NOTE: The SLEEP function is only available in
COOLING, HEATING and AUTO operations.
When the FRESH function is initiated, the
IONIZER/PLASMA (depending on models) is
energized and will help to remove pollen and
impurities from the air.
1
3
2
TURBO
SELF
CLEAN
SLEEP
FRESH
SILENCE
FP
TIMER
ON/OFF
INTELLIGENT
EYE
LOCK
RESET
LED
FOLLOW
ME
FAN
SPEED
SWING
MODE
TEMP
SWING
TURBO
SELF
CLEAN
SLEEP
FRESH
SILENCE
FP
TIMER
ON/OFF
INTELLIGENT
EYE
LOCK
RESET
LED
FOLLOW
ME
FAN
SPEED
SWING
MODE
TEMP
SWING
LED/FOLLOW ME F unction
Pressing the button for less than 2 seconds will
initiate LED function. If pressed for more than
2 seconds, the FOLLOW ME function is
initiated.
When t he F OL LO W ME f un ction i s
acti va te d, t he d is playe d te mp er at ure on th e
remo te i s th e ac tu al t emper at ur e at i ts
loca ti on . Th e re mo te c on trol wi ll s en d th is
sign al t o th e ai r co nd ition er a t 3 mi nu te s
inte rv al s un ti l th e FOLLO W ME b ut to n is
pres se d ag ai n.
The FO LL OW M E fu nc ti on is not a va il ab le
unde r DRY and FA N mode.
Swit ch in g th e op er ation m od e or t ur ni ng off
the un it w il l au to ma tical ly c an ce l th e
FOLL OW M E fu nc ti on .
Pressing the button for less than 2 seconds will
initiate TURBO function. If pressed for more
than 2 seconds, the SELF CLEAN function is
initiated.
TURBO function enables the unit to reach the
preset temperature in the shortest time. When
this button is pressed while in cooling mode,
the unit will blow strong cooling air with super
high fan speed. When this button is pressed
while in heating mode, the unit will bring fast
heating operation with super high fan speed.
Unde r SE LF C LE AN m od e, the ai r
cond it io ne r wi ll a utoma ti ca ll y cl ean and d ry
the Ev ap or at or a nd k eep it fr es h fo r th e
next o pe ra ti on .
NOT E: The SE LF CLEA N fu nc ti on i s on ly
ava ilabl e in COOL ING ope ratio n.
TURBO/SELF CLEAN F unction
ON/OFF
ON/OFF
SLEEP /FRESH Func tion
1
3
2
 Loading...